USER MANUAL CIH 90 EGK 302C - CIH 90 EGK 302C VALBERG
This product is guaranteed for a period of 2 years from the date of purchase* against any failure resulting from a manufacturing or material defect. This warranty does not cover defects or damage resulting from incorrect installation, improper use or abnormal wear of the product.
*as shown on the sales receipt.
CONDITION DE GARANTIE
Thank you for choosing this VALBERG product.
Chosen, tested and recommended by ELECTRO DEPOT, the products of the VALBERG brand are easy to use, reliable and of an impeccable standard.
Thanks to this appliance, you can be sure that each use will bring you satisfaction.
Welcome to ELECTRO DEPOT.
Visit our website: www.electrodepot.fr
www.electrodepot.be
A
Preview of the appliance
Safety instructions
Technical features
B
Using the appliance
Installation (external outlet)
Recommendations for installation of the evacuation duct
Using your extractor hood
C
Useful information
Maintenance and cleaning
Troubleshooting
Packaging and the environment
Disposing of your old appliance
Safety instructions
Read these instructions carefully before using the appliance and save them for future reference.
General safety warnings
- Please refer to the appropriate chapter of this manual for details regarding cleaning and maintenance.
- This appliance may be used by children of at least 8 years of age and by people with reduced physical, sensory or mental capacities or without prior experience or knowledge, if they are properly supervised or if they have been given instructions on how to use the appliance safely and are aware of the risks involved.
- Children should not play with the appliance.
- Cleaning and user maintenance should not be carried out by children without supervision.
- It is necessary to respect the precautions specified in this manual when installing this appliance.
-
The power socket must remain accessible or a switch must be installed in the wiring system in accordance with the installation rules so that the appliance can be disconnected from the power supply network whatever the circumstances.
-
It is necessary to refer to the diagram of this manual to comply with the following points:
- Dimensions of the space to be provided for the appliance.
- Dimensions and position of the means used to support and fasten the appliance in this space.
- Minimum clearance between the different parts of the appliance and the surrounding structure.
- Minimum dimensions of air vents and their correct arrangement.
- Connection of the appliance to the power supply network.
- If the power cable is damaged, it must be replaced by the manufacturer, its after-sales department or similarly qualified persons to avoid any danger.
- The indications for attaching the appliance to its mount must be followed.
- Adhesives must not be used insofar as they are not considered to be a reliable means of fastening.
Specific safety warnings
-
If the appliance discharges air outside the room (extraction suction mode), appropriate ventilation of the room must be set up when a kitchen hood is used simultaneously with appliances using gas or another fuel.
-
Please respect the details of this manual regarding the method and frequency of cleaning.
- There is a risk of fire if the cleaning is not done in accordance with the instructions.
- Do not flambé food under the kitchen hood.
CAUTION:
Accessible parts of this device can become hot when used with cooking appliances.
- If the appliance discharges air outside the room (extraction suction mode), the air should not be sent into a duct used to evacuate the fumes of appliances using gas or another fuel.
- The minimum distance between the support surface for pans on the kitchen hob and the lowest part of the extraction hood must be 65~cm .
CAUTION:
If the installation instructions for the gas hob specify a larger distance, they must be complied with.
The regulations concerning the evacuation of air must be respected.
WARNING:
Failure to follow instructions for the installation of screws or fastening devices could create electrical hazards.
If the appliance has a downflow extraction system like so-called retractable "worktop" hoods.
CAUTION:
This appliance is not intended for use with gas hobs.
- If the appliance has a lighting system and the lamp is replaceable by the user, please read the information about its replacement method in the chapter of the user manual.
- If a lamp is not replaceable by the user, this is specified in the technical characteristics of the appliance. It is advisable in this case to call on the after-sales department if it proves to be defective
-
The types of lamps which may be used, as well as the illustrations and the ILCOS D code, are specified in the chapter
-
Make sure that the duct is not bent more than 90 degrees, otherwise it will adversely affect the efficiency of the extractor hood.
Additional safety warnings
- This appliance is only intended for the suction of stale air over a kitchen hob in a domestic setting and in no circumstances for use in a commercial or industrial setting.
- This appliance is only intended for household use.
- It is not suitable for use in similar applications such as:
- Kitchen areas reserved for staff in stores, offices and other professional environments.
- Farms and use by guests in hotels, motels and other residential environments.
- Bed-and-breakfast type environments.
- Catering and other similar applications except retail.
- The device should not be transported alone.
- The manufacturer cannot be held liable for any installation or connection that does not comply with the national regulations in force.
- Remove all parts of the packaging before installation.
-
If the appliance does not have a power plug, the electrical connection must be made by a qualified electrician only.
-
Before connection, first cut the power supply via the means of disconnection of the fixed power supply (electrical panel, fuse, circuit breaker, etc.).
- The power cable must have sufficient diameters to handle the maximum power of the device.
- In addition, the protective calibre of the electrical panel (fuse) must be adapted.
WARNING:
Do not connect the appliance to the mains with wet hands, as this could result in an electric shock.
- The power cable should be placed so that it does not touch any hot part of the kitchen hob or other nearby appliance.
- Any cleaning and/or thorough maintenance of the hood must be carried out with the electrical outlet unplugged or after the power supply has been cut off.
- Never disassemble or modify the appliance.
- In the event of a malfunction which cannot be resolved with the information provided in this manual, please contact the after-sales service.
Technical features
Product sheet according to EU Regulation No. 65/2014
| Trademark | Valberg | Valberg |
| Model Identification | CIH 60 EGK
302C (v2) | CIH 90 EGK
302C (v2) |
| Product code | 970127 | 970128 |
| Annual energy consumption in kWh | 23.1 | 23.1 |
| Energy efficiency class | A+ | A+ |
| Fluid-dynamic efficiency | 33.9 | 33.9 |
| Fluid-dynamic efficiency class | A | A |
| Light efficiency in lux/Watt | 22.4 | 20.5 |
| Light efficiency class | B | B |
| Grease filtration efficiency in % | 56.4 | 56.4 |
| Grease filtration efficiency class | E | E |
| Air flow in m³/h at minimum speed during normal operation | 178.7 | 178.7 |
| Air flow in m³/h at maximum speed during normal operation) | 523.0 | 523.0 |
| Acoustic air emissions weighted against value A in dB at minimum speed during normal operation | 44 | 44 |
| Acoustic air emissions weighted against value A in dB at maximum speed during normal operation (Lwa | 62 | 62 |
| W power consumption in off mode | 0.27 | 0.27 |
| Growth factor over time (f) | 0.8 | 0.8 |
| Energy efficiency index (EElhotte) | 41.4 | 41.4 |
| Air flow in m3/h measured at maximum efficiency point (Qbep) | 244.3 | 244.3 |
| Air pressure in Pa measured at maximum efficiency point (Pbep) | 349 | 349 |
| Maximum air flow in m³/h | 579.1 | 579.1 |
| Trademark | Valberg | Valberg |
| Electric power input in W measured at maximum efficiency point (Wbep) | 69.9 | 69.9 |
| Nominal power in W of lighting system (WI) | 3.7 | 3.7 |
| Average brightness in lux of lighting system on the cooking surface (Emiddle) | 83 | 76 |
| Rated supply (voltage in V, type of current & frequency in Hz) | 220-240 ~ 50-60 | 220-240 ~ 50-60 |
| Electrical protection class | Class I | Class I |
| Rated motor supply in W | 78 | 78 |
| Number and type of lights | 2 x Module LED | 2 x Module LED |
| Lighting power in W by light/total | 1.5 / 3 | 1.5 / 3 |
| Lighting replaceable by user | No | No |
| Total rated power in W | 81 | 81 |
| Code ILCOS D | DSR- 1.5/65-S-64 | DSR- 1.5/65-S-64 |
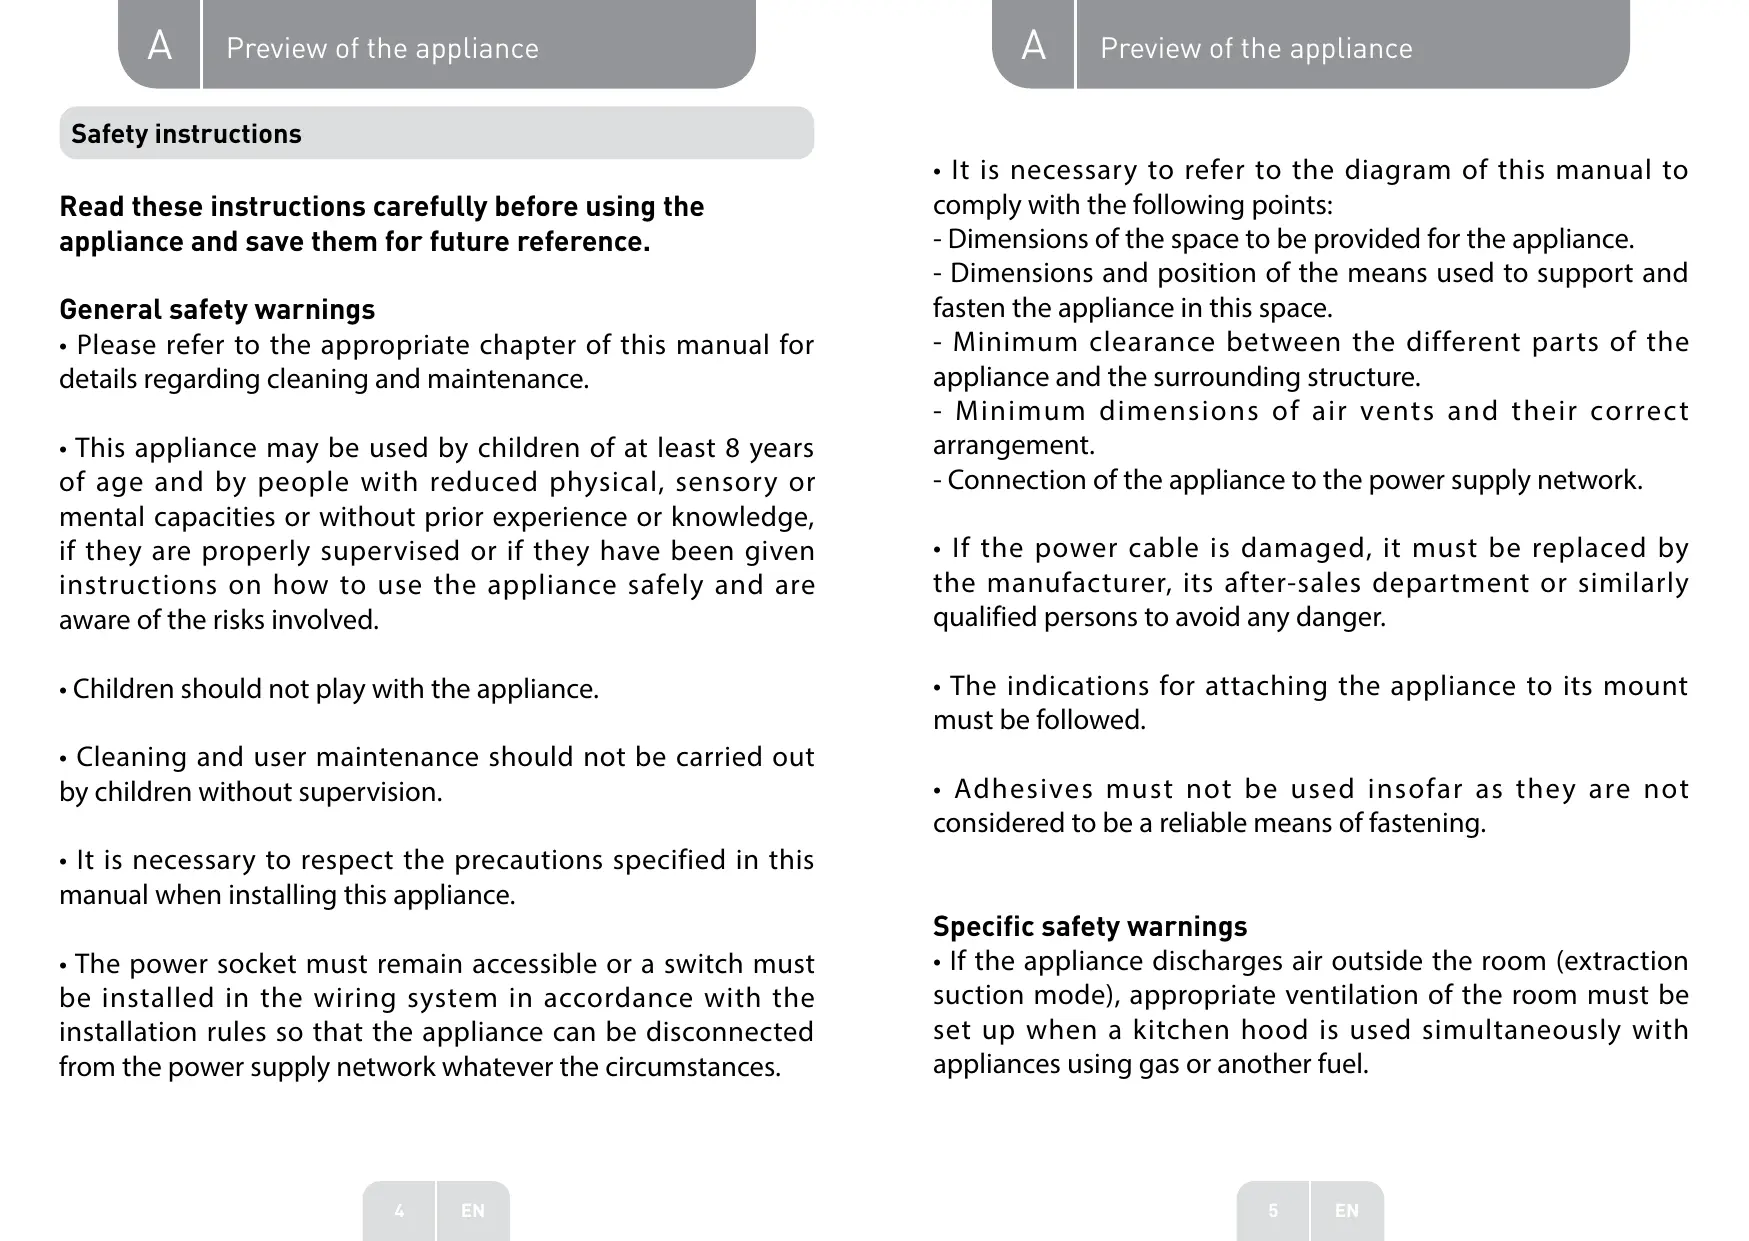
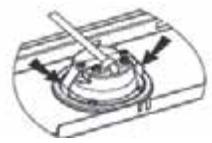
1 Check valve
4 Axis
Halves of the check valve
5 Holes
3 Stem
6 Housing
Installation (external outlet)
Before using the appliance for the first time, please consider the following tips.
Mounting the check valve
If the extractor hood is not equipped with an assembled check valve, you must mount the two halves onto the body of the hood. The illustrations for mounting the check valve are provided below as an indication. The evacuation may vary depending on the model and configuration.
To mount the check valve:
- Fit the two halves into the housing;
- Direct the stem ③ upwards;
- Insert the axis into the holes in the 5 housing;
- Repeat all the operations for the other half.
Installation
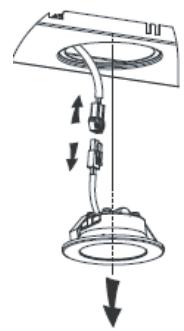
If you have an external evacuation, you can connect your extractor hood as illustrated below using an extraction duct (flexible tube made from aluminium, enamel or other non-flammable material tube with an internal diameter of 150mm ).
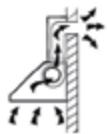
- Switch off the appliance and disconnect from the mains prior to installation.
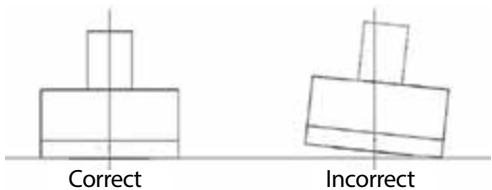
- For optimum results, the extractor hood should be installed at a distance of 65 to 75~cm above the cooking surface.
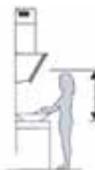
75cm 65cm
- After deciding on the height of the extractor hood, measure the position of the holes required to suspend the hood as well as the inner duct mount. Drill 4 holes of 8: 2 for the inner duct mount and 2 others to suspend the hood, while making sure it is properly levelled. The position of the inner duct mount corresponds to the location of the duct. See figure 2
Figure 2
- Screw two 4 × 30 mm screws to the wall using dowels to secure the hood, then use two 4 mm x 40 mm screws to secure inner duct mount. See figure 2
- Install the transformer as well as the expansion pipe on the outlet. Attach the extension pipe to the transformer using the clamp. See figure 3
Reminder: the extension pipe is not supplied.

- Install the outer duct mount using 2 ST4*8mm screws, ensuring that the inner duct remains flexible. See figure 4
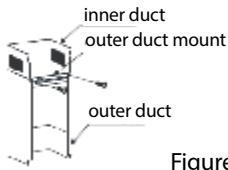
Figure 4
- Suspend the hood from the wall by adjusting its position and fix the extractor hood using 2 ST4*30 mm safety screws.
COMMENT : The two safety vents are placed on the rear cover and have a 6 mm diameter. See figure 5
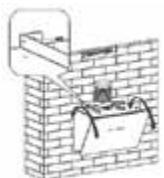
Figure 5
- Adjust the height of the inner duct relative to the position of the inner duct mount and fix it all using 2 ST4*8 mm screws. See figure 6
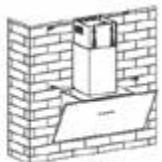
Figure 6
Recommendations for installation of the evacuation duct
The following rules must be strictly followed, in order to obtain optimal air extraction:
- Keep the evacuation duct short and straight.
- Do not shorten or obstruct the evacuation duct.
- If you use a flexible pipe, always install it so that it is properly stretched out to limit pressure losses.
- Failure to comply with these basic instructions will reduce the performance of the hood and increase its noise level.
- All installation work must be carried out by a qualified electrician or a competent person.
- Do not connect all the ducts in the hood to an existing ventilation system that is used for another device, such as heating, gas or hot air ducts. The angle of curvature of the ventilation duct shall not be less than 120^ ; you need to position the duct horizontally. Otherwise, raise the pipe vertically from the entry point and guide it towards an outside wall.
- Once the installation is complete, check that the extractor hood is level to avoid any accumulation of grease on one end.
Ensure that the evacuation duct chosen for the installation meets applicable standards and is flame retardant.
WARNING : For safety reasons, please only use fastening or mounting screws with the dimensions recommended in this user manual. Any non-compliant installation of the screws or fastening devices with these instructions presents an electrical hazard.
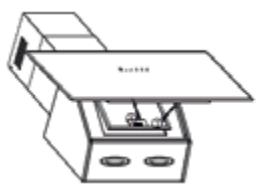
LED touch control


The LED touch control has five buttons, see figure.
Reduce
+ Increase
Lamp
Timer
On/Off
- Turning on the appliance: once the extractor hood has been connected to the main power supply, the backlighting of all the buttons will come on. The LED display comes off. The extractor hood does not work, it goes into standby mode. The backlighting will switch off automatically after 2 s. of inactivity.
- On/Off button):
- Press the (On/Off) button, the front cover of the extractor hood will open. The backlighting of the button will come on and the hood will begin to operate at low speed. The lamp will also come on. The backlighting of the — (Decrease), + (Increase) and (Lamp) buttons will come on. Press the (On/Off button) again: the front cover of the hood will close, the backlighting of this button will go out and the hood will be switched off. Functional operations can only be performed when the cover is open.
-
(Lamp) button:
Push the (Lamp) button, the backlighting of this button and the lamp will come on. If you press the button again, the backlighting of the button and the lamp will go out. The following operations can be performed repeatedly.
-
-
Press the + (Increase) button: the backlighting of the + (Increase), — (Reduce) and Ⓞ (On/Off) buttons will come on. The extractor hood starts to operate at low speed. The LED display will indicate "1".
- Press the + (Increase) button again when the hood is operating at low speed: the backlighting of the + (Increase), - (Reduce) and On/Off) buttons will come on. The hood operates at medium speed and the LED display will indicate "2".
- Press the + (Increase) button again when the hood is operating at medium speed: the backlighting of the + (Increase) button will go out. The — (Decrease) and Ⓞ (On/Off) buttons will stay on. The extractor hood operates at high speed and the LED display will indicate "3".
-
If you press the + (Increase) button again while the hood is operating at high speed, it will continue to operate at high speed.
-
— (Decrease) button
-
Push the (Decrease) button to lower the hood by one speed. The display shows the current speed of operation. If you press the (Reduced) button again while the hood is operating at high speed, it will continue to operate at medium speed. The backlighting of the + (Increase), (Reduce) and (On/Off) buttons will be on. If you press the (Decrease) button when the hood is operating at medium speed, it will switch to low speed. The backlighting of the + (Increase), (Reduce) and (On/Off) buttons will be on. If you press the (Decrease) button again when the hood operates at low speed, the hood will switch off, as will the backlighting of the (Decrease) button.
- (Timer) button:
- The (Timer) button operates only when the motor and the light are on. The maximum timer setting is 5 min. The timer can be repeated. After the elapsed time, the hood and the light will switch off.
- After setting the timer, if you adjust the speed in the meantime, the timer delay will be recalculated.
Maintenance and cleaning
CAUTION:
- The extractor hood must be disconnected from the power source before any maintenance or cleaning. Make sure the hood is switched off at the wall socket and the plug is disconnected.
- External surfaces are easily scratched and scraped. Please follow the cleaning instructions to ensure the best possible result without damaging the appliance.
Maintenance, especially cleaning, must be performed once the appliance has cooled down. Avoid leaving alkaline or acidic substances (lemon juice, vinegar, etc.) on the surfaces.
Stainless steel
Stainless steel should be cleaned regularly (e.g. once a week) to ensure long life. Wipe with a clean, soft cloth. You can also use a special cleaner for stainless steel.
NOTE:
- Be sure to wipe the stainless steel to prevent the appearance of any unsightly scratches.
Surface of the control panel
The coating on the control panel can be cleaned with hot soapy water. Make sure the cloth is clean and properly wrung out before cleaning. Use a soft cloth to remove any excess moisture left after cleaning.
Use neutral detergents and avoid harsh chemicals, strong household detergents or products containing abrasives because they would damage the appearance of the appliance, could remove any illustrations printed on the control panel which would void the warranty.
Grease filters
Mesh grease filters can be cleaned by hand. Dip in water containing a degreaser for 3 minutes, then brush them with a soft brush. Do not press too hard to avoid damaging them. (Let them dry in the open air and away from direct sunlight.) The filters must not be washed along with dishes and kitchen utensils. Rinse aid should not be used Refer to the figure opposite to dismantle the grease filters.
Installation of grease filters
- To install the filters, please follow the following four steps.
- Tilt the filter in the slots at the rear of the hood.
- Push the button on the handle of the filter.
- Release the handle once the filter is locked in position.
- Repeat to install all the filters.
Charcoal filter (not supplied)
An activated charcoal filter may be used to neutralise odours. Normally, the charcoal filter should be changed every three to six months, depending on cooking habits. The installation procedure of the activated charcoal filter is as follows:
Recycling version:
To transform the hood from the evacuation version to the recycling version, ask your dealer for activated charcoal filters.
Installing the activated charcoal filter (cassette)
-
The aluminium filter must be removed to install the activated charcoal filter.
-
Open the grating, press the locking device and pull the filter downwards.
- Place the activated charcoal filter inside the appliance and fasten it by turning anticlockwise.
- Replace the grating in its original position.
Installing the activated charcoal filter (cut-out)
- The aluminium filter must be removed to install the activated charcoal filter.
- Place the precut filter above the aluminium filter.
- Replace the aluminium filter.
- We recommend running the hood for a few minutes before starting to cook. We also recommend switching it off 15 minutes after cooking has finished to eliminate odours as much as possible and remove bad air.

NOTE:
- Make sure the filter is properly inserted. Otherwise, it will come out and present a hazard.
- When an activated charcoal filter is installed, the suction power is reduced.
Bulb replacement
IMPORTANT:
- The bulb must be replaced by the manufacturer, one of its technicians or a qualified person.
- Always switch off the power before performing any operation on it. Before handling the bulb, make sure it has completely cooled.
- When handling bulbs, hold them with a cloth or gloves to ensure that sweat does not come into contact with them, as this may reduce their life
Replacement the lamp
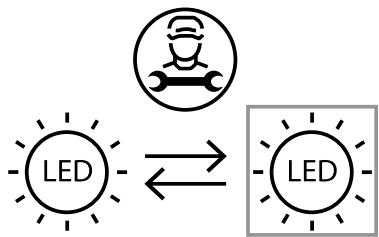
Light source in this product can only be replaced by qualified professionals.
Please contact after-sales service if the light source fails. The light source shall be removed at the end of the product's useful life, with sorting and recycling done separately.
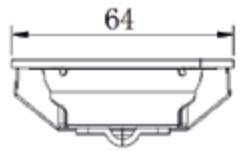
- The ILCOS D code for this lamp is: DSR-1.5/65-S-64
- LED modules - round bulb
- Max power: 2 × 1.5 W
Voltage range: 12V DC
- Dimensions: 64 mm
Troubleshooting
| Problem | Potential causes | Solution |
| The light comes on but the motor is not working. | The fan switch is disabled. | Select a position for the fan switch. |
| The fan is out of order | Contact the service centre. |
| The motor is out of order. | Contact the service centre. |
| The light comes on but the motor is not working. | The home's fuses are defective. | Reset / Replace fuses. |
| The power cord is detached or disconnected. | Re-plug the cord into the power socket. Switch on the power socket. |
| Oil leak | The check valve and the output device have a sealing defect. | Dismantle the check valve and seal it using a sealant. |
| There is a leak on the connection between the duct and its cover. | Remove the duct and seal the leak. |
| The light is not working. | The bulbs are defective/ broken. | Replace the bulbs in accordance with this manual. |
| Insufficient suction | The distance between the hood and the stove is too large. | Reposition the hood at the right distance. |
| The extractor hood is tilted. | The mounting screws are not tight enough. | Tighten the suspension screw by aligning the hood horizontally. |
COMMENT : All electrical repairs to this appliance must comply with your local, state and federal legislation. If in doubt, contact the service centre before undertaking anything. Always unplug the appliance from the power source if you need to open it.
Packaging and the environment
DISPOSING OF PACKAGING MATERIALS
Packaging materials protect your appliance from damage that may occur during transport.
These materials are environmentally friendly since they are recyclable. Recycling materials saves raw materials and reduces waste production.
Disposing of your old appliance
SELECTIVE SORTING OFELECTRICAL AND ELECTRONIC
This appliance bears the WEEE (Waste Electronic and Electrical Equipment) symbol meaning that, at the end of its life, it must not be disposed of with household waste but must be taken to the local sorting centre. Waste recovery helps preserve our environment.
ENVIRONMENTAL PROTECTION - DIRECTIVE 2012/19/EU
To preserve our environment and our health, the end-of-life disposal of electrical and electronic devices must be done according to very specific rules and requires the involvement of everyone, whether supplier or user.
This is why your appliance, as indicated by the symbol on its nameplate or on the packaging, should under no circumstances be thrown into a public or private bin intended for household waste. The user has the right to take the device to public collection points which selectively sort waste to be either recycled or reused for other applications in accordance with the directive.
For child safety, keep your old appliances in a safe place until they are discarded, out of your home.

Commande tactile LED


La commande tactile LED presente cinq boutons, cf. figure.

Diminuer

Augmenter

Lampe

Minuterie

Marche/Arret