
M-CUBE SATELLITE - Speaker MISSION - Free user manual and instructions
Find the device manual for free M-CUBE SATELLITE MISSION in PDF.

| Type | Satellite speaker |
| Brand | MISSION |
| Model | M-CUBE SATELLITE |
| Dimensions (per satellite) | 90 × 90 × 90 mm |
| Weight (per satellite) | 1.02 kg |
| Driver | High-power 25 mm Radial Drive |
| Enclosure type | DML, infinite baffle |
| Enclosure construction | 6 mm aluminium extrusion |
| Enclosure volume | 0.4 litre |
| Recommended amplifier power | 30 - 150 W per channel |
| Frequency response (-6 dB) | 280 Hz - 30 kHz |
| Impedance | 8 Ohms compatible, 4 Ohms minimum |
| Sensitivity (2.83 V @ 1 m) | 85 dB |
| Magnetic shielding | Yes |
| Inputs / outputs | 4 mm multi-way binding posts |
| Supplied accessories | 5 satellites, 1 amplified subwoofer, 3 spare membranes, speaker cables, mains cable, umbilical link, wall brackets, connectors, feet, spikes, screws, Allen keys, user manuals, warranty card |
| Warranty | 2 years (subject to conditions, see manual) |
| Maintenance | Clean with a soft dry cloth, do not use abrasive products |
| Operating temperature | Avoid extreme temperatures, humidity, direct sunlight |
Frequently Asked Questions - M-CUBE SATELLITE MISSION
User questions about M-CUBE SATELLITE MISSION
0 question about this device. Answer the ones you know or ask your own.
Ask a new question about this device
Download the instructions for your Speaker in PDF format for free! Find your manual M-CUBE SATELLITE - MISSION and take your electronic device back in hand. On this page are published all the documents necessary for the use of your device. M-CUBE SATELLITE by MISSION.
USER MANUAL M-CUBE SATELLITE MISSION
User instructions 4-7
Care, service, and troubleshooting 8
Technical specifications 9
Deutsch
Warning: If using spikes make sure that they do not pierce mains cables etc. under/above the carpet.
When making any connections, switch your amplifier off.
When you switch on your system or change sources, set the volume control at minimum and turn the level up gradually.
Do not use your amplifier at full volume.
Avoid extreme settings of tone controls or graphic equalisers. Ideally, they should be set 'flat' or, if possible, bypassed. Ensure that all loudspeakers in the system are correctly wired and are in phase.
Do not place objects on top of loudspeakers.
Do not subject your loudspeakers to excessive cold, heat, humidity or sunlight.
Do not connect your loudspeakers to the mains supply, except for subwoofoers.
Do not attempt to dismantle the loudspeaker. There are no user serviceable parts inside and you will render the warranty void.
Position hi-fi electronics away from the loudspeakers on a rigid stand or cabinet.
Loudspeakers should not share the same shelf or cabinet as other hi-fi electronics.
Use only the stand or bracket specified by the manufacturer, or sold with the apparatus.
Retain all packaging materials so that your loudspeaker can be repacked and shipped without damage.
The apparatus must not be exposed to dripping or splashing and no objects filled with liquids, such as vases, should be placed on the apparatus.
Some manufacturers forbid the placing of objects on top of their TV sets. Check your TV handbook before installing the centre speaker directly on your TV set. Consult your TV dealer if you are in any doubt.
When an amplifier is driven beyond its power output capabilities it will produce distortion which will quickly damage your speakers by overheating. Make sure that your amplifier is not left unattended when playing, for example at parties, and turn the volume control down at the first sign of audible distortion.
Congratulations on your purchase
Your Mission M-Cube satellites are the most stylish way to fill your room with the exciting sound available today from modern formats such as DVD and CD. By using NXT® technology, the M-Cube satellites work together with room acoustics to allow you complete freedom to place them anywhere that suits your room décor.
WHAT'S IN THE BOX
5 x M-Cube satellite speakers
1 x M-Cube active subwoofer
3 x extra packs of M-Cube wraps
2 x 16m speaker cable
3 x 7m speaker cable
1 x power supply cable
1 x umbilical cable
2 x instruction manuals
1 x warranty card
Accessory carton including:
3 x wall brackets
3 x wall bracket connectors
4 x subwoofer feet
4 x subwoofer pads
4 x subwoofer spikes
3 x m6 screws
2 x Allen Keys
WARRANTY CONDITIONS
The warranty card enclosed should be completed and returned to Mission or its Distributor within 8 days of purchase.
No Dealer or Distributor may vary the terms of this warranty which is personal to the original purchaser and is not transferable.
Please retain the sales receipt as proof of purchase.
Warranty claims must wherever possible be made through the Dealer from whom the equipment was purchased.
Equipment for attention under warranty should be considered return carriage paid. If equipment is found to comply with the
published specification, Mission reserves the right to raise a charge.
The above conditions do not affect your statutory rights as a consumer.
This warranty excludes:
Damage caused through neglect, accident, misuse, wear and tear, or through incorrect installation, adjustment or repair by unauthorised personnel.
Liability for damage or loss occurring in transit to or from the purchaser.
Consequent damage, loss or injury, arising from or in conjunction with this equipment.
Any unauthorised servicing will result in loss of warranty.
UNPACKING
Carefully unpack each item from the box.
Retain all packing materials so that the product can be repacked and shipped without damage.
| STAGE 1 | STEP 1 | STEP 2 | STEP 3 | STEP 4 |
| Mounting the M-Cube satellite to the wall | Offer the mounting bracket to the wall and mark the positions for 2 mounting points. Having selected fixings appropriate to the mounting surface, drill 2 holes to accommodate the fixings. Attach the mounting bracket to the wall using appropriate countersunk screws (not supplied). | Attach the wall bracket to the mounting bracket by sliding down vertically. Loosen the locking mechanism screw using the Allen key provided. Set the pitch of the wall bracket arm as desired, and re-tighten the locking mechanism screw. Loosen the locking mechanism screw using the Allen key provided. Set the pitch of the wall bracket arm as desired, and re-tighten the locking mechanism screw. | Attach the satellite and connector to the wall bracket using the M6 screw provided. Before tightening fully, swivel the satellite to the desired angle. Note that the connector between the satellite and bracket has a locating device that will only fit one way. | |
| Screws/fixings not supplied | Screws/fixings not supplied | Screws/fixings not supplied | Screws/fixings not supplied | |
| STAGE 2 | STEP 1 | STEP 2 | STEP 3 | STEP 4 | STEP 5 |
| Mounting the M-Cube satellite to the floorstand | Attach the stand base to the pole. Connect securely by using the M3 screw provided. | Pass the speaker cable through the stand base. Then, attach the spikes and locking nuts to the stand base, using the appropriate end of the spikes for your flooring. | Thread the speaker cable through the bung and then slot the bung into the stand. | Screw the stand connector into the satellite using the long M6 screw provided. | Place the satellite on the pole and screw the stand connector to the stand using the 2 x M3 screws. |
| Warning: Be careful. Floorstand spikes are very sharp. When positioning the speakers avoid piercing any electrical cables etc. under or above the carpet. | Note that the connector between the satellite and bracket has a locating device that will only fit one way. | ||||
| STAGE 3 | STEP 1 | STEP 2 | STEP 3 | NOTE | |
| Setting up the M-Cube satellites | Using the speaker cable supplied, connect each M-Cube satellite (pic 1) to the appropriate binding posts on the M-Cube subwoofer (pic 2), observing the correct polarity. Alternatively, connect directly to your AV receiver. | In your AV receiver's speaker setup, set all speakers to 'LARGE'. In your AV receiver's speaker setup, set the subwoofer to 'ON'. | In your AV receiver's speaker setup, set the listening distance for each satellite, and adjust the level of each satellite channel to give the same volume at the listening position. If you are unsure, set each channel to the same level. | If your bass sounds excessively boomy when listening to stereo sources (eg. CD), set the subwoofer to 'OFF' in your AV receiver's speaker setup (see troubleshooting guide for more information). | |
| pic 1 | Speaker Setup LARGE MEDIUM SMALL | ||||
| pic 2 | Subwoofer ON OFF | ||||
| STAGE 4 | STEP 1 | STEP 2 | STEP 3 | STEP 4 | |
| Changing the M-Cube wrap | Unscrew the 2 x M3 screws in the base of the satellite, using the Allen key provided. | Remove the rubber plug from the base of the satellite and carefully remove the fabric wrap. | Attach the new fabric wrap to the 4 pins. The wrap has a softer side which is designed to face outwards. | Re-insert the rubber plug and screw in the 2 x M3 screws, using the Allen key provided. Ensure the correct orientation of the rubber plug as illustrated below. | |
| OVERDRIVE PROTECTION | TROUBLESHOOTING GUIDE | ||
| Care, service, and troubleshooting | Your M-Cube satellites are independently protected by overdrive detection circuitry: If the input signal level exceeds the safe operating threshold on a particular channel, the satellite volume will cut significantly on that channel. If this occurs, the receiver volume control should be reduced to zero for approximately 15 seconds, after which the volume can be increased to a safer level, and normal function will return. | No sound coming from satellites Check all connections; ensure AV receiver is set to correct input channel; ensure volume is above zero; ensure subwoofer power status indicator is live; ensure source is connected and powered up. | Bass sounds boomy in 2 channel (stereo) mode In stereo / 5-channel stereo modes, some receivers will route bass information to the subwoofer via the LFE channel. If so, you should set the subwoofer to 'OFF' in your AV receiver's speaker setup when listening to 2-channel sources. |
| Low sound output Protection devices may have tripped - turn volume down for 15 seconds. | Only 2 channels are audible Check receiver is not in stereo mode; check all connections. | ||
| SATELLITE CARE | PRODUCT SERVICE | ||
| Use only a soft, dry cloth to clean your M-Cube satellites. Do not use abrasives as you will risk damaging the finish. Refer to wrap packaging for washing instructions. | Should a fault occur with your loudspeaker system, please return the product in its original packaging. Product for service should be returned to the dealer from whom the product was purchased. If you experience difficulties or there is no Mission dealer in your area, please contact the Mission distributor for your country, or the Main Service Centre for your country. | ||
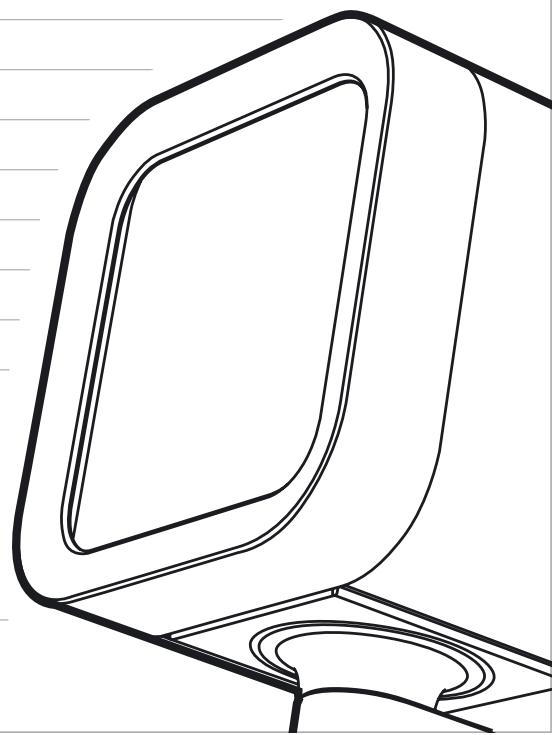
SATELLITE
Technical specifications
Sound Panel: 2.2 mm Hexulite sandwich
Drive Unit: 25 mm, high-power radial magnet exciter
Enclosure Type: DML in infinite baffle
Enclosure Construction: 6 mm aluminium extrusion
Enclosure Volume: 0.4 litres
Recommended Amplifier Power: 30 - 150 W per channel
Frequency Response (-6 dB): 280 Hz - 30 kHz
Dimensions: 90 × 90 × 90 ~mm
Weight (per satellite): 1.02 kg
Impedance: 8 Ohms compatible, min 4 Ohms
Sensitivity (2.83V @ 1m): 85 dB
Magnetically Shielded: Yes
Inputs / Outputs: Multiway 4 mm binding post
CONSIGNES IMPORTANTES
FRANÇAIS
CONDITIONS DE LA GARANTIE
Specifications techniques
Panneau sonore : Sandwich Hexulite 2,2 mm
NXT and are registered trademarks of New Transducers Limited.
IAG is a trading name of IAG Macao Commercial Offshore Ltd.
Specifications subject to change without notice. E&OE
Designed in England.
Gestaltung in England.
NXT y son marcas registradas de New Transducers Limited.