PROLINE 7305 - Range hood NOVY - Free user manual and instructions
Find the device manual for free PROLINE 7305 NOVY in PDF.


User questions about PROLINE 7305 NOVY
0 question about this device. Answer the ones you know or ask your own.
Ask a new question about this device
Download the instructions for your Range hood in PDF format for free! Find your manual PROLINE 7305 - NOVY and take your electronic device back in hand. On this page are published all the documents necessary for the use of your device. PROLINE 7305 by NOVY.
USER MANUAL PROLINE 7305 NOVY
Operating and installation Instructions
p. 20
ALGEMENE INFORMATIE
These are the mounting instructions for UP_SIDE. Carefully read these instructions before installing and co mmissioning. It is reco mmended to have one or more qualitied persons carry out the installation only. Take the hood carefully out of the packaging.
The hood is to be used in a table top and it is intended for household use only.
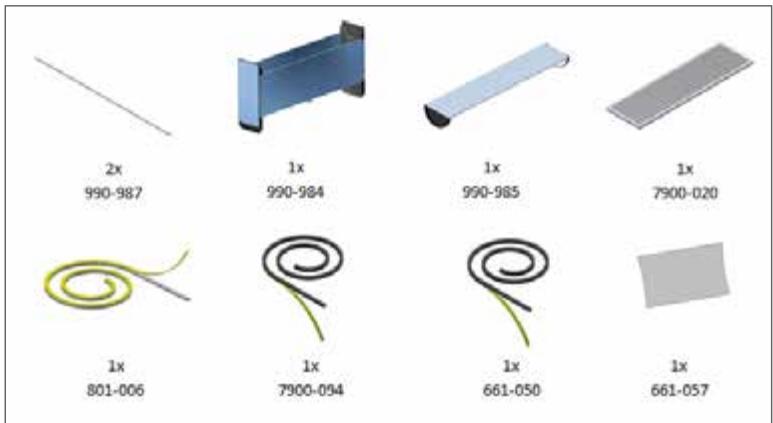
Check with the help of the drawing given below whether all mounting materials and accessories have been included in the delivery.
1 INSTALLATION
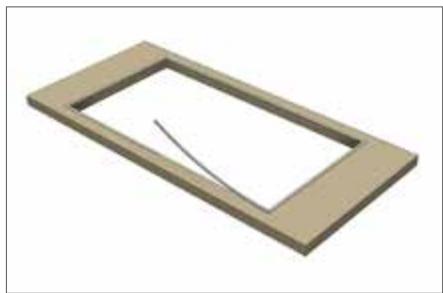
Choose whether UP_SIDE and the dominos or cooking plate are to be mounted as 'surface mounting' or as 'flush mounting'.
1.1 CUT-OUT IN THE TABLE TOP FOR SURFACE MOUNTING
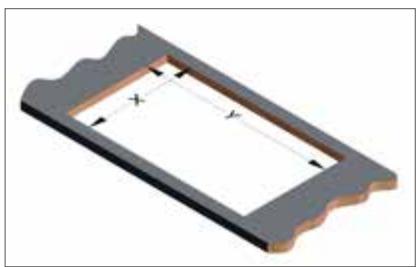
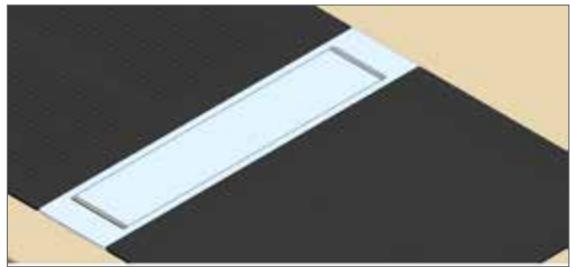
Cut an opening in the table top with the following dimensions:
X = 502 mm (tolerance -0/+1 mm) for UP_SIDE and cooking plate above UP_SIDE. For the appliance beside UP_SIDE the cut-away must be 490 mm.
Y = the overall dimensions of the domino + UP_SIDE(s) -10 mm
NOTE:
The most common applications of UP_SIDE with domino or an induction hotplate can be found at the back of the annexes.
1.2 CUT-OUT IN THE TABLE TOP FOR FLUSH MOUNTING
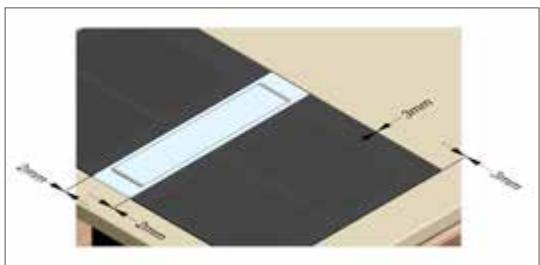
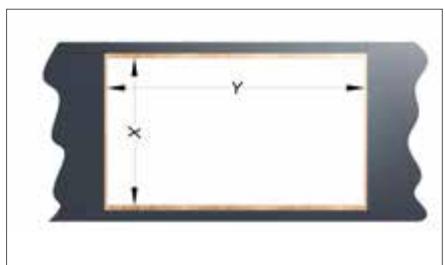
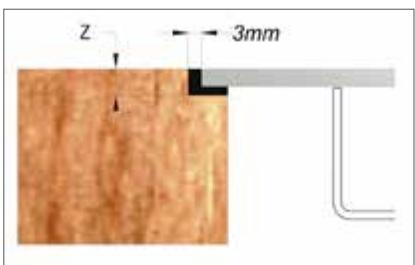
Cut-out in the table top:
X = 502 mm (tolerance -0/+1)
Y = the overall dimensions of the domino + the distance in between must every time be 2 mm + UP_SIDE(s) - 10 mm
Milled groove:
X= 526 mm
Y = the total width of all appliances + space for the silicon (3 mm between the table top and the appliance, 2 mm between 2 appliances)
Z = the depth of the milled groove = the thickness of the glass of the cooking plate +1,5mm (tolerance -0 / + 0,5mm)
Example with 2 x UP SIDE and 3 domino elements:
Domino 2 zone (380 mm) + UP_SIDE (110 mm) + Domino 2-zone (380 mm) + UP_SIDE (110 mm) + Domino wok (380 mm)
Flush mounting:
Opening
$$ \begin{array}{l} X = 5 0 2 \mathrm {m m} \ Y = (3 8 0 \mathrm {m m} + 2 \mathrm {m m} + 1 1 0 \mathrm {m m} + 2 \mathrm {m m} + 3 8 0 \mathrm {m m} + 2 \mathrm {m m} + 1 1 0 \mathrm {m m} + 2 \mathrm {m m} + 3 8 0 \mathrm {m m}) - 1 0 \mathrm {m m} \ \end{array} $$
Milled groove
$$ \begin{array}{l} X = 5 2 6 \mathrm {m m} \ Y = 3 \mathrm {m m} + 3 8 0 \mathrm {m m} + 2 \mathrm {m m} + 1 1 0 \mathrm {m m} + 2 \mathrm {m m} + 3 8 0 \mathrm {m m} + 2 \mathrm {m m} + 1 1 0 \mathrm {m m} + 2 \mathrm {m m} + 3 8 0 \mathrm {m m} + 3 \mathrm {m m} \ \end{array} $$
1.3 CHANGE THE EXHAUST DIRECTION
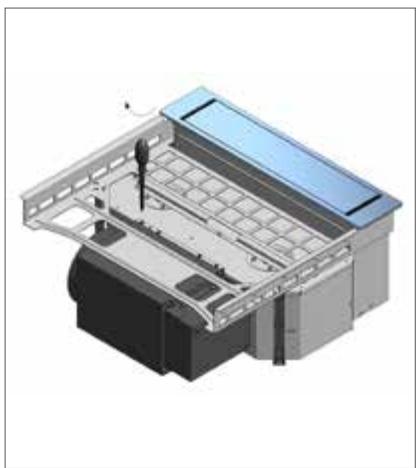
The exhaust direction can be changed dependent on the exhaust direction of the motor casing (left or right of UP_SIDE's suction opening).
A: Remove the 8 screws of the sound-insulating outlet.
B: Turn the electronics box by removing the 4 screws and by placing back the box upside down (cables facing up). (7901_M3) Remount using the 4 screws.
C: Turn the outlet 180^ again with the 8 screws.
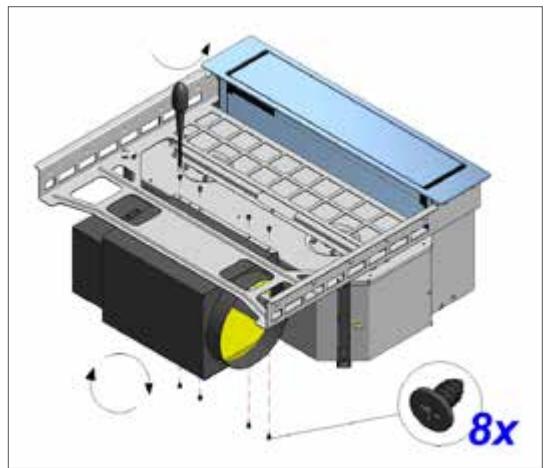
A

B
C
1.4. POSITION DES ABDECKRAHMENS ÄNDERN
Attention! When using the adapter (7901.052), this should be mounted first unto UP_SIDE, before placing UP_SIDE into the table top (more information about the adapter 7901.052 is to be found at point 6).
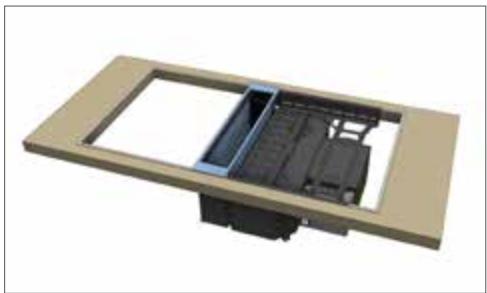
2.1 SURFACE MOUNTING
Stick the delivered grey insulating tape (661-050) on the edge of the opening.
Determine the position of UP_SIDE and put it at the correct place in the opening.
Proceed with 2.3
2.2 FLUSH MOUNTING
Before installing the domino and/or the induction hotplate, please make the preparations below with respect to the appliances.
- In order to be able to completely seal UP_SIDE after installation, apply a drip tray (990-987) to the bottom side of the adjacent domino or induction hotplate only along the side lying against UP_SIDE.
- Turn the appliance concerned and mark the centre of the side lying against UP_SIDE.
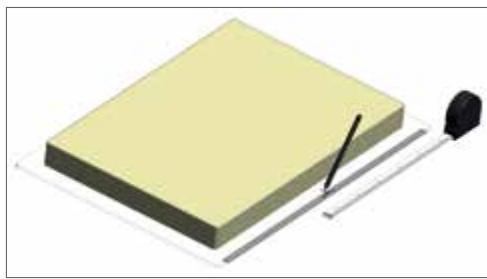
- Also mark the centre of the drip tray and remove the protective layer from the adhesive strip.
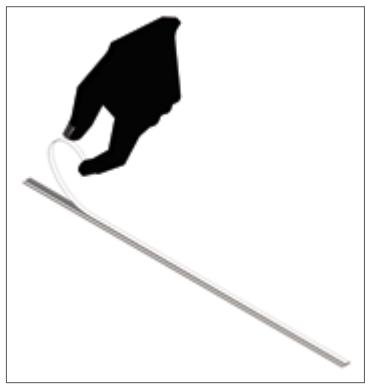
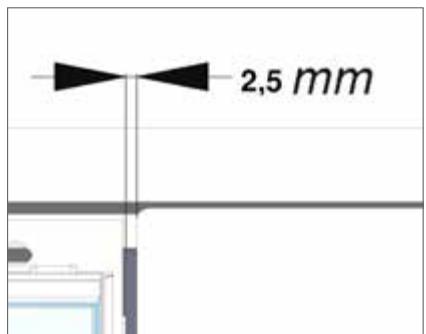
- Stick the drip tray unto the bottom side of the work surface of the domino or induction hotplate and make sure the tray is centred and protrudes max. 2,5 mm along the edge of the appliance.
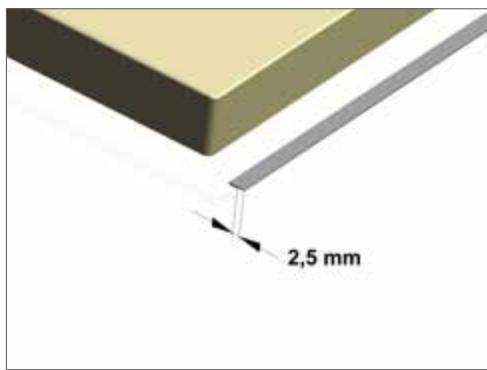
Place UP_SIDE at the correct position and first shut off the exhaust duct before laying the domino or the induction hotplate into the cut-away.
2.3 INSTALL THE EXHAUST DUCT
The exhaust of the hood must be well maintained in order to exhaust the cooking fumes as well as possible. You may choose between an exhaust duct to the outside or connecting the exhaust duct to an exhaust box with a monoblock recirculation filter. Information about the exhaust box is to be found in chapter 6.
For optimum performance of the hood it is important to pay attention to the points given below.
When using a round exhaust duct:
- Use smooth, non-fla mmable pipes with an internal diameter that is equal to the external diameter of the connection nozzle of the hood. The UP_SIDE requires an exhaust duct of 0150 ~mm . Maximally extend flexible ducts and cut them to size.
- Do not reduce the exhaust diameter. This will decrease the capacity and increase the noise level.
- When connecting to a short exhaust duct, it may be required to mount a non-return valve TSKE in the duct to prevent the wind from blowing in.
- Use a hose clamp or aluminium tape for airtight connections.
In case of an exhaust pipe through the outside wall, use the outside wall grate type MGE.
When using a flat exhaust duct:
Use flat ducts with rounded corners and air conductors in the bends. These ducts are to be obtained through Novy.
In case of restricted space in the cabinet, you can order an adapter as an option (item number 7901.052). For additional information see chapter 5.
Make use of the connecting piece when connecting the flat duct to the outlet of the UP_SIDE.
General:
Make the duct as short as possible and with as few as possible bends to the outside.
- Avoid square bends. Use rounded bends for proper air conduction.
- If an exhaust pipe through the outside wall passes a cavity wall, make sure that the exhaust duct fully bridges the cavity and slightly declines to the outside.
In case of an exhaust pipe through the roof, use a double-walled roof passage with sufficient width.
- Never connect the exhaust to a flue duct.
Make sure that sufficient air is supplied. Fresh air can be supplied by slightly opening a window or an outside door or by installing an inlet grate.
Use the delivered white insulating tape for an airtight seal (801-006).
2.4 APPLIANCE ADJACENT TO THE UP_SIDE
For surface mounting and flush mounting
- On the appliance that is not placed above the motor casing of UP_SIDE the delivered black PVC strip (7900-094) must be applied at the front and the rear. This is to set off the difference in height.
- Stick the strip at the front and at the rear.
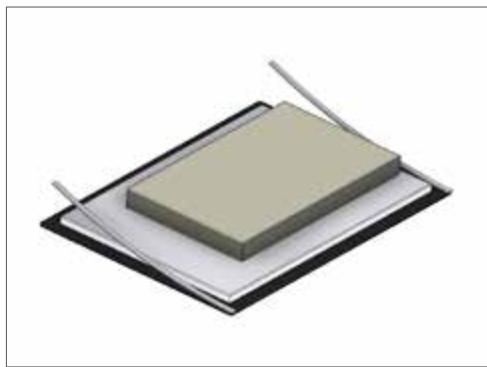
For surface mounting:
- Place the domino and/or induction hotplate besideUP_SIDE.
For flush mounting:
- Place the appliance(s) beside UP_SIDE. The drip tray is just not touching the decorative frame of the UP_SIDE.
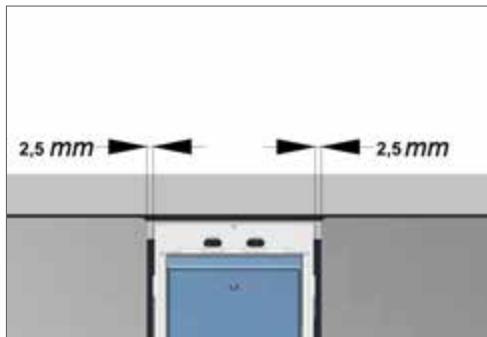
3 ADJUST THE SUCTION UNIT OF UP_SIDE
By default the click system is properly adjusted such, that the suction unit (990984) locks into place in the suction opening.
Adjust the click system (only in the following cases):
Suction unit (C) does not stay down = distance between A and B too large
Suction unit (C) cannot be fully pushed down = distance between A and B too small
If adjustment is still required, follow this instruction.
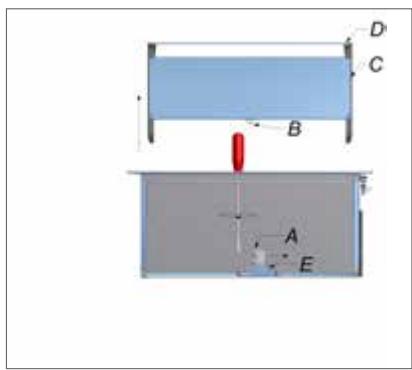
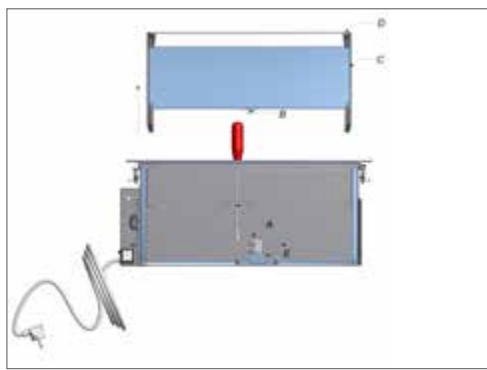
Adjust the click system (A) and the hook (B):
- Remove the suction unit (C) from the hood and remove the lid (D) from the box.
Slightly unscrew the 4 capped nuts, so you can slide the foot (E) together with the click system (A) into the longitudinal direction. - Place the suction unit (C) back and push it fully downwards.
- Press the foot (E) together with the click system (A) until it is against the hook (B).
- Tighten the capped nuts (manually).
- Place back the lid (D).
4 ELECTRICAL CONNECTION
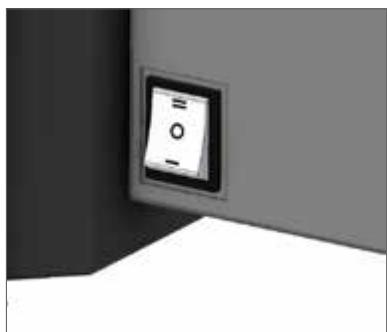
Set the selector switch to 'position II' (this is the default setting). This switch has been placed on the casing of the junction box. Plug the power cable into an earthed wall socket.
The plug must always be accessible, so UP_SIDE can be disconnected from the mains whenever necessary.
- Setting the selector switch to '0' also disconnects UP_SIDE from the mains.
- In special cases (limited space, insufficient draught) the technician may opt to set the switch to position 'I'. In this energy-saving position, the appliance will move significantly less air and therefore make significantly less noise.
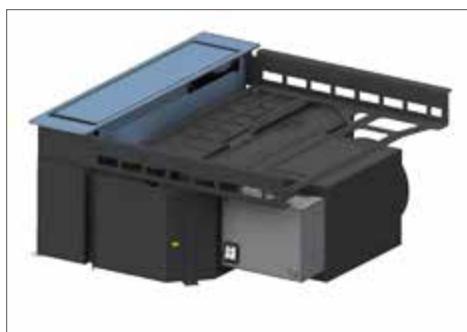
The cooker hood has a cable with earthed plug and must be connected to an earthed wall socket.
Amperage and absorption are shown on the specification label on the inside of the cooker hood.
Replacement of the connection cable is to be done by a qualified installer.
5 PLACE THE SUCTION UNIT AND FINISHING
- Place the fat filter (7900.020) into the suction unit (990.984). The fat filter will lie at a slant in the suction unit.
- Place the tilt lid (990.985) onto the suction unit.
Take the complete suction unit with the fat filter and press it down the suction opening of UP_SIDE
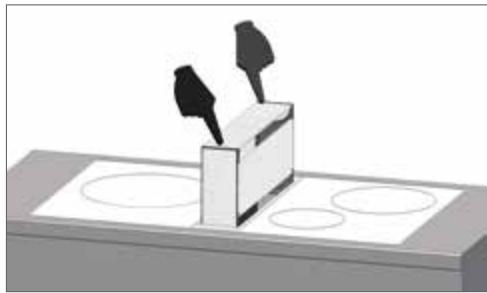
- The motor of the appliance will start operating i immediately. Use both hands - one at the front and one at the rear of the suction unit - to press down and lock the suction unit into place. The motor switches off when the lid on the suction unit is horizontal.
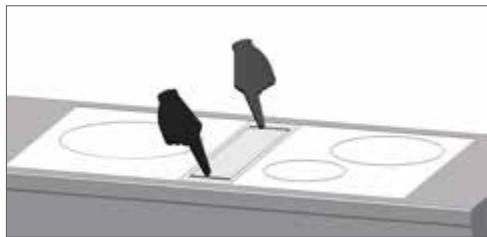
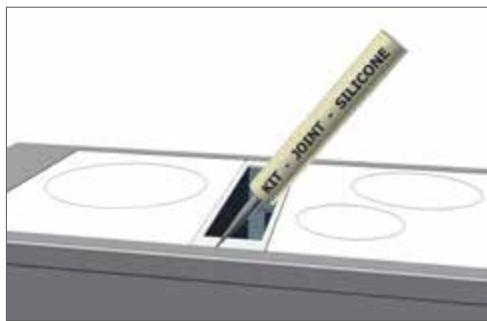
- Check the functioning of the installed appliances. Use sealant (not supplied) to close the gaps between UP_SIDE, the work surface and the other appliances. This prevents cooking liquid, condensation, etc. from entering the space between the work surface and the cabinets.
6 ACCESSORIES
Adapter for flat ducting (item number 7901.052)
The adapter makes it possible to continue with a flat duct directly from the cooking hood. In case of a cabinet with a limited depth, this adapter is the ultimate solution to allow installation with flat ducts. The adapter is mounted unto the outlet of UP_SIDE to which a flat duct can be connected directly. More information for connecting the adapter can be found in the mounting instructions for the adapter.
Recirculation
UP_SIDE can be connected to an exhaust box with a monoblock recirculation filter. The choice can be made between 3 exhaust boxes, being:
- 7900.400 - 140 mm height for building in into the plinth
- 7910.400 - 98 mm height for building in into the plinth
- 830.400 SS/ 831.400 WHITE - 270 x 500 x 295 mm
More information for connecting the exhaust box can be found in the mounting instructions for the exhaust box concerned.
UP_SIDE with 2 dominos
UP_SIDE (2x) with a domino and a Teppan Yaki 580 mm
NOVY reserves the right to modify the construction and prices of her products, without reservation at any time.
France: Tel: 0320.940662