PLIKO - PLIKO P3 - Strollers PEG PEREGO - Free user manual and instructions
Find the device manual for free PLIKO - PLIKO P3 PEG PEREGO in PDF.
| Product type | Stroller convertible into carrycot (Pliko P3 Pramette) |
| Brand | Peg Perego |
| Model | Pliko / Pliko P3 |
| Maximum child weight | 20 kg (44 lb) |
| Maximum child height | 110 cm (43 inches) |
| Maximum basket load | 5 kg (11 lb) |
| Maximum bottle holder load | 1 kg |
| Maximum pouch load | 0.2 kg (0.44 lb) |
| Safety system | 5-point harness, parking brake |
| Adjustments | 4-position reclining backrest, 3-position footrest, 2-position handle height |
| Front wheels | Swivel or fixed (locking lever) |
| Included accessories | Reversible canopy, apron, bottle holder, rain cover (optional), mosquito net (optional) |
| Car seat compatibility | Yes, via Ganciomatic system (Primo Viaggio seat sold separately) |
| Maintenance | Clean with sponge and soapy water, lubricate moving parts with light oil, wash cover according to instructions |
| Materials | Metal parts, plastic, fabric |
| Spare parts | Use only original Peg Perego parts. Contact support service. |
| Country of origin | Italy (Peg Perego S.p.A., Arcore, MI) |
Frequently Asked Questions - PLIKO - PLIKO P3 PEG PEREGO
User questions about PLIKO - PLIKO P3 PEG PEREGO
0 question about this device. Answer the ones you know or ask your own.
Ask a new question about this device
Download the instructions for your Strollers in PDF format for free! Find your manual PLIKO - PLIKO P3 - PEG PEREGO and take your electronic device back in hand. On this page are published all the documents necessary for the use of your device. PLIKO - PLIKO P3 by PEG PEREGO.
USER MANUAL PLIKO - PLIKO P3 PEG PEREGO
63 Accessory
64 Accessory
65 Accessory
66 Accessory
67 Accessory
67 Accessory
Pliko P3 - Pramette
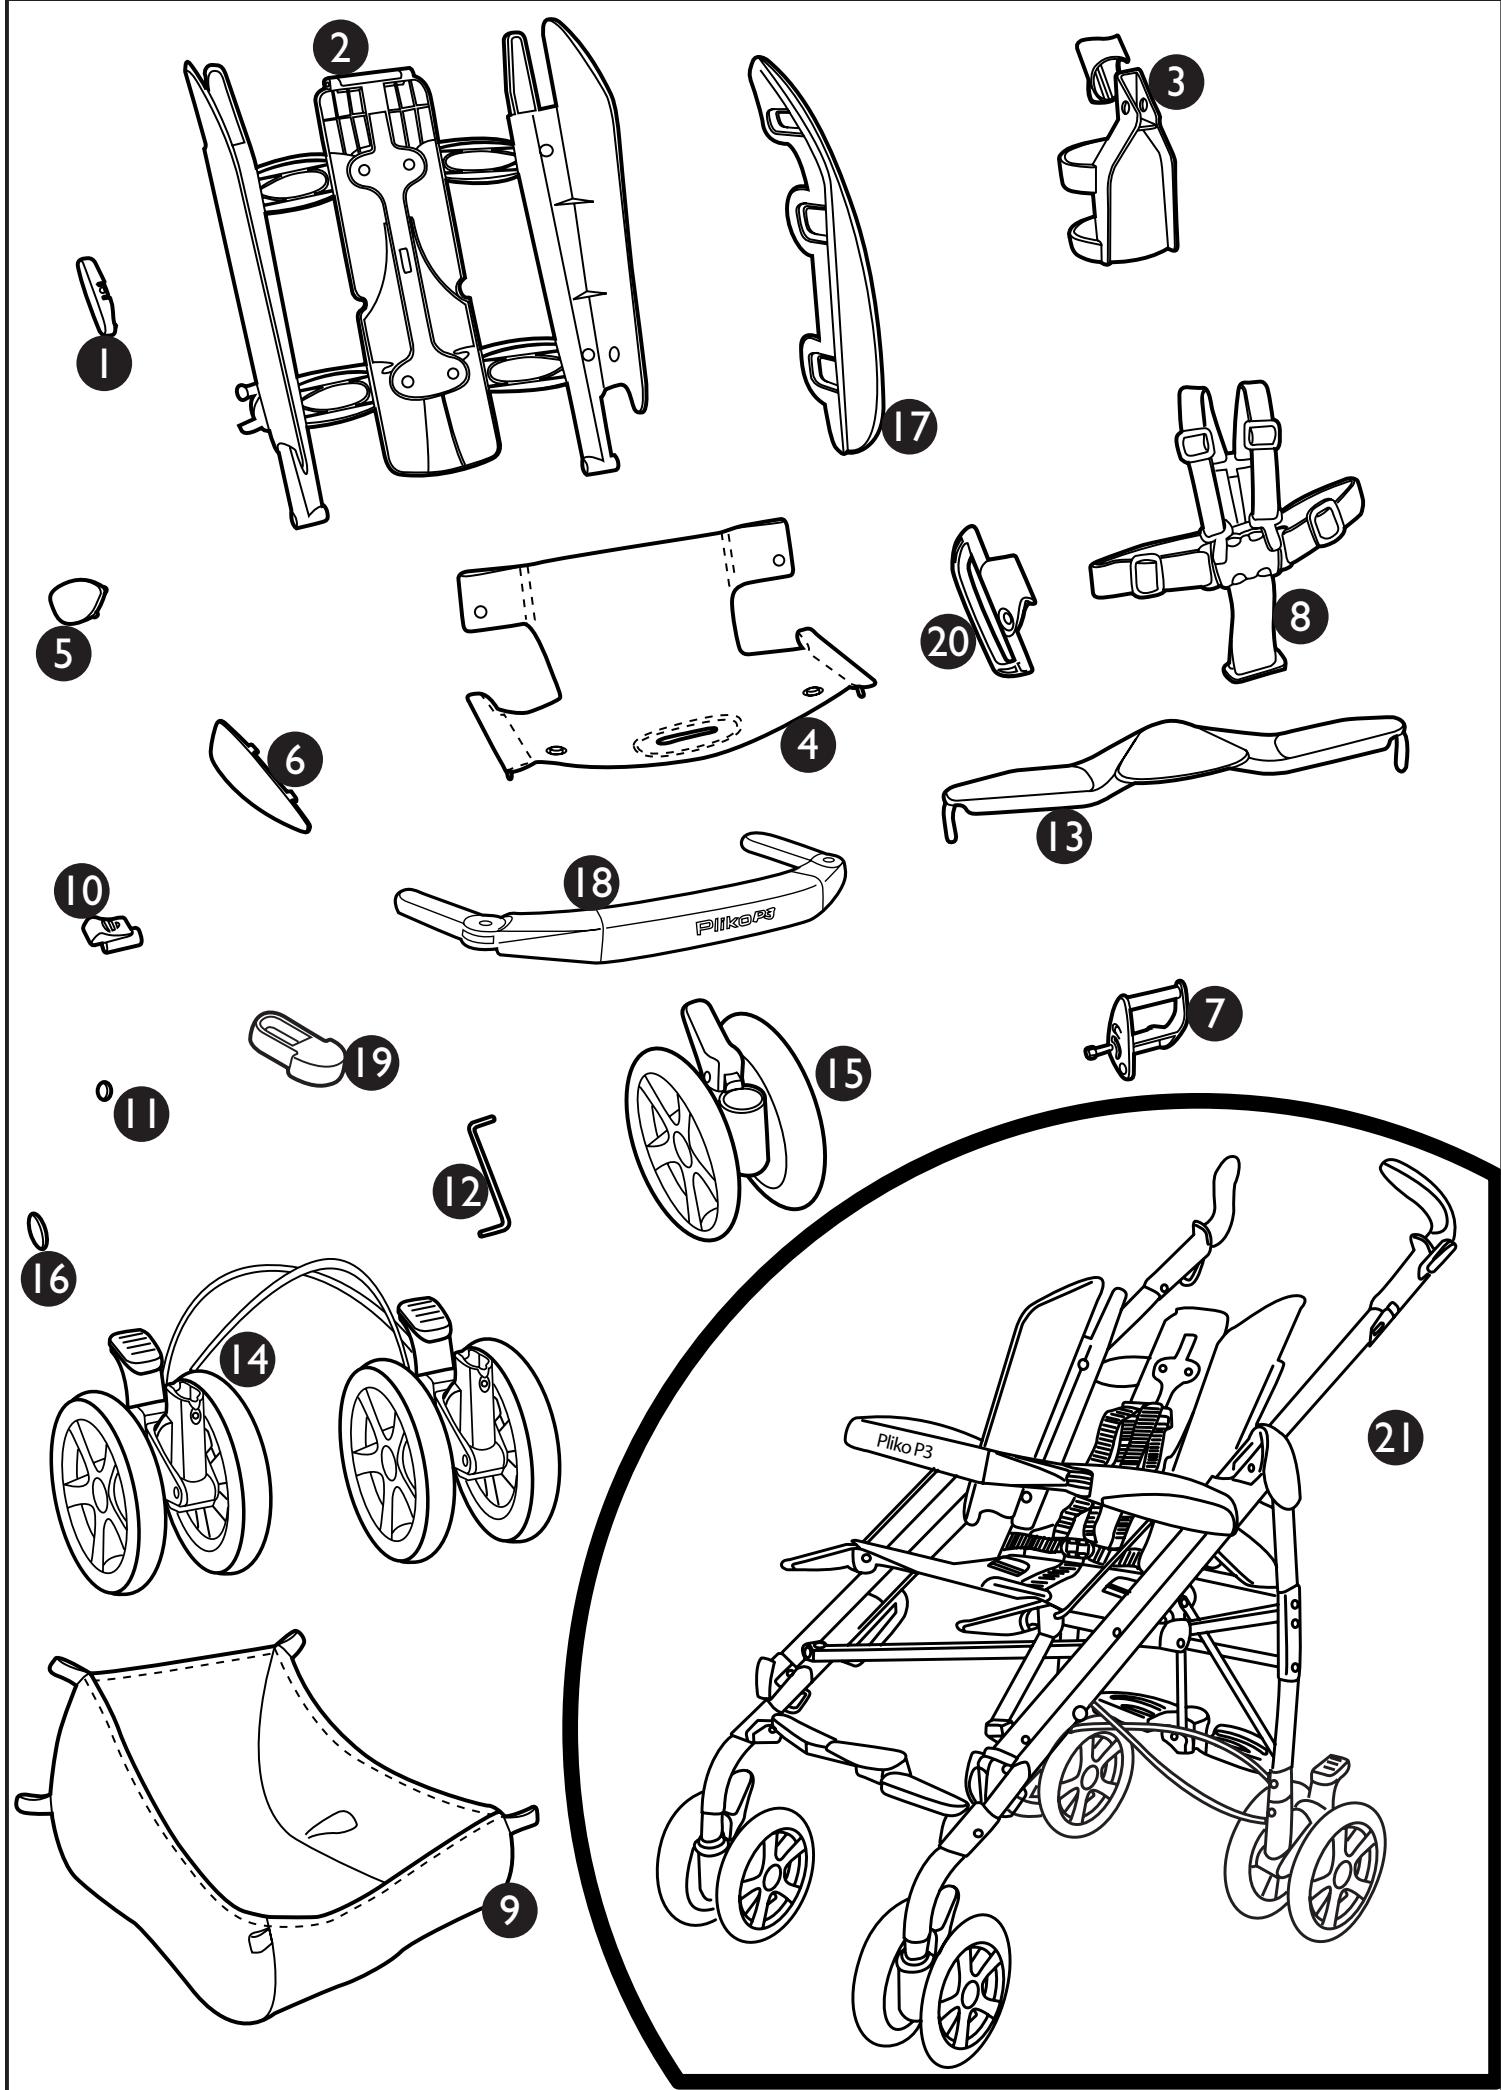
Pliko P3 - Pramette
1 SPST5332
2 ARPI0282
3 IRTR0015GR
4 RSEP3N---NL
- IMPORTANT: read these instructions carefully and keep them for future reference.
Failure to follow these instructions could put the child's safety at risk.
PEG PEREGO reserves the right to make any necessary changes or improvements to the products shown at any time without notice.
CUSTOMER SERVICE
If parts of the model are accidentally lost or damaged, use only original Peg Perego spare parts. Contact the Peg Perego Customer Service for all repair work, replacements, information about products, and sale of original spare parts and accessories, at the following:
CANADA:
tel.: 905.839.3371
fax: 905.839.9542
Call us toll free: 1.800.661.5050
www.pegperegco.com
INSTRUCTIONS FOR USE
OPENING
- Before opening the stroller remove the two protective caps from the hooks as shown in the figure. Otherwise, the stroller will not open correctly.
- To open the stroller, pull up the two levers on the handles and
- at the same time, lift the stroller, which will open automatically. To make sure that the stroller has been set up correctly, check the two side hooks (see figure).
- To mount the front wheels, lower Lever A and slip the wheels onto the axle, as shown in the figure. Press until the wheels click into place.
- To assemble the rear wheels fasten the wheels connected by the break wire, as indicated in the figure.
- Carefully distinguish the left wheel from the right, to fasten the two rear wheels properly. The left wheel has a rib on the wheel tube and one on the chassis to guarantee proper fastening (see figure).
- Make sure that it is fastened properly, as indicated in the figure (click).
- To mount the basket, slide the slots onto the front hooks A and the rear hooks B and C.
- The figure shows the mounted basket.
- The drink-holder can be attached to the
left or the right handle of the stroller, using the two bands.
-
To mount the drink-holder to the handle, widen the clamp and fasten as shown in the figure.
-
Slide the clamp in the drink-holder until it clicks.
Do not put hot drinks in the drink-holder, nor items weighing more than 1kg (2.2 lbs).
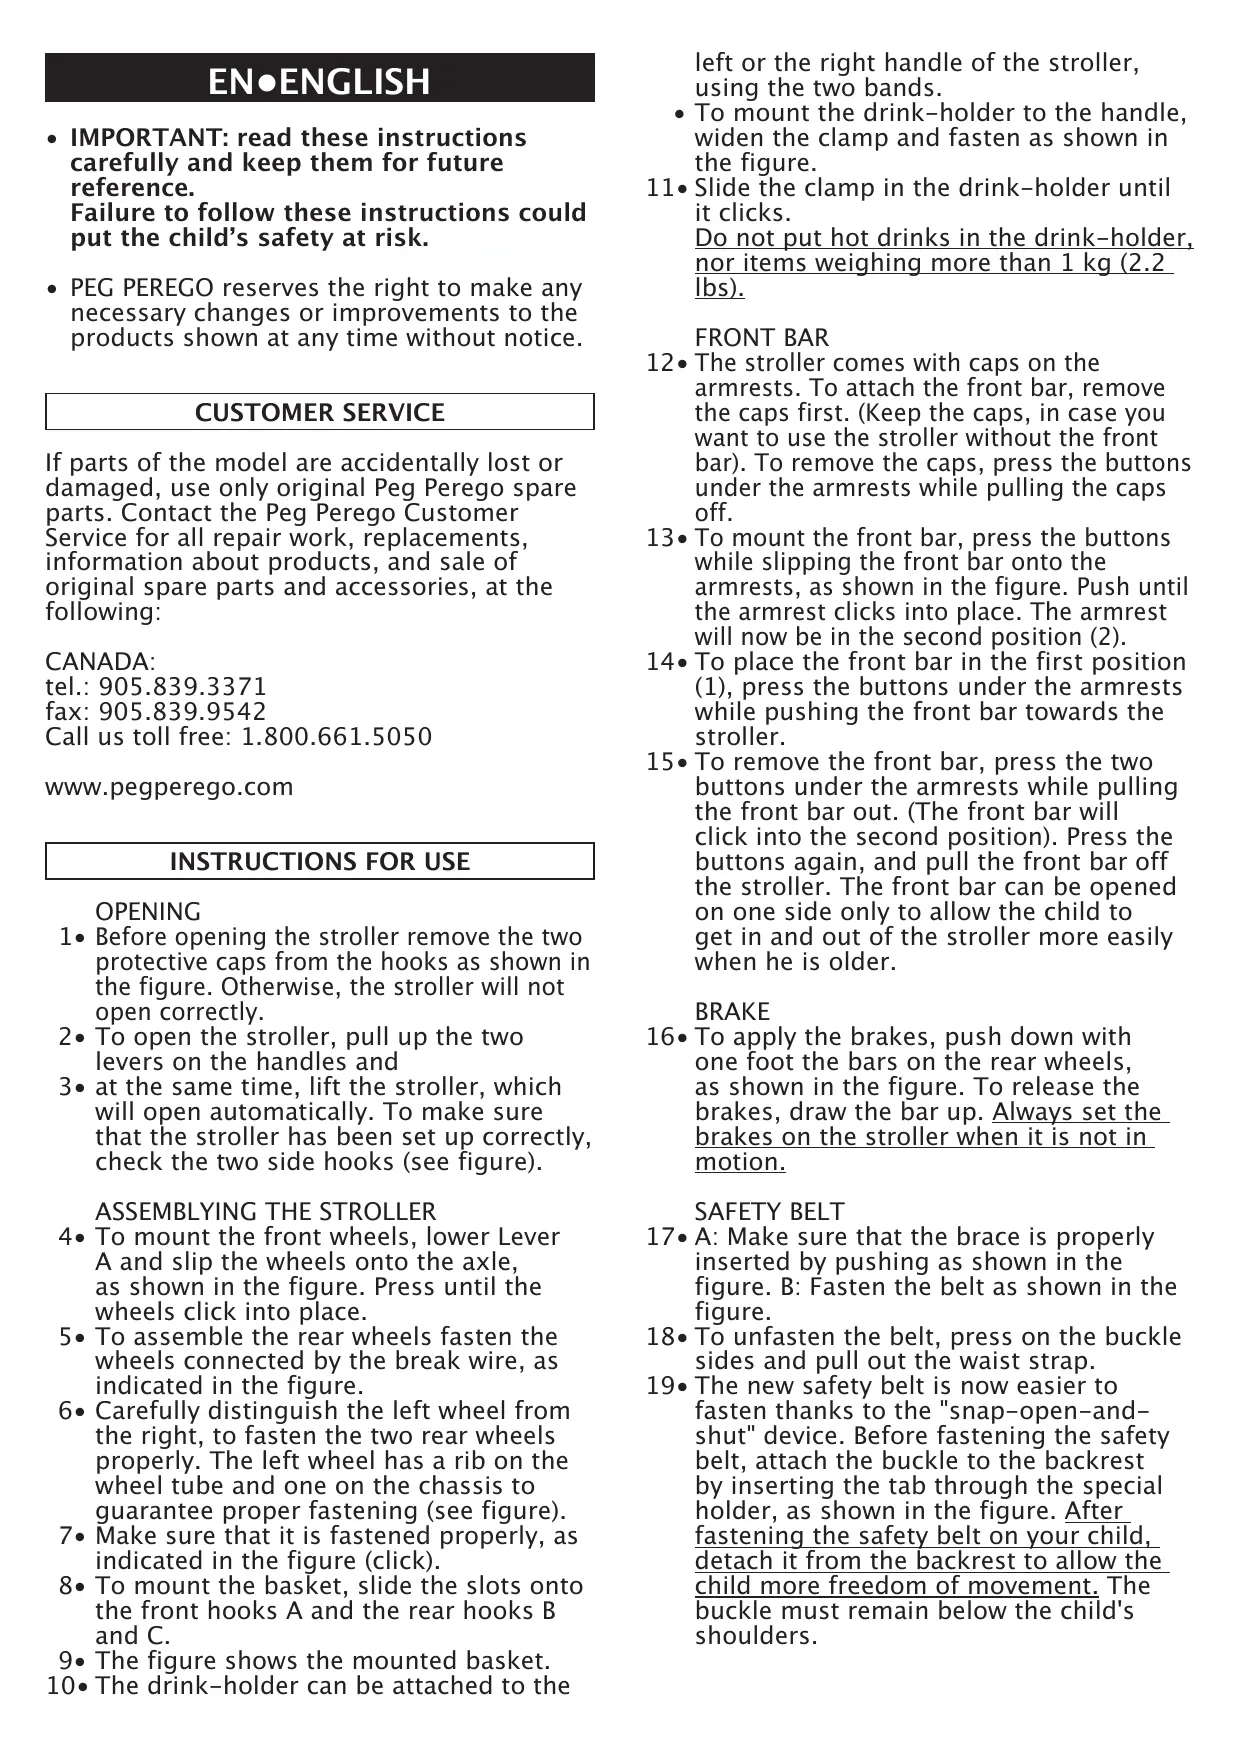
FRONT BAR
- The stroller comes with caps on the armrests. To attach the front bar, remove the caps first. (Keep the caps, in case you want to use the stroller without the front bar). To remove the caps, press the buttons under the armrests while pulling the caps off.
- To mount the front bar, press the buttons while slipping the front bar onto the armrests, as shown in the figure. Push until the armrest clicks into place. The armrest will now be in the second position (2).
- To place the front bar in the first position (1), press the buttons under the armrests while pushing the front bar towards the stroller.
- To remove the front bar, press the two buttons under the armrests while pulling the front bar out. (The front bar will click into the second position). Press the buttons again, and pull the front bar off the stroller. The front bar can be opened on one side only to allow the child to get in and out of the stroller more easily when he is older.
BRAKE
- To apply the brakes, push down with one foot the bars on the rear wheels, as shown in the figure. To release the brakes, draw the bar up. Always set the brakes on the stroller when it is not in motion.
SAFETY BELT
- A: Make sure that the brace is properly inserted by pushing as shown in the figure. B: Fasten the belt as shown in the figure.
- To unfasten the belt, press on the buckle sides and pull out the waist strap.
- The new safety belt is now easier to fasten thanks to the "snap-open-and-shut" device. Before fastening the safety belt, attach the buckle to the backrest by inserting the tab through the special holder, as shown in the figure. After fastening the safety belt on your child, detach it from the backrest to allow the child more freedom of movement. The buckle must remain below the child's shoulders.
- The footboard can be adjusted to three different positions. To lower the footboard, pull the two small levers downward while lowering. To lift the footboard, pull it up until it clicks into place. This is the third, highest position (see figure) for the baby carriage version of Pliko P3-Pramette.
- The backrest can be reclined in four positions. To lower the backrest, raise the handle as you lower the backrest, blocking it in the desired position. To raise it, push the backrest upward.
SWIVELLING WHEELS
- To make the front wheels swivel, push down as shown in the figure. To fix the wheels, pull up the lever.
ADJUSTING THE HANDLES
- The height of the handles can be adjusted in two positions. For the upper position, press the button as you raise the handle. To lower it, press the button as you lower the handle.
REAR LEDGE
- The rear ledge helps overcome small rises and can also be used to carry a second child.
LOADING SEQUENCE
- To use the stroller with two children, brake the stroller, place the smaller child in the seat and fasten the safety belt (1). Grip the handles (2) and help the second child climb onto the footrest (3). Never leave your children unattended. Do not allow the child to climb onto the rear footrest when the stroller is empty.
STROLLER-BABY CARRIAGE
-
Pliko P3-Pramette is the new stroller with a baby carriage incorporated. With a flick of your hand, you can turn the stroller into a baby carriage, and back again.
-
The hood, thanks to its reversible attachment system, can also be installed on the part by the handles when in the stroller version (A) or on the part opposite the handles when in the carriage version (B). Before removing the hood to turn it around, close it and bring it right forward to rotate the fasteners, then detach it and reinstall it on the opposite part; you can even rotate the fasteners with your hands.
- The hood comes with a zipper, to make it easy to attach products from our accessory line, such as the rain canopy and the mosquito netting.
- The Pliko P3-Pramette cover can be mounted on the same side as the footboard for the stroller version (A), and
on the same side as the backrest for the baby carriage version (B).
VERSION “A” - STROLLER (PLIKO P3)
- To mount the hood on the stroller, place it on the same side as the handles and push the tabs downwards, as shown in the figure. (Turn the hood attachment to adjust it for mounting the hood on the stroller).
- To extend the hood, push the brace downwards. The hood can be reclined along with the backrest.
- To mount the cover, zip it onto the footboard as shown in the figure.
REMOVING THE HOOD
- To remove the hood, you must unbutton it from the stroller, loosen the couplings and raise the tabs of the fasteners, pushing towards the inside of the stroller.
VERSION "B" - BABY CARRIAGE (PRAMETTE)
- To turn the stroller into a baby carriage, remove the hood and the cover if they have been mounted. Lift the footboard to its highest position. Place the front bar in the second position, and make sure the safety belts are attached to the backrest by inserting the tab through the special holder in the sack.
- Unbutton the tab buttons, as indicated in the figure from the backrest sack and lower as indicated in figure.
- Unzip the two zippers found on the top of the backrest and fold the sack as indicated in the figure.
- Unite the sack zipper and the footboard zipper, encompassing the front bar and arrange the sack as indicated in the figure.
- Lower the backrest completely, and lift the tab as shown in the figure. The bassinet part of the baby carriage is now ready.
- Mount the hood on the opposite side from the handles, by pushing the tabs downward as shown in the figure. (Turn the hood attachment to adjust it for mounting the hood on the stroller)
37- and button it under the footboard, as indicated in the figure. - Attach the hood to the backrest and button it at the sides, as shown in the figure.
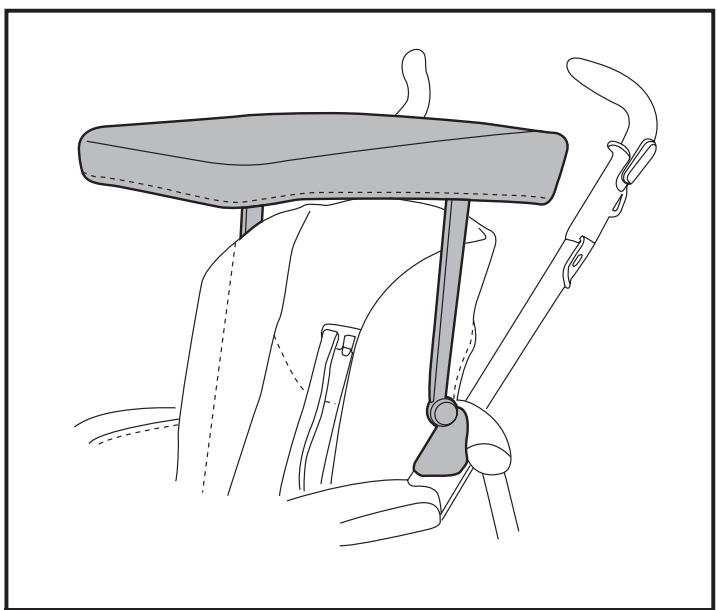
RAIN CANOPY
- To mount the rain canopy, zip it onto the hood.
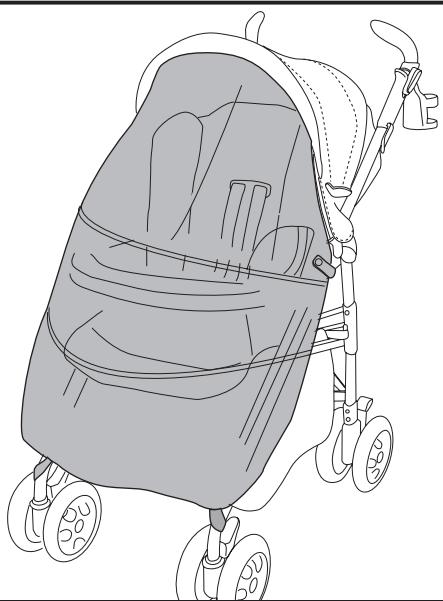
- The figure shows the rain canopy on the stroller version of Pramette.
- The figure shows where to fasten the rain canopy button and elastic band on the Pramette stroller version.
42 • The figure shows the lowered rain canopy
on the stroller version of Pramette (when the zip is open the elastic loops ensure that the rain canopy remains fastened to the stroller).
43. This rain canopy is also designed for use when the Primo Viaggio car seat is hooked onto the stroller, ensuring total protection.
44. The figure shows the rain canopy on the carriage version of Pramette.
45. The figure shows where to fasten the rain canopy button and elastic band on the Pramette carriage version.
46. The figure shows the lowered rain canopy on the carriage version of Pramette (when the zip is open the elastic loops ensure that the rain canopy remains fastened to the stroller).
- Do not use the rain canopy indoors and always check to be sure that your child is not too hot.
- Do not place the PVC rain canopy near sources of heat and pay attention to cigarettes.
- Verify that the rain canopy cannot interfere with any moving mechanism of the chassis or stroller.
Always remove the rain canopy before closing your chassis or stroller.
- Wash with a sponge and soapy water without using any detergent.
CLOSING
Before closing the stroller, loosen the braces if the hood is attached, and raise the backrest if it is lowered.
- The stroller can be closed with one hand: pull first one lever up and then the other until it releases.
- Grip the central handle and pull it upward until it closes, as shown in the figure.
- Verify the correct closing of the stroller from the safety hook. The folded stroller can stand upright.
- Pliko P3-Pramette can be closed while the hood and cover are mounted, both in the stroller and the baby carriage version. When closed, the hood will be on the top and the cover on the bottom for the stroller version (A), and the cover will be on the top and the hood on the bottom for the baby carriage version (B).
TRANSPORT
- The stroller can easily be carried (lock the swivelling front wheels) by gripping the central handle, as shown in the figure.
- You can also use the side handle to carry it, as shown in the figure.
REMOVABLE LINING
- To remove the stroller's lining, loosen the fasteners on the armrests as shown by the arrows.
- Unbutton the sack at the side, as shown in the figure. Slip the leg divider on the
safety belt out from under the seat.
- Unscrew the strap (only on one side) as shown in the figure, holding your finger under the nut.
- Unbutton the sack from the seat, and slip it off the hooks on the footboard.
- Slip the sack off the side of the backrest, as shown in the figure.
- Slip the previously loosened strap through the slit in the sack, as shown in the figure.
- Remove the sack and wash it, following the instructions given here.
- To remount the sack on the stroller, carry out the instructions in the reverse order, making sure to screw the strap back into place.
GANCIOMATIC SYSTEM
The Ganciomatic System is the swift, practical system that allows one to fasten to the stroller, with Ganciomatic fasteners, the car seat Primo Viaggio, which can be bought separately and is also equipped with Ganciomatic System. Primo Viaggio can be detached from its base (which stays in the car) and attached to the Ganciomatic fasteners of the stroller to transport your child without disturbing him/her.
- To raise the Ganciomatic hooks on the stroller, pull the sack up at the corners of the seat and turn the two hooks upwards until they click into place.
- To lower the Ganciomatic hooks on the stroller, pull the little lever outwards and turn the hooks upwards at the same time, as shown in the figure.
- Lower the Ganciomatic fasteners if, afterwards, you use Pliko P3-Pramette in the carriage version.
PLIKO P3 PRAMETTE + PRIMO VIAGGIO
- Fasten "Primo Viaggio" onto Pliko P3-Pramette in the stroller version.
62 • To fasten the car seat to the stroller:
- set the brake on the stroller;
- remove the hood from the stroller;
- completely lower the backrest on the stroller;
- raise the Ganciomatic hooks on the stroller;
- place the car seat, turned towards the adult, on the stroller and push downward until it clicks into place;
- Do not remove the front bar of the stroller when attaching the car seat, and make sure that it is in its original position;
- See the user's manual for instructions on how to detach the car seat from the stroller.
ACCESSORY LINE
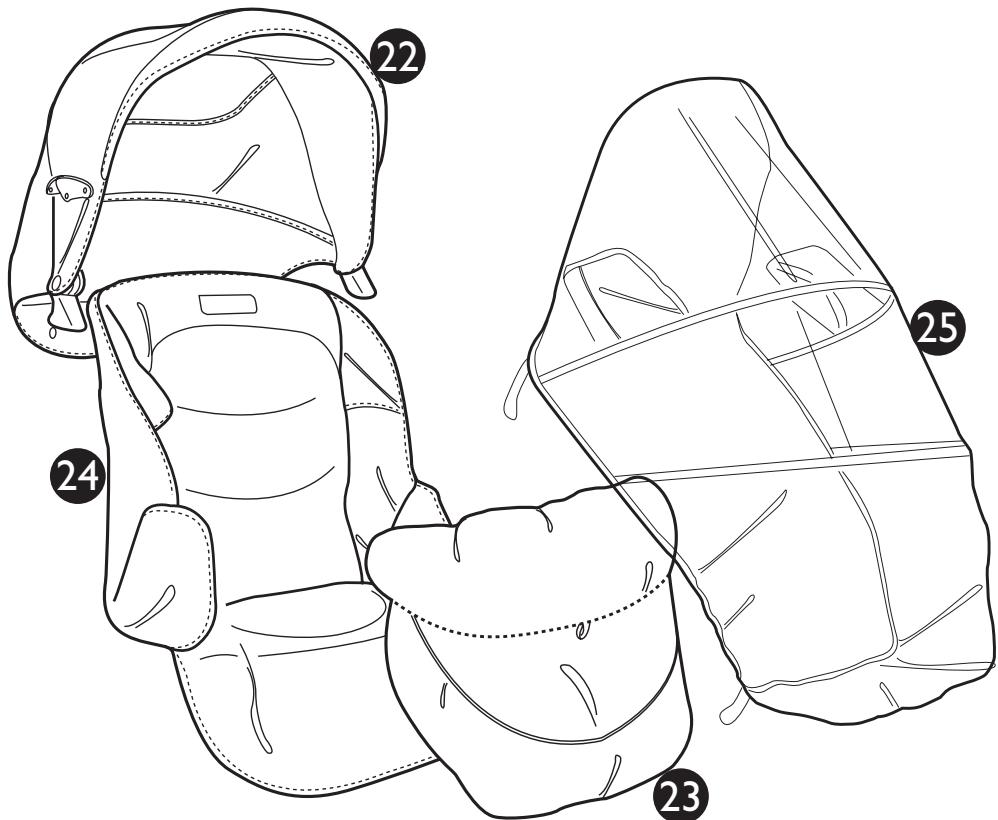
- Diaper- Changing Bag: Satchel with pad for changing baby's diaper. Attaches to the stroller.
64·Sun Canopy: Sun canopy attaches to the stroller. - Rain Canopy: Rain canopy zips onto the hood.
- Mosquito Netting: Mosquito netting zips onto the hood.
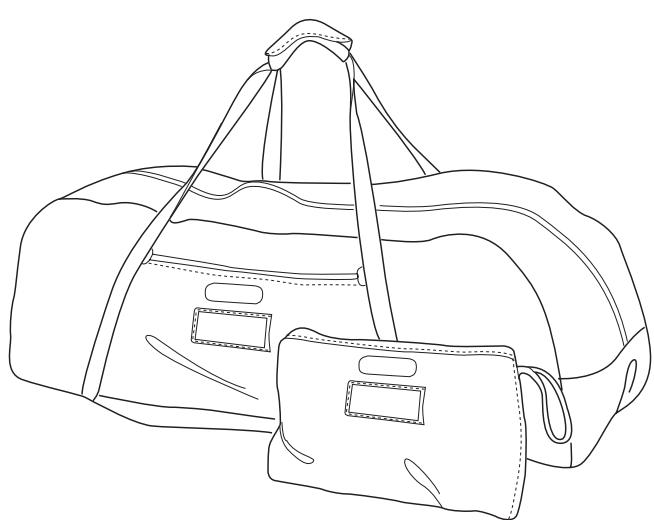
- Travel Bag: Practical duffle bag for transporting the stroller by plane.
CLEANING & MAINTENANCE
Your product requires only minimal maintenance. Cleaning and maintenance operations must be performed only by adults.
- Be sure to keep all moving parts clean, lubricating them with light oil if necessary.
- Dry off metal parts to prevent rusting.
- Regularly clean the plastic parts with a damp cloth. Do not use solvents or similar products.
- Brush the fabric parts to remove dust.
- Remove any dust and sand from the wheels.
- Protect the product against smog, water, rain and snow. Continued and extended exposure to sunlight can change the colours of many materials.
- Store the product in a dry area.
- To wash the sack, follow the instructions below.


WARNING
- THIS PRODUCT IS DESIGNED FOR CHILDREN WHOSE MAXIMUM WEIGHT IS 44 POUNDS (20 KG) AND WHOSE MAXIMUM HEIGHT IS 43 INCHES (110 CM). THIS SHOPPER BASKET IS DESIGNED TO CARRY A MAXIMUM WEIGHT OF 11 POUNDS (5 KG). ANY CUPHOLDER EVENTUALLY PROVIDED WITH THIS UNIT IS DESIGNED TO CARRY A MAXIMUM WEIGHT SPECIFIED ON THE CUPHOLDER ITSELF. ANY POACH OR POCKET PROVIDED WITH THIS UNIT IS DESIGNED TO CARRY A MAXIMUM WEIGHT OF 0.44 POUNDS (0.2 KG).
- FAILURE TO FOLLOW MANUFACTURER'S SPECIFICATIONS
OR USE OF ACCESSORIES OTHER THAN THOSE APPROVED BY THE MANUFACTURER MAY CAUSE THE UNIT TO BECOME UNSTABLE.
- AVOID SERIOUS INJURY FROM FALLING OR SLIDING OUT. ALWAYS USE COMPLETE 5 POINT SEAT BELT.
- NEVER LEAVE YOUR CHILD UNATTENDED.
- ALWAYS USE ALL THE BRAKES WHENEVER PARKED.
- TO AVOID SERIOUS INJURY, WHEN MAKING ADJUSTMENTS ENSURE THE CHILD'S BODY IS CLEAR OF ALL MOVING PARTS.
- ALL OPERATING AND ASSEMBLY PROCEDURES SHOULD BE PERFORMED BY AN ADULT.
- DO NOT LIFT THE STROLLER BY GRIPPING THE FRONT BAR. THE FRONT BAR IS NOT DESIGNED TO WITHSTAND LOADS.
- ENSURE THAT THE STROLLER IS OPENED CORRECTLY AND LOCKED IN POSITION OF USE.
- CHECK TO MAKE SURE THAT THE CAR SEAT OR THE BABY CARRIAGE IS CORRECTLY FASTENED TO THE STROLLER (WHERE APPLICABLE).
- DO NOT DRIVE THIS PRODUCT AROUND STAIRS OR STEPS; CARE MUST BE TAKEN IF UNIT IS USED ON STAIRS OR ESCALATORS.
DO NOT USE THE PRODUCT IF IT HAS BROKEN OR MISSING PARTS.
DO NOT USE NEAR FIRE OR EXPOSED FLAME. - CHILD MAY SLIP INTO LEG OPENINGS AND STRANGLE. NEVER USE IN RECLINED CARRIAGE POSITION UNLESS FOOTREST ENCLOSURE IS FULLY INSTALLED/ IMPLEMENTED. REMOVE FOOTREST ENCLOSURE WHEN USING IN STROLLER POSITION IN ORDER TO PROPERLY USE SAFETY BELT.
ES·ESPÁÑOL
Call us toll free: 1.800.661.5050
www.pegperego.com
NOTICE D'EMPLOI
OUVERTURE
tel. 0039•039•60881 fax 0039•039•615869-616454
tel. 0039•039•6088213 fax: 0039•039•3309992
phone 905●839●3371 fax 905●839●9542
Call us toll free 1-800-661-5050
www.pegperego.com