
VIDEOWONDER DVB - DVB receiver GENUIS - Free user manual and instructions
Find the device manual for free VIDEOWONDER DVB GENUIS in PDF.
| Product Type | DVB-T PCI Receiver |
| Brand | GENUIS |
| Model | VIDEOWONDER DVB |
| Card Dimensions | Approximately 12 x 6 x 2 cm |
| Card Weight | Approximately 100 g |
| Power Supply | Via PCI bus (5V/3.3V) |
| Main Functions | Digital terrestrial TV reception (DVB-T), digital radio, scheduled recording, image capture, picture-in-picture (PIP), composite and S-Video inputs, remote control included |
| Video Inputs | Composite, S-Video |
| Antenna Input | ANT connector for UHF/VHF antenna |
| Audio Outputs | Stereo audio jack (via AV cable) |
| Recording Formats | MPEG-1, MPEG-2, VCD, SVCD, DVD (depending on profile) |
| Recording Resolution | Up to 720x576 (PAL) or 720x480 (NTSC) |
| TimeShift Function | Pause and resume live TV |
| Picture-in-Picture Mode | Allows viewing an external source while watching DTT |
| Remote Control | Yes, with keys: channel, volume, mute, TV/Radio, SAP, record, etc. |
| Included Software | Genius DTV (drivers and application) |
| Required Operating System | Windows 2000 SP4 or Windows XP SP1 |
| Minimum Configuration | Pentium III 800 MHz, 256 MB RAM, graphics card with DirectX 8.1, 20 MB free disk space |
| Connectivity | PCI slot (v2.1 or higher) |
| Included Accessories | Portable antenna, AV cable, remote control, installation CD, user manual |
| Maintenance and Cleaning | Keep the card clean and dust-free. Use a soft, dry cloth to clean the connectors. Avoid moisture. |
| Safety | Turn off the computer before installation. Follow electrostatic discharge precautions. Do not open the card. |
| Spare Parts and Repairability | No user-serviceable parts. Contact customer support if issues arise. |
| General Information | DVB-T receiver for PC with advanced recording and viewing functions. |
Frequently Asked Questions - VIDEOWONDER DVB GENUIS
User questions about VIDEOWONDER DVB GENUIS
0 question about this device. Answer the ones you know or ask your own.
Ask a new question about this device
Download the instructions for your DVB receiver in PDF format for free! Find your manual VIDEOWONDER DVB - GENUIS and take your electronic device back in hand. On this page are published all the documents necessary for the use of your device. VIDEOWONDER DVB by GENUIS.
USER MANUAL VIDEOWONDER DVB GENUIS
Get ready to be amazed with the Video Wonder DVB-T. This remarkable box is more powerful than your TV. It allows you to access free to air digital terrestrial TV and listen to free to air digital radio directly.
Never again do you need to worry about missing any favorite shows, you can record the TV programs in MPEG-2 format by using the schedule recording function. You can also capture images to make your own desktop wallpaper. The Video Wonder DVB-T can replay the programs you recorded at any time; you can even watch video from a DVD/VCD player, a VCR, or anything with composite /S-Video output and Digital TV at the same time.
1.2 Features:
Watch Digital Terrestrial TV and listen to Digital Radio on your PC
Supports schedule recording
- Watch digital terrestrial TV and play video programs from DVD/VCD/VHS/camcorder at the same time
- Portable antenna included (the receiving quality is subject to local DVB-T signal)
1.3 Package Contents
You should have the following items in the package.
Video Wonder DVB-T
AV Cable
- Driver
Remote control
Portable antenna
- User's Manual
1.4 System Requirement
To use the Video Wonder DVB-T successfully, please ensure that your desktop system meets the following requirements:
- Mainboard with available busmaster* capable PCI slot (v.2.1 or higher)
-
Pentium® III 800 MHz or faster PC
-
MPEG-1 real-time encoding: PIII® 1GHz or AMD Athlon® 1 or higher
- MPEG-2 real-time encoding: P4® 1.6GHz or AMD Athlon® 1.6 or higher
DVD real-time encoding: P4® 2GHz or AMD Athlon® 2GHz or higher
256 MB RAM (minimum), 512 MB RAM recommended
VGA-Card with DirectX 8.1 Support
- Windows® 2000 (Service Pack 4), Windows® XP (Service Pack 1)
- DirectX 9 or higher
- CD-ROM or DVD drive
20 MB available hard disk space for installation
Additional free space in your hard disk for recording and editing files
VGA monitor with DirectShow installed supporting 16-bit color
Sound card
- Speakers for audio output
Available IRQ
- TV antenna or TV cable
2. Input & Output Connections
2.1. Video Wonder Series Model Connections
The Video Wonder DVB-T card supports both S-Video and Composite input. See the diagram below for connection details.
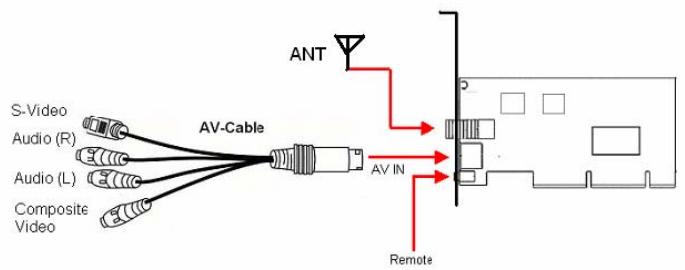
Remote: Connects the sensor of your Video Wonder DVB-T Remote Control
AV Cable: Connects the AV Cable to the 7-pin connector of the Video Wonder DVB-T
Composite Video: Used for connecting external devices like a VCR, camera, or camcorder.
Audio (L): Connects the left audio channel of an external audio device
Audio (R): Connects the right audio channel of an external audio device
S-Video: Connects external devices like a VCR or camcorder.
ANT: Use this connection to connect your home or room antenna.
The Remote Control
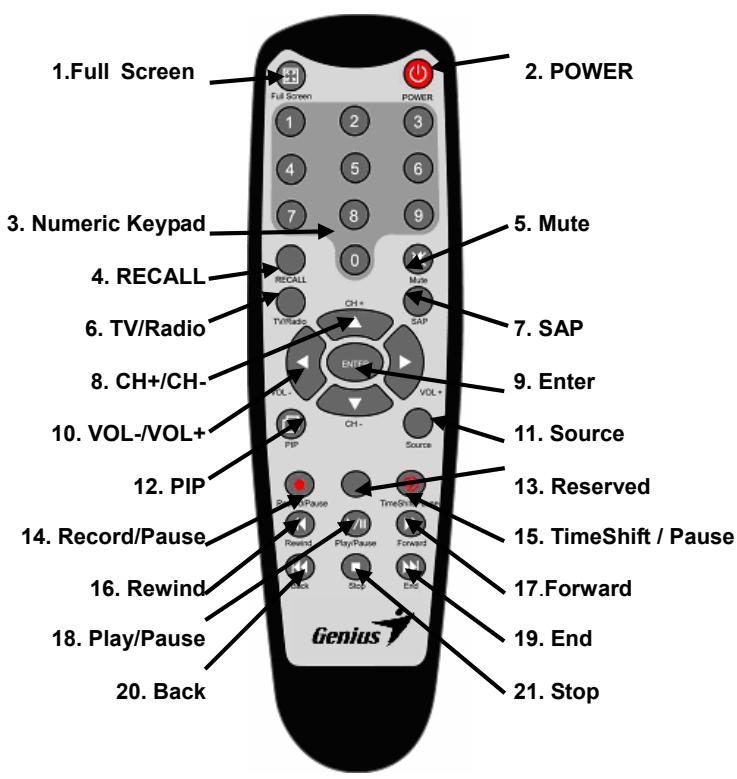
- Full Screen: Switch between Full Screen and previous size
- Power: Turns on/off the Genius DTV Program
- Numeric Keypad: Select the desired channel directly. In Scan Mode you can type in the frequency directly and confirm with "Enter"
- Recall: Switch to the previous watched channel
- Mute: Mute the Audio
- TV/Radio: Switch between TV and Radio reception
- SAP: Switch to a Second Audio Program (if transmitted)
- CH + / CH - Switch to the next/previous channel
- VOL-/VOL+: Decrease/increase the Audio Level
- Enter: Confirm a selection
- PIP: To enable/disable the PIP Mode and to switch on Main and second window
- Source: To switch between the different sources DVB -> AV-In -> S-Video
- Record/Pause: To start and pause the recording of the current program
- Reserved
- TimeShift / Pause: To start and pause the current program
- Rewind: To go back through the Playback
- Play/Pause: To play and pause a recorded file
- Forward: To go forward through the Playback or Time Shifted Recording
- Back: To go to the beginning of a recorded video during Playback
- Stop: Stops the Playback or Recording
- End: To go to the end of a recorded video during Playback
3. Installation of Hardware and Drivers
The following sections provide step-by-step instructions on installing and configuring the DVB-T card, accessories and software.
3.1. DirectX
Before installing your new Video Wonder DVB-T, it is necessary to install DirectX 9.0 or higher to your Operating system. You'll find this program on the CD-ROM in the folder DirectX
3.2. Installing the Video Wonder DVB-T (Digital Video Broadcasting Terrestrial)
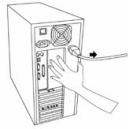
- Switch off your PC and all connected peripheral devices such as your printer and monitor. Leave the AC power cable connected for the time being, so that your computer is still grounded.
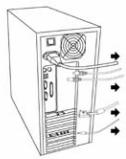
- Touch the metal chassis at the rear of the PC to ground and to discharge static. Now unplug the cord from the AC power socket.
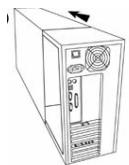
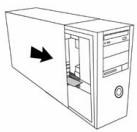
- Remove the cover from the case of your PC.
- Look for a free PCI expansion slot. When selecting the PCI slot, note that DVB-T cards should not be plugged into PCI slot 1 in conjunction with an AGP graphics card because PCI slot 1 is very frequently assigned to the same interrupts as the AGP slot. This would give both cards the same interrupt, which can lead to crashes during operation! The numbers assigned to the PCI slots are listed in your motherboard manual.
- Carefully remove the card from its packaging and pick it up by the edges with one hand while your other hand is touching a metal part of the PC.
This will ensure that your body is completely discharged via your computer without damaging the TV card.
- Align the holder at the rear of the TV card in the expansion slot in such a way that the card's connectors are directly in line with the slot's socket.
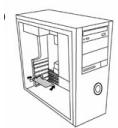
- Push the DVB-T card firmly into the slot, ensuring good contact.

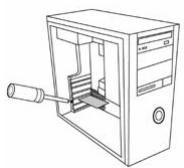
- Fasten the DVB-T card with an appropriate screw.
- Reinstall the cover of your PC case.
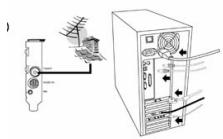
- Connect the portable antenna cable or the UHF/ VHF antenna cable (which you would normally connect to the antenna input terminal on your television) to the TV antenna terminal on the DVB-T card. Reconnect the AC power cable as well as all other cables. Make sure that your speakers are set to low volume.
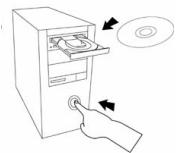
- Switch your computer on again to begin installing the software.
3.3. Driver Installation for Windows® 2000(Service Pack 4) / Windows® XP (Service Pack 1)
After rebooting, Windows® 2000(Service Pack 4) / XP (Service Pack 1) will automatically detect the presence of a new hardware component in the system and will tell you so in a “Found new Hardware Wizard” window.
If you are not sure what version of Windows you have, just click the right mouse button on "my computer" folder and select "Properties" to see the version. If your PC is not ether Windows® 2000 (Service Pack 4) or Windows® XP (Service Pack 1), please go to Microsoft's website (http://www.microsoft.com) to upgrade your Windows version of Service Pack 4 for Windows® 2000 or Service Pack 1 for Windows® XP by the Internet.
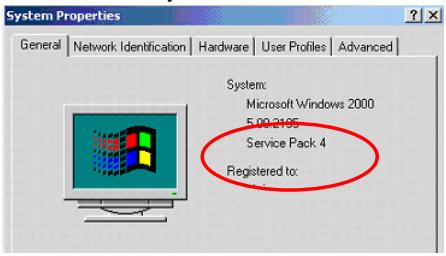
This is an example for checking the version of Windows 2000.
If you have not already done so, place the Installation CD into your CD-ROM drive.
Then select the "Install from a list or specific location (Advanced)" item and click
"Next".
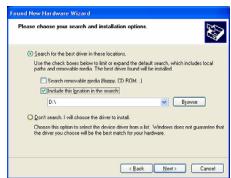
Now select "Search for the best driver in these locations." item and click "Next". Windows will now find the drivers on the Installation CD and install them automatically. After installing the driver, Windows will inform you that it has done so successfully. Click "Finish". This completes the installation of the drivers and you can now start installing the application program.
4. Installation
4.1. Installation of Genius DTV (Digital TV)
The installation of the Genius DTV software can be carried out by using either the Auto start program of the provided Driver and Application CD ("Software Installation"), or by executing a single file if you have downloaded the program from the Internet.
If the Auto start program does not appear automatically when you insert your Genius Installation CD, start it manually by running the "InstallCD.exe" file located on the Genius Installation CD.
4.2. Scanning for TV Channels
Before you can watch Digital TV, you have to scan for available channels in your area.
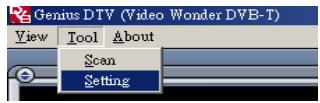
To access the Scan Button click in the Window title bar on Tools -> Scan
Receiving Setup:
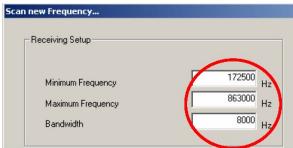
Click on terrestrial scanning, so you can enter the minimum and maximum frequency area that can be scanned for channels.
Channel Scan:
You have two possibilities to scan for available channels:
- Auto Scan: From the Drop-Down field you can select your country Button.

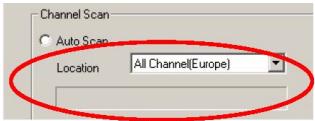
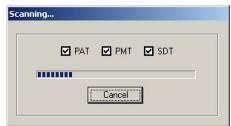
During the Auto Scan, you will see the above picture showing you the actual status.
2. Transponder Scan:
If you have already successfully scanned for channels and you want to add another frequency manually, type in the section for Transponder Scan the frequency in kHz, and the modulation (for DVB-T 16QAM or 64QAM in most cases) and press the Button again.
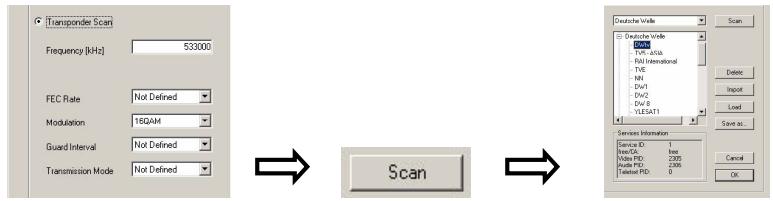
The found channels are displayed in the window, with additional information of TID, SID, Video PID and Audio PID. Here you also have the possibility to save your frequency list, and to import it again.
After the scan, click on "Ok" you should have a similar screen as follows
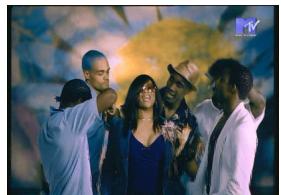
4.3. Receiving DVB-T (Digital Video Broadcasting-Terrestrial)
On the right side, you will find all scanned and saved channels, which you choose by double-clicking on it. Here you will find a drop down menu, where you can select which kind of transmission you want to see: You can choose between TV (Free) Channels, scrambled channels - TV (CA-Conditional Access)* or Radio.
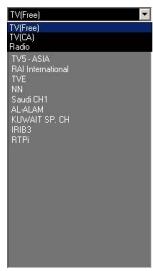
*To receive scrambled channels you need a subscription from your broadcaster
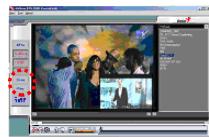
4.4. Choosing your source
Your Video Wonder DVB-T Card is not only limited to receive Digital signals, you can also switch to a different analogue source.

On the left side you will find a button with an arrow pointing to the left.
By clicking this button, a sidebar will open to access different video sources. You can choose between: AV in; S-Video; DVB; PIP; Scan; Play; Swap
AV in Tc
to switch to an external device connected to the AV-In Input (yellow)
S-Video
To switch to an external device connected to the S-Video Input
To watch Digital Terrestrial TV (selected by default)
PIP
To watch a second analog source while watching digital terrestrial TV
Scan
To access the scan settings
Play
For playback of recorded files
Swap
Swaps video between main window and second window (in PIP mode)
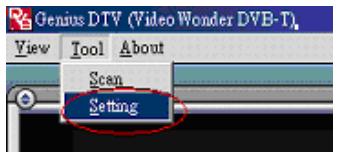
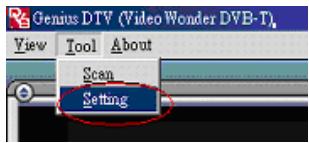
5. Settings
To access the Setting Dialog click in the Window title bar on Tools -> Settings
Genius DTV (Video Wonder DVE-T)
Depending on your Source, you have several possibilities to customize your settings.
5.1 DVB Mode
5.1.1. Directory Settings
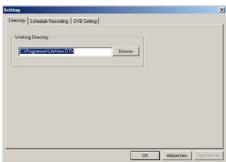
When you have DVB-T as the main source, you will see the Dialog box as shown on the left side and here you can specify the folder, which is used as the working directory.
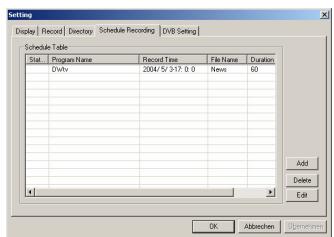
5.1.2. Schedule Recording
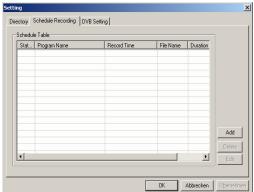
Here you can enter a list of programs that you would like to record in the future.
Please check section 8 for a description on how to use the Schedule Recording
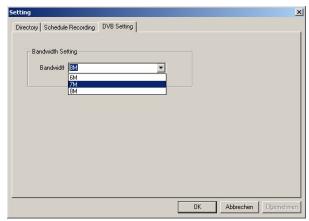
5.1.3. DVB Setting
Here you control the bandwidth settings, for different countries.
5.2. Analog Mode (AV-In or S-Video)
5.2.1. Display Settings
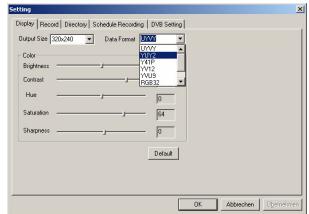
When you have selected AV-In or S-Video you will see the Dialog box as shown above.
Output Size: Here you specify the display size of the analog source
- Data Format: The different output formats are specified
Color: Customize the Color of the display characteristics like Brightness, Contrast, Hue, Saturation and Sharpness. A click on "Default" will disregard all settings and restore to the Default Settings
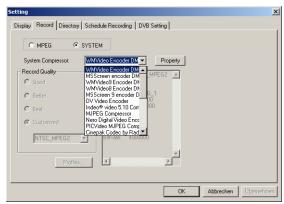
5.2.2. Record Settings
The Record Settings offer the possibility to use the standard settings provided by the DTV Software.

MPEG:
Here you can define whether you want to record Good, Better or Best Quality by predefined settings. When you choose "Customized", you can also select the standards you want to record.
You can choose between the following formats:
- NTSC or PAL MPEG-1
- NTSC or PAL VCD
- NTSC or PAL MPEG-2
- NTSC or PAL SVCD
- NTSC or PAL DVD
The "Profiles" - Button is also available in "Customized" - Mode and opens the following Menu:
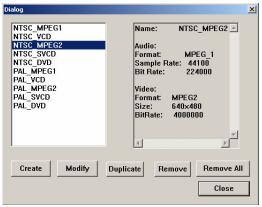
Choose here whether you want to Create a new Profile, Modify, or Duplicate the existing profiles, or Remove one or Remove all existing profiles.
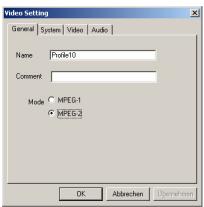
Create Profiles
General: Enter a name for the Profile and add a Comment. Also decide whether this should be a MPEG-1 or MPEG-2 Profile
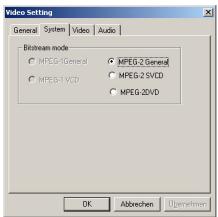
System: Depending on the Mode you selected in the "General" - Settings you can select the Bitstream Mode here.
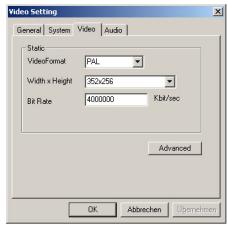
Video: Select the Video Standard, the resolution and the Bitrate. When you click on "Advanced" another Window will open where you can select the Frame Rate, the Encoder level and whether the recording should be done Inverted, Deinterlaced and/or Off Line.
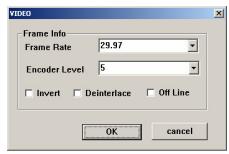
System
5.2.3. Directory Settings
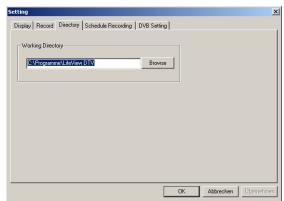
Select the Folder for your working directory.
5.2.4 Schedule Recording
This is where you will find a list of the programs you want to record in the future. Refer to section 8 for a description on how to use the Schedule Recording
5.2.5 DVB Setting
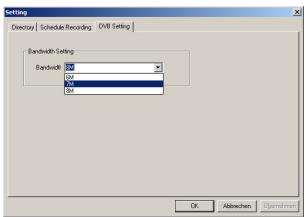
You can set the bandwidth settings for different countries
6. PIP (Picture-In-Picture)
The PIP function can be accessed using the left menu.
When you click on the PIP Button (shown in the right image), you will see in the right hand corner, a second live stream from an external source, while watching the digital TV. The second live source can be a VCR, DVD, video camera, DV, or anything with composite/S-video output.
When you are in PIP-Mode, you can switch between S-Video and AV In, depending which connection you used for your external device.
A second click on the PIP Button will switch the windows, so the program played by the external device will be shown in the main window while the digital TV is shown in the small window.
Another click on the PIP Button will turn off the PIP function.
7. The Function Buttons
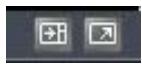
Click on this button to expand viewing screen and hide the channel list.

Click on this button to change the screen back and make the channel list available again

Click on this screen to switch to Full Screen, and the DVB-T TV Signal will be shown on the complete monitor.


The title and bottom bar will become visible again when you move the mouse, and by clicking on this button, you will leave the full screen mode.
8. Recording

8.1. The Recording Button
By clicking on the record button, you can record the main window. In DVBS mode, you can record pure MPEG-2 Audio and Video signal.
In analog mode (S-Video or AV-In) you can record the signal in the format that you have specified before in section 5.2
In both modes, you will find the recorded files in the directory, where you have specified in section 5.2.1 and 5.2.2
8.2. The Schedule Recording
Directory Schedule Recording
DVB Setting
As explained in section 5.2.4, you can access the Schedule Recording in the Settings Menu.
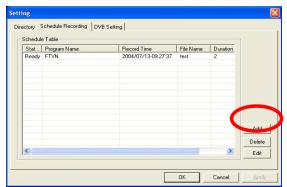
This is your schedule list of your planned recordings.
Click on the "Add" Button, and can add a new scheduled recording. The "Delete" Button cancels the highlighted scheduled recording and the "Edit" Button gives you the option of change the settings of a scheduled recording
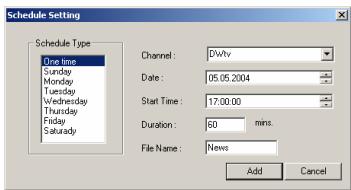
The "Add" and "Edit" Buttons open a second menu
Choose whether you want to add a recording one time only, or do the same recording on different days for the same channel.
From the Drop-Down Menu, select the desired channel, choose the date and the start time, the duration of the recording and give the Schedule Recording a specific name.
By clicking on the "Add" Button, the settings are saved to the Schedule List.

8.3 The TimeShift Button
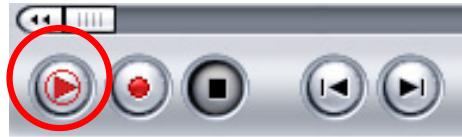
With the TimeShift function, you can pause live TV, leave, and come back and watch your program right where you left it. You can then also fast forward past commercials, or rewind to see a particular scene again. To begin TimeShift, simply click the TimeShift button. The TimeShift button will then turn into a Pause/Play button, letting you pause the video, and then clicking it again will begin playback right where you left it. Move the slider around to fast forward or rewind video. Click on the Skip to Beginning button to go to the beginning of the TimeShifted file, and click on Skip to End to move back to what is currently showing. When you want to stop TimeShift, click on the Stop button. You cannot change channels while TimeShift.
8.4 Snapshots button
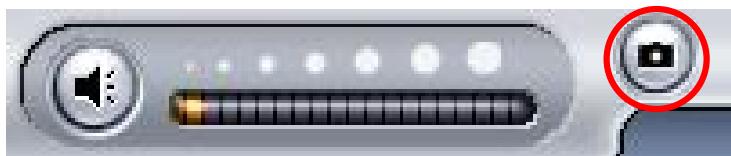
You can take still image snapshots of video and save them to your hard drive. To take a snapshot, click on the Snapshot button, and the current video image will be saved to your hard drive in the working directory specified in Directory Settings and you can see the snapshots you have taken.