
VIDEOWALKER DVB-T USB - USB TV Receiver GENUIS - Free user manual and instructions
Find the device manual for free VIDEOWALKER DVB-T USB GENUIS in PDF.
| Product Type | USB TV Receiver for DTT |
| Brand | GENUIS |
| Model | VIDEOWALKER DVB-T USB |
| Dimensions (approx.) | 8 x 3 x 1.5 cm |
| Weight (approx.) | 30 g |
| Power supply | Via USB port (bus-powered) |
| TV standards | DVB-T (DTT) |
| Main functions | Watch free DTT, listen to digital radio, real-time and scheduled MPEG-2 recording, Time-shift, still image capture, EPG, teletext |
| Video resolution | High resolution (MPEG-2) |
| Audio | 5.1 channel sound |
| Connectivity | USB 2.0, female DIN antenna connector |
| Supported operating systems | Windows 2000 / XP |
| Minimum system requirements | Pentium III 500 MHz, 128 MB RAM, 100 MB disk, 8 MB VGA card, DirectX 8.0, Media Player 7.0 |
| Included accessories | Driver CD, USB cable, infrared remote control (AAA battery included), miniature portable antenna |
| Care and cleaning | Clean with a soft dry cloth. Avoid moisture and extreme temperatures. |
| Safety | Do not expose to water. Use a suitable antenna. Disconnect before cleaning. |
| Spare parts and repairability | No user-serviceable parts. Contact customer support. |
| General information | Allows you to watch DTT and digital radio on a laptop. Works with a portable antenna or a home antenna. |
Frequently Asked Questions - VIDEOWALKER DVB-T USB GENUIS
User questions about VIDEOWALKER DVB-T USB GENUIS
0 question about this device. Answer the ones you know or ask your own.
Ask a new question about this device
Download the instructions for your USB TV Receiver in PDF format for free! Find your manual VIDEOWALKER DVB-T USB - GENUIS and take your electronic device back in hand. On this page are published all the documents necessary for the use of your device. VIDEOWALKER DVB-T USB by GENUIS.
USER MANUAL VIDEOWALKER DVB-T USB GENUIS
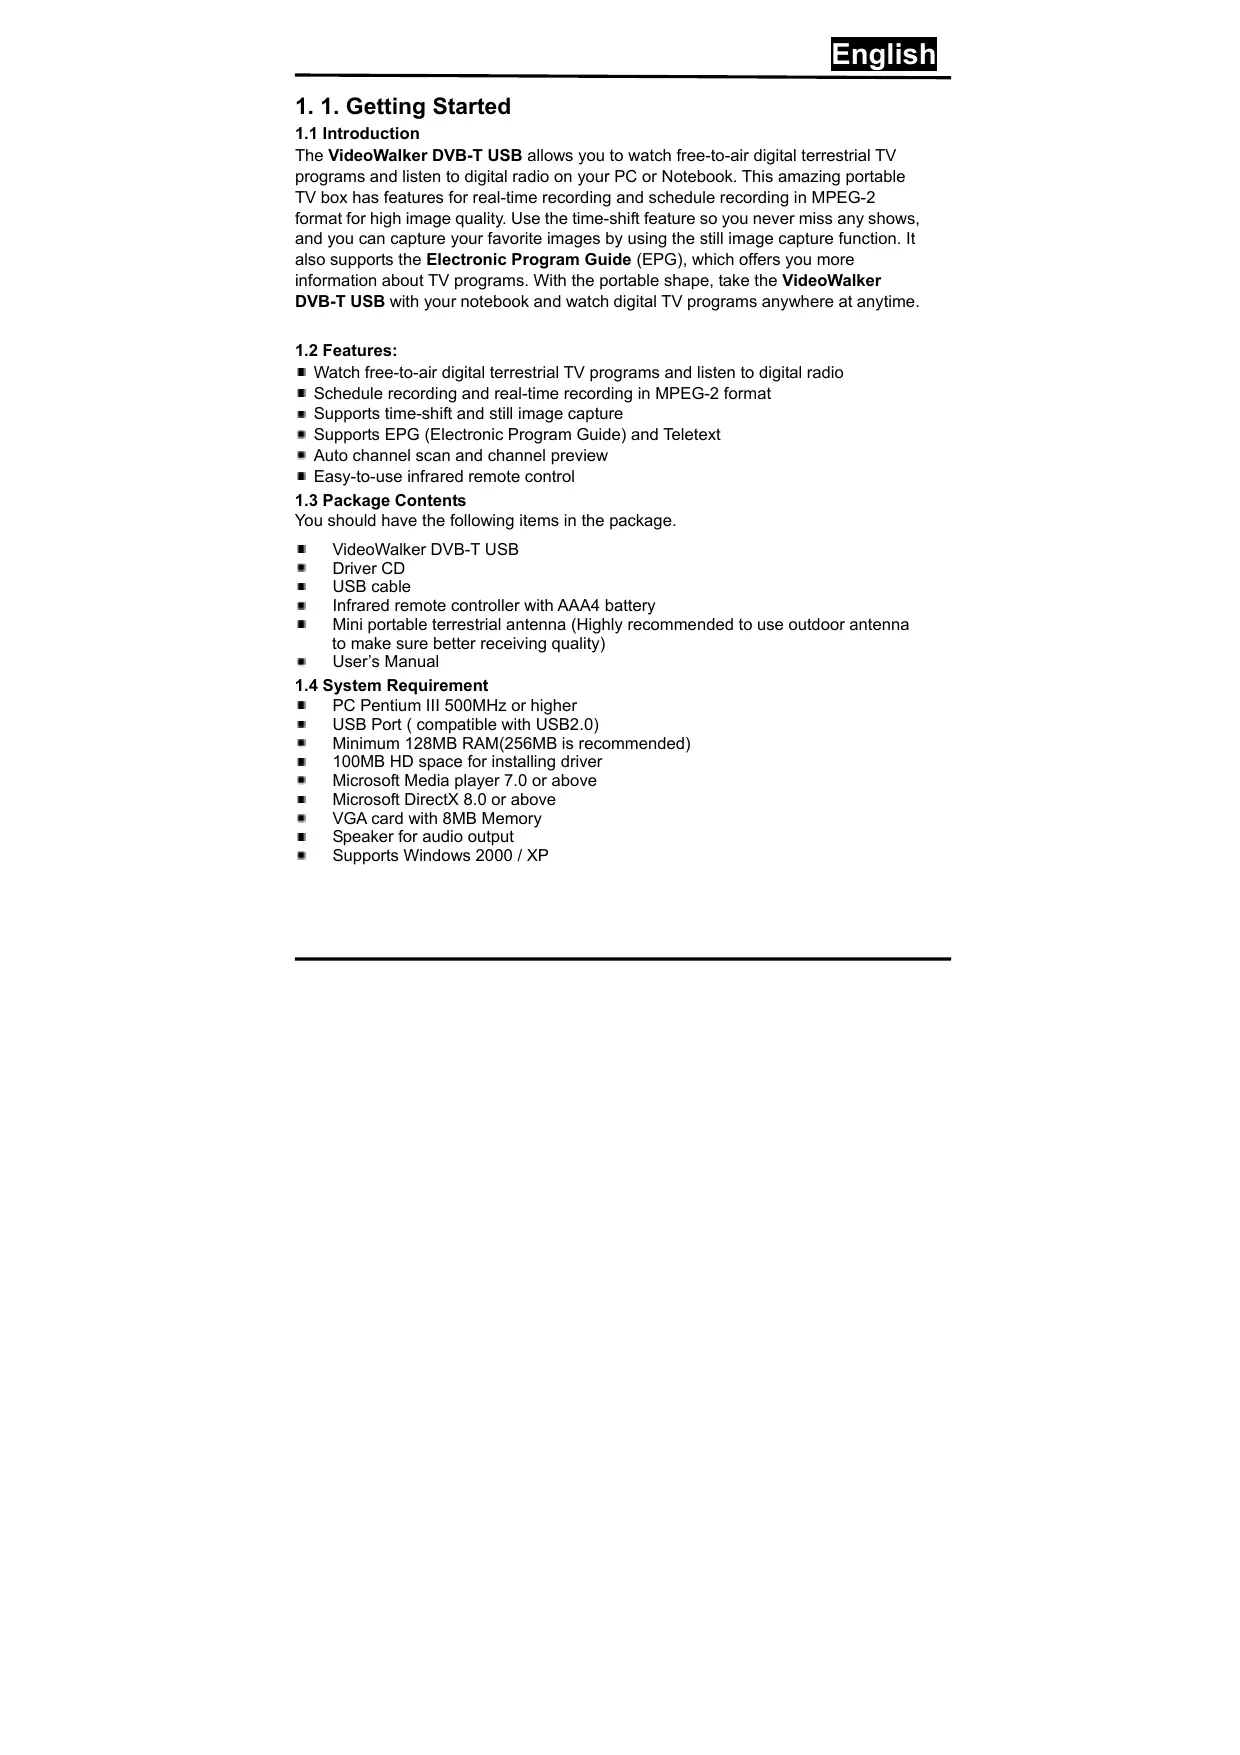
1. 1. Getting Started
1.1 Introduction
The VideoWalker DVB-T USB allows you to watch free-to-air digital terrestrial TV programs and listen to digital radio on your PC or Notebook. This amazing portable TV box has features for real-time recording and schedule recording in MPEG-2 format for high image quality. Use the time-shift feature so you never miss any shows, and you can capture your favorite images by using the still image capture function. It also supports the Electronic Program Guide (EPG), which offers you more information about TV programs. With the portable shape, take the VideoWalker DVB-T USB with your notebook and watch digital TV programs anywhere at anytime.
1.2 Features:
Watch free-to-air digital terrestrial TV programs and listen to digital radio
Schedule recording and real-time recording in MPEG-2 format
Supports time-shift and still image capture
Supports EPG (Electronic Program Guide) and Teletext
- Auto channel scan and channel preview
Easy-to-use infrared remote control
1.3 Package Contents
You should have the following items in the package.
VideoWalker DVB-T USB
Driver CD
USB cable
Infrared remote controller with AAA4 battery
- Mini portable terrestrial antenna (Highly recommended to use outdoor antenna to make sure better receiving quality)
User's Manual
1.4 System Requirement
PC Pentium III 500MHz or higher
USB Port (compatible with USB2.0)
Minimum 128MB RAM(256MB is recommended)
100MB HD space for installing driver
Microsoft Media player 7.0 or above
Microsoft DirectX 8.0 or above
VGA card with 8MB Memory
Speaker for audio output
Supports Windows 2000 / XP
1.5 Remote Controller
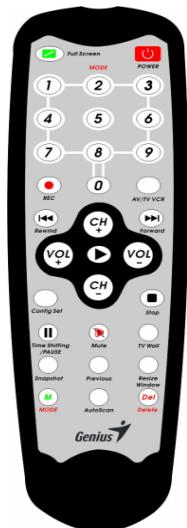
- Power: To turn on the power
- Numeric Keypad (0~9): Select the desired channel number directly
- Full Screen: Click this button to switch between Full Screen and the previous size
- Favorite: Press this button to add or delete channel
- Record: Click this button to record TV programs
- Rewind: Click this button to rewind the TV program while playing Time-shift function
- Forward: Click this button to forward the TV program while using Time-shift function
- Stop: Click this button to stop Time-shift function
- Volume Up/Down: Increases/decreases the audio level
- Channel Up/Down: Click this button to go to the next/previous channel
- Recall: Jump to the last selected TV channel
- Time-shift/Pause: Click this button to play time-shift and click again to pause
-
Cancel: Click this button to close Teletext and program list after clicking Teletext or program list button
-
Preview: Click this button to preview TV programs
- Capture: .Click this button to capture an image on TV
- EPG: Click this button to display EPG(Electronic Program Guide)
- Record List: Click this button to display the list you have recorded
- Tab: Click this button to choose the TV program you want to watch from program list and then press "play" button to play. If you want to cancel the program list, just click the "cancel" button.
- Teletext: Click this button to display Teletext
2. Installation and Introduction
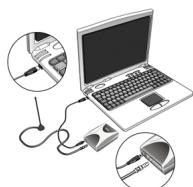
2.1 Hardware Installation
VideoWalker DVB-T USB Hardware Installation. You can connect either the portable antenna which is included in the package or your home antenna with VideoWalker DVB-T USB.

2.2. Connection
2.2.1. Connecting USB cable
I. Connect "B Type" end of USB cable to the USB jack on the VideoWalker DVB-T USB box
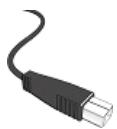
B type
II. Connect "A Type" end of USB cable to the USB jack on your desktop or notebook.
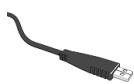
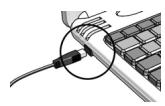
A type
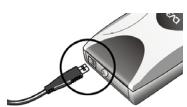
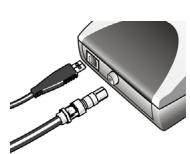
2.2.2 Connecting USB cable and digital terrestrial antenna
I. Make sure VideoWalker DVB-T USB has been connected with USB cable.
II. You can either connect the portable digital terrestrial antenna which is packaged in the box or your home TV antenna to the tuner "Din Jack" female connector on the VideoWalker DVB-T USB box. If the jack is not suitable, please buy a suitable converter from your TV shop.
Note 1: If you install Videowalker DVB-T USB in "Notebook", make sure to turn off the "Power Saving" function. It will slow down the CPU performance and could influence the operation of VideoWalker DVB-T USB
Note 2: Be sure to connect the suitable antenna to VideoWalker DVB-T USB every time you play the digital terrestrial TV.
3. Software Installation
Complete installation includes installing "Driver" and "Application Program". And both of them can be installed easily from the VideoWalker DVB-T USB TV Box driver CD.
Please follow the instructions.
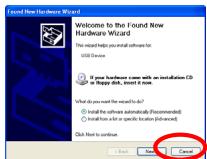
3.1. After connect VideoWalker DVB-T USB with your PC or Notebook, you should see two pop up windows of "Found New Hardware Wizard". Please just click at "Cancel" to quit, we will install the driver later from VideoWalker DVB-T USB Driver CD.
3.2. Insert the driver CD into your CD-ROM drive, and you should see an "Autorun" pop up window after inserting the CD, please click "Install Software and Driver".
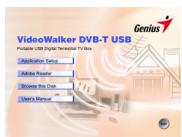
If you don't see an "Autorun" pop up window, please open the VideoWalker DVB-T USB folder in CD ROM and launch "setup.exe" manually.
3.3 Choose the proper language you would like to install.

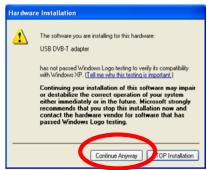
3.4. Just click "Continue Away" when you see the windows below.
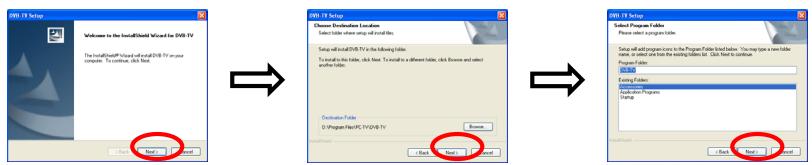
3.5. Following the steps.
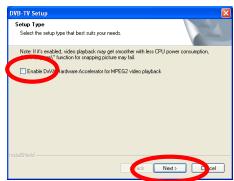
3.6 DxVA Hardware accelerator setting.
After finishing the above steps, it will go to the DxVA Hardware accelerator setting. The default setting is "Not" ticking". Tick the checkbox if you want to enable the accelerator. Note!! You will not be able to capture if you enable the function and the accelerator at the same time.
3.7. Please click "Finish" to finish installation.
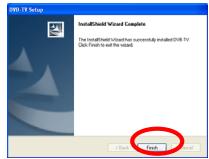
3.8 When you see the window, you can launch the VideoWalker DVB-T USB by clicking the "VideoWalker DVB-T USB" icon showed on your PC or Notebook.
VideoWalker DVB-T USB
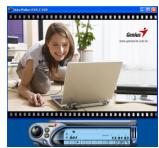
3.9 When you click the above icon, the below image will appear on your PC or Notebook screen, you can enjoy watching your personal Digital TV program now!
4. System setup
4.1 To watch digital terrestrial TV, you need to configure several functions. The necessary sections for system setting will be described in advance and unnecessary parts at the last.
To enter the configuration page please click at the icon on the VideoWalker DVB-T USB control panel.
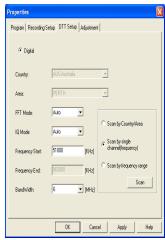
4.2 DTT (Digital Terrestrial TV) - Setup
There are three ways to scan Digital TV Programs, please choose one of them to setup when you power on VideoWalker DVB-T USB for the first time.(It is highly recommended to use the first one to scan TV programs if you do not know the frequency of TV channels). There are three different kinds of bandwidth of digital transferring frequencies (6/7/8 MHz) in the world. The frequency of 6MHz is used in Taiwan, the frequency of 7MHz is used in Austria, and the frequency of 8MHz is used in European countries. This can make sure you can access TV programs after scanning. It will take a few minutes for the first time scanning.
I. Searching for TV channels by Scanning Country/Area: If you do not know the frequency of the TV channels, you can choose to scan country for the TV channels.
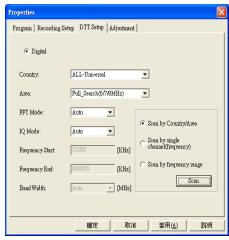
Step1: Please click at "Scan by Country/Area".
Step2: Please select your "Country".
Step3: Select your "Area"
Step4: Click at "Apply".
Step5: Click at "Scan"
Note: If you can't find the "Country" and "Area" of yours, please select "ALL-Universal" in the field of "Country" and "Full Search (6/7/8MHz)" in the field of "Area".
II. Searching for TV channels by scanning a signal channel(frequency): If you know the frequency of TV Channel, you can enter the frequency in the blank directly to search for TV channels.
Step1: Please click at "Scan by single channel
(frequency)”.
Step2: Please enter the frequency you would like to scan into
"Frequency Start". (Please check the correct Frequency in
your local area to make sure the signal is detective.)
Step3 : Also select the bandwidth of
the channel. (There are 6MHz /7MHz /8MHz bandwidth)
supported, if you are not sure of the correct one, please
choose "auto" for it.)
Step4: Click at "Apply"
Step5: Click at "Scan
III. Searching for TV Channels by scanning frequency range: the VideoWalker DVB-T USB will search for the TV channels by the frequency range that you put in.

Step1:
Please click at "Scan by frequency range".
Step2:
Or, Please enter the period of frequency you would like to scan into "Frequency Start" and "Frequency End". (Please check the correct Frequency in your local area to make sure the signal is detective.)
Step3 :
Or select the bandwidth of the channel.
(There are 6/7/8MHz bandwidth supported, if you are not sure of the correct one, please choose "auto" for it.)
Step4: Click at "Apply"
Step5: Click at "Scan"
4.3 Program
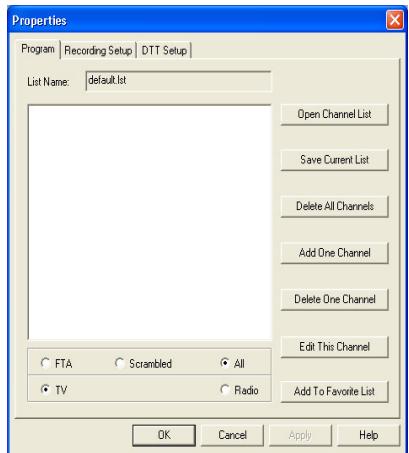
Functions
- List Name : The list file you are currently editing or using.
- Open Channel List : Open an exiting channels list file from your computer. It already saves the popular Terrestrial channels list. To save time, you can just open them without scanning the terrestrials or transponders.
- Save Current List: Save the channels list at the left side of your screen.
- Delete All Channels : Delete the channels list at the left side.
- Add One Channel : Add channels manually by inputting necessary information. The information includes "Frequency", "Symbol Rate",
"Polarization H/V", "VPID", and "APID". - Delete One Channel : Delete the channel on the list. Please note that the setting will be effective only after you save the file and exit the "Properties" panel.
- Edit This Channel: Edit the current program on the list.
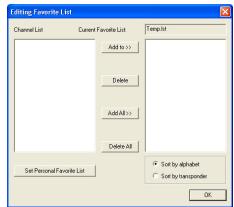
- Add to Favorite List : When you click “Add to Favorite List”, the icon “Editing Favorite list” will appear as the following. If you want to add the channels that you have scanned, please click “Add” or “Add All” from the channels listed on the
Channel list at the left side to the Right side icon. Click "OK" and type the file name to save. If you want to delete the channels you scanned, please click "Delete" or "Delete All" from the left side list then click "OK" and type the file name to save.
Programs Classification
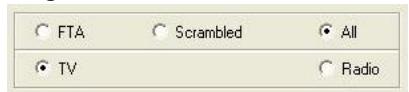
FTA: Only shows the FTA (Free to Air) channels in list.
Scrambled: Only shows the Scrambled channels in list.
All : Shows all channels.
TV : Only shows TV channels.
Radio: Only shows Radio channels.
4.4 Recording Setup
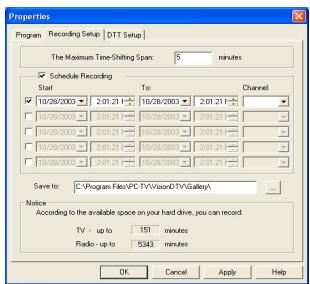
1. The Maximum time-shift Span
How long you would like your time-shift function to proceed with.
Time-Shifting: Record real time program when you need to be away for something and play it right after you come back. System will keep on recording the program when you are watching the recorded program until you stop it.
2. Schedule Recording
Set time to Record the DTV programs by when you are not available.
How to setup the schedule recording:
Step 1: Set the starting time.
Step 2: Set the ending time.
Step 3: Choose the Channel you would like to record.
Note 1: You will not be able to record multi-programs at the same time.
Note 2: Up to 10 TV programs to be recorded.
Note 3: Please don't take recorded TV Programs for commercial use.
Step 4: Choose the directory or drive where you would like your schedule recorded clip be saved on "Save to" icon.
Step 5: On the "Notice" icon: It tells how long you could record your TV or Radio programs. And it depends on the capacity of your hard disk. Clicking "OK" to finish the set up.
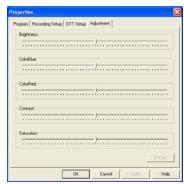
4.6 Adjustment
To view a better image quality, please adjust the image quality from change Brightness, ColorBlue, ColorRed, Contrast, Saturation of the image or you can click the "Default" button. Then click "OK" to finish adjusting.
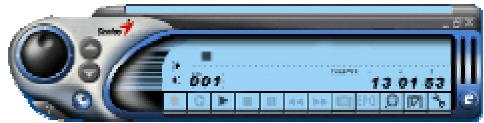
5. DVB-TV Application Program
DVB-TV Application Program is a powerful software for you to watch DTV in your personal computer. It provides all the functions you need to enjoy "High Resolution" video and "5.1channel" audio.
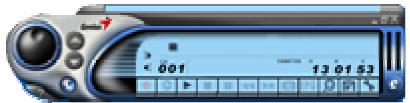
5.1 Control Panel
| The icons of control bar and control panel | ||||
| Icon | Function | Icon | Function | |
| Hyper Links and Terrestrial list live update | Play Video | |||
| On-Line Help | Stop Video | |||
| Display favorite list | Record Video | |||
| Capture | |
| Property | |
| Open recording file list | |
| EPG | Electronic Program Guide |
| Teletext | |
| Multi-Channel Preview | |
| Signal Quality(Left Bar) | |
| About | |
| Sound on |
| II | Pause |
| ← | Fast Rewind |
| → | Fast Forward |
| C | time-shift Start and Pause |
| Channel UP | |
| Channel Down | |
| Signal Strength(Right Bar) | |
| Adjust Volume | |
| Sound off |
5.2 Functions
5.2.1. Terrestrial List Live Update
Please click at on the control panel and click at "Update Terrestrial list". VideoWalker DVB-T USB will connect to server and update the latest terrestrial list. Note: Connect the PC to the internet in advance.
5.2.2. Clock
The clock will automatically be set to the host computer's time.
170457
5.2.3. Channel Title Displaying
The current channel name will be displayed on the control panel in the language assigned by the channel provider.
5.2.4. Turning the sound on and off
Turn off the right or left sound channel, just click at the icon , and you will see the icon changes like this "→".
5.2.5 Video Recording
You could record the video just by clicking at Or you can arrange the schedule recording by making changes at the "Recording Setup" page in the property menu
5.2.6. Multi-Channel Preview
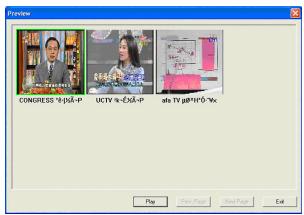
Click at on the control panel to preview multi-channel at the same time.
To watch the program you want just choose it then click at "Play".
Note: You can only preview the FTA channels from the same transponder.
5.2.7. Electronic Program Guide (EPG)
Click at EPG on the control panel to see the electronic program guide provided by the content provider. From here you can get more information about the broadcasting programs.
5.2.8. Multi-Language
From here you can choose the language of the program.
- Please click "Properties - "Program" and choose the program name on the list.
- Please click at "Edit", then "Set your program" will pop up.
- Please find the "APID [Dec]" to select another default of APID.
Note: Please check your content provider to see if the programs have multi-language.
5.2.9. Snap Shot
Click at to capture the still frame you are currently watching.
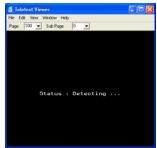
5.2.10. Teletext
The application "Teletext" is a simple teletext browser. To start this function, please click at on the control panel. It only works when VideoWalker DVB-T USB is
launching.
5.3 Right Click Menu
Right click your mouse over VideoWalker DVB-T USB UI and you will see a pop up menu.
Here are the brief introduction.
| Play Pause Stop Record Rewind Fast Forward Time Shifting | Play: Play Video Pause: Pause the video you are currently watching Stop: Stop the video you are currently watching Record: Record the video program you are currently watching Rewind: Rewind when you are watching the recorded video Fast Forward: Fast forward when you are watching the recorded video time shifting: Start or pause the “time shifting” function |
| Channel Up Channel Down Last Channel EPG Preview Capture Teletext Mute | Channel Up: Change to the previous channel Channel Down: Change to the next channel Last Channel: Change to the last channel EPG: Show the EPG window Preview: Multi-channel preview (only for FTA channels) Capture: Snap shoot the still frame Teletext: Show teletext window Mute: Turn the sound off |
| Properties Record List Favorite List ✔ Control Panel | Properties: Show the properties window Record List: Open the record List Favorite List: Open the favorite List Control Panel: Show the control panel |
| User Definition ✔ 4:3 16:9 | User Definition: Change the aspect rate of screen yourself 4:3: Set screen aspect rate at 4:3 16:9: Set screen aspect rate at 16:9 |
| Top Most | Top Most: Place screen always on the top |
| About | About: Display the version information |
| Exit | Exit: Turn program off |
6. Trouble Shooting
- The "Found new hardware wizard" window pops up while plug in the DVB-T USB? Please refer to"Driver Installation" of VideoWalker DVB-T USB user's man In XP/2000, if you change the USB port, you have to install the VideoWalker DVB-T USB driver again.
- VideoWalker DVB-T USB does not work properly?
In most cases, it's due to the drivers are not installed well. You might want to check the driver installed in the device manager of Windows Control Panel. In the device category "Sound, video and game controllers", there must be a device which is named "VideoWalker DVB-T USB adapter". If not, please remove the USB box, plug it into the USB port and follow the steps in "Driver Installation" of "VideoWalker DVB-T USB user's manual" to install the driver again.
- Windows cannot find VideoWalker DVB-T USB?
a. Check whether VideoWalker DVB-T USB was inserted correctly in the USB port.
b. After the VideoWalker DVB-T USB is plugged into the USB port, wait for at least 3 seconds before you launch VideoWalker DVB-T USB.
c. Re-start the operation system.
d. Run "Add/Remove Hardware Device" from Windows "Control Panel" to install the correct drivers.
e. Unplug the USB box, and then plug it again. Please note that the interval between plug and unplug should be at least 3 seconds.
f. Plug VideoWalker DVB-T USB box into another USB port of the PC.
- Windows cannot find the driver of VideoWalker DVB-T USB?
Make sure the original CD-ROM is in the CD-ROM drive during the installation. Please indicate the correct directory where the drivers are located for Windows if install the drivers manually.
a) For WinXP/Win2000 D:\Drivers\Win2K&XP
b) For Win98SE/WinME D:\Drivers\WinME&98SE
(D:\is your CD ROM
Make sure that the driver and your operation system matches. Please note that the drivers for Win98SE and Win ME are the same and the drivers for Win XP and Win 2000 are the same.
- Set up VideoWalker DVB-T USB software?
Install the software from autorun menu in CD-ROM.
Please run "Setup.exe" on the CD-ROM.
Follow the instruction of setup wizard for software installation.
- Cannot lock any program channel when auto scan?
Please click "Apply" button after making any changes to the settings in "DTT Setup" before scanning the terrestrial signal.
Check the cable connection between VideoWalker DVB-T USB and the antenna.
Please note that the cable should be connected well to the connector of the card.
Exit VideoWalker DVB-T USB. Unplug the USB box, then plug it again. Note that
the interval between plug and unplug should be at least 3 seconds . Launch
VideoWalker DVB-T USB and test again.
To update the latest Country/Area channel list, please click on the hyper link on the control panel and select "Update terrestrial list".
- When video plays but Audio fails?
Please check the sound card or the volume setting.
- When failed to play program?
Make sure you have installed Sound Card Driver and the Sound Card is working. Please note that no matter if you want to listen to the audio or not, the sound card and its driver must be installed. Please check the signal quality and strength.
- When playing the programs, audio is ok, but screen is blank. Why?
Please make sure your VGA driver and Microsoft DirectX8.1 were installed correctly.
- Why is the MPEG2 video not smooth when you playback on Notebook or PC?
MPEG2 video playback consumes lots of CPU power. To get better performance, please make sure "Power-saving" mode of the Notebook PC is disabled and the CPU is running at its maximum frequency.
- Why does the error message show "Can't create the capture process"?
The installation of VideoWalker DVB-T USB could be messed up. Please un-install VideoWalker DVB-T USB, then install it again.
- Remote controller "POWER" key cannot launch VideoWalker DVB-T USB?
The remote controller's "POWER" key for VideoWalker DVB-T USB can only "power off" the application, but not "power on". It's a hardware limitation.
- The Remote controller does not work. VideoWalker DVB-T USB does not react to the key presses?
VideoWalker DVB-T USB window must be the "focus" window to receive the remote controller input. You may click on the caption of VideoWalker DVB-T USB window, and then try again.