
TRIAX C10 - Watch NIKE - Free user manual and instructions
Find the device manual for free TRIAX C10 NIKE in PDF.
| Product Type | Sports watch with heart rate monitor |
| Brand | NIKE |
| Model | TRIAX C10 |
| Watch power supply | CR2032 3V Lithium battery (estimated 1.5 years) |
| HR transmitter power supply | CR2032 3V Lithium battery (estimated 1 year for 1h/day) |
| Main functions | Chronograph, heart rate monitor, heart rate zones, alarms, interval timer, power saving mode |
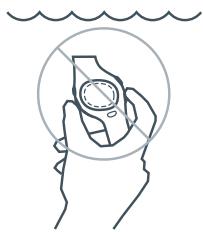
| Watch water resistance | 50 meters (do not press buttons underwater) |
| HR transmitter water resistance | 30 meters (wipe after use) |
| Operating temperature | -5°C to 50°C |
| Case material | Polycarbonate |
| Lens material | Mineral glass |
| Strap material | Polyurethane |
| Buckle and bezel | Stainless steel |
| Warranty | 2 years limited (excluding battery, crystal, strap) |
| Care and cleaning | Wipe the HR transmitter after use, do not store with conductive materials |
| Safety | Keep batteries out of reach of children, do not swallow |
| Spare parts and repairability | Replaceable batteries (CR2032), NIKE authorized after-sales service |
| Available modes | TIME, RUN, INTERVAL, DATA |
Frequently Asked Questions - TRIAX C10 NIKE
User questions about TRIAX C10 NIKE
0 question about this device. Answer the ones you know or ask your own.
Ask a new question about this device
Download the instructions for your Watch in PDF format for free! Find your manual TRIAX C10 - NIKE and take your electronic device back in hand. On this page are published all the documents necessary for the use of your device. TRIAX C10 by NIKE.
USER MANUAL TRIAX C10 NIKE
Using the Chronograph 6
Setting Heart Rate Zone 8
Customizing Primary Display 9
Setting "My View" Display 10
INTERVAL mode
Setting Training Intervals 11
DATA mode
Review Saved Runs 12
Heart Rate Intensity Chart 13
Linking the HR Transmitter to the Watch 14
Troubleshooting 15
Specifications 15
Battery 16
Warranty 17
FCC Compliance 17
This document with updates is available online at www.niketiming.com
Printed on Wood Free Paper
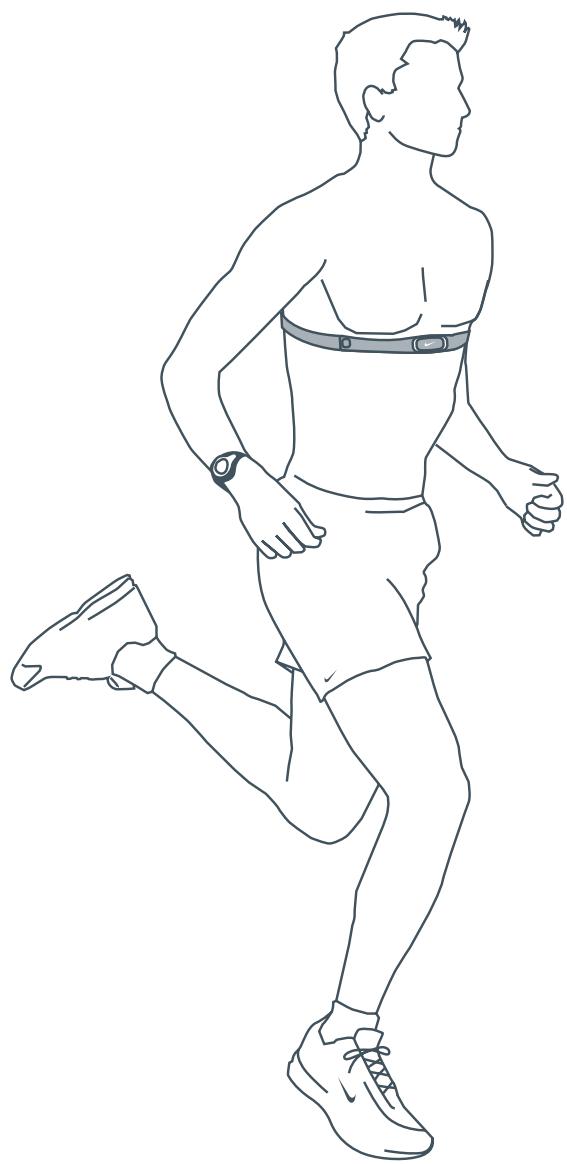
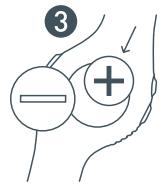
Push tab up through slot in HR transmitter.
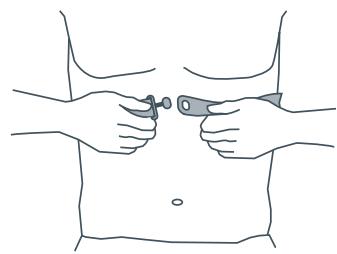
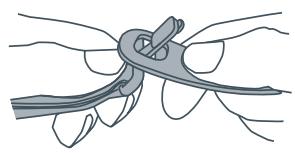
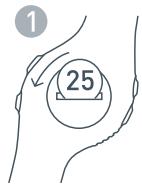
3 Attach other side of HR transmitter around chest. Position on rib cage just below the breast plate. The transmitter should be worn directly against skin and snug enough to stay in place during workout.
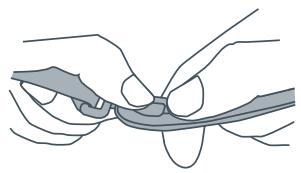
Press down tab until flush.

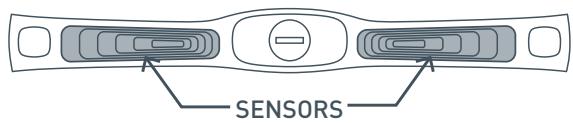
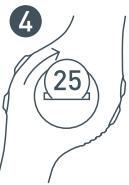
4 Generously wet both grooved areas on the back of the HR transmitter to ensure a strong connection between your pulse and the transmitter.
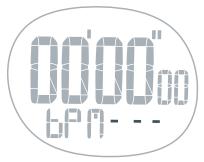
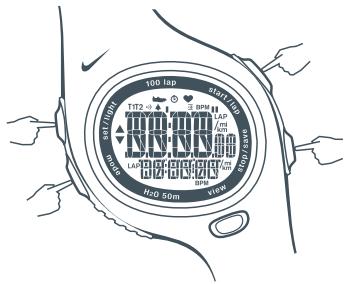
HRM linking
If you see the HRM LINK display within either RUN or INTR mode, the watch is not recognizing the digital ID of the HR transmitter. See page 14, Linking the HR Transmitter to the Watch.

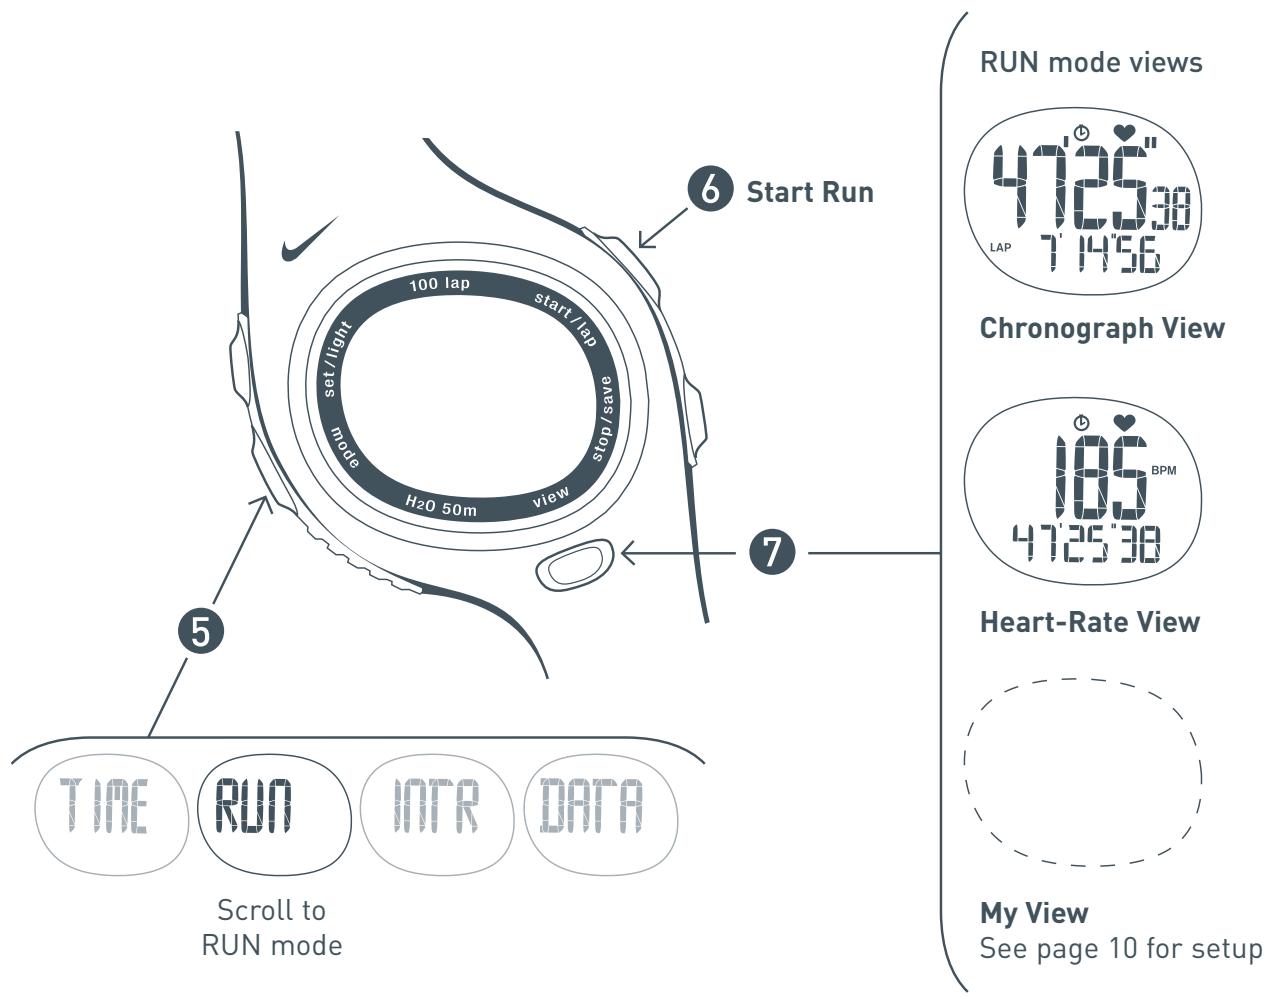
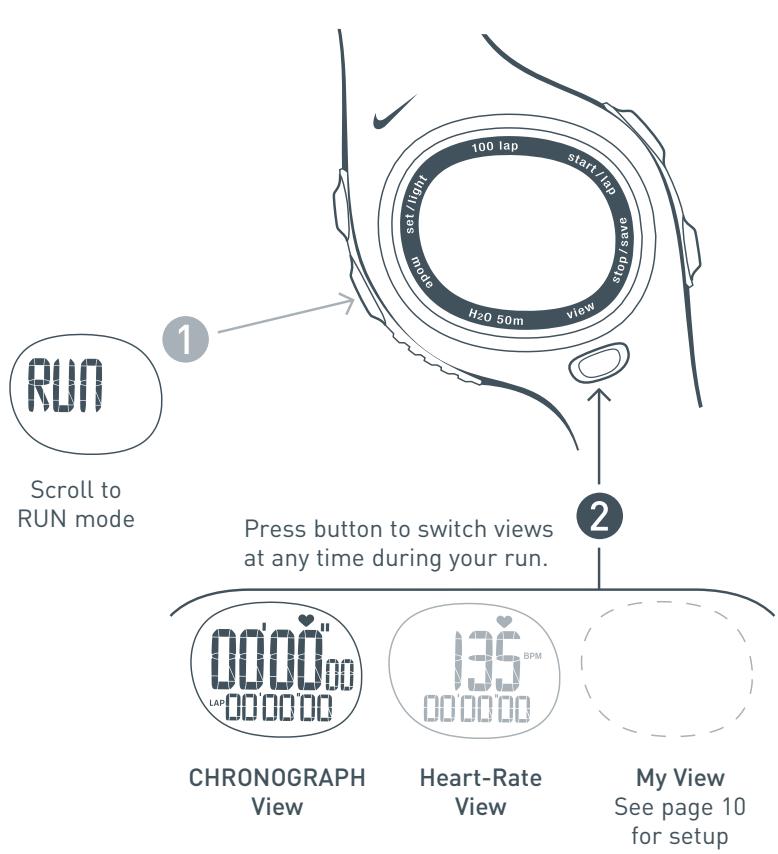
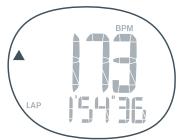
RUN mode views
Chronograph View
Heart-Rate View
My View
See page 10 for setup
or
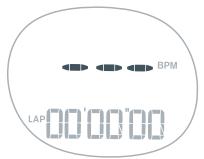
No Heart Rate Displayed
If you see three blinking lines in the display, the watch is not receiving transmission from the HR transmitter.
Run through the Quick Start again or see page 15 Troubleshooting.
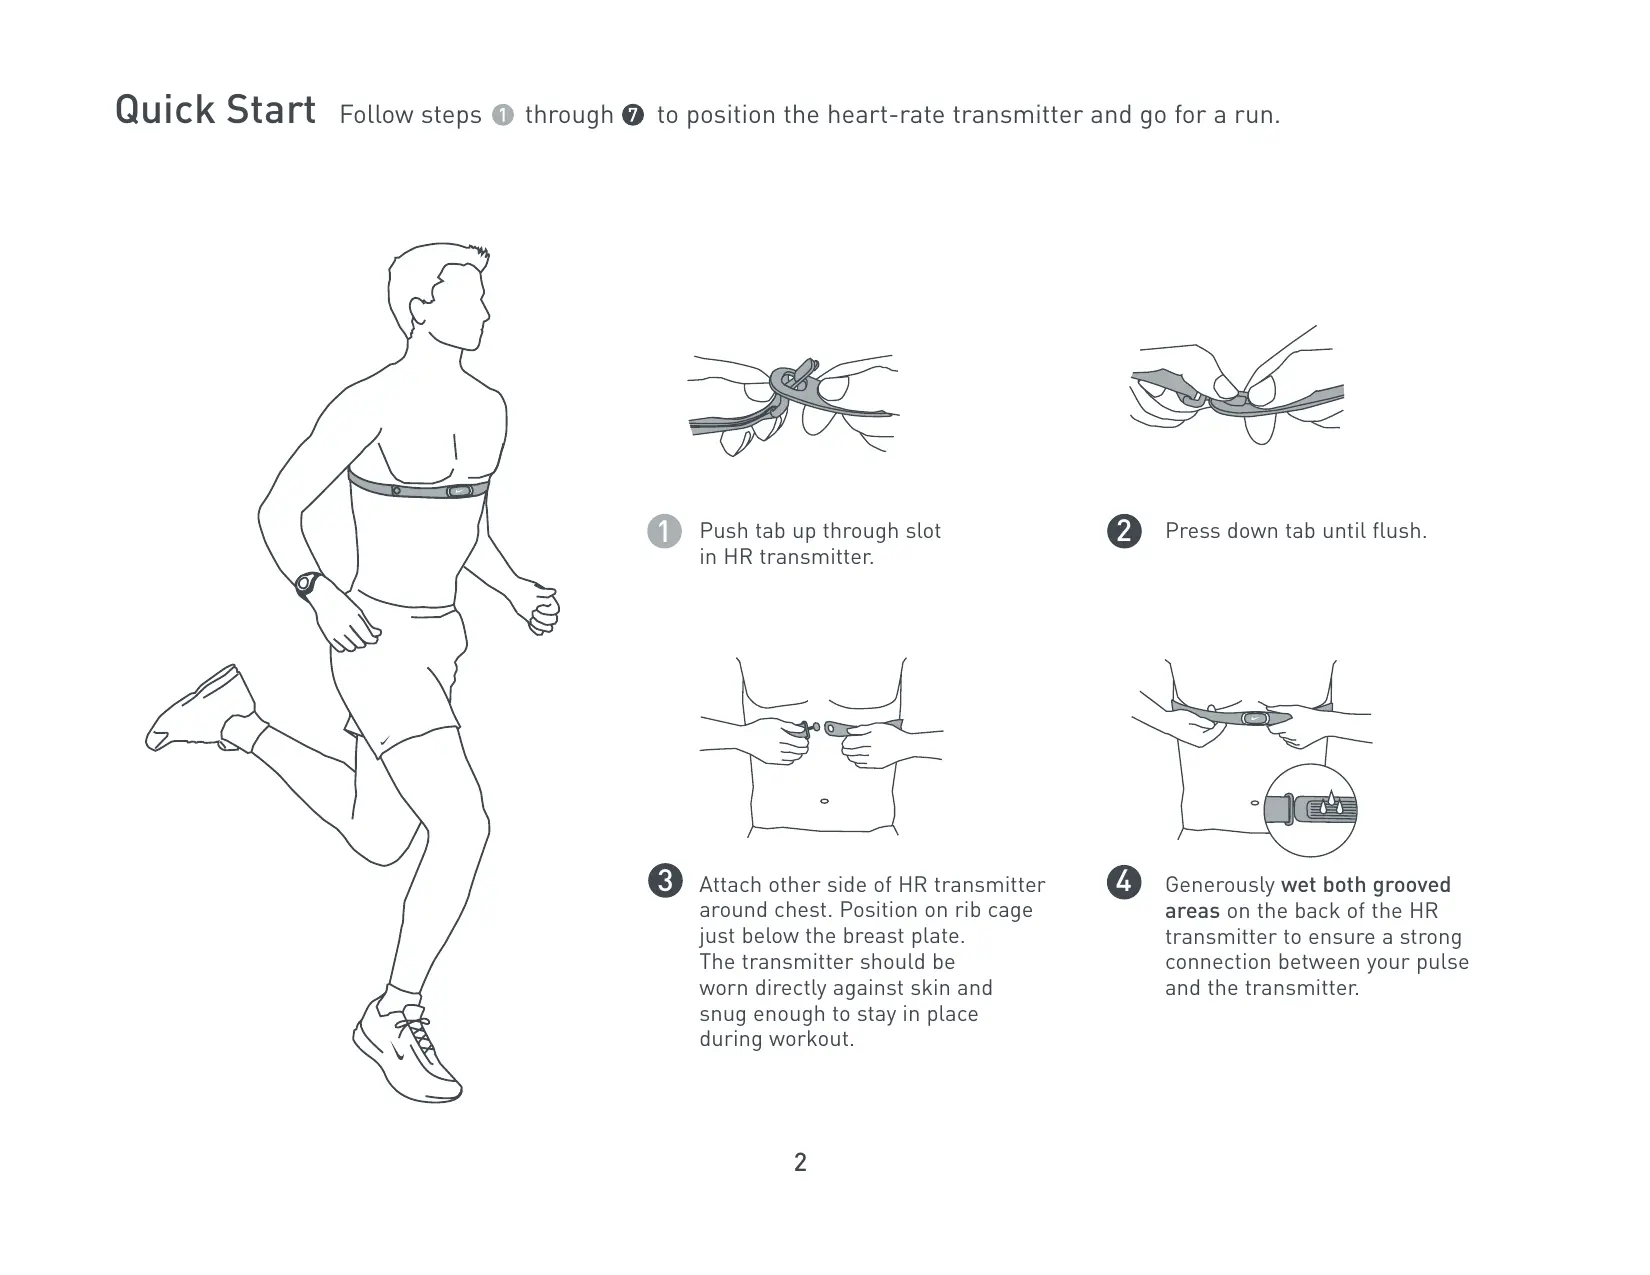
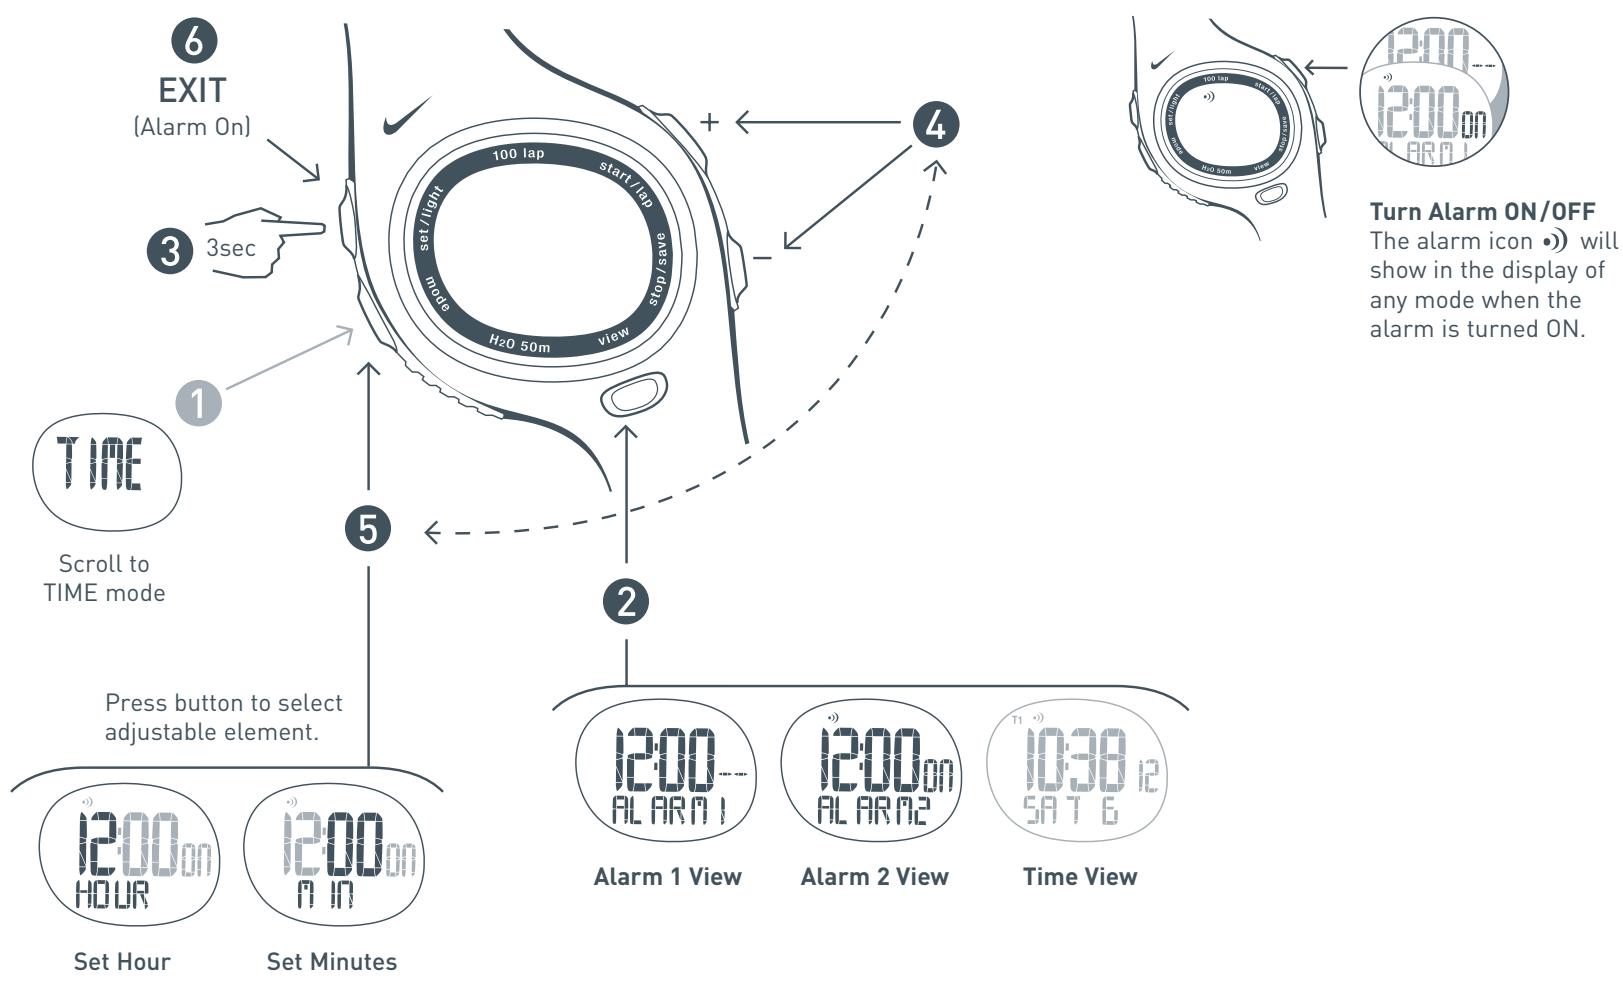
In TIME mode you can set the time, date and power save option. TIME mode is the only mode in which you can turn the button chime ON and OFF. Follow steps ① through ⑤ to set the time and date.
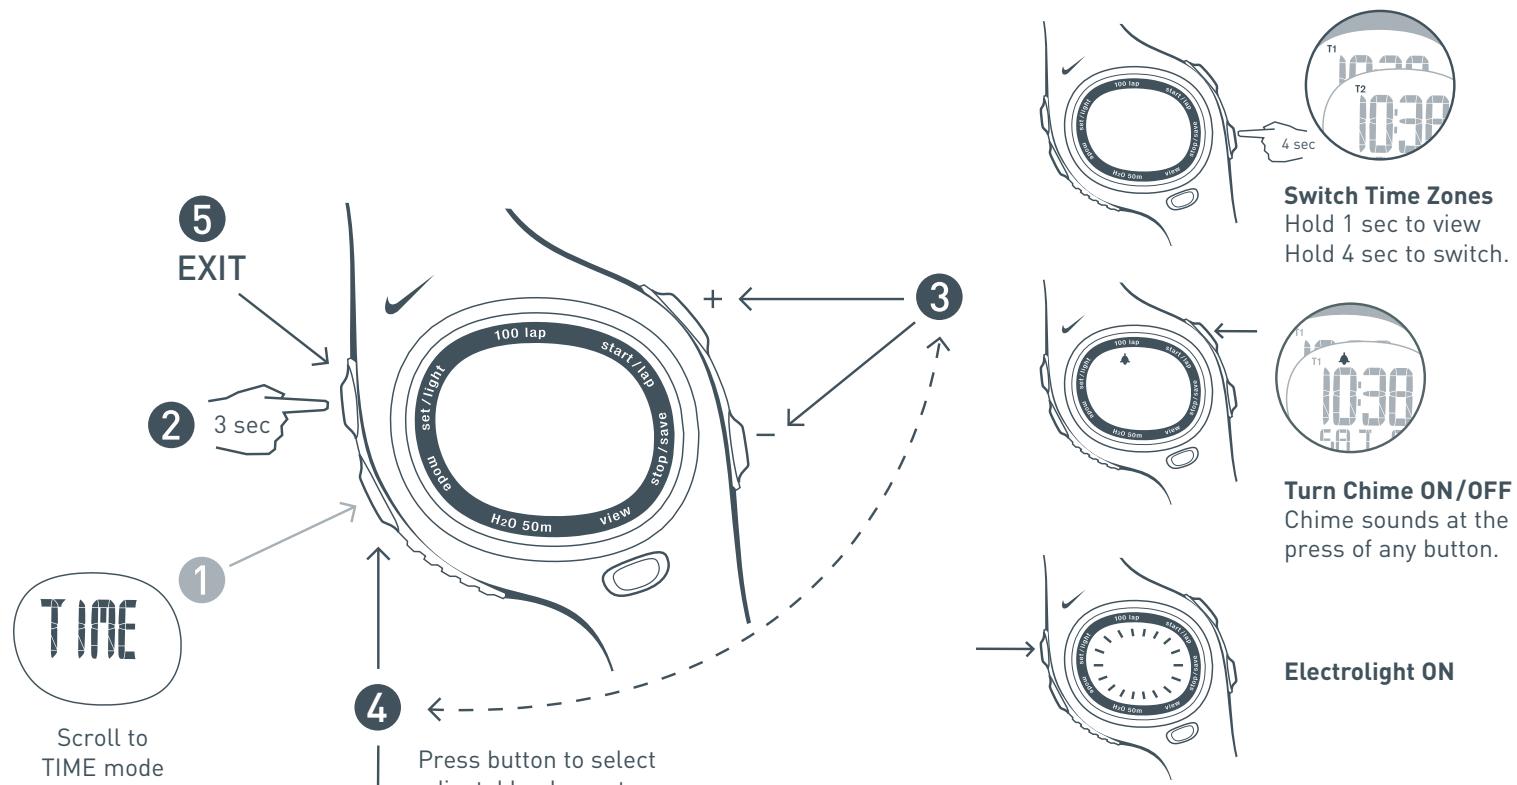
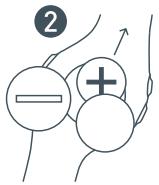
Press button to select adjustable element.
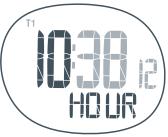
Set Hour
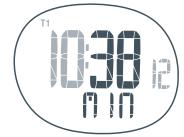
Set Minutes
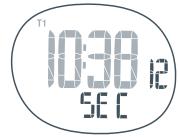
Set Seconds
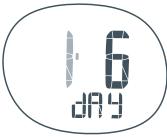
Set Day
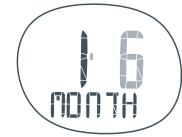
Set Month
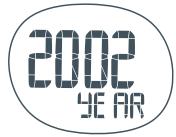
Set Year
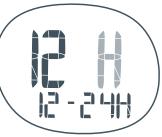
Choose 12 or 24 Hour Clock
Power Save (0-24 hrs.)

After X hours with no activity, watch goes to sleep. Push any button to wake. Alarm will still function.
Within TIME mode you can set two alarms. Follow steps ① through ⑥ to set the alarms.
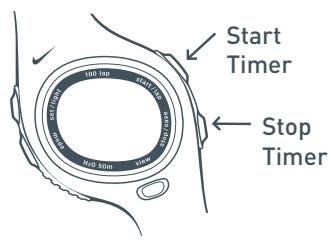
RUN
Using the Chronograph
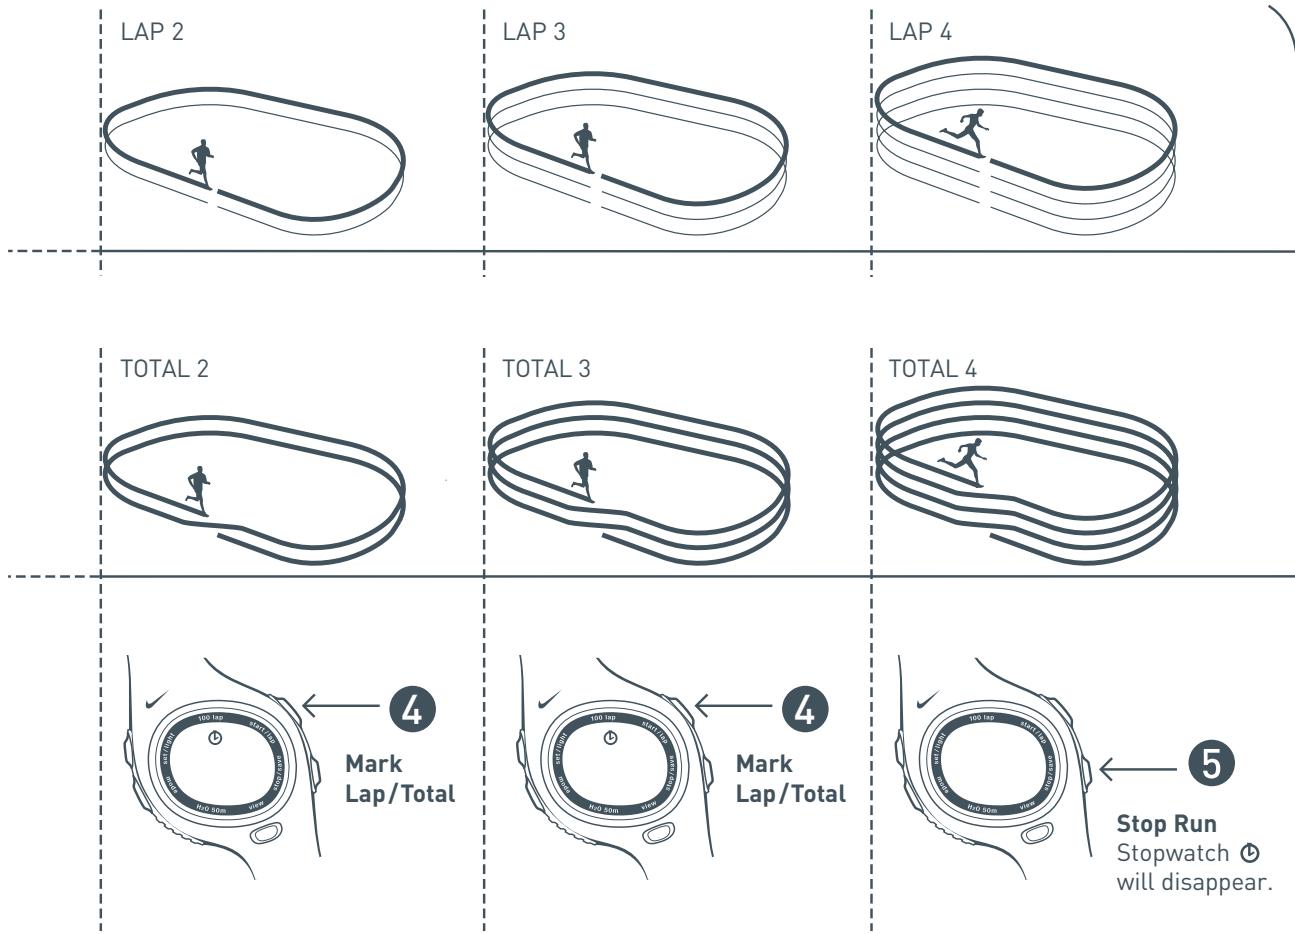
In Chronograph View, you can mark lap times and total times during your run. Both lap times and total times are captured simultaneously when you press the lap button. Average heart rate is also captured for each lap/total period. After you stop the chronograph, you can save your run information and review it in DATA mode. See page 12 for DATA mode. Follow steps ① through ⑥ to use your chronograph.
Mark Laps
Lap time is the time required to go once around a track or complete a segment of a run.

LAP 1

and
Mark Totals
Total time is the time from the beginning of the run up to the point you mark.

TOTAL 1

3
Start Run
A blinking stopwatch ① will appear.
4
Mark Lap/Total
You will have 7 seconds to read your lap and total time.
Heart rate is also captured for each lap/total period and can be viewed in DATA mode if the run is saved.
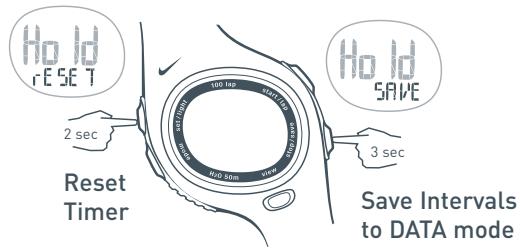
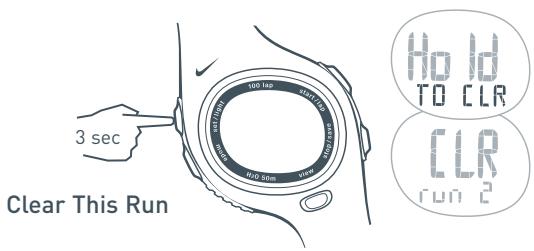
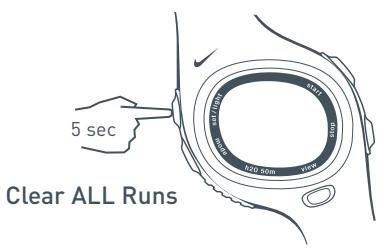
Save or Clear Run Information
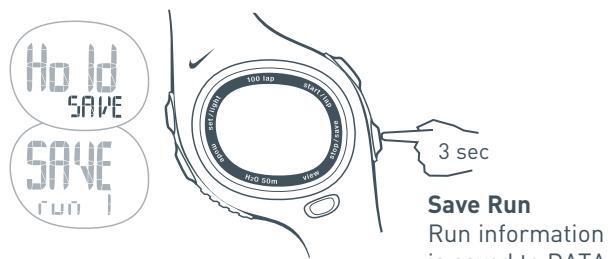
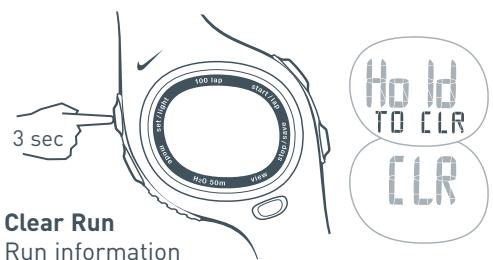
is erased.
Setting Heart Rate Zone
Your heart rate is measured in beats per minute (bpm). Setting a heart-rate zone allows you to work within an upper and lower heart-rate limit. Follow steps ① through ⑤ to set a target heart-rate zone.
Scroll to RUN mode
Press button to select adjustable element.
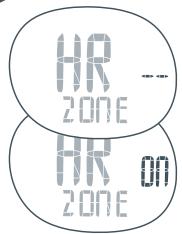
Turn Heart-Rate Zone ON
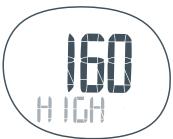
Set HIGH HR Limit
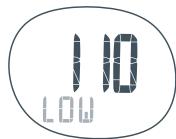
Set LOW HR Limit
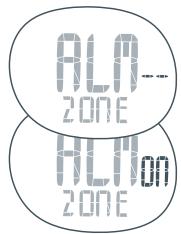
Turn Audible Zone Alarm ON/OFF
or
Above your heart-rate zone.

Below your heart-rate zone.
Out-of-Zone Indicators
If your heart rate is out of your zone, the LO (▼)
or HI arrow indicators will flash in the display.
Zone Alarm ON Indicator
If the zone alarm is ON, the watch will beep as your heart rate moves out of your zone.
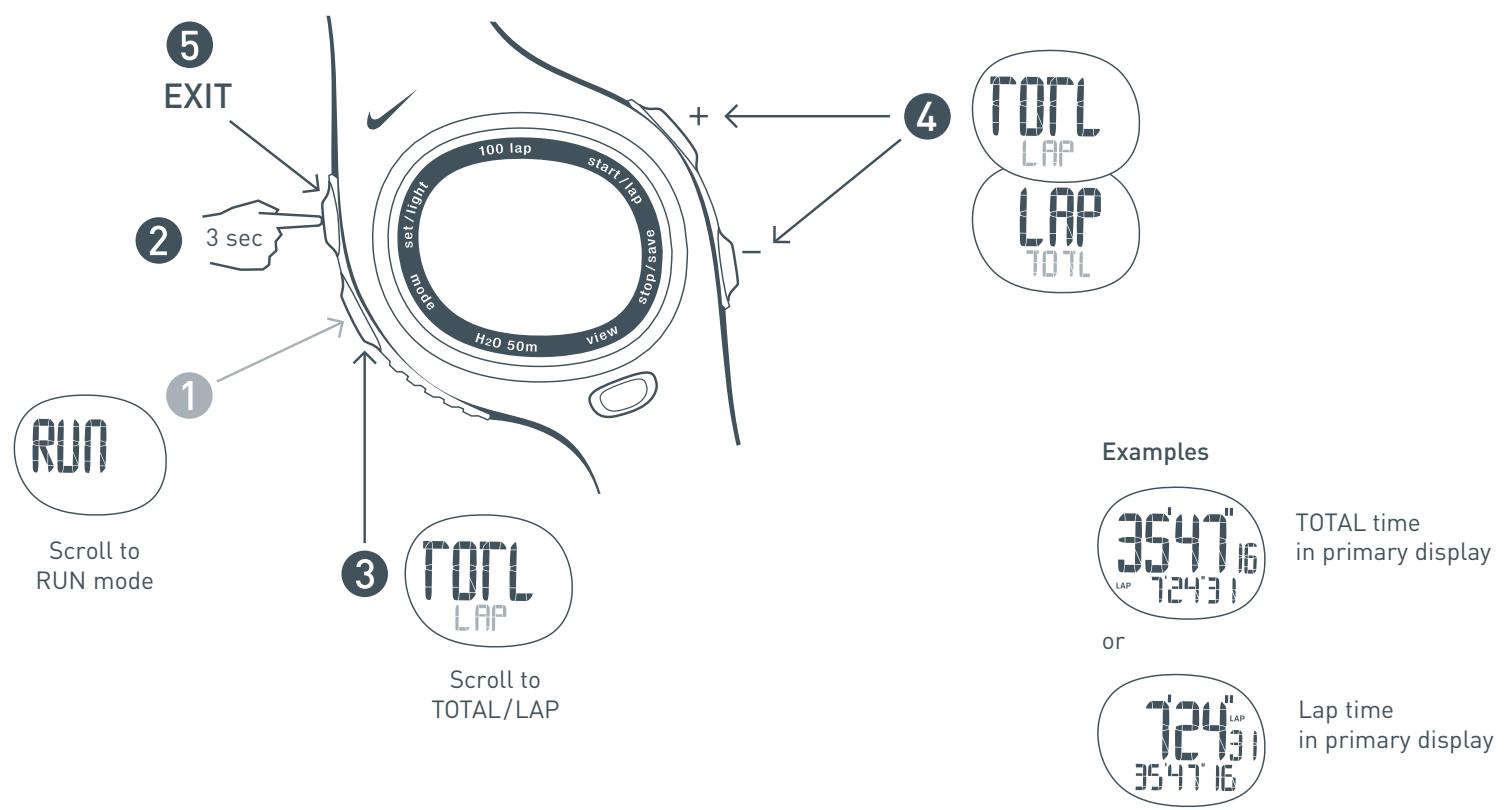
Customizing Primary Display
You can choose to view TOTAL time or LAP time in the primary display of your chronograph.
Follow steps 1 through 5 to switch your views.
Setting “My View” Display
"My View" allows you to create your own view in RUN mode with the information you use the most during your workout. When activated MY VIEW will appear as the first view in RUN mode. This feature allows you to choose which information appears in the Primary (larger) and the Secondary (smaller) displays. Follow steps ① through ⑤ to create your view.
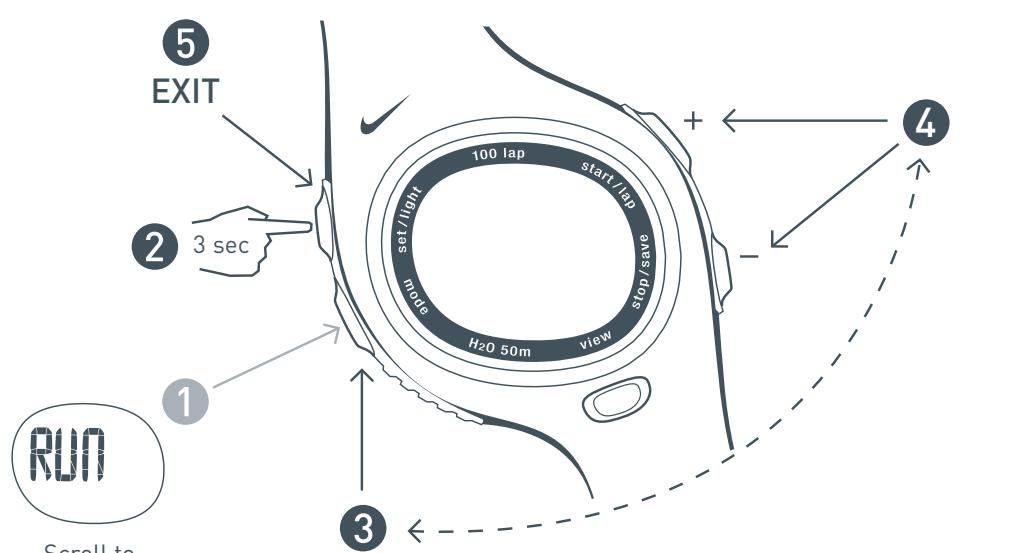
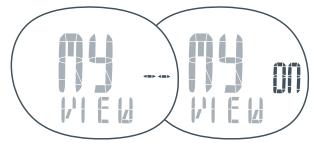
Press button to scroll to MY VIEW and select display choice.
Turn MY VIEW ON/OFF
PRIMARY display choices

SECONDARY display choices

NO display
Note: Your primary display choice will not show up in the secondary list of choices.
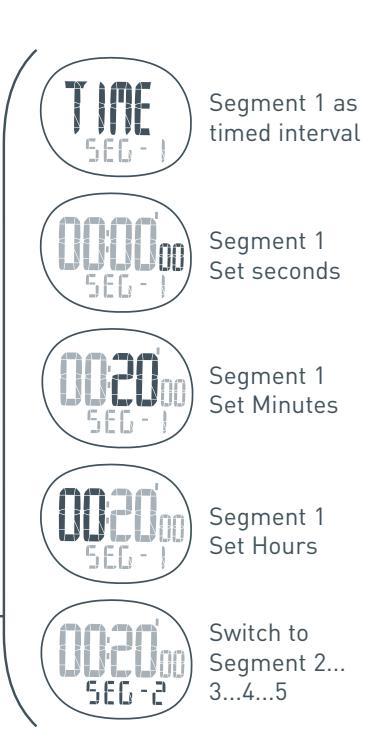
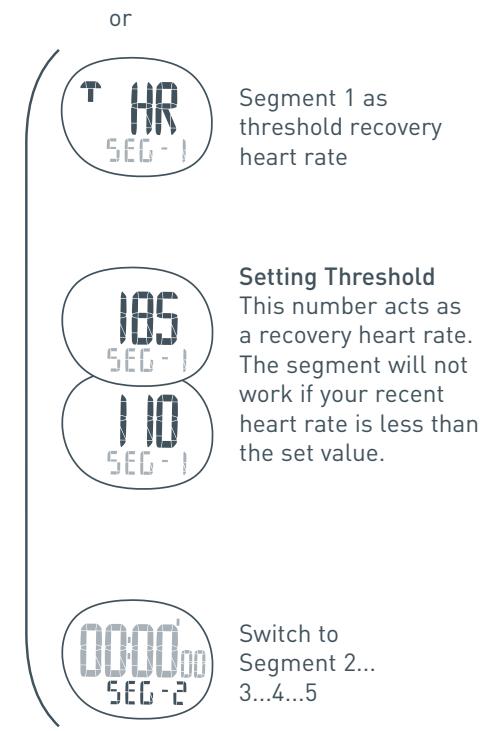
Setting Training Intervals
INTERVAL mode features a 5 segment countdown timer. You can use this as an interval training tool by setting the individual segments as a timed interval or a threshold recovery heart rate. As each segment is complete, as either a set time or specified heart rate; the next segment begins. All segments will continue to repeat until the timer is stopped. Follow steps 1 through 5 to set your training intervals.
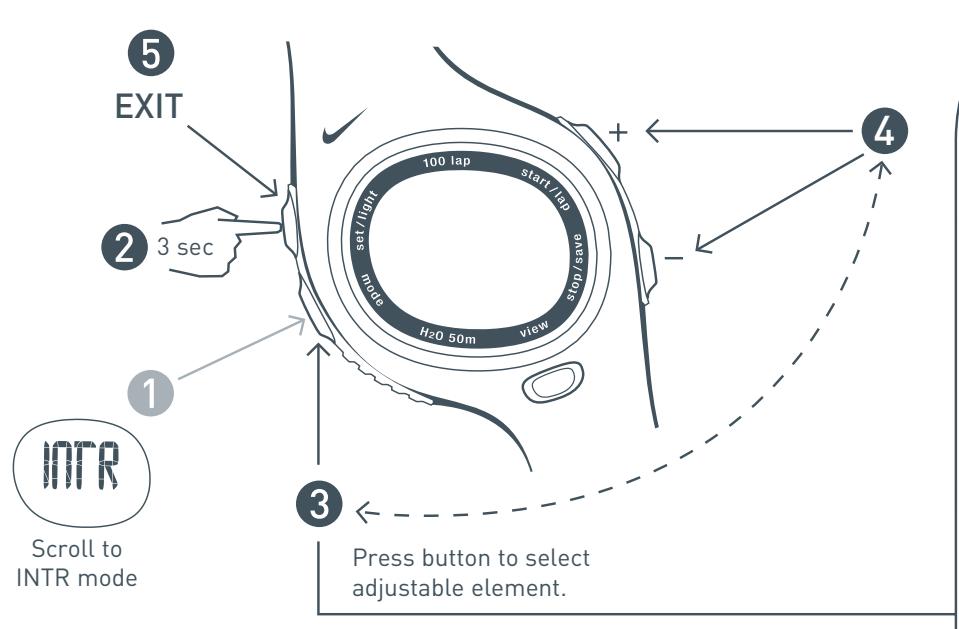
Note: Press the VIEW button to switch views during an active training interval session.
Cycle Segments
Press button to select beginning segment.
Timer must be reset.
See Reset Timer.
Note: You do not have to set all the segments. For example, if you only want to use 2 of the segments, set segments 3, 4 and 5 as zero timed intervals [00:00'00'] . A zero timed segment will not be active when the timer is started.
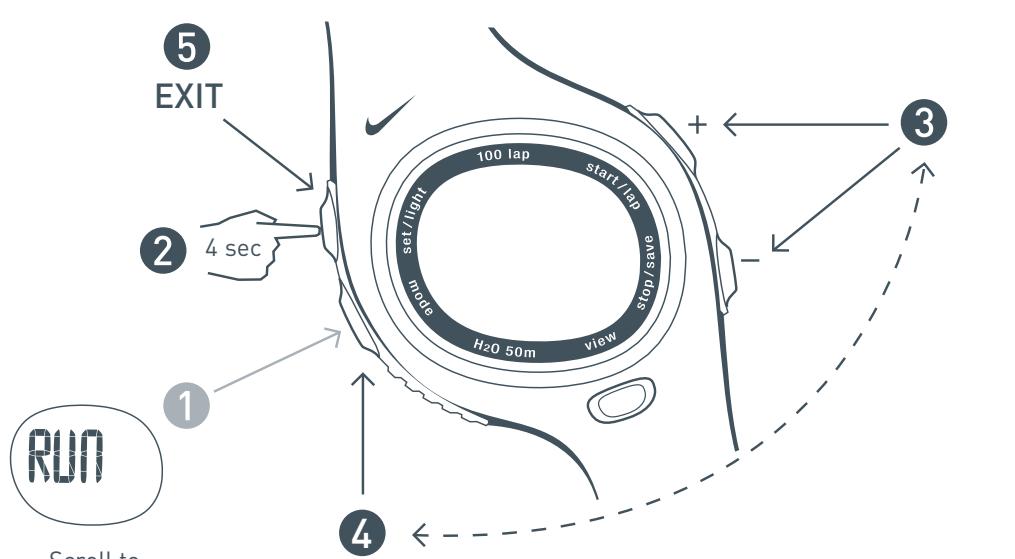
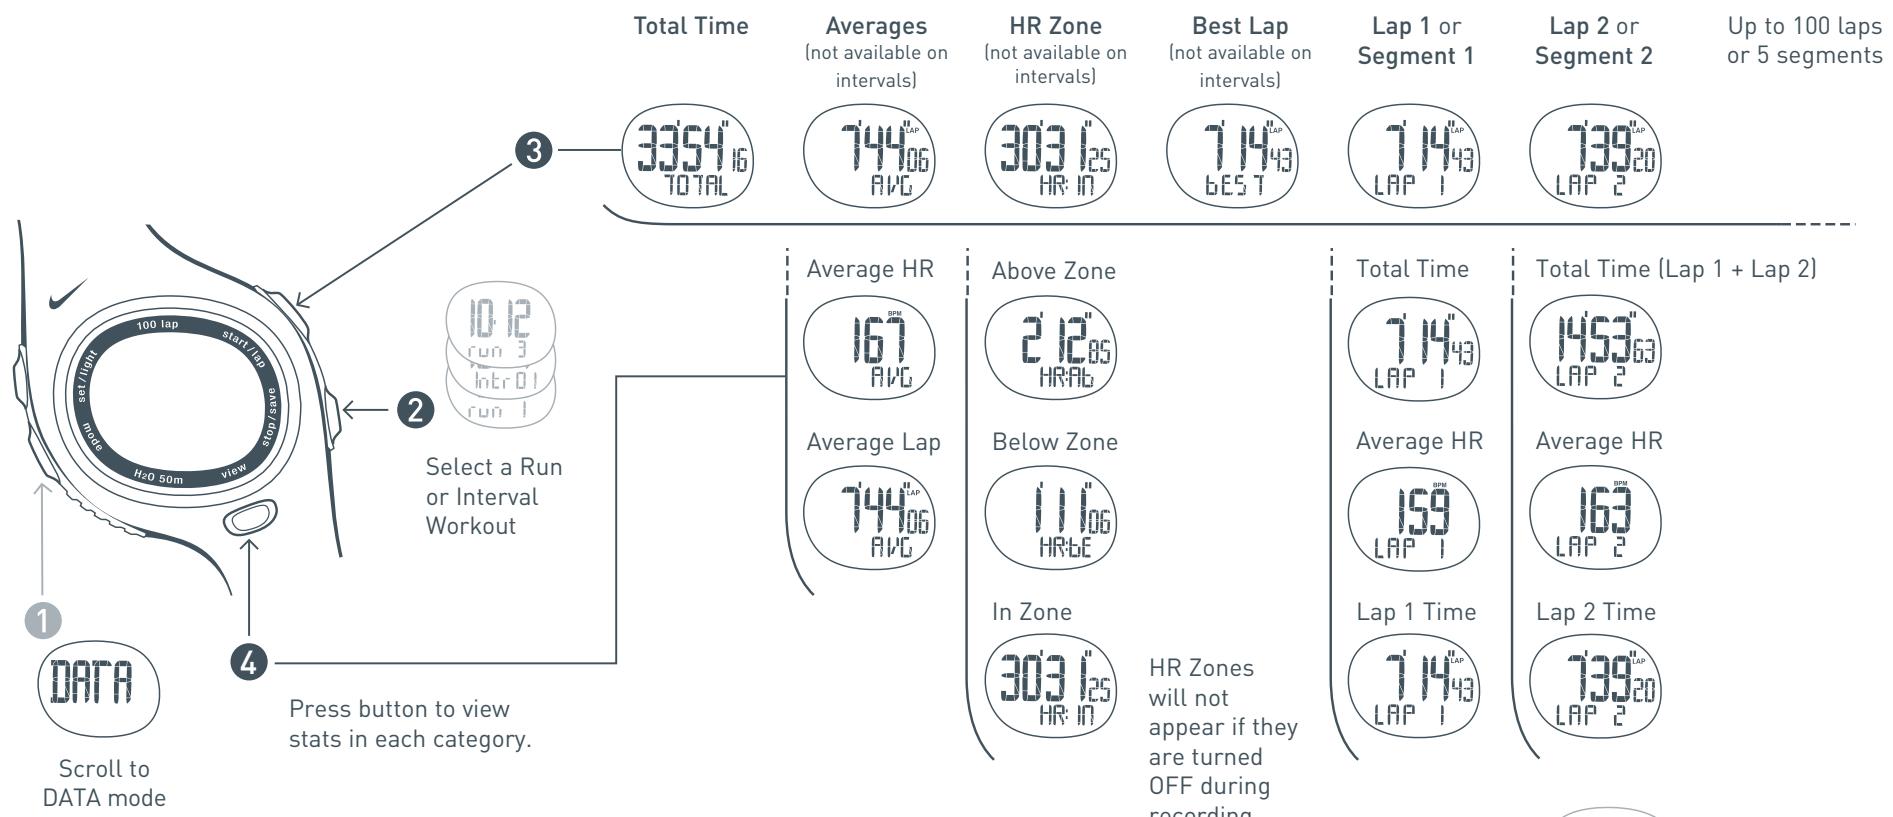
In DATA mode you can review detailed information about your saved runs. The memory can store multiple runs with up to 100 laps each. See page 7 for saving runs to DATA mode. Total time and segment data completed in INTERVAL mode will also be available for review in DATA mode. Follow steps ① through ④ to view data saved for each run.
Heart Rate Intensity Chart
This is another way to gauge your approximate heart rate zones based on sex, age and weight. Starting with your Max Heart Rate, use the chart to help calculate your zones depending on the intensity of your workout. Note this formula may not work for everyone.
| Find your Max Heart Rate | Determine your Target Heart Rate Zones (Intensities) | |||
| 210 - (0.7 x age) | Light Intensity (60-70% of Max HR) | Moderate Intensity (70-80% of Max HR) | Heavy Intensity (80-90% of Max HR) | Maximum Intensity (90-100% of Max HR) |
| Exercise in this range at the start of a workout or to recover from a tough workout or race. You should be able to easily maintain a conversation while exercising at this intensity. | Exercise in this range to develop endurance and prepare your muscles to make the transition from aerobic to anaerobic. You should be able to maintain this for a while. You should not be completely breathless and this should not hurt. | Exercise in this range to increase muscle strength and improve your anaerobic threshold. This is uncomfortable. You should be breathing very heavily. You should only be able to sustain this for a brief time. | Exercise in this range to increase mental toughness, Max V02 and tolerance to lactic acid. This is very uncomfortable. You can barely sustain it. You should be completely breathless. Do not exercise at this intensity except on the advice of a trained medical professional. | |
| Max Heart Rate | ||||
| 205 bpm | 123 - 143 bpm | 144 - 163 bpm | 164 - 184 bpm | 184 - 205 bpm |
| 200 | 120 - 139 | 140 - 159 | 160 - 179 | 180 - 200 |
| 195 | 117 - 136 | 137 - 155 | 156 - 175 | 176 - 195 |
| 190 | 114 - 132 | 133 - 151 | 152 - 170 | 171 - 190 |
| 185 | 111 - 129 | 130 - 147 | 148 - 166 | 167 - 185 |
| 180 | 108 - 125 | 126 - 143 | 144 - 161 | 162 - 180 |
| 175 | 105 - 122 | 123 - 139 | 140 - 157 | 158 - 175 |
| 170 | 102 - 118 | 119 - 135 | 136 - 152 | 153 - 170 |
| 165 | 99 - 115 | 116 - 131 | 132 - 148 | 149 - 165 |
| 160 | 96 - 111 | 112 - 127 | 128 - 143 | 144 - 160 |
| 155 | 93 - 108 | 109 - 123 | 124 - 139 | 125 - 155 |
| 150 | 90 - 104 | 105 - 119 | 120 - 134 | 121 - 150 |
Linking the HR Transmitter to the Watch
The HR transmitter has a unique digital ID to avoid crosstalk with other transmitters. Before your transmitter can communicate properly, the watch must be linked to the HR transmitter to establish and share this ID. The original transmitter which came with the watch was linked at the factory. Once linked, the digital ID of your HR transmitter is stored by the watch until you change the watch battery or reset the watch. Follow steps ① through ④ to re-link the original or any replacement transmitters to the watch.
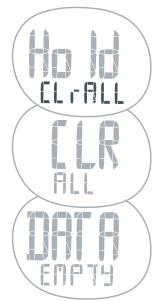
1 Press and hold all four side buttons simultaneously until the watch beeps and all segments of the watch LCD flash in the display
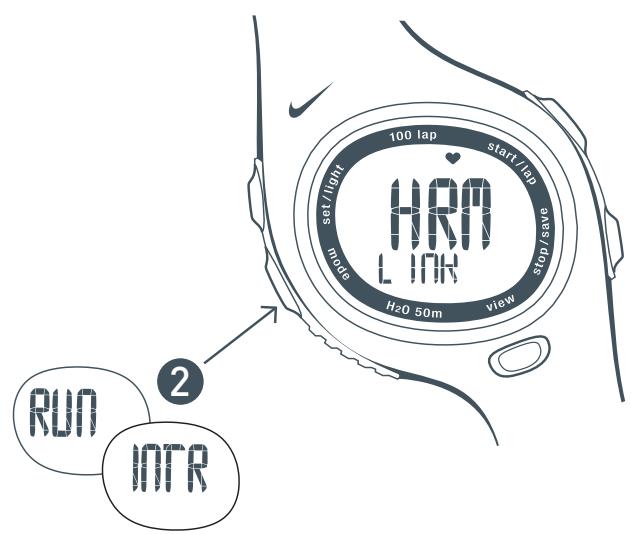
Scroll to RUN or INTR mode
3 Firmly grasp the HR transmitter with both hands, one on each end, making sure to touch the sensors on the back side of the transmitter. There is no ON/OFF switch for the transmitter. It sends a digital signal during the first 10 seconds of connection with the sensors.
NOTE: If you are unable to enter HRM LINK OK screen before the 10 seconds expires, wait two minutes for the HR transmitter to automatically turn off and try again.
After a few seconds the watch should display HRM LINK OK. The watch has located the digital ID of the HR transmitter and will store the ID until you either change the watch battery or reset the watch.

Troubleshooting
No heart rate displayed on watch:
The grooved sensors may not be wet enough.
Wet and try again. It is recommended that you wear the Heart Rate Transmitter directly against your skin.
If you are wearing the HR Transmitter over clothing, try getting the clothing wet also.
The HR Transmitter may not be positioned correctly.
Make sure the grooved sensors are flat against the skin.
Heart rate reading on watch is erratic or stops:
You may need to replace the battery in the HR Transmitter.
Sources of electromagnetic fields like appliances, computers and power lines can cause interference
Change your location.
This product complies with EN60601-1-2
Watch display is frozen:
The display of your watch may "freeze" due to static electricity or recent battery replacement. If this occurs, press and hold all four buttons at the same time.
This will erase the data in the memory and allow you to reset the watch to the factory settings.

Press and hold all four buttons at the same time to reset the watch to the factory settings.
Watch beeps continuously:
If you have the zone alarm on and your heart rate does not fall within any of your zones, the watch will beep to indicate you are out of your zones. See page 8 for instructions on how to turn off the zone alarm.
Specifications
Watch
Water Resistant up to 50 Meters:
Designed for underwater performance to a depth of 165 feet (50 m).
ATTENTION: Water damage
will occur if watch buttonsare pressed while underwa
Operating Temperature: -5 to 50^ Celsius
Material Specifications:
Crystal: Mineral Glass
Case: Polycarbonate
Buckle: Stainless Steel
Bezel: Stainless Steel
Caseback: Stainless Steel
Strap: Polyurethane
Mode Limits:
Chronograph: 23:59'59"
Heart Rate: 30 - 240 bpm
Timer: 23:59'59"
HR Transmitter
Water Resistant up to 30 Meters:
Wipe dry after use. Do not store among conductive material.
Operating Temperature: -5 to 50^ Celsius
Accuracy: ± 1% or ± 1% bpm, whichever larger (steady state)
Material Specifications:
Case: Polycarbonate
Strap: Urethane
Band: Elastic
Battery
WARNING! Keep watch batteries away from children. If swallowed, contact a doctor immediately.
WARNING! Batteries contain chemical substances. They should be disposed of properly according to local regulations.
Watch
Battery Type: CR2032 3V Lithium
Battery Life:
The battery is estimated to last 1.5 years depending on frequency and use of certain features. Activating the Electrolite feature will contribute to battery drain. Utilizing the Power Save function will help conserve battery life.
Battery Replacement:
Follow steps below to replace your watch battery. For best results, you can have Nike's authorized service center change the watch battery.
Using a coin, unscrew the battery hatch on the watch by turning counter-clockwise.
Twist and remove battery holder cover. Remove old battery.
Insert a CR2032, 3V lithium battery with the writing facing you. Do not touch the 2 contacts.
Replace the battery holder cover and battery hatch.
HR Transmitter
Battery Type: CR2032 3V Lithium
Battery Life:
The battery is estimated to last 1 year if HR Transmitter is used one hour per day.


Using a coin, unscrew the battery hatch by turning it counter-clockwise.


Insert a CR2032 3V lithium battery with the writing facing you. Do not touch the 2 contacts.


Replace the battery lid.
Two-Year Limited Warranty
Your NIKE watch is warranted to be free of defects in materials or workmanship, under normal use, for a period of two years from the date of delivery. This limited warranty excludes the battery, crystal, strap, or damage resulting from improper care or handling, accidents, modification, unauthorized repairs or normal wear.
Return the defective watch and the store receipt to the place of purchase. If there is a covered defect, you have the option to have the defective parts or watch repaired or replaced with the same product (if available) or a similar product of equal price. However, NIKE reserves the right to refuse either repair or replacement (but not both) if the cost of doing so would be disproportionate to the defect.
This limited warranty is in place of all other express warranties, and excludes refund of the purchase price. Any implied warranties, including merchantability and fitness for a particular purpose, are limited to the duration of this limited warranty. In no event shall NIKE be liable for direct, indirect, incidental or consequential damages arising out of the use of the watch, and any recovery is limited to the purchase price. No other person or company is authorized to change this limited warranty, and your dealer is solely responsible for any other warranties.
For U.S. Purchasers: Some states do not allow limitations on how long an implied warranty lasts, or exclusions of incidental or consequential damages, so the above limitations may not apply to you. This warranty gives you specific legal rights, and you may also have other rights which vary from state to state.
The foregoing is without prejudice to other legal rights that may arise under applicable national legislation.
For non-warranty service like battery or strap replacement, contact one of the listed service centers.
FCC and RSS-210 Compliance
This device complies with part 15 of the FCC and RSS-210 of the IC rules.
Operation is subject to the following two conditions:
(1) This device may not cause harmful interference.
(2) This device must accept any interference that may cause undesired operation of the device.
Tested to comply with FCC standards.
For home or office use.
FCC WARNING: Changes or modifications not expressly approved by Nike could void your authority to operate this device under FCC regulations.