
GHB 760 - Petrol garden shredder ATIKA - Free user manual and instructions
Find the device manual for free GHB 760 ATIKA in PDF.
User questions about GHB 760 ATIKA
0 question about this device. Answer the ones you know or ask your own.
Ask a new question about this device
Download the instructions for your Petrol garden shredder in PDF format for free! Find your manual GHB 760 - ATIKA and take your electronic device back in hand. On this page are published all the documents necessary for the use of your device. GHB 760 by ATIKA.
USER MANUAL GHB 760 ATIKA
Original instructions - Safety instructions - Spare parts
You may not start to operate the machine until you have read these operating manual, observed all the instructions given and completely and properly assembled the machine!
Keep the instructions in a safe place for future use.
Contents
Extent of delivery 13
EC Declaration of Conformity 13
Symbols
- Machine 14
- Operating manual 14
Operating times 14
Normal intended use 14
Residual risks 15
Safety instructions 15
Assembly 16
Before the first start-up 17
Fuelling 17
- Oil 17
- Oil capacity 17
- Oil filling 17
- Oil level checking 17
Petrol 17 - Storing fuel (petrol) 17
-Fuelling the garden shredder 17
Start-up 17
Before starting the engine 18
- Starting the engine 18
- Stopping the engine 18
Working with the garden shredder 18
- What can I shred? 18
- What kind of material can be shredded with 18 the filling hopper and how to feed it?
- What kind of material can be shredded with 18 the filling hopper and how to feed it?
Special tips on shredding 18
Maintenance and Care 19
- Maintenance 19
Tensioning the V-belt 19 - Replacing the V-belt 19
- Turning / replacing the knives 19
- Replacing the counter knife 19
- Turning / replacing the beaters 19
- Cleaning / replacing the air filter 20
- Checking / replacing the spark plug 20
- Checking the ignition spark 20
- Silencer / exhaust outlet 20
- Oil change 20
- Machine blocked 20
- Care 21
Maintenance schedule 21
Dislocation/Transport 21
Storage/Long-term storage 22
Technical data 22
Operational faults 23
Description of device / Spare parts 24
Guarantee 24
EC Declaration of Conformity
according to EC directive: 2006/42/EC
We,
ATIKA GmbH & Co. KG
Schinkelstraße 97
59227 Ahlen - Germany
herewith declare under our sole responsibility that the product Benzin-Gartenhacksler (petrol garden shredder) type GHB 760
Serial number: see last page
is conform with the above mentioned EC directives as well as with the provisions of the guidelines below:
2004/108/EC and 2000/14/EC
Following harmonized standards have been applied:
EN 13683:2003+A1:2009; EN ISO 14982:1998
Following other technical regulations / specifications have been applied: ZEK 01.1-08
Conformity assessment procedure: 2000/14/EC - Appendix V.
Measured level of the acoustic output L_WA108,4 dB (A).
Guaranteed level of the acoustic output L_WA 110 dB (A).
Keeping of technical documents at:
ATIKA GmbH & Co. KG - Technical department
Schinkelstr. 97 59227 Ahlen - Germany

Ahlen, 04.05.2010
A. Pollmeier, management
Extent of delivery

After unpacking, check the contents of the box
That it is complete
Check for possible transport damage
Report any damage or missing items to your dealer, supplier or the manufacturer immediately.
| 1 pre-assembled device unit | 1 Storage box |
| 2 carrying handles | 1 spark plug connector |
| 1 ejection slot | 1 safety goggles |
| 1 support | 1 pair of safety gloves |
| 1 axle support RH | 1 ear protection |
| 1 axle support LH | 1 oil filling funnel |
| 1 axle | 1 filling hopper cover |
| 2 wheels | Tools |
| 1 screw bag | 1 Operating manual |
Operating times
Before initiating the device please observe the provisions pertaining to corresponding laws (regional provisions) for the noise control.
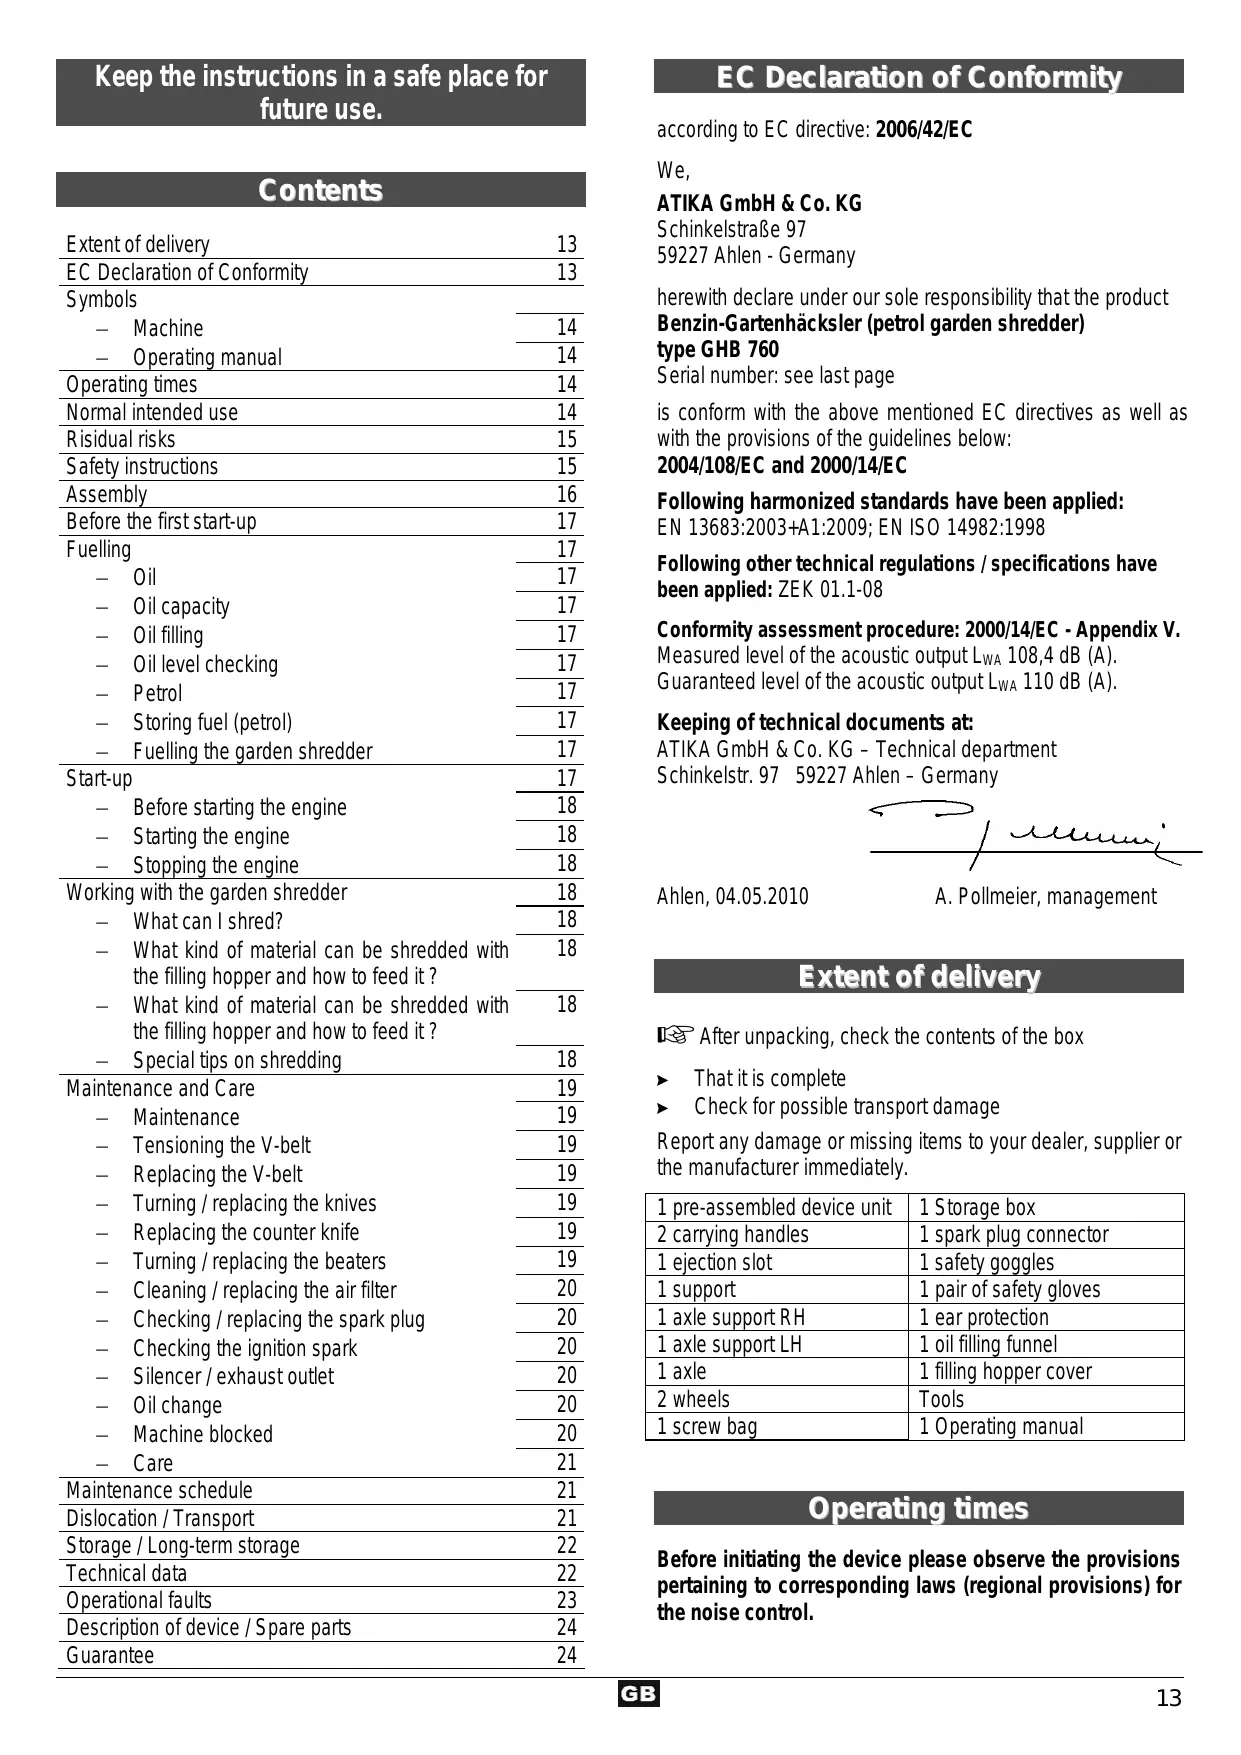
Symbols machine
| Carefully read operator's manual and the safety instructions before starting the machine and observe the instructions when operating. | |
| Stop the engine and disconnect the spark plug connector before performing cleaning, maintenance or repair work. | |
| Danger - objects may be thrown out at high speed when engine is running - keep bystanders, pets and domestic animals out of the danger area. | |
| Danger - rotating blades. Keep hands and feet out of openings while machine is running. | |
| Risk of carbon monoxide poisoning. Do not start or operate the engine in closed rooms even if doors and windows are open. | |
| Warning of hot surfaces. Danger of burning! Do not touch hot engine parts. Such parts may remain hot for a short time even after the machine has been stopped. | |
| Wear eye and ear protection! | |
| Wear protective gloves! | |
| Protect against humidity! | |
| Do not reach into the filling hopper. | |
| Do not remove or modify any protection or safety devices. | |
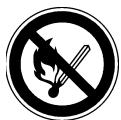
| Petrol and oil are a fire hazard and can explode. Smoking and open fire and smoke are prohibited. | |
| Fuel valve closed (OFF). Fuel valve opened (ON). | |
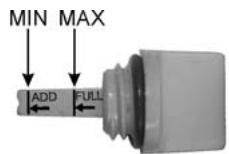
| MIN. speed MAX. speed | |
| Operating position Starting position CHoke | |
| Engine switched off (OFF) Engine started (ON) |
Symbols operating manual

Threatened hazard or hazardous situation. Not observing this instruction can lead to injuries or cause damage to property.

Important information on proper handling. Not observing this instruction can lead to faults.

User information. This information helps you to use all the functions optimally.

Assembly, operation and servicing. Here you are explained exactly what to do.
1,23,.
Number of figure associated to the text.
Normal intended use
The normal intended use includes the shredding of
- branches of any kind
filling hopper: up to 10 ~mm diameter (depending on wood species and freshness)
side hopper: up to 76~mm diameter (depending on wood species and freshness)
- wilted, moist garden refuse that has already been stored for several days, alternating with branches
Shredding of glass, metal, plastic parts, plastic bags, stones, fabric cut-offs, roots with soil, waste without solid consistency (e.g. kitchen scraps) is explicitly excluded.
Metallic parts (nails etc.) and other foreign objects have unconditionally to be removed from the material to be shredded.
Never start the product in closed rooms or poorly ventilated areas risk of carbon monoxide poisoning.
The machine may not be used in a potentially explosive environment or be exposed to rain.
The intended usage also includes compliance with the operating, servicing and repair conditions prescribed by the manufacturer and following the safety instructions included in the instructions.
Any other use is deemed not to be intended use. The manufacturer is not liable for any type of damage resulting from this: the user bears the sole risk.
Unauthorised modifications on the garden shredder exclude a liability of the manufacturer for damages of any kind resulting from it.
Only persons who are familiarised with the device and informed about possible risks are allowed to prepare, operate and service this device. Repair works may only be carried out by us or by a customer service agent nominated by us.
Risidual risks
! Even if used properly, residual risks can exist even if the relevant safety regulations are complied with due to the design determined by the intended purpose.
Residual risks can be minimised if the "Safety instructions" and the "Normal intended use" as well as the whole of the operating instructions are observed.
Observing these instructions, and taking proper care, will reduce the risk of personal injury or damage to the equipment.
- Risk of injuries when protective devices which are secured so that they can only be removed with a tool are removed while the machine runs.
- Risk of injury to the fingers and hands, if your hand grasps through an opening and reaches the blade unit.
- Risk of injury to the fingers and hands, when carrying out assembly work and cleaning on the blade unit.
- Injury by the chopped material spinning away near the hopper.
- Electric shock when touching the spark plug connector while the engine runs.
- Burning when touching hot parts.
- Carbon monoxide poisoning when using the device in closed or poorly ventilated rooms.
- Impairment of hearing when working on the machine for longer periods of time without ear protection.
In addition, in spite of all the precautionary measures taken, non-obvious residual risks can still exist.
Safety instructions
Before starting this device, read and keep to the following advice. Also observe the preventive regulations of your professional association and the safety provisions applicable in the respective country, in order to protect yourself and others from possible injury.
Pass the safety instructions on to all persons who work with the machine.
① Keep these safety instructions in a safe place.
Repair works on the safety cut out must be carried out by the manufacturer or by companies appointed by the manufacturer respectively.
- Make yourself familiar with the equipment before using it, by reading and understanding the operating instructions.
- Do not use the machine for unsuitable purposes (see 'Normal intended use' and 'Working with the garden shredder').
-
Provide a safe standing position and keep at any time the balance. Do not lean forward. When placing material into the shredder, always stand on the same level as the machine.
-
Be attentive. Be careful what you do. Behave sensibly when working. Do not use the device when you are tired or under the influence of drugs, alcohol or medicaments. One moment of carelessness when using the device can result in serious injuries.
- Wear protective goggles, gloves and noise protection while working with the machine.
- Wear suitable work clothes:
- do not wear loose-fitting clothes
- slip-proof shoes
- Within his area of work the operator is responsible for third parties.
- The machine must not be operated by children or young people under 16 years of age.
- Keep children away from machine.
- Never operate the machine if other persons are in the immediate vicinity.
- Never leave the device unattended.
- Keep your workplace in an orderly condition! Untidiness can result in accidents.
- Choose a working position alongside the equipment or behind it. Never stand near the ejection opening.
- Never reach into the filling or ejection opening.
- Keep your face and body away from the filling opening.
- Do not overload the machine! You work better and safer in the given performance range.
- Be sure to operate the product with sharp knives or beaters - this will reduce the risk of kickbacks.
- Only operate the machine with complete and correctly attached safety equipment and do not alter anything on the machine that could impair the safety.
- Only start shredding when the petrol engine has reached its max. speed.
- Do not alter the revolution speed of the engine, since this controls the safe maximum operating speed, and protects the engine and all rotating parts against damage due to excess speed.
- Do not operate without the funnel.
- Do not modify the device or parts of the device respectively.
- Close machine properly before enabling engine.
- Do not wash down device with water.
Take into consideration environmental influences: - Do not use the device in moist or wet ambience.
- Do not leave the machine standing in the rain or use when raining.
- Do only work with sufficient visibility conditions. Provide for good illumination.
- To prevent danger of injury to fingers during assembly or cleaning operations wear protecting gloves.
- Stop the machine and remove the spark plug connector when
- maintenance and cleaning
- eliminating faults
- carrying out repair works
- transport and storage
- changing the blades
- leaving the garden shredder (even in case of short-term interruptions)
- If the machine's filling hopper or ejection slot is blocked stop the engine, disconnect the spark plug connector and wait until the tools are stationary before removing residual material from the filling hopper or ejection slot.
-
Check the machine for possible damage:
-
Before further use of the machine the safety devices must be checked carefully for their proper and intended function.
- Check whether movable parts function perfectly and do not stick or whether parts are damaged. All parts must be correctly installed and fulfil all conditions to ensure perfect operation of the machine.
- Damaged guards and parts must be properly repaired or exchanged by a recognized, specialist workshop; insofar as nothing else is stated in the instructions for use.
-
Damaged or illegible safety labels should be replaced immediately.
-
Store unused equipment in a dry, locked place out of the reach of children.
- Do not allow any tool key to be plugged in! Before switching on, check always that wrenches and adjusting tools are removed.
- Do not repair the device unless you are qualified for such kind of work.
Do not carry out repair operations on the machine other than those described in section "Maintenance" but contact the manufacturer or authorized customer service centres.
Local regulations - especially regarding protective measures - must be observed.
Use only original spare parts. Accidents can arise for the user through the use of other spare parts. The manufacturer is not liable for any damage or injury resulting from such action.
Safe handling with fuels

Fuels and fuel vapours are inflammable and may cause serious injury on the skin or when inhaled. Therefore be careful and provide sufficient ventilation when handling with fuels.
- Stop the engine and allow the garden shredder to cool down before fuelling it.
- Do not smoke and avoid open flames when fuelling.
- Wear gloves when fuelling.
- Do not fuel in closed rooms (risk of explosion).
- Avoid spilling of fuel or oil. Clean the garden shredder immediately when you have spilled fuel or oil. Change your clothes immediately when you have spilled fuel or oil on them.
Make sure that no fuel can come into the soil. - Carefully close the tank cap after fuelling and check that it does not get loose during operation.
- Check that there is no leakage on the tank cap and fuel lines. If there are leaks this device may not be started.
- Only transport and store fuels in containers approved and identified for this.
-
Keep children away from fuels.
-
Do not handle and store fuels close to combustible and highly inflammable materials as well as sparks and open flames.
- Go away at least three metres from the fuelling place to start the device.
Assembly
Two persons are required for assembly.
1 Close the side hopper using the four nuts M8.
2 Mount the carrying handles.
You will need: 4 pcs tallow-drop screw M8x35, 4 pcs self-locking hexagon nut, 12 pcs washer A8.4 - Ø 16, 4 pcs washer A8.4 - Ø 24.
3 Second person:
Tilt the garden shredder towards yourself.
3 Other person:
Remove the screw.
4 Put the ejection slot (7) between plate and ejection screen (6).
5 Guide the screw M8x195 through plate, ejection slot and screen.
6 Secure the screws with washer A8.4, lock washer A8 and hexagon nut M8.
7 Do not firmly tighten the hexagon nut.
Fold up the ejection slot (7).
Then install the support (12).
Install at first the supports RH and LH using the screws M8x20, washer A8.4, lock washer A8 and hexagon nut M8.
8 Then place the distance sleeve (39) and guide the screw M8x205 through it.
9 Secure the screw with washer A8.4, lock washer A8 and hexagon nut M8.
Firmly tighten all screw connections.
Then, the other person tilts the garden shredder to the opposite direction.
10 Guide the screws M8x205 through the axle support RH (38) and then through the device.
Position the distance sleeves (39) and guide the screws through them.
11 Guide the axle (10) through the axle support.
Then place on the axle support LH (37).
Secure the screws with washer A8.4, lock washer A8 and hexagon nut M8.
12 Put the wheels (11) on the axle.
13 Secure the wheels using the lock washer A5 and the wheel cap (40).
14 Remove the both screws.
15 Attach the storage box (9).
Before the first start-up
The motor of the garden shredder is supplied without petrol and oil in it.
Fuel the garden shredder as described under "Fuelling".
Fuelling
Oil
Use high-quality oil of the classes SF, SG, SH SJ or better.
Together with the recommended oil no other specific additives are needed.
Do not mix the oil with petrol.
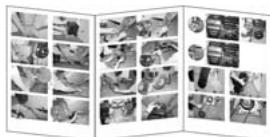
Air-cooled engines operate with higher temperatures than vehicle engines. When using non-synthetic multigrade oil types (5W-30, 10W-30, etc.) at temperatures above 4^ C a higher than normal oil consumption occurs. The oil level needs to be checked more frequently.
* When using the engine at temperatures under 4^ synthetic oil must be used. Otherwise the engine may be damaged.
When using SAE 30 oil at temperatures under 10^ it is hard to start the engine and the cylinder bore may be damaged due to insufficient lubrication.
Oil capacity: 0.6 l
Oil filling
- Remove the oil filling plug (3). 16
- Slowly pour oil into the hole.
- Tighten the oil filling plug.
- Wipe off oil residues/spilling.
Oil level checking
Remove the oil filling plug (3).
Petrol
Utmost care is required when handling fuel. Keep away Keep away smoke and open flames (risk of explosion).smoke and open flames (risk of explosion).
Clean fresh non-leaded petrol having an octane number of 85 as a minimum.
Do not fill in leaded petrol, diesel or other non-approved fuels.
Do not use petrol having a smaller octane number than 85 ROZ. This may lead to severe engine damages due to increased engine temperatures.
If you frequently operate the device at high speeds, you should use petrol with a higher octane number.
The use of unleaded petrol is recommended for environment protection reasons.
Storing fuel (petrol)
Fuels have only a limited shelf-life, they are subject to ageing. Outdated fuels and fuel mixtures may result in starting problems. Therefore, store only that quantity of fuel which you can use within a month.
Only store fuels in containers approved and identified for this. Keep fuel containers in a dry and safe area.
Make sure that fuel containers are kept out of the reach for children.
Fuelling the garden shredder
- Stop the engine and allow it to cool down.
- Wear protective gloves.
- Avoid eye and skin contact.
-
Strictly follow the instructions under "Safe handling with fuels".
-
Only fuel the garden shredder outdoors or in sufficiently ventilated rooms.
- Clean the area around the filler neck. Contamination in the tank may result in malfunction.
- Carefully open the tank cap (28) to allow possible overpressure to relax. 17
- Carefully pour fuel into the filler neck until it is approx. 4 cm below the neck's edge to allow the fuel space for expansion.
- If contaminated, clean the fuel filling filter (29). [17]
- Close the tank cap. Check that the tank cap is tight.
- Clean the tank cap and the area around it.
- Check the tank and the fuel lines for leaks.
- Before starting the engine take the machine and go away at least three metres from the fuelling place.
Start-up
- Check that the machine is completely and correctly assembled.
- To avoid toppling, place the shredder on a firm horizontal surface.
- Do not place the equipment on ground which is paved or surfaced with gravel.
-
The machine should only be operated in the open. Always maintain a safe distance (at least 2m ) from walls or other fixed objects.
Before each use, check -
there are no damages at the machine
- All screws are tight.
Before starting the engine 18
- Check the oil and fuel level (refill if required).
- Put the choke lever (25) to the position CHOKEL
- Put the throttle (24) to the position
- Put the fuel valve (2) to the position ON.
- Put the ignition switch (30) to the position ON
Starting the engine 19
- Grasp and slowly pull the cranking rope handle (22) until you feel a resistance.
- Pull the cranking rope (23) quickly and then guide it back slowly.
Do not fully pull out the cranking rope and do not allow that the rope handle strikes against the engine.
3. Put the choke lever (25) to the position I Run when the engine has started.
If the engine does not start after the first pulling operation, put the choke lever (25) to the position IRUN and repeat the step until the engine starts.
Stopping the engine 20
- Put the throttle lever (24) to the position
- Put the ignition switch (30) to the position OFF.
- Put the fuel valve (2) to the position OFF.
1 Do NOT put the choke lever (25) to the position CHOKEL to stop the engine. This may result in backfire or engine damages.
Working with the garden shredder


Do not forget!
- Choose a working position alongside the equipment or behind it. Never stand near the ejection opening.
- Longer material that is protruding from the device could spring back when it is drawn in by the blades! Observe safety distance!
- Never reach into the filling or ejection opening.
- Keep your face and body away from the filling opening.
- Never place hands, other parts of the body or clothing into the filler funnel, ejection channel or in the vicinity of other moving parts.
- Check that no chopped residues are in the filling hopper before switching on the equipment.
- Only start shredding when the petrol engine has reached its max. speed.
- Do not tip or tilt the machine when the engine is running.
- When filling, be careful that no pieces of metal, stones, bottles or other objects unintended for processing, enter the filling hopper.
- Immediately switch off the equipment and allow it to come to a stop, if foreign objects enter the filling hopper or if the equipment starts to make unusual noises or vibrates. Carry out the following checks:
inspect for damage,
- replace or repair damaged parts,
- check the equipment and tighten loose parts.
You must not repair the equipment yourself if you are unauthorized to do so.

What can I shred?
Yes:
organic household and garden waste
e. g. hedge and tree cuttings, bushes, perennial herb, dead flowers
No:
- glass, metal, plastic, plastic bags, stones, cloth, roots with soil, food left-overs, fish or meat.

What kind of material can be
shredded with the filling hopper (1) and how to feed it?
Shrub parts, leaves, organic waste and thin branches can be chopped.
Thin and long shrub parts and branches are dragged in rapidly. Release the material quickly.
Process material which contains a lot of water and tends to sticking alternately with woody material to prevent the device from getting blocked.
Do not feed too much material at the same time into the filling hopper to prevent the cutting tool from getting blocked.
Use a wooden rod to feed hardly accessible material to the cutting tool.

What kind of material can be
shredded with the side hopper (31) and how to feed it?
Thicker branches must be fed through the side hopper.
Make sure to feed the branches slowly to avoid the cutting tool from getting overloaded or blocked.

Special tips on shredding:
Branches, twigs and wood should be broken down immediately after they have been cut.
- Material of this kinds gets very hard when it is dry, and the maximum allowed branch diameter to be processed has to be reduced.
Remove any side shoots from branches with a large number of twigs.
Feed branches with larger diameter slowly.
Do not allow the shredded material to pile up too high in the area of the ejection opening. This can lead to shredded material blocking the ejection channel, and backing up to the filler opening.
Clean out the filler opening and ejection channel thoroughly if the machine becomes blocked. Before doing this, stop the engine and disconnect the spark plug connector.
Please do not exceed the maximum branch diameter specified (cutting fresh wood) for your appliance ( see p. 22). Depending on the wood's nature and freshness the maximum branch diameter the machine can process may be smaller.
The blades largely pull the material into the machine by themselves.
Immediately stop the engine when the cutting unit is blocked to prevent the engine overloading. Eliminate the fault before restarting the engine.
Maintenance and Care

Before each maintenance and cleaning work
- Stop the engine.
- Wait until the cutting device does not longer move.
- Remove the spark plug connector.

Do not carry out maintenance work close to open flames. Risk of fire.
For maintaining and cleaning, removed security devices must unconditionally be mounted properly and proved again.
Use only original parts. Other parts can result in unexpected damages and injuries.

Wear protective gloves in order to avoid injury to the hands.
Be sure to have removed any tools from the machine after completion of service work.
Maintenance and repair work other than those described in this chapter is only allowed to be carried out by service staff.
Maintenance
To guarantee a long and reliable usage of the product carry out the following maintenance works regularly.
Check the machine for:
- loose fastening elements.
- worn out or damaged parts especially V-belts, blades and beaters.
leaks from the fuel tank cap or fuel lines. - correct assembly and faultless covers and protective devices.
Tensioning the V-belt (14)
Check the V-belt's tension on a regular basis as a loose V-belt reduces the engine's speed.
The V-belt tension is correct if it can be pressed down by approx. 10mm.
- To check the V-belt tension you have to remove the belt cover (16). 21 22
- Check the V-belt tension. 23
-
For retensioning loosen the four screws on the engine. 24
-
Move the engine so that you can press down the V-belt by 10 ~mm .
- Make sure that the drive pulley (13) and the engine pulley (15) are in true alignment.
- Retighten the screws on the engine.
- Re-mount the belt cover.
Replacing the V-belt (14)
Replace damaged or too long V-belts without delay.
- Remove the belt cover (16). 21 22
- Loosen the four screws on the engine. 24
- Move the engine so that the V-belt can be removed without any problems.
- Place a new V-belt.
- Tension the V-belt by moving the engine so that you can press down the V-belt by 10mm . 23
- Make sure that the drive pulley (13) and the engine pulley (15) are in true alignment.
- Retighten the screws on the engine.
- Re-mount the belt cover.
Turning / replacing the knives (17)
Identification of dull knives:
The shredding noise indicates sluggish working.
The V-belt slips although it is tensioned.
Heavily decrease of working speed.
- Remove the screw M8x205. [25]
- Pull out the both spring cotter pins (34) and the bolt (35). [26]
- Fold down the ejection screen (6). 27
- Remove the four nuts. 27
- Open the hinged cover (19). 28 Open the hinged cover by 90^ only. This will block the knife plate.
- Turn the knife plate so that the knife is visible through the opening. [28]
- At first remove the self-locking nuts and then screw off the screws. 28
- Turn or replace the knife.
- Mount the knife with the screws and the self-locking nuts and tighten them firmly.
- Close the hinged cover using the four nuts.
- Fold up the ejection screen and fix it.
- Re-mount the distance sleeve (9) and the screw M8x205.
Replacing the counter knife (18)
- Remove the four nuts on the side hopper (31). [29]
- Remove the four nuts on the counter knife. 30
- Install a new counter knife.
- Retighten the four nuts to close the side hopper.
Turning / replacing the beaters
If the shredding performance decreases, the beaters have to be turned or replaced.
This maintenance work is only allowed to be done by our customer service.
Cleaning / replacing the air filter (21)
Clean the air filter from dust and dirt on a regular basis to prevent
- starting problems,
loss of output,
too high fuel consumption.
Clean the air filter every 25 operating hours, or more frequently in dusty environments.
- Loosen the screw and remove the cover (20). 31
- Remove the holding clamp (32) and the foam air filter (21) from the cover. 32
- Clean holding clamp, cover and air filter plate (33).
- Wash the foam air filter using water and liquid cleaner.
- Squeeze the air filter in a dry and clean cloth.
- Allow the air filter to dry well.
- Dip the air filter into engine oil and then squeeze it in a dry and clean cloth to remove surplus oil.
- Install the air filter and the holding clamp in the cover.
- Re-mount the cover.
Replace the air filter on a regular basis.
Damaged air filters must be replaced without delay.
Checking / replacing the spark plug (26)
Do not touch the spark plug or the spark plug connector while the engine is running. High voltage!
Risk of burning on the hot engine. Wear protective gloves.
Check the spark plug and the spark gap on a regular basis.
For this proceed as follows:
- Allow the engine to cool down.
- Remove the air filter cover (20). 31
- Pull the spark plug connector (27) from the spark plug. 33
- Remove the spark plug using the supplied spark plug wrench (36). 34
- Clean the spark plug when it is contaminated.
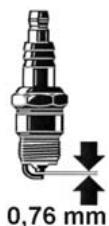
- The electrode gap must be 0.76mm
Replace the spark plug:
- every 100 hours or each season (whichever case comes first)
- when the insulating body is damaged,
- when the electrodes show excessive erosion,
- when the electrodes show excessive dirt or oil.
Use the following spark plug type:
- Champion RC12YC
or equivalent types
Checking the ignition spark
- Allow the engine to cool down.
- Remove the air filter cover (20). 31
- Pull the spark plug connector (27) from the spark plug (26). 33
- Remove the spark plug using the supplied spark plug socket spanner (36).
- Remove the spark plug.
- Firmly connect the spark plug connector.
- Adjust the engine as described in "Before starting the engine".
- Use an insulated pair of tongs to press the spark plug against the engine body (away from the spark plug hole).
- Firmly pull the cranking rope on the cranking handle.
A spark between the electrodes is a sign of proper functioning.
Silencer / exhaust outlet 38
Check the silencer regularly.
Clean the exhaust outlet (41) on a regular basis.
Oil change
Change the oil as long as the engine is still warm.
The oil must be changed after the first 5 operating hours. Then, only every 100 operating hours or once in a season.
Two persons are required.
- Remove the shroud (5) of the ejection slot. 35
- Loosen the oil drain plug (4). 36
- First person: Hold a container with a capacity of at least 0.6 litres below the oil drain plug. 37 Second person: Tilt the garden shredder to allow the oil to flow out. 37
- Thoroughly clean the area around the oil outlet.
- Retighten the oil drain plug.
- Re-mount the shroud of the ejection slot.
- Remove the oil filling plug (3).
- Slowly pour 0.6 litres of new oil (for oil type see "Fuelling") into the hole.
- Tighten the oil filling plug.
- Wipe off oil residues/spilling.
Machine blocked
Sticked material within the machine reduces the machine's performance. How to remove blockings?
- Remove the screw M8x205. [25]
- Pull out the both spring cotter pins (34) and the bolt (35). [26]
- Fold down the ejection screen (6). 27
- Remove all contamination from the machine.
- Fold up the ejection screen and fix it.
- Re-mount the distance sleeve (9) and the screw M8x205.
Care
Clean the machine thoroughly after each application so that the faultless function is kept. To maintain their efficiency and a long life, observe the following:
- Keep vent slits clean and free from obstructions.
- Check the locking screws (tighten where necessary).
Clean the device after shredding.
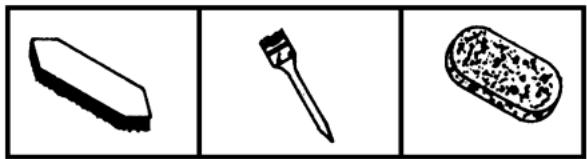
To clean your product only use a warm moist cloth and a soft brush.
Never use cleaning agents or solvents. Otherwise the device may be damaged irreversibly. Plastic parts may be corroded by chemicals.
- Do not clean the machine with running water or high-pressure cleaners.
- After each operation treat bare metal parts with an environment-compatible biodegradable spray oil to protect them against corrosion.
Maintenance schedule
| Maintenance work | Before each use | After each use | After the first 5 hours | Every 25 hours | Every 50 hours | Every 100 hours | If required | Each season |
| Check fuel and oil level | ■ | |||||||
| Oil change | ■ | ■ | ■ | |||||
| Change fuel | ■ | |||||||
| Clean fuel filling filter | ■ | |||||||
| Change fuel filling filter | ■ | |||||||
| Cleaning the air filter | ■ | |||||||
| Replace air filter | ■ | |||||||
| Check the spark plug and the spark plug connector | ■ | ■ | ||||||
| Replace the spark plug | ■ | |||||||
| Check the machine | ■ | |||||||
| Clean the machine | ■ | |||||||
| Check the V-belt | ■ | |||||||
| Check the knives | ■ | |||||||
| Replace the knives | ■ |
Dislocation / Transport
Before each change to another work place
Stop the engine, disconnect the spark plug connector and close the fuel valve.
Before each transport:
Stop the engine, disconnect the spark plug connector, close the fuel valve and allow the engine to cool down.
Drain the fuel tank to prevent fuel spilling.
Secure the machine within or on the vehicle against getting out of place.
Storage / Long-term storage
- Keep unused machines in a dry and closed area out of the reach of children. Do not store them close to a cooker, oven or hot-water apparatus with permanent flame or other spark-generating devices.
- Allow the engine to cool down before storing the machine.
Prior to a longer period of storage carry out the following to extend the machine's service life and ensure an easy operating:
thoroughly clean the device
treat all movable parts with an environmentally friendly oil
① Never use any grease!
Remove the spark plug connector.
Remove the spark plug. Then fill a little amount of engine oil (approx. 5-10 ml) into the cylinder. Slowly pull out the cranking rope handle to distribute the oil. Re-mount the spark plug.
① Before any use of the device you have to remove and clean the spark plug.
Empty the fuel tank completely.
① Dispose of remaining fuel in an environmentally compatible manner.
Operatethe engine until the carburettor is empty.
Change the oil.
Check the machine for perfect condition to ensure a safe use of it after a longer period of storage.
Technical data
| GHB | |
| Type | 760 |
| Engine | 4-stroke petrol |
| Engine rating | 4,8 kW (6,5 PS) |
| max. engine speed n0 | 3600 min-1 |
| Max. cutting speed | 2000 min-1 |
| Sound pressure level LPA | 96 dB (A) |
| measured sound power level LWA | 108,4 dB (A) |
| guaranteed sound power level LPA | 110 dB (A) |
| Max. branch diameter (only for freshly cut wood) | Filling hopper: Ø 10 mm Side hopper: Ø 76 mm |
| Weight | 83.5 kg |
| Fuel: | Petrol (unleaded) |
| Oil: | Classification SF, SG, SH, SJ or better |
| Oil tank capacity: | 0,6 l |
Before each fault elimination:
- switch off device
- Wait for standstill of the garden shredder.
- Remove the spark plug connector.
| Fault | Possible cause | Remedy |
| Engine does not start. | Engine cold. Choke lever put to IRUN. | Put choke lever to CHOKEL. |
| Throttle lever put to . | Put throttle lever to . | |
| Ignition switch put to OFF. | Put ignition switch to ON. | |
| Fuel valve put to OFF. | Put fuel valve to ON. | |
| No fuel supply | Check the fuel quantity | |
| Fuel old or contaminated. | Drain the fuel into a container outdoors. Fill the tank with fresh and clean fuel. | |
| Fault in the fuel line | Check the fuel line for kinks or damages | |
| Spark plug connector not placed on. | Place on the spark plug connector. | |
| No ignition spark. | a) Clean or replace the spark plug. b) Check the ignition cable. c) Fault cannot be eliminated? Get the manufacturer or authorised service staff to check the ignition system. | |
| Engine flooded. | Screw off, clean and dry the spark plug. Then pull the cranking rope several times and reinstall the spark plug. | |
| Carburettor defective | Contact the manufacturer or the responsible customer service respectively. | |
| Engine defective. | Replace the engine. | |
| Internal fault. | Contact the manufacturer or the responsible customer service respectively. | |
| Engine is sputtering. (runs erratically) | Choke lever put to CHOKEL. | Put choke lever to CHOKEL. |
| Spark plug connector not firmly placed on. | Firmly place on the spark plug connector. | |
| Vent in the tank cap blocked. | Clean the tank cap and the vent. | |
| Fuel old or contaminated. | Drain the fuel into a container outdoors. Fill the tank with fresh and clean fuel. | |
| Incorrect carburetor adjustment. | Have the caburetor adjusted correctly. | |
| Decreasing engine power. | Machine overloaded. | a) Reduce material feeding. b) Do not exceed the max. branch diameter. |
| Machine is blocked. | Thoroughly clean inside the machine. | |
| Cutting performance decreases. | Knife edges became blunt. | Turn the knife or replace it with a new set of knives. |
| Beaters worn. | Replace the beaters. | |
| V-belt slipping. | Tension the V-belt. | |
| Branches are not automatically drawn in into the side hopper. | Knife edges became blunt. | Exchange knives. |
| Unusual noise or vibrations. | Screws, nuts or other parts loosened. | Tighten the parts. If the parts can not be tightened or noises remain: Contact the manufacturer or the responsible customer service respectively |
| Pos.-no. | Order-No. | Designation |
| 1 | 385605 | Filling hopper |
| 2 | Fuel valve | |
| 3 | Oil filling plug | |
| 4 | Oil drain plug | |
| 5 | 385606 | Ejection shroud |
| 6 | 385607 | Ejection screen |
| 7 | 375608 | Ejection slot |
| 8 | Carrying handle | |
| 9 | 3856011 | Storage box |
| 10 | 385612 | Axle |
| 11 | 385613 | Wheel |
| 12 | 385614 | Support |
| 13 | Drive pulley | |
| 14 | 385616 | V-belt |
| 15 | Engine pulley | |
| 16 | 385618 | Belt cover |
| 17 | 385619 | Knife |
| 18 | 385620 | Counter knife |
| 19 | Hinged cover | |
| 20 | Air filter cover | |
| 21 | 385640 | Air filter |
| 22 | Cranking rope handle | |
| 23 | Cranking rope | |
| 24 | Throttle lever |
| Pos.-no. | Order-No. | Designation |
| 25 | choke lever. | |
| 26 | 385639 | Spark plug |
| 27 | Spark plug connector | |
| 28 | Tank cap | |
| 29 | Fuel inlet filter | |
| 30 | Ignition switch | |
| 31 | 385622 | Side hopper |
| 32 | Holding clamp for air filter | |
| 33 | Air filter plate | |
| 34 | 385623 | Spring cotter pin |
| 35 | 385624 | Bolt |
| 36 | Spark plug socket spanner | |
| 37 | 385625 | Axle support LH |
| 38 | 385625 | Axle support RH |
| 39 | 385626 | Distance sleeve |
| 40 | 385627 | Wheel cap |
| 41 | Silencer / exhaust outlet | |
| 42 | 385628 | Splash guard (filling hopper) |
| 43 | 385631 | Splash guard (side hopper) |
| 44 | 385602 | Safety label 1 |
| 45 | 385603 | Safety label 2 |
| 46 | 382316 | Safety label 3 |
| 47 | 385604 | Safety label 4 |
Ordering spare parts:
available from the manufacturer or dealer
orders must quote the following informations:
colour of device
- spare parts no. / designation
quantity required
- garden shredder model
- garden shredder type
Example:
orange, 385606 / Ejection shroud, 1, GHB 760
Guarantee
Please observe the enclosed terms of guarantee.
2004/108/CE e 2000/14/CE.
11 Schuif de as (10) door de asdrager.
Steek dan de asdrager links (37) op.
2004/108/ES a 2000/14/ES.
A. Pollmeier, Jednatel
Obsah dodávky
