
KS 88 E - Track saw FESTOOL - Free user manual and instructions
Find the device manual for free KS 88 E FESTOOL in PDF.

| Product type | Track saw |
| Brand | FESTOOL |
| Model | KS 88 E |
| Power | 1600 W |
| No-load speed | 1400 - 3400 min⁻¹ (continuously adjustable) |
| Blade diameter | 260 mm |
| Blade bore | 30 mm |
| Weight | 20.7 kg |
| Protection class | II (double insulation) |
| Max cutting capacity (0°/0°) | 88 x 305 mm |
| Max cutting capacity (45°/0°) | 88 x 215 mm |
| Max cutting capacity (0°/45° right) | 35 x 305 mm |
| Max cutting capacity (0°/45° left) | 55 x 305 mm |
| Horizontal tilt | 0° to 60° right, 0° to 45° left (with detents) |
| Vertical tilt | −47° to +47° (depending on selector) |
| Main functions | Cross cuts, miter cuts, bevel cuts, grooving |
| Blade change | Fastfix system with spindle lock |
| Safety devices | Tilting protective guard, safety switch, slip clutch |
| Sound pressure level (LpA) | 88 dB(A) |
| Sound power level (LwA) | 101 dB(A) |
| Vibrations (emission value) | < 2.5 m/s² |
| Dust extraction | Connection for vacuum cleaner (Ø 27 or 36 mm), flexible chip guard |
| Maintenance | Cleaning of ventilation slots, replacement of table insert, auto-stop carbon brushes |
| Warranty | 24 months in EU (minimum 12 months depending on country) |
Frequently Asked Questions - KS 88 E FESTOOL
User questions about KS 88 E FESTOOL
0 question about this device. Answer the ones you know or ask your own.
Ask a new question about this device
Download the instructions for your Track saw in PDF format for free! Find your manual KS 88 E - FESTOOL and take your electronic device back in hand. On this page are published all the documents necessary for the use of your device. KS 88 E by FESTOOL.
USER MANUAL KS 88 E FESTOOL
links: 0^ , 15^ , 22,5^ , 30^ , 45^
rechts: 0^, 15^, 22, 5^, 30^, 45^, 60^
45^ / 45^ links - 55 x 215
Circular cross-cut saw KAPEX KS 120 EB/ KS 88 E
Table of contents
1 Symbols. 16
2 Technical data 16
3 Machine features 16
4 Intended use 16
5 Safety instructions. 17
6 Commissioning 18
7 Adjustments 18
8 Operation 20
9 Service and maintenance 21
10 Accessories. 23
11 Disposal 23
12 Warranty 23
13 EU Declaration of Conformity 23
1 Symbols

Warning of general danger.

Read the Operating Instructions/Notes!
Danger area! Keep hands, fingers and arms away from this area.

Wear protective goggles.
Wear ear protection.

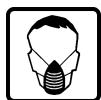
Wear a dust mask.
Wear protective gloves.

Caution: laser beams!

Dispose of the machine, accessories and packaging at an environmentally responsible recycling centre.
2 Technical data
| Power | 1600 W |
| Rotational speed (idle) | 1400 - 3400 rpm |
| Tool spindle, dia. | 30 mm |
| Weight | |
| KS 120 EB | 21.5 kg |
| KS 88 E | 20,7 kg |
| Protection class | 回/II |
See section 8 "Operation" for the maximum workpiece dimensions.
The specified illustrations can be found at the beginning an at the end of the operating instructions.
Components on illustrations marked with * are only included in the scope of delivery of the KS 120 EB.
3 Machine features
(1.1) Hand grip
[1.2] On/off switch
[1.3] Switch-on lock
(1.4) Lever for cutting depth limiter
(1.5) Rotary knob for clamping the guide fixture
(1.6) Transport safety device
(1.7) Scale for litre cuts (vertical)
(1.8) Scale for mitre cuts (horizontal)
(1.9) Clamp lever for litre cuts (horizontal)
(1.10) Stop lever for preset litre cut angles (horizontal)
(1.11) Rotary handle for fine adjustment of mitring angle (vertical) *
(2.1) On/off switch for laser*
(2.2) Adjusting wheel for rotational speed
(2.3) Fastfix spindle lock
(2.4) Clamping lever for stop ruler
(2.5) Release lever for special cutting position*
(2.6) Lever for special cutting position*
(2.7) Cable holder with integral handle
(2.8) Clamp lever for litre cuts (vertical)
(2.9) Selector switch for litre angle range (vertical)
- Only included in the scope of delivery of the KS 120 EB.
4 Intended use
The electric power tool is a stationary unit designed for sawing blocks of wood, plastic, aluminium profiles and similar materials.
Do not process other materials, in particular steel, concrete and mineral materials.
The electric power tool is designed and approved for use by trained persons or specialists only.
The user bears the responsibility for damage and accidents caused by improper use.
Other risks
In spite of compliance with all relevant design regulations, dangers may still present themselves when the machine is operated, e.g.:
- Workpiece parts being thrown off
- Parts of damaged tools being thrown off
- Noise emission
- Dust emission
5 Safety instructions
5.1 General safety instructions

WARNING! Read all safety warnings and all instructions. Failure to follow the warn-
ings and instructions may result in electric shock, fire and/or serious injury.
Save all warnings and instructions for future reference.
- Never allow children to use the machine.
- Before using the machine, make yourself sufficiently familiar with the application, setting and operation of the machine.
5.2 Machine-related safety instructions
Safety precautions
- Always use original Festool tools (in accordance with EN 847-1).
- For reasons of safety, the dimensions of the saw blades should be as follows: saw blade diameter 260 ~mm , location hole 30 ~mm , standard blade thickness 1.8 ~mm . Using saw blades with different dimensions increases the risk of injury for the user and the machine may become damaged because the integrated sliding clutch may not activate correctly.
- To guarantee safe clamping of the workpieces, they must have a minimum length of 200 ~mm .
- Use only correctly sharpened tools without damage or deformation. The maximum rotational speed specified on the tool must be observed.
- Select the saw blade suitable for the material you wish to work on.
- Do not use saw blades made of high-speed steel.
- Do not use spacers or spindle rings.
- Ensure the work area has adequate lighting.
- Attach the machine securely to the worktop or a bench.
- To minimise the release of dust, the machine should be connected to a suitable extraction unit. All dust extraction elements (exhaust hoods etc.) must be properly set.
- Wear suitable personal protective equipment: ear protection to reduce the risk of hearing loss; safety goggles; a dust mask to prevent inhalation of harmful dust; protective gloves when working with raw materials and when changing tools.
- Only transport the tool in suitable packaging.
Maintenance and repair
- Replace a tabletop insert if worn.
- Only use the machine if all protection devices are in their correct positions, the machine is in good condition and has been well maintained.
- Faults on the machine, including the separating
guards or the tool, must be reported to maintenance staff immediately upon discovery. The machine must not be used until the fault has been eliminated.
- If the machine is equipped with a laser, ensure it is always replaced by a laser of the same type. Repairs must only be made by the laser manufacturer or an authorised agent.
Safe work
- Only process material for which the machine has been approved. Aluminium must only be sawed with the special saw blades from Festool designed for this purpose.
- Never process material containing asbestos.
- Ensure that the floor around the machine is level, clean and free of loose objects (e.g. chips and offcuts).
- Keep hands, fingers and arms well away from the rotating tool. Never reach into the area of the saw blade behind the stop.
-
Always assume the correct position before starting work:
-
front at the operating end,
-facing the machine, -
next to the cutting line.
-
Do not remove offcuts or other workpiece parts from the cutting area while the machine is still running or before the saw blade stops.
- Use a suitable device to support long workpieces and ensure that they are horizontal.
- Never allow another person to hold or support the workpiece when sawing. Always clamp the workpiece in a suitable device.
- Observe the specified maximum workpiece dimensions.
- Observe the instructions for lifting and transporting the machine.
- Observe the instructions for installing and operating the machine.
- Ensure the permissible dimensions of the saw blade are not exceeded. Never use reducers or adapters to secure the saw blade on the tool spindle.
- Do not saw wood containing metal parts such as nails, screws, etc.
- Do not apply lateral force to the saw blade.
- Always saw only one workpiece at a time. It is not possible to safely secure several workpieces; they can displace each other during sawing and block the saw blade.
- If the saw blade is blocked, switch the machine off immediately and disconnect the mains plug. Do not remove the jammed workpiece until you have done this.
5.3 Emission levels
Levels determined in accordance with EN 61029 are typically:
Sound pressure level 88 dB(A)
Noise level 101 dB(A)
Measuring uncertainty allowance K = 3 ~dB

Wear ear protection.
Measured acceleration < 2.5 m/s²
The emission values specified (vibration, noise) were measured in accordance with the test conditions stipulated in EN 61029 and are intended for machine comparisons. They are also used for making preliminary estimates regarding vibration and noise loads during operation.
The emission values specified refer to the main applications for which the power tool is used. If the electric power tool is used for other applications, with other tools or is not maintained sufficiently prior to operation, however, the vibration and noise load may be higher when the tool is used. Take into account any machine idling times and downtimes to estimate these values more accurately for a specified time period. This may significantly reduce the load during the machine operating period.
6 Commissioning Warning
- Observe the mains voltage: The voltage and frequency of the power source must comply with the specifications on the machine's identification plate.
- In North America, only Festool machines with the voltage specifications 120 ~V / 60 ~Hz may be used.
Prior to initial operation:
- Remove the transport safety device (4.4) from the guide rod.
On/Off switch
- Press the on/off switch (1.2) as far as possible to unlock the saw unit and the pivot guard.
- Press the switch-on lock (1.3).
- Press the on/off switch (1.2) all the way in to start the machine.
- Release the on/off switch again to switch off the machine.
7 Adjustments

Always pull the plug out of the socket before performing any type of work on the machine.
KS 120 EB only: Replace the laser warning sticker (3.1) with the relevant accompanying warning sticker in your language.
7.1 Transport
Securing the machine (transport position)
- Press the on/off switch (4.1).
- Swivel the saw unit downwards until it reaches the fence.
- Press the lock (4.2). The saw unit now remains in the lower position.
- Tighten the rotary knob (4.3) to secure the saw unit in the rear position.
- Wind up the mains cable into the cable holder (5.5) before transporting.
- Stow away the Allen key (5.4) and the bevel (5.3) (KS 120 EB only) in the holders provided.
! Never carry or lift the machine by the movable pivot guard (5.1).
Carry the machine by the edge of the saw table (5.2) and the handle (5.5) in the cable holder.
Unlocking the machine (working position)
- Push the saw unit down slightly and remove the transport safety device (4.2).
- Swivel the saw unit upwards.
- Unscrew the rotary knob [4.3].
7.2 Mounting the machine
Always pull the plug out of the socket before performing any type of work on the machine.
Before using the machine, set up on a level, stable work surface (e.g. the underframe UG-KAPEX, the multifunction table MFT or a worktop).
The following assembly options are available:
Fastening: Secure the machine on the work surface using four screws. Use the holes (6.1) on the four support points on the saw table.
- Clamps: Secure the machine on the work surface using four clamps. The flat surfaces (6.2) on the four saw table support points are used as clamping surfaces.
Clamping set (for MFT): Secure the machine on the Festool multifunction table MFT using the clamping set (6.4, 494693). Use the two screw holes (6.3).
Underframe UG-KAPEX
Secure the machine on the underframe as described in the assembly instructions enclosed with the underframe.
7.3 Changing tools Risk of accident
-
Always pull the mains plug out of the socket before changing blades.
-
Actuate the spindle lock (7.2) only after the saw blade has come to rest.
- The saw blade becomes very hot during operation; do not touch it before it has cooled down.
- Always wear protective gloves during tool change due to the risk of injury from the sharp tool cutters.
Removing saw blades
- Move the machine to working position.
- Push in the spindle lock (7.2) and turn 90^ clockwise.
- Unscrew the screw (7.8) completely using the Allen key (7.9) (left-handed thread).
- Press the on/off switch (7.3) to unlock the pivot guard.
- Open the pivot guard (7.4) completely.
- Remove the clamping flange (7.7) and the saw blade.
Installing saw blades
- Clean all parts before installing them (saw blade, flanges, screw).
- Place the saw blade on the tool spindle (7.5).

Ensure that the directions of rotation of the saw blade (7.6) and machine (7.1) correspond.
- Secure the saw blade with the flange (7.7) and the screw (7.8).
- Tighten the screw (7.8) (left-handed thread).
- Push in the spindle lock (7.2) and turn 90^ anticlockwise.
7.4 Inserting workpiece clamps
- Insert the workpiece clamp (8.1) in one of the two holes (8.2). The clamping fixture must face forwards.
- Turn the workpiece clamp until the clamping fixture is facing forwards.
7.5 Dust extraction
Harmful/toxic dusts can be produced during your work (e.g. lead-containing paint, some types of wood and metal). Contact with these dusts, especially inhaling them, can represent a hazard for operating personnel or persons in the vicinity.
- Comply with the safety regulations that apply in your country.
- Connect the electric power tool to a suitable extraction system.
- To protect your health, wear a P2 protective mask.
A Festool dust extractor with an extractor hose diameter of 36mm or 27mm (36 mm recommended due to the reduced risk of clogging) can be connected to the extractor connector (9.1)
The flexible chip deflector (9.2) improves dust and
chip collection. Always work with a chip deflector fitted.
The chip deflector is attached directly to the protective cover via the bracket (10.1). The hooks (10.2) on the bracket must slot into the recesses (10.3) on the protective cover.
7.6 Workpiece fence
Adjusting the stop ruler
When making litre cuts, adjust the stop rulers (11.1) so that they do not impede the pivot guard or come into contact with the saw blade.
- Open the clamping lever (11.2).
- Slide the stop ruler until the shortest distance from the saw blade is max. 4.5 ~mm .
- Close the clamping lever again.
Removing the stop ruler
For certain litre cuts, one of the stop rulers may need to be removed otherwise it will collide with the saw unit.
- Turn the screw (11.3) as far as possible into the threaded hole (downwards).
- You can now slide out the stop ruler sideways.
- After inserting the stop ruler again, unscrew the screw three turns.
Auxiliary stop
You can insert an auxiliary stop made from wood (12.2) into the holes (12.1) on each stop ruler to enlarge the fence surface. This will allow you to position larger workpieces more securely.
Remember the following:
- The screws for securing the auxiliary stops must not protrude above the surface.
- The auxiliary stops should be used only for 0^ cuts.
- The auxiliary stops should not affect the function of the protective covers.
7.7 Horizontal litre angles
You can set any horizontal litre angle between 50^ (on the left) and 60^ (on the right). Alternatively, you can use the standard preset litre angles.
The arrow on the pointer (13.2) indicates the current horizontal litre setting. The two marks on the right and left of the pointer arrow allow you to adjust the angle more accurately to half a degree. The two marks must be congruent with the straight lines on the scale.
Standard horizontal metre angles
The following preset litre angles are available:
left: 0^, 15^, 22.5^, 30^, 45^
right: 0^, 15^, 22.5^, 30^, 45^, 60^
- Move the machine to working position.
- Pull the clamp lever (13.5) upwards.
-
Push the stop lever (13.4) downwards.
-
Turn the saw base to the desired metre angle.
- Release the stop lever. The stop lever must latch into place.
- Push the clamp lever downwards.
Other horizontal metre angles
- Move the machine to working position.
- Pull the clamp lever (13.5) upwards.
- Push the stop lever (13.4) downwards.
- Turn the saw base to the desired metre angle.
- Push the clamp lever downwards.
- Release the stop lever.
7.8 Vertical litre angles
- Move the machine to working position.
- Open the clamping lever (14.1).
- Turn the selector switch (14.2) to the desired setting range (0^ - 45^, + / - 45^ , or + / - 47^ ).
- Swivel the saw unit until the pointer (14.3) indicates the desired litre angle. KS 120 EB only: You can adjust the vertical litre angle more accurately using the fine adjustment rotary handle (14.4).
- Close the clamping lever (14.1).
7.9 Special cutting position (KS 120 EB only)
Apart from the standard position for cutting or trimming boards/panels, the machine also has a special cutting position for trimming strip material up to 120 ~mm in height.
- Pull the saw unit forwards.
- Push the lever (15.3) down.
- Slide the saw unit back until the metal bracket (15.1) hooks into the rear opening on the saw unit.
- In this position, you can trim strip material up to 120 ~mm in height against the fence. The guiding function and the vertical swivel function on the circular cross-cut saw are deactivated how-ever.
- To move the machine back to its normal position, push the release lever (15.2) and pull the saw unit forwards. The metal bracket (15.1) unhooks itself and the lever (15.3) moves back.
7.10 Cutting depth limiter
The vertical swivelling range of the saw unit can be adjusted via the stepless cutting depth limiter, allowing you to groove or form workpieces.
① Note that the grooved section is limited: Infinitely variable adjustments are only possible between 0 and 45 ~mm . The maximum possible length of the groove is also limited. Example: with a cutting depth of 48 ~mm and a workpiece thickness of 88 ~mm , this range is between 40 and 270 ~mm .
- Move the machine to working position.
- Move the cutting depth limiter lever (16.1) down until it slots into position. The saw unit can now be moved down only as far as the preset cutting depth.
- Turn the lever for the cutting depth limiter to set the required cutting depth.
- To deactivate the cutting depth limiter, move the cutting depth limiter lever up again.
7.11 Fixed horizontal position
Turn the rotary knob (16.2) to clamp the saw unit in any position along the guide rod (16.3).
7.12 Switching on the laser (KS 120 EB only)
The machine has two lasers which the mark the kerf on the right and left of the saw blade, allowing you to align the workpiece on both sides (left or right side of the saw blade or kerf).
- Press the button (2.1) to switch the laser on and off. If the machine is not used for 30 minutes, the laser switches off automatically and must be restarted if needed again.
8 Operation
! Risk of accidents
- Before starting work, make sure that the saw blade cannot touch the stop ruler, workpiece clamp, screw clamps or other machine parts.
- Do not cross your hands in front of the saw unit; never hold the workpiece with your left hand to the right of the saw blade and vice versa.
- Do not overload the machine so much that it stops.
- Observe the specified working position.
Maximum workpiece dimensions
Mitre angle as per scale,
horizontal/vertical - height x width [mm] 0^ / 0^ - special cutting position 120 × 60 (KS 120 EB only) 0^ / 0^ - 88 × 305 45^ / 0^ - 88 × 215 0^ / 45^ right - 35 × 305 0^ / 45^ left - 55 × 305 45^ / 45^ right - 35 × 215 45^ / 45^ left - 55 × 215
8.1 Clamping workpieces
! Risk of accidents
-
Always use the workpiece clamp to secure workpieces. The holding rod (17.2) must be positioned securely on the workpiece. (Note: auxiliary tools may be needed depending on the contour of the workpiece, e.g. curved contours).
-
Never machine workpieces that are to small to clamp properly.
- Make sure that the saw blade cannot pull the workpiece backwards into the gap between the saw blade and the stop ruler. Users are at particular risk when performing horizontal mitre cuts.
- Reinforce very thin workpieces (24.2) by sawing them together with an additional strip (24.2). Very thin workpieces can wobble or break when being cut.
Procedure
- Place the workpiece on the saw table and push it against the stop ruler.
- Release the lever (17.1) for the workpiece clamp.
- Turn the workpiece clamp until the holding rod (17.2) is over the workpiece.
- Lower the holding clamp onto the workpiece.
- Close the clamping lever (17.1).
8.2 Speed control
You can regulate the rotational speed steplessly between 1400 and 3400rpm using the adjusting wheel (2.2). This enables you to optimise the cutting speed to suit the respective material.
Recommended position of the adjusting wheel
| Wood | 3 - 6 |
| Plastic | 3 - 5 |
| Fibreboard materials | 1 - 3 |
| Aluminium and non-ferrous profiles | 3 - 6 |
8.3 Cutting without guiding action
- Make the required adjustments to the machine.
- Secure the workpiece.
- Slide the saw unit backwards up to the fence (towards the workpiece stop) and close the rotary knob (1.5) for clamping the guide fixture, or secure the saw unit in the special cutting position (KS 120 EB only).
- Switch on the machine.
-Hold the saw unit by the handle (1.1), guide slowly downwards and cut through the workpiece at an even rate of advance. - Switch off the machine and wait until the saw blade stops completely.
- Swivel the saw unit upwards again.
8.4 Cutting with guiding action
- Make the required adjustments to the machine.
- Secure the workpiece.
- Draw the saw unit forwards along the guide rods.
-
Switch on the machine.
-
Hold the saw unit by the handle (1.1) and guide slowly downwards.
- Push the saw unit backwards at an even rate of advance and cut the workpiece.
- Switch off the machine.
- Wait until the saw blade stops completely and then swivel the saw unit upwards.
8.5 Bevel (KS 120 EB only)
You can use the bevel to record any angle (e.g. between two walls) and transfer the dissecting angle to the circular cross-cut saw. Available as accessories.
Interior angle
- Open the clamp [18.2].
- Place the bevel with the two legs (18.1) against the interior sides of the corner.
- Close the clamp (18.2).
- Place the bevel with one leg on a stop ruler attached to the circular cross-cut saw.
- To set the dissecting angle (horizontal mitre angle), swivel the saw unit until the laser beam is congruent with the line (19.1) on the bevel.
Exterior angle
- Open the clamp (18.3).
- Slide the aluminium profile (18.4) on both legs forwards.
- Place the bevel with the two legs (18.4) against exterior sides of the corner.
- Close the clamp (18.3).
- Slide back the aluminium profile on both legs.
- Place the bevel with one leg on a stop ruler attached to the circular cross-cut saw.
- To set the dissecting angle (horizontal mitre angle), swivel the saw unit until the laser beam is congruent with the line (19.1) on the bevel.
9 Service and maintenance

Always pull the plug out of the socket before performing any type of work on the machine!

All maintenance and repair work which requires the motor housing to be opened, must only be carried out by an authorised service workshop.

Damaged safety devices and parts should be repaired or replaced by an authorised service centre unless otherwise specified in the operating instructions.
To ensure constant air circulation, always keep the cooling-air openings in the motor housing clean and free of blockages.
The machine is equipped with self-disconnecting special carbon brushes. If they are worn, power is interrupted automatically and the machine comes
to a standstill.
- Clean the tabletop insert [20.1] regularly and remove wood chips, dust deposits and workpiece offcuts from the extraction channel on the chip deflector (see Fig. 10).
9.1 Adjusting the laser (KS 120 EB only)
If the laser beams do not line up with the cutting edge, you can adjust both of the lasers.
Use an Allen key screwdriver (size 2.5) to do this.
- Pierce the points (3.2 to 3.7) marked on the sticker using the Allen key screwdriver to reveal the adjusting screws located underneath.
- The laser beam factory settings are correct. Only turn the adjusting screws when indicated.
- Place a test workpiece on the machine to check the laser.
- Cut a groove in the workpiece.
- Swivel the saw head upwards and check the setting.
Laser beam is not visible
- First check whether the laser is switched on. If not, press the button (2.1) to switch on the laser.
Identify which laser beam is not visible. - Turn the adjusting screws for the left (3.3) and right (3.5) laser until the laser beam shines on the workpiece.
- As described, first (a) adjust the laser beam so it is parallel with the scribe line, then (b) adjust the inclination angle and finally (c) adjust the axial displacement of the laser beam.
a) Laser beam is not parallel with the scribe line [Fig. 3A]
Adjust until parallel.
Left laser beam Adjusting screw (3.4)
Right laser beam Adjusting screw (3.6)
b) Laser beam strays off line when workpiece trimmed towards the left or right [Fig. 3B]
Adjust the inclination angle until the laser beam no longer strays off line when workpieces are trimmed.
Left laser beam Adjusting screw (3.3)
Right laser beam Adjusting screw (3.5)
c) Laser beam is not positioned on the cut [Fig. 3C]
Adjust the axial displacement.
Left laser beam Adjusting screw (3.2)
Right laser beam Adjusting screw (3.7)
9.2 Correcting horizontal metre angles
If the pointer (13.2) no longer rests on the preset litre angle values, you can loosen the screw (13.1) and readjust the pointer.
If the actual (sawn) litre cut deviates from the preset value, you can correct this value accordingly:
- Engage the saw unit in the 0^ position.
- Loosen the three screws (13.3) that secure the scale to the saw table.
- Slide the scale together with the saw unit until the actual value is 0^ . You can check this by setting an angle between the stop ruler and the saw blade.
- Tighten the three screws (13.3) again.
- Check the angle setting by making a test cut.
9.3 Correcting vertical metre angles
If the actual value no longer corresponds with the preset value, you can correct this value accordingly:
- Engage the saw unit in the 0^ position.
- Open both screws (23.1).
- Swivel the saw unit until the actual value is 0^ . You can check this by setting an angle between the saw table and the saw blade.
- Tighten the two screws (23.1) again.
- Check the angle setting by making a test cut. If the pointer (22.2) no longer rests on the preset value, you can loosen the screw (22.1) and readjust this value.
9.4 Replacing the tabletop insert
Never work with a worn table insert (20.1), replace it with a new one.
-To replace the table insert, unscrew the six screws (20.2).
9.5 Cleaning or replacing window for laser (KS 120 EB only)
The window (21.2) for protecting the laser can become dirty during operation. It can be removed for cleaning or replacement.
- Release the screw (21.5) by approx. 2 rotations.
- Press the window at the same time in the directions (21.3) and (21.4).
- Remove the window.
- Clean the window or replace it with a new one.
- Fit the cleaned/new window. Both of the pegs (21.1) on the window must snap into the recesses of the upper hood as shown in Fig. 21.
- Tighten the screw (21.5).
10 Accessories
Use only original Festool accessories and Festool consumable material intended for this machine because these components are designed specifically for the machine. Using accessories and consumable material from other suppliers will most likely affect the quality of your working results and limit any warranty claims. Machine wear or your own personal workload may increase depending on the application. Protect yourself and your machine, and preserve your warranty claims by always using original Festool accessories and Festool consumable material!
Festool offers you a comprehensive range of accessories for your circular cross-cut saw:
- Saw blades for different materials.
- Trimming attachment (workpiece support surface with integral measurement scale): allows you to support and machine long workpieces accurately.
- Cornice stop: support for sloping strip material and cornices.
Other accessories and order numbers for accessories and tools can be found in the Festool catalogue or on the Internet under www.festool. com.
11 Disposal
Do not throw the power tool in your household waste! Dispose of the machine, accessories and packaging at an environmentally-responsible recycling centre! Observe the valid national regulations.
EU only: European Directive 2002/96/EC stipulate that used electric power tools must be collected separately and disposed of at an environmentally responsible recycling centre.
12 Warranty
For our tools, we give warranty for material and production defects in accordance with the locally applicable legal provisions, but in any case for at least 12 months. Within the EU member states, the warranty period is 24 months (verification through invoice or delivery note). Damage caused by, in particular, natural wear, overloading, incorrect handling, or damage caused by the operator, or damage caused through use of the equipment contrary that specified in the Operating Instructions, or damage which was known at the time of purchase, is not covered by the warranty. Furthermore, damage caused by the use of nonoriginal accessories and consumable materials
(e.g. sanding pads) is also excluded. Complaints can only be recognised if the tool is returned while still assembled to the supplier or an authorised Festool Customer Service workshop. Keep the Operating Instructions, Safety Instructions, Spare Parts List and purchase receipt in a safe place. Otherwise the respective, current warranty conditions of the manufacturer shall apply.
Note
Due to continuous research and development work, we reserve the right to make changes to the technical content of this documentation.
13 EU Declaration of Conformity
| Circular cross-cut saw | Serial no. | ||
| KS 120 EB | 495773, 495774, 495775, 495776, 495777 | ||
| KS 88 E | 496868, 496869, 496871, 496872 | ||
| Year of CE mark | KS 120 EB | 2007 | |
| KS 88 E | 2009 | ||
We solely declare that this product conforms with the following standards and normative documents: EN 61029-1, EN 61029-2-9, EN 55014-1, EN 55014-2, EN 61000-3-2, EN 61000-3-3 in accordance with the regulations in Directives 2004/108/EC, 2006/42/EC.
p9a. D. Jdannn Siniw
Dr. Johannes Steimel 22.01.2010
Head of Research, Development and Technical Documentation
REACH for Festool products, their accessories and consumables
REACH is a European Chemical Directive that came into effect in 2007. As “downstream users” and product manufacturers, we are aware of our duty to provide our customers with information. We have set up the following website to keep you updated with all the latest news and provide you with information on all the materials used in our existing products: www.festool.com/reach
Scie guidée
KAPEX KS 120 EB / KS 88 E
Sommaire
links: 0^, 15^, 22, 5^, 30^, 45^
rechts: 0^ , 15^ , 22.5^ , 30^ , 45^ , 60^
Adverselomgeneralfare!
Sikre maskinen (transportstilling)
PacfnKcnpyTe MaunHky (pa6oee noIoxKeHne)
Ipeed haayalom IIO6bIX pa60T Ha MaunHKe BceRda BbIHMaIte BNkU n3 pO3eTKN.
Ipeep nCpOJIb3OBaHnEm CMOHTnpuYte MaunHky Ha poBHO n CTa6NJIbHO pa6Oey NOBepxHOCTn (HaNPmEp, noDcTaBka UG-KAPEX, MHOrofoyHK- cNoHaJIbHbI cToJ MFT nII BepCTaK).
CyuectbYOT cIeIyUoIne BO3MOXHOCTN MOHTa-Xa:
7.10 OrpaHnueHne rIy6nHbI TopeBaHnA
BepTnKaJIbHbI yroJ haKIoHa nIbI yCTaHaBnBa- etc c NOMOuI pIaBHO OrpaHueHn rIy6nHbI TOPeBaHn. 3To I03BOJareT deLaTb Na3bl N Bbl- emKn Ha 3aRTOBkax.
① C6bIoudaIte orpaHnueHnЯДЯ 30HbI Na3a: ПlaBHa rpeYlnpOBKa BO3MOK-Ha TOnbko B DnAna3OHe 0-45 MM. TaKxhe orpaHnueHa N BO3MOXHnA DInHa Na3a. Pprime: npri rJy6nHe na3a 48 MM n TOnLsHe 3aToTOBKn 88 MM Doynctmbln DnAna3OH (DnHbI) coCTabJIeT 40-270 MM.
-ПрИБЕДиTe MaшинКуВ pa6очee noLoжен.
-PbUar orpaHnueHnra Tny6nHbI TopceBaHnra (16.1) nepeBeDnte Bn3 Do fNkcauH. Tepepb Nila MoXket DnRaTbcra Bn3 ToJbKO Do yCTaHOBLeH-HoR Tny6nHbI TopceBaHnra.
-Поворотom рычara орарниеня г lyбины
Topцевань установпешаему г lyбину
Topцевань.
-ДяТOrOчTO6bI De3aKTHBnPoBaTb orpaHnueHne rIy6nHbI TOpueBaHnry, npeBeDInTe pbluror orpaHnueHnry rIy6nHbI TOpueBaHnry cHOBA BBepx.
BoJokHnCtble MaTepeHaJIbI 1-3
AJIOMHnI npoΦnIu n3 CBeTHOrO MeTaJIa 3-6
8.3 Pacnll 6e3 npotjxkn
-ПрпзВeДиTe Heo6xOДиMbIe HacTppoiKn Maшин-KN.
- Haidexho 3aXMMTe 3aToTOBky.
- CdBnHbTe nIy ha3aJ do ynpa (Ha npabJeHne ynpa 3aIOTOBKn) n 3aBepHnte BpaauOuSyocr pyky (1.5) dIy 3aJIMa ycTpoiCTBa npoTjKKn, IIN 3aΦnKcnpyIte nIy B oOc6om pIoJoxeHN (ToIbKO dJI K S 120 EB).
-BKJIIOUHTeMaUNHKy.
-MeIJIeHNO npOBeIte pNly, B3aBUnc6 3a pyKoTky (1.1), Bn3 n CpeJaTe npOnJ 3aToTOBKn c paBHomepHoi noJaYe.
- BыключITE Maшинку и дождntecb, пoka Пильные ДИСК NOЛноctьЮ He OCTaHOBITcra.
- POnHnMnte nIy cHOBa BBepx.
8.4 Pacnul c npoTjXkoJ
-ПроиЗВeДиTe Heo6xOДиMbIe HacTppoiKn Maшин-KN.
- HaideXho 3aXMMTe 3aToTOBky.
- PpOraHnTe pNly BpepeB DIOJb WToHr PpOraKKn.
-BKJIIOUHTeMaUSHNKy.
-MeIJIeHNO npOBeIte pNJIy, B3aBbIc6 3a pyKo- Tky (1.1), Bn3.
- HaximaiTe Ha piny c paBHomepnoi noaey Bn3 i CdeJaTe npOPII 3aTOBKn.
-BbIKJIIOUHTeMaIINHKy.
-ДождNTecb,пOKа пиьный ДИСК пОЛНOCТьIO He octaHOВITcra,ИТOLБКО ПОСЛЕ 3TOFO ПОДнHMITE ПИЛу ВВepx.
8.5 MaIIka (ToIbko IJIa KS 120 EB)
C nOmoIbIO MaJIKN Bbl MoKeTe cKoInpOBaTb IIO-60B yroJ (Ha npImep, MeKdy DByM aCTeHkAmn) uYcTaHOBNTb 6uCCeKTPncy Ha TOpUOBOUHOI pJIe.
BHyTpeneHnn yroJ
- Pa36lOKnpyTe 3aXmM [18.2].
-Прилloxитeme малку Двymя HOЖКамn (18.1) К Внтурениму угл. - 3a6lOknpyuTe 3aJkM [18.2].
-ПрилloxиTe MaIky OndHон HOЖКо K ynpHоN Планke TOpцOBOчHо NnJIbl.
-Дя установки би ССЕКТРИCSы (roPn3OHTaJIbHbI yroJ cKocA)HaKIOHЯITE pNly Do tex nop, noka Ia3eRbI JyU He coBnaTe C IInHnei (19.1) MaJIKN.
BheunnyoJ
- Pa36lOknpuYTe 3aXmM (18.3).
-Передвиные пофел (18.4) obenuх Ножек Впера.
-ПрилwxиTe MaIky ДВумя HOЖКamn (18.4) K BHeшнemy yrny.
-3a6lOkuynTe 3axm (18.3).
-Передвиные"aюнievesпрфию obeхножек сюва назад.
-Прилобжnte MaMKу OndHoN HOЖКо K ynpHoi Планke TOpOBOUHOн ПиЛы.
-Дя установки би ССЕКТРИCSы (roPn3oHTaJIbHbI yroJ cKocA)HaKIoHЯITE pNly Do Tex nop, noka Ia3epHbI JyU He coBpAdet C IInHnei (19.1) MaJIKN.
9

06cIyXnBaHne n yxoJ
Ipeud haayalom IIO6bIX pa60T Ha MaunHKe BceTdA BbyHMaJTe BNJKy n3 pO3eTKn!
Bce pa60tblno 6cIyXnBaHnIO npemOnTy, KOToPbIe Tpe6yOT OTKpbIBaHnI KOpnyCa DBNrAteJIa, MOrYT pOu3BOJNTbcra T0JIbKO B aBTOpN3OBaHHo MaCTepCKo CepBnc-HoClyx6bl.

IobpexdHbIe 3aunTHbIe npncnoc6leHnny3bldoJXhbl6bTbHaJIeXaUMo6pa30M OTpeMOHTN-pOBAHbI nn 3aMeHeHbIyNoHOMOeHHbIM Ha 3TO cneBnaJIInCTOM,ecnB pyKOBODCTBe nO 3KcPlyaTabn He npeducMaTpNaBaETcraTO-ln6o dpyroe.
Для обесенья сиркусяво3dуха OTbercTия Для oxlaжdeняВКорпuce ДИгагелЯ BCerДдdoJxHbI 6bITb OKpbITbIMN UnCTbIMN.
Maushnka ochaeneha camaotknoaoumncy yrohbimn etskam. Pnpnx n3hoce npocxodnt aBTOMatnueckoe BbIKNoyeHne Toka n HcTpymehn nepectaet pa6oTaB.
- Perúnpo oùnzaïte BCTaBky cToJa-ocHOBaHn [20.1], a taKxe kaHaI nbIeYdaJeHnHa nbIeYJ naBnBaTeIe (cM. pnc. 10) ot uεenok, OTloKeHn nbIiN Yuactu3aTOrTOBOK.
9.1 Peru npovka na3epa (ToIbko Iy Ks 120 EB)
EcnI Ja3epHbIe LyuH He COBpAaHT C KpOMKoI pe3a, Bbl MoKeTe OTpEryInpOBaT b6a Ja3epa.
JIeBbI Jana3epHbI Jny UcTaHOBOUHbI BnHT (3.4)
IpaBbI Ia3epHbI IyU YcTaHOBOHyB I BnHT (3.5)
c) Лаzerньй луч He coBnaJaT c MeCTOM npoPnla [Pnc. 3C]
OtpereylnpuyTe oceBoe cmeuenie.
JIeBbI JanaepHbI Jny UcTaHOBOuHbI BnHT (3.2)
PpaBbI Ja3epHbI lyu YcTaHOBOHyBn BnHT (3.7)
9.2 KoppeKtupOBka ropN3oHTaJIbHOro yrJaCKOca
Ecn yka3aTeIb (13.2) npn fncnpyEmbIX yrlax cKoc a 6oJIe He noka3bIbaet ycTaHOBLeHHoe 3HaueHne, Bbl moKeTe oTpeYIpOBaTb yka3aTeIb nocIe oTKpyuBaHnB BnHTa (13.1).
Ecnn Φaktnueckn (otnneHbIy yroI cKoc a otnuaetcra ot yctaHOBHeHHoro, Bbl moKet ckoppeKTnpOBaTbe erO cJeDyUoUIM 6pa30M:
- YctaHOBInTe NnIy B nOJoxHeN 0°.
-OTBnHTnte Tprn BnHTa (13.3),KoTOpbIMn ShkaJa npNKpePJIeHa K PJIate-OCHOBaHIO.
- Cdknbte shkaIy c nIIOJ, noka fakTneckoe 3naueHHe He coCTaBNT 0^ . 3To moKHO npOKoHTpOJInpOBaTb NO yrIy MeJdy ynpHOJ nnHKOJ I nnJIbHbIM DnCKOM.
CHOBA 3aTaNHTe TpN BnHTa (13.3).
- PpokoHTpOInpyuTe yCTaHOBky yrJa c NOMOu np06Horo pe3a.
9.3 KoppeKtnpoBka BepTnKaJIbHOro yrna ckOca
Ecni foaktuuecko 3naeHne 6oJee He coBnadaet C yctaHOBJennbIM, Bbl moKte cKopkeTnpobTa bero cIeDyUOuM o6pa3OM:
-
YctaHOBInTe NnIy B nIoJKeHne 0^
-
OТВИNTte оba ВИNTa (23.1).
-ПоворачиВаiteплуdoТexпор,пoka DeiCTBnTeьhoeЗнayehne He coCTaВNT 0°.ЭTO можнопрokонтpoлирOBaTB no yглу Meжду уpopнoi ПланКОИ ПильНыIMДИСКOM.
-
Choba 3aTЯнite оба виHTа (23.1).
-
PpokoHTpOInpyTe yCTaHOBky yrJa c NOMOuI np06Horo pe3a.
Ecn yka3aTeIb (22.2) npn fHKcnpyEmbIX yrlax cKoCa 60lee He noka3bIbaeYUCTaHOBJIeHHoe 3NaueHne, Bbl moxete OtperyInpoBaTb yka3aTeIb nocle oTKpyuBaHnB BnHTa (22.1).
9.4 3aMeHa BCTaBKn CToJa-OCHOBaHnA
He pa6oTaIe c noBpeJdeHnoB BcTaBkoi (20.1), 3aMeHnte ee Ha HOByU.
-ДяЭТOrO Heo6xOДиMo OTBnHTuTb IeCTb BnHTOB (20.2).
9.5 Ounstka nIи 3aMeHa OKHa Ia3epa (ToIbko dIg KS 120 EB)
BoBpeMa 3KcPnyaTaunn B03MoXHo 3aRpa3HeHne OKHa (21.2)ДЯ 3aUNTbI Na3epa.ДЯ OUnCTKN NJI 3aMeHb Bi MoKeTe ChrTb OKHO.
- BыВернite ВИNT (21.5) на пим. 2 оборota.
- OДновразимно нажмITE на okho Byka3aHHbIX habравлиях: (21.3) n (21.4).
-ИЗВЛЕКИТе OKHO. - OuNCTIte IJIIN 3aMeHInTe eRo Ha HOBoE.
- Bctabte ouHueHoe/HoBoe OKho. 06a Bbictya (21.1) okHa dOJXhbl 6bITb 3aΦNKcnpoBaHbB B bIeMKkx BepxHero 3aUHTHO KOKyxa, KaKn3o6paXeHo Ha (nll. 21).
-3aTaNHTe BnHT (21.5).
10 Ochactka
Приименяп Te Tolyko opriиналы Bi epinadJIeK-HocTи npacxOndHbIe MaTePnaiBbI ΦInpMb! Festool,прднa3NaYeHHbIe ДЯ DAHHoJ MaShINHKn,NotomyуTO 3TN CnCTeMHbIe KOMNoHENTbl ONTIMaJIbHO IOxOJaT Dpyr K Dpyr. B clyuae nCnoJIb3OBAHnA OCHAcTkn npacxOndHbIX MaTePnaiNob DpyrNx npo-3BOdnteJe CLeDyET npINHMaTb BO BHNMaHne BO3MOxHocTb ChNXeHnRA KaucEcbTa pa60tbi N OpranHuEHHIO rapaHTnIHbIM o6a3aTeJIbCTBaM. B 3aBnCmOcTn OT BnDa pa60T eTO MOnket npiBecTNI K Bolee INTEHCNBHomU n3HocU MaShINKINII K yBeJIuHEnHIO HarpY3Kn Ha pykN. IooTOMy,ДЯ TOrO qTo6bl CbepeYb CBoN CInbl, OINTMaJIbHO NCNoJIb3OBaTb pecypc MaShINKIN OBecepeHTb HAdexKHOCTb rapaHTnIHbIX o6a3aTeJIbCTB, npimehayTe Tolyko opriinHaJIbHbIe OChAcTky npacXOndHbIe MaTePnaiBb! Festool!
Festool npedlaeraT Bam o6wnrpHbI MoeJIbHbI pRd npHaadJeXHoCTe Ira BaWei TOpOBOUHOI pNJIbl:
-Пильные Доста разлuchых матерпалов.
- TopoBOUHbI ynpO (onopa IJRA3aROTOBKn CO BCTPOEHHO IN3MePnteJIbHOJ 1KkaIOn):YBnJeTcA ONOpO npN ToHOb o6pa6OTKe DJIINHHOMEpHbIX 3aROTOBOK.
- YnpdIa KaPn3HOrO npoФиЯ: BCnOMorTaJIb-Hoe yCtpoiCTBO dIy 3aKpeJIeHn IJaHOK CoCKOCm N KaPn3HbIX npoФиJe.
HomepaДлЯЗаКaЗаОСнachtКиИнстpyМ entOB moxHo haIHTN B KaTalore Festool N B cetu INHTep- netno aDpecy www.festool.com.
11 ytnnn3aun
He BbIbpaCbIbAaTe 3JIeKTpOuHcTpyMeHTbI BMeCTe C bItOBbIMn OTxOdaMn! IpeJaTe HcTpyMeHT, OChactKy n yPaKOBky dJa 3KOJIoRnUHOy TynlN3a- cnn. Co6JIouaTe JeIcTByUoUne HaCNoHaJIbHbIe INHcTpyKcun.
ToIbko IJRA EC: corlaacHo EbponeeCKo JnpeKtNBe 2002/96/EG oTcnyxuBwne cBoi cpoK 3JIeKTpOHHCTpymeHTbl DOLXHbI yTuIN3NpOBaTBcR OTdJIbHO HAnpaBJIaTbcr Ha 3KOJIoTnHyU yTuIN3aCNIU.
12 TapaHTnA
Ha haun npnbopblMbI daem rapaHTnIO, Cb3aHHyUc DeΦeKtAmu MaTePnaJa nnC DeΦeKTaMn npn npOn3BOJCTBe,B COOTBETCTBUN C 3aKOHOaTeJIbCTBOM KaJDoN n3 cTpaH, Ho He MeHbwe 12 Mecayeb.B cTpaHax EC cpoK rapaHTn coCTabJIaET 24 Mecya (noTbeXdHne no cuety nn HaKlaadNo).rapaHTn He pacnpoctpanraetc H a NobpeXdHn, noLyuHhble B pe3yJbTaTe eCTBeHHoro n3Hoca/ncNoJb3OBAHn, nepepy3Kn, HeNaJExkaSeero nCNoJb3OBAHn, nobpeXdHn. no BInHe POnJb3OBaTeJIa nn pRn nCNoJb3OBAHn BOppeKn PykoBoDCTBy no 3KcPnyatauHn, n6o N3BeCThble Ha MOMENT NOKyn (yeHka ToBapa). TaKxe NcKlIoUaeteTcA OTBETCTBeHHocTb 3a yuep6, Bbl3BaHHbI nCNoJb3OBAHnem HeOpriHaJIbHO oChactkn n paCxOJNbIx MaTePnaJIOB (HaNPmep, OJINΦOBaJIbHbIX TapeJok).
PeKlaMaIuN npn3HaOTc TToIbKO B TOM clyuae, ecIn HnCTpyMeHr OTnpaBJIeTc NocTaBUNky nIn B MaCTepcKyIO CepBnCHoN cLyX6bl Festool B Hepa3o6paHHom coCTOraHn. CoxpaHnTe PyKOBODCTBO NO 3KcIIyatauN, yKa3aHnNo TeXHnke 6e3OpacHOCTN, cnncOK 3aPacHbIX qacteN KBrTaHnO O pOKynke. B OCTaJbHOM ImeIoT cNilY DeiCTByUoIne ycIOBnI PpeDcTAbJeHnra rapAHTN IN3r0TOBNTeJIa.
PpimmeaHne
B CB83n C NOCTO8HHbIMN UCCJIeIOBaHn8Mn HOBblIM TeXHnueCKmN pa3pa60TkamN φnpMa OCTaBJIa8T 3a c6oB n pabo H BHeceHne N3MeHeHn BTexHnueCKne XapaKTepnCTnKn.
13 JeKnapauncoOTBeTCTBnE EC
| Руковозво по заимлuya-Тацни на немechом язбке Topцовочая пILA | |
| KS 120 EB | 495773, 495774, 495775, 495776, 495777 |
| KS 88 E | 496868, 496869, 496871, 496872 |
| Гов маркирoveknCE: | KS 120 EB 2007 KS 88 E 2009 |
Mbl3aBnemnoCobCTBeHHyOOTBeTCTBeHHoCTb,
UTo DaHHeu3DeJIne COOTBeTCTByeT CJeDyUOnm
CTaHApTaM HOpMaTnBhBIM DoKymeHTam:EN
61029-1,EN 61029-2-9,EN 55014-1,EN 55014-
2,EN 61000-3-2,EN 61000-3-3 B COOTBeTCTBnN
cNoIooJHnMyn DnpeKtNB 2004/108/EG,2006/42/
EG.
p90. 7. Jd aann nn
- Circular cross-cut saw KAPEX KS 120 EB/ KS 88 E
- Table of contents
- Symbols
- Technical data
- Machine features
- Intended use
- Other risks
- Safety instructions
- General safety instructions
- Save all warnings and instructions for future reference.
- Machine-related safety instructions
- Safety precautions
- Maintenance and repair
- Safe work
- Emission levels
- Commissioning Warning
- Prior to initial operation:
- On/Off switch
- Adjustments
- Transport
- Securing the machine (transport position)
- Unlocking the machine (working position)
- Mounting the machine
- The following assembly options are available:
- Underframe UG-KAPEX
- Changing tools Risk of accident
- Removing saw blades
- Installing saw blades
- Inserting workpiece clamps
- Dust extraction
- Workpiece fence
- Adjusting the stop ruler
- Removing the stop ruler
- Auxiliary stop
- Remember the following:
- Horizontal litre angles
- Standard horizontal metre angles
- Other horizontal metre angles
- Vertical litre angles
- Special cutting position (KS 120 EB only)
- Cutting depth limiter
- Fixed horizontal position
- Switching on the laser (KS 120 EB only)
- Operation
- ! Risk of accidents
- Maximum workpiece dimensions
- Clamping workpieces
- Procedure
- Speed control
- Cutting without guiding action
- Cutting with guiding action
- Bevel (KS 120 EB only)
- Interior angle
- Exterior angle
- Service and maintenance
- Adjusting the laser (KS 120 EB only)
- Laser beam is not visible
- a) Laser beam is not parallel with the scribe line [Fig. 3A]
- b) Laser beam strays off line when workpiece trimmed towards the left or right [Fig. 3B]
- c) Laser beam is not positioned on the cut [Fig. 3C]
- Correcting horizontal metre angles
- Correcting vertical metre angles
- Replacing the tabletop insert
- Cleaning or replacing window for laser (KS 120 EB only)
- Accessories
- Disposal
- Warranty
- Note
- REACH for Festool products, their accessories and consumables
- Scie guidée
- KAPEX KS 120 EB / KS 88 E
- Sommaire
- Sikre maskinen (transportstilling)
- PacfnKcnpyTe MaunHky (pa6oee noIoxKeHne)
- CyuectbYOT cIeIyUoIne BO3MOXHOCTN MOHTa-Xa:
- OrpaHnueHne rIy6nHbI TopeBaHnA
- Pacnll 6e3 npotjxkn
- Pacnul c npoTjXkoJ
- MaIIka (ToIbko IJIa KS 120 EB)
- BHyTpeneHnn yroJ
- BheunnyoJ
- 9
- 06cIyXnBaHne n yxoJ
- Peru npovka na3epa (ToIbko Iy Ks 120 EB)
- c) Лаzerньй луч He coBnaJaT c MeCTOM npoPnla [Pnc. 3C]
- KoppeKtupOBka ropN3oHTaJIbHOro yrJaCKOca
- KoppeKtnpoBka BepTnKaJIbHOro yrna ckOca
- 3aMeHa BCTaBKn CToJa-OCHOBaHnA
- Ounstka nIи 3aMeHa OKHa Ia3epa (ToIbko dIg KS 120 EB)
- Ochactka
- ytnnn3aun
- TapaHTnA
- PpimmeaHne
- JeKnapauncoOTBeTCTBnE EC
- p90. 7. Jd aann nn
Brand : FESTOOL
Model : KS 88 E
Category : Track saw