
SLIDES 2PC MK III - Bluetooth speaker ION - Free user manual and instructions
Find the device manual for free SLIDES 2PC MK III ION in PDF.


| Product Type | 35mm Slide and Negative Scanner |
| Brand | ION |
| Model | SLIDES 2PC MK III |
| Connection | USB 2.0 |
| Power | Via computer USB port |
| Compatible operating systems | Windows XP/Vista/7 (32/64-bit), Mac OS X 10.6 or higher |
| Minimum system requirements | Pentium 4 1.6 GHz, 512 MB RAM, 500 MB disk space, 1024x768 color display, CD-ROM drive |
| Included software | ImageScanTool |
| Included accessories | Software CD, slide holder, quick-feed slide holder, film strip holder, cleaning brush, quick start guide |
| Main functions | Scanning mounted slides, 35mm negatives and roll film; adjust brightness, color, rotation, mirror; live preview |
| Maintenance and cleaning | Clean the glass surface with a clean, dry cotton swab; ensure negatives and slides are clean before scanning |
| Safety | Do not open the casing, avoid water and humidity, use only recommended accessories |
| Spare parts and repairability | Slide holder, quick-feed slide holder, film strip holder, cleaning brush; repairs by an authorized center |
| General information | Compliant with FCC Class B regulations; separate disposal of electronic waste |
Frequently Asked Questions - SLIDES 2PC MK III ION
User questions about SLIDES 2PC MK III ION
0 question about this device. Answer the ones you know or ask your own.
Ask a new question about this device
Download the instructions for your Bluetooth speaker in PDF format for free! Find your manual SLIDES 2PC MK III - ION and take your electronic device back in hand. On this page are published all the documents necessary for the use of your device. SLIDES 2PC MK III by ION.
USER MANUAL SLIDES 2PC MK III ION
Thank you for purchasing SLIDES 2 PC film and slide scanner. Please take a moment to read through this manual in order to get the most out of your SLIDES 2 PC.
PRECAUTIONS
Before using SLIDES 2 PC, please ensure that you read and understand the safety precautions described below. Always ensure that the SLIDES 2 PC is operated correctly:
- Never operate SLIDES 2 PC inside of an aircraft or anywhere else where operation of such devices is restricted. Improper use creates the risk of serious accident.
- Do not try to open the case of SLIDES 2 PC or attempt to modify SLIDES 2 PC in any way. High-voltage internal components create the risk of electric shock when exposed. Maintenance and repairs should be performed only by authorized service providers.
- Keep SLIDES 2 PC away from water and other liquids. Do not use SLIDES 2 PC with wet hands. Never use SLIDES 2 PC in the rain or snow. Moisture creates the danger of fire and electric shock.
- Keep SLIDES 2 PC and its accessories out of the reach of children and animals to prevent accidents or damage to the image copier.
If you notice smoke or a strange odor coming from SLIDES 2 PC, turn the power off immediately. Take SLIDES 2 PC to the nearest authorized service center for repair. Never attempt to repair SLIDES 2 PC on your own. - Use only the recommended power accessories. Use of power sources not expressly recommended for SLIDES 2 PC may lead to overheating, distortion of the equipment, fire, electrical shock or other hazards.
SLIDES 2 PC may become slightly warm during use. This does not indicate malfunction.
If the exterior of SLIDES 2 PC needs cleaning, wipe it with a soft, dry cloth.
FCC NOTICE
This equipment has been tested and found to comply with the limits for a Class B digital device, pursuant to Part 15 of the FCC Rules. These limits are designed to provide reasonable protection against harmful interference in a residential installation. This equipment generates, uses and can radiate radio frequency energy. If not installed and used in accordance with the instruction, it may cause harmful interference to radio communication. However, there is no guarantee that interference will not occur in a particular installation. If this equipment does cause harmful interference to radio or television reception, which can be determined by turning the equipment on the off, the user is encouraged to try to correct the interference by one or more the following suggestion:
Reorient or relocate the receiving antenna.
- Increase the distance between the equipment and the receiver.
- Connect the equipment to a different power outlet other than the one where the receiver is connected.
- Consult an experienced television or radio technician for help.

CAUTION: To comply with the limits for a Class B digital device, pursuant to Part 15 of the FCC Rules, this device must only be installed on computer equipment certified to comply with the Class B limits.
SYSTEM REQUIREMENTS
PC:
Pentium® 4 1.6 GHz or equivalent AMD Athlon
Free USB2.0 port
512MB RAM internal memory minimum
500MB free hard disk space
1024 x 768 color monitor
CD-ROM drive
- Windows XP Service Pack 2, Vista or 7 (32-bit or 64-bit)
MAC:
Intel Core Duo or higher processor recommended
Free USB2.0 port
768MB RAM internal memory minimum
500MB free hard disk space
1024 x 768 color monitor
CD-ROM drive
Mac OS X 10.6 or higher
BOX CONTENTS
SLIDES2PC
- Software CD
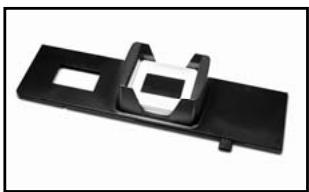
- Slide holder
Rapid slide feeder
Negative roll feeder
- Cleaning brush
- Quickstart Poster
- Safety Instructions & Warranty Information Booklet
SLIDES 2 PC FEATURES
- COPY BUTTON
- POWER LED
- FILM HOLDER SLOT
- USB PORT
- USB CABLE
- BRUSH
- SLIDE HOLDER
- RAPID SLIDER FEEDER
- NEGATIVE ROLL FEEDER
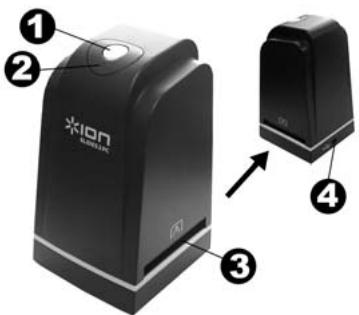
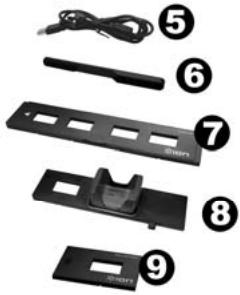
Note: We strongly suggest using a clean, dry, non-alcohol cotton swab to insert into the image copier slot and clean the glass surface periodically to produce a clear image. Please make sure your film negatives/ mounted slides and cover trays are clean before inserting into the copier as well. Dust or dirt from the negatives and cover trays will affect the quality of your scanned images.
SOFTWARE INSTALLATION
To use the SLIDES 2 PC you must install ImageScanTool in advance.
SOFTWARE INSTALLATION (WINDOWS)
Note: Please remove any prior version of ImageScanTool before installing this version.
- On the window that appears after you insert the disc, click "Install Software."
If this window does not automatically appear, double-click "My Computer" then double-click the name of the CD. The window should appear. If the window still does not appear, right-click the name of the CD and select "Explore." Once the CD's contents are shown, double-click "Install.exe."
- Follow the on-screen instructions.
- Restart the computer.
SOFTWARE INSTALLATION (MAC)
- Insert the installation CD into the CD-ROM drive and the click the CD icon.
- Double-click "ImageScanTool Installer."
- Follow the on-screen instructions.
USING THE INCLUDED HOLDERS
SLIDE HOLDER
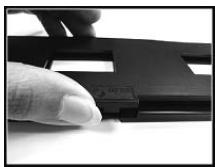
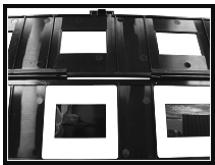
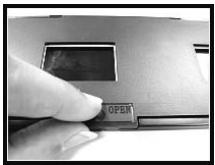
- Open the film holder by lifting the tab on the bottom.
- Insert the slide(s) into the slide slot(s) or lay the negative over the negative slot.
- Close the film holder. Be sure the latch and sides of the holder are securely in place.
ROLL FILM HOLDER
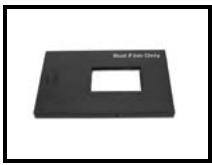
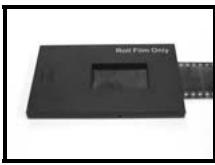
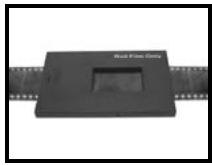
- Lay the film holder flat.
- Insert one end of the roll of film in the slot on the right-hand side of the holder.
- Gently push/pull the roll of film through the holder to move from picture to picture.
Tip: To avoid laying a negative in the wrong direction (which will produce a mirror image), be sure you can correctly read the serial numbers at the top of the negative when placing it in the holder.
RAPID SLIDE FEEDER
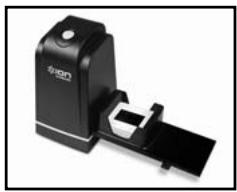
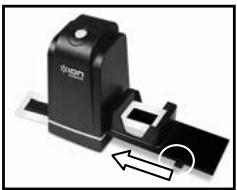
- With the lever all the way to the right, stack your slides in the rapid slide feeder.
- Place the rapid slide feeder into the FILM HOLDER SLOT.
- Push the lever towards the left, then pull the lever back to the right again to load a slide from the feeder into SlIDES 2 PC. Repeat this step for subsequent slides (which will push the used slides out the other side).
USING THE SLIDES 2 PC
1
Plug the USB cable of the SlIDES 2 PC into your computer's USB port. Once connected, the power LED light will be blue.
Note for Windows users: The first time you connect SLIDES 2 PC to your computer, wait a few seconds until you see a dialog box that says "Found New Hardware" (this means the computer recognizes the SLIDES 2 PC). After you see this, SLIDES 2 PC is ready to use.
Found New Hardware
Your new hardware is installed and ready to use.
2
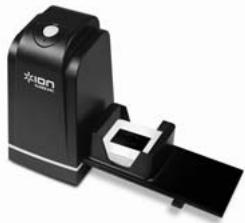
Insert the loaded film / slide holder properly into the slot as shown.
3
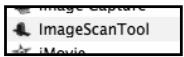
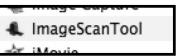
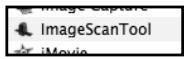
Go to Start Menu All Programs 35mm Film Scanner Launch ImageScanTool (PC),
Launch ImageScanTool
or Applications ImageScanTool (Mac).
4

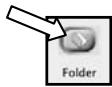
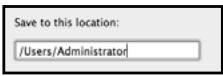
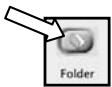
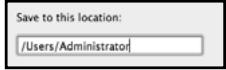
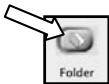
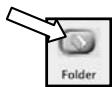
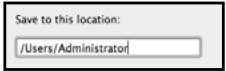
Click the "folder" icon button and select the location to save your pictures.
5a
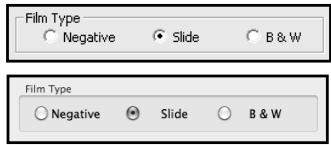
Select the proper film type.
6
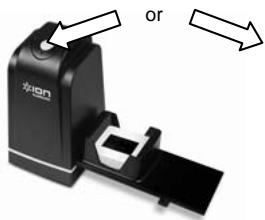


Click "Snapshot" on the screen or press the COPY button on SLIDES 2 PC.
You can adjust the location of the film by moving the film holder.
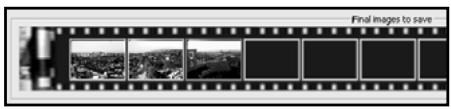
The maximum is 12 pictures in the preview area. Press the "Save" button to save the pictures to your computer.
Note1: To ensure the best image quality, please allow about 5 seconds between snapshots and transfers for white balance enhancement.
EDITING YOUR PICTURES
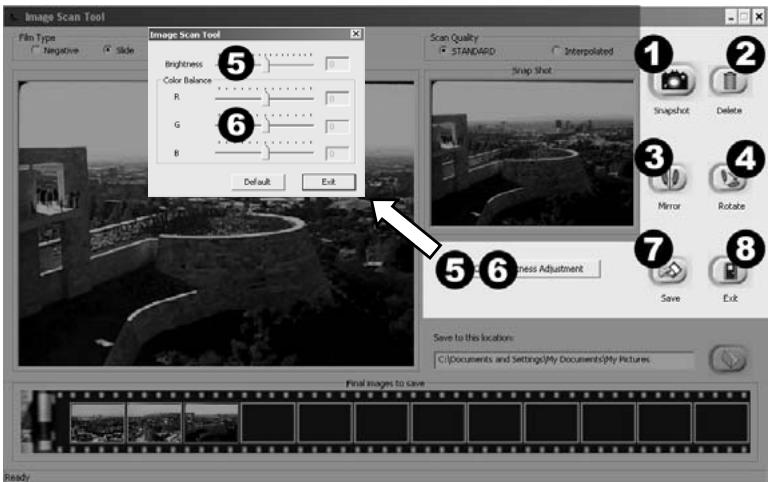
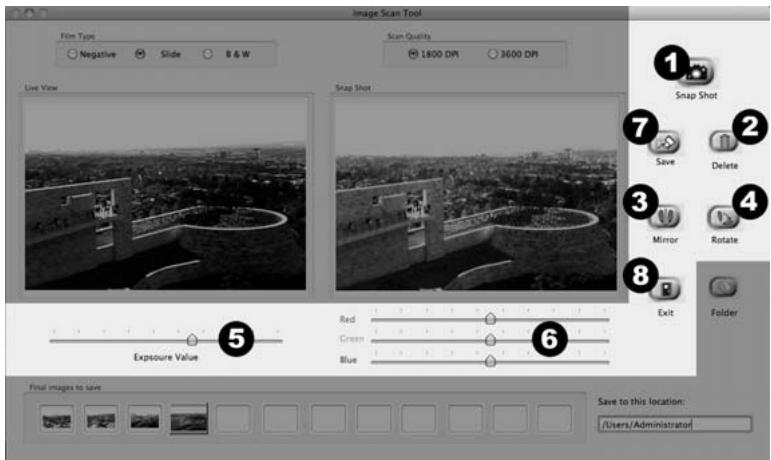
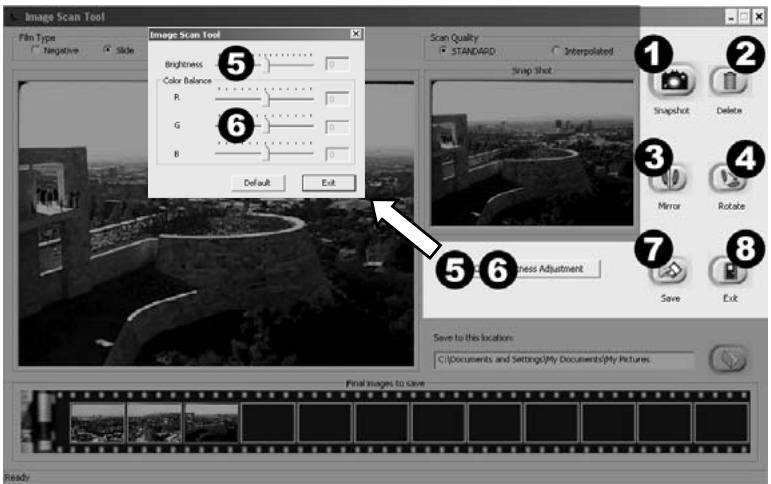
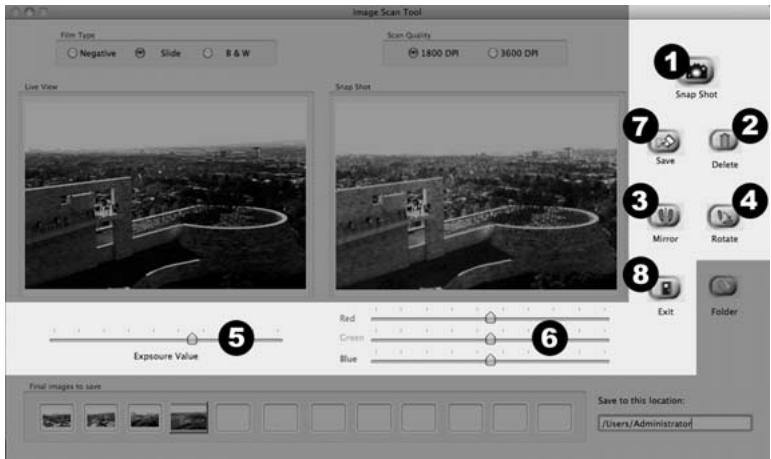
- Snapshot - To capture your previewed image, click "Snapshot."
- Delete - Deletes a file selected from the list.
- Mirror - Click this button to mirror the image.
- Rotate - Rotates the image right 90^ .
- Brightness/Exposure - Click and drag the slider to adjust the image's brightness.
- Color Balance - Click and drag the RGB (red, green, and blue) sliders to adjust the image's color.
- Save - Click "Save" to save the picture to your computer.
- Exit - Click this button to exit the software.
TROUBLESHOOTING
| ISSUE | POSSIBLE CAUSE | RESOLUTION |
| My computer does not recognize the SLIDES 2 PC. I get a Windows message that reads "device not recognized." | SLIDES 2 PC not plugged into a high-speed USB port. | Your computer must have a USB 2.0 to communicate with your SLIDES 2 PC. Check to see if USB 2.0 is installed on your computer. If you do not have a USB 2.0 installed on your computer you can upgrade your USB ports. This hardware is available at most electronic stores. |
| I have a USB 2.0 port on my computer, but my computer still won't recognize my image copier. | All ports on your computer may not be high speed. | Even though you may have USB 2.0 installed, all of your USB ports may not be USB 2.0 compatible. Check all your USB ports to find the 2.0 compatible ports. |
| My installation disc will not auto start. | May be a problem with your CD drive. | Check to see if your CD drive is operating properly. If possible, check another computer to see if the disc is recognized. If you are able to browse the contents of the CD but the installation does not start automatically, please double-click on Install.exe. |
| Warning from Windows that device "has not passed Microsoft logo testing". | This is normal. OK to continue. | Choose "Continue anyway". The image copier will not harm your computer. (Windows certification is in process for this software) |
| My SLIDES 2 PC is working but some of my slides or negatives look overexposed. | Time for auto exposure varies according to your computer configuration. | The image copier self adjusts to your slide/negative exposure. Wait for the live view window to stop adjusting for exposure and then click "Capture." Check your slides or negatives to see if they may have been overexposed when originally developed. Several photo adjusting software applications are available to "clean-up" your newly digitized picture. |
| There is a black border around the edge of the image. | The slide or film might not be properly inserted in the holder, or the holder might not be fully inserted into the SLIDES 2 PC. | Remove the holder from SLIDES 2 PC and make sure the slide or film is placed correctly in the holder. Reinsert the holder into SLIDES 2 PC (it should click into place when inserted properly). |
This symbol on the product or in the instructions means that your electrical and electronic equipment should be disposed at the end of its life separately from your household waste. There are separate collection systems for recycling in the EU. For more information, please contact the local authority or your retailer where you purchased the product.

BIENVENIDO
Your new hardware is installed and ready to use.
2
Applications ImageScanTool (Mac).
4

CÓMÖ EDITAR LAS FOTOGRAFÍAS
Your new hardware is installed and ready to use.
2
Your new hardware is installed and ready to use.
2
Save to this location:
C:\Documents and Settings\My Documents\My Pictures



/Users/Administrator
Your new hardware is installed and ready to use.
2
Your new hardware is installed and ready to use.
2
of Applications ImageScanTool (Mac).
4
Save to this location:
C:\Documents and Settings\My Documents\My Pictures
| Image Sensor | 5 mega CMOS sensor, 5.17 megapixels |
| Lens Specification | Precision Glass Element Fixed Focus |
| Color Balance | Automatic + software |
| Exposure Control | Automatic + software |
| Supported film size auto-converting | Slide; color negative film; black/white negative film |
| Focus Range | Fixed focus |
| PC interface | USB 2.0 |
| Scan High Resolution | 1,800 dpi (enhances to 3,600 dpi via interpolation) |
| Data Conversion | 10 bits per color channel |
| Light Source Back Light | 3 white LED |
| Power | From USB port |
| Dimension | 152 mm x 86 mm x 82 mm (H x W x L) |
| Bundled Software | ImageScanTool |
| *Specifications are subject to change without prior notice. | |
www.ionaudio.com

- PRECAUTIONS
- FCC NOTICE
- SYSTEM REQUIREMENTS
- PC:
- MAC:
- BOX CONTENTS
- SLIDES 2 PC FEATURES
- SOFTWARE INSTALLATION
- SOFTWARE INSTALLATION (WINDOWS)
- SOFTWARE INSTALLATION (MAC)
- USING THE INCLUDED HOLDERS
- SLIDE HOLDER
- ROLL FILM HOLDER
- RAPID SLIDE FEEDER
- USING THE SLIDES 2 PC
- 1
- 2
- 3
- 4
- 5a
- 6
- EDITING YOUR PICTURES
- TROUBLESHOOTING
- BIENVENIDO
- CÓMÖ EDITAR LAS FOTOGRAFÍAS
Brand : ION
Model : SLIDES 2PC MK III
Category : Bluetooth speaker