MOHAIR - Textiles ACOVA - Free user manual and instructions
Find the device manual for free MOHAIR ACOVA in PDF.
User questions about MOHAIR ACOVA
0 question about this device. Answer the ones you know or ask your own.
Ask a new question about this device
Download the instructions for your Textiles in PDF format for free! Find your manual MOHAIR - ACOVA and take your electronic device back in hand. On this page are published all the documents necessary for the use of your device. MOHAIR by ACOVA.
USER MANUAL MOHAIR ACOVA
EN 60.335.1 / 60.335.2.30
1 General 18
2 Installing your appliance 19
2.1 Positioning your appliance
2.2 Connecting your appliance
2.3 Installation restrictions
3 Using your appliance 22
3.1 Operating mode selection
3.2 Operating your appliance without a programming base unit
3.3 Operating your appliance with a Pilot Wire programming base unit (not supplied) – Auto mode
3.4 "Open window" detection
3.5 Electronic lock
4 Advice and recommendations 26
5 In case of fault 28
1 General
Dear customer
Thank you for choosing this radiator. This product has been manufactured in accordance with our stringent quality requirements to give you total satisfaction. To get the most out of your radiator, we advise you to read these instructions carefully and keep them to hand.
Thank you for your purchase.
WARNING
This appliance is not intended for use by persons (including children) with impaired physical, sensory or mental capacities, or by persons lacking in experience or knowledge, unless they are supervised by, or have received prior instruction in using the appliance from, a person responsible for their safety.
Children must be supervised to ensure that they do not play with the appliance.

CAUTION To avoid overheating, DO NOT COVER the heating appliance.
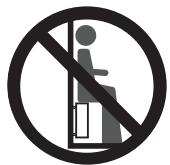
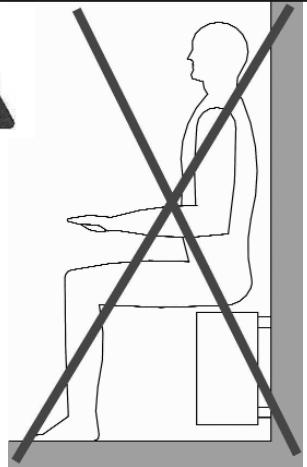
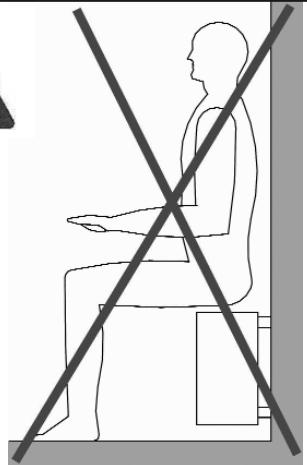
DO NOT SIT on the heating appliance.
2 Installing your appliance
2.1 Positioning your appliance
To get the most out of your appliance and enjoy the highest standards of comfort, we recommend that you:
- install the appliance near places of high heat loss (windows, doors, etc.) wherever possible,
- ensure that an area of about 50~cm in front of the appliance is clear of objects which might hinder air circulation (furniture, armchairs),
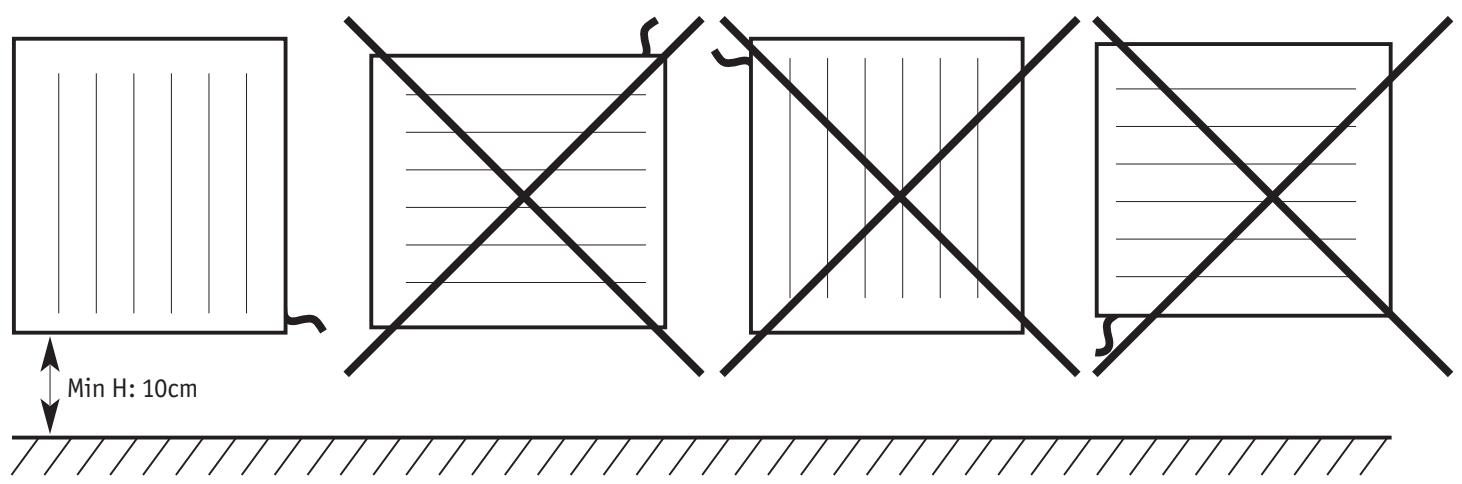
- ensure that the bottom of the control unit is positioned at least 10cm from the floor,
- not place the heating appliance underneath a power outlet,
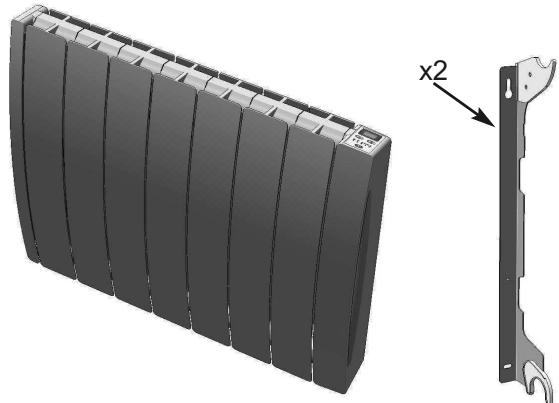
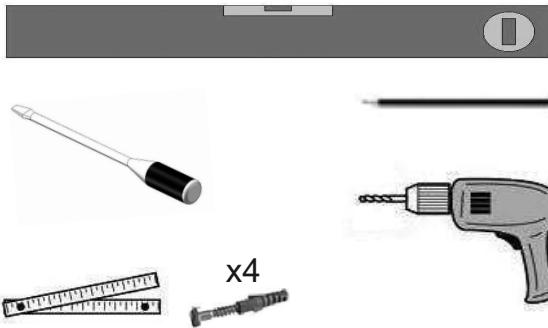
- use mounting screws suitable for your wall.
IMPORTANT This appliance should never be installed with the electrical connection box positioned topside.
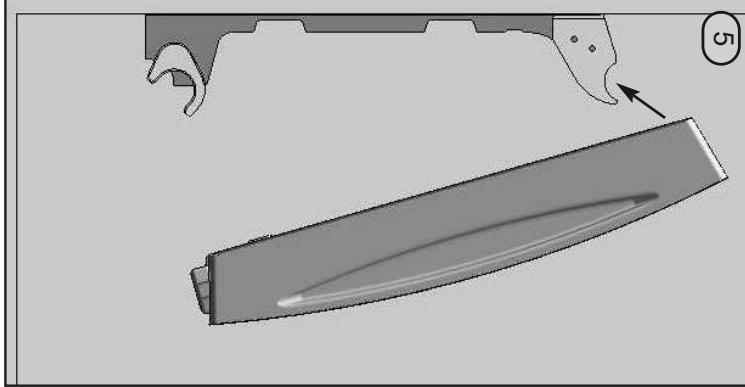
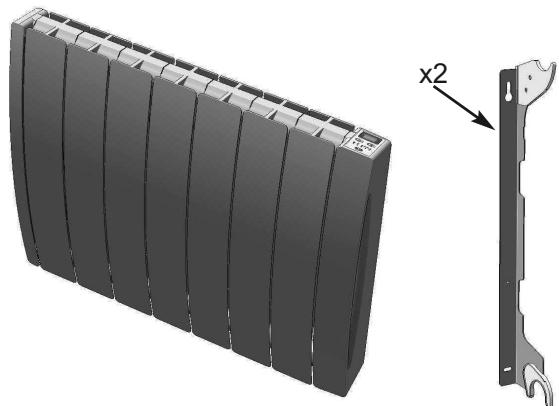
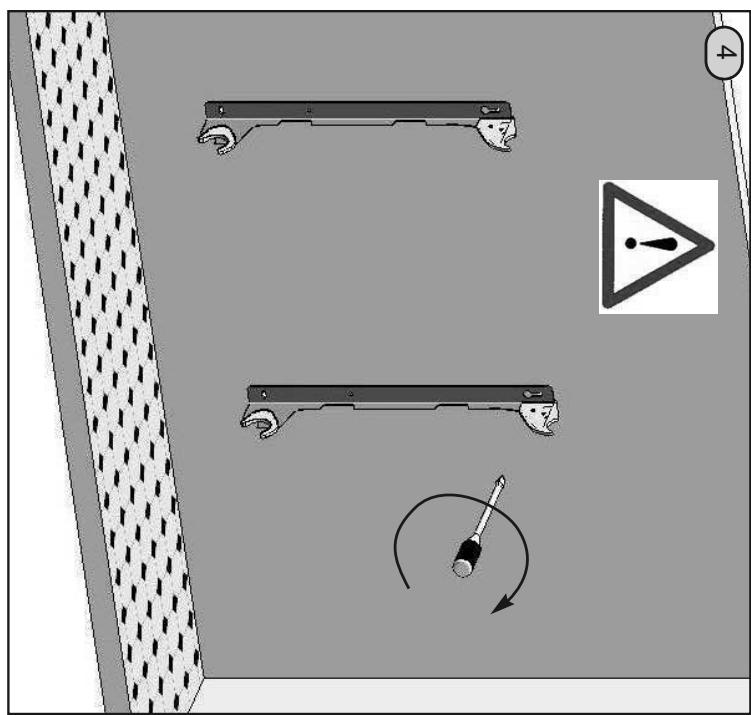
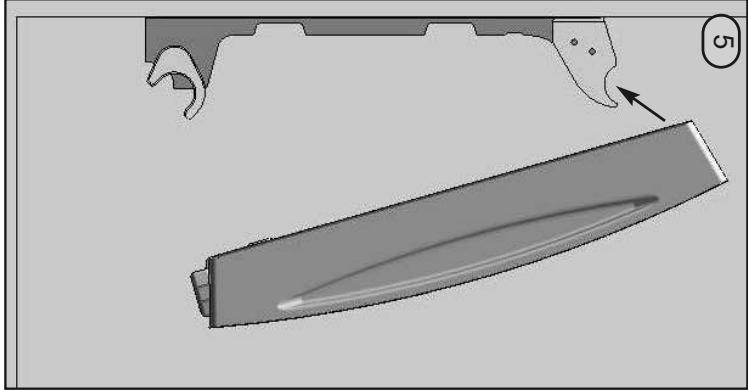
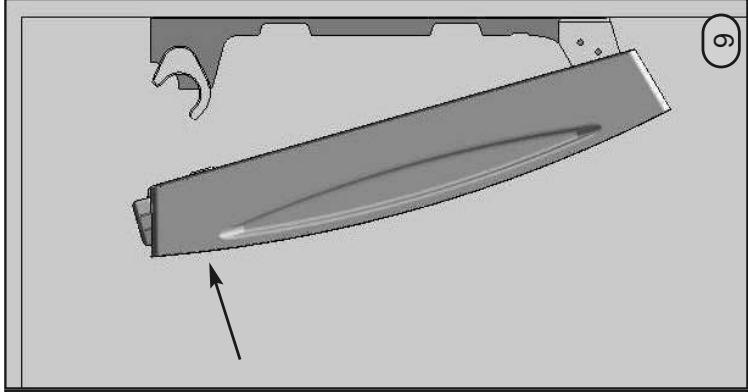
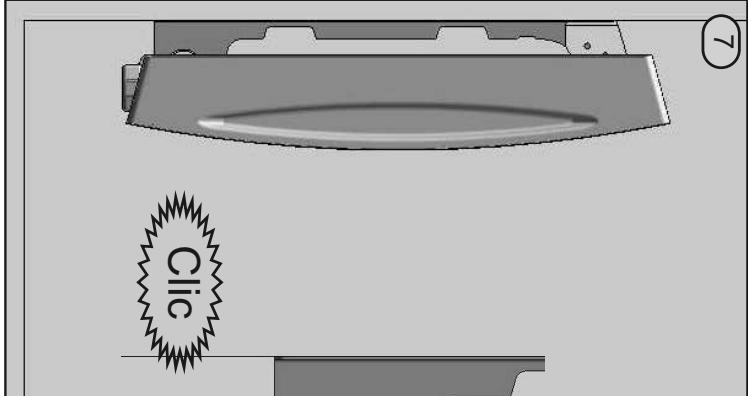
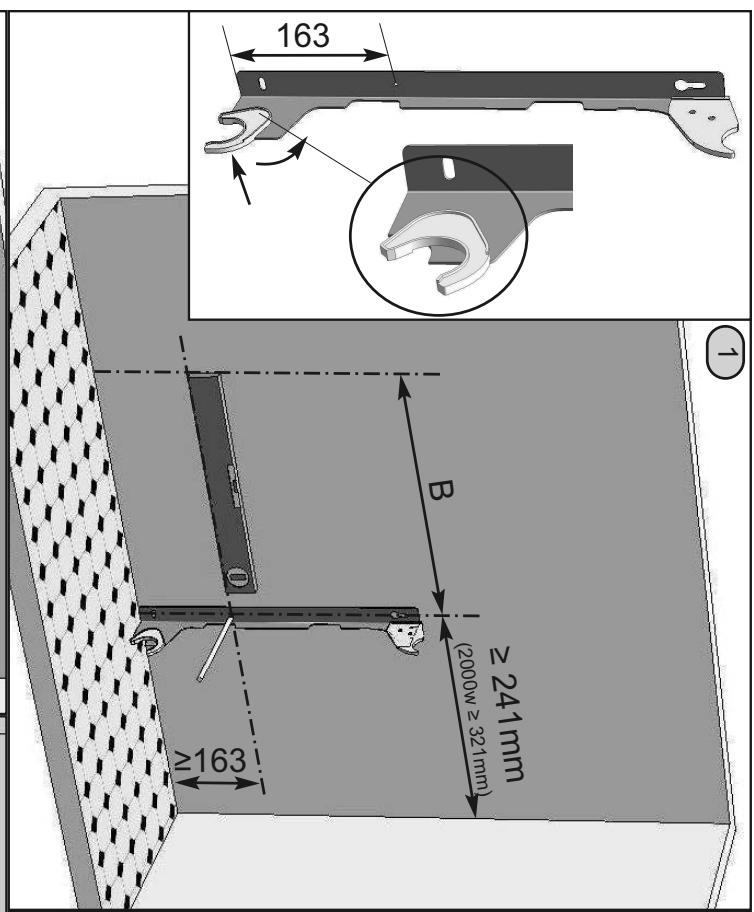
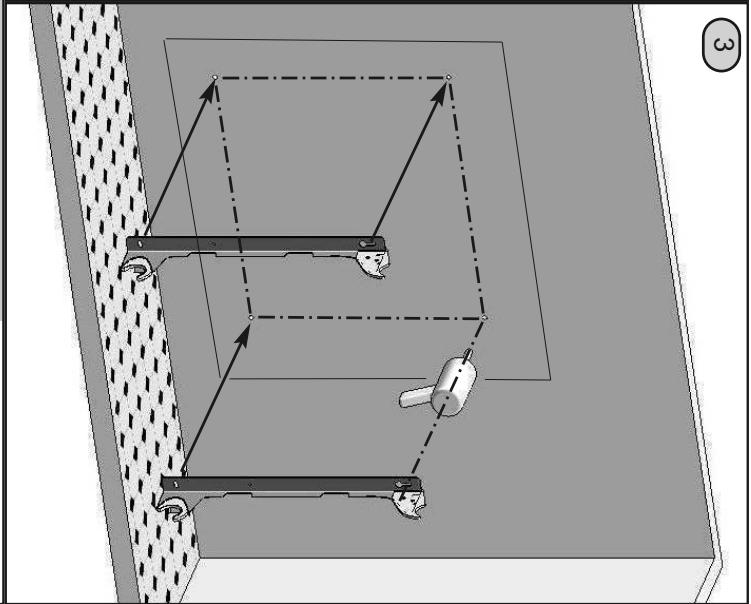
WALL-MOUNTING PROCEDURE (DEPENDS ON MODEL AND BRACKETS
ATTACHED) See the installation instructions supplied in the radiator packaging.
2.2 Connecting your appliance
The technical specifications of your radiator are shown on the nameplate at the bottom of the appliance.
Please take note of these before installing the appliance.
When connecting the appliance to the mains, you must ensure that the following requirements are met:
- the voltage marked on the nameplate
- standard colour coding (brown: live; blue or grey: neutral; black: Pilot Wire.
NOTE Your appliance is equipped with a pilot wire for connection to a Pilot Wire programming base unit (not supplied with the appliance).
The flexible cable supplied with the appliance is designed to be connected to the mains via a junction box that must be placed behind the appliance, with no need for a plug.
In a kitchen or bathroom, the junction box must be positioned at least 25cm from the floor.
IMPORTANT If the Pilot Wire is not connected, it must be insulated for safety reasons. Under no circumstances must it be connected to earth.
2.3 Installation restrictions
This appliance must be installed in accordance with applicable standards and good practice in the country concerned.
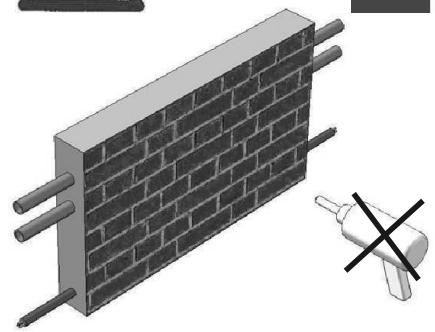
IMPORTANT the radiator must not be exposed to intense or ongoing ambient humidity (shower, swimming pool, etc.).
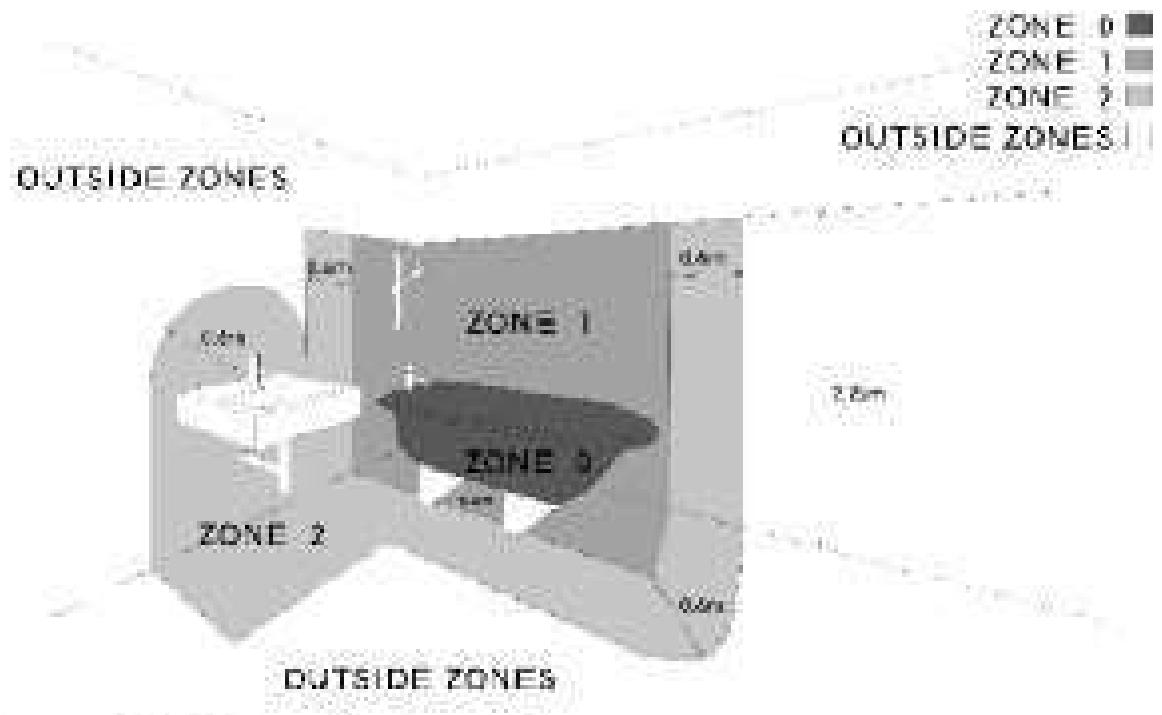
Space under bath is Zone 1, if ready accessible NB: The above diagram is only a guide and not to scale Please refer to E.F.Wing Regulations (RS 7671.2018).
3 Using your appliance
3.1 Operating mode selection
Press the MODE button repeatedly to select one of the five possible operating modes, each of which has its own green LED:
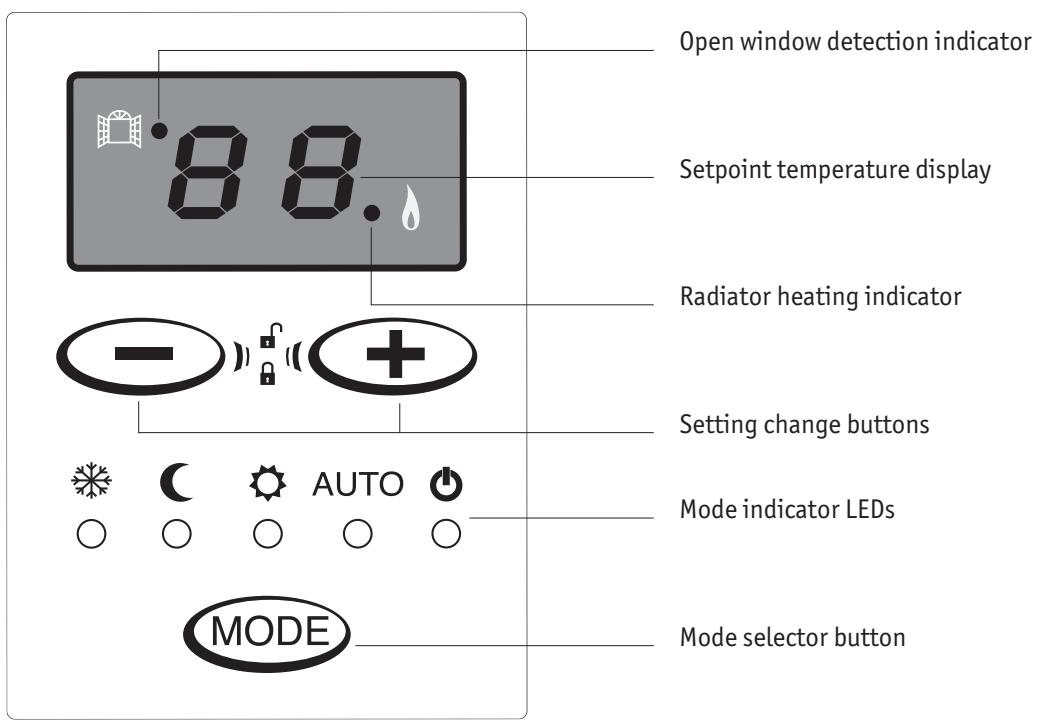
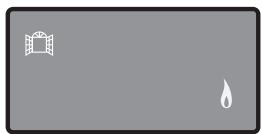
NOTE For your comfort, the LEDs and the display will switch off automatically if a button is not pressed for 30 seconds. This standby function does not affect the operation of your radiator, and pressing any button will reactivate the display.

FROST PROTECTION MODE
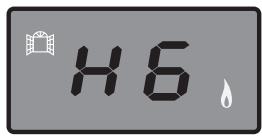
Display: HG
Your radiator maintains a non-modifiable minimum room temperature of 7^ C to prevent any risk of frost. This mode is recommended when the room is unoccupied for periods longer than 24 hours.

ECO MODE
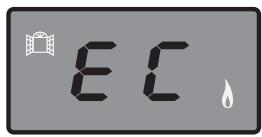
Display: EC
This is the "economy" mode, and it will produce a temperature approximately 3.5^ C lower than COMFORT mode.
This mode is recommended when the room is unoccupied for periods longer than 2 hours.
Example: if your radiator is set to 20^ in COMFORT mode, the ECO mode setpoint temperature will be 16.5^ .

COMFORT MODE
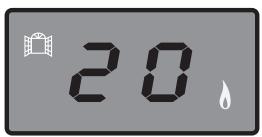
Display:
Setpoint
temperature
This is your radiator's normal operating mode. You can select your desired room temperature using the temperature change buttons.
This mode is recommended when the room is occupied. The temperature can be set to between 7 and 28^ .
AUTO
AUTO MODE

Display:
Setpoint
temperature
In this mode your radiator receives operating mode instructions remotely from a Pilot Wire unit (not supplied).

NO HEAT
The radiator does not heat.
3.2 Operating your appliance without a programming base unit
Press the MODE button repeatedly until COMFORT mode is selected and use the + and + buttons to set the desired temperature.
If this setpoint temperature is higher than the room temperature measured by your appliance, your radiator will start to heat.

Press the button repeatedly until the required operating mode is selected.
3.3 Operating your appliance with a Pilot Wire programming base unit (not supplied) – Auto mode
The programming base unit sends operating mode commands (No Heat, Frost Protection, Eco, Comfort) to your radiator via the Pilot Wire in your wiring system. It can also switch your radiator to one of two supplementary modes (Comfort -1°C and Comfort -2°C).
First set your required Comfort mode setpoint temperature using the and buttons.
Press the MODE button repeatedly until AUTO mode is selected.
Then consult the instructions supplied with your Pilot Wire unit for information on operating your radiator via Pilot Wire.
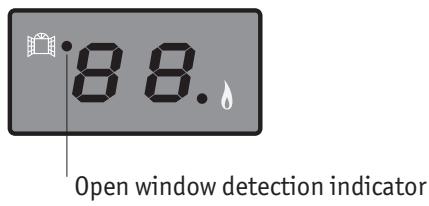
3.4 "Open window" detection
Your radiator can detect a significant fall in temperature such as that produced by leaving a window open for a prolonged period in winter. It automatically adjusts its operation to save energy.
When this happens, the "open window detection" LED illuminates.
When the temperature in your room stabilises, the radiator resumes normal operation and the LED goes out.
3.5 Electronic lock
This function prevents unwanted operation of the control panel. When it is activated, unintentional mode or setpoint temperature changes are not possible.
To activate this function, press the and buttons together for 3 seconds then release when the temperature display flashes.
If any of the buttons are touched, the setpoint temperature display will flash three times to indicate that they are locked.
NOTE This function will not block mode change commands from a Pilot Wire unit.
To unlock, press the and buttons together for 3 seconds. This will unlock the control panel.
4 Advice and recommendations
GETTING TO KNOW AND GETTING THE MOST OUT OF YOUR RADIATOR
This electrical appliance with circulating fluid is delivered ready to use. It is plugged and filled with a high-performance thermal mineral oil before leaving the factory. This fluid was specially designed for this use and requires no special maintenance.
As soon as the appliance is switched on, you will notice certain differences compared to a standard electric heating system:
- the electric heating element heats the fluid, which gradually and naturally starts circulating in your appliance,
- the properties of the fluid are such that it takes at least ten minutes for the radiator to reach its optimum surface temperature, depending on the model and the room temperature when the appliance is switched on,
- this principle also ensures consistent and sustained heating even when the element is no longer powered.
TAKING CARE OF YOUR RADIATOR

Before carrying out any maintenance operation on your appliance, ensure that it is switched off.
High-quality materials and surface treatment protect your radiator against corrosion and impacts.
To maximise the service life of your appliance, we recommend that you do not use abrasive or corrosive materials to clean it. Use warm soapy water and a dry cloth instead.
TECHNICAL SPECIFICATIONS OF YOUR ELECTRIC RADIATOR


ENVIRONMENTAL REGULATIONS
When disposing of the heating appliance, comply with the regulations in force on the disposal of oil.
RoHS: Complies with Directive 2002/95/EC
WEEE: Complies with Directive 2002/96/EC
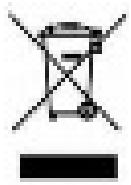
DISPOSAL OF END-OF-LIFE ELECTRICAL AND ELECTRONIC APPLIANCES
This symbol indicates that this product should not be disposed of with household waste. It must be taken to a suitable collection point to be recycled.
By disposing of this product correctly, you will help prevent potential negative consequences for the environment and human health.

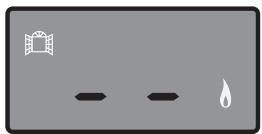
5 In case of fault
The display opposite indicates that a fault has been detected and action is required to remedy it.
If your appliance stops working, check that:
- your radiator is properly connected to an appropriate power supply,
- the radiator is not set to No Heat mode,
- the setpoint temperature is higher than the current room temperature and that this causes the radiator to heat,
- your appliance responds when an open window is detected. The fall in temperature produced when you air your room may not be sufficient to trigger this function. In this case, your radiator will continue to operate normally.
IMPORTANT If the power cable from the electrical connection box is damaged, for safety reasons it must be replaced by the manufacturer, the manufacturer's after-sales service department or a similarly qualified person.
PILOT WIRE UNIT
If your radiator is connected to a Pilot Wire unit, please see the instructions supplied with the unit for information on operating your appliance via Pilot Wire.
NOTE Your appliance is equipped with an integrated electronic control system and we cannot accept any liability should the appliance be used with Pilot Wire control units that function by disconnecting the supply voltage (refer to the instructions supplied with your control unit).
If your radiator stops receiving instructions, when in AUTO mode it will operate to your COMFORT mode settings until a new mode command is received from the Pilot Wire unit.
AFTER A POWER OUTAGE
When reactivated, the radiator will remember the last mode and setpoint temperature selected.
AFTER-SALES SERVICE
If your appliance stops working or you require spare parts, contact your installer or dealer.
Prior to making contact and to ensure your problem is dealt with quickly and effectively, please make a note of:
- the details shown on the appliance's nameplate,
- the sales reference for your appliance shown on your dated purchase invoice.
This heating appliance is filled with a precise quantity of special oil.
Any repair work requiring the oil tank to be opened should only be carried out by the manufacturer or their after-sales service department, which should also be contacted in the event of an oil leak.
GUARANTEE
Your electric radiator is guaranteed against manufacturing defects for two years from the date of purchase.
It complies with Directive 2004/108/EC on the approximation of the laws of the Member States relating to electromagnetic compatibility (EMC) and with European standards EN 60335-1 / 60335-2-30.
Should they be replaced, spare parts are guaranteed for one year, not including labour and travel costs.
Dated proof of purchase must be presented to activate the guarantee.
The guarantee does not cover radiator transport, removal and installation costs.
The guarantee shall not apply if the appliance is installed, used or maintained in a way that does not comply with standards in force in the relevant country, good professional practice, or the manufacturer's instructions.
NL
EN 60.335.1/60.335.2.30.
Original mounting instruction
02/05/11
PVA


S


NICTHTBEDECKEN
NO CUBRIR
NE PAS COUVRIR
DO NOT COVER
NON COPRIRE
NIET BEDEKKENNIE
NIEPRZYKRYWAC

ATTENTION NE PAS COUVRIP44


...W

···
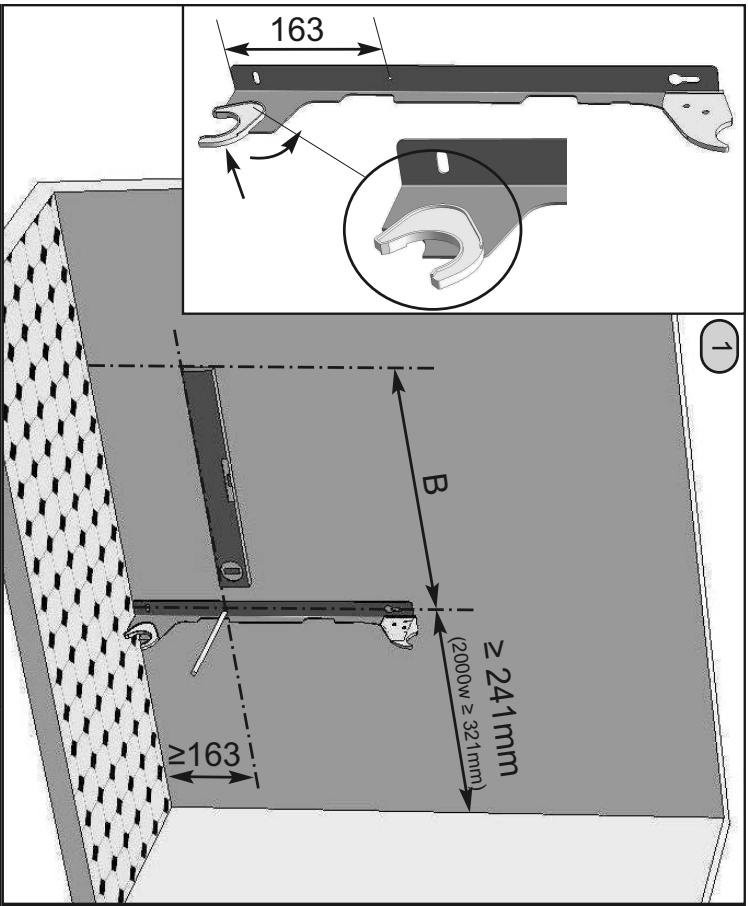
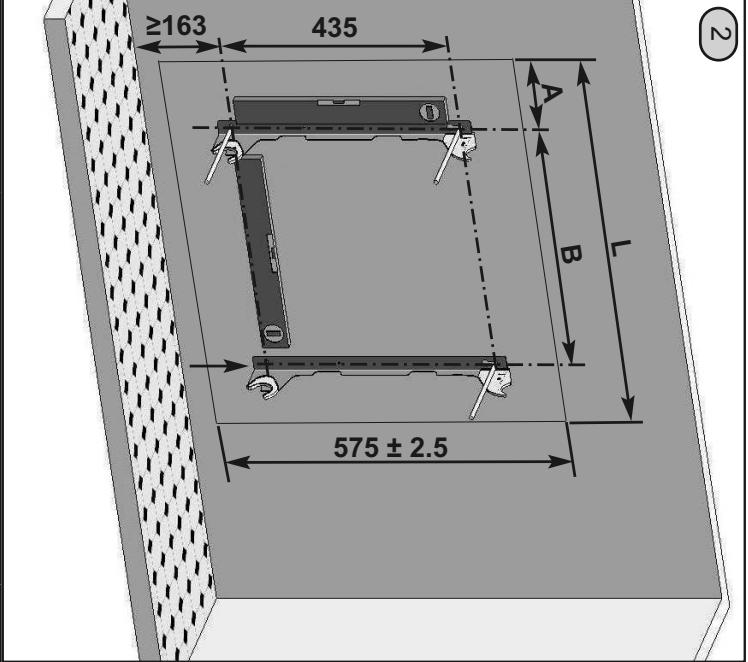
| L | A | B | |
| 5002 0020 | 406 | 90 | 160 |
| 5002 0030 | 486 | 90 | 240 |
| 5002 0040 | 645 | 90 | 400 |
| 5002 0050 | 803 | 90 | 560 |
| 5002 0060 | 883 | 90 | 640 |
| 5002 0080 | 1200 | 170 | 720 |

Z23170
DE
ES
FR
GB
IT
NL
PO
Montageanleitung
Instrucciones de montaje
Instructions de montage
Assembly Instructions
Instruzione di montaggio
Montagehandleiding
Instrukcja montazu
Original mounting instruction
02/05/11
PVA

S
A


NICTHTBEDECKEN
NO CUBRIR
NE PAS COUVRIR
DO NOT COVER
NON COPRIRE
NIET BEDEKKENNIE
NIEPRZYKRYWAC

ATTENTION NE PAS COUVRIP44


...W

···
| L | A | B | |
| 5002 0020 | 406 | 90 | 160 |
| 5002 0030 | 486 | 90 | 240 |
| 5002 0040 | 645 | 90 | 400 |
| 5002 0050 | 803 | 90 | 560 |
| 5002 0060 | 883 | 90 | 640 |
| 5002 0080 | 1200 | 170 | 720 |