SA1500 / SA1700 - Speaker System Audio - Free user manual and instructions
Find the device manual for free SA1500 / SA1700 System Audio in PDF.
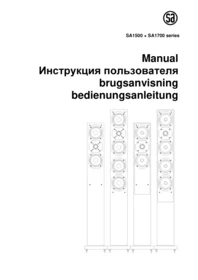


| Product Type | Passive Loudspeaker |
| Brand | System Audio |
| Model | SA1500 / SA1700 |
| Recommended Burn-in Time | Approximately 50 hours |
| Biwiring Support | Yes (two sets of terminals) |
| Biamping Support | Yes (requires extra power amplifier) |
| Sand Chamber | Yes (fill with dry sand) |
| Terminal Polarity | Red positive, black negative |
| Golden Bridges | Included, remove for biwiring/biamping |
| Recommended Distance Between Speakers | 2-3 meters |
| Bass Response | Amplified near wall, reduced when far |
| Grille | Removable, mountable on rear |
| Cabinet Cleaning | Moist cloth |
| Grille Cleaning | Vacuum with brush attachment |
| Warranty | 2 years against manufacturing defects |
| Serial Number | On rear label |
| Manufacturer Address | System Audio A/S, Klosterengen 137 K, 4000 Roskilde, Denmark |
| Website | www.system-audio.com |
| Manual Availability | Free PDF download (English and other languages) |
Frequently Asked Questions - SA1500 / SA1700 System Audio
User questions about SA1500 / SA1700 System Audio
0 question about this device. Answer the ones you know or ask your own.
Ask a new question about this device
Download the instructions for your Speaker in PDF format for free! Find your manual SA1500 / SA1700 - System Audio and take your electronic device back in hand. On this page are published all the documents necessary for the use of your device. SA1500 / SA1700 by System Audio.
USER MANUAL SA1500 / SA1700 System Audio
manual (English)
Thank you, for choosing SA. This manual will help you getting correctly started with your new loudspeakers. Follow the instructions of the manual to obtain the best sound. Please, note that the loudspeakers need approximately 50 hours burn in before the sound is optimised. There are no special precautions during the burn in period.
check the serial number
At the rear of the loudspeaker you will find a label with the serial number. It is a good idea to write the serial number down on the invoice from the dealer and save it together with your insurance documents. Contact your dealer if there is no serial number on the loudspeakers.
using the sand chamber
At the bottom of the cabinet you will find a separate sand chamber for filling with dry sand. The filling is performed by laying the loudspeaker down and removing the black cover (at the rear of the loudspeaker). Then the sand is poured through the hole until the chamber is full. Put the cover back on. The sand will stabilise the cabinet and absorb vibrations making the sound even more accurate.
connecting the loudspeaker to the amplifier
At the rear of the loudspeaker you will find the input terminal. This is where you connect the cable from the amplifier output to the loudspeaker. The red terminal is positive the black is negative. Make sure that the cable is correctly connected so that + on the amplifier is connected to + on the loudspeaker. The right and the left channel should also be correctly connected. Make sure that the connection is solid and clean.
If you use one cable per loudspeaker (single wiring), you must connect the cable to one of the sets of terminals. Do not dismount the golden "bridges". You can also choose to connect the loudspeaker with double cables. This wiring principle is called biwiring.
biwiring makes the sound clearer
The biwiring principle means that the loudspeaker has two sets of input terminals, and is constructed in separate bass driver and tweeter sections. Thus you can use two cables per loudspeaker i.e. one for the tweeter and one for the bass driver. On the amplifier the two cables must be connected to the same input terminal. When using the biwiring principle the two golden “bridges” between the two sets of terminals must be removed.
biwiring can be upgraded to biamping
Most modern amplifiers can be extended with an extra power amplifier. This enables you to connect your existing amplifier to the tweeter section and connect the power amplifier to the bass driver section (pls. refer to your amplifier manual)
Very important!
By use of biamping the two golden bridges between the two sets of terminals must be removed!
a good installation of the loudspeakers is vital to obtain a good sound
Place the loudspeakers 2 or 3 metres apart from each other. The sound from the loudspeakers should be able to find its way to your preferred listening position unobstructed.
Be aware that:
- the bass level is increased when the loudspeaker is placed close to a wall, and reduced by making the distance to the wall bigger
- the sound gets clearer if the loudspeakers are angled towards the listening position
cleaning the SA loudspeakers
The sides of the loudspeakers are cleaned with a moist cloth. The front grill is carefully cleaned with a vacuum cleaner with a brush mounted on the mouthpiece. Avoid touching the membranes of the loudspeakers and do not use any strong detergents.
warranty
System Audio A/S grants 2 years warranty against manufacturing defects. The warranty does not cover misuse. The dealer or an associated workshop performs repair or inspection. The warranty is valid, as long as there have been no modifications to the construction.
this is how you make the most of your SA loudspeakers
- Use some time experimenting with the position of the loudspeakers
• Give the speakers some time to burn in - The better your HiFi system is, the better your loudspeakers sound
• Good cables will improve the sound noticeable
• Never play louder than it still sounds good - Remove the front grill for serious listening sessions. They can be mounted at the rear of the loudspeaker.
- Visit the SA Internet homepage www.system-audio.com, where you can find more advice and manuals.
System Audio A/S
Klosterengen 137 K
4000 Roskilde
Denmark
Internet: www.system-audio.com
SA is a registered trademark
Barnsly Sound Organization
SA is a registered trademark


- MANUAL (ENGLISH)
- CHECK THE SERIAL NUMBER
- USING THE SAND CHAMBER
- CONNECTING THE LOUDSPEAKER TO THE AMPLIFIER
- BIWIRING MAKES THE SOUND CLEARER
- BIWIRING CAN BE UPGRADED TO BIAMPING
- A GOOD INSTALLATION OF THE LOUDSPEAKERS IS VITAL TO OBTAIN A GOOD SOUND
- CLEANING THE SA LOUDSPEAKERS
- WARRANTY
- THIS IS HOW YOU MAKE THE MOST OF YOUR SA LOUDSPEAKERS
Brand : System Audio
Model : SA1500 / SA1700
Category : Speaker