
NPH750 S - Earphones TEAC - Free user manual and instructions
Find the device manual for free NPH750 S TEAC in PDF.


User questions about NPH750 S TEAC
0 question about this device. Answer the ones you know or ask your own.
Ask a new question about this device
Download the instructions for your Earphones in PDF format for free! Find your manual NPH750 S - TEAC and take your electronic device back in hand. On this page are published all the documents necessary for the use of your device. NPH750 S by TEAC.
USER MANUAL NPH750 S TEAC
Integrated Amplifier
OWNER'S MANUAL
MODE D'EMPLOI
MANUAL DEL USUARIO
The lightning flash with arrowhead in an equi-lateral triangle is intended to alert the user to the presence of uninsulated "dangerous voltage" within the product's enclosure that could be of sufficient magnitude to constitute a risk of electric shock to persons.

The exclamation point in an equilateral triangle is intended to alert the user to the presence of important operating and maintenance (servicing) instructions in the literature accompanying the appliance.
WARNING: TO PREVENT FIRE OR SHOCK HAZARD, DO NOT EXPOSE THIS APPLIANCE TO RAIN OR MOISTURE.
CAUTION
DO NOT REMOVE EXTERNAL CASES OR CABINETS TO EXPOSE THE ELECTRONICS. NO USER SERVICEABLE PARTS ARE WITHIN!
- IF YOU ARE EXPERIENCING PROBLEMS WITH THIS PRODUCT, CONTACT TEAC FOR A SERVICE REFERRAL. DO NOT USE THE PRODUCT UNTIL IT HAS BEEN REPAIRED.
- USE OF CONTROLS OR ADJUSTMENTS OR PERFORMANCE OF PROCEDURES OTHER THAN THOSE SPECIFIED HEREIN COULD RESULT IN HAZARDOUS RADIATION EXPOSURE.
IN NORTH AMERICA USE ONLY ON 120 V SUPPLY.
For North American model:
This device complies with "Part 15 of FCC Rules" and "RSS-Gen of IC Rules".
Operation is subject to the following two conditions: (1) this device may not cause interference, and (2) this device must accept any interference, including interference that may cause undesired operation of this device.
This Class B digital apparatus complies with Canadian ICES-003.
Changes or modifications to this equipment not expressly approved by TEAC CORPORATION for compliance will void the user's warranty.
NOTE
For product available in the USA/Canada market, only channels 1 to 11 can be operated. Selection of other channels is not possible.
This transmitter must not be co-located or operating in conjunction with any other antenna or transmitter.
Information to the user:
This equipment has been tested and found to comply with the limits for a Class B digital device, pursuant to Part 15 of the FCC Rules. These limits are designed to provide reasonable protection against harmful interference in a residential installation. This equipment generates, uses, and can radiate radio frequency energy and, if not installed and used in accordance with the instructions, may cause harmful interference to radio communications. However, there is no guarantee that interference will not occur in a particular installation. If this equipment does cause harmful interference to radio or television reception, which can be determined by turning the equipment off and on, the user is encouraged to try to correct the interference by one or more of the following measures:
- Reorient or relocate the equipment and/or the receiving antenna.
- Increase the separation between the equipment and receiver.
- Connect the equipment into an outlet on a circuit different from that to which the receiver is connected.
- Consult the dealer or an experienced radio/TV technician for help.
Radiation Exposure Statement
This equipment complies with FCC/IC radiation exposure limits set forth for an uncontrolled environment, meets the FCC radio frequency (RF) Exposure Guidelines, and RSS-102 of the IC radio frequency (RF) Exposure rules.
End-users and installers must be provided with antenna installation instructions and transmitter operating conditions for satisfying RF exposure compliance.
Note
This equipment should be installed and operated with minimum distance 20cm between the radiator and your body.
Precautions concerning batteries
Misuse of batteries could cause them to rupture or leak leading to fire, injury or the staining of nearby things. Please read and observe the following precautions carefully.
- Be sure to insert the batteries with correct positive () and negative () orientations.
- Use batteries of the same type. Never use different types of batteries together.
- If the remote control is not used for a long time (more than a month), remove the batteries to prevent them from leaking.
- If the batteries leak, wipe away the leakage inside the battery compartment and replace the batteries with new ones.
- Do not use batteries of types other than those specified. Do not mix new batteries with old ones or use different types of batteries together.
- Do not heat or disassemble batteries. Never throw batteries into fire or water.
- Do not carry or store batteries with other metallic objects. The batteries could short circuit, leak or explode.
- Never recharge a battery unless it is confirmed to be a rechargeable type.
MPEG Layer-3 audio coding technology licensed from Fraunhofer IIS and Thomson.
Wi-Fi is a mark of the Wi-Fi Alliance.
The Wi-Fi CERTIFIED Logo is a certification mark of the Wi-Fi Alliance.
This product is protected by certain intellectual property rights of Microsoft. Use or distribution of such technology outside of this product is prohibited without a license from Microsoft.
Windows, Windows Vista, Windows 7, Windows Media and Internet Explorer are either registered trademarks or trademarks of Microsoft Corporation in the United States and/or other countries.
"Made for iPod," "Made for iPhone," and "Made for iPad" mean that an electronic accessory has been designed to connect specifically to iPod, iPhone, or iPad, respectively, and has been certified by the developer to meet Apple performance standards.
Apple is not responsible for the operation of this device or its compliance with safety and regulatory standards. Please note that the use of this accessory with iPod, iPhone, or iPad may affect wireless performance.
Apple, Macintosh, Mac OS X, AirPlay, the AirPlay logo, iPad, iPhone, iPod, iPod nano, iPod touch and iTunes are trademarks of Apple Inc., registered in the U.S. and other countries.
IOS is a trademark or registered trademark of Cisco in the U.S. and other countries and is used under license.
DLNA®, the DLNA Logo and DLNA CERTIFIED® are trademarks, service marks, or certification marks of the Digital Living Network Alliance.
Other company names, product names and logos in this document are the trademarks or registered trademarks of their respective owners.
NOTE: Open source software copyright and license information is included at the end of this manual.
IMPORTANT SAFETY INSTRUCTIONS

1) Read these instructions.
2) Keep these instructions.
3) Heed all warnings.
4) Follow all instructions.
5) Do not use this apparatus near water.
6) Clean only with dry cloth.
7) Do not block any ventilation openings. Install in accordance with the manufacturer's instructions.
8) Do not install near any heat sources such as radiators, heat registers, stoves, or other apparatus (including amplifiers) that produce heat.
9) Do not defeat the safety purpose of the polarized or grounding-type plug. A polarized plug has two blades with one wider than the other. A grounding type plug has two blades and a third grounding prong. The wide blade or the third prong are provided for your safety. If the provided plug does not fit into your outlet, consult an electrician for replacement of the obsolete outlet.
10) Protect the power cord from being walked on or pinched particularly at plugs, convenience receptacles, and the point where they exit from the apparatus.
11) Only use attachments/accessories specified by the manufacturer.
12) Use only with the cart, stand, tripod, bracket, or table specified by the manufacturer, or sold with the apparatus. When a cart is used, use caution when moving the cart/ apparatus combination to avoid injury from tip-over.
13) Unplug this apparatus during lightning storms or when unused for long periods of time.
14) Refer all servicing to qualified service personnel. Servicing is required when the apparatus has been damaged in any way, such as power-supply cord or plug is damaged, liquid has been spilled or objects have fallen into the apparatus, the apparatus has been exposed to rain or moisture, does not operate normally, or has been dropped.
- The apparatus draws nominal non-operating power from the AC outlet with its POWER or STANDBY/ON switch not in the ON position.
- The mains plug is used as the disconnect device, the disconnect device shall remain readily operable.
- Caution should be taken when using earphones or headphones with the product because excessive sound pressure (volume) from earphones or headphones can cause hearing loss.
CAUTION
- Do not expose this apparatus to drips or splashes.
- Do not place any objects filled with liquids, such as vases, on the apparatus.
- Do not install this apparatus in a confined space such as a book case or similar unit.
- The apparatus should be located close enough to the AC outlet so that you can easily reach the power cord plug at any time.
- If the product uses batteries (including a battery pack or installed batteries), they should not be exposed to sunshine, fire or excessive heat.
- CAUTION for products that use replaceable lithium batteries: there is danger of explosion if a battery is replaced with an incorrect type of battery. Replace only with the same or equivalent type.
WARNING
Products with Class I construction are equipped with a power supply cord that has a grounding plug. The cord of such a product must be plugged into an AC outlet that has a protective grounding connection.
CLASS II apparatus with double insulation, and no protective earth provided.

For European Customers
Disposal of electrical and electronic equipment
(a) All electrical and electronic equipment should be disposed of separately from the municipal waste stream via collection facilities designated by the government or local authorities.
(b) By disposing of electrical and electronic equipment correctly, you will help save valuable resources and prevent any potential negative effects on human health and the environment.
(c) Improper disposal of waste electrical and electronic equipment can have serious effects on the environment and human health because of the presence of hazardous substances in the equipment.
(d) The Waste Electrical and Electronic Equipment (WEEE) symbol, which shows a wheeled bin that has been crossed out, indicates that electrical and electronic equipment must be collected and disposed of separately from household waste
(e) Return and collection systems are available to end users. For more detailed information about the disposal of old electrical and electronic equipment, please contact your city office, waste disposal service or the shop where you purchased the equipment.
Disposal of batteries and/or accumulators
(a) Waste batteries and/or accumulators should be disposed of separately from the municipal waste stream via collection facilities designated by the government or local authorities.
(b) By disposing of waste batteries and/or accumulators correctly, you will help save valuable resources and prevent any potential negative effects on human health and the environment.
(c) Improper disposal of waste batteries and/or accumulators can have serious effects on the environment and human health because of the presence of hazardous substances in them.
(d) The WEEE symbol, which shows a wheeled bin that has been crossed out, indicates that batteries and/or accumulators must be collected and disposed of separately from household waste.

Pb,Hg,Cd
If a battery or accumulator contains more than the specified values of lead (Pb), mercury (Hg), and/or cadmium (Cd) as defined in the Battery Directive (2006/66/EC), then the chemical symbols for those elements will be indicated beneath the WEEE symbol.
(e) Return and collection systems are available to end users. For more detailed information about the disposal of waste batteries and/or accumulators, please contact your city office, waste disposal service or the shop where you purchased them.
Contents
Thank you for choosing TEAC. Read this manual carefully to get the best performance from this unit.
Before use 6
Files 8
Connecting speakers 9
Connections. 11
Names and functions of parts (main unit) 14
Names and functions of parts (remote control unit) 16
Using the remote control unit 19
Playing back music on a computer. 20
Setting the current time 23
Basic operation 24
About the ErP 27
Listening files on a USB flash drive 27
Searching inside folders 29
Information shown on the display 30
Shuffle playback 30
Repeat playback 31
Listening to an iPod/iPhone/iPad 32
Initial network setup. 34
Network configuration. 37
Listening to the Internet radio 38
Internet radio portal 41
Setting up the media player 42
Listening with the media player. 47
Using AirPlay 48
Using DLNA 49
Sleep Timer. 50
Setting the wake-up timer. 50
Updating the firmware 52
Troubleshooting 57
Restoring factory settings. 59
Specifications. 60
Before use
Features of NP-H750
- USB port for iPod/iPhone/iPad/USB flash drives
Internet radio (page 38)
Media player (page 42)
AirPlay (page 48)
DLNA (page 49)
Tracks on a server connected to the network can be played back by computers and mobile devices if they have applications that support DLNA installed.
What's in the box
Check to be sure the box includes all the supplied accessories shown below.
Please contact the store where you purchased this unit if any of these accessories are missing or have been damaged during transportation.
Power cord × 1
Remote control unit (RC-1308) × 1
Batteries for remote control unit (AAA) × 2
Owner's manual (this document) × 1
- Keep this manual in a safe place for future reference.
Warranty card × 1
CAUTION
Read this before attempting any operations.
- Avoid placing the unit in direct sunlight or close to any source of heat, such as a radiator, heater, open fireplace or amplifier. Also avoid locations that are subject to vibrations or exposed to excessive dust, cold or moisture.
- This unit consumes energy when in standby.
- Place the unit in a stable location near the audio system that you will use.
- Be careful to avoid injury when moving the unit due to its weight. Get someone to help you if necessary.
The voltage supplied to the unit should match the voltage as printed on the rear panel. If you are in any doubt regarding this matter, consult an electrician. - As the unit could become warm during operation, always leave sufficient space around it for ventilation. When placing this unit, position it so that it is at least 30~cm ( 12^ ) from walls and other devices in order to allow good heat dissipation. When installing it in a rack, leave at least 30 cm ( 12^ ) open above and behind the unit. DO NOT place anything, not even CDs, CD-Rs, LP records or cassette tapes, on top of the unit.
- Do not open the body of the unit as this might result in damage to the circuitry or cause electric shock. If a foreign object should get into the unit, contact your dealer or TEAC service company.
- When removing the power plug from the wall outlet, always pull directly on the plug; never yank on the cord.
- Depending on the electromagnetic waves of television broadcasts, interference might appear on television screens when this unit's power is on. This does not indicate that this unit or the TV is malfunctioning. If this occurs, put the unit in standby.
Maintenance
If the surface of the unit gets dirty, wipe it with a soft cloth or use diluted mild liquid soap. Allow the surface of the unit to dry completely before using.

For safety, disconnect the power cord from the socket before cleaning.
- Never spray liquid directly on this unit.
- Do not use thinner or alcohol as they could damage the surface of the unit.
- Avoid allowing rubber or plastic materials to touch this product for long periods of time, because they could damage the cabinet.
Playable Files
This unit can play audio files that are on external USB flash drives.*
- USB flash drives must be formatted as FAT 16 or FAT 32, but not NTFS.
*The USB port on this unit only supports USB flash drives (also known as "thumb drives" and "jump drives"). It does not support standard USB hard drives.
The file formats that can be played back by each playback source are as follows.
| Format | USB flash drive | Media player | |
| WiFi | Ethernet cable | ||
| WAV | ✓ | ✓ | ✓ |
| FLAC | ✓ | ✓ | ✓ |
| MP3 | ✓ | ✓ | ✓ |
| OGG | ✓ | ✓ | ✓ |
| WMA | ✓ | ✓ | ✓ |
WAV
File extension:.wav
Stream:LPCM
Sampling Frequency: 8kHz to 48kHz
FLAC
Sampling Frequency: 8 kHz to 48 kHz
Only 48kHz is supported with USB.
MP3
File extension:.mp3
Stream: MPEG-1/2 Layer III
Sampling Frequency: 8 to 48kHz
Bit Rate: 8 to 320 kbps/VBR
Ogg Vorbis
File extension:ogg
Stream: Ogg
Sampling Frequency: 8 kHz to 48 kHz
Bit Rate: 16 kbps to 128 kbps
WMA
File extension:.asf/.wma
Stream: WMA2/7/8/9/10, WMA Pro, WMA Lossless**
Sampling Frequency: 8 kHz to 48 kHz
Bit Rate: 5 kbps to 320 kbps
**WMA Pro and WMA Lossless formats are only supported when the playback computer is using Windows Media Player 12 or later. (Playback occurs after transcoding.)
File names shown on the display
The display of this unit can only show single-byte letters and numbers. If the file information uses Japanese, Chinese or other double-byte characters, playback is possible but the name will not be shown correctly.
Precautions when using computers and other devices to create files
Always include the extension in the file name.
See the manual for the software that you are using when you create a file using a PC.
Files that cannot be played correctly
- Files without extensions cannot be played. Even if the file name has an extension, playback is not possible if the data format is incorrect.
- Variable bit rate files might not play back correctly.
- When more than 2000 files are recorded on the USB flash drive, the unit might not be able to play them correctly.
Connecting speakers (1)
Precautions when making connections
- Complete all other connections before connecting power plugs to power outlets.
- Read the owner's manuals of all devices that will be connected, and follow their instructions.
- Do not bundle connecting cables with power cords. Doing so could cause noise.
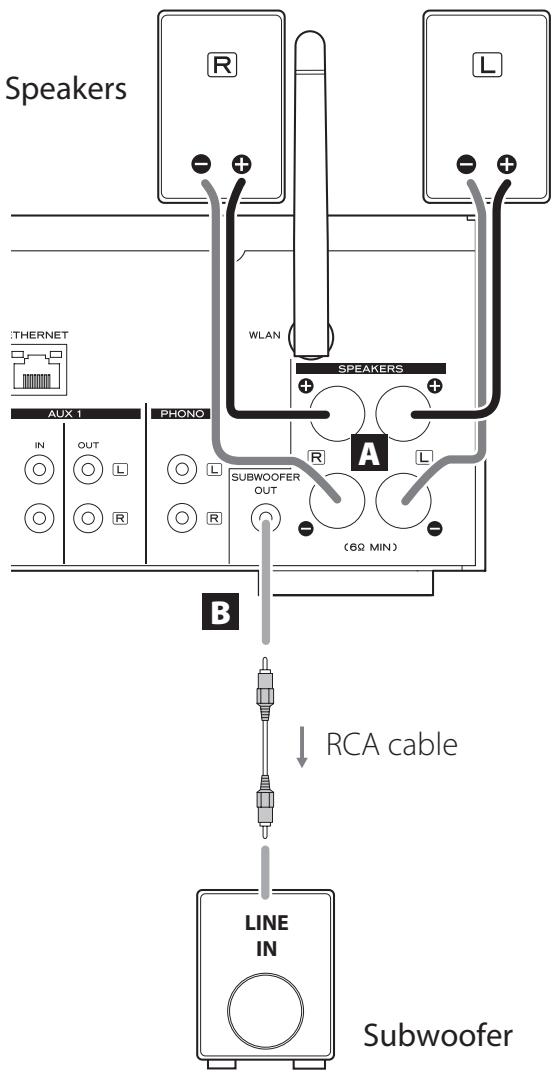
A SPEAKERS terminals
Connect speakers to this unit using commercially available speaker cables.
This unit's (positive) terminals are red (for the right speaker) and white (for the left speaker). The black speaker terminals are (negative). Generally, the wire of the speaker cable is marked to make it distinguishable from the wire of the cable. Connect the marked wires to the red and white terminals and the unmarked wires to the black terminals.
- Check the impedance of your speakers. Connect speakers with an impedance of 6 ohms or more.
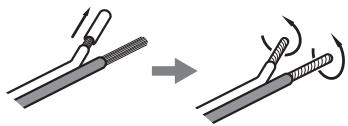
Before connections
- Remove about 1cm (1 / 2^ ) of the sheath at the end of the speaker cable.
- Twist the cable core well.
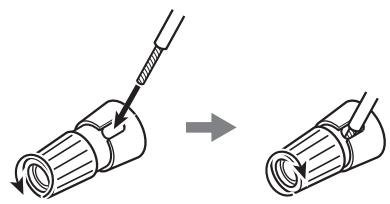
Making cable connections
- Turn the terminal cap counterclockwise to loosen it.
- Insert the wire into the hole in the terminal screw and turn the terminal cap clockwise to connect it securely.
CAUTION
If the exposed end of a core wire in a speaker cable contacts another cable or terminal, a short could occur. Do not allow this to happen.
Connecting speakers (2)
Connecting speakers using banana plugs
You can also connect speakers using commercially available banana plugs. Connect the speaker cable to the banana plug first, and then insert the plug into the terminal.
- Carefully read the instructions of the banana plugs that you intend to use with this unit.
- For North American customers Before inserting banana plugs, remove the black cap from the top of each terminal cap.

For European customers
In accordance with European safety regulations, it is not possible to connect banana plugs into the speaker terminals on European models. The holes into which banana plugs are inserted have been covered with black caps. Connect the speakers using spades or bare wires. If the black caps become separated from the terminals, return them to their original position.
B SUBWOOFER OUT jack
You can connect a subwoofer to enhance low frequencies here.
Connect a commercially available powered subwoofer to this u nit using a commercially available RCA cable.
- Use a subwoofer with a built-in amplifier. In order to balance the levels with the main speakers, adjust the subwoofer volume while listening to audio that you know well. Adjust it as you like to suit the music.
Using an iPod/iPhone/iPad
Compatible iPod/iPhone/iPad models
This unit can be connected to and used with the following iPod/iPhone/iPad models.
iPod nano (2nd, 3rd, 4th, 5th, and 6th generation)
iPod touch (1st, 2nd, 3rd, and 4th generation)
iPhone 4S, iPhone 4, iPhone 3GS, iPhone 3G
iPad 2, iPad
- To connect an iPod/iPhone/iPad, use the USB cable supplied with the iPod/iPhone/iPad.
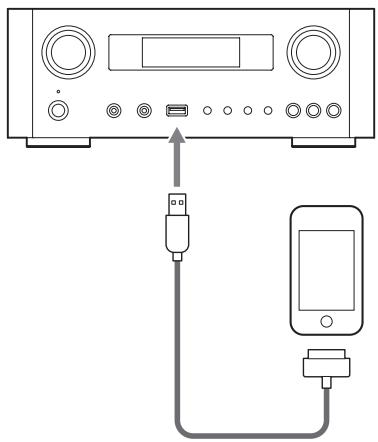
iPod/iPhone/iPad software
If the unit or remote control buttons do not work properly with your iPod/iPhone/iPad, updating its software might solve the problem.
Download the latest software for your iPod/iPhone/iPad from the following Apple website.
http://www.apple.com/downloads/
Connections (1)
Precautions when making connections
- Complete all other connections before connecting power plugs to power outlets.
- Read the owner's manuals of all devices that will be connected, and follow their instructions.
- Do not bundle connecting cables with power cords. Doing so could cause noise.
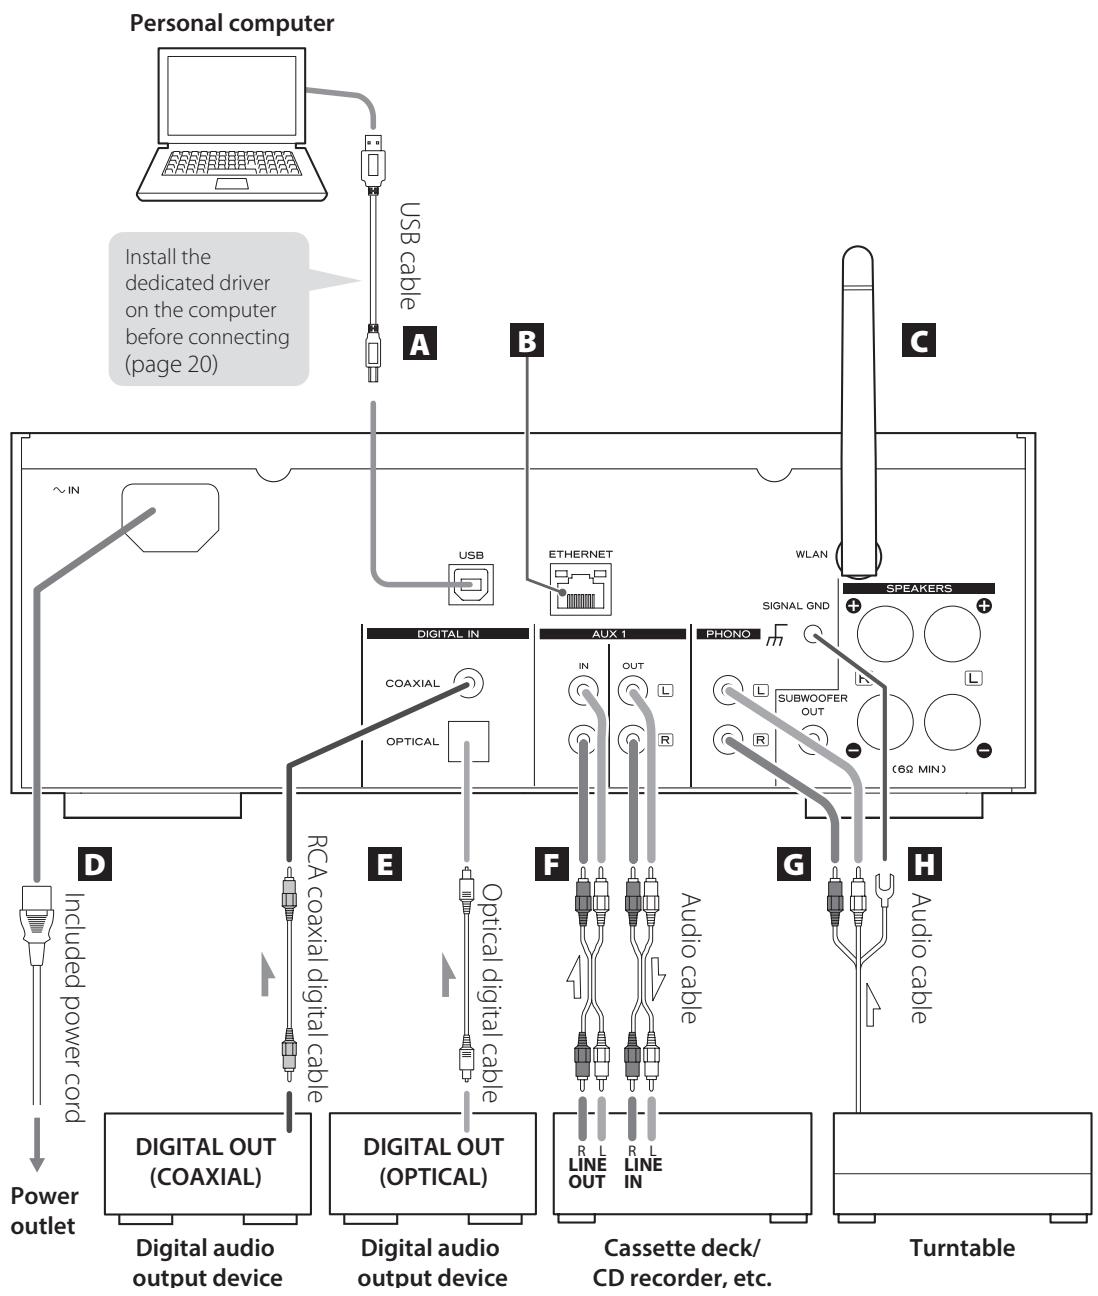
Connections (2)
A USB audio input port
Use to input digital audio from a computer. Connect with a USB port on the computer.
Use a commercially available USB cable to make the connection.
- Install the dedicated driver before connecting the computer to this port by USB (page 20).
B ETHERNET port
If you want to use a wired Internet connection, connect the ETHERNET port of this unit to an Ethernet network using a commercially available Ethernet cable.
- If you connect or disconnect the Ethernet cable while the unit is turned on, put the unit in standby, disconnect the power cord from the wall outlet, connect it and turn the unit on again.
Wireless LAN antenna
If you can use a wireless LAN in your installation site, the unit connects to the LAN using the wireless LAN antenna. As shown in the illustration on page 11, turn the antenna so that it points up.
D Power inlet [~IN]
Connect the supplied power cord here.
- Unplug the cord from the outlet when not using the unit for a long time.
CAUTION
- Be sure to connect the power cord to an AC outlet that supplies the correct voltage.
- Hold the power plug when plugging it into an outlet or unplugging it. Never pull or yank on the power cord.
Digital audio input connectors [COAXIAL, OPTICAL]
Use to input digital audio. Connect to the digital audio output connectors of a device capable of outputting digital audio.
COAXIAL: Coaxial digital cable (RCA)
OPTICAL: Optical digital cable (TOS)
AUX 1 IN/OUT jacks
These input/output analog audio signals.
Connect this unit's input and output jacks to the output and input jacks of other devices using commercially available audio cables.
- Connect an audio cable's white pin plug to the white (L) jack and connect its red pin plug to the red (R) jack.

- If you want to use a recorder (eg. a cassette deck or a CD recorder) with this unit, connect the output jacks of the recorder to the AUX 1 IN jacks of this unit and connect its input jacks to the AUX 1 OUT jacks.
- Be sure to insert each plug securely. To prevent humming and interference, avoid bundling the signal interconnection cables together with the AC power cord or speaker cables.
G PHONO jacks
Connect the turntable's RCA pin cable to the PHONO jacks.
- Connect an audio cable's white pin plug to the white (L) jack and connect its red pin plug to the red (R) jack.
- Be sure to insert each plug securely. To prevent humming and interference, avoid bundling the signal interconnection cables together with the AC power cord or speaker cables.
- This unit supports the use of MM cartridges (input sensitivity: 2.5mV / 47k ). It does not support the use of MC cartridges.
H Grounding connector [SIGNAL GND]
Connect the grounding wire of the turntable here.
This is not an electrical safety ground.
- If the grounding wire of the turntable is not connected here, hum noise may be heard.
Names and functions of parts (main unit) (1)
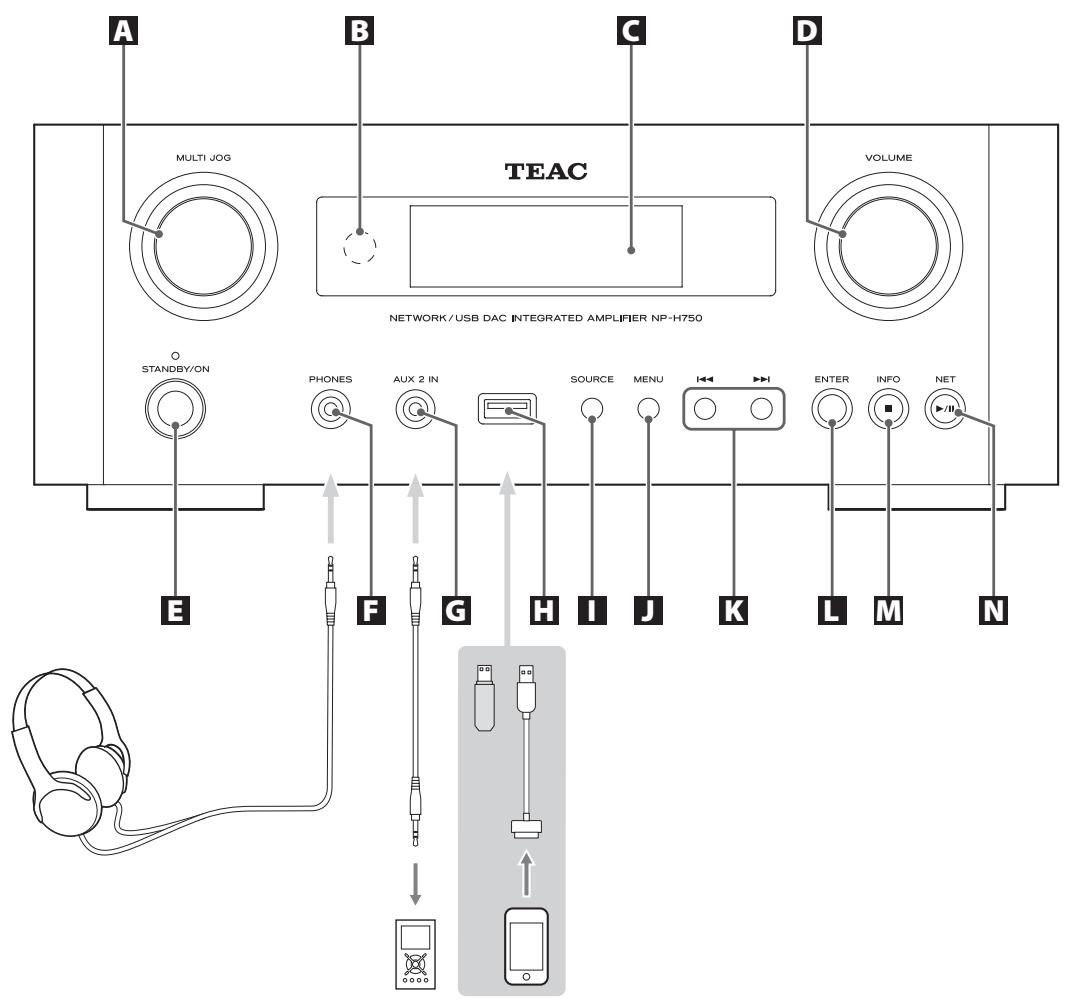
A MULTI JOG knob
Use this knob to set the clock and the timer.
In USB/iPod mode, use this knob to scroll up and down the menu when an iPod/iPhone/iPad is connected.
In USB/iPod mode, turn the MULTI JOG knob to search files inside folders or at the root level.
- When a USB flash drive is connected, turning this knob skips between all the files (tracks) and folders within only the selected folder.
In network mode, use for each file or setting mode. - Use this knob to adjust the low and high frequency levels (bass and treble).
Remote sensor
When operating the remote control unit, point it towards the remote sensor.
C Display
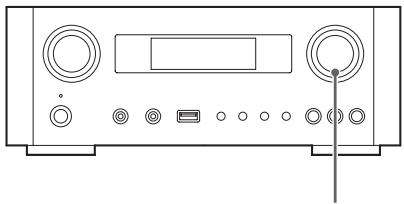
D VOLUME knob
Use this knob to adjust the volume. Turn it clockwise to increase and counterclockwise to decrease the volume.
- After adjusting the volume, the volume level will be retained even if you press the STANDBY/ON button to put the unit into standby.
E STANDBY/ON button
Press this button to turn the unit on or put it in standby mode.
The color of the indicator above the STANDBY/ON button shows the status of the unit.
| Indicator | Status |
| Orange | Standby |
| Blue | ON |
F PHONES jack
To listen with headphones, first minimize the volume. Then, insert the headphones' plug into the PHONES jack and gradually increase the volume.
No sound will be output from the speakers while the headphones' plug is inserted in the PHONES jack.
CAUTION
Do not connect or disconnect headphones or turn the unit on or put it in standby while wearing them.
Sudden loud noises could occur, which might cause hearing damage.
AUX 2 IN jack
Connect this jack to the headphones' jack (or an audio output jack) of a portable audio player or other device using a commercially available 3.5 mm stereo mini plug cable.
USBport
Connect an iPod/iPhone/iPad or USB flash drive.
SOURCE button
Use this button to select the source.
D MENU button
In USB/iPod mode, use this button to go back to the previous menu when an iPod/iPhone/iPad is connected. When in network mode (Internet radio/media player), the setup menu appears.
K Skip buttons [!▶/▶]
In USB/iPod mode, use these buttons to skip to the previous or next track or file when playing back or paused. Use these buttons to adjust the balance.
When a menu is shown, use to select in the same way as the ENTER button.
When a folder is shown, press to move up one folder level.
ENTER button
In USB/iPod mode, use this button to confirm selections in menus when an iPod/iPhone/iPad is connected.
When making settings, use this button to confirm selection of a menu item.
In network mode (Internet radio/media player), use to select a station or track.
Names and functions of parts (MU) (2)
M INFO button
While listening to the Internet radio or with the media player function, use this button to change the information on the display.
For information about use in network mode, see page 18.
Stop button [■]
In USB/iPod mode, use this button to stop playback.
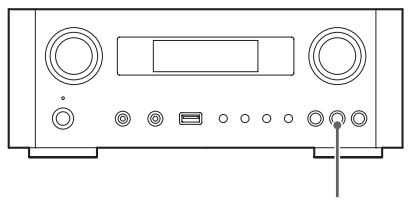
When "Media Player" is selected as the input source, hold this button for at least 2 seconds to stop playback.
NET button
Press when in network mode to switch between Internet radio and media player.
Play/pause button [▶/II]
In USB/iPod mode, use this button to start or pause playback.
For information about use in network mode, see page 18.
Names and functions of parts (RC) (1)
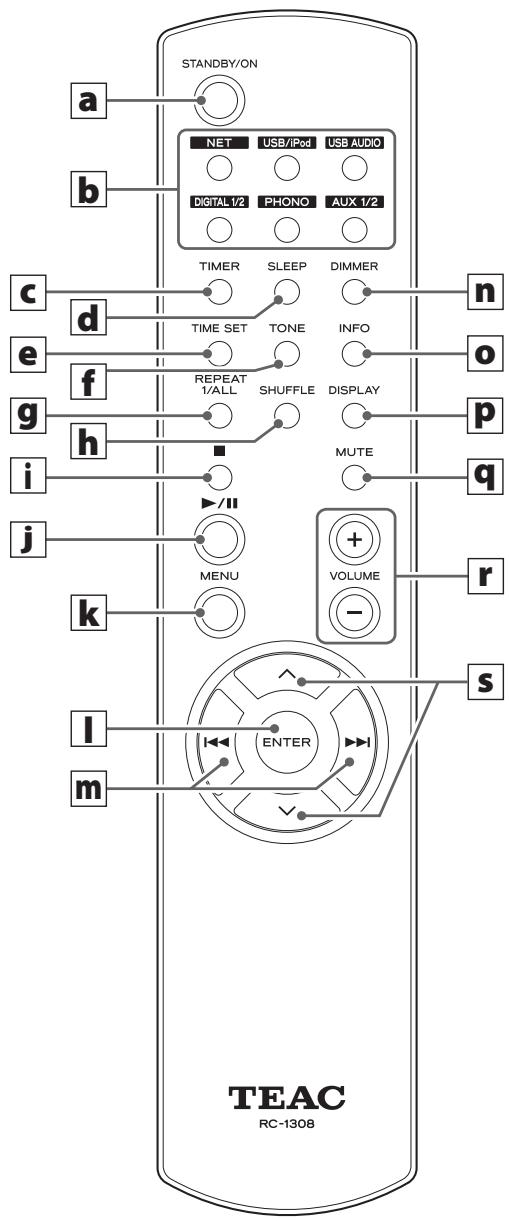
When both the main unit and the remote control have buttons with the same functions, this manual explains how to use either of them. The corresponding buttons can be used in the same manner.
a STANDBY/ON button
Press this button to turn the unit on or put it in standby mode.
The color of the indicator above the STANDBY/ON button shows the status of the unit.
| Indicator | Status |
| Orange | Standby |
| Blue | ON |
Source buttons [NET, USB/iPod, USB AUDIO, COAXIAL, OPTICAL, PHONO, AUX 1/2]
Use these buttons to select a source.
NET.......Network mode (Internet radio/media player)
USB/iPod.....USB/iPod mode
USB AUDIO .... USB audio input mode
COAXIAL .......Digital input mode (coaxial)
OPTICAL .......Digital input mode (optical)
PHONO.....Phono mode
AUX 1/2 .......External input mode (AUX)
To select the media player, use the NET button.
- Press the AUX 1/2 button again to switch between AUX 1 and AUX 2.
TIMER button
Use this button to select the timer function ("Timer Daily","Timer Once", or "Timer Off").
d SLEEP button
Use this button to set the sleep timer (page 50).
e TIME SET button
Use this button to adjust the clock and to set the wake-up timer.
TONE button
Use this button with the Scroll buttons (/) to adjust the low and high frequency levels as well as the left-right balance (page 26).
9 REPEAT 1/ALL button
In USB/iPod mode, use this button to set the repeat playback of an iPod/iPhone/iPad or a USB flash drive (page 31).
h SHUFFLE button
In USB/iPod mode, use this button to start shuffle playback of an iPod/iPhone/iPad or a USB flash drive.
i Stop button [■]
In USB/iPod mode, use this button to stop playback of an iPod/iPhone/iPad or a USB flash drive.
When "Media Player" is selected as the input source, hold this button for at least 2 seconds to stop playback.
Play/pause button [▶/III]
In USB/iPod mode, use this button to start or pause playback of the iPod or USB.
Refer to the table on the next page for operation in network mode.
K MENU button
In USB/iPod mode, use this button to go back to the previous menu. This button is equivalent to the MENU button on your iPod.
When in network mode (Internet radio/media player), the setup menu appears.
ENTER button
In USB/iPod mode, use this button to confirm selections in menus when an iPod/iPhone/iPad is connected.
When making settings, use for menu selection.
In network mode (Internet radio or media player), use to select a station or track.
Names and functions of parts (remote control) (2)
m Skip button [1
In USB/iPod mode, use these buttons to skip to the previous or next track or file when playing back or paused. Use these buttons to adjust the balance.
When a menu is shown, use to select in the same way as the ENTER button.
When a folder is shown, press to move up one folder level.
DIMMER button
Use this button to change the brightness of the display (page 26).
INFO button
While listening to the Internet radio or with the media player function, use this button to change the information on the second line of the display.
DISPLAY button
In USB/iPod mode, use this button to change what information is displayed.
MUTE button
Use this button to mute the sound.
VOLUME buttons [+ / - ]
Use these buttons to adjust the volume level.
Press + to increase and - to decrease the volume.
Scroll buttons [ / ]
In USB/iPod mode, use these buttons to select a folder or file that is on a device connected to the unit's USB port. (When an iPod/iPhone/iPad is connected, use these to scroll through its menu.)
When making settings, use these to scroll through menus.
After pressing the TONE button, use to adjust the tone settings (low and high frequency levels) (page 26).
- When in network mode, the buttons on the unit and the remote control function differently.
Main unit
| Status | Button | Function |
| Stopped | Play/pause button (▶/■) | Change network mode |
| Stop button (■) | No function | |
| Playing back | Play/pause button (▶/■) | Play/pause |
| Stop button (■) | Show information |
Remote control
| Status | Button | Function |
| Stopped | Play/pause button (▶/■) | Start playback |
| INFO button | No function | |
| Playing back | Play/pause button (▶/■) | Play/pause |
| Stop button (■) | Stop playback | |
| INFO button | Show information |
Using the remote control unit
Precautions for use
Misuse of batteries could cause them to rupture or leak leading to fire, injury or the staining of items nearby. Please carefully read and observe the precautions on page X.
- Point the remote control unit at the main unit's remote sensor from within 5 meters (16 feet) of it. Make sure that there are no obstructions between the remote control and the main unit.
- If direct sunlight or strong artificial illumination shines on the remote sensor, the remote control might not function. If that is the case, move this unit to another location.
- If the remote control unit is operated near other devices that generate infrared rays, or if other remote control devices using infrared rays are used near the unit, it might operate incorrectly. The other devices might also operate incorrectly.
Battery installation
Remove the cover from the back of the remote control and insert two AAA batteries with their / ends oriented in the case as shown. Replace the cover.
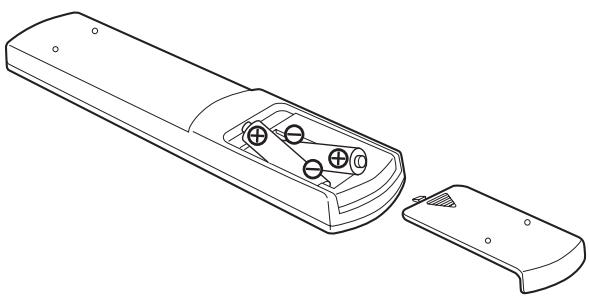
Battery replacement
If the operation range of the remote control decreases, the batteries have become exhausted. In this case, replace the batteries with new ones.
For detailed information about the collection of batteries, please contact your local municipality, your waste disposal service or the point of sale where you purchased the items.
Installing the driver
In order for this unit to play back audio files stored on a computer, you must first install a driver on the computer. Please download this driver from the following web address.
Driver software download page
http://www.teac.co.jp/audio/software(teac_e.html
USB connection is only possible with computers running the following operating systems.
Windows XP (32-bit)
Windows Vista (32/64-bit)
Windows 7 (32/64-bit)
Mac OS X 10.6 (Snow Leopard)
(OS X 10.6.4 or later)
Mac OS X 10.7 (Lion)
Mac OS X 10.8 (Mountain Lion)
(As of October, 2012)
Operation with other operating systems is not guaranteed.
CAUTION
Install the driver before connecting the computer to this unit's USB audio input port by USB.
If you connect this unit with a computer before installing the driver, it will not work properly. Moreover, if the computer is running Windows XP, its operation could become noticeably slower, requiring it to be restarted.
- For instructions about driver installation procedures, please see our download page.
- Depending on the combination of hardware and software, proper operation might not be possible even with the above operating systems.
Transmission modes
You can choose from two transmission modes when connecting this unit's USB audio input port to a computer by USB.
Transmittable sampling frequencies are 32kHz , 44.1kHz , 48kHz , 88.2kHz , 96kHz , 176.4kHz and 192kHz .
- Do not change the transmission mode during playback. Doing so could cause the unit to freeze or other problems.
- Quit the music playback software on your computer before changing the transmission mode.
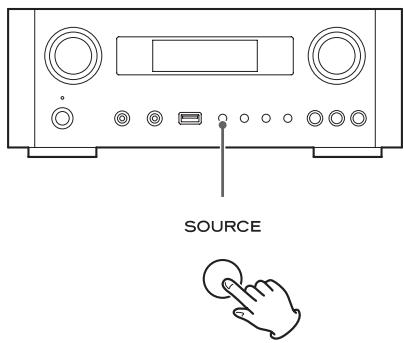
Press the SOURCE button repeatedly to select "USB Audio In".
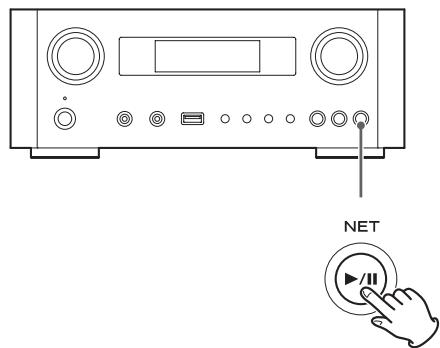
Press the NET button to select the mode.
Press once to show the current mode. Press again to change the mode.
Example:
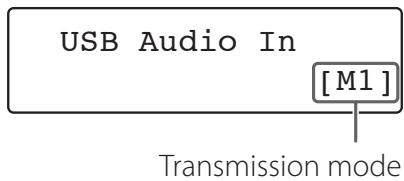
M1 mode
Use the settings to select M1.
The unit connects with the computer using high-speed mode.
When properly connected, you will be able to select "TEAC USB HS AUDIO" as an audio output from the computer OS.
M2 mode
Use the settings to select M2.
The unit connects with the computer using high-speed asynchronous mode.
When properly connected, you will be able to select "TEAC USB HS ASYNC AUDIO" as an audio output from the computer OS.
- In M2 mode, the audio data sent from the computer is processed using this unit's clock. By reducing the jitter during data transmission, this contributes to playback with better audio quality.
- When you connect this unit and a computer in M2 mode, if the playback sound should skip or noise should occur at fixed intervals, set the unit to M1 mode instead.
Playing back audio files on a computer
1 Connect a computer to this unit using a USB cable.
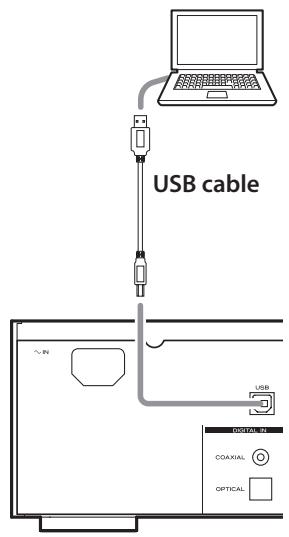
- Use a cable with a connector that matches that of this unit.
2 Turn the computer power on.
- Confirm that the operating system has started properly.
Playing back music on a computer (2)
3 Press the POWER button to turn this unit on.
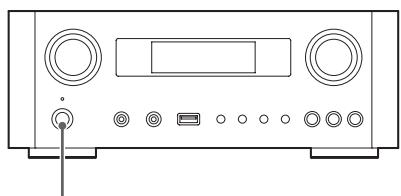
O STANDBY/ON
Press the SOURCE button repeatedly to select "USB Audio In".
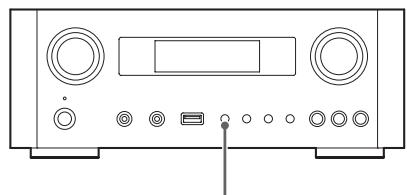

SOURCE
5 Start playback of a music file on the computer.
Maximize the volume on the computer and use this unit's VOLUME knob to adjust the output level for better sound quality.
Minimize the volume on this unit before starting playback and gradually raise the level.
- You cannot control this unit from the computer, and you cannot control the computer from this unit.
-
Do not do any of the following when connected to a computer and playing back an audio file. Doing so could cause the computer to malfunction. Always quit the music playback software before doing any of the following.
-
Unplugging the USB cable
- Putting the unit in standby
- Changing the current input selection
-
Switching between transmission modes
-
When connected to a computer and playing back an audio file, computer operation sounds will also be output. If you do not want these sounds to be output, change settings on the computer to turn them off.
- If you connect this unit with the computer or change its input to "USB Audio In" after starting the music playback software, audio files might not play back correctly. If this should occur, restart the audio playback software or restart the computer.
-
Do the following before starting the music playback software. Doing them after could prevent proper music file playback. If this occurs, restart the music playback software or restart the computer.
-
Connect the unit with the computer
- Set the unit input to "USB Audio In"
- Switch between M1 and M2 modes
Setting the current time (1)
Set the current time before using the unit.
- If the power cord is disconnected from the outlet, the set time will be reset to the default.
Press the STANDBY/ON button to turn the unit on.
The indicator above the STANDBY/ON button lights blue.
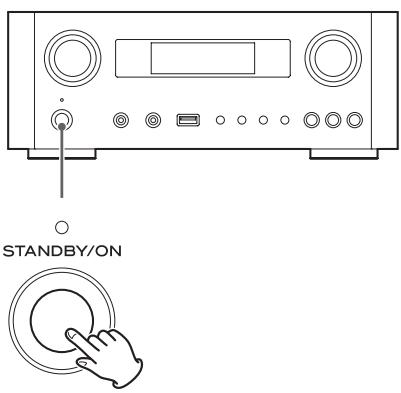
Press the TIME SET button.
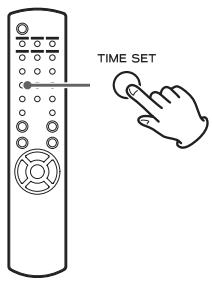
"Current Time" appears and the hour value blinks.
- Press the TIME SET button repeatedly to cycle through the following menu items. The items other than Current Time are used to set the alarm clock (page 50).
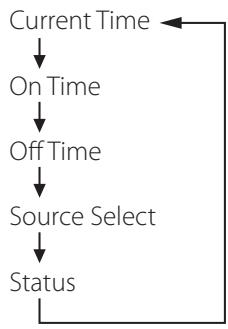
- For Europe, the unit uses the 24-hour "military" clock.
For North America, the unit uses the 12-hour clock. - Press the stop button (■) to cancel the time setting.
- When no action is taken for 30 seconds, the clock setting mode will be cancelled.
Press the scroll buttons (/) to set the current hour and press the ENTER button.
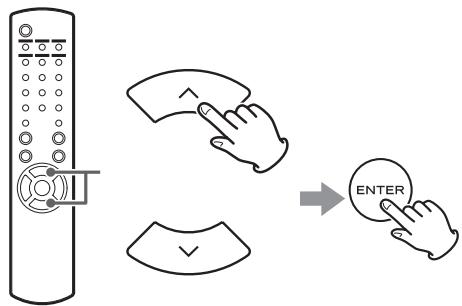
The "minute" value blinks.
- You can also use the MULTI JOG knob and ENTER button on the main unit in the same way.
Setting the current time (2)
4 Press the scroll buttons (/) to set the current minute and press the ENTER button.
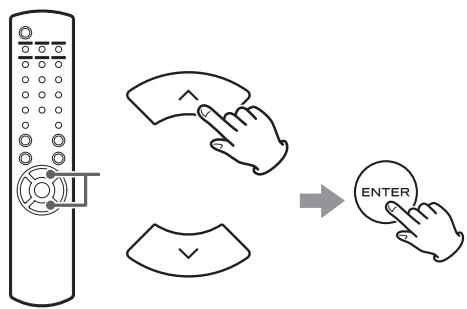
The clock will start from the set minute at 0 seconds.
Checking the current time
When the source is set to Audio In, AUX 1/2, COAXIAL, OPTICAL or PHONO, press and hold the INFO button for at least three seconds to show the current time for five seconds.
Basic operation (1)
In this section, we explain operations that are the same in every mode.
Press the STANDBY/ON button to turn the unit on.
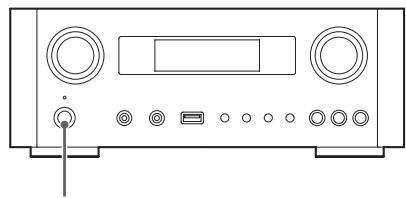
O STANDBY/ON
The indicator above the STANDBY/ON button lights blue.
Press the SOURCE button to select the source.
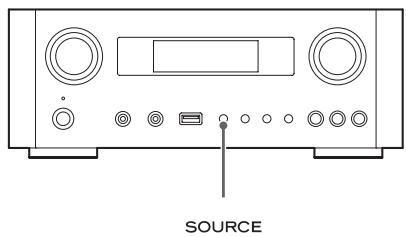

Every time you press the SOURCE button, the source changes as follows:

NET.......Network mode (Internet radio/media player)
USB/iPod.....USB/iPod mode
USB Audio In... USB audio input mode
COAXIAL .......Digital input mode (coaxial)
OPTICAL . Digital input mode (optical)
PHONO......Phono mode
AUX 1/2 ....... External input mode (AUX)
- To select the media player, use the NET button.
- Press the AUX 1/2 button again to switch between AUX 1 and AUX 2.
3 Turn the VOLUME knob counterclockwise to decrease the volume.
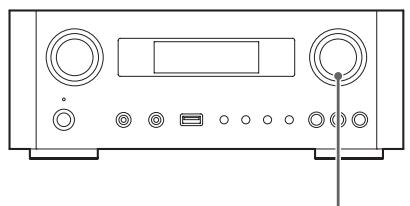
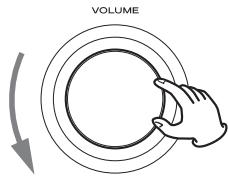
VOLUME MIN: Minimum volume
VOLUME MAX: Maximum volume
4 Start playback on the source and use the VOLUME knob to adjust the volume to its optimal level.
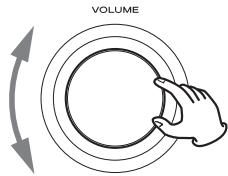
VOLUME MIN: Minimum volume
VOLUME MAX: Maximum volume
- In order to prevent sudden loud noises, raise the volume gradually.
- When connecting the headphone jack of a portable audio player to this unit, you must raise the player's headphone output volume level.
Basic operation (2)
- If you raise the volume level of the connected device too high, the sound might distort. If this occurs, lower the volume of the connected device until distortion stops and then adjust the volume on this unit.
Muting the output
To mute the sound temporarily, press the MUTE button. Press the MUTE button again or change the volume setting to restore the sound.
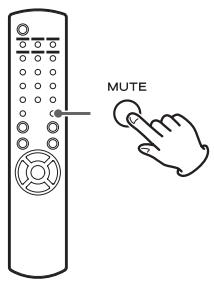
Dimmer
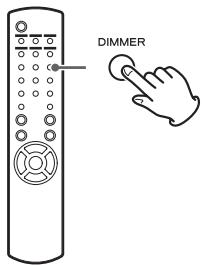
Press the DIMMER button to switch between the two brightness settings: bright and dim.
- The dimmer setting is turned off when you press the STANDBY/ON button.
Adjusting the tone and balance
You can adjust the low and high frequency levels as well as the left-right balance as you like.
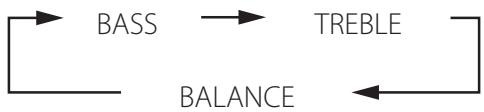
Press the TONE button repeatedly to select BASS, TREBLE, or BALANCE.
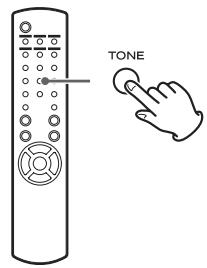
Every time you press the TONE button, the mode changes as follows.
2 Within 3 seconds, press the scroll buttons (/) to adjust the bass or treble, or press the skip buttons (|▲/▲>1) to adjust the balance.
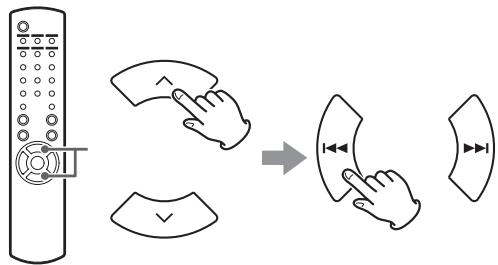
-
The low (BASS) and high (TREBLE) frequency settings can each be adjusted in a range between -5 and +5 . The left-right balance can be set to CENTER or from +1 to +6 L/R (left/right).
-
You can also use the main unit's MULTI JOG knob to adjust the low and high frequency levels (bass and treble).
About the ErP
This product is compliant with the European ErP Standby Power Regulation. In order to comply with this regulation, the automatic power saving function of this unit is set to 30 minutes when shipped new, so the unit will automatically enter standby if 30 minutes pass under the conditions shown in the following table.
However, when "On" is selected for the network standby setting (page 37), this function is not active. (The default network standby setting is "Off".)
- When you turn on the unit, the selected source is the one selected before the unit was put into standby.
- During playback in iPod mode, if you put the unit into standby by pressing the STANDBY/ON button, the next time the power is turned on again, the unit will be in iPod mode and playback will start automatically when an iPod/iPhone/iPad is connected. Playback will not start automatically in other modes.
| Status | AirPlay, iPod/ iPhone/ iPad | USB flash drive | Media player Internet | External input |
| No connection | ✓ | ✓ | ✓ | ✓ |
| Stopped/ paused | ✓* | ✓ | ✓ | |
| No input signal | - | - | - | ✓ |
External input: USB Audio In, COAXIAL, OPTICAL, PHONO, AUX 1/2
Automatic power saving function active
Automatic power saving function not active
* Compatible only with AirPlay
Not applicable
Listening files on a USB flash drive (1)
You can play audio files stored on a USB flash drive by connecting it to this unit.
For details on playable files, see page 8.
Press the SOURCE button repeatedly to select "USB/iPod".
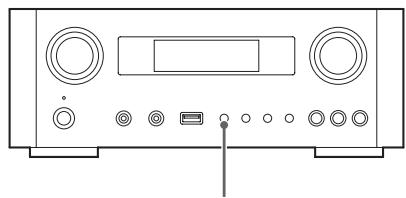

SOURCE
- You can also use the USB/iPod button to select this directly.
- "Not Connected" will be displayed if no USB flash drive is connected.
2 Connect a USB flash drive to the unit.
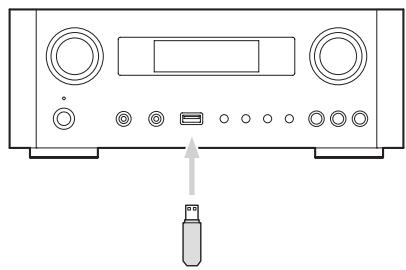
3 Select the file you want to play.
For details, see page 29.
Press the play/pause button ( /II) or ENTER button to start playback.
- If you press the button when a file is displayed, playback will also start.
Listening files on a USB flash drive (2)
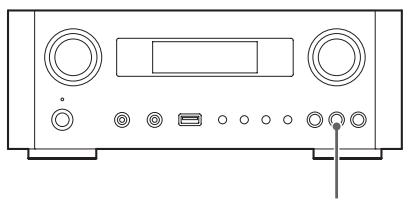
Stopping playback
Press the stop button (■) to stop playback.
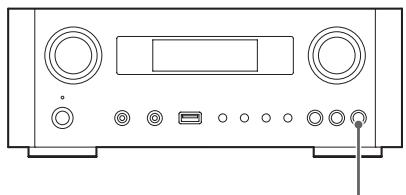
Pausing playback
Press the play/pause button (▶/■) to pause playback at the current position.
To resume playback, press the play/pause button (▶/■) again.
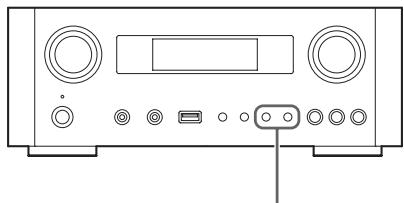
Skipping to the next or previous track/file


During playback, press the skip buttons (▶/▶) repeatedly until the desired track/file is found. The selected track/file will be played from the beginning.
- When the 1 button is pressed during playback, the track/file being played will be played from the beginning. To return to the beginning of the previous track/file, press the 1 button again.
- When the playback time is five seconds or less, press to play the previous track.
- When playing tracks on a USB flash drive, skipping to the next track from the last track will stop playback.
Searching inside folders
You can search for and select tracks by name within folders on a USB flash drive and play them back.
If double-byte characters, such as Japanese kana, are used in a file name, this unit cannot show them correctly, so accurate searching will not be possible.
Press the scroll buttons (/) to select the folder you want to listen to the track within.
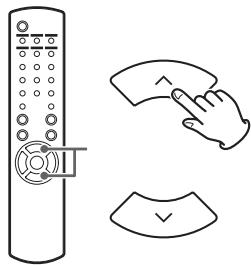
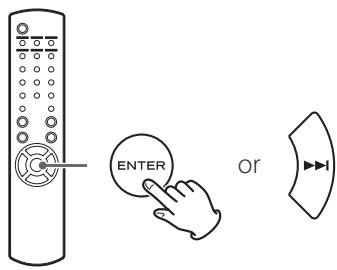
Press the ENTER button.
- MP3/WMA files that are not inside folders will be shown after the folders in order.
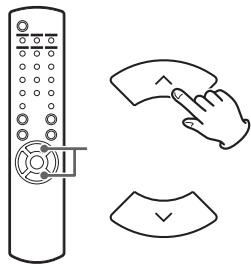
Press the scroll buttons (/) to select the track you want to listen to.
4 Press the ENTER button.
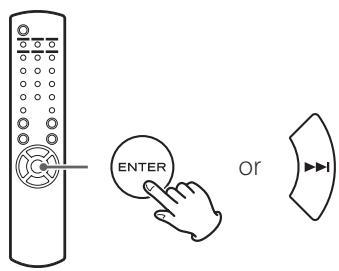
Playback starts from the selected track.
- When playing files on a USB flash drive, press the skip (1-4) button to move to the folder before.
- When viewing a folder, press the skip (▶▶I) button to move to the next folder.
- When a file is selected, press the skip (▶▶|) button to start playback of the track.
Information shown on the display
During playback of a file on a USB flash drive, information about the track scrolls on the display.
During playback, press the DISPLAY button repeatedly to change what is shown on the display.
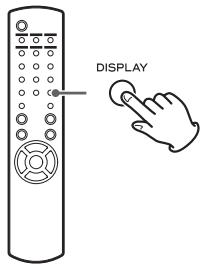
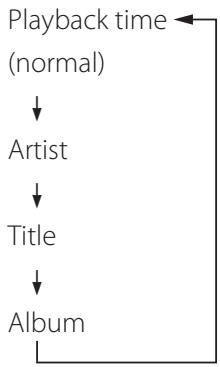
- The display of this unit can only show single-byte letters and numbers. If the file information uses Japanese, Chinese or other double-byte characters, playback is possible but the name will not be shown correctly.
A maximum of 80 characters of track information can be shown.
Shuffle playback
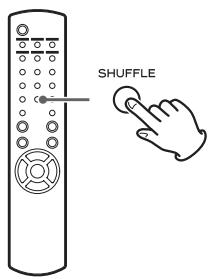
Press the SHUFFLE button to activate shuffle playback mode. Tracks on the USB flash drive will be played in random order.
USB flash drive
Example:
USB/Shuffle
00:07 WMA
- If you press the skip button (▶▶I) during shuffle playback, the next track/file will be randomly selected and played. If you press the skip button (I▶), the currently played track/file will be played from the beginning.
During shuffle playback, playback will not return to a track that has already completed playing. - To cancel shuffle playback, press the SHUFFLE button.
- If you press the stop button (■), shuffle playback will stop, but shuffle mode will remain active.
- Shuffle playback of a USB flash drive will play all the files in the selected folder only.
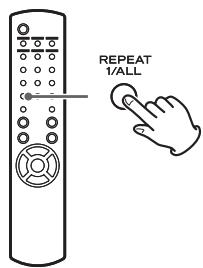
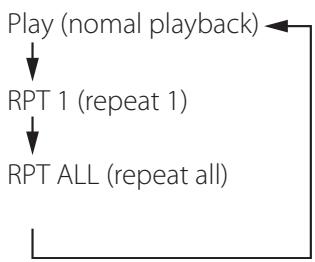
Press the REPEAT 1/ALL button to cycle through repeat modes as follows.
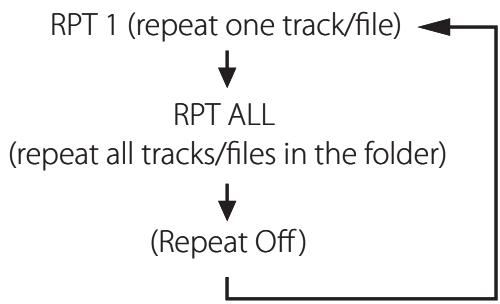
- Repeat mode will not be cancelled if you press the stop button (■).
Repeat one track/file (RPT 1)
The track/file being played will be played repeatedly.
- If you press the skip buttons (▶/▶) to select another track/file in "RPT 1" mode, the track/file you selected will be played repeatedly.
- When stopped, use the MULTI JOG knob on the main unit or the scroll buttons (/) on the remote control to select the file. Then, press the play/pause button (/) or the skip button ( ) to start playback followed by the REPEAT 1/ALL button.
- If you press the REPEAT 1/ALL button when stopped, the REPEAT 1 function will become active but will not appear on the display.
Repeat all tracks/files in the folder (RPT ALL)
All the tracks/files in the folder will be played repeatedly.
- Use the scroll buttons (▲/▼) during repeat playback to move to other folders.
Use the skip buttons (I▲/■) to move up and down folder levels.
All the tracks in the open folder will be played back repeatedly.
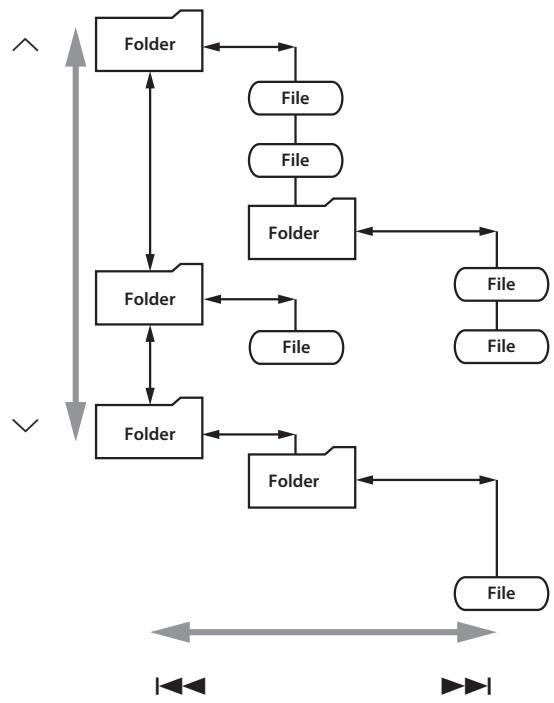
Selecting a folder or file
Listening to an iPod/iPhone/iPad (1)
For detailed information about compatibility, see page 10.
- The following explanations refer to an iPod, but they also apply to use with an iPhone or iPad.
Press the SOURCE button repeatedly to select "USB/iPod".
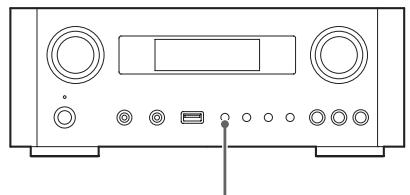

SOURCE
- The remote control's USB/iPod button can also be used.
- "Not Connected" will appear when no iPod is connected.
Connect an iPod to this unit using the USB cable supplied with the iPod.
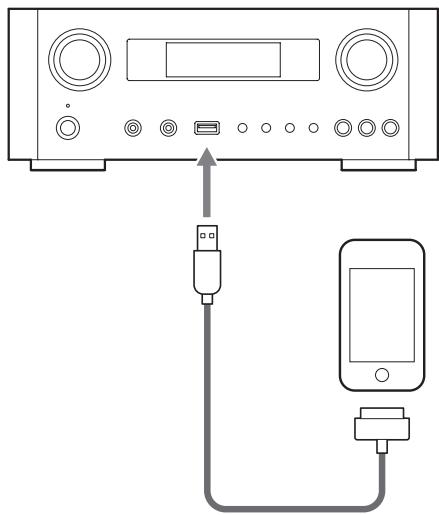
The iPod automatically turns on and starts playback from the iPod music list.
- When the iPod is connected while a mode other than iPod/USB mode is selected in the NP-H750, the iPod will turn on and enter pause mode.
- If an iPod is connected to this unit, it will only be recharged when this unit is ON.
- Recharging will stop when the iPod is fully recharged.
- Recharging is not possible when this unit is in standby.
Pausing playback
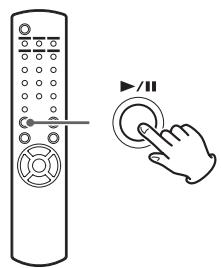
Press the play/pause button ( / ) to pause playback. Playback stops at the current position.
To resume playback, press the play/pause button (▶/■) again.
Skipping to the next or previous file/ track
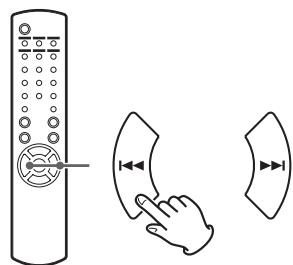
During playback or when paused, press the skip buttons (I▶/▶) repeatedly until the desired file/track is found.
- When the 1 button is pressed during playback, the file/track being played will be played from the beginning. If you want to play the previous files/tracks, press the 1 button twice or more.
Searching for a part of a song
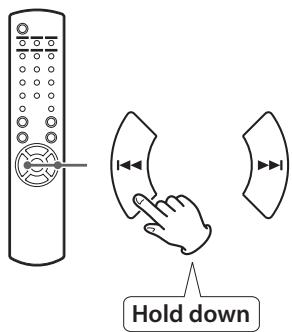
During playback, hold down the skip buttons (I▶/▶I) and release it when the part you want to listen to is found.
Going back to the previous menu
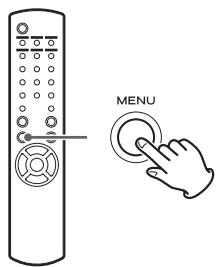
Press the MENU button to go back to the previous menu.
Selecting a menu item
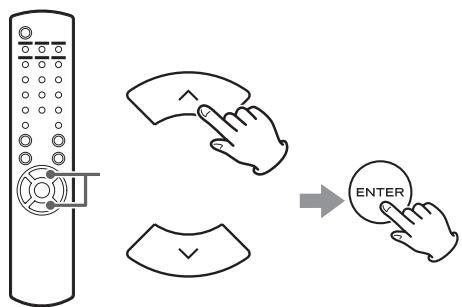
When stopped, press the scroll buttons (A/V) to select a menu item and then press the ENTER button.
Repeat playback
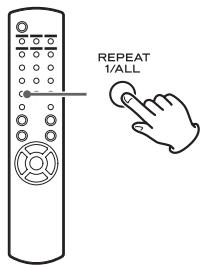
Press the REPEAT 1/ALL button to change the playback mode.
If the iPod is set to repeat one song, the icon appears on the display of the iPod.
If the iPod is set to repeat all songs, the icon appears on the display of the iPod.
Listening to an iPod/iPhone/iPad (2)
Shuffle playback
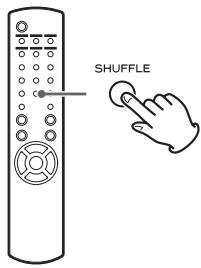
During playback, press the SHUFFLE button to change the shuffle mode.

SHU: SHUFFLE
When you select "SHU Songs", the iPod shuffles songs within the list you choose to play.
When you select "SHU Album", the iPod plays all the songs on an album in order, and then randomly selects another album in the list and plays through it in order.
If the iPod is set to either of the shuffle modes, the icon will appear on the iPod's display.
Initial network setup (1)
When you use the network function for the first time, the unit starts an initial setup procedure to connect to the Internet.
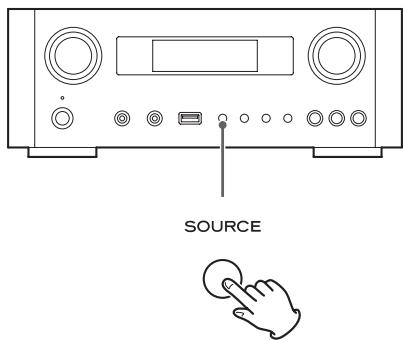
Press the SOURCE button repeatedly to select "Internet Radio".
- You can also use the remote control's NET button.
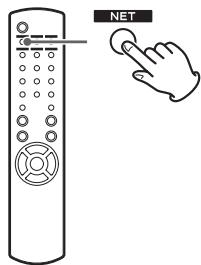
Each time you press the NET button, the source switches between Internet radio and media player.
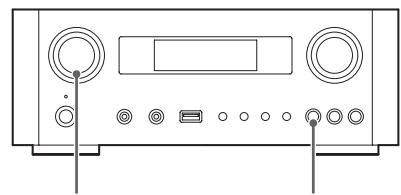
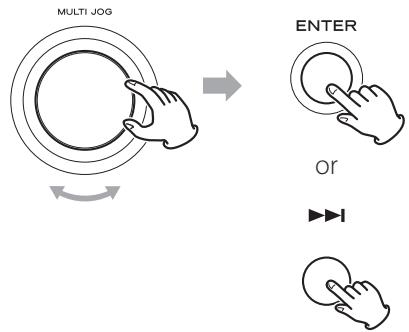
Press the MENU button to select "Setup Menu", turn the MULTI JOG knob to select "Network", and then press the ENTER button.
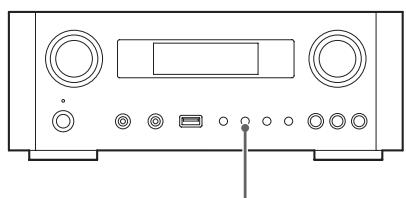

MENU

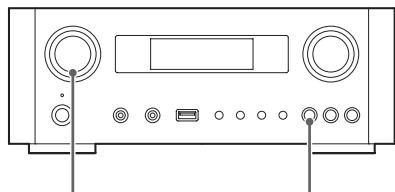
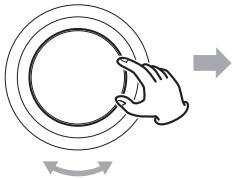
MULTI JOG
ENTER
or


To go back to the previous screen, press the 1 button.
3 Turn the MULTI JOG knob to select "Wired" or "Wireless", and then press the ENTER button.
MULTI JOG
ENTER
or


- When you select "Wired":
Use the MULTI JOG knob and the ENTER button to change settings of "DHCP" and "Proxy Setting".
For detailed information, contact your network administrator.
- Make sure that the unit is connected to the network using a LAN cable.
- When you select "Wireless":
- Turn the MULTI JOG knob to select "Search AP", and then press the ENTER button. (AP: access point)
- Turn the MULTI JOG knob to select the desired access point, and then press the ENTER button.
- If you are asked to enter a wireless security password "KEY", turn the MULTI JOG knob to select characters you want to enter. See "Entering characters" on the right column.
- When you have finished entering all the characters of your password, press the ENTER button.
- The wireless security password is case-sensitive, so be careful to enter lower and upper case letters as necessary.
- If you enter an incorrect password, "Failure" will appear followed by "Network Problem". In that case, go back to Step 2 and make settings again.
When the unit has been successfully connected to the access point, "Success" will appear on the display.
- Make sure that no LAN cable is connected to this unit.
Now the unit starts to connect to the Internet. When the connection is established successfully, the internet radio menu will be displayed. See page 38 to select a station.
- If you are unable to connect the unit to the Internet, refer to the Network item of the Troubleshooting section (page 58).
Entering characters
1 Turn the MULTI JOG knob to select a character.
2 Move the cursor by pressing▶ button.
Press the button to go back to the previous character.
- Repeat steps 1 to 2 to enter next characters.
- Press the CLEAR button to delete the character at the cursor position.
- To change a character, move the cursor to that character's position and turn the MULTI JOG knob to select the character desired.
Press the ENTER button to confirm the selection.
4 When you have finished entering all the characters, make sure that the cursor is to the right of the last character you entered, and then press the ENTER button.
Available characters
0123456789
ABCDEFGHIJKLMNOPQRSTUVWXYZ
abcdefghijklmnopqrstuvwxyz
(space)!''#%&'(0)*+,-:/;<=?@[][-]||{]}
Network configuration (1)
Searching an access point
If you have moved or modified your Wi-Fi network environment, or if you have a problem connecting to the Internet, perform the initial network setup to establish the Internet connection again.
Follow the menu items as follows:
"Setup Menu" "Network" "Wireless" "Search AP"
- Follow the procedures described on pages 34-35 to open the menu.
Network standby setting
If you select "On" for this setting, the unit turns on and starts playback automatically when it detects an AirPlay or DLNA signal.
Follow the menu items as follows:
"Setup Menu" "Network" "Wireless" "Wired" "Standby (Off) ", and then select "On".
- Follow the procedures described on pages 34-35 to open the menu.
Manual Internet setup
You can check and modify detailed settings of the Internet connection.
Follow the menu items as follows:
To check the current network settings
"Setup Menu" "Information"
To configure Wired LAN settings
Select "Setup Menu" "Network" "Wired", and then change settings of "DHCP" and "Proxy Setting".
To configure Wireless LAN settings
Select "Setup Menu" "Network" "Wireless", and then change settings of "DHCP", "SSID", "Security", "Key", and "Proxy Setting".
- Follow the procedures described on pages 34-35 to open the menu.
Using iPod Wi-Fi login sharing
Using this function, you can send the Wi-Fi setting on your iPod/iPhone/iPad to this unit. If you have already finished the Wi-Fi setting for this unit, you do not need to follow the steps below.
This function is supported by the iPod/iPhone/iPad with iOS 5.x or later only.
- The following explanations refer to an iPod, but they also apply to use with an iPhone or iPad.
1 Connect an iPod to a Wi-Fi network.
2 Turn the unit on.
DO NOT connect a LAN cable to the unit.
Repeatedly press the SOURCE button to select "Internet Radio".
If the unit cannot be connected to a Wi-Fi network by using the Internet radio or media player function, the message "Network problem" will appear on the unit's display. Move on to the next step.
4 Repeatedly press the SOURCE button on the unit or the USB/iPod button on the remote control to select USB/iPod as the source.
Network configuration (2)
5 Connect the iPod to the unit's USB port using the USB cable that was supplied with your iPod.
6 Press and hold the MENU button on the unit for about 3 seconds.
The buttons "Allow" and "Ignore" appear on the iPod. Select "Allow".
The message "Wi-Fi Sharing connecting" appears on the unit's display.
When the setting process is completed, the message "Wi-Fi Sharing Success" will appear on the display.
After the message "Wi-Fi Sharing Success" disappears, put the unit in standby and turn it on again, and then set the unit to AirPlay mode.
Listening to the Internet radio (1)
Listening to an Internet radio broadcast/a podcast
Make sure to perform settings required for Internet connections before you listen to an Internet radio broadcast or podcast.
Press the SOURCE button repeatedly to select "Internet Radio".
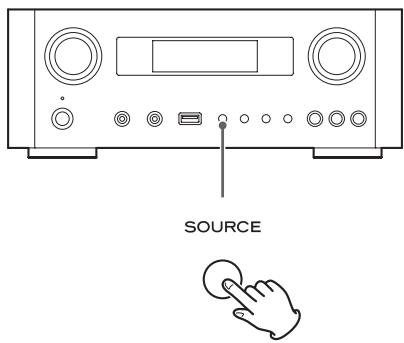
- You can also use the remote control's NET button.
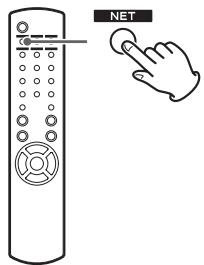
Each time you press the NET button, the source switches between Internet radio and media player.
2 Turn the MULTI JOG knob to select a search option, and then press the ENTER button.
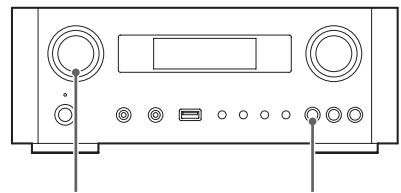
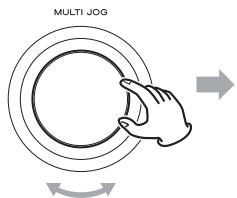
ENTER
or


Example:
Internet Radio
Favorites
Favorites:
A list of stations/podcasts you stored as favorite is displayed. Select a station/podcast you want to listen to. You can make a Favorites list at our Internet portal site. See page 41.
CAUTION:
The first time you access it, nothing will have been added to the Favorites and "---- empty ----" will be displayed.
In this case, press the button to return to the display shown above. Then, select a different search method, or create a Favorite list (page 41) and select this method again.
Added Stations:
Search the list created on our Internet portal site. Even though the station list contains thousands of stations/podcasts, you may want to listen to stations not listed. You can add your own stations/podcasts via the internet radio portal. See page 41.
Location:
Search by the location of the broadcaster.
Genre:
Search by the genre of music played on the station/podcast.
Podcasts By Location:
Search by the Podcast's location.
Podcasts By Genre:
Search by the podcast's genre.
New Stations:
Select from a list of recently added stations.
Most Popular Stations:
Select from a list of popular stations.
Recently Played:
You can select the station/podcast from the ones you listened to recently.

If you have selected "Location", "Genre" "Podcasts By Location", or "Podcasts By Genre" in step 2, turn the MULTI JOG knob to select an item, and then press the ENTER button.
Example:
Business NewsCeltic
The list of stations/podcasts is displayed.
Listening to the Internet radio (2)
4 Turn the MULTI JOG knob to select the station you want to listen to, and then press the ENTER button.
Example when the information shown on the display is set to elapsed time and file format:
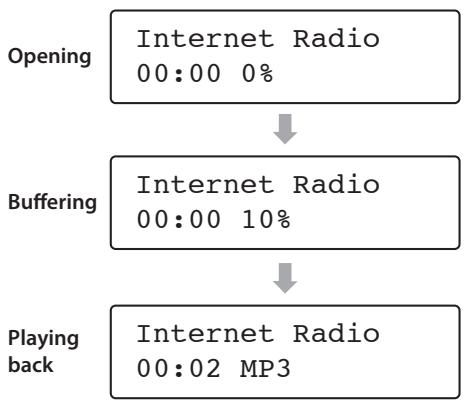
- When opening or buffering, the amount of data being downloaded is shown as a percentage.
Information shown on the display
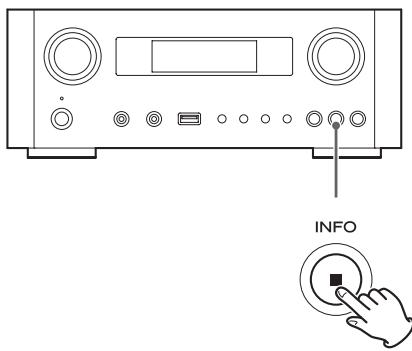
Each time you press the INFO button, the information on the second line of the display changes as shown below. ("Internet Radio" is shown on the first line of the display.)
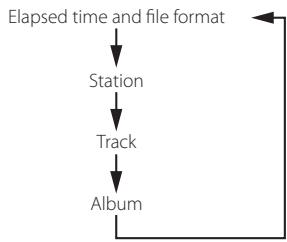
- If no information is available, the line will be empty.
Internet radio portal
Access the radio portal on the Internet using your computer to fully enjoy the internet radio function of this unit.
Creating a list of favorite stations/podcasts
You can create a list of your favorite stations/podcasts on the portal. This list can be viewed from your unit, making it easier for you to find your usual programmes.
You can see the list of your favorite stations from "Favorites" in the internet radio menu.
Adding favorite stations/podcasts
If the station/podcast you want to listen to is not in the channel list, you can create your own list.
You can see the list of your added stations from "Added Stations" in the internet radio menu.
Accessing the radio portal
Registering as a user
1 Open your Internet browser and access the following website.
http://teac.vtuner.com/
You can change the language by clicking each nation's flag icon on the top.
2 Enter your e-mail address and password to register.
3 Enter the MAC address of the unit.
You can confirm the MAC address from "Setup Menu" "Information" "MAC Address".
When you enter the MAC address, do not enter ".between the alphanumeric characters.
4 Select a genre from the list.
5 Select a station to add to your favorite list.
Click the + button to add the station, then a dialog box appears.
Input a group name in the dialog box to make a group, then click the Go button.
The group name is added to "My Favourite Groups". You can access the group from "Favourites" in the Internet Radio menu.
- To delete a station from your favorite list, select a station, and then click the button. The station will be deleted and a dialog box will appear.
About the media player function
Using the media player function, you can play back the music files on your computers through the LAN.
There are two ways of connecting to the computer: using media sharing and using folder sharing.
Media sharing
Media sharing allows this unit to play back a shared media library on the computer, as well as browsing the tracks using tag items such as artist names, genres and album names.
- This unit can display only single-byte alphanumeric characters. If a file includes double-byte characters (such as Japanese, Chinese, etc.), they cannot be displayed correctly. However, it does not affect file playback.
You need a PC running on Windows XP, Windows Vista, or Windows 7, and Windows Media Player 11 or later on it.
Folder sharing
To use file sharing method, you need to configure your music files open to access, so that other computers or this unit can read those files.
Setting Windows Media Player 12
1 Connect your computer to a LAN.
2 Connect this unit to the LAN.
- If you have a problem connecting to the LAN, see page 58.
3 If the files you want to share are not yet added to the media library of Windows Media Player, add them to the media library.
Refer to the manual of Windows Media Player for details.
4 On Windows Media Player, open "Stream", then "Turn on media streaming".
5 Click "Turn on media streaming".
6 On Windows Media Player, open "Stream", then "More streaming options...".
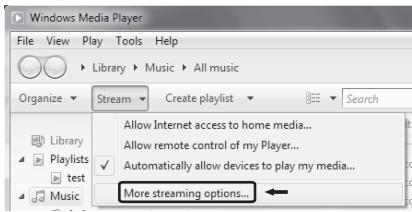
7 Select "NP-H750" from the list, then click "Customize...".
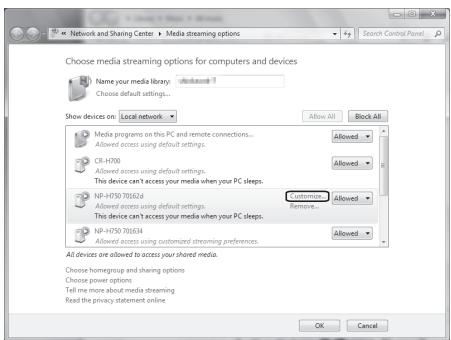
8 Configure detailed sharing settings.
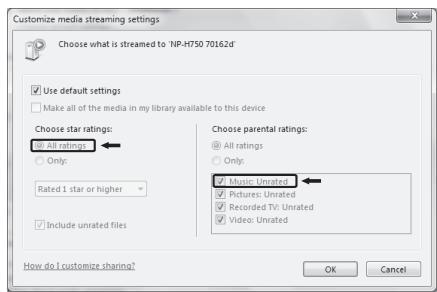
To listen to music files regardless of their rating, set "Choose star ratings" to "All ratings".
- Ensure that "Music" is checked.
9 Click"OK".
For the procedure of playback, see page 47.
Setting Windows Media Player 11
1 Connect your computer to a LAN.
2 Connect this unit to the LAN.
- If you have a problem connecting to the LAN, see page 58.
3 If the files you want to share are not yet added to the media library of Windows Media Player, add them to the media library.
Refer to the manual of Windows Media Player for details.
4 On Windows Media Player, open "Library", then "Media Sharing...".
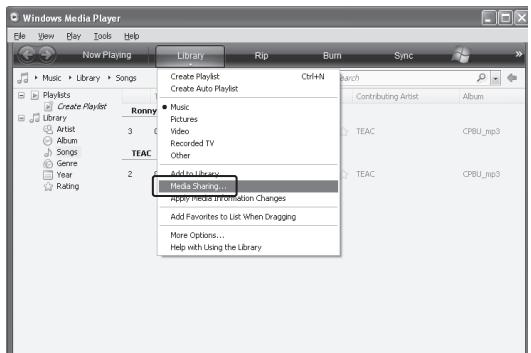
Media Sharing window opens.
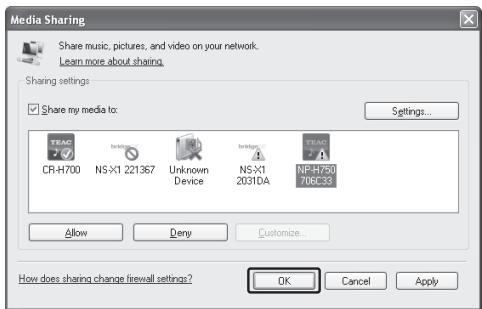
5 Activate "Share my media to:"
"NP-H750" appears in the device list.
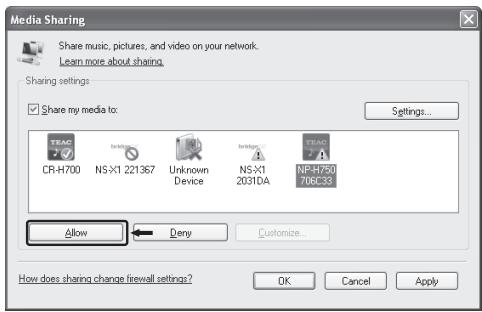
6 Select "NP-H750" and click "Allow".
The NP-H750 can now access to the shared library.
7 Click"Settings...".
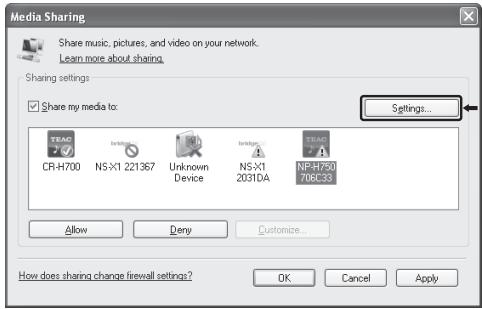
8 Configure detailed sharing settings. Click "OK".
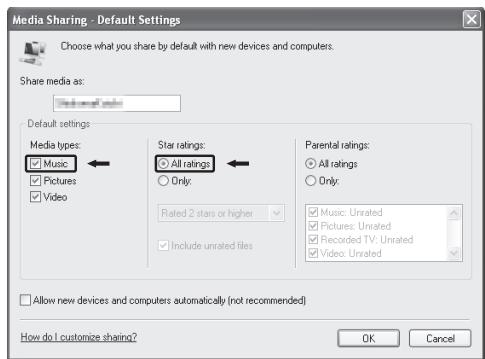
- To listen to music files regardless of their rating, set "Star ratings" to "All ratings".
- Ensure that "Music" is checked under the "Media types" setting.
For the procedure of playback, see page 47.
9 Click"OK".
Setting shared folders (Windows XP)
Check the name of the Domain or the Workgroup your computer belongs to.
To enable Shared Folders, your computer needs to be a member of a Domain or a Workgroup.
Usually, your computer belongs to a Workgroup by default. To see the name of the Domain or the Workgroup your computer belongs to, check the PC setting as follows:
Control Panel System Computer Name
2 Check the user account name and its password.
To access the computer from this unit, you need the user account name and the password of the computer.
3 Copy files to the "Shared Music" folder in "Shared Documents".
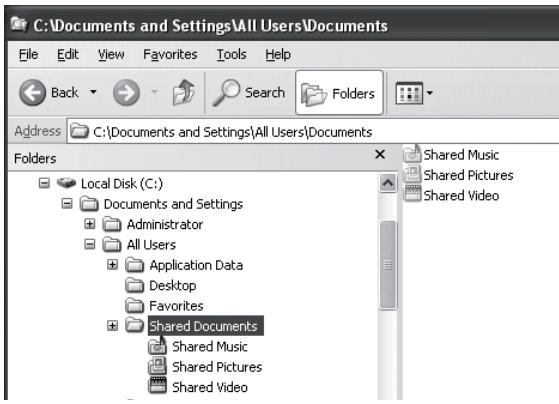
- You cannot play back files in the folder other than the "Shared Music" folder with this unit. You need to perform settings for the shared folder to play back files.
4 Right-click the folder which contains the music files you want to share, and select "Sharing and Security".
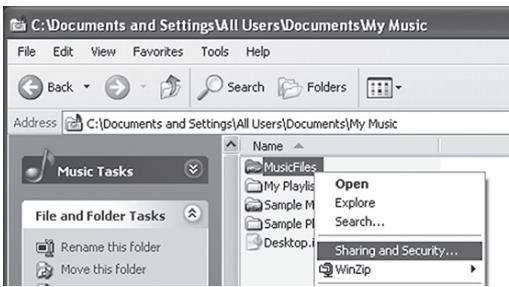
5 In the "Sharing" tab, check "Share this folder".
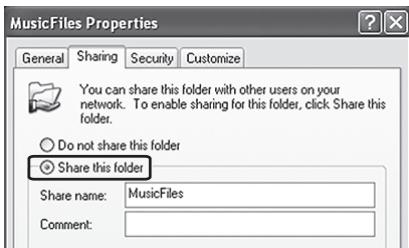
6 Add files in the "Shared Music" folder to "Media Library" on Windows Media Player.
If "Media Player" is selected as the current source, select "Media Player" again (page 47).
Setting shared folders (Windows Vista)
Check the name of the Domain or the Workgroup your computer belongs to.
To enable Shared Folders, your computer needs to be a member of a Domain or a Workgroup.
Usually, your computer belongs to a Workgroup by default. To see the name of the Domain or the Workgroup your computer belongs to, check the PC setting as follows:
Control Panel System and Maintenance System
2 Check the user account name and its password.
To access the computer from this unit, you need the user account name and the password of the computer.
3 Open "Control Panel", "Network and Internet", then "Network and Sharing Center".
4 Set "Public folder sharing" to "On (read only)".
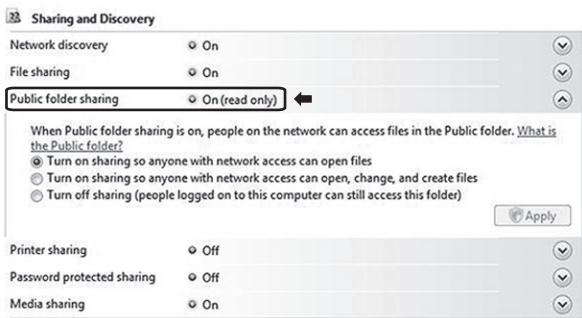
Setting up the media player (3)
Set "Password protected sharing" to "On".
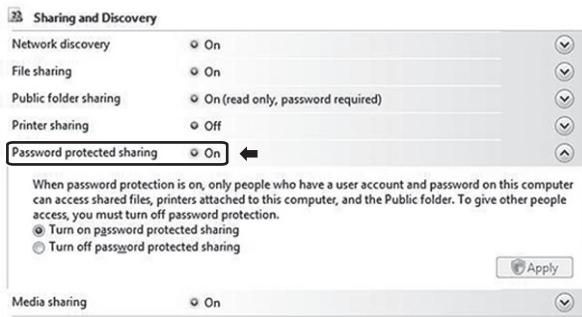
6 Copy the music files you want to play back with this unit into the "Public Music" folder in the "Public" folder.
Setting shared Folders (Windows 7)
Check the name of the Domain or the Workgroup your computer belongs to.
To enable Shared Folders, your computer needs to be a member of a Domain or a Workgroup.
Usually, your computer belongs to a Workgroup by default. To see the name of the Domain or the Workgroup your computer belongs to, check the PC setting as follows:
Control Panel System and Security System
2 Check the user account name and its password.
To access the computer from this unit, you need the user account name and the password of the computer.
3 Open "Control Panel", "Network and Security", then "Network and Sharing Center".
4 Click "Change advanced sharing setting".
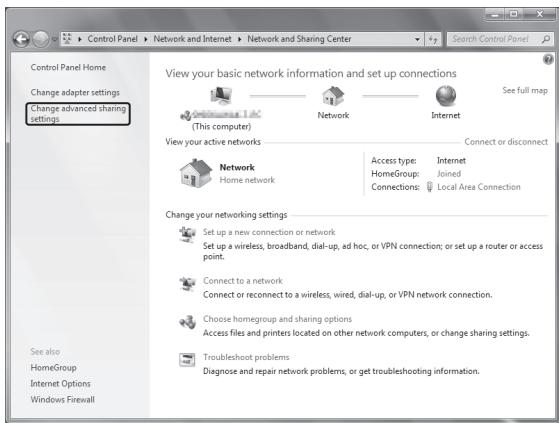
5 Select "Turn on sharing so anyone with network access can read and write files in the Public folders" for "Public folder sharing".
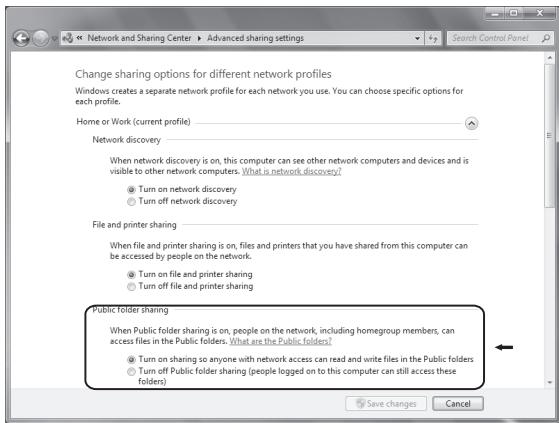
6 Click"Save changes".
7 Copy the music files you want to play back with this unit into the "Public Music" folder in the "Public" folder.
Listening with the media player (1)
- Before listening with the media player function, perform setup for the Internet connection. For details, see pages 34-36.
1 Connect the unit and the computer or NAS (Network Attached Storage) server to the network through a wired or wireless LAN connection.
2 Select "Media Player" by pressing the NET button.
The server name appears on the display.
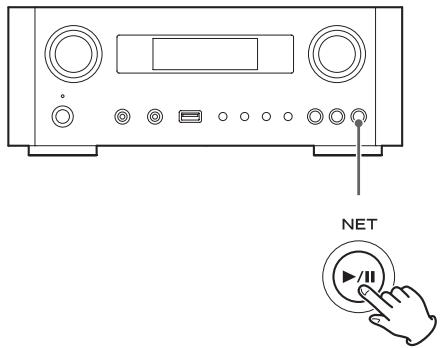
3 Turn the MULTI JOG knob to select the computer or server you want to use, and then press the ENTER button or button.
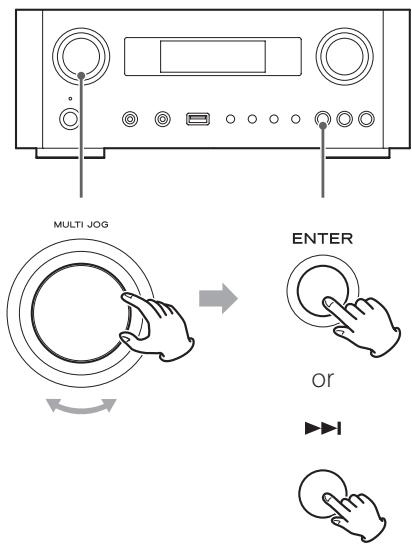
4 Turn the MULTI JOG knob to select the file/ track you want to play back, and then press the ENTER button or button.
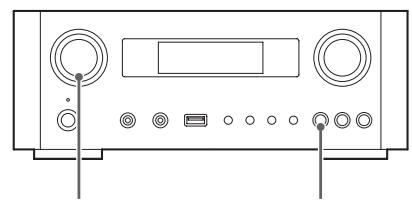
This unit can display only single-byte alphanumeric characters. If a file includes double-byte characters (such as Japanese, Chinese, etc.), they cannot be displayed correctly. However, it does not affect file playback.
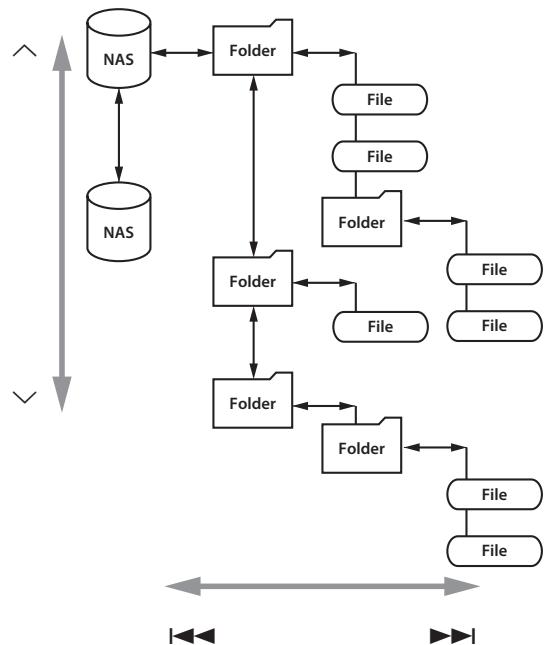
Selecting a folder or file
Listening with the media player (2)
Information shown on the display
During playback, press the INFO button repeatedly to change what is shown on the display.
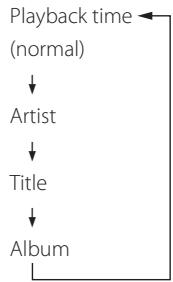
- To stop playback, press the stop (■) button on the main unit for at least two seconds.
Using AirPlay (1)
This unit is compatible with AirPlay. You can play back audio files on your computer with iTunes 10 or later or iPod touch/iPhone/iPad with iOS 4.2.1 or later through AirPlay.
- The following explanations refer to an iPod touch, but they also apply to use with an iPhone or iPad.
From your iPod touch/iPhone/iPad:
- Before using AirPlay, perform setup for the Internet connection. For details, see pages 34-36.
Press the STANDBY/ON button to turn the unit on.
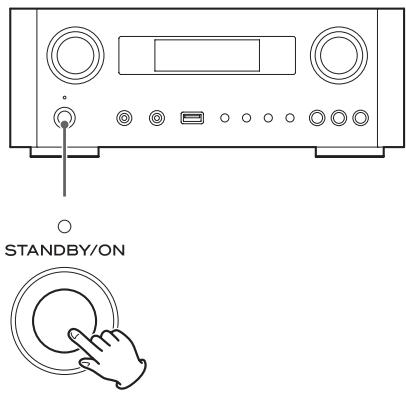
The indicator above the STANDBY/ON button lights blue.
2 Turn your iPod touch on.
3 Connect your iPod touch to the network where this unit is connected.
4 Select "Music" on your iPod touch.
5 Tap the (AirPlay) icon.
The available device list is displayed.
Using DLNA
6 Select "NP-H750" from the list.
- "NP-H750" can be set to appear in the list when you have changed the Device Name Edit setting on the Setup Menu.
7 Start playing back a file from your iPod touch.
It takes five or six seconds to start playing back a file.
- If you do not select another source after AirPlay has been stopped, "Air Play" will not disappear from the display.
- When the iPod touch is connected to this unit's USB port, AirPlay cannot be used.
From your Computer:
- Before using AirPlay, perform setup for the Internet connection. For details, see pages 34-36.
1 Turn your computer on.
Connect your computer to the network where this unit is connected.
3 Start iTunes on your computer.
4 Click the (AirPlay) icon on iTunes.
The available device list is displayed.
5 Select the "NP-H750" from the list.
6 Start playing back a file from iTunes.
You can play back audio files on the server connected to the network, from your computer or mobile device.
- Before using DLNA, perform setup for the Internet connection. For details, see pages 34-36.
- Make sure that DLNA application software is installed on your computer or mobile device.
Prepare an NAS (Network Attached Storage) server compatible with DLNA.
1 Turn your computer or mobile device on.
Connect a NAS (Network Attached Storage) server to the network.
For details on how to connect, refer to the server's instructions.
3 Connect your computer or mobile device to the unit and the NAS server using the DLNA application software.
4 Start playing back a file from your computer, mobile device or DLNA application software.
Sleep Timer
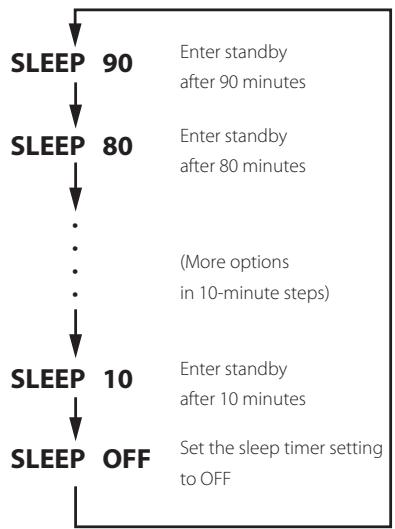
Using the sleep timer, you can put the unit in standby after a specified amount of time.
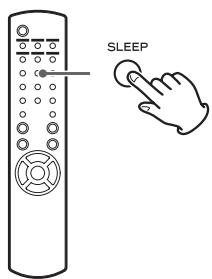
Press the SLEEP button repeatedly until the desired setting appears on the display. The settings for the time until the unit enters standby change as follows.
The display will be dimmed when you set the sleep timer.
- After setting the sleep timer, press the SLEEP button once to show for three seconds the amount of time until the unit enters standby.
- When the sleep timer setting is set to OFF, dimming of the display also stops.
Setting the wake-up timer (1)
You can set the wake-up timer to start playback at a set time.
- Adjust the clock before setting the timer (page 23).
Setting the time of the timer
Press the TIME SET button repeatedly until "On Time" is displayed.
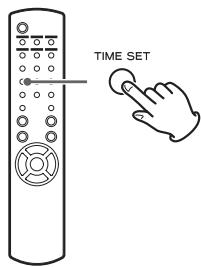
The "hour" value blinks.
Press the scroll buttons ( / ) to set the hour value, and press the ENTER button.
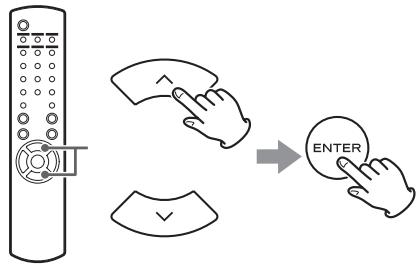
The "minute" value blinks.
- If you do not do anything for 30 or more seconds, the unit will exit timer setting mode automatically.
- To exit timer setting mode, press the stop (■) button.
Press the scroll buttons (/) to set the minute value, and press the ENTER button.
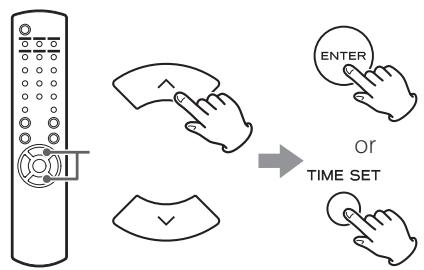
"Off Time" appears on the display, and the "hour" value blinks.
4 Repeat step 2 and 3 to set the Off time.
"Source Select" appears on the display.
Press the scroll buttons (/) to select the source, and press the ENTER button.

This completes setting the clock time used for the timer. Next, you must activate the timer. Follow the procedures in the next sections.
- USB playback is not possible. Only iPod/iPhone/iPad playback is possible.
AirPlay cannot be used with the wake-up timer.
Changing the timer mode
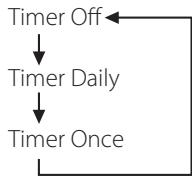
Press the remote control's TIMER button to cycle through timer modes as follows.
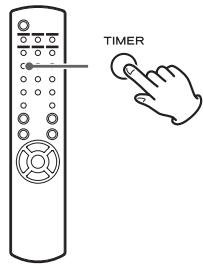
Setting the timer (daily or once)
At the set On Time, the unit will turn on and start playback (every day or once). At the set Off Time, the unit will enter standby.
1 Set the timer on and off times (page 50).
2 Select "Timer Daily" or "Timer Once" by pressing the TIMER button on the remote control unit.
The timer indicator "..." lights on the display.
- When in standby, power consumption is less than 0.5W , so "..." will not be shown.
Setting the wake-up timer (2)
Press the ENTER button.
Prepare the playback source.
Before setting the wake-up timer, connect the input source to be used and adjust the volume.
- AUX 1, AUX 2, iPod, OPTICAL and COAXIAL can be used as input sources for the wake-up timer.
- If the input source is an iPod, it will start playing automatically. Other types of sources will not play automatically, so they must be playing back at the On Time or no audio will be output. (Use the timer function of the input device to start its playback, for example.)
- Playback will not occur if a USB flash drive is connected.
5 Press the STANDBY/ON button to put the unit in standby.
This completes setting the wake-up timer.
Turning the timer off
When not using the timer, press the remote control's TIMER button to select "Timer Off".
The timer indicator "..." disappears from the display.
Updating the firmware (1)
Using the latest firmware file that is available on the internet, you can update this unit's firmware (built-in program that controls the unit).
We recommend that you use the unit with the latest firmware because updating the firmware to the latest version can add more functions to or improve the stability of the unit.
Cautions when updating the firmware
- If the following window is displayed on the screen during the update process, the unit's firmware is being updated. Please wait.
- During the update process, do not put the NP-H750 into standby, or do not turn off the power of the computer or any network peripherals (access point, router, splitter, repeater, etc.) that are required for Wi-Fi communication. Do not unplug those power cords, either.
WARNING
Putting the unit into standby or unplugging the power cord of the devices mentioned above as well as power outage may interrupt the update process and may result in permanent damage to the unit.
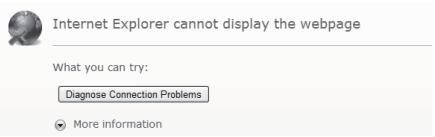
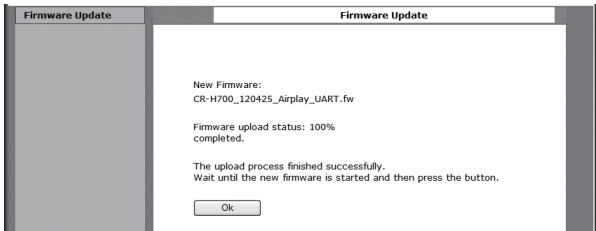
- If the following message appears, do not click OK before the unit restarts automatically.
If you click OK by mistake before the unit restarts, the webpage will not appear.
Downloading the latest firmware
You can download the latest version of the firmware from the NP-H750 product information page of TEAC website.
http://www.teac.eu/
- If there is no firmware update, no firmware files will be available on the website.
- You can check the current firmware version of your unit using "Setup Menu". Follow the menu items as follows:
"Setup Menu" "Information" "Firmware Version"
Updating the firmware using a LAN
1 Connect the unit to your LAN through a wired or wireless connection.
For detailed information, see pages 11 and 37.
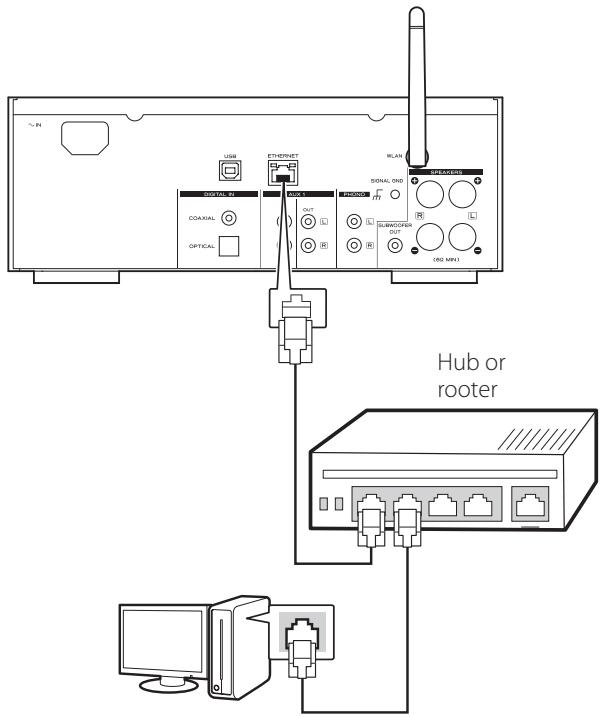
Wired connection
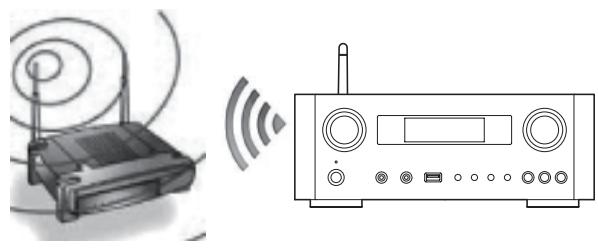
Wireless connection
Press the SOURCE button repeatedly to select network mode.
3 Select "Internet Radio" or "Media Player" by pressing the NET button on the unit or on the remote control.
4 Press the MENU button on the unit. Select "Software Update", and then select "Webpage".
The unit will restart automatically.
- The unit's IP address will appear on the unit's display after the unit restarts.
5 Start your web browser, and then enter the unit's IP address.
- In this example, we explain this procedure using Internet Explorer 8 on Windows XP.
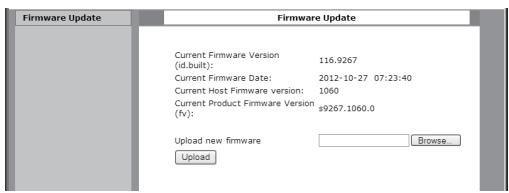
Updating the firmware (2)
6 Click Browse..., and then select the desired firmware file (.fw).
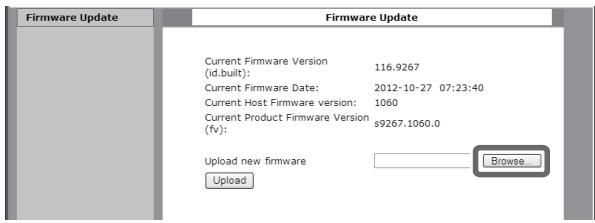

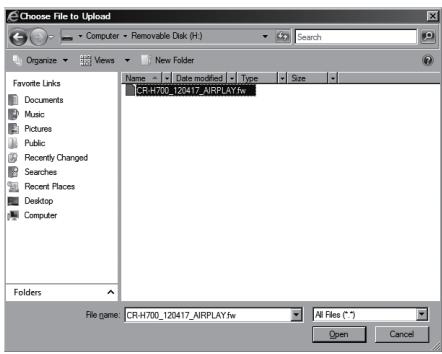
7 Click"Upload".
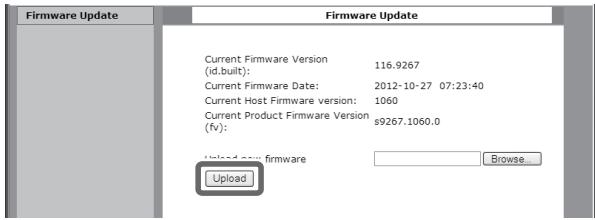
If the following message appears, click "OK", and then return to Step 5. Check the file and its name.
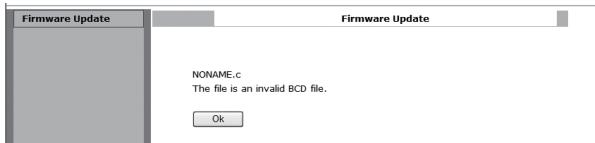
8 Click "OK" to start the firmware update.
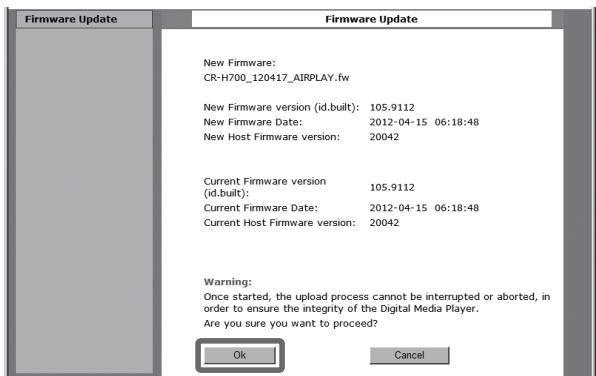
When the update starts, the following message will appear.
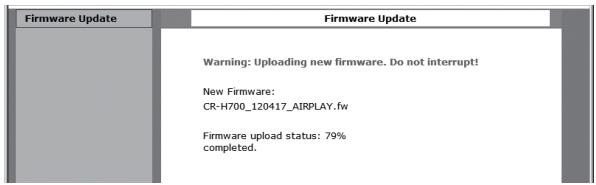
- The update status is also displayed on the unit.
When the firmware update is completed, the unit will restart automatically.
9 Disconnect the power cord from the outlet, connect it again, and then press the STANDBY/ ON button to turn the unit on.
Updating the firmware via the Internet
Press the SOURCE button repeatedly to select network mode.
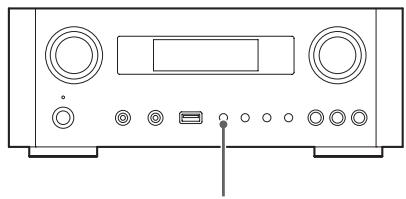

SOURCE
2 Select "Internet Radio" by pressing the NET button.
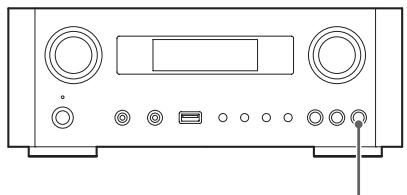
NET
3 Open "Setup Menu" by pressing the MENU button.
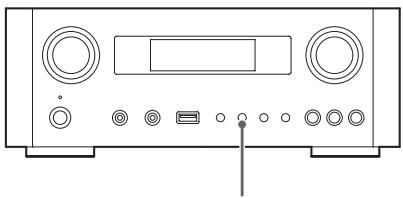

MENU
4 Select "Software Update" from "Setup Menu" by turning the MULTI JOG knob, and then press the ENTER button or button.
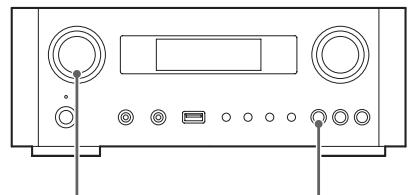
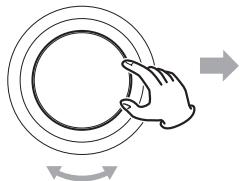
MULTI JOG
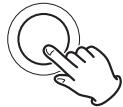
ENTER
or

"Software Update" appears on the display.
Setup Menu
Software Update
Updating the firmware (3)
5 Turn the MULTI JOG knob to select "Internet", and then press the ENTER button or the button.
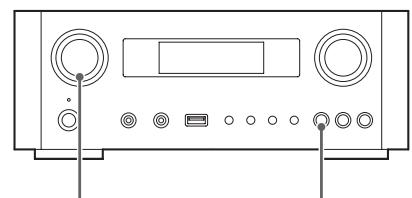
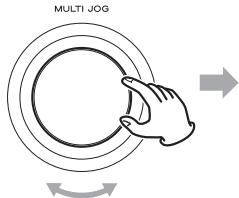
or
- You can check the current firmware version of your unit using "Setup Menu". Follow the menu items as follows:
"Setup Menu" "Information" "Firmware Version"
6 Disconnect the power cord from the outlet, connect it again, and then press the STANDBY/ON button to turn the unit on.
Updating the firmware using a USB flash drive
Download the latest version of the firmware file from TEAC website, save it on a USB flash drive, and insert the USB flash drive into the USB port in the unit's front panel.
For information about downloading the firmware, see page 53.
2 Follow Steps 1 to 4 in "Updating the firmware via the Internet" on page 55 to show the following on the unit's display.
Setup Menu
Software Update
3 Turn the MULTI JOG knob to select "USB", and then press the ENTER button or the 1 button.
Installation of the firmware file starts automatically.
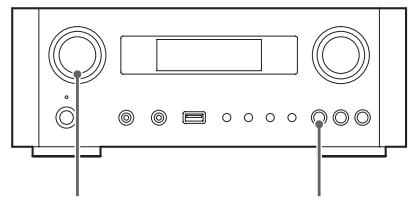
or

4 Disconnect the power cord from the outlet, connect it again, and then press the STANDBY/ON button to turn the unit on.
Troubleshooting (1)
If you experience a problem with this unit, please check the following items before requesting service. If it still does not operate correctly, contact the retailer where you purchased the unit or TEAC customer support (See the back cover for contact information).
General
No power.
- Check that the power cord is completely plugged into the power outlet.
No sound output
Press the SOURCE button to select proper source.
Adjust the volume.
Remote control unit does not work.
If the batteries are exhausted, change the batteries.
Use remote control unit within the range (5 m/16 ft.) and point at the front panel.
Clear obstacles between the remote control unit and the main unit.
If a fluorescent light is near the unit, turn the light off.
The sound is noisy.
The unit is too close to a TV set or similar appliances. Install the unit apart from them, or turn them off.
Audio Files
There is no sound even if the play/pause button ( / ) is pressed.
Check the file format (page 8).
"Artist:[ ], "Title:[ ], and "Album:[ ]" appears on the display.
There is no ID3 tag information for the music file. Edit the title, artist, and album information of the song on a PC using editing application software for MP3, WMA or other file formats.
Some unknown characters are displayed on the display panel.
This unit cannot display symbols and full-size or double-byte characters (such as Japanese, Chinese, etc.) correctly. File names for MP3, WMA or other file formats should consist of alphanumeric characters.
iPod/iPhone/iPad
- The following explanations refer to an iPod, but they also apply to use with an iPhone or iPad.
Will not play.
Remove the iPod from the USB port, wait a few seconds, and insert it again.
Software update may solve the problem. Visit the Apple website and download the latest iPod software. http://www.apple.com/downloads/
Cannot operate the iPod/iPhone/iPad.
Make sure the HOLD switch of the iPod is not set to HOLD.
You cannot adjust the unit volume using an iPod/ iPhone/iPad.
USB connections with a computer
The computer does not recognize this unit.
USB connection is only possible with computers running the following operating systems.
Windows XP (32-bit)
Windows Vista (32/64-bit)
Windows 7 (32/64-bit)
Mac OS X 10.6 (Snow Leopard)
Mac OS X 10.6.4 or later)
Mac OS X 10.7 (Lion)
Mac OS X 10.8 (Mountain Lion)
(As of October, 2012)
Operation with other operating systems is not guaranteed.
You must install the dedicated driver on the computer. If you connect this unit with a computer before installing the driver, it will not work properly (page 20).
Troubleshooting (2)
There is noise.
If other applications are run while a music file is being played back, the sound could break up and noise might be heard. Avoid running other applications during playback.
If you connect this unit with the computer via a USB hub, noise might occur. If this happens, connect this unit directly to the computer.
Audio files cannot be played back.
Connect the computer with this unit and switch to "USB Audio In" before starting the music playback software and music file playback. If you connect this unit and the computer, or switch the input to "USB Audio In" after launching the music playback software, the audio data might not play back properly.
Network
Cannot connect to the Internet.
Check if your computer can connect to the Internet using the same network.
Enter a correct pass key to the network.
Check the settings of your network's firewall. The unit needs access to the following UDP and TCP ports as a minimum: 80, 554, 1755, 5000 and 7070.
Cannot listen to a station/podcast.
The broadcaster has a temporary problem with Internet connection.
Check if your Internet connection is not temporarily disconnected or disturbed.
Cannot find a station/Podcast in the station list.
Add the station/podcast to your own station list by accessing the internet radio portal (page 41).
The station/podcast may not be broadcast at the moment.
The link of the station/podcast may be out of date.
The broadcast station or podcast might no longer be available.
If the Internet connection speed is too slow, searching might take time.
AirPlay
Will not play.
Check if you selected the unit as the device for Airplay.
- Check the connection with the access point (page 37).
Media player
Will not play.
Check if you selected the unit as the device for Music Streaming.
Cannot connect to the LAN.
Check the settings of your network's firewall. The unit needs access to the following UDP and TCP ports at least: 80, 554, 1755, 5000 and 7070.
Check if your computer can connect to the Internet using the same network.
Enter a correct password to the network.
Check if the computer is not shut down or in the sleep mode. Set up the computer not to shut down or enter sleep mode automatically.
There may be a problem with the network authentication. Press the SOURCE button or NET button to select "Media Player" again.
Cannot find a track. (Shared Media)
Add the track to the media library of Windows Media Player.
Select "NP-H750" from the list (Windows 7) or select "Allow" for "NP-H750" (Windows Vista).
Check the file format (page 8).
If you have antivirus security software enabled on your computer, the unit may fail to connect.
Restoring factory settings
Cannot find a folder/file. (Shared Folders)
Configure the folder/file sharing setting (pages 44-46).
Add the file to the shared folder.
Enter a correct password of the user account.
Check the file format (page 8).
If you have antivirus security software enabled on your computer, the unit may fail to connect.
Since this unit uses a microcontroller, external noise and other interference can cause the unit to malfunction. If this should occur, unplug the unit's power from the outlet and wait a little while before plugging the power in again and retrying the operation. If the unit still does not function properly after doing this, follow the procedures in the next section to restore the unit to its factory default settings.
If the unit does not operate properly, follow the procedures below to restore the unit to its factory default settings. This might return it to ordinary operation.
When the unit is in standby, hold down the SOURCE button and play/pause button (▶/II) together for at least 4 seconds.
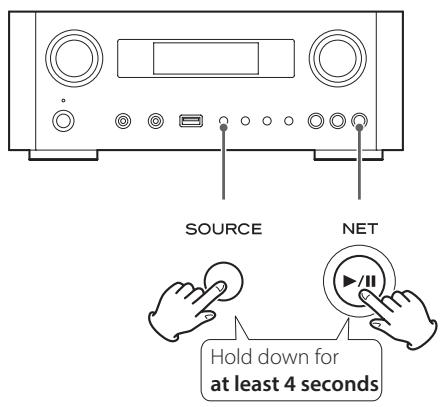
2 Disconnect the power cord from the outlet, connect it again, and then press the STANDBY/ ON button to turn the unit on.
The unit is restored to its factory default settings.
- If the power supply is interrupted for 14 days or longer, all the settings kept in memory (such as timer settings) will be erased.
It takes more than 3 days after plugging the power cord into the outlet to charge enough electricity for the memory backup function.
Specifications
Amplifier
Output Power . . . . . . . . . . . . . . . . . . . . . . . . . . . . . . . . . . . . . . . . . . . . . . . . . . . . . . . . . . . . . . . . . . . . . . . . . . . . . . . . . . . . . . . . 40 W + 40 W (6 ohms, 0.5 %, 1 kHz)
Input Sensitivity PHONO:2.5 mV/47 kΩ
AUX1, AUX2: 200 mV/47 kΩ
Frequency Response 20 Hz to 60 kHz (+1/-3 dB)
Subwoofer pre-out 10 Hz to 35 kHz
USB port (front panel)
USB-A connector USB 2.0 compliant
Playable format. . . . . . . . . . . . . . . . . . . . . . . . . . . . . . . . . . . WAV, FLAC, MP3, OGG, WMA
Frequency Response 20 Hz to 20 kHz (±2 dB)
Signal-to-Noise Ratio . more than 85 dB
Power supplied. 500 mA - 2100 mA
USB audio input connector (rear panel)
USB-B connector . USB 2.0 compliant
Sampling frequency
32 kHz, 44.1 kHz, 48 kHz, 88.2 kHz, 96 kHz, 176.4 kHz, 192kHz
Quantization bit rates. 16/24-bit
Internet Radio
Format . WAV,FLAC,MP3,OGG,WMA
Internet connection
LAN terminal 10/100 BASE-T
Wireless LAN . IEEE 802.11b compliant
(modulation method: DSSS)
IEEE 802.11g compliant
(modulation method: OFDM)
Security WEP, WPA-PSK, WPA2-PSK
Digital audio inputs
COAXIAL digital. .RCA jack × 1
(0.5 Vp-p/75 Ω)
OPTICAL digital
Optical digital connector (rectangular) × 1
(-24.0 to -14.5 dBm peak)
GENERAL
Power Requirements
European model AC 230V,50 Hz
North American model.. AC 120V,60 Hz
Power Consumption. 120 W
less than 0.5 W (standby)
Dimensions (W× H× D) 290x113x340mm
(93/8"×33/4"×11")
Weight 5.4 kg (12 lb)
Standard Accessories
Power Cord × 1
Remote Control Unit (RC-1308) × 1
Batteries (AAA) × 2
Owner's manual × 1
Warranty card × 1
- Design and specifications are subject to change without notice.
- Weight and dimensions are approximate.
- Illustrations may differ slightly from production models.
INSTRUCTIONS DE SECURITE IMPORTANTES
B Prise SUBWOOFER OUT
http://www.apple.com/downloads/
Raccordements (1)
F Prises AUX 1 IN/OUT
Touché Lecture/Pause [▶/II]
PHONO.........Mode phono
Touche Lecture/Pause [▶/II]
Mac OS X 10.7 (Lion)
Mac OS X 10.8 (Mountain Lion)
PHONO.........Mode phono
AUX 1/2 .........Mode d'entree exter (AUX)
Podcasts By Location :
Sharing and Discovery
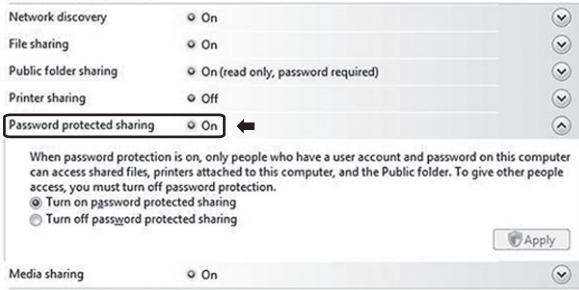
Internet Explorer cannot display the webpage
What you can try:
Diagnose Connection Problems
More information
Mac OS X 10.7 (Lion)
Mac OS X 10.8 (Mountain Lion)
Port USB (face avant)
Piles (AAA) × 2
| Formato | Unidad flash USB | Reproductor multimedia (media player) | |
| WiFi | Cable Ethernet | ||
| WAV | ✓ | ✓ | ✓ |
| FLAC | ✓ | ✓ | ✓ |
| MP3 | ✓ | ✓ | ✓ |
| OGG | ✓ | ✓ | ✓ |
| WMA | ✓ | ✓ | ✓ |
WAV
B Terminal SUBWOOFER OUT
http://www.apple.com/downloads/
Conexiones (1)
COAXIAL: cable digital coaxial (RCA)
OPTICAL: cable digital optico (TOS)
F Terminales AUX 1 IN/OUT
Use these botones paraaabstarel balance.
Mac OS X 10.7 (Lion)
Mac OS X 10.8 (Mountain Lion)
USB/Shuffle 00:07 WMA
Characteres dispensibles
0123456789
ABCDEFGHIJKLMNOPQRSTUVWXYZ
abcdefghijklmnopqrstuvwxyz
(espacio)!"#q%&'(*)+,-/;;<==?@[]--||{]-
Favorites (favoritos):
Added Stations (emisorasañadidas):
Podcasts By Genre (podcasts porGsenero):
Business News
Celtic
Media sharing (compartir Contents)
Mac OS X 10.7 (Lion)
Mac OS X 10.8 (Mountain Lion)
32 kHz, 44.1 kHz, 48 kHz, 88.2 kHz, 96 kHz, 176.4 kHz, 192kHz
This appliance has a serial number located on the rear panel. Please record the model number and serial number and retain them for your records.