
MP-113 - Mp3 player TEAC - Free user manual and instructions
Find the device manual for free MP-113 TEAC in PDF.


| Type de produit | Lecteur MP3 |
| Marque | TEAC |
| Modèle | MP-113 |
| Capacité de stockage | 8 Go (interne) |
| Écran | LCD 1.8 pouces (couleur) |
| Formats audio supportés | MP3, WMA, WAV, FLAC |
| Autonomie | Jusqu'à 20 heures (lecture audio) |
| Alimentation | Batterie lithium-ion rechargeable (via USB) |
| Connectivité | USB 2.0, prise casque 3.5 mm |
| Dimensions (L x H x P) | 75 x 30 x 12 mm |
| Poids | 45 g |
| Fonctions principales | Lecture audio, radio FM, enregistrement vocal, répétition A-B, égaliseur, gestion de playlist |
| Entretien et nettoyage | Essuyer avec un chiffon doux et sec. Ne pas utiliser de produits chimiques. |
| Sécurité | Ne pas exposer à l'humidité ou aux températures extrêmes. Utiliser un chargeur adapté. |
| Pièces détachées et réparabilité | Batterie remplaçable (modèle standard), port USB interchangeable. Pièces disponibles en ligne. |
| Informations générales | Lecteur MP3 compact avec interface intuitive. Compatible Windows et Mac. |
Frequently Asked Questions - MP-113 TEAC
User questions about MP-113 TEAC
0 question about this device. Answer the ones you know or ask your own.
Ask a new question about this device
Download the instructions for your Mp3 player in PDF format for free! Find your manual MP-113 - TEAC and take your electronic device back in hand. On this page are published all the documents necessary for the use of your device. MP-113 by TEAC.
USER MANUAL MP-113 TEAC
To ensure the smooth handling of your warranty please write the serial number of your device into the box. In the case of warranty you are expected to send it together with a copy of your invoice to your nearest TEAC sales representative.
natural_image
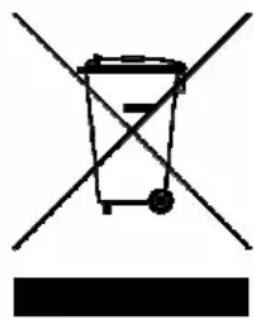
Simple line drawing of a trash bin with two crossed lines and a solid black bar below (no text or symbols)Disposing of the Product
Your device should not be placed in municipal waste. Please check local regulations for disposal of electronic products.
- Changes in specifications and features may be made without notice or obligation.
● Copyright © 2007, TEAC Europe GmbH. All rights reserved. Edition: July 2007 - Company and product names provided herein are trademarks of their respective companies.
Content
Precautions....4
System requirement....5
Content of Package 5
- Installation instruction....5
1.1 Installing driver for Windows 98 (not required for Windows ME or above).5
1. 2 Installing battery ....5
- USB mode....6
2.1 Connecting a PC as USB 6
2.1 Connecting a PC as MTP 6
2.3 Removing the USB device....7
- Basic operation....8
3.1 Buttons and functions....8
3.2 Power on/off 8
3.3 Main menu setup 9
- How to use the MP3 player....9
4.1 Playing music 9
4.2 Voice mode....10
4.2.1 Playing voice .... 10
4.2.2 Recording....10
4.3 FM Tuner 11
4.3.1 Playing FM 11
4.3.2 Recording FM 11
4.3.3 Setting FM 12
- 4 Function Setting....13
4.4.1 Setting EQ mode....13
4.4.2 Setting Play mode 13
4.4.3 Setting Contrast 13
4.4.4 Adjusting Backlight....13
4.4.5 Setting Power Set....14
4.4.6 Setting sleep timer....14
4.4.7 Key lock setting 14
4.4.8 Settings for Recording....14
4.4.9 Setting Language 14
4.4.10 Setting Exit 14
4.5 Folder navigation....15
4.6 About....16
4.7 Exit 16
4.8 Warnings....16
Low battery....16
No file....16
Device full 16
4.9 Lyric sync 16
- Troubleshooting....17
- Technical specifications....18
Warranty 19
Precautions
1) Never use the player during driving or operating other vehicles to avoid traffic accident, which is also restricted by the law in some districts. Even on foot, it is still dangerous to listen in extremely high volume especially during crossing the street. Wherever with potential risks, please stop using the player for safety purpose.
2) Please insert the earphone before powering on the player, which can not only avoid damaging the earphone but keep the player in good condition.
3) Keep the player clean and away from heat source or direct sunlight, dirty, humid or rainy place.
4) If the surface is dirty, please clean with soft cloth dipped with clean water or soft abluent. Never clean the case with alcohol or diluents.
5) Never use the player in rather dry environment to avoid static.
6) Never disconnect the player from PC abruptly during downloading, uploading and formatting to avoid application failure.
7) When the player is used as removable disk, please follow the proper file download and upload procedures. Our company resumes no responsibility for any file lost due to improper operation.
8) In order to provide the best access performance, it will be unable to format in FAT-32 in PC if your mp3 flash memory capacity is 128MB.
IMPORTANT!
Please use high quality batteries only. Weak batteries can significantly reduce the performance of your player!
System requirement
■ Microsoft Windows 98/2000/Me/XP
■ Pentium 200MHZ or above.
■ USB port
■ 120MB hard disk space
■ Mouse installed
■ CD-ROM drive
Content of Package
MP3 player MP-113
Earphone with neck strap
Driver CD
Basic Operation Manual
User's manual (on CD)
AAA battery
1. Installation instruction
1.1 Installing driver for Windows 98 (not required for Windows ME or above)
a. Connect the MP3 Player to the USB port of a PC; after "Found new hardware" appears on the screen, click "Search for the best driver for your device" and insert the driver CD into CD-ROM, then click "Next".
b. Select "Specify a location" to direct the installation directory to the "Drivers" files of the driver CD, and click Yes.
c. PC will install the driver for Windows 98 automatically.
1. 2 Installing battery
Ensure to insert the AAA 5V alkaline battery properly according to the polarity shown in the battery compartment.
Press the button to power the player on and enter the MP3 standby mode.
2. USB mode
2.1 Connecting a PC as USB
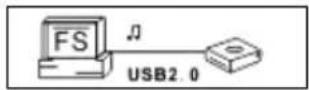
Before operation, please verify the player is powered on, with one end of the provided USB plugged into PC and the other end into the MP3 player. The related icons appear on the LCD screen.
USB mode
Important:
Due to computer capability issue, please turn on your MP3 player before you connect it to the USB port.
2.1 Connecting a PC as MTP
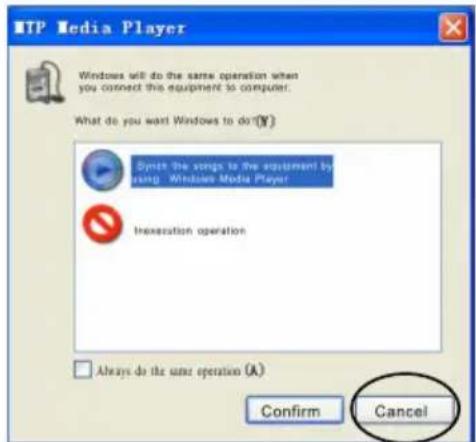
After connecting to the PC, there are 2 modes which can be selected after you have connected the player to the PC.
MTP
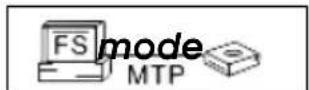
Click Cancel to stop the MTP mode or press the button to change the MTP mode to USB mode.
2.3 Removing the USB device
a. Double click the Safely Remove Hardware icon in taskbar:
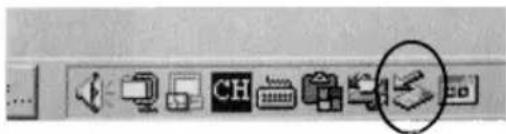
b. From Safely Remove Hardware screen, highlight "USB Mass Storage Device" item, and then click "Stop" button. "Stop a Hardware Device" window appears on the screen as shown in the picture below.
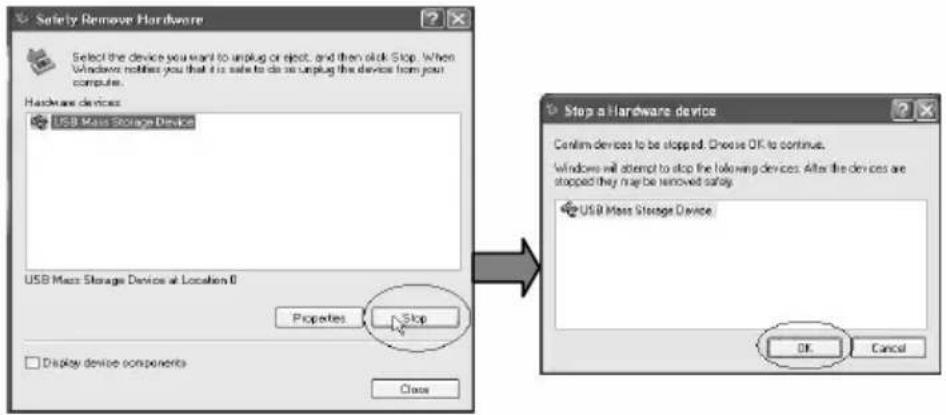
c. Click "OK". After the "Safe to Remove Hardware" window appears, the player can be disconnected from PC safely.

Important: Never unplug the USB cable when data is transmitted to avoid damaging the player; after data transmission is completed please do not disconnect the player from PC until "The device can now be safely removed" window appears; while using USB function, all other buttons have no function.
Please refer to "Troubleshooting" if any messages like "application lost" or "I/O error" appear or if any power on issues have to be fixed.
3. Basic operation
3.1 Buttons and functions
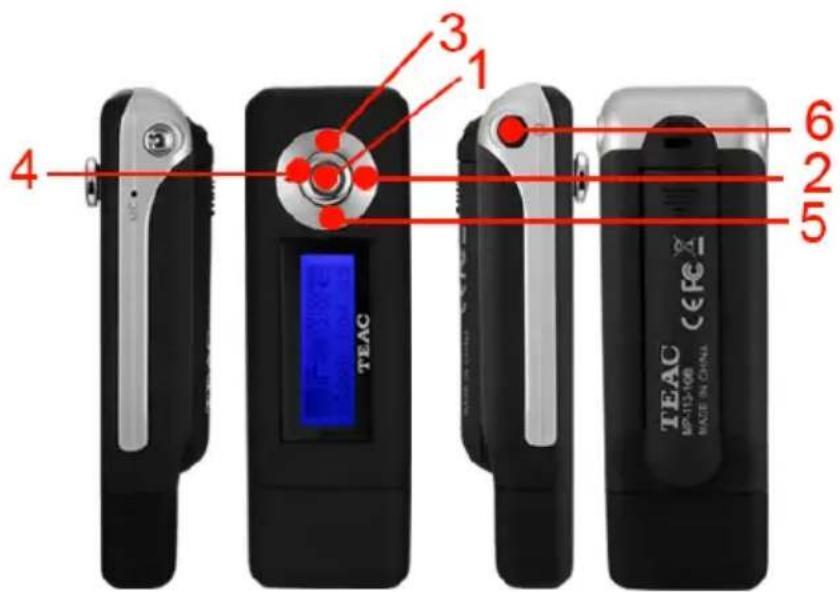
1 Ⓜ Play/Pause/Menu key
2 ▼ Volume –
3 ▶▶ Next button
4 ▲ Volume +
5 Previous button
6 Power/Stop button
3.2 Power on/off
Press the ⏻ button to power on the player and enter the MP3 standby mode by pressing Ⓜ button. Under any mode keep pressing the ⏻ button 3 seconds, the player will save data and enters power off mode.
Important: If the power is directly cut off in standby mode or during play back, nothing, neither data or anything else will be saved.
3.3 Main menu setup
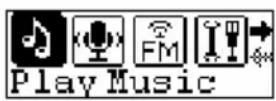
In standby or playing mode, you can press the Ⓜ button to enter the main menu function setting mode.
Push ◀◀ or ▶▶ button to select: Play music, Voice mode, FM tuner, Setting, Record, About, Folder, or Exit. You have to press the Ⓜ button to enter the desired setting.
4. How to use the MP3 player
4.1 Playing music
a) From MP3 standby mode, you can press the Ⓜ button to play MP3 music and press the Ⓜ button again to pause.
b) In play or pause mode, press and hold the Ⓜ button 2 seconds, the player will return to the MP3 standby mode, press and hold the Ⓜ button again, it will repeat step "a)".
c) In MP3 standby or play mode, you can push the ◀◀ or ▶buttons to select last or next music.
d) In STOP status, you can push and hold the ◀◀ or ▶buttons to find your desired music quickly.
e) In play mode, you can press the ◀◀ or ▶buttons to fast backward or forward within this music.
f) In play mode, press the ▲ or ▼ buttons to adjust volume.
g) In MP3 standby, play and pause mode, press and hold the Ⓞ buttons 3 seconds, the player will save data and enters power off mode.
4.2 Voice mode
4.2.1 Playing voice
a) In MP3 mode or voice standby mode, you can press the Ⓜ button to enter the main menu. To enter the playing voice mode, please push the ◀◀ or ▶▶ buttons to select Voice and press Ⓜ to enter.
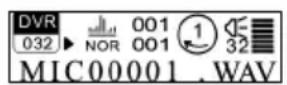
b) In voice standby or play mode, you can press the◀◀ or ▶▶ buttons to select last or next voice file.
c) In STOP status, you can push and hold the ◀◀ or ▶buttons to find your desired voice file quickly.
d) In play mode, you can push and hold ◀◀ or ▶buttons to fast backward or forward.
e) In voice standby mode, press Ⓜ button 3 seconds and the player will enter the MP3 standby mode.
f) In play mode, press the ▲ or ▼buttons to adjust volume. Push and hold the ▲ or ▼buttons to adjust volume quickly.
Note: The EQ selection will be unavailable while playing voice files.
4.2.2 Recording
In MP3 mode or voice standby mode, press Ⓜ button to enter the main menu You can push Ⓜ to select Record and push Ⓜ again to enter. Push Ⓜ button to finish the recording and return to main menu.
4.3 FM Tuner
4.3.1 Playing FM
a) While MP3 playing, voice playing or in standby mode, press the Ⓜ button to enter the main menu, push ◀ or buttons to select FM tuner and press the Ⓜ button to enter. The player will scan the radio stations automatically if there were no radio stations saved before.
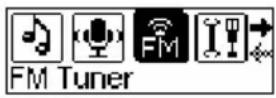
b) In FM playing mode, you can switch between the saved channels by pressing the ◀◀ or ▶▶buttons when the "Preset" appears after pressing the Ⓜ button.
c) In FM playing mode, push the ◀◀ or ▶buttons to adjust and select the frequency; the frequency will increase or decreased by 0.1MHZ; after selecting the channel, please press the Ⓜ button to enter the FM sub-directory, push the ◀◀ or ▶buttons to select Save Station, and then press Ⓜ button to enter and Ⓜ again to save.
d) In FM playing mode, press the ▲ or ▼buttons to adjust the volume.
e) In FM playing mode, press the ⏻ button 3 seconds, the player will then enter the power off mode.
4.3.2 Recording FM
In FM playing mode, press the ◀◀ or ▶▶ buttons to select Record, music will be recorded in WAV format. You can press the Ⓜ button to pause recording. press the Ⓜ button again to finish recording and save the file. The player will return to the FM Tuner screen. You can listen to it in Voice mode.
4.3.3 Setting FM
In FM playing mode, press Ⓜ key to enter the function setting mode. Push the ◀◀ or ▶buttons to select Play Music, Play Voice, Save Station, Delete Station, Auto Scan, EXIT (Return to FM Tuner), and press Ⓜ button again to enter the selected mode.
a) Return to Play Music: In FM play mode, press Ⓜ button to enter the FM sub-directory, push the ◀◀ or ▶▶buttons to select Play Music; press the Ⓜ button again to return to the music playing mode
b) Return to Play Voice: In FM playing mode, press Ⓜ button to enter the FM sub-directory, push the ◀◀ or ▶buttons to select Play Voice; press the Ⓜ button to enter voice playing mode.
c) Save radio station: In FM playing mode, pressM button to enter the FM sub-directory, push the ◀◀ or ▶buttons to select Save Station. Press the Ⓜ button to confirm saving.
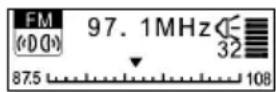
d) Delete radio station: In FM playing mode, press Ⓜ button to enter the FM sub-directory, push the ◀◀ or ▶buttons to select Delete Station, and then press the Ⓜ button again to confirm the deletion of the station.
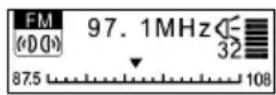
e) Scan radio station: In FM playing mode, press Ⓜ button to enter the FM sub-directory, push the ◀◀ or ▶buttons to select Auto Scan, by pressing Ⓜ key to enter, the player will scan and save radio stations automatically.
f) Exit: Return to FM playing mode.
4. 4 Function Setting
Select Setting in the main menu by pressing Ⓜ button to enter. Push ◀◀ or ▶buttons to select EQ, Play Mode, Contrast, Backlight, Powerset, Sleep timer, Key lock, Recordset, Language, and Exit, press the Ⓜ button again to enter the selected mode.

4.4.1 Setting EQ mode
After entering the EQ mode, push the ◀◀ or ▶▶ buttons to select Normal, Pop, Rock, Classic, Jazz and Bass. Press the Ⓜ button to save the selected EQ setting.

4.4.2 Setting Play mode
After entering Play Mode, push the ◀◀ or ▶▶ buttons to select Normal, repeat one, repeat all or shuffle. Press the Ⓜ button to save the selected play mode.
Normal repeat one repeat all shuffle

4.4.3 Setting Contrast
After entering Contrast, push ◀◀◀ or ▶▶▶ buttons to adjust the contrast of LCD. Press the Ⓜ button again to save the selected setting.

4.4.4 Adjusting Backlight
After entering Backlight, push the ◀◀ or ▶▶ buttons to select Off, 5 Sec, 20 Sec, on. Press Ⓜ button again to save the selected setting.

4.4.5 Setting Power Set
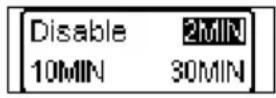
After entering Power Set, push ◀◀ or ▶▶ buttons to select Disable, 2min, 10min, 30min. Press the Ⓜ button to save the selected shutdown time.
4.4.6 Setting sleep timer
After entering Sleep timer, push ◀◀ or ▶▶ buttons to select Disable, 10min, 30min, 60min, 90mins. Press Ⓜ button to save the selected sleep time.
4.4.7 Key lock setting
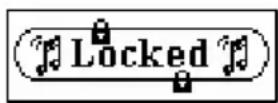
After entering Key lock, push ◀◀ or ▶▶ buttons to select Disable, 10sec, 30sec, 1min, 3min, 10mins. Press Ⓜ button to save the selected key lock time.
Unlocking the keys:
Press and hold the ▲ key to unlock the player.
4.4.8 Settings for Recording
After entering Recordset, push ◀◀ or ▶▶ buttons to select 8000Hz, 11000Hz, 16000Hz, or 22000Hz. Press the Ⓜ button again to save the selected recording setting.
4.4.9 Setting Language
After entering Language mode, push ▶ or ▶ buttons to select the desired language. Press Ⓜ button to save the selected language.
4.4.10 Setting Exit
Press Ⓜ key to exit the Setting menu.
4.5 Folder navigation
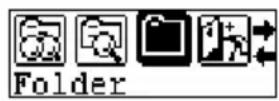
In MP3 or voice standby mode, you can press the Ⓜ button to enter the main menu, and push the ◀◀ or ▶buttons to select folder function. Press the Ⓜ button to enter the file list. You can push the ◀◀ or ▶buttons to browse the files.
A).Select to play music in the root directory
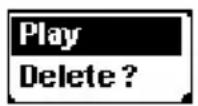
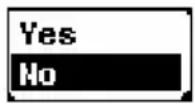
In folder mode, press the ◀◀ or ▶buttons to select a certain song. Press Ⓜ to enter the PLAY or DELETE mode. Press Ⓜ to confirm. If you select Play, it will play the current song. If you select Delete, it will go into delete mode. Press the ◀◀ or ▶buttons again to select YES or NO. Press Ⓜ to confirm deleting (YES) or press Ⓜ button to exit (NO).
B).Select to play music in the folder and its subdirectory
In folder mode, press the ◀◀ or ▶buttons to select a certain folder. Press Ⓜ to enter it's subdirectory. Press ◀◀ or buttons again to select a certain song. Press Ⓜ to enter PLAY or DELETE mode. Press Ⓜ to confirm. If you select Play, it will play the current song. If you select Delete, it will go into delete mode. Press the ◀◀ or ▶buttons again to select YES or NO. Press Ⓜ to confirm deleting (YES) or press the Ⓜ to exit (NO).
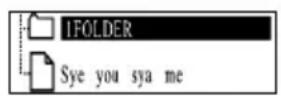
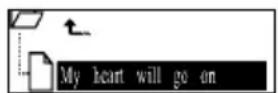
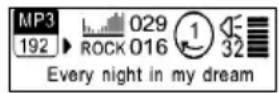
Important: You can not view the record folder and its files in play music mode, which will only be available in play voice mode.
4.6 About
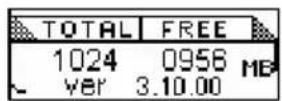
Push ◀◀ or ▶▶ buttons to select About in the main menu, press the Ⓜ button to enter. You can see the total memory information and version number.
4.7 Exit
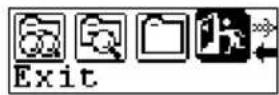
Return to MP3 mode.
Note: From setting mode, you can press the Ⓜ button to exit the setting mode quickly.
4.8 Warnings
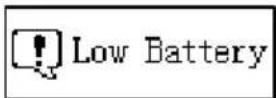
Low battery
The player will display an image to warn users to change the battery.
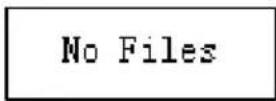
No file
If there is no corresponding file in the player, the following image will be displayed on the screen.
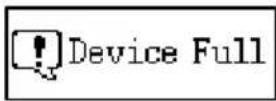
Device full
During recording, if the device memory is full, the following image will be displayed on the screen.
4.9 Lyric sync
This player supports lyric sync function.
Important: The lyric name shall be the same as music with suffix of *. LRC and saved in the same directory, and only the lyrics with time indication can be displayed properly.
- Troubleshooting
| Problem | Causes | Solution |
| No display after pressing the Play/Pause M or Power button | Without installed battery or battery is empty | Verify the battery is installed, change battery. |
| No sound when playing music. | 1. Volume is too low or without music in your player.2. Battery low3. MP3 or WMA file is corrupt. | 1. Adjust volume or download file.2. Change battery3. Try different files |
| Unable to download files to the player after a connection is made. | 1. The function Key lock is set and the keys are locked, or the internal memory storage is write protected.2. The USB plug is not inserted to the PC properly.3. Wrong folder directory | 1. Unlock the keys.2. Connect to the USB interface again and verify PC has identified it as removable disk.3. Maximum number of folders and files that can be saved under a directory are 30 and 500, respectively |
| MP3 files are not displayed | The MP3 files are made with different format and compress rate--the file might have been compressed with MP3 layer one or two. | Download standard MP3 files. |
| PC cannot identify the MP3 player | 1. The necessary driver is not installed.2. The PC has caused an error. | 1. Install the driver properly.2. Format the removable disk. |
| No response after pressing buttons | The function Key lock is set and the keys are locked. | Unlock the keys. |
| Cannot open the disk or prompt I/O error after connecting PC. | Caused by some improper operation | Click related upgrading problem, pressing and holding the Volume up key (▲), and connect USB cable, then click START to format and upgrade will solve the problem. |
6. Technical specifications
Bit rate: 32\~320Kbps (MP3)
SNR: >85dB
Distortion: <0.05%
Output: 2*5mW
Condition of storage: Humidity<90%, normal temperature
Working condition: Humidity <85%, -10\~40°C
USB port: USB2.0
Dimension: 83mm x 27mm x 19.5mm
Weight: 30g (without battery)
Memory: 512MB/1GB/2GB/4GB
Battery life: >8h
Music number limitation: 500 files, 30 folders
Screen: 96x32
LCD
WARRANTY
Model Serial Number
Owner's name
Address
Dealer's name Date of purchase
Dealer's address
Warranty Period
TEAC Europe GmbH, hereinafter called TEAC, warrants this product against any defect in material and workmanship for two (2) years from the date of purchase by the original retail purchaser. According to the following terms this TEAC
product will be repaired without charge of labor and materials by the authorized TEAC service stations, by the authorized TEAC dealers and/or their authorized service stations. TEAC, the authorized TEAC service stations, the authorized
TEAC dealers and/or their authorized service stations may decide whether the defective product will be repaired or replaced as a whole or partially. The TEAC dependencies, the authorized TEAC service stations, the authorized TEAC
replaced as a whole of particularly. The VLTs Deutschland, the authorized VLTs service stations, the authorized VLTs dealers and/or their authorized service stations will also honor this warranty in the other EC and EFTA member states based on the terms in this warranty conditions.
based on the terms in this warranty conditions.
What is Covered and What is Not Covered.
Except as specified below, this warranty covers any defects in materials and workmanship of this product. The following
are not covered by the warranty:
-
Damage to or deterioration of the external cabinet. 2. Any unit that has been altered or on which the serial number has been deferred, modified, or removed.
-
Any unit that has been altered of on which the serial 3. Damage, deterioration or malfunction resulting from:
(a) accident, misuse, abuse or neglect:
(b) failure to follow instructions supplied with the product;
(c) any shipment of the product. Any damage arising of transportation is the liability of the freight company. Any damage arising of transportation and any implicit and explicit risks are the liability of the freight company. This is expressly not a liability of TEAC;
expressively not a liability of TEAC, (d) repair or attempted repair by anyone not authorized by TEAC to repair this product;
(d) repair of attempted repair by anyone not authorized by TEAO to repair this product, (e) causes other than product defects, including lack of technical skill, competence or experience of the user. Espe-
cially damages which may arise of incidental use respectively by improper ventilation.
(f) damages caused by improper or incorrect installation of software,
(g) periodic check-ups,
(h) maintenance respectively repair of parts due to normal wear and tear,
(i) adoptions or adjustments to the product in order to conform to different national technical or safety standards of
any country other than the one for which the product was originally designed and manufactured.
These warranty terms do not affect any statutory rights of consumers which were granted by the respective national laws.
TEAC Europe GmbH
DSPD
Bahnstraße 12
65205 Wiesbaden-Erbenheim
TEAC Europe GmbH, DSPD:
- Disposing of the Product
- Content
- Precautions
- IMPORTANT!
- System requirement
- Content of Package
- Installation instruction
- 2 Installing battery
- USB mode
- Connecting a PC as USB
- USB mode
- Important:
- Connecting a PC as MTP
- MTP
- Removing the USB device
- Basic operation
- Buttons and functions
- Power on/off
- Main menu setup
- How to use the MP3 player
- Playing music
- Voice mode
- Playing voice
- Recording
- FM Tuner
- Playing FM
- Recording FM
- Setting FM
- 4 Function Setting
- Setting EQ mode
- Setting Play mode
- Setting Contrast
- Adjusting Backlight
- Setting Power Set
- Setting sleep timer
- Key lock setting
- Unlocking the keys:
- Settings for Recording
- Setting Language
- Setting Exit
- Folder navigation
- A).Select to play music in the root directory
- B).Select to play music in the folder and its subdirectory
- About
- Exit
- Warnings
- Lyric sync
- Technical specifications
- WARRANTY
- TEAC Europe GmbH
Brand : TEAC
Model : MP-113
Category : Mp3 player