
VT8830 - Fan SOLAC - Free user manual and instructions
Find the device manual for free VT8830 SOLAC in PDF.

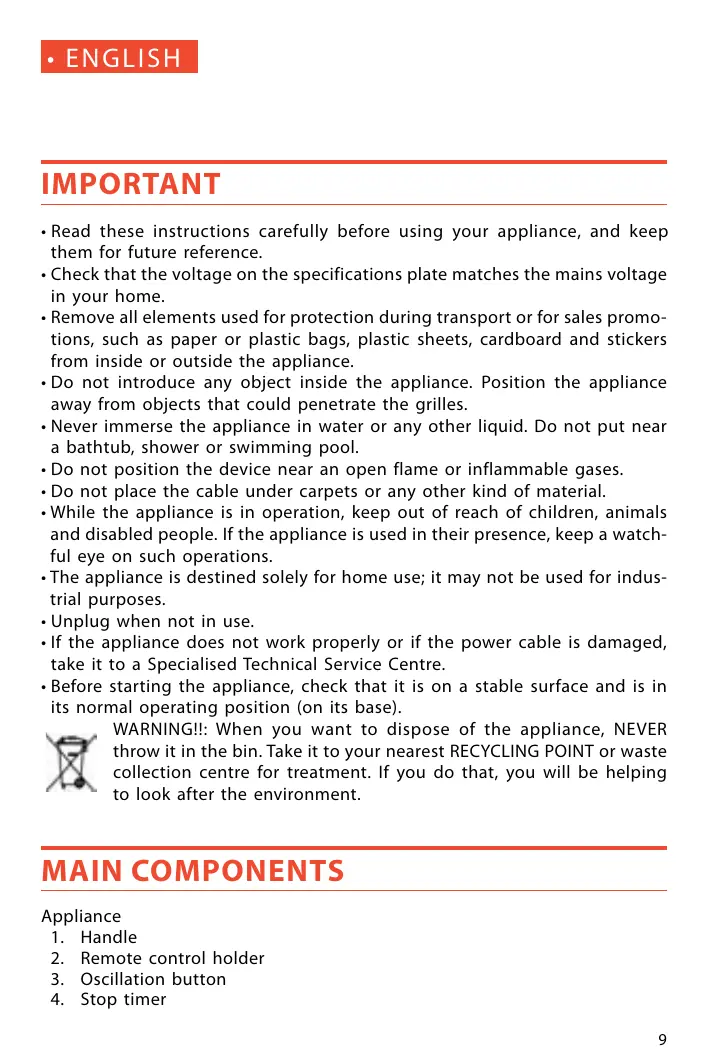


| Product type | Pedestal fan (tower) |
| Brand | SOLAC |
| Model | VT8830 |
| Power supply | Mains 220-240 V ~ 50/60 Hz |
| Power | 45 W (estimated) |
| Number of speeds | 3 (minimum, intermediate, maximum) |
| Oscillation function | Yes, left-right oscillation control |
| Operating modes | Normal, Nature, Night |
| Timer | 30 min to 7 h 30 in 30 min intervals |
| Remote control | Yes, with 2 LR03 AAA 1.5 V batteries, range 6 m |
| Display | LED display for speed and timer indicators |
| Material | Plastic |
| Dimensions (approx.) | Height 85 cm, base Ø 30 cm |
| Weight (approx.) | 3.5 kg |
| Cable length | Approximately 1.5 m (estimated) |
| Maintenance | Unplug before cleaning; damp cloth; do not immerse; no solvents |
| Safety instructions | Do not use if cable damaged; keep out of reach of children; avoid water |
| Intended use | Household use only |
| Assembly | Assembly of the column and base with provided screws |
| After-sales service | Contact an authorized technical service in case of malfunction |
| Recycling | Do not dispose of with household waste; take to a recycling center or collection point |
Frequently Asked Questions - VT8830 SOLAC
User questions about VT8830 SOLAC
0 question about this device. Answer the ones you know or ask your own.
Ask a new question about this device
Download the instructions for your Fan in PDF format for free! Find your manual VT8830 - SOLAC and take your electronic device back in hand. On this page are published all the documents necessary for the use of your device. VT8830 by SOLAC.
USER MANUAL VT8830 SOLAC
VENTILADOR
FAN
VENTILATEUR
VENTILATOR
VENTILADOR
VENTILATORE
VENTILATOR
VENTILATORU
WENTYLATOR
VENTILATOR
TIPUSU VENTILATORHOZ
BEHTMJIATOP
VENTILATOR
VENTILATORUL
INSTRUCCIONES DE USO
INSTRUCTIONS FOR USE
MODE D'EMPLOI
GEBRAUCHSANLEITUNG
INSTRUÇões DE USO
ISTRUZIONI PER L'USO
GEBRUKSAANWJZING
NÁVOD K POUZITÍ
INSTRUCJA OBSLUGI
NÁVOD NA POUZITIU
HASZNÁLATI UTSÍTÁS
Инструкциа за уnotpe6a
UPUTE ZA UPOTREBU
INSTRUÇIUNI DE UTILIZARE
5-8·ESPANOL
9-12 • ENGLISH
13-16·FRANÇAIS
17-20 • DEUTSCH
21-24·PORTUGUES
25-28·ITALIANO
29-32 • NEDERLANDS
33-36 • CESKY
37-40 • POLSKA
41-44 • SLOVENSKY
45-49·MAGYAR
50-53·6bIrapck
54-56·HRVATSKA
57-60·ROMANA


ATENCIón
- Read these instructions carefully before using your appliance, and keep them for future reference.
- Check that the voltage on the specifications plate matches the mains voltage in your home.
- Remove all elements used for protection during transport or for sales promotions, such as paper or plastic bags, plastic sheets, cardboard and stickers from inside or outside the appliance.
- Do not introduce any object inside the appliance. Position the appliance away from objects that could penetrate the grilles.
- Never immerse the appliance in water or any other liquid. Do not put near a bathtub, shower or swimming pool.
- Do not position the device near an open flame or inflammable gases.
- Do not place the cable under carpets or any other kind of material.
- While the appliance is in operation, keep out of reach of children, animals and disabled people. If the appliance is used in their presence, keep a watchful eye on such operations.
- The appliance is destined solely for home use; it may not be used for industrial purposes.
- Unplug when not in use.
- If the appliance does not work properly or if the power cable is damaged, take it to a Specialised Technical Service Centre.
- Before starting the appliance, check that it is on a stable surface and is in its normal operating position (on its base).

WARNING!!: When you want to dispose of the appliance, NEVER throw it in the bin. Take it to your nearest RECYCLING POINT or waste collection centre for treatment. If you do that, you will be helping to look after the environment.
MAIN COMPONENTS
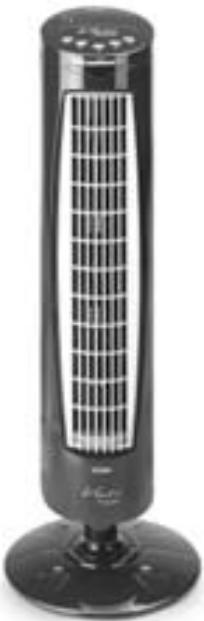
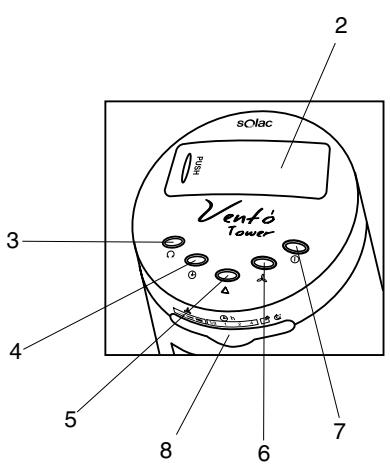
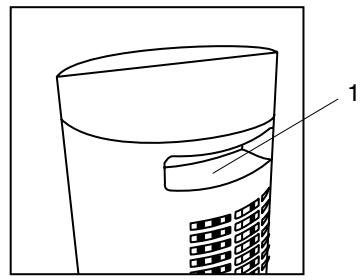
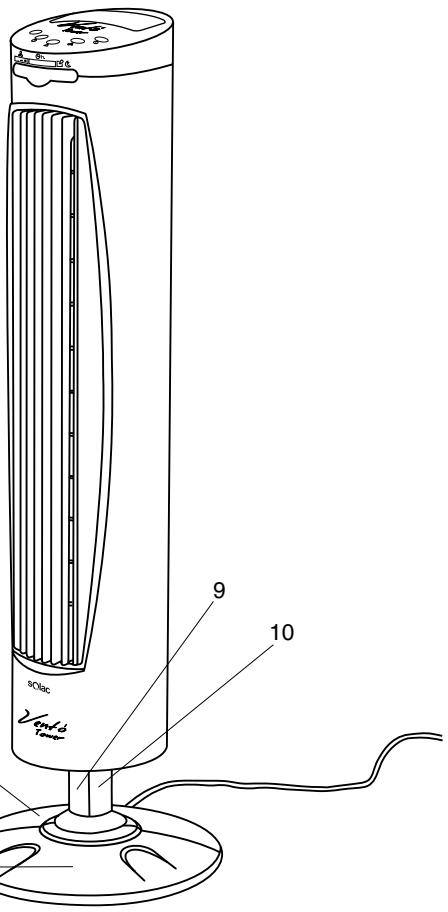
Appliance
- Handle
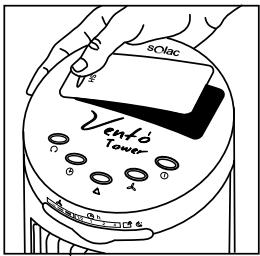
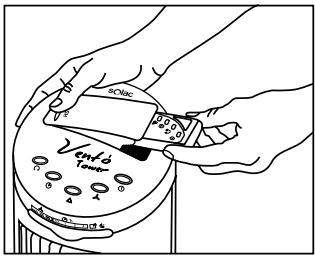
- Remote control holder
- Oscillation button
-
Stop timer
-
Operating mode selector
- Speed selector
- Start/stop button
- Screen
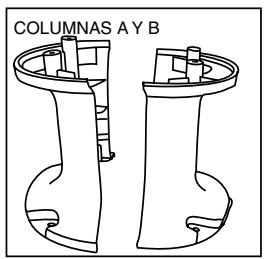
- Column A
- Column B
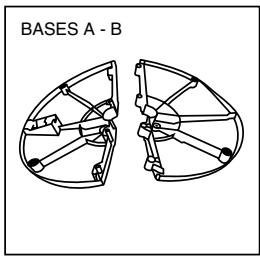
- Base A
- Base B
- Fixing screws
Remote control
- Start/stop button
- Oscillation button
- Stop timer
- Operating mode selector
- Speed selector
ASSEMBLY
- Carefully turn the fan over, placing it on a smooth surface.
- The column and the base of the fan each consist of two parts, which need to be joined together and fixed using screws.
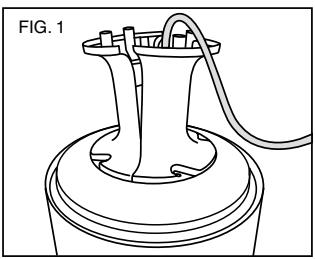
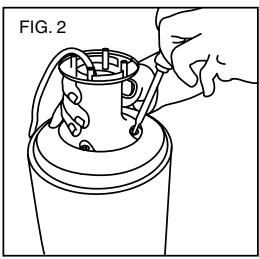
- Assemble column A (9) and column B (10) passing the power cable through the channel left between them (Fig.1). Use 4 fixing screws to fix the two parts to the bottom of the fan body (Fig. 2).
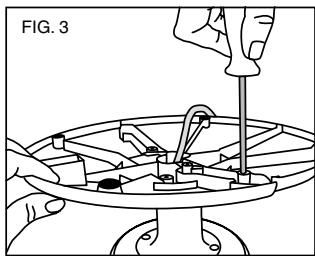
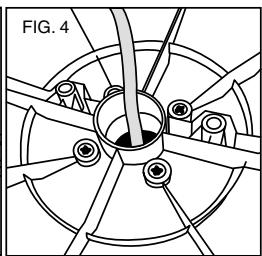
- Next, fit base A and base B together, allowing the power cable to pass through the channel that remains between the 2 bases, and join the two bases together using screws (Fig.3). Fix the two bases to the central column using the remaining 4 screws (Fig. 4).
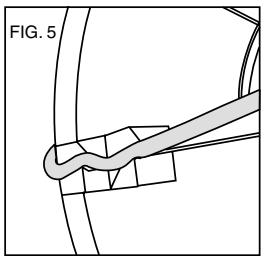
- Finally, guide the power cable through the rail provided on the base for this purpose (Fig.5).
- *You can find all the fixing screws in one of the cavities there is in one of the polyspan protections of the appliance.
USER INSTRUCTIONS
- Press the start /stop button (7) to start the fan; it will start on its lowest speed. The relevant pilot light will come on.
- To increase the speed, press the speed selector (6) once to select the medium speed and again if you want high speed. In each case, the relevant pilot light will come on.
-
The fan will stop when the start / stop button (7) is pressed again.
-
Oscillation selector: The appliance is designed to oscillate horizontally and thus to efficiently ventilate large areas.
- For this, you will need to press the oscillation button (3). If you press it again, the fan will stop oscillating and remain in the same position.
- Operating modes: The fan operates by default in "normal" mode. Press the operating mode selector (5) once for the fan to start working in "nature" mode and twice is you want it to work in "night" mode. To return to the "normal" operating mode, press the mode selector a third time and the pilot lights that show the operating mode will go off.
- Stop timer: It is possible, while the fan is working, to set it to stop automatically after a preset time has passed. The fan can be programmed to stop after 30 minutes and up to 7 hours and 30 minutes, at thirty-minute intervals.
- Press the stop timer (4) once to set the timer for 30 minutes starting at that time. After this time has passed, the appliance will stop working. Likewise, every time you press the timer (4) will delay the automatic stop of the appliance by 30 minutes. The selected time will be shown by the pilot lights in the screen (8). (Fig. 6)
- To deactivate the timer function, press the stop timer (4) once more after selecting 7 hours and 30 minutes.
- The remote control unit operates with two 1.5 V LR-03 AAA alkaline batteries. It is advisable to remove the batteries from the unit if it is not going to be used for more than one month Do not mix old and new batteries.
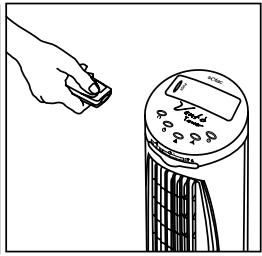
- You can use the remote control to select the same functions as with the buttons on the actual fan. Follow the instructions given in the previous section.
- The range of the remote control unit is up to 6 metres from the fan. Point it straight at the front of the fan to ensure good transmission.
- The fan will make a "beep" noise, and the lights on the digital screen will light up, confirming that the device has received the instructions sent through the remote control unit.
CLEANING AND MAINTENANCE
- Your appliance must be disconnected from the mains before any cleaning operation is performed.
-
Clean with a slightly damp cloth.
-
Never immerse the appliance in water or any other liquid. Check that no drops of liquid enter the motor area.
-
Do not use solvents or abrasive cleaners to clean the device, since they could damage its plastic parts.
-
When the appliance is not in use it should be kept in a damp-proof location.
ATTENTION
LIMPEZA E MANUTENÇÂO
Brand : SOLAC
Model : VT8830
Category : Fan