
TS128MJFLASHM - USB Drive TRANSCEND - Free user manual and instructions
Find the device manual for free TS128MJFLASHM TRANSCEND in PDF.
User questions about TS128MJFLASHM TRANSCEND
0 question about this device. Answer the ones you know or ask your own.
Ask a new question about this device
Download the instructions for your USB Drive in PDF format for free! Find your manual TS128MJFLASHM - TRANSCEND and take your electronic device back in hand. On this page are published all the documents necessary for the use of your device. TS128MJFLASHM by TRANSCEND.
USER MANUAL TS128MJFLASHM TRANSCEND
Your Supplier, Your Partner, Your Friend.
Table of Contents
Introduction
Package Contents.... 1
Features 1
System Requirements 2
Before Use 2
Driver Installation
Driver Installation for Windows 98SE.... 3
Driver Installation for Windows Me, 2000, and XP .... 4
Driver Installation for Mac OS 9.0 or Later.... 4
Driver Installation for Linux Kernel 2.4 or Later 5
Data Storage 5
Uninstall....6
How to Unplug JetFlash Safely
To Remove JetFlash in Windows 98SE....7
To Remove JetFlash in Windows Me, 2000, and XP ...... 7
To Remove JetFlash in Mac OS.... 7
To Remove JetFlash in Linux 7
Product Overview......8
Basic Operation
Enter MP3 Mode 8
Enter Record Mode 8
Play a Track.... 9
Pause a Track.... 9
Advance to Next Track 9
Reverse to Previous Track.... 9
Fast Forward 9
Fast Reverse...... 9
Increase Volume 9
Decrease Volume 9
Repeat a Track 9
Repeat All Tracks.... 10
Repeat a Portion of One Track (AB Repeat) 10
Hold.... 10
MP3 Function
To Download or Upload MP3/WMA files 10
To Play MP3 Music.... 11
AB Repeat Function 11
Voice Recording Function
To Record Voice.... 11
To Play the Recorded Files 12
LED Indication 13
Recover JetFlash
To Recover JetFlash in Windows 98SE .... 13
To Recover JetFlash in Windows Me, 2000, and XP 17
Troubleshooting.... 23
Specifications.... 26
Ordering Information 26
Warranty
Introduction
Thank you very much for purchasing Transcend's JetFlash™. This small device is more than a USB Flash Drive. It combines a USB Flash Drive with MP3, AB repeat, and voice recording functions. With a USB connector, it can expedite exchanging huge amounts of data between any desktop or laptop computers with a USB port. With the MP3 function, you can upload or download music files to or from a PC and use JetFlash as an MP3 player. With the AB repeat function, you can continuously replay a designated section of a track. With the voice recording function, you can also use JetFlash as a digital recorder. In addition, JetFlash's mobility, strong data retention ability, and impressive appearance will provide you with a brand-new data storage experience.
Package Contents
The JetFlash package includes the following items:
- JetFlash
- AAA battery
• Earphone with neck strap - Driver CD
• USB extension cable
• Quick Installation Guide
Features
• USB 1.1 compliant and USB 2.0 compatible;
- Expedited Data Transfer: Maximum transfer rate up to 12Mbit/sec at full speed;
- Power Supply: For data transfer, JetFlash is powered directly via the USB port, and no external power or battery is needed. To use it as an MP3 player or digital recorder, one AAA battery is necessary. (One AAA alkaline battery can support up to 12 hours of operation);
- Operating Systems Supported: Windows® 98SE, Windows® Me, Windows® 2000, Windows® XP, Mac™ OS 9.0 or later, and Linux™ kernel 2.4 or later. Only Windows® 98SE needs the enclosed driver;
- MP3 Function: Supports MP3 and WMA formats and so can be used as an MP3 player;
- Supports AB repeat, enabling JetFlash to continuously replay a designated section of a track;
• Voice Recording Function: Supports WAV format, thus making JetFlash a digital
recorder;
• Power Saving Function: Auto-powers off after two minutes without use.
• LEDs indicate the usage status of JetFlash.
System Requirements
Desktop or notebook computer with USB port
One of following operating systems:
- Windows 98SE
- Windows Me
- Windows 2000
- Windows XP
• Mac OS 9.0 or later
• Linux kernel 2.4 or later
Before Use
- Keep JetFlash away from heat, direct sunlight, and moisture. Do not bend, flex, or drop JetFlash.
- Make sure the HOLD HOLD switch is set to the "OFF" position.
- Plug or unplug JetFlash by grasping the sides.
- Never use the "Quick Format" or "Full Format" of Windows to format your JetFlash.
- Follow the procedures in "How to Unplug JetFlash Safely" to remove JetFlash from the system.
Driver Installation
Driver Installation for Windows 98SE
- Put the Driver CD into the CD-ROM (Auto-Run supported). Click Win98 Driver button.

text_image
JetFlash MP3 REC JetFlash™ Walkable Music Win'8 Driver Utility Recovery User's Manual Exit Transcend Your Supplier, Your Partner, Your Friend. www.transcendusa.com Copyright©2003 Transcend information, Inc. All rights reserved.- Click Next to continue.

text_image
SigmaTel MSCN Audio Player Setup Welcome to the InstallShield Wizard for SigmaTel MSCN Audio Player The InstallShield® Wizard will install SigmaTel MSCN Audio Player on your computer. To continue, click Next. < Back Next > Cancel-
The Install Shield Wizard guides you through the installation process.
-
Plug JetFlash into an available USB port. Your computer automatically detects this new device. A new Removable Disk drive with a newly assigned drive letter appears in the My Computer window.
Driver Installation for Windows Me, 2000, and XP
No driver is required. These Windows operating systems have built-in drivers to support JetFlash. Simply plug JetFlash into an available USB port, and Windows installs the files needed to use it. A new Removable Disk drive with a newly assigned drive letter appears in the My Computer window.

text_image
My Computer File Edit View Favorites Tools Help Back Search Folders Address My Computer System Tasks View system information Add or remove programs Change a setting Eject this disk Other Places My Network Places My Documents Shared Documents Control Panel Details Removable Disk (E:) Files Stored on This Computer Shared Documents CHZ's Documents Hard Disk Drives Local Disk (C:) Devices with Removable Storage 3½ Floppy (A:) CD Drive (D:) Removable Disk (E:) CD Drive (H:)Driver Installation for Mac OS 9.0 or Later
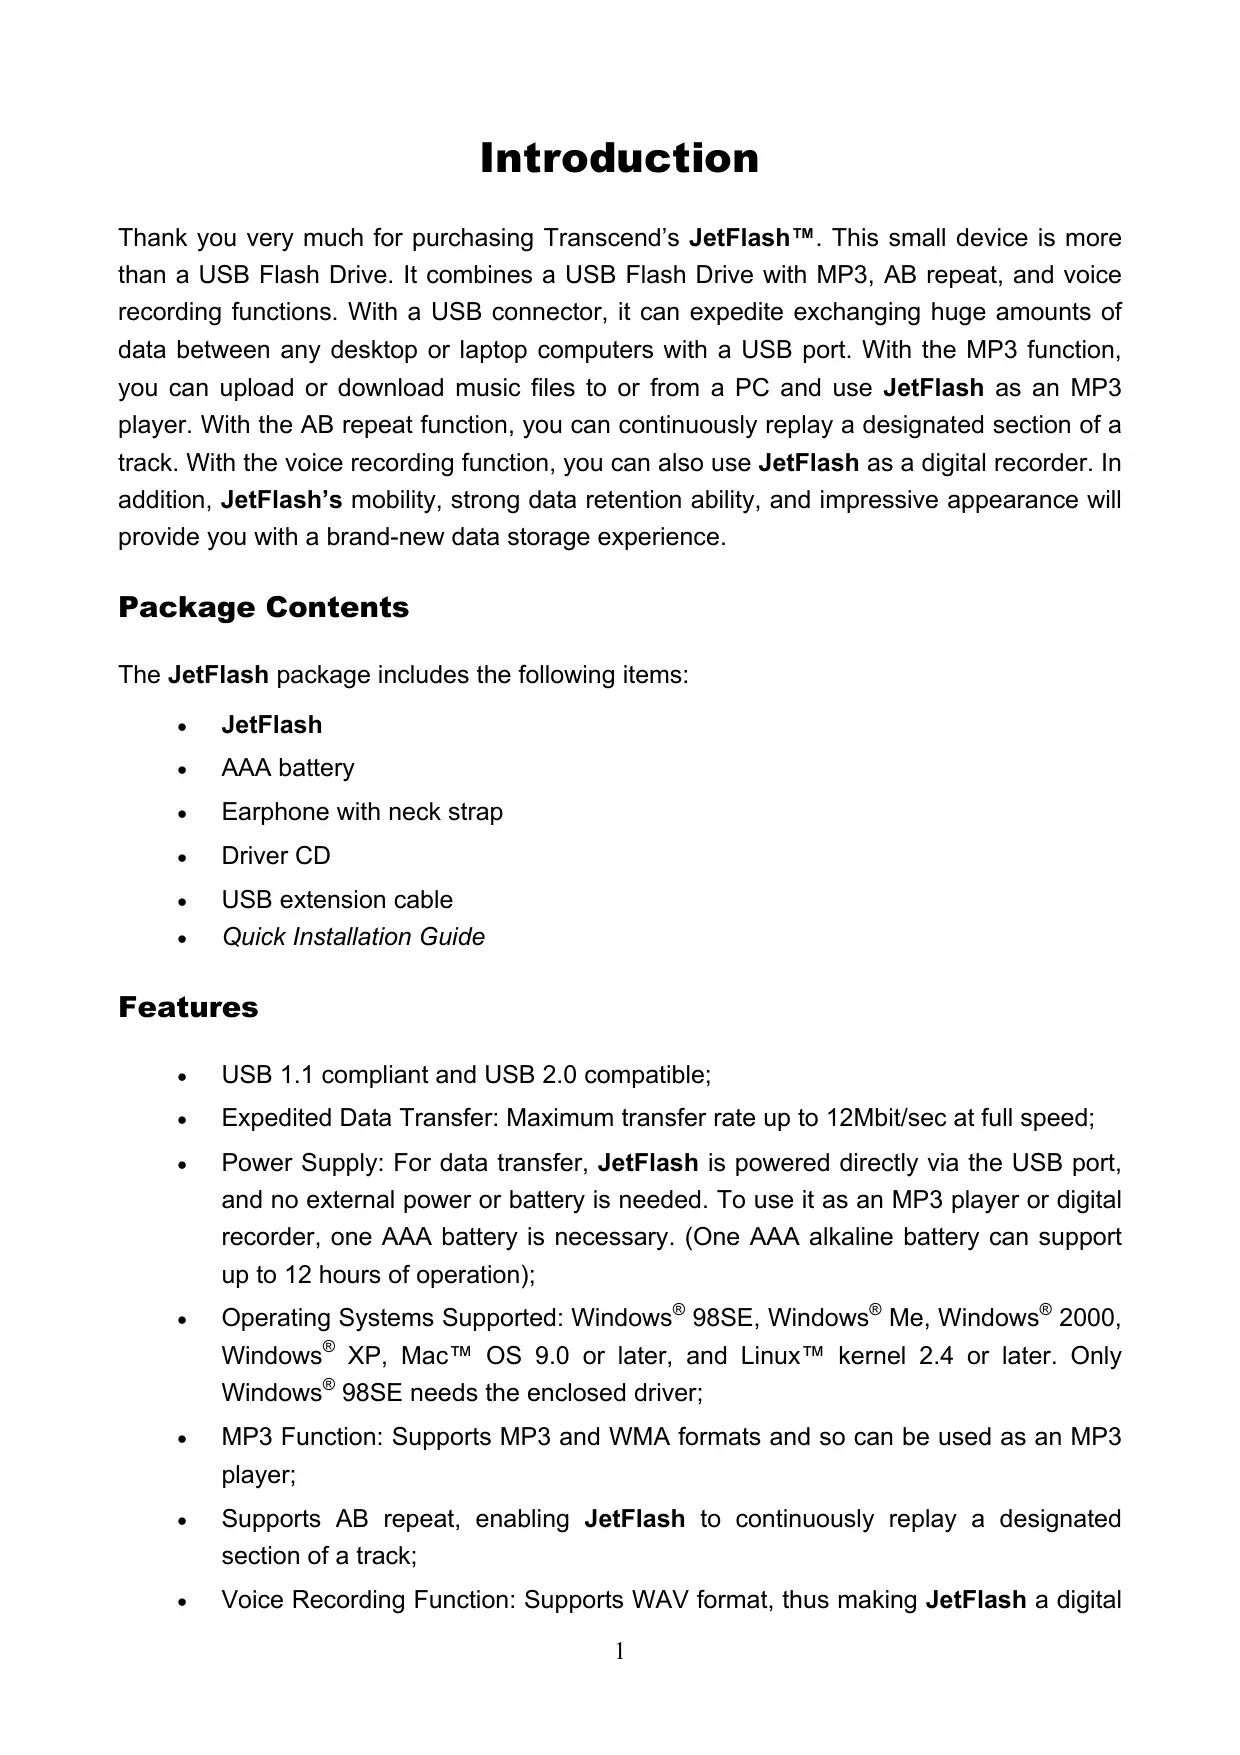
No driver is required. Just plug JetFlash into an available USB port and your computer automatically detects it.
text_image
JETFLASH Back View Computer Home Favorites Applications TS8.6 TS9.1 Desktop (Mac OS) JETFLASHDriver Installation for Linux Kernel 2.4 or Later
No driver is required. Just plug JetFlash into the USB port and mount it.
Example: 1. Create directory of /mnt/JetFlash first: mkdir /mnt/JetFlash
- mount JetFlash: mount -a -t msdos /dev/sda1 /mnt/JetFlash
Data Storage
After installing the driver, simply plug JetFlash into an available USB port and you can use it like a hard drive or other data storage device.
WARNING: To prevent loss of data and/or damage to JetFlash, never remove a JetFlash from a device while LED is flashing.
WARNING: To prevent the malfunction of JetFlash, never press the PLAY/PAUSE button while JetFlash is connected with a USB Port.
Uninstall
- Put the Driver CD into the CD-ROM (Auto-Run supported). Click Win98 Driver button.

text_image
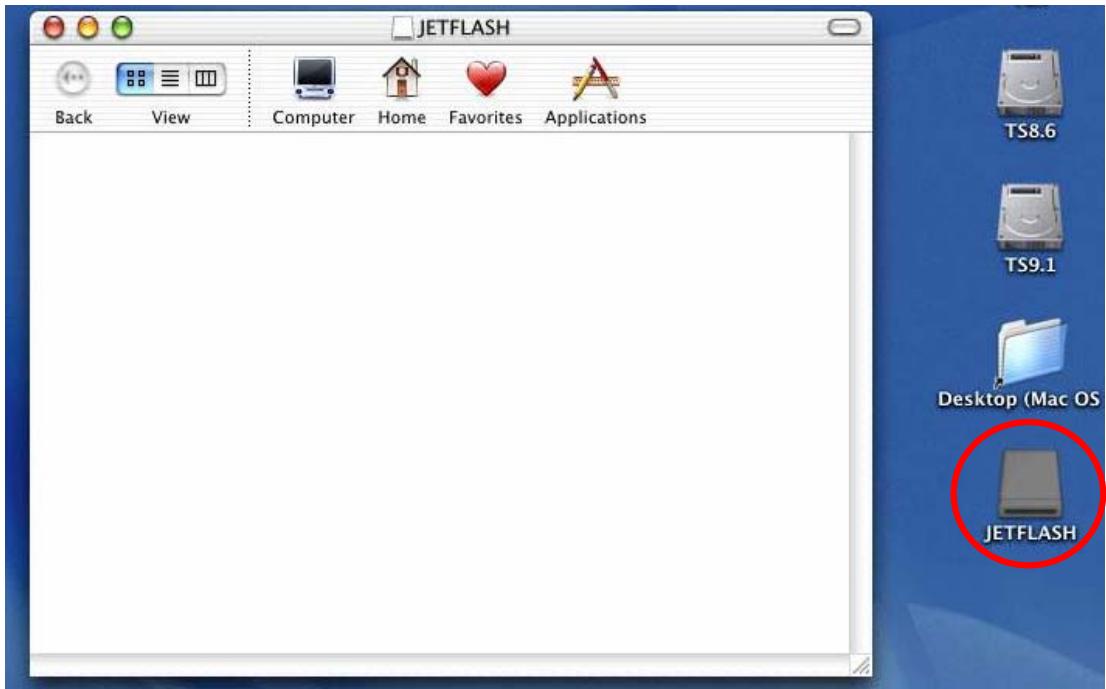
JetFlash™ Walkable Music Win'ts Driver Utility Recovery User's Manual Exit Transcend Your Supplier, Your Partner, Your Friend. www.transcendusa.com Copyright©2003 Transcend information, Inc. All rights reserved.- Click OK to continue.
text_image
Confirm Uninstall Do you want to completely remove the selected application and all of its components? OK CancelHow to Unplug JetFlash Safely

Before removing JetFlash, please make sure the LED is not flashing! If you remove JetFlash while the LED is flashing, unpredictable damage to the files or JetFlash may occur.

When JetFlash is unplugged, it automatically enters MP3 mode. To exit MP3 mode, press and hold the PLAY/PAUSE ▶/II button until the Power/Play LED turns off.
To Remove JetFlash in Windows 98SE
Unplug JetFlash from your system directly when data are not transferring.
To Remove JetFlash in Windows Me, 2000, and XP
- Click the icon on the system tray.

text_image
5:38 PM- The Safely remove USB Mass Storage Device pop-up menu will appear. Click to continue.

text_image
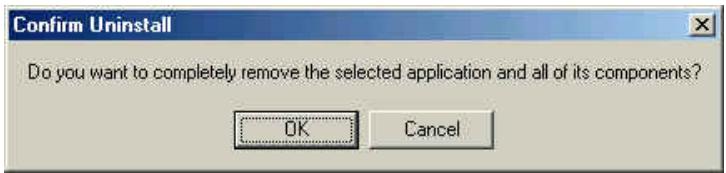
Safely remove USB Mass Storage Device - Drives(E:, B:) 4:33 PM- A message box appears: The ‘USB Mass Storage Device’ device can now be safely removed from the system.
text_image
Safe To Remove Hardware The 'USB Mass Storage Device' device can now be safely removed from the system.To Remove JetFlash in Mac OS
Drag and drop the Disk icon corresponding to JetFlash into the trashcan. Then unplug JetFlash from the USB port.
To Remove JetFlash in Linux
Execute umount /mnt/JetFlash to un-mount the device.
Product Overview

text_image
A B C D E Transcend JetFlash™ F G H J K Transcend
A REC Button
B PLAY/PAUSE Button
C Record LED
D Power/Play LED
E Repeat LED
F USB Connector Cover
G HOLD Switch
H Microphone
I Earphone Jack
J Track Control Wheel
K Volume Control Wheel
Basic Operation
Enter MP3 Mode
-
Disconnect JetFlash from your computer.
-
Press and hold the PLAY/PAUSE ▶/II button for a few seconds to power on (enter MP3 mode). The Power/Play LED turns green.
To exit from MP3 mode, press and hold the PLAY/PAUSE ▶/II button for a few seconds till the LED turns off.
Enter Record Mode
-
Disconnect JetFlash from your computer.
-
Press and hold the PLAY/PAUSE ▶/II button for a few seconds to power on (the Power/Play LED turns green).
-
Press and hold the REC button for a few seconds to enter Record mode. The Record LED turns red.
To resume MP3 mode, press and hold the PLAY/PAUSE ▶/II button until the Record LED turns off.
Play a Track
Press the PLAY/PAUSE ▶/II button after entering MP3 or Record mode. The Power/Play LED blinks green and there is track playback.
If there is no track in your JetFlash, the Power/Play LED turns green.
Pause a Track
Press the PLAY/PAUSE ▶/II button when there is track playback. The Power/Play LED turns green and the track is paused.
To resume track playback, press the PLAY/PAUSE button again.
Advance to Next Track
Roll the Track Control Wheel toward NEXT 🏠. The track advances to the next one.
Reverse to Previous Track
Roll the Track Control Wheel toward the PREV 📋. The track reverses to the previous one.
Fast Forward
Roll and hold the Track Control Wheel toward NEXT
Fast Reverse
Roll and hold the Track Control Wheel toward PREV
Increase Volume
Roll and hold the Volume Control Wheel toward VOL+ + VOL until you reach the desired volume.
Decrease Volume
Roll and hold the Volume Control Wheel toward VOL- ∞ VOL until you reach the desired volume.
Repeat a Track
Press the Track Control Wheel 📂 when the Repeat LED is off. The Repeat LED turns orange.
To resume normal playback, press the Track Control Wheel Mode twice.
Repeat All Tracks
Press the Track Control Wheel 📂 when the Repeat LED is on, or press the Track Control Wheel 📂 twice when the Repeat LED is off. The Repeat LED blinks orange.
To resume normal playback, press the Track Control Wheel Mode again.
Repeat a Portion of One Track (AB Repeat)
- Press the Volume Control Wheel (A-B) to mark the beginning of the portion you wish to repeat. The Repeat LED blinks orange.
- Press the Volume Control Wheel (A+B) again to mark the end of the portion you wish to repeat. The Repeat LED blinks orange at a slow speed, and the marked portion is played as a continuous loop.
Hold
When the HOLD HOLD switch is set to the "ON" position, all the buttons and control wheels are disabled. To enable the buttons and control wheels, the HOLD HOLD switch must be set to "OFF".
If the HOLD HOLD switch is set to "ON", all LEDs will blink twice when you power on the JetFlash.
MP3 Function
To Download or Upload MP3/WMA files
- Complete the driver installation.
- Plug JetFlash into an available USB port. A new Removable Disk drive with a newly assigned drive letter appears in the My Computer window. You can now download or upload MP3/WMA files from or to your computer by clicking and dragging the file names/icons to the desired directories.
In order to be able to play MP3 or WMA files, you must store them in the root directory of JetFlash. - JetFlash only supports Mpeg I Layer 3 and WMA files compressed at a rate of 32 Kbps–320Kbps.
To Play MP3 Music
- Make sure you have downloaded MP3 or WMA files to the root directory of your JetFlash.
- Disconnect JetFlash from your computer.
- Connect the earphone with the earphone jack ☐.
- Set HOLD HOLD switch to "OFF" position.
- Press and hold the PLAY/PAUSE ▶/II button for a few seconds to power on (enter MP3 mode). The Power/Play LED turns green.
- Press the PLAY/PAUSE ▶/II button again. The Power/Play LED blinks green and the MP3/WMA files are played back, in alphabetical order.
- To pause music playback, press PLAY/PAUSE ▶/II button.
- To power off, press and hold the PLAY/PAUSE ▶/II button until the Power/Play LED turns off.
For more operating instructions, please refer to Basic Operation
AB Repeat Function
Following the procedures below, you can repeat a portion of one track. Make sure the HOLD HOLD switch is set to "OFF".
- Enter MP3 mode and play the tracks.
- Press the Volume Control Wheel 📄 to tag the beginning of the portion you wish to repeat. The Repeat LED blinks orange at fast speed, and music playback continues.
- Press the Volume Control Wheel 📐 again to tag the end of the portion you wish to repeat. The Repeat LED blinks orange at slow speed, and the tagged portion is played as a continuous loop.
- To resume normal playback, press the Volume Control Wheel
For more operating instructions, please refer to Basic Operation.
Voice Recording Function
To Record Voice
- Disconnect JetFlash from your computer.
- Set HOLD switch to "OFF" position.
-
Press and hold the PLAY/PAUSE ▶/II button for a few seconds to power on (enter MP3 mode). The Power/Play LED turns green.
-
Press and hold the REC button for a few seconds to enter Record mode. The Record LED turns red.
- Press the REC button. The Record LED blinks red and voice recording starts.
- Press the REC button to stop voice recording when you wish to stop.
- Press the REC button to start voice recording when you wish to start again.
The recorded files (VXXX.WAV format) are saved on the folder "Voice", in an ascending order.
- With sufficient power: 128MB memory can store up to 9 hours of recorded voice.
256MB memory can store up to 18 hours of recorded voice.
512MB memory can store up to 36 hours of recorded voice.
To achieve better quality recording, please keep voice source close to the microphone of JetFlash.
If JetFlash is full and there is no memory available for voice recording, the Power/PLAY LED turns on. To make memory available for voice recording, delete some files or folders from JetFlash.
To resume MP3 mode, press and hold PLAY/PAUSE ▶/II button until the Record LED turns off.
To Play the Recorded Files
- Disconnect JetFlash from your computer.
- Set HOLD switch to "OFF" position.
- Press and hold the PLAY/PAUSE ▶/II button for a few seconds to power on (enter MP3 mode). The Power/Play LED turns green.
- Press and hold the REC button for a few seconds to enter Record mode. The Record LED turns red.
- Press the PLAY/PAUSE ▶/II button to play the recorded files. The Power/Play LED blinks green.
To resume MP3 mode, press and hold PLAY/PAUSE ▶/II button until the Record LED turns off.
To power off, press and hold the PLAY/PAUSE ▶/II button until the Power/Play LED turns off.
For more operating instructions, please refer to Basic Operation.
LED Indication
| Record LED (Red) | Power/Play LED (Green) | Repeat LED (Orange) | Status |
| off | off | off | Power off |
| off | fast blink | off | Data transfer |
| off | on | off | Power on (in MP3 mode) |
| off | normal blink | off | Play MP3 music |
| off | normal blink | on | Repeat a track |
| off | normal blink | normal blink | Repeat all tracks |
| off | normal blink | fast blink | The beginning of the portion you wish to repeat is marked in MP3 mode |
| off | normal blink | slow blink | Repeat a portion of one track |
| on | on | off | In Record mode |
| normal blink | off | off | Record voice |
| on | normal blink | off | Play the recorded file(s) |
| on | normal blink | on | Repeat a recorded file |
| on | normal blink | normal blink | Repeat all recorded files |
| on | normal blink | fast blink | The beginning of the portion you wish to repeat is marked in Record mode |
| on | normal blink | slow blink | Repeat a portion of one recorded file |
Recover JetFlash
If your JetFlash is ever damaged, you can use the Recovery program to restore its default settings.
Running the Recovery program will erase all the data on the JetFlash.
If there are bad blocks in the flash memory chip of JetFlash, the memory size of JetFlash after running the Recovery program will be smaller than the original memory size.
To Recover JetFlash in Windows 98SE
- Put the Driver CD into the CD-ROM (Auto-Run supported).
- Remove the battery from JetFlash.
- Press and hold the PLAY/PAUSE ▶/II button, then plug JetFlash into an available USB port.
Do not release the PLAY/PAUSE ▶/II button until the Recovery procedures are completed.
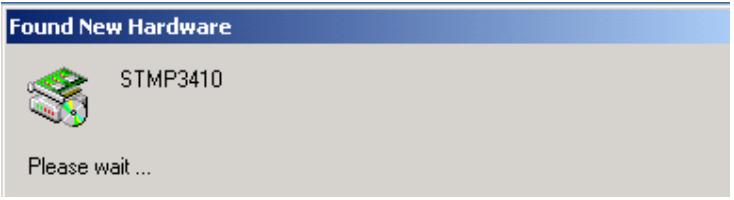
- Found New Hardware and New Hardware Found messages appear. (Only the first time you recover the JetFlash.)
text_image
Found New Hardware STMP3410 Please wait ...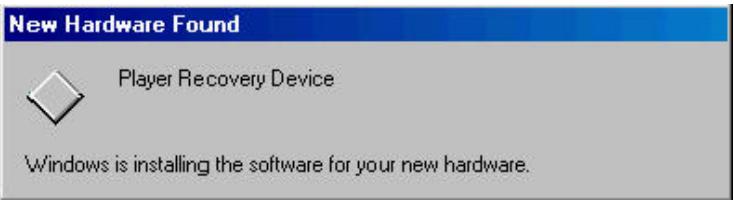
text_image
New Hardware Found Player Recovery Device Windows is installing the software for your new hardware.- Click the Recovery button on the JetFlash splash screen.

text_image
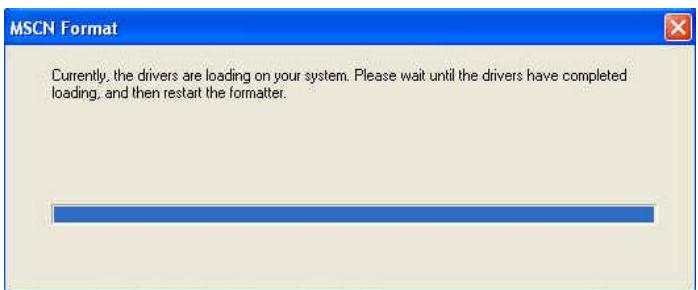
JetFlash™ Walkable Music Win't Go Driver Utility Recovery User's Manual Exit Transcend Your Supplier, Your Partner, Your Friend. www.transcendusa.com Copyright©2003 Transcend information, Inc. All rights reserved.- MSCN Format status bar message appears.
text_image
MSCN Format Currently, the drivers are loading on your system. Please wait until the drivers have completed loading, and then restart the formatter.If above message does not appear, click the Recovery button on the JetFlash splash
screen again. If this still doesn't work, press and hold PLAY/PAUSE ▶/II button to re-plug JetFlash first. Then, click the Recovery button on the JetFlash splash screen again.
- New Hardware Found messages appear. (Only the first time you run the Recovery program.)
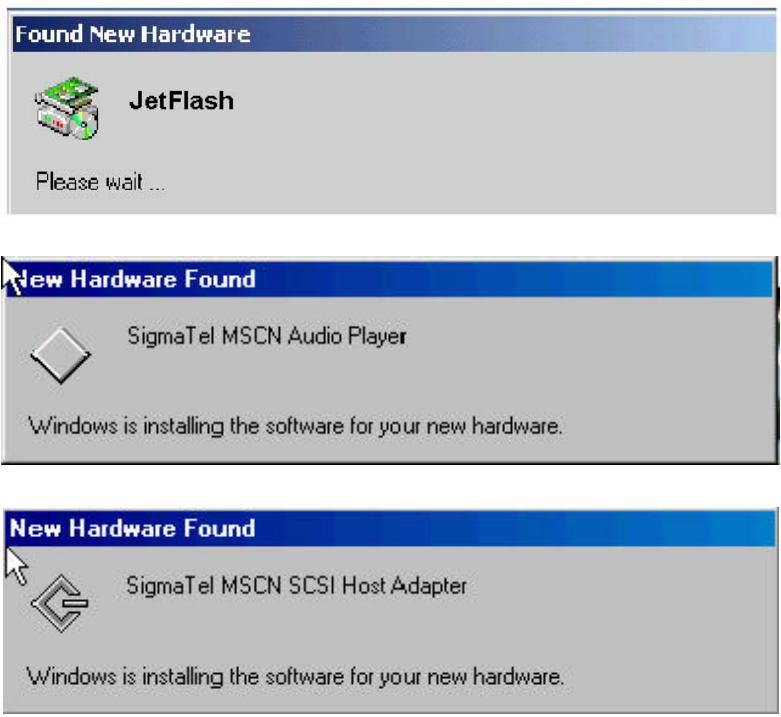
text_image
Found New Hardware JetFlash Please wait ... New Hardware Found SigmaTel MSCN Audio Player Windows is installing the software for your new hardware. New Hardware Found SigmaTel MSCN SCSI Host Adapter Windows is installing the software for your new hardware.- Click the Recovery button on the JetFlash windows splash screen again.

text_image
JetFlash™ Walkable Music Win'g Driver Utility Recovery User's Manual Exit Transcend Your Supplier, Your Partner, Your Friend. www.transcendusa.com Copyright © 2003 Transcend Information, Inc. All rights reserved.- MSCN Format dialog box appears. Make sure that the Quick format checkbox
remains unchecked. Click Start to initiate the low-level format.
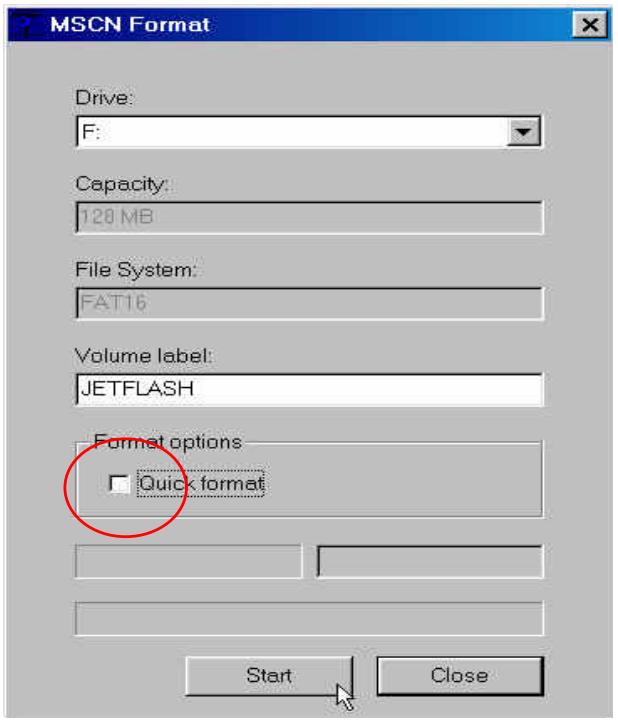
text_image
MSCN Format Drive: F: Capacity: 120 MB File System: FAT16 Volume label: JETFLASH Format options □ Quick format Start Close- Complete message appears. Click Close to complete the Recovery procedures.
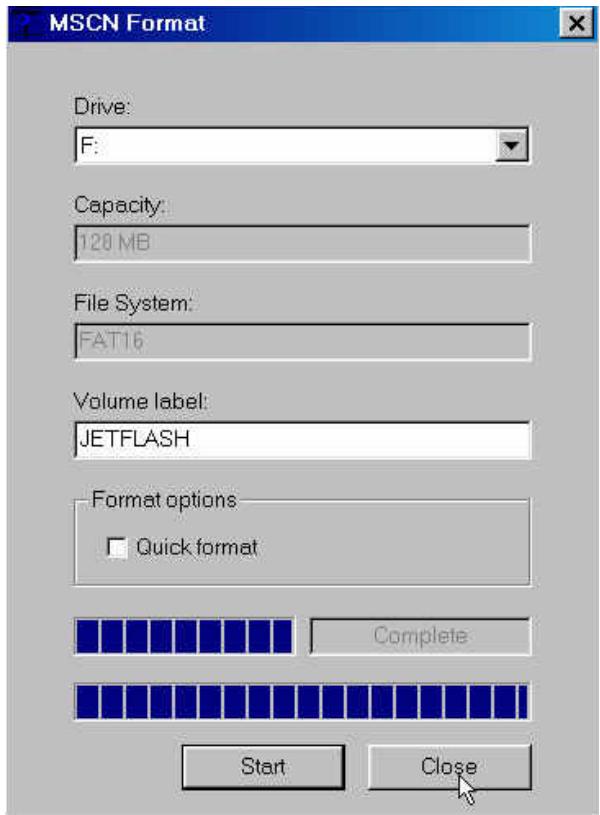
text_image
MSCN Format Drive: F: Capacity: 128 MB File System: FAT16 Volume label: JETFLASH Format options □ Quick format Complete Start Close- Release the PLAY/PAUSE ▶/II button. JetFlash has been returned to its initial status for your usage.
To Recover JetFlash in Windows Me, 2000, and XP
- Skip steps 1-3 if the Utility program has already been installed.
- Put the Driver CD into the CD-ROM (Auto-Run supported) and click the Utility button on the JetFlash splash screen.

text_image
JetFlash™ MP3 REC JetFlash™ Walkable Music Win's Driver Utility Recovery User's Manual Exit Transcend Your Supplier, Your Partner, Your Friend. www.transcendusa.com Copyright © 2007 Transcend Information, Inc. All rights reserved.- SigmaTel MSCN Audio Player Setup window appears. Click Next to continue.
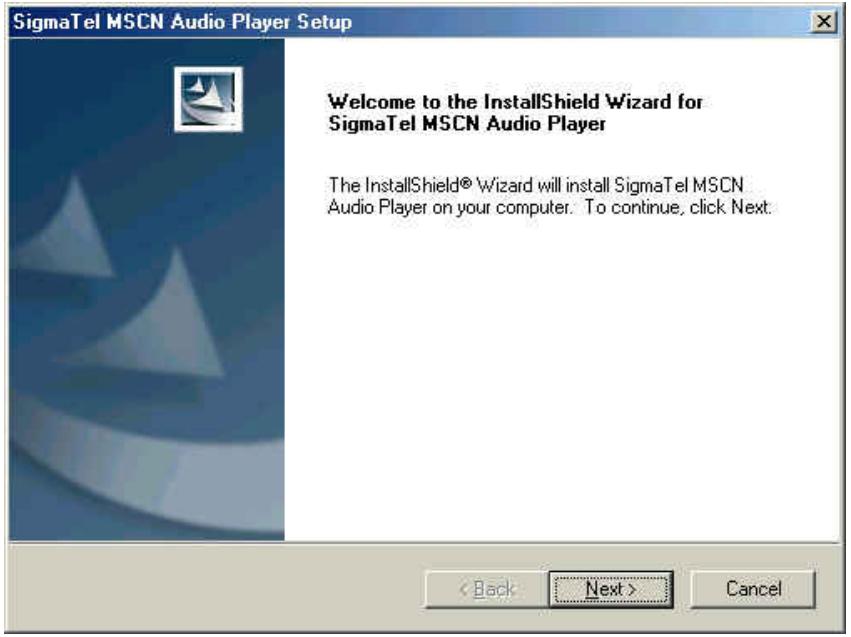
text_image
SigmaTel MSCN Audio Player Setup Welcome to the InstallShield Wizard for SigmaTel MSCN Audio Player The InstallShield® Wizard will install SigmaTel MSCN Audio Player on your computer. To continue, click Next.- The InstallShield Wizard guides you through the Utility installation.
-
Remove the battery from JetFlash.
-
Press and hold the PLAY/PAUSE ▶/II button, then plug JetFlash into an available USB port.
Do not release the PLAY/PAUSE ▶/II button until the Recovery procedures are completed. - Found New Hardware messages appear. (Only the first time you recover the JetFlash.)
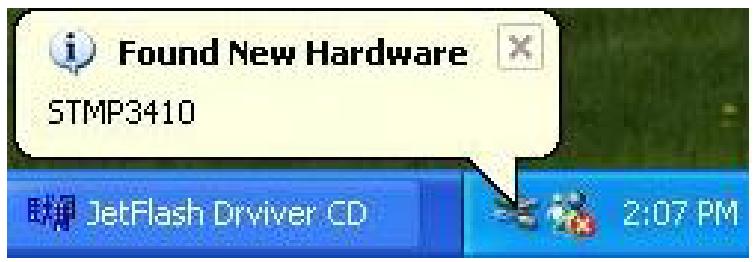
text_image
Found New Hardware STMP3410 JetFlash Driver CD 2:07 PM
text_image
Found New Hardware Player Recovery Device JetFlash Driver CD 2:09 PM
text_image
Found New Hardware STMP3410 JetFlash Driver CD 2:07 PMIf using Windows Me or 2000, go directly to step 9.
7. Wait a while until Found New Hardware Wizard windows appears. Click Next to continue. (Only appears the first time you recover the JetFlash.)
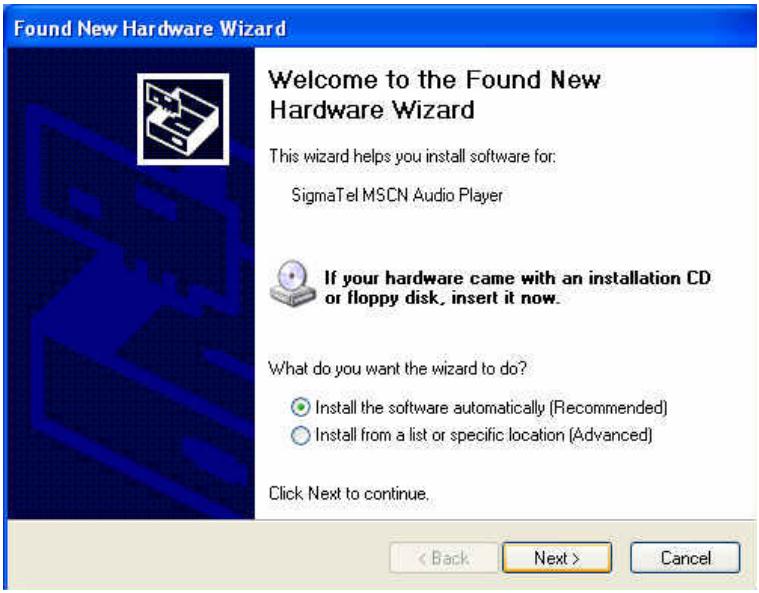
text_image
Found New Hardware Wizard Welcome to the Found New Hardware Wizard This wizard helps you install software for: SigmaTel MSCN Audio Player If your hardware came with an installation CD or floppy disk, insert it now. What do you want the wizard to do? Install the software automatically (Recommended) Install from a list or specific location (Advanced) Click Next to continue. < Back Next > Cancel- Found New Hardware Wizard window appears. Click Finish to continue. (Only appears the first time you recover the JetFlash.)
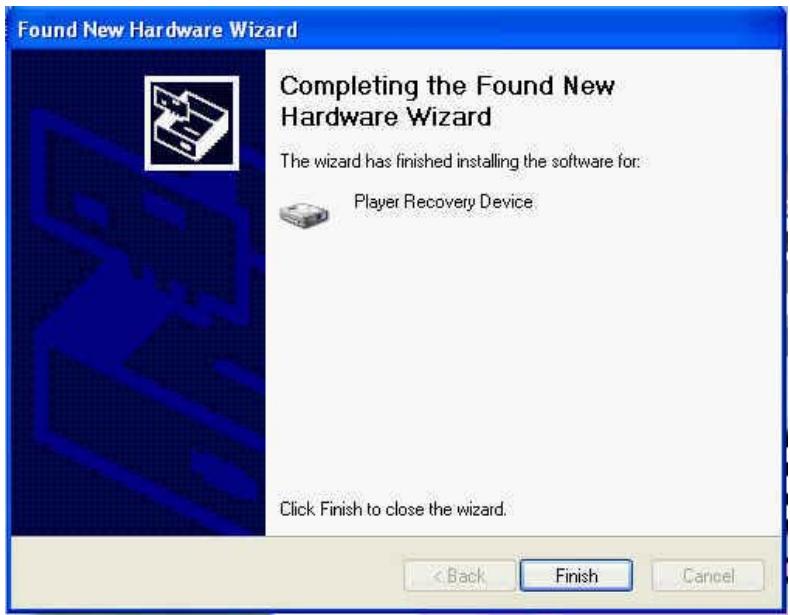
text_image
Found New Hardware Wizard Completing the Found New Hardware Wizard The wizard has finished installing the software for: Player Recovery Device Click Finish to close the wizard. < Back Finish Cancel- Click the Recovery button on the JetFlash splash screen.
- MSCN Format status bar message appears.
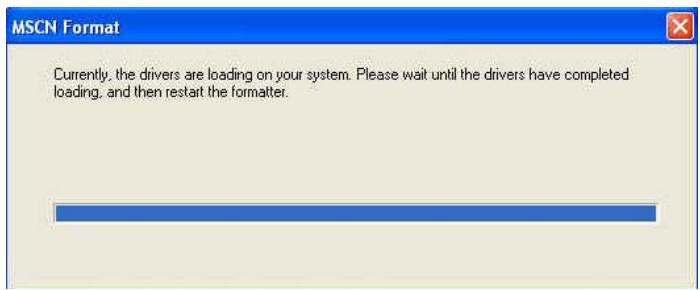
text_image
MSCN Format Currently, the drivers are loading on your system. Please wait until the drivers have completed loading, and then restart the formatter.If above message does not appear, click the Recovery button on the JetFlash splash screen again. If this still doesn't work, press and hold PLAY/PAUSE button to re-plug JetFlash first. Then, click the Recovery button on the JetFlash splash screen again.
11. Found New Hardware messages appear. (Only appears the first time you run the Recovery program.)

text_image
Found New Hardware JetFlash MSCN Format 2:11 PM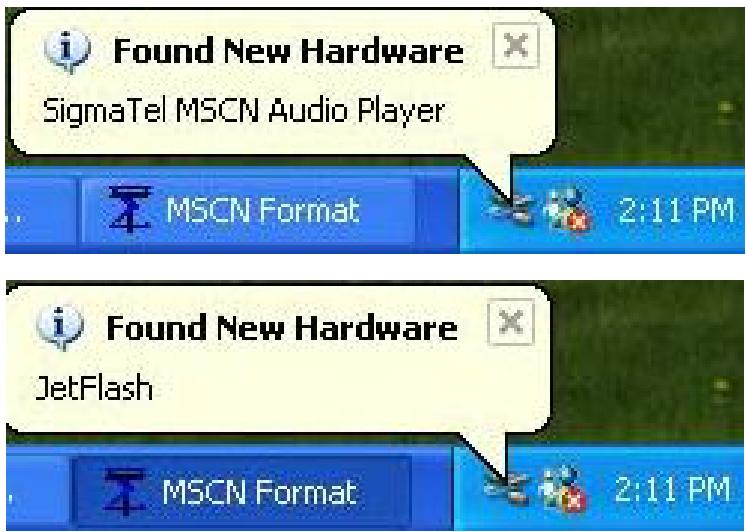
text_image
Found New Hardware SigmaTel MSCI Audio Player MSCN Format 2:11 PM Found New Hardware JetFlash MSCN Format 2:11 PMIf using Windows Me or 2000, go directly to step 15.
- Found New Hardware Wizard window appears. Click Next to continue. (Only appears the first time you run the Recovery program.)

text_image
Found New Hardware Wizard Welcome to the Found New Hardware Wizard This wizard helps you install software for: SigmaTel MSCN Audio Player If your hardware came with an installation CD or floppy disk, insert it now. What do you want the wizard to do? • Install the software automatically (Recommended) • Install from a list or specific location (Advanced) Click Next to continue. < Back Next > Cancel- Found New Hardware Wizard window appears. Click Next to continue. (Only appears the first time you run the Recovery program.)
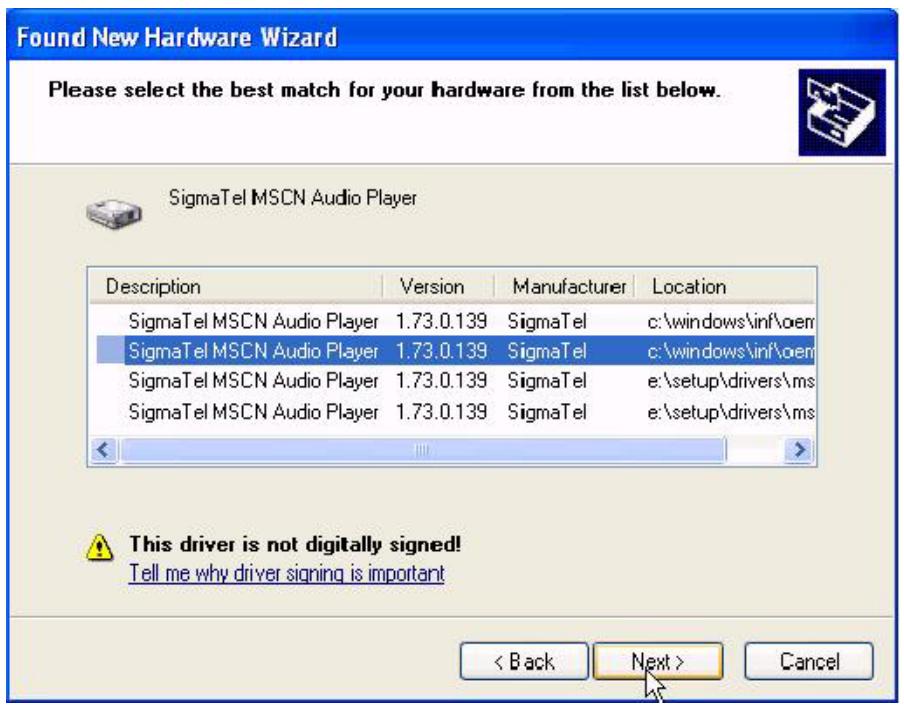
text_image
Found New Hardware Wizard Please select the best match for your hardware from the list below. SigmaTel MSCN Audio Player Description Version Manufacturer Location SigmaTel MSCN Audio Player 1.73.0.139 SigmaTel c:\windows\inf\oem SigmaTel MSCN Audio Player 1.73.0.139 SigmaTel c:\windows\inf\oem SigmaTel MSCN Audio Player 1.73.0.139 SigmaTel e:\setup\drivers\ms SigmaTel MSCN Audio Player 1.73.0.139 SigmaTel e:\setup\drivers\ms This driver is not digitally signed! Tell me why driver signing is important < Back Next > Cancel- Completing the Found New Hardware Wizard message appears. Click Finish to continue. (Only appears the first time you run the Recovery program.)
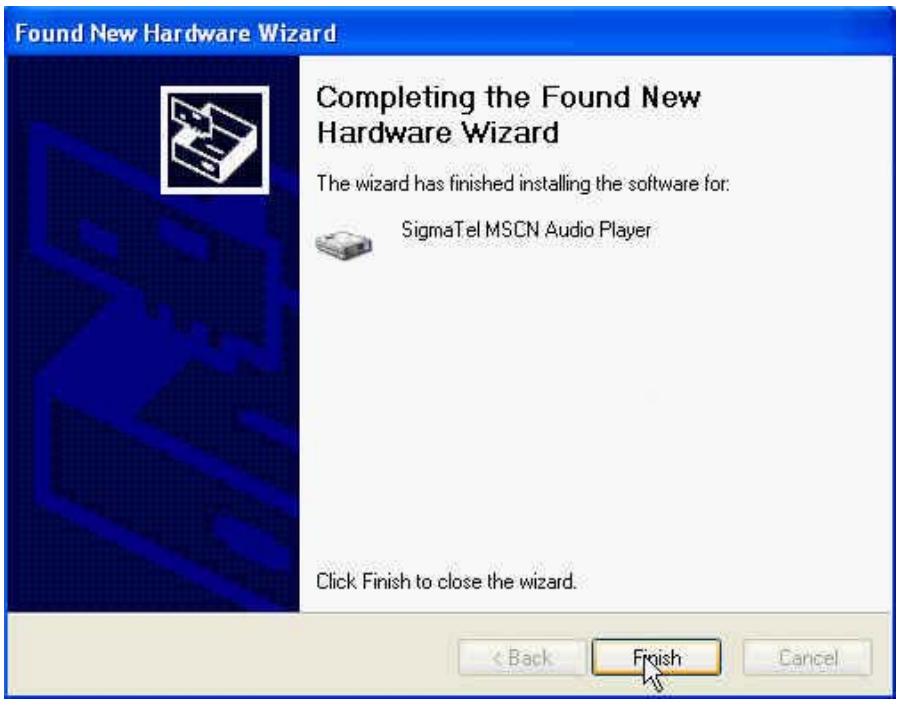
text_image
Found New Hardware Wizard Completing the Found New Hardware Wizard The wizard has finished installing the software for: SigmaTel MSCN Audio Player Click Finish to close the wizard. < Back Finish Cancel- MSCN Format dialog box appears. Click Start in the Media Recovery tab to initiate the low-level format.
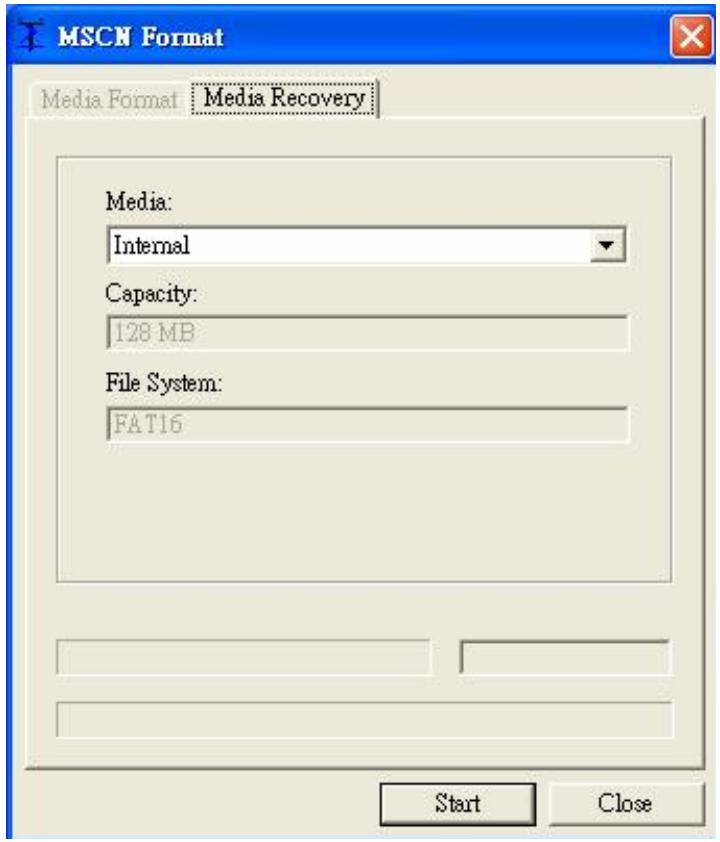
text_image
MSCN Format Media Format Media Recovery Media: Internal Capacity: 128 MB File System: FAT16 Start Close- Complete message box appears. Click Close to complete the Recovery procedures.
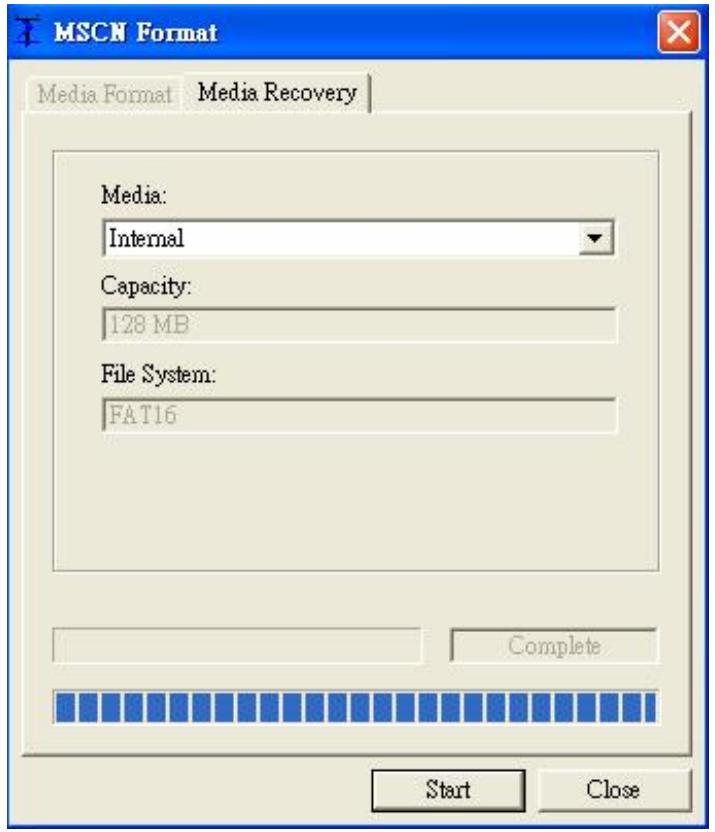
text_image
MSCN Format Media Format Media Recovery Media: Internal Capacity: 128 MB File System: FAT16 Complete Start Close- Release the PLAY/PAUSE ▶/II button. JetFlash has been returned to its initial status for your usage.
Troubleshooting
Q1: Why doesn't the driver CD Auto-Run after it is inserted into the CD-ROM drive in Windows?
A1: This problem usually occurs because the Auto-Insert function of the CD-ROM drive is disabled. Please enter Device Manager in Control Panel and enable the Auto-Insert function of the CD-ROM drive. Alternatively, you can execute the JetFlash.EXE in the driver CD manually.
Q2: Why isn't my operating system detecting JetFlash after I've plugged it into the USB port of my computer?
A2: Please check following:
- Is the driver installation complete? If not, follow the procedures in Driver Installation to complete it.
- Is JetFlash properly connected to the USB port? If not, unplug it and plug it in again.
- Is the USB port enabled? If not, refer the user's manual of your computer (or motherboard) to enable it.
Q3: Why can't MP3 or WMA files be downloaded to JetFlash?
A3: This problem may be caused by an incomplete driver installation. Uninstall the driver and re-install it. If it doesn't work, see Recover JetFlash to format JetFlash.
Q4: Why can't I find the file that was just copied to JetFlash? Why does the file that was just deleted still appear?
A4: This problem occurs when the copy or delete process had not been completed before you unplugged JetFlash. Please re-copy or re-delete the file and follow the procedure shown in How to Unplug JetFlash Safely to remove JetFlash after the copy or delete process is completed.
Q5: Why does the Power/Play LED turn green after I have unplugged JetFlash from my computer?
A5: This situation is normal. Whenever JetFlash is unplugged from a computer, it enters MP3 mode automatically. To exit from MP3 mode, press and hold the PLAY/PAUSE button until the Power/Play LED turns off.
Q6: Why don't the buttons work during the operation of JetFlash?
A6: Check to see if the Hold switch is set to "ON". If yes, set it to "OFF".
Q7: Why do the three LEDs just blink a moment and extinguish when press the PLAY/PAUSE button to turn on JetFlash?
A7: Please press and hold the PLAY/PAUSE button a second or two longer, until the three LEDs blink once and the Power/Play LED turns green. If the problem persists, please check to see whether the battery power is used up. If it is, replace the battery with a new one.
Q8: Why can't I turn on JetFlash and start playing MP3 music or recording voice?
A8: Please check following:
- Is JetFlash connected to your computer? If yes, unplug it.
- Is the Hold switch set to "ON"? If yes, set it to "OFF".
- Is the battery inserted in the right direction? If not, reverse the battery.
- Is the battery power used up? If yes, replace it with a new one.
Q9: Why can't I hear track playback after pressing the PLAY/PAUSE button?
A9: Please check following:
- Are there any MP3 or WMA files in the root directory of JetFlash? If not, you must download music files from your computer or Internet first. (Only Mpeg I Layer 3 and WMA files compressed at a rate of 32Kbps–320Kbps are supported.)
- Is the earphone properly connected to the earphone jack? If not, connect it again.
- Is the volume loud enough? If not, roll and hold the Volume Control Wheel toward VOL+ ⊕ VOL until the music playback can be heard.
Q10: Why does the track playback sound intermittent?
A10: This problem usually occurs when the earphone is not properly connected to the earphone jack. Plug the earphone into the earphone jack again to make sure they are properly connected.
Q11: Why does the volume become softer and softer? When I roll the Volume Control Wheel to increase the volume, my JetFlash turns off.
A11: This problem occurs when battery power is too low. Please replace the battery with a new one.
Q12: Why does the Power/Play LED turn on when recording voice and then JetFlash turns off 2 minutes later?
A12: JetFlash is full and there is no memory available for voice recording. To make memory available for voice recording, delete some files or folders from JetFlash.
Q13: Why does JetFlash turn off automatically after entering MP3 mode or Record mode?
A13: JetFlash features a power-save function. If your JetFlash is idle for two minutes, power-save is triggered and the power turns off automatically.
Q14: Why is JetFlash automatically removed from the operating system when I use it as a USB Flash Drive?
A14: This problem occurs when you press the PLAY/PAUSE ▶/II button while JetFlash is connected with a USB port. Please unplug JetFlash from the USB port then re-plug it.
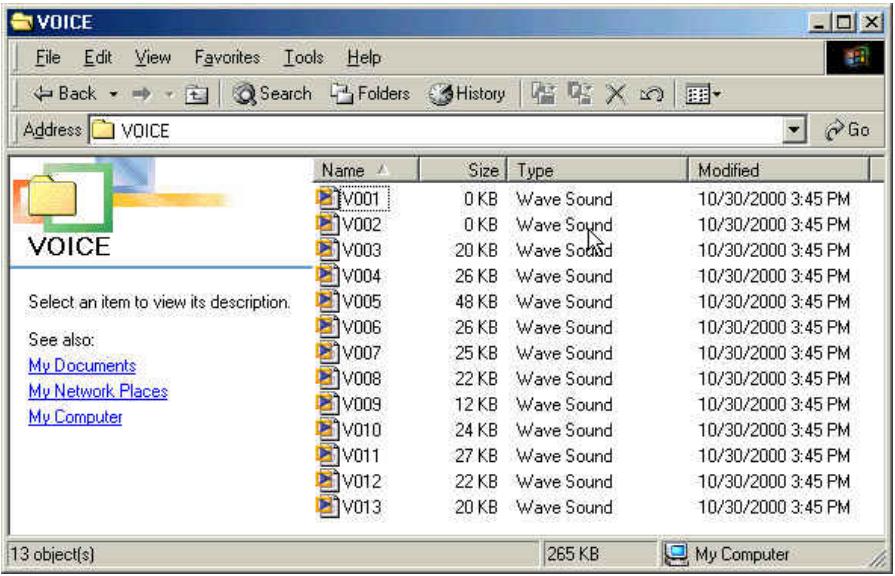
Q15: Why are the “Modified” times of voice files all the same?
text_image
VOICE File Edit View Favorites Tools Help Back Search Folders History Address VOICE Go Name Size Type Modified V001 0 KB Wave Sound 10/30/2000 3:45 PM V002 0 KB Wave Sound 10/30/2000 3:45 PM V003 20 KB Wave Sound 10/30/2000 3:45 PM V004 26 KB Wave Sound 10/30/2000 3:45 PM V005 48 KB Wave Sound 10/30/2000 3:45 PM V006 26 KB Wave Sound 10/30/2000 3:45 PM V007 25 KB Wave Sound 10/30/2000 3:45 PM V008 22 KB Wave Sound 10/30/2000 3:45 PM V009 12 KB Wave Sound 10/30/2000 3:45 PM V010 24 KB Wave Sound 10/30/2000 3:45 PM V011 27 KB Wave Sound 10/30/2000 3:45 PM V012 22 KB Wave Sound 10/30/2000 3:45 PM V013 20 KB Wave Sound 10/30/2000 3:45 PM 13 object(s) 265 KB My ComputerA15: Because of the limitations of the controller circuitry, JetFlash does not have a clock for use in recording file creation or save time. To better distinguish files from each other, you can rename them.
Q16: Why can't the MP3 and voice recording functions work after I've formatted JetFlash using the "Quick Format" or "Full Format" option in Windows?
Q16: Formatting JetFlash using the “Quick Format” or “Full Format” option of Windows destroys the default format of JetFlash. To retrieve the default format, you must link to http://www.transcend.com.tw/English to download and update the JetFlash firmware.
Specifications
• Size: 97 mm × 31 mm × 18 mm
• Weight: 25 g (without battery)
• Data retention: Up to 10 years
• Shock resistance: 1000 G (maximum)
- Erase cycles: 1,000,000 times
• Signal-to-Noise Ratio: 90dB
• Output frequency: 20Hz–20KHz
• Estimated battery life: 12 hours (alkaline battery)
• MP3 format: MP3 and WMA
• Record format: ADPCM (WAV)
• Compress rate: 32Kbps–320Kbps
• Speed: Read 7.2 Mbit/sec, Write 5.8 Mbit/sec
• Certificates: CE, FCC, BSMI
Ordering Information
| Memory Size | Transcend P/N |
| 128MB | TS128MJFLASHM |
| 256MB | TS256MJFLASHM |
| 512MB | TS512MJFLASHM |
JetFlash Limited Warranty
“Above and beyond” is the standard we set ourselves for customer service at Transcend. We consistently position ourselves to be significantly above the industry norm. It’s all part of our commitment to Customer Satisfaction.
All Transcend Information, Inc. (Transcend) products are warranted and tested to be free from defects in material and workmanship and to conform to the published specifications. Should your Transcend JetFlash malfunction during normal use in its recommended environment due to improper workmanship or materials within the warranty period, Transcend will repair or replace your product with a comparable product. This warranty is subject to the conditions and limitations set forth herein.
Duration of Warranty: Transcend JetFlash are covered by this warranty for a period of two (2) years from the date of purchase. Transcend will inspect the product and make the determination as to whether the product is eligible for repair or replacement. The decision by Transcend regarding eligibility of the product for repair or replacement will be final and binding. Transcend reserves the right to provide a functionally equivalent refurbished replacement product.
Limitations: This warranty does not apply to products that fail due to accident, abuse, mishandling, improper installation, alteration, and acts of nature, improper usage, or problems with electrical power. Transcend JetFlash must be used with devices that conform to the recommended industry standards. Transcend will not be liable for damages resulting from a third party device that causes the Transcend product to fail. Transcend shall in no event be liable for any consequential, indirect, or incidental damages, lost profits, lost business investments, lost goodwill, or interference with business relationships as a result of lost data. Transcend is also not responsible for damage or failure of any third party equipment, even if Transcend has been advised of the possibility. This limitation does not apply to the extent that it is illegal or unenforceable under applicable law.
Disclaimer: The foregoing limited warranty is exclusive, with no other warranties, implied or statutory, including, but not limited to any implied warranty of merchantability or fitness for a particular purpose. This warranty is not affected in any part by Transcend providing technical support or advice.
Transcend
Your Supplier, Your Partner, Your Friend.
Transcend Information, Inc.
www.transcendusa.com