
TS30GSJOTG-EU - USB Drive TRANSCEND - Free user manual and instructions
Find the device manual for free TS30GSJOTG-EU TRANSCEND in PDF.
User questions about TS30GSJOTG-EU TRANSCEND
0 question about this device. Answer the ones you know or ask your own.
Ask a new question about this device
Download the instructions for your USB Drive in PDF format for free! Find your manual TS30GSJOTG-EU - TRANSCEND and take your electronic device back in hand. On this page are published all the documents necessary for the use of your device. TS30GSJOTG-EU by TRANSCEND.
USER MANUAL TS30GSJOTG-EU TRANSCEND
System Requirements....2
Caution: Safety Instructions....2
Product Overview....4
OLED Display 5
Charging the Battery....5
Basic Operation....6
Peripheral Operation 6
Power ON 6
Power OFF....6
Connecting to a Computer....7
Formatting the Hard Drive ....7
Performing a Reset......8
Standalone Operation 8
Power ON 8
Power OFF....8
Copy....9
Browse / Delete....12
Settings 13
Firmware Upgrade 16
Driver Installation....17
Driver Installation Windows ^® 98SE .... 17
Driver Installation for Windows ^® Me, 2000, and XP 17
Driver Installation for Mac ^TM OS 10.1.3, or Later....17
Safely Remove Your StoreJet ^TM OTG 18
Remove the StoreJet ^TM OTG in Windows ^® 98SE....18
Remove the StoreJet ^TM OTG in Windows ^® Me, 2000, and XP .... 18
Remove the StoreJet ^TM OTG in Mac ^TM OS 18
Troubleshooting....19
Specifications....21
Ordering Information 21
Transcend Limited Warranty 22
Introduction
Congratulations on purchasing Transcend's StoreJet™ OTG. This portable Hi-Speed USB OTG (On-The-Go) storage device is the perfect Standalone, or Peripheral data management system for uploading, downloading, storing and transferring your vital data and information. With a huge storage capacity and Hi-Speed USB 2.0 data transfer rates, the compact StoreJet™ OTG is ideal for storing and transferring your files, folders, documents, photos, music and e-work without the need for a computer.
As a Standalone device the StoreJet™ OTG can act as a direct host for storing the data on your USB Flash Drive, Digital camera, MP3 player, MultiCard Reader and other USB enabled digital devices. Files, folders and information can immediately be managed via the StoreJet™ OTG's color OLED display, therefore eliminating the need for a desktop or notebook computer. As a Peripheral device the StoreJet™ OTG takes on the functionality of an External Hi-Speed USB 2.0 Hard Disk Drive (HDD) that will work in harmony with your desktop or notebook computer.
The StoreJet ^™ OTG is the ultimate portable storage device. It easily fits in your shirt pocket and is capable of performing the direct exchange and management of your data and files, anytime, anywhere.
Package Contents
• StoreJet™ OTG (TS30GSJOTG)
- Carry bag
- Driver CD
- Mini USB to USB A-Type Cable
- Power Adapter
- Quick Instruction Guide
Features
- Fully compatible with the Hi-Speed USB 2.0 OTG (On The Go) specification
• Hi-Speed data transfer rates Peripheral 14MB/sec, Standalone 4MB/sec
• 30GB 1.8" Micro Hard Disk Drive - Dual color OLED Display easily viewed at any angle and in any light
- Internal rechargeable Li-ion battery supports 1.5 hours of continuous copy, standby 4.5 hours
-
Supports the direct input and exchange of data between most USB and Mini USB devices including:
-
Flash Drives
■ Digital Cameras
■ MP3 Players
■ MultiCard Readers
- Hot Key Control for Full Backup and storage of connected devices
• Bi-directional data transfer
• Hot-Swappable connecting devices
System Requirements
To use the StoreJet ^™ OTG as a peripheral you need:
-
Desktop or notebook computer with a working USB port
-
One of the following operating systems:
-
Windows® 98SE
- Windows® Me
- Windows® 2000
- Windows® XP
• Mac ^TM OS 10.1.3, or later
Caution: Safety Instructions
Please follow these usage and safety guidelines for your StoreJet™ OTG.

Only one USB device can be connected to the StoreJet ^™ OTG at a time. USB devices must be connected to the StoreJet ^™ OTG's USB A-Type port. If the connecting device uses a Mini USB port you must use the Mini USB to USB A-Type cable.
General Use
- Avoid exposing your StoreJet™ OTG to temperature extremes of above 45°C, or below 5°C.
- Do not allow your StoreJet™ OTG to become damp or wet from water or any other liquids.
- Do not place your StoreJet™ OTG in a strong magnetic field.
- Do not place your StoreJet™ OTG in any unstable or vibrating environment.
- Do not use a damp/wet cloth to wipe or clean the exterior case and/or the OLED display.
-
Do not use or store your StoreJet™ OTG in any of the listed environments:
-
Direct sunlight
- Next to an air conditioner, electric heater or other heat sources
- In a closed car that is in direct sunlight
Backing Up Data
- Transcend does NOT take any responsibility for data loss, or damage during operation. We strongly advise you to regularly backup the data on your StoreJet™ OTG to a computer, or other storage medium.
- To ensure High-Speed USB 2.0 data transfer rates when using your StoreJet™ OTG with a computer. Please check the computer has the relevant USB drivers, if you are unsure of how to
check this, please consult the computer or motherboard's User's manual for USB driver information.
When Transporting
- Do not pack your StoreJet ^™ OTG into luggage without the proper padded support. Other items in the luggage may damage your StoreJet ^™ OTG without the proper protection.
- Avoid squeezing your StoreJet™ OTG to prevent damage to the OLED display.
- Avoid placing objects onto your StoreJet™ OTG to prevent damaging it.
Power
- Only an approved Transcend power adapter such as the one supplied, or USB cable can be used with the StoreJet™ OTG.
- Use the AC to DC 5V power adapter according to the electrical outlet pin type of the country you are in.
- Before you connect your StoreJet™ OTG to an electrical outlet, check the outlet voltage rating to ensure that the voltage and frequency match the StoreJet™ OTG's requirements.
- Ensure nothing is resting on the adapter's power cable and that the cable is not located where it can be tripped over or stepped on.
- To optimize your StoreJet™ OTG's rechargeable battery life, please completely discharge and recharge the battery at least every 3 months.
Product Overview

text_image
A E F Transcend USB 2.0 OTG B C D H GA 128x64 Dual Color OLED Display – Display featuring dual color graphic user interface.
B Power ON/OFF & Multifunction Button:
- Press and hold for more than one second to power on and off the StoreJet™ OTG
- Press once to return the previous screen
- Press once in Main Menu to execute Full Backup Hot Key function
• Copy or Delete selected files
C Enter/Select/OK Button – Enter, select, or confirm a command on a selected file.
D Navigation Pad – Browse drives, folders, files and settings.
Power (DC 5V) Adapter Port – Connect the 5V DC Power Adapter, or USB power cable to charge the internal Li-ion rechargeable battery.
F Mini USB B-Type Port – Connector port for StoreJet™ OTG to computer.
G USB A-Type Port – Connector port for USB devices.
H Reset Switch – Resets the StoreJet™ OTG.
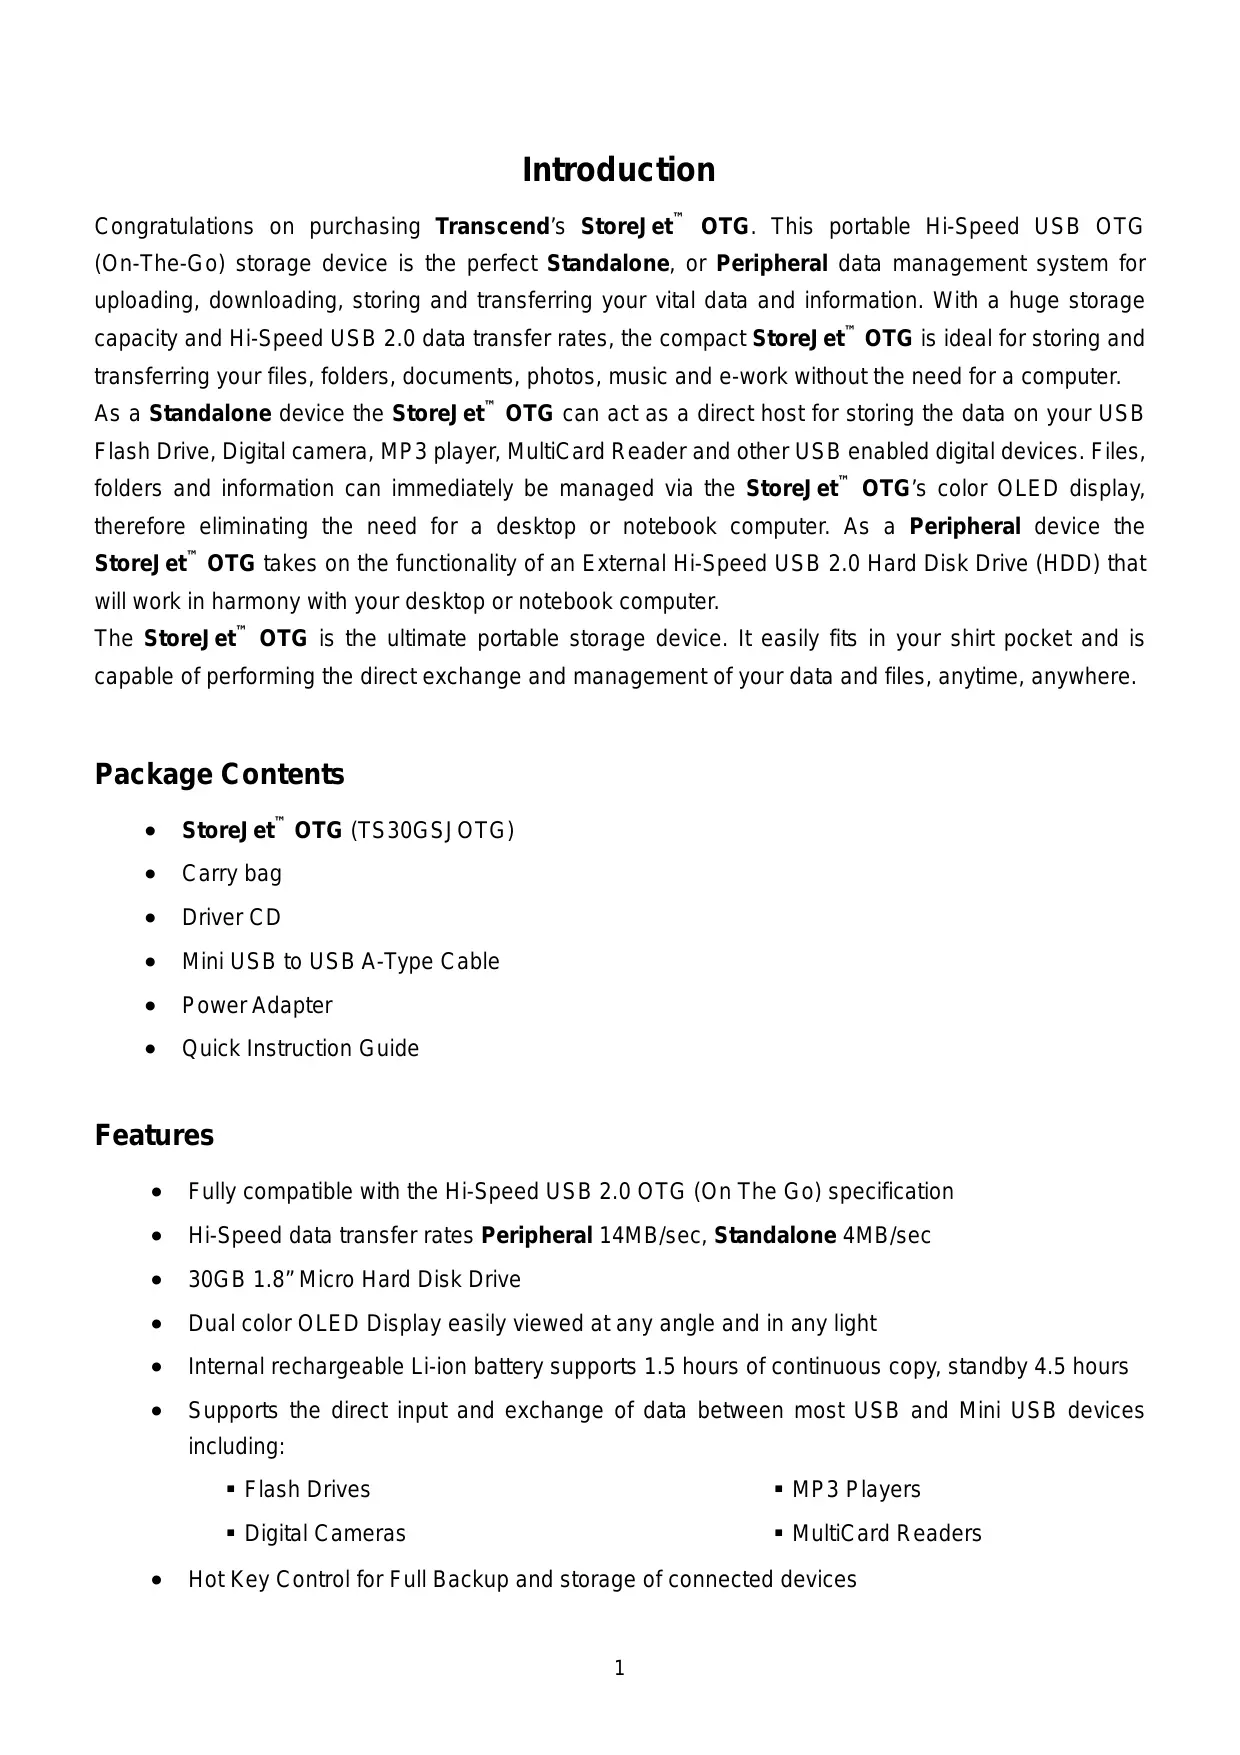
OLED Display
text_image
12:09 U3 Copy1 Clock – Indicates the time.
2 Disk & Folder Level Indicator – Indicates the current disk in use and folder level of the StoreJet™ OTG (H x), or connected USB device (U x).
3 Connected Device Detected Icon – Appears once a USB device is connected.
4 Battery Status – Indicates the rechargeable battery's power capacity.
5 Main Menu Function Icons – Displays the main menu’s options.
6 Command Option – Indicates the command options that are available
Charging the Battery

Before using the StoreJet ^™ OTG for the first time it is necessary to charge the battery for at least 4 hours.
The StoreJet ^™ OTG has an internal rechargeable Lithium-ion battery that can be charged using either the supplied Transcend Power adapter, or USB power cable.
- Connect the Power Adapter cable, or the USB cable to the 5V DC Power Adapter port on your StoreJet ^™ OTG.
- Connect the adapter to a suitable power outlet, or connect the USB cable to the USB port of a computer. Once connected the battery charging icon will appear on the StoreJet™ OTG's display.
- Once the StoreJet™ OTG's battery has completed charging, a long beep will be heard and the message "Charge Completed" will appear on the display.
- Under normal conditions it takes approximately 3 hours to completely recharge the battery.
Basic Operation

Only one USB device can be connected to the StoreJet ^TM OTG at a time. USB devices must be connected to the StoreJet ^TM OTG's USB A-Type port. If the connecting device uses a Mini USB port you must use the Mini USB to USB A-Type cable.
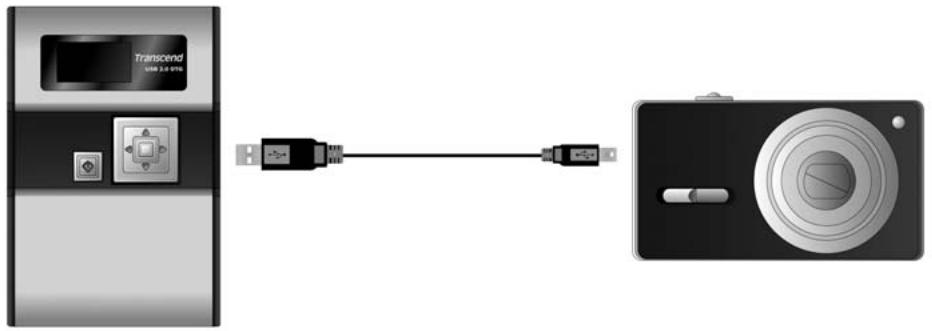
Peripheral Operation

natural_image
Diagram showing a laptop connected to a USB cable and a device labeled 'Transcend USB 3.0 VTD' (no text or symbols on devices)Use as a Peripheral Device
Power ON
Press and Hold the Power Button for more than 1 second to turn on the StoreJet™ OTG. The Transcend logo will appear on the OLED display.
Transcend
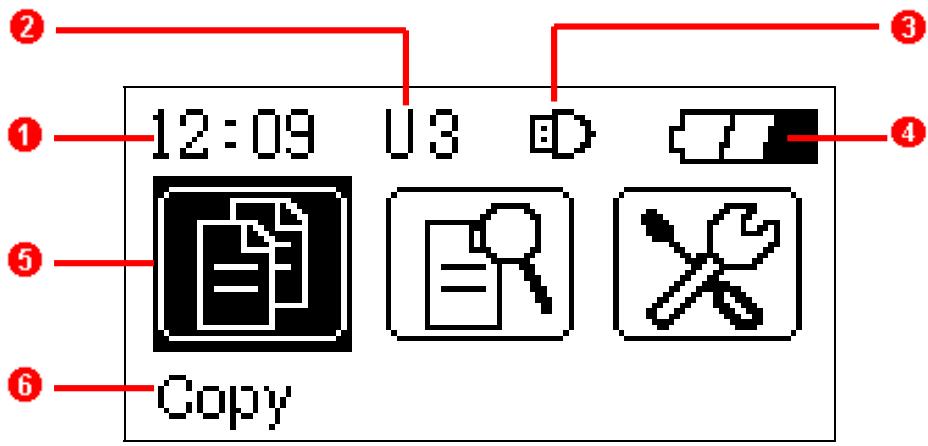
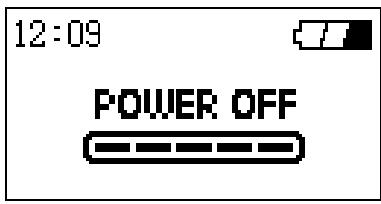
Power OFF
Press and hold the Power Button for about 2 seconds and the Power Off Status Bar will appear on the OLED display to indicate the Power Off status.
text_image
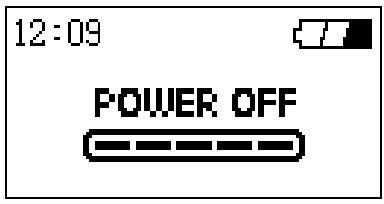
12:09 POWER OFFConnecting to a Computer
If you want to use the StoreJet ^™ OTG as a Peripheral device to upload/download data to, or from your computer you will need to connect it using the provided USB cable.
If the computer's operating system is Windows® 98SE, please install the necessary drivers first.
1. Connect the Mini USB end-connector of the cable to the Mini USB port on the StoreJet™ OTG.
2. Connect the normal USB end-connector of the cable to an available USB port on the computer.
3. When the StoreJet ^™ OTG is successfully connected to the computer the following screen will appear on the StoreJet ^™ OTG's display and a new Removable Disk drive with a newly assigned drive letter will appear in the My Computer window. As long as the StoreJet ^™ OTG is connected to a computer the unit's keys will remain inactive.
text_image
12:09- At this stage the StoreJet™ OTG is a Peripheral device and is charged via the computer's USB port. You can use the StoreJet™ OTG as an external hard drive in conjunction with your computer and upload/download data.
- On occasion the power supplied from the computer's USB port may not be sufficient, or if using the StoreJet™ OTG with a notebook computer you may want to conserve the notebook's battery power, in these instances please use the StoreJet™ OTG's power adapter in addition to the USB connection.
Formatting the Hard Drive
As the StoreJet ^™ OTG contains a hard disk drive it is capable of being formatted.

Formatting a disk removes all information from the disk.
- To format the disk the StoreJet ^™ OTG must be connected to a computer.
- Open My Computer, and click on the new Removable Disk that corresponds to the StoreJet ^™ OTG.
- On the File menu, click Format.
- Select or specify any of the options that you want, but ensure that you choose the FAT32 format for the StoreJet™ OTG.
The StoreJet™ OTG must be formatted using the FAT32 format. - Click Start.
Performing a Reset
If the StoreJet ^™ OTG stops responding, or the display freezes you can perform a reset by pressing the reset button with the head of a pen or pencil. Files that are in the process of being transferred may be lost during the reset, but the StoreJet ^™ OTG's other data is normally retained. After the reset, the StoreJet ^™ OTG will automatically turn off and need to be restarted by pressing the Power Button.
Standalone Operation
text_image
Transcend USB 3.0-PTM USB 3.0-PTMUse as a Standalone Device

Before using the StoreJet ^™ OTG as a Standalone device you must disconnect it from your computer.

Do NOT connect the StoreJet ^™ OTG to your computer when it is copying data as a Standalone device. This may cause unexpected results and possible data loss.
Power ON
Press and Hold the Power Button for more than 1 second to turn on the StoreJet ^™ OTG. The Transcend logo will appear on the OLED display.
Transcend
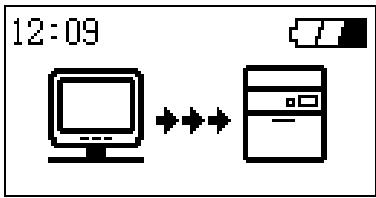
Power OFF
Press and hold the Power Button for about 2 seconds and the Power Off Status Bar will appear on the
OLED display to indicate the Power Off status.
text_image
12:09 POWER OFFCopy
The StoreJet ^™ OTG provides two copy options:
- File Copy
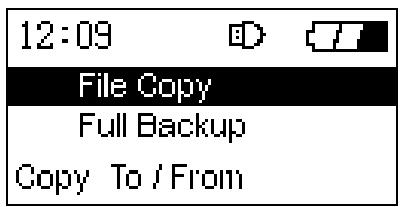
text_image
12:09 File Copy Full Backup Copy To / From- Full Backup
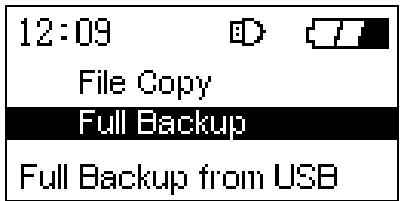
text_image
12:09 File Copy Full Backup Full Backup from USBFile Copy
Allows you to choose the specific files, or folders that you want to copy to, or from the StoreJet ^™ OTG and the connected USB device.
- Connect a USB device to the StoreJet™ OTG.
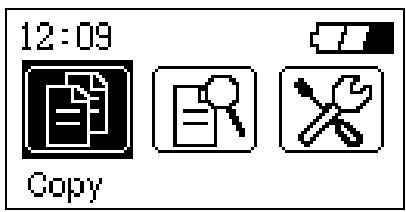
text_image
12:09 Copy- Select the “Copy” icon in the Main Menu and press the “OK” button to enter the submenu. The StoreJet™ OTG will recognize the USB device and the Connected Device icon will appear.
- Select the "File Copy" option and press the "OK" button.
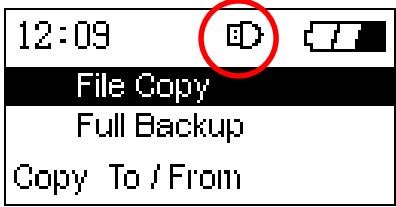
text_image
12:09 File Copy Full Backup Copy To / From- Select the source disk, either USB Device, or Local Device from where you want to copy the
files/folders and press the "OK" button, or right click the Navigation Pad to enter the source disk's root directory.
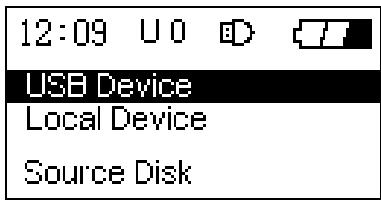
text_image
12:09 U 0 D USB Device Local Device Source Disk- Use the Navigation Pad to browse through the source disk and locate the files, or folders that you wish to copy. Select the files, or folder by pressing the "OK" button. An asterisk will appear next to the selected file or folder to indicate that it has been selected.
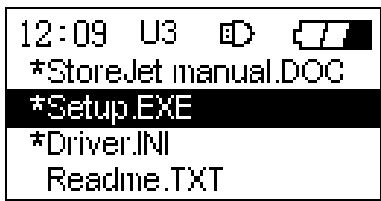
text_image
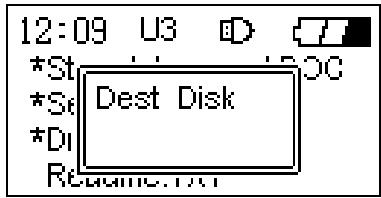
12:09 U3 *StoreJet manual.DOC *Setup.EXE *Driver.INI Readme.TXT- After selecting the files and folders that you want to copy, press the “Power” button and select a destination disk, either USB Device, or Local Device where you want to copy the files/folders. Press the “OK” button or right click the Navigation Pad to enter the destination disk’s root directory.
text_image
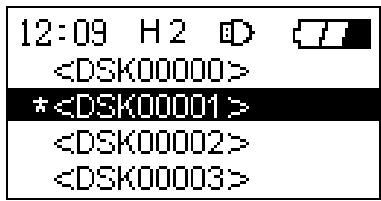
12:09 U3 D *St Dest Disk *St *Di Regime.txt- Use the Navigation Pad to browse through the destination disk and locate the destination folder where you wish to copy the files, or folders selected in the source disk.
text_image
12:09 H2- Once you have located your preferred destination folder, press the "Power" button.
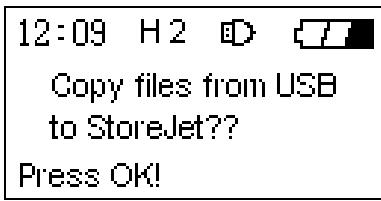
- A confirmation message will appear on the display, “Copy files from USB Device to StoreJet?” or “Copy files from StoreJet to USB Device?” Press the “OK” button to proceed; pressing any other button will cancel the copy process.
text_image
12:09 H 2 Copy files from USB to StoreJet?? Press OK!- After the files/folders have been fully copied, a “Copy Completed” message will appear on the StoreJet™ OTG’s display to confirm the copy process has finished.

text_image
12:09 Copy Completed- Left click the Navigation pad to break off the copy process.
Full Backup
Allows you to backup the entire contents of a connected USB disk to a newly created directory in the StoreJet ^™ OTG.
- Connect a USB device to the StoreJet™ OTG.

text_image
12:09 Copy- Select the “Copy” icon in the Main Menu and press the “OK” button to enter the submenu. The StoreJet™ OTG will recognize the USB device and the Connected Device icon will appear.
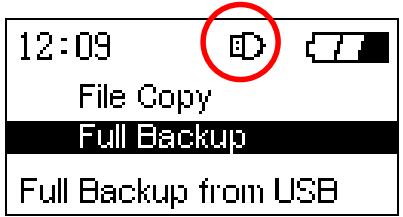
- Select the "Full Backup" option and press the "OK" button.
text_image
12:09 File Copy Full Backup Full Backup from USB- A confirmation message will appear on the display, "Fully Copy from USB Device?"

text_image
12:09 Fully copy from USB device? Press OK!- Press the "OK" button to proceed; pressing any other button will cancel the backup.
- After the full backup has completed, a "Copy Completed" message will appear on the StoreJet™ OTG's display to confirm the backup process has finished.

text_image
12:09 Copy Completed- Left click the Navigation pad to break off the copy process.
Full Backup Hot Key Function
In addition to the above Full Backup procedure the StoreJet ^™ OTG offers an easy to use Hot Key feature for performing a full backup of a connected USB device.
- Connect a USB device to the StoreJet™ OTG.

text_image
12:09 Copy- Press once on the "Power" button while in the Main Menu screen.
- A "Fully Copy from USB Device?" message will appear.
- Press the "OK" button to proceed; pressing any other button will cancel the backup.
- After the full backup has completed, a “Copy completed” message will appear on the StoreJet™ OTG’s display to confirm the backup process has finished.

text_image
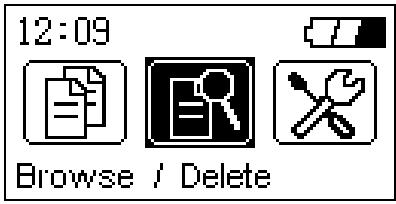
12:09 Copy CompletedBrowse / Delete
The Browse / Delete option in the Main Menu allows you to browse the files and folders on the StoreJet ^™ OTG, or connected USB device and delete selected files, or folders.
- Select the “Browse / Delete” icon in the Main Menu and press the “OK” button to enter the submenu.
text_image
12:09 Browse / Delete- Select the disk you wish to browse, either USB Device, or Local Device and press the "OK" button, or right click the Navigation Pad to enter the disk's root directory.
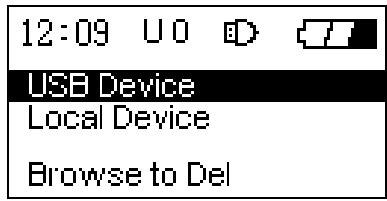
text_image
12:09 U O USB Device Local Device Browse to Del- Use the Navigation Pad to browse through the disk and locate the files, or folders that you wish to delete. Select the files, or folder by pressing the "OK" button. An asterisk will appear next to the
selected file or folder to indicate that it has been selected.
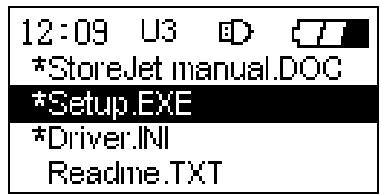
text_image
12:09 U3 *StoreJet manual.DOC *Setup.EXE *Driver.INI Readme.TXT- After selecting the files and folders that you want to delete, press the "Power" button.
- A confirmation message will appear on the display, "Delete File(s)?" Press the "OK" button to proceed; pressing any other button will cancel the delete process.

text_image
12:09 U3 D Delete File(s)?? Press OK!- After the files/folders are deleted, a “Deletion Completed” message will appear on the StoreJet ^™ OTG’s display to confirm the deletion process has finished.

text_image
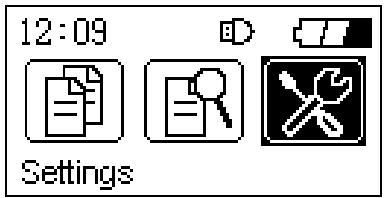
12:09 Deletion CompletedSettings
The Settings option in the Main Menu allows you to customize certain basic StoreJet ^™ OTG settings. Select the “Settings” icon in the Main Menu and press the “OK” button to enter the settings menu. There are seven submenus within Settings, some of the submenus have options that can be customized, other submenus just provide information about the StoreJet ^™ OTG.
text_image
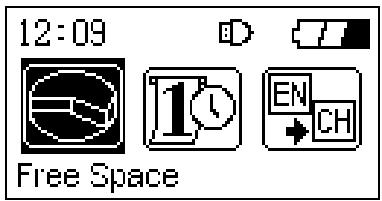
12:09 SettingsFree Space
- Select the “Free Space” icon in the Settings Menu and press the “OK” button to enter the Free Space submenu. Information will be provided about the free disk space that is available on the StoreJet™ OTG and any connected device.
- Press the "OK" button to return to the Settings menu, pressing and hold the "Power" button to return to main menu screen.
text_image
12:09 Free Space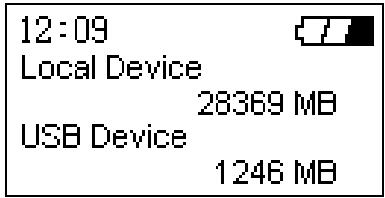
text_image
12:09 Local Device 28369 MB USB Device 1246 MBDate / Time
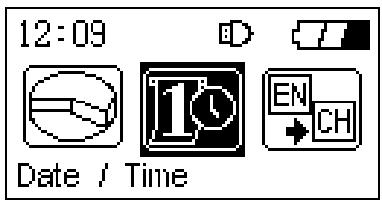
- Select the “Date / Time” icon in the Settings Menu and press the “OK” button to enter the Date / Time submenu. You can adjust the date and time of the StoreJet™ OTG using the Navigation Pad.
- Press the “OK” button to confirm the new date and time, press and hold the “Power” button will cancel the new date and time settings and return to main menu screen.
text_image
12:09 Date / Time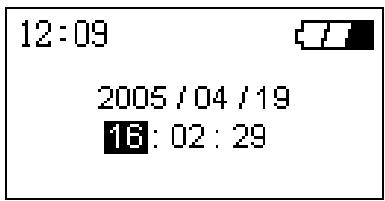
text_image
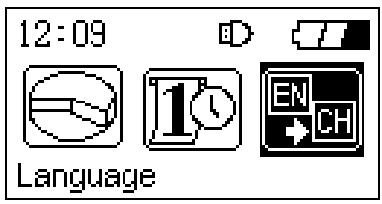
12:09 2005/04/19 16:02:29Language
The StoreJet ^™ OTG supports the use of 11 different languages in the user interface screens.
- Select the “Language” icon in the Settings Menu and press the “OK” button to enter the Language submenu. You can select the StoreJet™ OTG’s user interface language using the Navigation Pad.
-
The languages to choose from are:
-
English (Default)
- French
- German
-
Italian
-
Japanese
- Korean
- Portuguese
-
Russian
-
Spanish
- Simplified Chinese
-
Traditional Chinese
-
Press the “OK” button to confirm the StoreJet™ OTG’s new user interface language setting, pressing and hold the “Power” button will cancel the new language settings and return to main menu screen.
text_image
12:09 Language
text_image
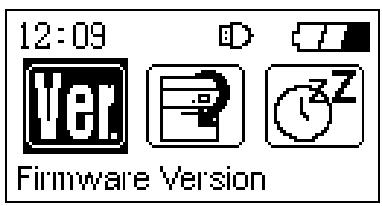
12:09 English French German ItalianFirmware Version
-
Select the “Firmware Version” icon in the Settings Menu and press the “OK” button to enter the Firmware submenu. Information will be provided about the StoreJet™ OTG’s current firmware version.
-
Press the "OK" button to return to the Settings menu, pressing and hold the "Power" button to return to main menu screen.
text_image
12:09 Ver P Z Firmware Version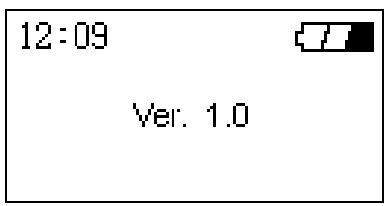
text_image
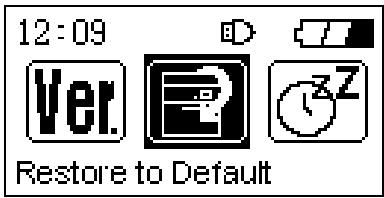
12:09 Ver. 1.0Restore to Defaults
- Select the “Restore to Defaults” icon in the Settings Menu and press the “OK” button to enter the Restore to Defaults submenu.
- A “Press ‘OK’ to restore?” message will appear.
text_image
12:09 Ver. Restore to Default
text_image
12:09 Press 'OK' to restore- Press the “OK” button to proceed and restore the StoreJet™ OTG’s default settings, pressing any other button will cancel the restore.
Auto-Shutdown Time
- Select the “Auto-Shutdown Time” icon in the Settings Menu and press the “OK” button to enter the Auto-Shutdown Time submenu.
-
Use the Navigation Pad to choose the length of idle time after which the StoreJet ^™ OTG will automatically shutdown and save on battery power:
-
Disable (Default)
• 1 Minute - 3 Minutes
- 5 Minutes

text_image
12:09 Ver. Auto-Shutdown Time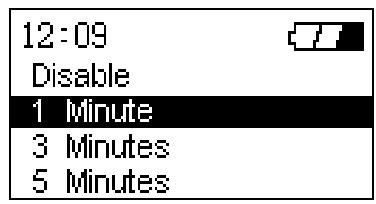
text_image
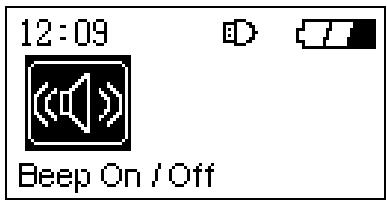
12:09 Disable 1 Minute 3 Minutes 5 MinutesBeep On / Off
- Select the “Beep On / Off” icon in the Settings Menu and press the “OK” button to enter the Beep On / Off submenu.
- Use the Navigation Pad to choose to Enable, or Disable the StoreJet™ OTG's notification beep
sound.
text_image
12:09 Beep On / Off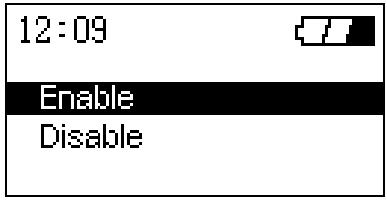
text_image
12:09 Enable Disable- Press the "OK" button to choose to Enable, or Disable the StoreJet™ OTG's beep sound.
Firmware Upgrade
You can download the latest StoreJet™ OTG firmware version from the Transcend website; http://www.transcendusa.com/
This will ensure that your StoreJet ^™ OTG supports the maximum number of USB devices.
Driver Installation
Driver Installation Windows® 98SE
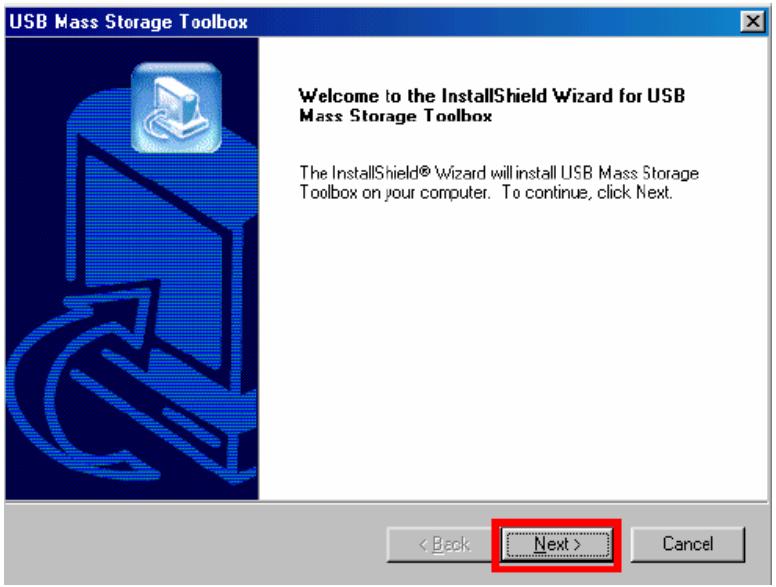
- Put the Driver CD into the CD-ROM (Auto-Run supported). Select the Windows® 98 Driver Installation button.
- The InstallShield Wizard will guide you through the installation process. Select "Next" to continue.
text_image
USB Mass Storage Toolbox Welcome to the InstallShield Wizard for USB Mass Storage Toolbox The InstallShield® Wizard will install USB Mass Storage Toolbox on your computer. To continue, click Next. < Back Next > Cancel- Follow the on-screen instructions to complete the driver installation.
- After the drivers have been installed, connect your StoreJet™ OTG to an available USB port on the computer. The New Hardware Found dialogue boxes will appear.
- Your computer will automatically detect this new device. A new Removable Disk drive with a newly assigned drive letter will appear in the My Computer window.
Driver Installation for Windows ^® Me, 2000, and XP
No drivers are required. These Windows operating systems have built-in drivers to support the StoreJet ^™ OTG. Simply connect the StoreJet ^™ OTG to the computer using an available USB port and Windows will install the files. A new Removable Disk drive with a newly assigned drive letter will appear in the My Computer window.
Driver Installation for Mac ^TM OS 10.1.3, or Later
No drivers are required. Just connect the StoreJet ^™ OTG to the computer using an available USB port and your computer will automatically detect it.
Safely Remove Your StoreJet™ OTG
Remove the StoreJet ^TM OTG in Windows ^® 98SE
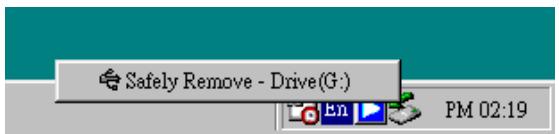
- Select the icon on the system tray.
- The "Safely Remove - Device" pop-up menu will appear. Select it to continue.
text_image
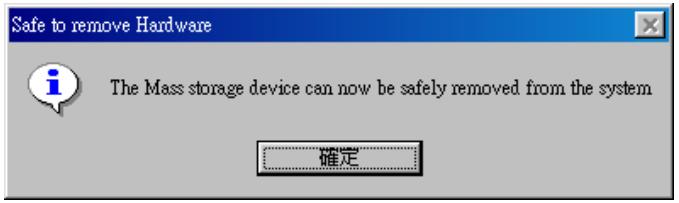
Safely Remove - Drive(G:) PM 02:19- A message box will appear: "The Mass Storage device can now be safely removed from the system."
text_image
Safe to remove Hardware The Mass storage device can now be safely removed from the system 確定Remove the StoreJet ^™ OTG in Windows ^® Me, 2000, and XP
- Select the icon on the system tray.
- The "Safely Remove Hardware" pop-up menu will appear. Select to continue.

text_image
Safely remove USB Mass Storage Device - Drive(F:) 4:27 PM- A message box will appear stating: "The 'USB Mass Storage Device' device can now be safely removed from the system."

text_image
Safe To Remove Hardware The 'USB Mass Storage Device' device can now be safely removed from the system.Remove the StoreJet ^TM OTG in Mac ^TM OS
Drag and drop the Disk icon corresponding to your StoreJet ^™ OTG into the trashcan. Then unplug your StoreJet ^™ OTG from the USB port.
Troubleshooting
If an error occurs with your StoreJet ^™ OTG, please first check the information listed below before taking your StoreJet ^™ OTG for repair. If you are unable to remedy a problem from the following hints, please consult your dealer, service center, or local Transcend branch office. Transcend also provides an FAQ and Support on our websites.
Driver CD cannot auto-run in Windows® OS
Enter the Device Manager in the Control Panel and enable the Auto-Insert function for the CD-ROM drive. Alternatively, you can manually execute the sjotg.exe on the driver CD.
Operating system cannot detect StoreJet™ OTG
Check the following:
- Is your StoreJet ^™ OTG properly connected to the USB port? If not, unplug the cable and plug it in again. If yes, try another available USB port.
- Is your StoreJet ^™ OTG connected to the Mac keyboard? If yes, unplug it and plug it into an available USB port on your Mac Desktop instead.
- Is the USB port enabled? If not, refer to the user's manual of your computer (or motherboard) to enable it.
- Is the necessary driver installed? If your computer is running Windows ^® 98SE, a driver is required. A driver is not required for Windows ^® ME/2000/XP, Mac ^™ OS 10.1.3 or later.
- Is any USB device insert to USB A-Type port? Please remove the USB device before connect the StoreJet™ OTG to computer.
Cannot Power On
Check the following:
- Is the StoreJet ^™ OTG connected to a computer? If so, unplug it and try Power it on again.
- You may not be holding down the Power button long enough. Please press and hold the Power button for at least 2 seconds.
- The StoreJet ^™ OTG may be low on power, try plugging in the power adapter, or USB power cable and Powering on the unit.
- Perform a reset and try Powering on the unit again.
HDD init error
Check the following:
- The StoreJet ^™ OTG may be low on power, try plugging in the power adapter, or USB power cable and Powering on the unit.
- You must format the StoreJet ^™ OTG using the FAT system (FAT12, FAT16, or FAT32). Please check the hard disk format type using your computer.
USB Device Detect Error
Check the following:
- Ensure the USB device is in proper working order; you can do this by checking to see if it works with
a computer. Certain USB devices may need to be powered on before connecting them to the StoreJet ^™ OTG.
- Some USB devices require a higher power input, than the StoreJet ^™ OTG can provide. Please check to see what power input the connecting USB device requires.
- The StoreJet ^™ OTG fully supports USB Mass Storage Class and PTP (Photo Transfer Protocol) devices. Please ensure the connecting USB device conforms to these standards.
Copy/Backup failed
Check the following:
- The StoreJet ^™ OTG may be low on power, try plugging in the power adapter, or USB power cable and re-copying the files, or folders.
- The StoreJet ^™ OTG supports file copying a maximum of 40 files, or folders from the same directory at one time.
- If attempting a complete Backup, please ensure that the source disk does not have any folders that contain more than 10 levels.
Browse to select and delete files failed
Some digital cameras, which are compatible with the PTP do not support a browse and delete function. These devices only support one-way copying of data i.e. from USB device to StoreJet™ OTG.
Specifications
| • Size: | 105 mm × 70 mm × 19.5 mm |
| • Weight: | 198g (with battery) |
| • Battery: | Li-ion Rechargeable battery (1200mAh) |
| • Estimated Battery Life: | 1.5 hours continuous, 4.5 hours standby |
| • Display: | High Contrast Color OLED Display (128 X 64 pixels) |
| • Max Transfer Speeds: | Peripheral: 14MB/sec, Standalone: 4MB/sec |
| • Operating Temperature: | 5°C (41°F) to 45°C (113°F) |
| • Storage Temperature: | -10°C (-14°F) to 45°C (113°F) |
| • Humidity: | 8% - 85% RH |
| • Certificates: | CE, FCC Class B, BSMI |
Ordering Information
| Product Type | Transcend P/N |
| StoreJetTM OTG | TS30GSJOTG |
| Rechargeable Battery | TS-BL12M |
Transcend Limited Warranty
“Above and Beyond” is the standard we set ourselves for customer service at Transcend. We consistently position ourselves to be significantly above the industry norm, which is all part of our commitment to Customer Satisfaction.
All Transcend information, Inc. (Transcend) products are warranted and tested to be free from defects in material and workmanship and to conform to the published specifications. During the warranty period should your Transcend StoreJet™ OTG fail under normal use in the recommended environment due to improper workmanship or materials, Transcend will repair the product or replace it with a comparable one. This warranty is subject to the conditions and limitations set forth herein.
Duration of Warranty : The Transcend StoreJet™ OTG is covered by this warranty for a period of two (2) years from the date of purchase. Proof of purchase including the date of purchase is required to collect on the warranty. Transcend will inspect the product and decide whether to repair or replace it. Transcend reserves the right to provide a functional equivalent product, or a refurbished replacement product.
Limitations : This warranty does not apply to product failure caused by accidents, abuse, mishandling, improper installation, alteration, acts of nature, improper usage, or problems with electrical power. In addition, opening or tampering with the product casing, or any physical damage, abuse or alteration to the product's surface, including all warranty or quality stickers, product serial or electronic numbers will also void the product warranty. Transcend is not responsible for recovering any data lost due to the failure of a hard drive or flash memory device. Transcend's StoreJet™ OTG must be used with devices that conform to the recommended industry standards. Transcend will not be liable for damages resulting from a third party device that causes the Transcend StoreJet™ OTG to fail. Transcend shall in no event be liable for any consequential, indirect, or incidental damages, lost profits, lost business investments, lost goodwill, or interference with business relationships as a result of lost data. Transcend is also not responsible for damage or failure of any third party equipment, even if Transcend has been advised of the possibility. This limitation does not apply to the extent that it is illegal or unenforceable under applicable law.
Disclaimer : The foregoing limited warranty is exclusive. There are no other warranties, including any implied warranty of merchantability or fitness for a particular purpose. This warranty is not affected in any part by Transcend providing technical support or advice.
Online Registration : To expedite warranty service, please register your Transcend Product within 30 days of purchase.
Register online at http://www.transcendusa.com/registration
* The specifications mentioned above are subject to change without notice.
Transcend
Exceeding Your Expectations
Transcend Information, Inc.
www.transcendusa.com
*The Transcend logo is a registered trademark of Transcend Information, Inc.
*All logos and marks are trademarks of their respective companies.