
XEMIO-126 - Media player LENCO - Free user manual and instructions
Find the device manual for free XEMIO-126 LENCO in PDF.
| Product Type | MP3 Media Player |
| Brand | Lenco |
| Model | XEMIO-126 |
| Dimensions | 88 x 26 x 21 mm |
| Net Weight | Less than 25.8 g |
| Power Supply | 1 AAA alkaline battery 1.5 V (type #7) |
| Internal Memory | 128 MB / 256 MB / 512 MB / 1 GB |
| Display | LCD screen with blue backlight, ID3 display |
| USB Port | USB 2.0 High Speed |
| Supported Audio Formats | MP3, WMA |
| Battery Life | More than 10 hours |
| Menu Languages | German, English, French, Spanish, Polish, Danish, Portuguese, Italian, Dutch, Finnish, Swedish |
| Main Functions | MP3 playback, voice recording, A-B repeat, equalizer (Normal, Rock, Jazz, Classic, Pop, Bass), lyrics sync, preview, folder navigation |
| Equalizer | Normal, Rock, Jazz, Classic, Pop, Bass |
| Playback Mode | Normal, Repeat One, Repeat All, Shuffle Repeat |
| Adjustable Backlight | Off, 5s, 10s, On |
| Auto Power Off (Powerset) | 2min, 10min, 30min, Off |
| Distortion | Less than 0.05% |
| Signal-to-Noise Ratio | 80 dB (1 KHz) |
| Operating Conditions | Humidity < 85%, temperature -10°C to 40°C |
| Safety | Do not use while driving; avoid exposure to heat, moisture; disconnect properly from computer |
| Maintenance | Clean with a slightly damp soft cloth; do not use alcohol or solvents |
| Recycling | Do not dispose of with household waste; take to an electronic waste recycling center |
Frequently Asked Questions - XEMIO-126 LENCO
User questions about XEMIO-126 LENCO
0 question about this device. Answer the ones you know or ask your own.
Ask a new question about this device
Download the instructions for your Media player in PDF format for free! Find your manual XEMIO-126 - LENCO and take your electronic device back in hand. On this page are published all the documents necessary for the use of your device. XEMIO-126 by LENCO.
USER MANUAL XEMIO-126 LENCO
Xemio-106/116/126/136 User's Manual
Notice: Thank your for choosing our product! Please read the user's manual carefully to ensure proper operation.
Content
Precautions
System requirement
- Installation instruction
1.1 Installing the driver
1.2 Installing the battery
- Connecting/ downloading/ disconnecting
2.1 Connecting a PC
2.2 Downloading MP3 music
2.3 Removing USB device
- Basic operation
3.1 Buttons and functions
3.2 Power on/off
3.3 Main menu setup
- MP3 Player Operation
4.1Playing music
4.2 Voice mode
4.2.1 Playing voice
4.2.2 Recording
4.3 Function Setting
4.3.1 Setting EQ mode
4.3.2 Setting play mode
4.3.3 Setting contrast
4.3.4 Setting backlight
4.3.5 Setting power set
4.3.6 Setting recording
4.3.7 Setting language
4.3.8 Exit
4.4 Intro
4.5 About
4.6 Folder function
4.7 Exit
- A-B loop playing
- Lock function
Lyric sync
USB mode
FAQ
Technical specifications
Precautions
1) Never use the player during driving or operating other vehicles to avoid traffic accident, which is also restricted by the law in some districts. Even on foot, it is still dangerous to listen in extremely high volume especially during crossing the street. Wherever with potential risks, please stop using the player for safety purpose.
2) Please insert the earphone before powering on the player, which can not only avoid damaging the earphone but keep the player in good condition.
3) Keep the player clean and away from heat source or direct sunlight, dirty, humid or rainy place.
4) If the surface is dirty, please clean with soft cloth dipped with clean water or soft abluent. Never clean the case with alcohol or diluents.
5) Never use the player in rather dry environment to avoid static.
6) Never disconnect the player from PC abruptly during downloading, uploading and formatting to avoid application failure.
7) When the player is used as removable disk, please follow the proper file download and upload procedures. Our company resumes no responsibility for any file lost due to improper operation.
System requirement
System requirement of MP3 player:
Microsoft Windows 98/2000/Me/XP
Pentium 200MHZ or above.
USB
120MB hard disk space
Mouse installed
CD-ROM drive
1. Installation instruction
1.1 Installing driver only for Windows 98 (The driver can be downloaded from our website: www.lenco-audiovideo.com. This driver is not required for Windows ME or above)
a. Connect the MP3 Player to the USB port of a PC, "Find new hardware" appears on the screen, then click "Search latest driver for this device", and then click "Next".
b. Select "Look in" to select the directory where you unzipped the driver files, and then click Yes.
c. PC will install the driver for Windows 98 automatically.
1.2 Installing battery
Install one #7 1.5V alkaline battery properly upon indicator on the play.
Press and hold the button to power the player on and enter the MP3 standby mode.
2. Connecting and downloading
2.1 Connecting a PC
Before operation, please verify the player is powered off with one end of the USB cable came with the system inserted into PC and another end into the MP3 player.
2.2 Downloading MP3 music
Connect MP3 player to the USB port of a PC
Download MP3 music to MP3 player.

Data transmitting
Notice: If not all the downloaded files can be played, please verify there are not more than 500 files on the MP3 player. This is the maximum capacity.
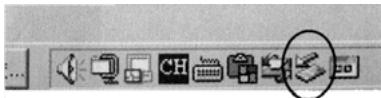
2.3 Removing the USB device
Double click the Safely Remove Hardware icon on the taskbar:
From the Sately Remove Hardware screen, highlight "USB Mass Storage Device" item, and then click the "Stop" button. The "Stop Hardware Device" window appears on the screen as shown in the picture below.
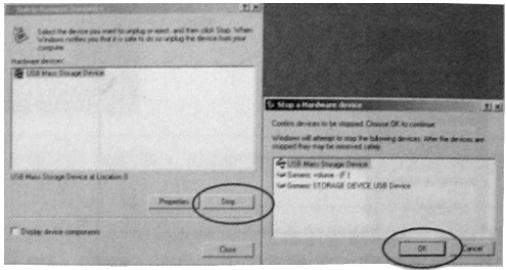
Click "OK". After the "Safe to Remove Hardware" window appears, the player can be safely disconnected from the PC.

Notice: Never unplug the USB cable when transmitting data with PC to avoid damaging the Player. After data transmitting, please do not disconnect the player from your PC until "Device can now safely be removed" appears. While using USB function, all other buttons will be nonfunctional.
In case of application lost or I/O error and power on issues caused by improper operations, please refer to the FAQ.
- Basic operation
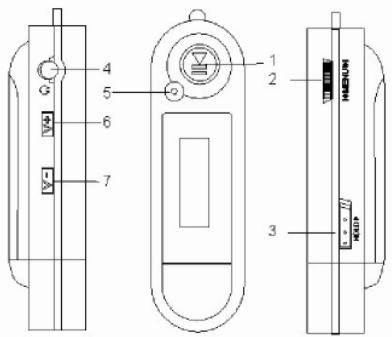
3.1 Buttons and functions
1) Play/Pause/Stop
2) Menu/Last/Next
3) Hold
4) Earphone
5) (A-B) Repeat/REC
6) Volume+
7) Volume-
3.2 Power on/off
From power off mode, press the button to enter the MP3 standby mode. Press the button 3 seconds in any mode and the player will save the data and enter power off mode.
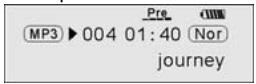
MP3 standby mode
Notice: If the player is powered off while in standby mode or while playing, all the settings will be lost!
3.3 Main menu setup
From standby or playing mode, you can press the MENU button to enter the main menu.
Push the I<or button to select: Play music, Voice, Setting, Intro, About, Folder and Exit; you can press the MENU button to enter the desired submenu.
4. How to use the MP3 player
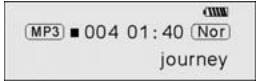
4.1 Playing music
a) From MP3 standby mode, you can press the button to play MP3 music and press the button again to pause. To resume playing, please press the button a third time.
Play

Pause

b) From play or pause mode, press and hold the button for 2 seconds, the player will return to the MP3 standby mode, press and hold the button again, it will repeat step "a").
c) From MP3 standby or play mode, you can push the or button to select the previous or next song.
d) From STOP mode, you can push and hold the | | button to find your desired music quickly.
e) From PLAY mode, you can press the | | button to fast backward or forward in the current song.
f) From PLAY mode, press the V + or V-button to adjust the volume.
g) From MP3 standby, play and pause mode, press and hold the button for 3 seconds, the player will save the data and enter the power off mode.
4.2. Setting the voice mode
4.2.1 Playing voice
a) From MP3 mode or voice standby mode, you can press the MENU button to enter the main menu. To enter the playing voice mode, please push the I or I button to select Voice and press the II button. You can press the II button to play, and press this button again to pause. To resume playing, please press this button a third time.
b) Voice playing mode includes: Normal, single play, repeat all.


c) From voice standby or play mode, you can press the or button to select previous or next voice file.
d) From STOP status, you can push and hold the | | or button to find your desired music quickly.
e) From Play mode, you can push and hold or button to fast backward or forward in this voice file.
From voice standby mode, press the button for 2 seconds, the player will enter the MP3 standby mode.
Note: The EQ selection will be unavailable when playing voice files.
4.2.2 Recording
From MP3 mode or voice standby mode, press the A-B/REC button for 2 seconds to begin recording, and repress the A-B/REC button to stop. You can press the button to play the recorded voice, and press this button again to pause. To resume playing, please press this button a third time.
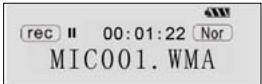
Pause recording

Stop recording
Notice: You can record a maximum of 999 voice files.
4.3 Function Setup
From MP3 mode or voice standby mode, you can press the MENU button to enter the main menu, and push the or button to select Setting and press the button to confirm. The function setting includes: EQ mode, Play mode, Contrast, Backlight, Power set, Record set, Language, Exit. You can press the MENU button to save the selected setting mode.
4.3.1 Setting EQ mode
Push the I or button to select the EQ mode: Normal, rock, jazz, classical, pop and bass. Press the MENU button to save the selected EQ setting.

Normal

Rock

Jazz

Classical

Pop

Bass
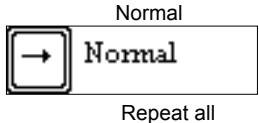
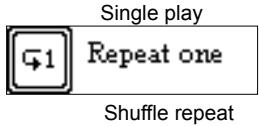
4.3.2 Setting Play mode
Push the or button to select the playing mode, including: Normal, repeat one, repeat all and shuffle repeat. You can press the MENU button to save the selected play mode.
Normal

Normal
Repeat all

Repeat all
Repeat one

Repeat one
Shuffle repeat

Shuffle repeat
4.3.3 Contrast Setup
Push the I or button to adjust the contrast of the LCD screen. Press the MENU button to save the selected setting.

Contrast
4.3.4 Adjusting Backlight
Push the or button to select the desired backlight setting: Off, 5s, 10s, on. Press the MENU button to save the selected setting.

Backlight
4.3.5 Power set Setup
Push | ← or → | button to select the desired Power set: 2m, 10m, 30m, off. Press the MENU button to save the selected shutdown time.

Power Set

BLE 2MIN N 30MIN
4.3.6 Recording Setup
Push | ← or > button to select the desired recording setting: 8000Hz, 11000Hz, 16000Hz, 22000Hz. Press the MENU button to save the selected setting.


4.3.7 Language Setup
Push the or button to select from the following languages: German, English, French, Spanish, Poland, Danish, Portuguese, Italian, Dutch, Finnish, and Swedish. Press the MENU button to save the selected language.

4.3.8 Exit
Return to upper menu.
4.4 Intro
From MP3 mode or voice standby mode, you can press the MENU button to enter the main menu, and push the or button to select the intro function, and then press the MENU button to begin. During intro, it will play the initial 10 seconds of each music file and then skip to the next file. You can press the button to exit.
4.5 About
From MP3 mode or voice standby mode, you can press the MENU button to enter the main menu, and push the or button to select the about function, and then press the MENU button to view the total memory capacity and the memory currently available.

4.6 Folder function
From or voice standby mode, you can press the MENU button to enter the main menu, and push the or button to select the folder function, and then press the MENU button to confirm.
You can push and hold the MENU button to browse the file, and push the I or to select the desired one.

Press the MENU button again, you can play or delete music.

Note: You can not view the record folder and recorded files while in play music mode, this is only possible in play voice mode.
4.7 Exit
Return to MP3 mode. Note: From the SETUP mode, you can press the button to exit the SETUP mode quickly.
5. A-B Play Mode
From MP3 or voice mode:
1) Press the A-B/REC button to select starting point A;
2) Press the A-B/REC button to select end point B, then it will repeat between A-B.
3) Press the A-B/REC button again to cancel setting and resume playing MP3 or voice.
6. Lock function
From MP3 and voice standby/ play/ pause/ record mode, you can push the HOLD switch in the direction of the arrow to lock all the other buttons. A Lock icon will be visible on the LCD screen. If you want to unlock the buttons, please push the HOLD switch in the opposite direction of the arrow.
Lyric sync:
This player supports lyric sync function.
Notice: The lyric file name must be the same as the corresponding music file with the .LRC suffix. It must also be saved in the same directory. Only the lyrics with time indication will be displayed properly.
USB mode
Plug the Player into the USB port of a PC, corresponding icons will appear on the LCD screen.
LCD screen may display corresponding icons when transmitting files between the
Player and PC.
For information on how to update the software or format the removable disk, please refer to the website.
FAQ
| Problem | Causes | Solution |
| No display after pressing the power button | No battery or battery low. | Verify the battery is installed, change battery. |
| No sound when playing music. | 1. Volume is too low or there are no music files in your player. 2. Battery low. 3. MP3 or WMA file is corrupt. | 1. Adjust volume or download file. 2. Change battery 3. Download the files again. |
| Can not download music file after connection | 1. HOLD function is engaged, the disk is write protected 2. The USB is not properly connected to the PC. 3. Storage directory is wrong | 1. Push the HOLD switch in the opposite direction. 2. Connect to the USB interface again and verify that the PC recognizes the removable disk. 3. A maximum of 256 folders or files can be saved in the root directory (if the file name is over 8 characters, the maximum number of folders or files will decrease accordingly) If this |
| maximum is exceeded, please create another subdirectory in the root directory before copy. | ||
| Can not play the MP3 file that is made by user. | The MP3 files are compressed with a different compression rate and format, while this Player supports standard compressed MP3, please do not use layer one or two compression. | Download the standard MP3 files again. |
| PC can not identify the mp3 player | Improper operation. | Format the removable disk. |
| No response after pressing button. | HOLD function is engaged, buttons are locked | Push the HOLD switch in the opposite direction. |
Technical specifications
Bit rate: 32~320Kbps
Adjustable LCD contrast: 0-5
SNR: >85db
Adjustable backlight time: 5s, 10s, on, off
Dynamic range: >80(1KHZ)
Condition of storage: Humidity<90%, normal temperature
Distortion: <0.05%
ID3 information display, blue backlight
USB port: standard USB2.0 full speed
Memory: 128MB/256MB /512MB/1GB
Net weight: <25.8g
Dimension: 88^26^21mm
Working condition: Humidity < 85% , -10 40^
Output: 5mW^*2
Language: German, English, French, Spanish, Poland, Danish, Portuguese, Italian, Dutch, Finnish, and Swedish.

If at any time in the future you should need to dispose of this product please note that: Waste electrical products should not be disposed of with household waste. Please recycle where facilities exist. Check with your Local Authority or retailer for recycling advice. (Waste Electrical and Electronic Equipment Directive)
Manuel de l'usager du Xemio-106/116/126/136
Specifications techniques
Precautions
Specifications techniques
Débit binaire: 32~320Kbps
Contraste LCD ajustable :0- 5
SNR: >85db
Bitrate: 32-320 kbps
Bit rate: 32~320Kbps
USB poort: standard USB 2.0 full speed
Geheugen: 128MB/256MB /512MB/1GB
- Xemio-106/116/126/136 User's Manual
- Content
- Precautions
- System requirement
- Installation instruction
- Installing battery
- Connecting and downloading
- Connecting a PC
- Downloading MP3 music
- Removing the USB device
- Power on/off
- Main menu setup
- How to use the MP3 player
- Playing music
- Play
- Pause
- Setting the voice mode
- Playing voice
- Recording
- Function Setup
- Setting EQ mode
- Setting Play mode
- Normal
- Repeat all
- Repeat one
- Shuffle repeat
- Contrast Setup
- Contrast
- Adjusting Backlight
- Backlight
- Power set Setup
- Power Set
- BLE 2MIN N 30MIN
- Recording Setup
- Language Setup
- Exit
- Intro
- About
- Folder function
- Exit
- A-B Play Mode
- Lock function
- Lyric sync:
- USB mode
- Technical specifications
- Manuel de l'usager du Xemio-106/116/126/136
- Specifications techniques
Brand : LENCO
Model : XEMIO-126
Category : Media player