Flatpro 2500 Touch - Microwave Oven CECOTEC - Free user manual and instructions
Find the device manual for free Flatpro 2500 Touch CECOTEC in PDF.


| Product type | Microwave oven |
| Brand | Cecotec |
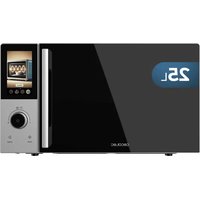
| Model | Flatpro 2500 Touch |
| Capacity | 25 liters |
| Microwave power | 900 W |
| Power supply | 230 V ~ 50 Hz |
| Control panel | Touchscreen with digital display |
| Interior plate | Ceramic plate |
| Power levels | Multiple adjustable levels |
| Timer | Digital timer with x2 button |
| x2 function | Doubles cooking time with one press |
| Stop/reset function | Instant stop and reset |
| Dimensions (W × H × D) | 455 × 280 × 350 mm |
| Net weight | 12.5 kg |
| Installation | Free space of 10 cm at the rear and sides, 30 cm above |
| Cleaning and maintenance | Clean with a damp cloth; ceramic plate easy to maintain |
| Safety | Door safety lock |
| Box contents | Microwave oven and instruction manual |
| Spare parts and repairability | Official Cecotec technical service |
| General information | Requires clear space on the left side; keep the serial number |
Frequently Asked Questions - Flatpro 2500 Touch CECOTEC
User questions about Flatpro 2500 Touch CECOTEC
0 question about this device. Answer the ones you know or ask your own.
Ask a new question about this device
Download the instructions for your Microwave Oven in PDF format for free! Find your manual Flatpro 2500 Touch - CECOTEC and take your electronic device back in hand. On this page are published all the documents necessary for the use of your device. Flatpro 2500 Touch by CECOTEC.
USER MANUAL Flatpro 2500 Touch CECOTEC
Commercial microwave oven with touch buttons.

- Parts and components 20
- Before use 20
- Installation 21
- Operation 21
- Tips 28
- Cleaning and maintenance 29
- Problem solving 30
- Copyright 31
- Simplified EU Declaration of Conformity 31
SOMMAIRE
EN • The coding in this manual is generic and applies to all code variants of the appliance.
A. Control panel
B. Observation window
C. Door assembly
D. Security system
E. Ceramic plate
Control panel
Fig. 2
- Screen
- Power buttons
- Time button
- Button x2
- Stop/reset button
- Start button
- Numeric buttons
NOTE:
The graphics in this manual are schematic representations and may not exactly match the product.
2. BEFORE USE
- This appliance has packaging designed to protect it during transport. Remove the appliance from its box and remove all packaging material. You can store the original box and other packaging in a safe place to prevent damage to the appliance if you need to transport it in the future. If you wish to dispose of the original packaging, be sure to recycle all items properly.
- Make sure that all parts and components are included and in good condition. If any of them are missing or not in good condition, please contact the Cecotec Service Centre immediately.
Contents of the box
- Microwave
- This instruction manual
Do not remove the serial number of the product, in order to keep a correct traceability of your equipment in case of requesting assistance.
3. INSTALLATION
Select a level surface that provides sufficient clearance for the air inlet and outlet grilles. Maintain a clearance of 10 cm between the appliance and the right and rear walls, and a clearance of 30 cm at the top. Never remove the legs of the appliance or block the air inlet and outlet openings. The left side must be kept clear.
- Blocking the air inlet and/or outlet grilles may damage the microwave.
- Place the microwave as far away as possible from radios and televisions. Microwave operation may cause interference with radio or television reception.
- Connect your microwave to a standard household socket. Make sure that the voltage and frequency are the same as those indicated on the rating label.
Warning: The power socket, other electrical appliances or anything else that may be affected by heat and moisture should be kept away from the microwave vents.
4. OPERATION
Control panel
Fig. 2
- Screen
- Power Buttons: Buttons for selecting the desired microwave power level.
- Time Entry Button: Button to initiate manual entry of cooking time.
- Button X2: Button to cook double quantity.
- Stop/Reset button: Button to stop the cooking process or reset the microwave.
- Start button: Button to start the cooking process.
- Numeric buttons: Buttons for entering the cooking time or selecting preset programmes.
The following table shows the different power ratings available for this microwave oven.
| Level | HIGH | MED_HIGH | MEDIUM | DEFROST | HOLD |
| Power | 100% | 70% | 50% | 20% | 0% |
| Screen | PL10 | PL7 | PL5 | PL2 | PL0 |
ENGLISH
Preset cooking times
The microwave will be supplied with the following preset cooking times:
| Numeric button | Display (minutes:seconds) | Power (%) | Cooking factor (%) |
| 1 | 0:10 | 100 | 80 |
| 2 | 0:20 | 100 | 80 |
| 3 | 0:30 | 100 | 80 |
| 4 | 0:45 | 100 | 80 |
| 5 | 1:00 | 100 | 80 |
| 6 | 1:30 | 100 | 80 |
| 7 | 2:00 | 100 | 80 |
| 8 | 3:00 | 100 | 80 |
| 9 | 4:00 | 100 | 80 |
| 0 | 5:00 | 100 | 80 |
1. Ignition
- When the microwave is connected to a mains socket for the first time, the display will show " — — — — “. If you press the button “◇”, the microwave will switch to idle mode.
NOTE: In idle mode, you cannot press any buttons.
2. Idle (standby) mode
- The microwave will enter idle mode after a certain number of seconds have elapsed in Ready Mode without any keys being pressed or the door being opened and closed. The number of seconds is determined by the Keypad Timeout, which is set by User Option 4.
- During idle mode, the LED will be off and there will be no microwave activity.
- By opening and then closing the microwave door, the microwave will exit the idle mode and enter the ready mode.
3. Ready mode
- When the door is opened and closed, the microwave is ready for use.
- The display shows "0:00".
- From this mode, you can access all the functions of the microwave.
4. Open door mode
- This mode is activated when the door is opened.
- The display is off.
- When closing the door, the microwave will return to Ready Mode, unless you have interrupted a cooking programme (see 5. Pause Mode).
5. Pause mode
- If you open the door or press the "◇" button while the microwave is operating, the microwave will pause.
- The display shows the remaining cooking time.
- If you leave the microwave on pause for a period of time, it will return to the Inactive Mode (the standby time can be adjusted in the settings).
- To cancel cooking, press the "◇" button. To continue, press the "▷" button.
6. Manual cooking mode
- This mode allows you to set the cooking time and cooking power manually.
- In the ready mode, press the "TIME" button, the microwave will enter the Manual Cooking Entry Mode and the display will show "00:00".
- Enter the desired cooking time using the number buttons (e.g. "1:30" for one minute and thirty seconds).
- Select the desired power by pressing the power buttons: "HOLD", "DEFROST", "MEDIUM", "MED_HIGH". If you press the same power button twice, the maximum power PL10 will be set. If you do not select any power, the microwave will use the maximum power (PL10).
- Press the "▷" button to start cooking.
- To return to Ready Mode, press the button "◇".
7. Automatic Cooking Mode
- This mode uses predefined programmes to cook different types of food in a simple way.
- Press the "▷" button to enter the automatic cooking mode.
- During this mode, the display will show the remaining cooking time.
- When cooking is finished, the microwave will enter the end of cooking mode.
- To cancel cooking, press the "◇" button, the microwave will enter pause mode.
8. End of Cooking
- When the cooking time reaches zero, the microwave will stop and beep to warn you.
- The display will show "End".
- The microwave will beep (the type of beep can be adjusted in the settings). If setting OP:11 or "OP:12" is selected, the microwave will continue to beep until the user confirms it by opening and closing the door or pressing the "◇" button. If Option OP:10 is selected, after the 3 second beep, the microwave will switch to Ready Mode.
ENGLISH
9. Cooking mode with preset programmes
- This mode allows you to cook food at the touch of a button, using predefined cooking programmes.
- In Pause Mode, press one of the number buttons to start the cooking programme associated with that number (see the table "Default Cooking Times", to see which programme corresponds to which number).
- The microwave will start cooking automatically and the display will show the remaining cooking time. If the programme has several stages, the total remaining time will be displayed, not the time of each individual stage.
- At the end of the programme, the microwave will enter the "End of cooking mode".
- To pause or cancel cooking, press the "◇" button.
10. Quick cooking mode
- If the "Quick Cook" option is activated (see "User options" section), you can start a preset cooking programme by pressing a numeric button while the microwave is cooking or paused.
- While the microwave is cooking or paused, press one of the number buttons (1-9) to start the programme associated with that number.
- The display will show the remaining cooking time.
- At the end of the programme, the microwave will enter the "End of cooking mode".
- To pause or cancel cooking, press the " ◊ " button.
11. Programming mode
- This mode allows you to assign cooking times and power levels to the number buttons to create your own personalised programmes.
- Open the microwave door and press and hold the "1" button for 5 seconds. The microwave will beep and enter Programming Mode, the display will show "ProG".
-
Press any numeric button (0-9) to select the programme you want to modify. The display will show the saved cooking time for that programme (if any).
-
Enter the desired cooking time using the number buttons.
-
Select the desired power by pressing the power buttons: "HOLD", "BEFROST", "MEDIUM", "MED_HIGH", "MED_HIGH", "70%". If you do not select any power, the microwave will use the maximum power ("PL10").
-
To set the Cooking Factor: Press the "X2" button. The display will show "CF:XX" (default factor is 80%). To change the factor, press one of the number buttons to set the new value.
-
After setting the time and power, press the button "◇" within 30 seconds to save the programme. The display will show "ProG" to confirm that the programme has been saved.
-
If the cooking time exceeds the maximum cooking time allowed (see "User options" section), the microwave will emit three short beeps and the display will return to "ProG". The programme will not be saved.
-
Close the door to return to Ready Mode.
Important notes:
- If the power is cut off, saved programmes will not be lost.
- To modify an existing programme, repeat the above steps.
- If you press the “◇” button during the programming process, the microwave will return to Ready Mode and the changes will not be saved.
- If there is no programme stored for a numeric button, the microwave will beep when that button is pressed and do nothing.
12. Double Quantity Cooking Mode
- This mode automatically adjusts the cooking time to cook twice the amount of food.
-
In Ready Mode, press the "X2" button and then press one of the number buttons (0-9) within 5 seconds to select a preset cooking programme.
-
The display will show "doub" and then the set cooking time for double quantity. For example, if the preset programme has a cooking time of 1 minute, pressing "X2" will set the time to 1 minute * (1 + 0.8) = 1 minute and 48 seconds.
-
The microwave will start cooking automatically at the set time.
- At the end of the programme, the microwave will enter the End of Cooking Mode.
13. Cooking mode in stages
- This mode allows you to cook food using a combination of different power levels in several stages.
- You can set up to three cooking stages. First, set the power and time for the first stage.
-
Then press the button "TIME" to proceed to the second stage. The display will show "S-2". Set the power and time for the second stage.
-
Repeat the previous step to set up a third stage (the display will show "S-3").
-
Press the "▷" button to start cooking.
- Example: To program three stages: The first at medium power (PL7) for 1 minute and 25 seconds, the second at low power (PL5) for 5 minutes and 40 seconds:
-
In Ready Mode, press the numeric button "1" for 5 seconds to enter Programming Mode (the display will show "ProG").
-
Press the numeric button "3" to store the programme in memory "3".
-
Enter the time "1:25" by pressing the number buttons "1", "2" and "5".
-
Press the button "MED_HIGH" (the display will show "PL7"). The first stage is set.
-
Press the button "TIME". The display will show "S-2".
-
Enter the time "5:40" by pressing the number buttons "5", "4" and "0".
ENGLISH
- Press the button "MEDIUM" (the display will show "PL5"). The second stage is configured.
- Press the Start button to save the programme.
14. User Options Mode
- This mode allows you to customise different microwave settings, such as the beep volume.
- Open the microwave door and press and hold the number button "2" for 5 seconds. The microwave will beep and enter the User Options Mode and the display will show "OP: - - -".
- Press the number button corresponding to the option you wish to modify (see "User Options" section). For example, to adjust the beep volume, press the "2" button. The display will show the current setting (e.g. "OP:22" for medium volume).
-
To change the setting, continue to press the same number button. The display will show the different settings available in cycle (e.g. "OP:20" for off, "OP:21" for low, "OP:22" for medium, "OP:23" for high, then back to "OP:20").
-
When you have selected the desired setting, press the button "D" to save it. The display will return to "OP: --".
-
If you press the "◇" button during the setting process, the microwave will return to Open Door Mode. When closing the door, it will return to Ready Mode, but the changes will not be saved.
-
If you do not press the "▷" button to save the setting, the microwave will not save the changes and will keep the previous setting.
User options
| Option | Adjustment | Description |
| 1. Type of sound | OP:10 | A 3-second beep |
| OP:11 | A continuous beep | |
| OP:12 | 5 rapid repeating beeps | |
| 2. Volume of the audible warning device | OP:20 | Audible warning device deactivated (mute) |
| OP:21 | Low volume | |
| OP:22 | Average volume | |
| OP:23 | High volume | |
| 3. Audible warning device on/off | OP:30 | Key beep disabled |
| OP31 | Key beep activated | |
| 4. Panel illumination time | OP:40 | 15 seconds |
| OP:41 | 30 seconds | |
| OP:42 | 60 seconds | |
| OP:43 | 120 seconds | |
| 5. On the fly | OP:50 | On-the-fly" function deactivated (no changes can be made during operation) |
| OP:51 | On-the-fly" function activated (changes can be made during operation) | |
| 6. Restoration by door | OP:60 | Door Reset disabled (open door pauses, but does not restart) |
| OP:61 | Door Reset enabled (opening the door stops and restarts the function) | |
| 7. Maximum time | OP:70 | Maximum cooking time 60 minutes |
| OP:71 | Maximum cooking time 10 minutes | |
| 8. Manual programming | OP:80 | Manual programming deactivated (only predefined programmes can be used) |
| OP:81 | Manual programming activated (can be programmed manually) | |
| 9. Double digit | OP:90 | Single-digit mode - 10 programmes (programmes 1 to 10 are selected with a single digit) |
| OP:91 | Double digit mode - 100 programmes (up to 100 programmes can be selected using two digits) |
ENGLISH
15. Service Mode
- This mode is intended for qualified service technicians only.
- Open the microwave door and press and hold the number button "3" for 5 seconds to enter Service Mode. The display will show "SErU".
- To check the number of times the door has been opened and closed, press the number button "1". The display will show the number of times.
- To cancel an error message, press the "▷" button and then press the numeric button "4" within 3 seconds. The display will show "4-CL".
- Press the "◇" button to enter the Door Open Mode. When the door is closed, it will return to Ready Mode.
16. Consultation Function
- During the cooking process, you can press the "TIME" button to check the current power level. The display will show the power level for 3 seconds and then return to the previous state.
- This function is available even during multi-stage cooking.
17. Factory Default Setting
- To restore the factory default settings, switch on the microwave and, in Ready Mode, press the "▷" button and the numeric button "0" at the same time.
5. TIPS
- Place the food carefully: place the thickest parts of the food towards the edge of the turntable. Try to avoid overlapping the food.
- Keep an eye on the cooking time: start by cooking food for as little time as possible and add more time as necessary. Overheating food may cause it to smoke or burn.
- Cover food while cooking: covering food prevents splattering and cooks food more evenly.
- Turn or stir the food 1 time during the cooking process.
- Respect the preheating time: do not exceed the time specified on the label of each food.
- It is important to use materials and containers that are compatible for safe use in microwave ovens. The following table shows which materials are suitable and which are not:
| Container material | Apt | Warnings |
| Browning dish | Yes | Follow the manufacturer's instructions. The base of the browning pan must be at least 5 mm above the turntable. Misuse may cause the turntable to break. |
| Tableware | Yes | Microwave safe only. Follow manufacturer's instructions. Do not use cracked or chipped dishes. |
| Glass jars | Yes | Always remove the lid. Use them only to heat food slightly. Most glass jars are not heat resistant and may break. |
| Glass tableware | Yes | Heat-resistant, microwave-safe glass tableware. Make sure there are no metallic decorative elements.Do not use dishes or cracked or chipped material. |
| Bags for microwave cooking. | Yes | Follow the manufacturer's instructions. Do not use metal fasteners. Make small cuts to allow steam to escape. |
| Cooking paper | Yes | Use to cover food when reheating and to absorb fat. Use with supervision when cooking or heating food for a short time. |
| Baking paper | Yes | Use it to cover and prevent splashing, or for steaming. |
| Plastic | Yes | Microwave safe only. Follow manufacturer's instructions. Must be labelled "microwave safe". Some plastic containers soften when the food inside is heated. Boil-in bags and sealed plastic bags should be cut or punctured slightly if indicated on the product. |
| Plastic wrapping | Yes | Microwave safe only. Use to cover food and retain moisture. Do not allow plastic film to come into contact with food. |
| Thermometers | Yes | Microwave-safe only (meat thermometer and candy thermometer). |
| Aluminium tray | No | It may curl. Transfer food to a microwave-safe dish or container. |
| Cardboard with metal handle | No | It may curl. Transfer food to a microwave-safe dish or container. |
| Metal utensils or utensils with metal decorations | No | The metal deflects the energy directed at the food. The metal trim could cause an electric arc. |
| Metal wire fasteners | No | It may curl. Transfer food to a microwave-safe dish or container. |
| Paper bags | No | They could cause flames inside the microwave oven. |
| Plastic foam | No | The plastic foam could melt and contaminate the liquid inside when exposed to high temperatures. |
| Wood | No | Wood could dry out inside the microwave and break or cracking. |
6. CLEANING AND MAINTENANCE
Note: The microwave should be cleaned regularly.
- Disconnect the power cord from the power outlet before cleaning the appliance. Do not
ENGLISH
immerse the appliance in water or any other liquid when cleaning.
- If you do not clean the microwave regularly, its service life will be affected.
- Do not use abrasive cleaning products or scouring pads to clean the microwave.
- Do not remove the mica plate.
- When you have finished using the microwave, wipe surfaces that have come into contact with food with a damp cloth to remove any residue and then dry them thoroughly. Accumulated grease can overheat and catch fire.
- The outer surface of the microwave can also be cleaned with a damp cloth.
- If you notice that the microwave is emitting unpleasant odours, follow one of the 3 cleaning methods below:
A. Place several slices of lemon in a cup, then heat on high power for 2-3 min.
B. Place a cup of red tea and heat it on high power.
C. Put in some orange peels and heat on high power for 1 minute.
- When the microwave is not in use, place it in a dry and ventilated place.
7. PROBLEM SOLVING
This table describes situations which may occur during normal use of the microwave and which do not indicate a malfunction.
| Microwave interferes with TV reception. | Radio and television reception can be affected by microwave operation. This is similar to interference from small electrical appliances such as blenders, hoovers and electric fans. |
| Dim light from the microwave. | In low power microwave cooking, the light of the microwave may become dim. |
| Steam accumulated in the door, hot air escaping through the vents. | When cooking, steam may escape from the food. Most of it will escape through the vents. But some may collect in a cool place, such as the microwave door. |
| Microwave accidentally turned on without food inside. | Never use the microwave without food inside. It is very dangerous |
If you experience any of the following problems, refer to this table to identify the cause and find a possible solution.
| Problem | Possible cause | Possible solution |
| The microwave cannot be started | The power cable is not properly plugged in. | Unplug. Plug back in after 10 seconds. |
| The fuse has blown or the circuit breaker is tripped. | Replace the fuse or reset the circuit breaker, contact the official Cecotec Technical Assistance Service. | |
| Problem with the power socket. | Test the socket outlet with other electrical appliances. | |
| The microwave does not heat. | The door is not properly closed. | Close the door tightly. |
8. COPYRIGHT
The intellectual property rights to the texts in this manual belong to CECOTEC INNOVACIONES, S.L. All rights reserved. The contents of this publication may not, in whole or in part, be reproduced, stored in a retrieval system, transmitted or distributed by any means (electronic, mechanical, photocopying, recording or similar) without the prior authorisation of CECOTEC INNOVACIONES, S.L.
9. SIMPLIFIED EU DECLARATION OF CONFORMITY

Cecotec Innovations hereby declares that this product is in compliance with the essential requirements and other relevant provisions of the regulations applicable in the European Union. This product has been designed, manufactured and tested in compliance with the required safety and quality standards. The full text of the EU
Declaration of Conformity can be found at the following web address: https://cecotec.es/es/information/declaration-of-conformity
FRANÇAIS
1. PIÈCES ET COMPOSANTS
Img. 1
7. PROBLEEMOPLOSSING
| Seviye | HIGH | MED_HIGH | SORTA | DEFROST | HOLD |
| Güç | 100% | 70% | 50% | 20% | 0% |
| Ekran | PL10 | PL7 | PL5 | PL2 | PL0 |

- SOMMAIRE
- CONTROL PANEL
- FIG. 2
- NOTE
- BEFORE USE
- CONTENTS OF THE BOX
- INSTALLATION
- OPERATION
- ENGLISH
- PRESET COOKING TIMES
- IGNITION
- IDLE (STANDBY) MODE
- READY MODE
- OPEN DOOR MODE
- PAUSE MODE
- MANUAL COOKING MODE
- AUTOMATIC COOKING MODE
- END OF COOKING
- COOKING MODE WITH PRESET PROGRAMMES
- QUICK COOKING MODE
- PROGRAMMING MODE
- IMPORTANT NOTES
- DOUBLE QUANTITY COOKING MODE
- COOKING MODE IN STAGES
- USER OPTIONS MODE
- SERVICE MODE
- CONSULTATION FUNCTION
- FACTORY DEFAULT SETTING
- TIPS
- CLEANING AND MAINTENANCE
- PROBLEM SOLVING
- COPYRIGHT
- SIMPLIFIED EU DECLARATION OF CONFORMITY
- FRANÇAIS
- PIÈCES ET COMPOSANTS
- IMG. 1
- PROBLEEMOPLOSSING
Brand : CECOTEC
Model : Flatpro 2500 Touch
Category : Microwave Oven