
DF-1520 - Disc player LENCO - Free user manual and instructions
Find the device manual for free DF-1520 LENCO in PDF.


| Product type | Digital photo frame with 15-inch screen |
| Brand | LENCO |
| Model | DF-1520 |
| Screen size | 15 inches (diagonal) |
| Display resolution | 1024 x 768 pixels |
| Internal memory | 128 MB |
| Supported image formats | JPEG (up to 12 megapixels) |
| Supported audio formats | MP3 |
| Supported video formats | Animated JPEG (AVI), MPEG-1, MPEG-2, MPEG-4 |
| Compatible memory cards | SD, MMC, MS, CF, XD |
| USB ports | 1 USB host port, 1 USB slave port |
| Power supply | AC power adapter 110-240V, 50/60 Hz; output 12V DC |
| Power consumption | 24 Watts |
| Main functions | Automatic slideshow with transition effects, background MP3 music playback, image rotation and zoom, file copy and delete, calendar, clock and alarm |
| Package contents | Digital photo frame, stand, power adapter, remote control, USB cable, user manual |
| Care and cleaning | Clean with a soft dry cloth. Avoid liquids and abrasive products. |
| Safety | Do not expose to moisture. Use only the supplied adapter. Disconnect before cleaning. |
Frequently Asked Questions - DF-1520 LENCO
User questions about DF-1520 LENCO
0 question about this device. Answer the ones you know or ask your own.
Ask a new question about this device
Download the instructions for your Disc player in PDF format for free! Find your manual DF-1520 - LENCO and take your electronic device back in hand. On this page are published all the documents necessary for the use of your device. DF-1520 by LENCO.
USER MANUAL DF-1520 LENCO
Package Contents - 2
Installing your unit. 3
Connecting to a PC 3
Operation. 4
Controls. -5-
Using your Remote Control. 6
Inserting Memory Cards. 7
Main menu -8-
Viewing Pictures - 9
Previous. 10
Play or Pause. 10
Next - 10
Rotate -10-
Stop -10-
Zoom. 10
Watching video. 11
Previous. 12
Fast Forward. 12
Play or Pause. 12
Fast Backward 12
Next - 12 -
Stop 12
Zoom. 12
Listening to MP3 music 13
File Option - 14
Playing a slideshow with music 14
Previous. 15
Play or Pause. 15
Next 15-
Rotate -15-
Stop 15
Zoom. 15
VOL. 15
Copying and Deleting Files. 16
Using the SETUP option 18
Technical Support 19
Frequently asked questions. 19
Specifications - 21
Introduction
Congratulations on your purchase of 15 inch Digital Picture Frame, model DP-1520 Before operating the unit, please read this manual thoroughly, and retain it for future reference. This manual will help you use many of the exciting and useful features that will make your Digital Picture Frame viewing more enjoyable.
This Digital Picture Frame lets you view digital pictures directly from your camera's memory cards. You will be able to create a slideshow using multiple transition effects or display one picture at a time. No computer, digital camera or Internet connection is required.
This Digital Picture Frame is compatible with the following popular memory card formats: CompactFlash®, SD™, XD, MultiMediaCard™, and Memory Stick®.
It can also read files stored on a USB Flash drive using the USB host port.
Main Features
- Displays digital pictures (JPEG) without a computer
- Simply insert a compatible memory card into the Digital Picture Frame to show photos, play MP3 music or supported video files (memory card not included).
- Compatible memory cards include Secure Digital Card (SD), MultiMedia Card (MMC), Memory Stick (MS), XD Cards & Compact Flash
- Able to read files located on a USB Flash drive
- Instantly plays MP3 music with the integrated speakers.
- Instantly plays MPEG1 2 4 files stored on supported memory cards*.
Supports up to 12 Mega Pixels image files (JPEG format). - Compatible with most digital cameras' stored JPEG images and motion JPEG files.
- Includes a credit card style remote control
- Bright 15" TFT active matrix LCD screen.
Automatic slide show with multiple transition effects. - Plays slide show with MP3 music on the background.
- User-friendly on-screen display lets you access all controls easily.
*Video files may not play properly if stored on a low speed card.
Getting Started
Package Contents
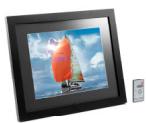
Digital Picture Frame and stand
User Guide
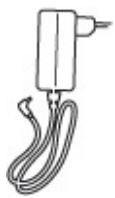
AC/DC Adapter
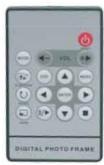
Remote
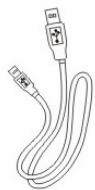
USB cable
Installing your unit
- Open the package and remove the protective foam. Remove the protective sleeve from the unit.
Install the Digital Picture Frame stand as the back of the unit. - Plug in the AC adapter into power outlet. Plug the other end into the unit.
- After the content is stored on the target flash media; insert the media into the correct slot.
- Turn power to ON position via the ON/OFF switch.
Connecting to a PC
The Digital Picture Frame has a USB port for connection to a PC (USB Slave) and a second USB port for connection to other devices such as a Flash Drive, USB card reader, or a camera (USB Host). When connected to the PC you can drag-and-drop content from the PC to the internal memory or memory card. You can also delete content from the internal memory.
NOTE: USB Slave and USB Host can not be used at the same time.
Operation
This Digital Frame is extremely easy to operate:
- Remove memory card from camera:

- Insert memory card into the frame with face away from the unit:
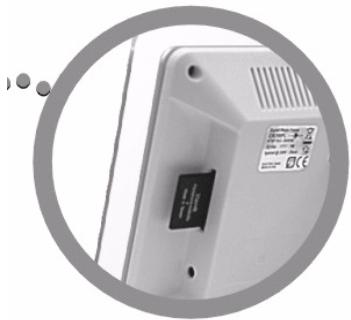
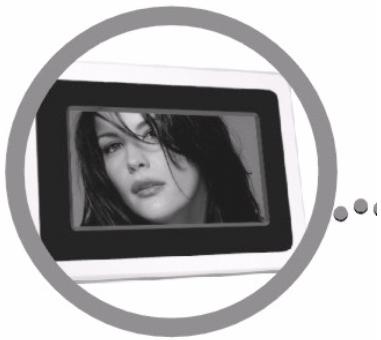
- when power on the frame, the picture would displayed automatically.
Controls

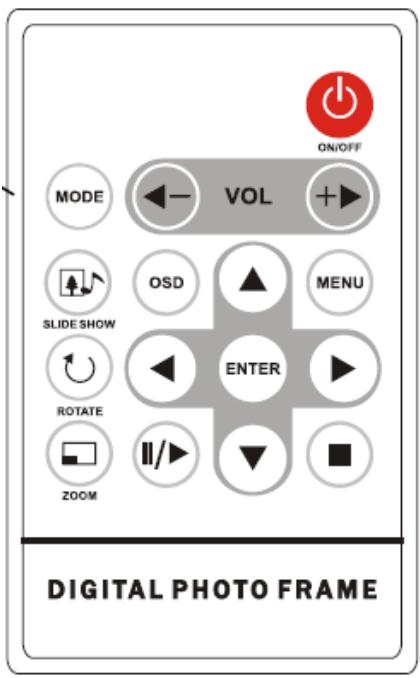
Using your Remote Control
The following table briefly describes the remote control functions
| Button | Description |
| On/Off | Switch on/off the frame |
| Mode | Photo/Audio/Video Mode Switch |
| Vol - | Decrease volume |
| Vol + | Increase Volume |
| Slideshow | Start the slideshow |
| OSD | Display the picture menu |
| Menu | Display the main menu |
| Rotate | Rotate the current picture |
| Enter | Confirm |
| Zoom | Zoom the current picture |
| Play/Pause | |
| Stop | |
| Arrows | Navigate on screen |
Inserting Memory Cards
The Digital Picture Frame is compatible with the following memory cards:
- Secure DigitalTM Card (SD)
- MultiMediaTM Card (MMC)
Memory StickTM - CompactFlash™ (CF) Card
- XD Picture Cards
Insert the memory card with the front label facing AWAY from you. Do not force the memory card into the memory slot. If you are not able to easily insert the memory card completely, you may have inserted it the wrong way.
Note:
The Digital Picture Frame will ONLY recognize digital pictures stored in JPEG format. Digital pictures stored in other formats will be ignored by the device.
Make sure you have at least one picture stored on the memory card. The frame will not function properly without a stored picture.
You also can use a USB flash drive in the exact same way as you would use a memory card. Simply copy files on the flash drive and insert it at the right side of the unit in the USB Host plug.
Main menu
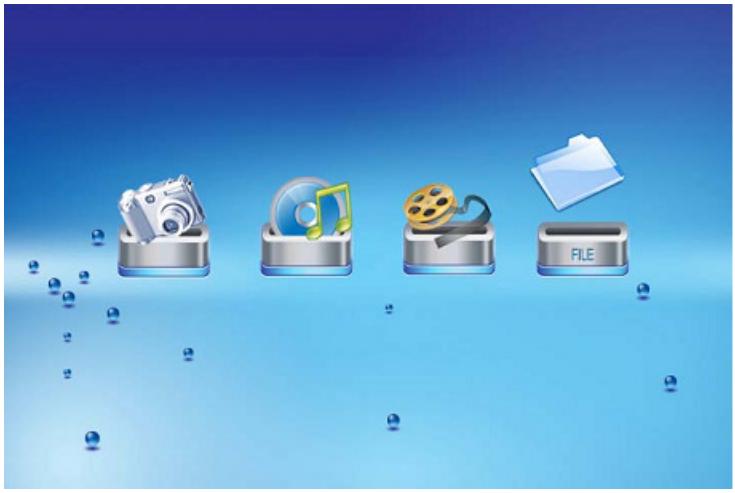
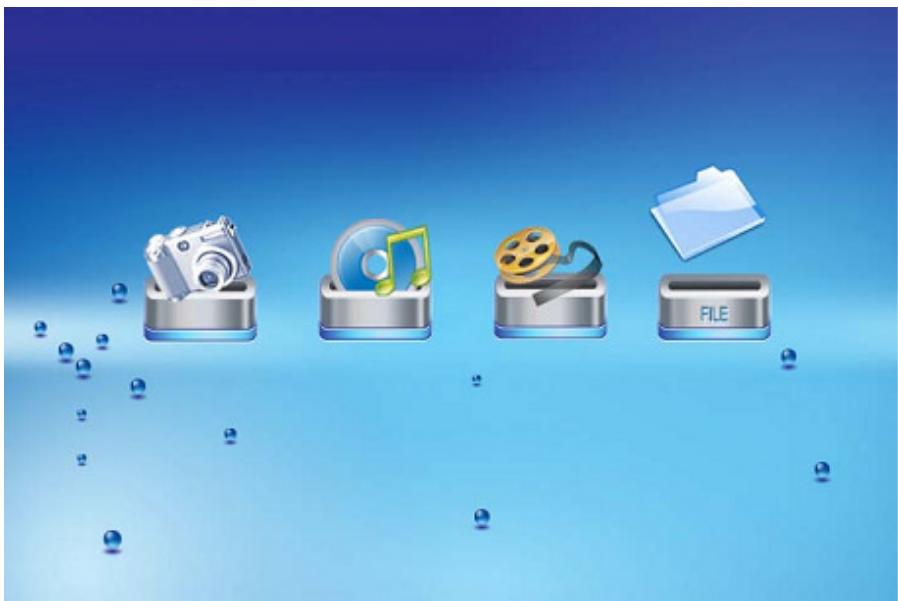
Upon turning on the Digital Picture Frame, you will go straight to the MENU screen. To set the Auto Start feature Choose the SETUP screen. Use the left/right arrow to go to the "Set up". Press the Enter button to enter the options screen. Use the Up / down arrows to choose your auto start option. Press the "MENU" button to show the following menu:
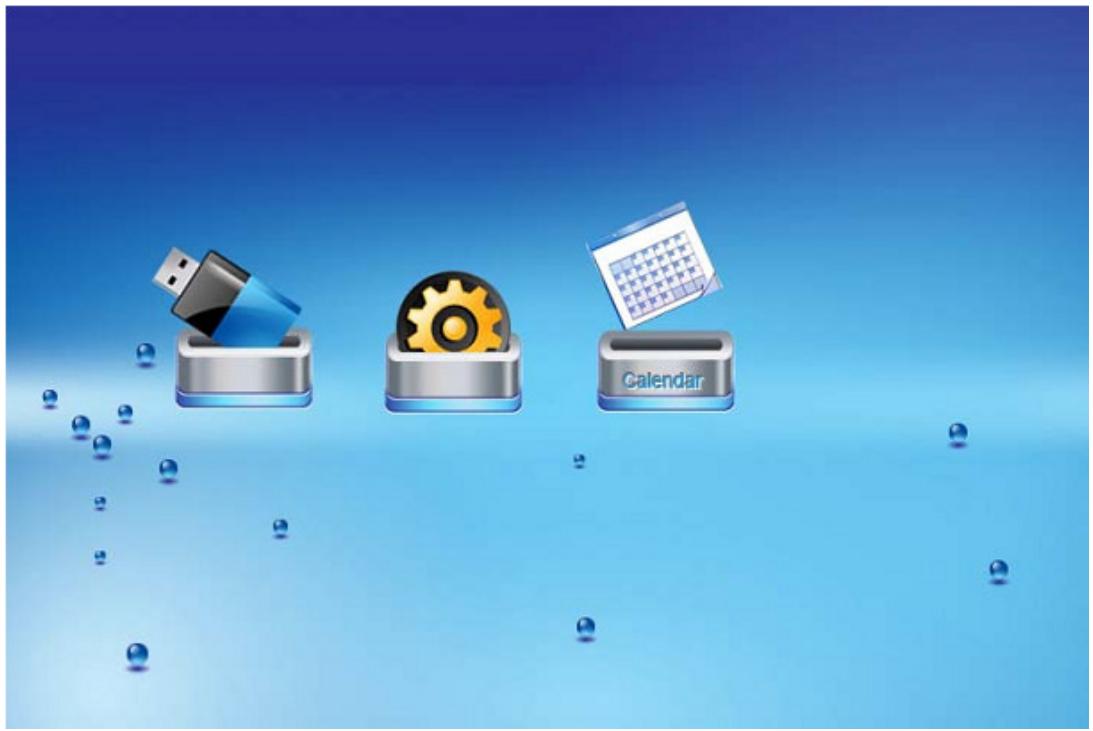
Use the left and right arrows to move inside the menu and then press "Enter" to continue
Note: In all menus, pressing the "Menu" button will bring you back to the main menu
| Function | Description |
| Nand | Play files in internal memory |
| Setup | Set system menu |
| Calendar | Display calendar, clock, alarm |
| SD/MMC/MS/xD | Play files on SD/MMC/MS/xD memory card |
| CF | Play files on CF memory card |
| USB | Play files on USB flash drive |
NOTE: Icons of above functions shall appear automatically on MENU screen when certain memory card is inserted. Icons shall disappear when correspondent card is removed from card slot.
Viewing Pictures
Make sure you have at least one picture on your memory card or your USB flash drive. When this is done:
- Select the desired flash media on main menu. (SD/xD/CF/MS/USB/NAND-Internal Memory)
- Select the "PHOTO" option from the menu and press "ENTER"
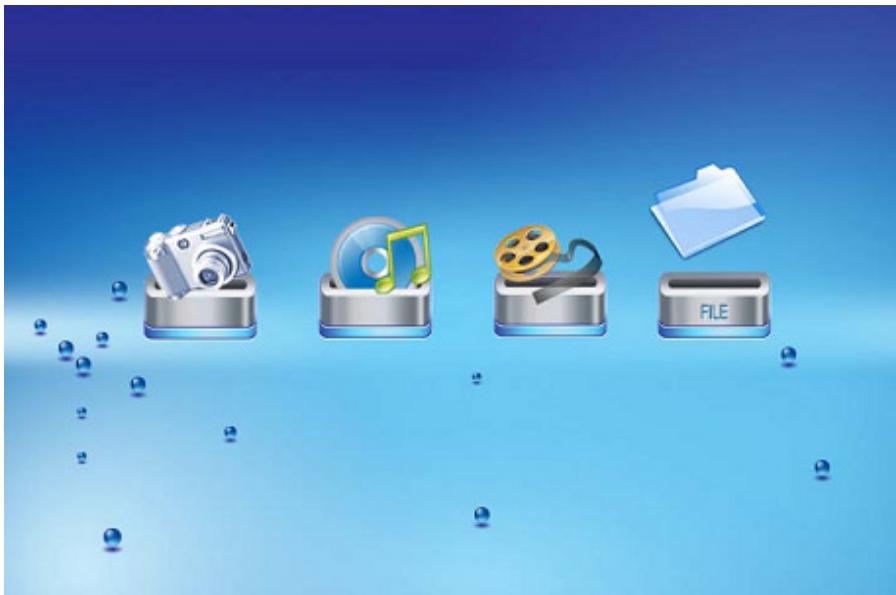
- A Photo thumbnail will appear. User UP/DOWN/LEFT/RIGHT arrows can move the highlight. If the highlighted is a folder, press Enter to enter the folder.
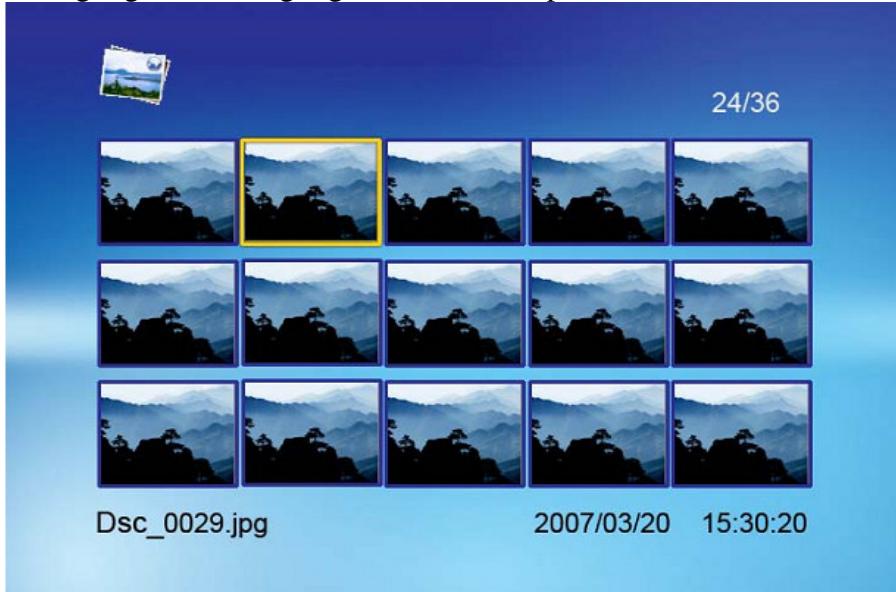
- Otherwise press Enter to enter the full screen photo (pause mode) and press Play to enter into slideshow mode.
- Once a slideshow is playing or a picture is being shown, press the OSD button. The following menu will appear:
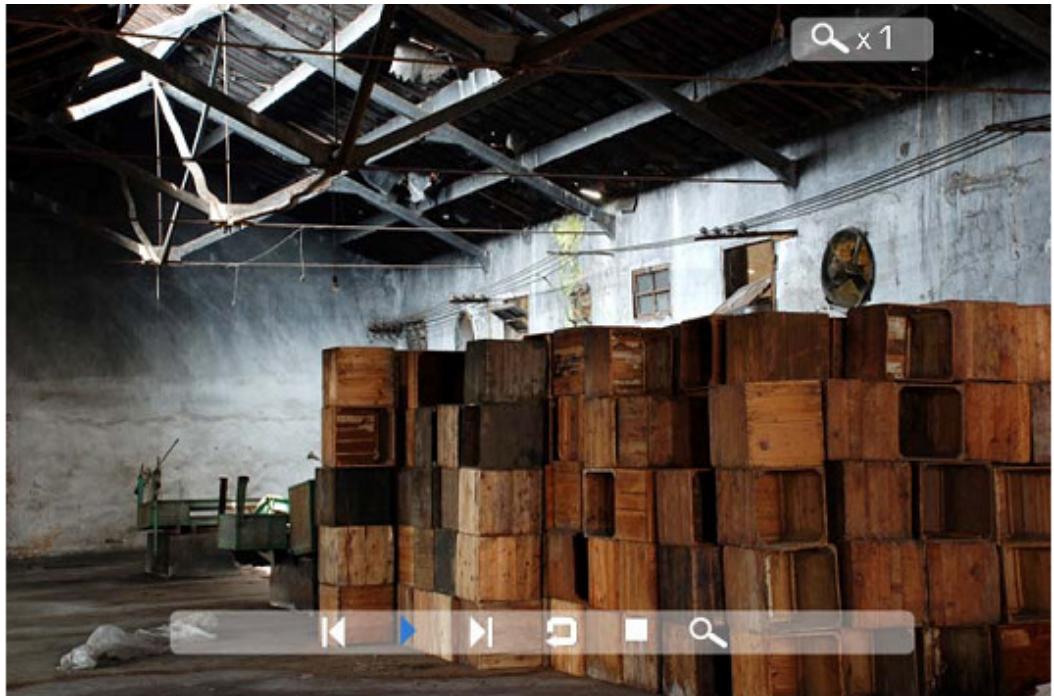
Previous
Play previous picture in the picture list
Play or Pause
Play or pause the current slideshow.
Next
Play next picture in the picture list.
Rotate
Use the rotate function to change the picture orientation to either portrait or landscape.
Stop
Stop slideshow and return to photo thumbnail.
Zoom
Choose the Zoom function to magnify the iamage, Repeat this operation several times to further zoom in.
Watching video
The Digital Picture Frame supports the following video formats:
- Motion JPEG (avi): video format used by most digital cameras MPEG-I &MPEG-2 -w/layer I,II,III(MPG,MPEG,DAT)
MPEG 4-W/MP3 audio (*avi)
Make sure you have at least one video on your memory card or your USB flash drive. When this is done:
- Select the desired flash media on main menu. (SD/xD/CF/MS/USB/NAND-Internal Memory)
- Select the "MOVIE" option from the menu and press "ENTER"
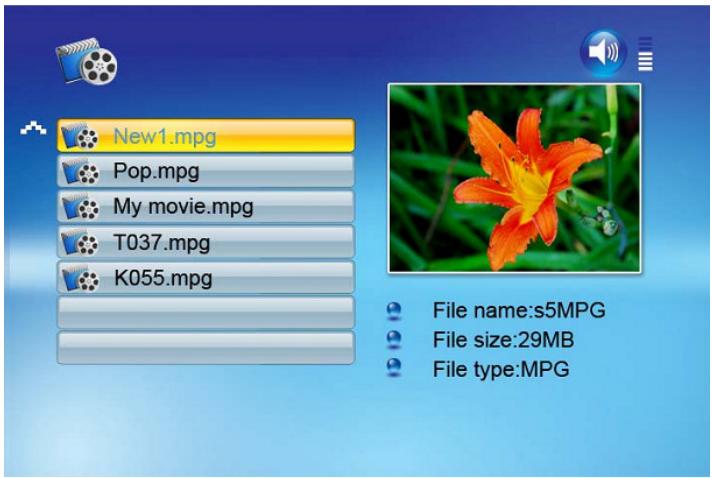
- A list of all movie files will be listed on the left side of the screen. The right side consists of the movie preview window and information display of the current movie. Use Up/Down arrows to select the movie and press Enter to play.
Once a movie is playing, press the OSD button on the remote control. The following menu will appear:
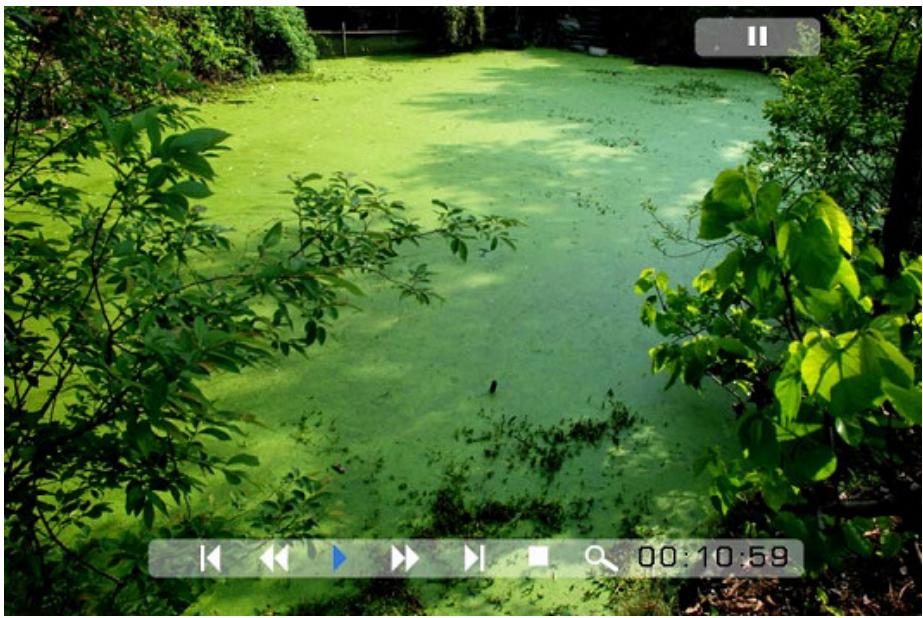
Previous
Play previous movie in the play list
Fast Forward
Play forward the movie by 2/3/4 times speed.
Play or Pause
Play or Pause the movie.
Fast Backward
Play backward the movie by 2/3/4 times speed.
Next
Play next movie in the play list
Stop
Stop the movie and return to the play list
Zoom
Increase the size of the picture by 2/3/4/1 times.
Listening to MP3 music
Make sure you have at least one MP3 file on your memory card or your USB flash drive. When this is done:
- Select the desired flash media on main menu. (SD/xD/CF/MS/USB/NAND-Internal Memory)
- Select the "MUSIC" option from the menu and press "ENTER"
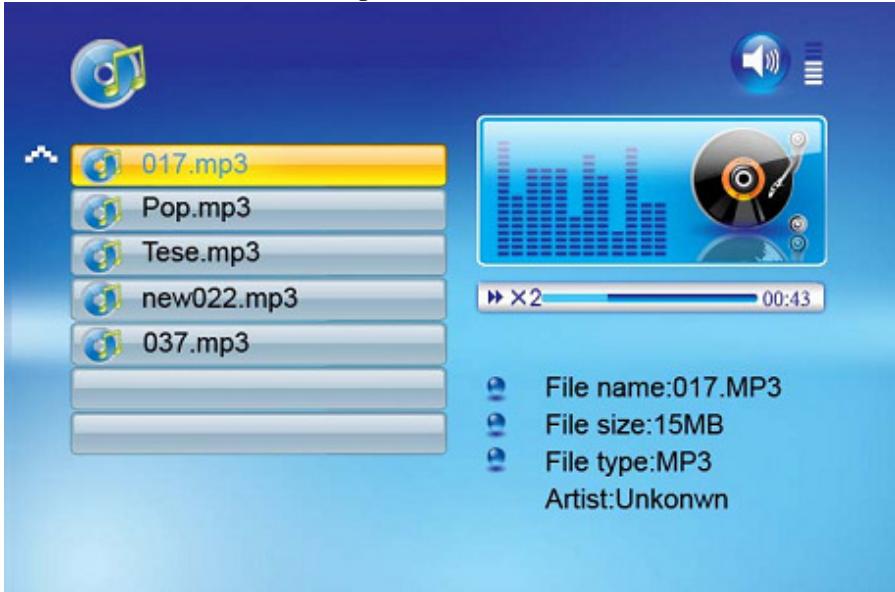
- A list of music files will be listed on the left side of the screen. The right side consists of the frequency chart and information status bar. The song information area is below the status bar. Use the Up/Down arrows to select the music file and press Enter to play.
- Press VOL+ to increase the volume or VOL- to decrease the volume.
- Press the Play/Pause button on remote control to play or pause the music file.
- Press the Stop button on the remote control to return to the list of music files.
File Option
Playing a slideshow with music
Ensure you have at least one picture on your memory card or your USB flash drive. Additionally, you must have one MP3 file saved on the selected memory card/USB/Internal Memory. When this is done:
- Select the desired flash media on main menu. (SD/xD/CF/MS/USB/NAND-Internal Memory)
- Select the "FILE" option from the menu and press "ENTER"
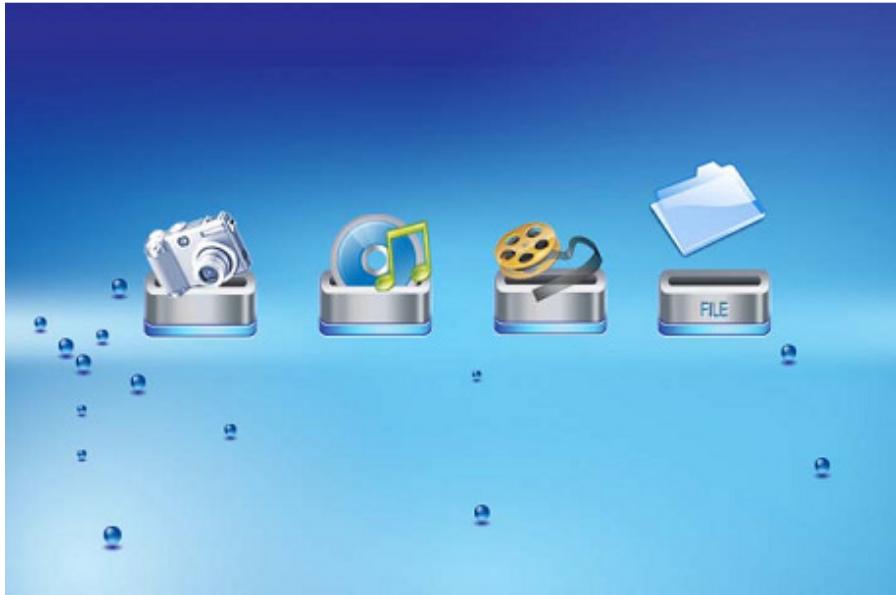
- A list of all files on the selected memory card or internal memory will be listed on the left side of the screen. The right side consists of the file information. Use Up/Down arrows to select a picture file and press Enter to enter a full screen photo (pause mode). Press Play button on the remote control, an audio slideshow will begin automatically.
Once an audio-slideshow is playing, press the OSD button. The following menu will appear:
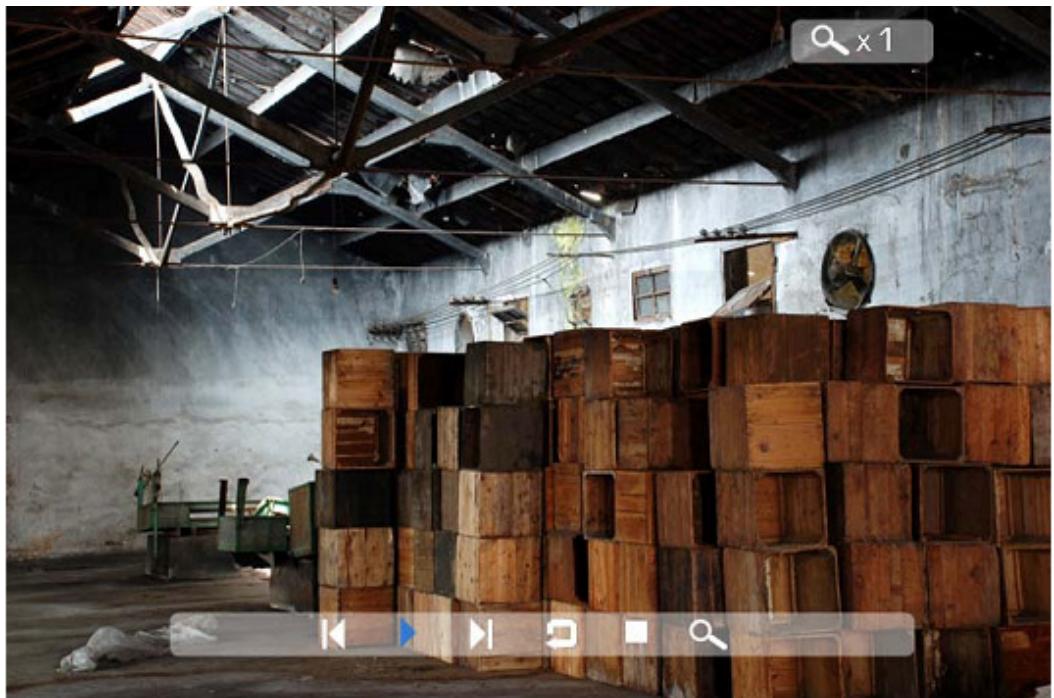
Previous
Play previous picture in the picture list
Play or Pause
Play or pause the current slideshow.
Next
Play next picture in the picture list
Rotate
Use the rotate function to change the picture orientation to either portrait or landscape.
Stop
Stop slideshow and return to photo thumbnail.
Zoom
Increase the size of the picture by 2/4/8/16/1 times.
VOL
Press VOL+ or VOL- on remote control to increase or decrease the volume
Copying and Deleting Files
To copy and delete files on your memory card, USB drive or internal memory.
Copy
- Select the desired flash media on main menu. (SD/xD/CF/MS/USB/NAND-Internal Memory)
- Select the "FILE" option from the menu and press "ENTER"
- A list of available files will be displayed. Use the up and down arrows to highlight your required file and press the right arrow to highlight the desired file. Repeat for all files that you want to copy
- Press the "OSD" button to display the Copy and Delete menu. Select Copy function and Enter.
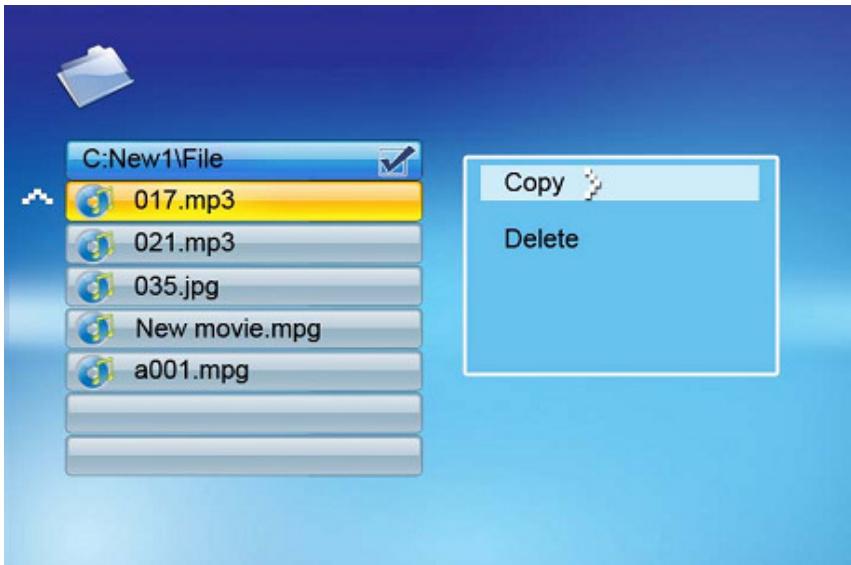
- Use the Up/Down arrows to select the file destination folder. Press Right button to confirm.
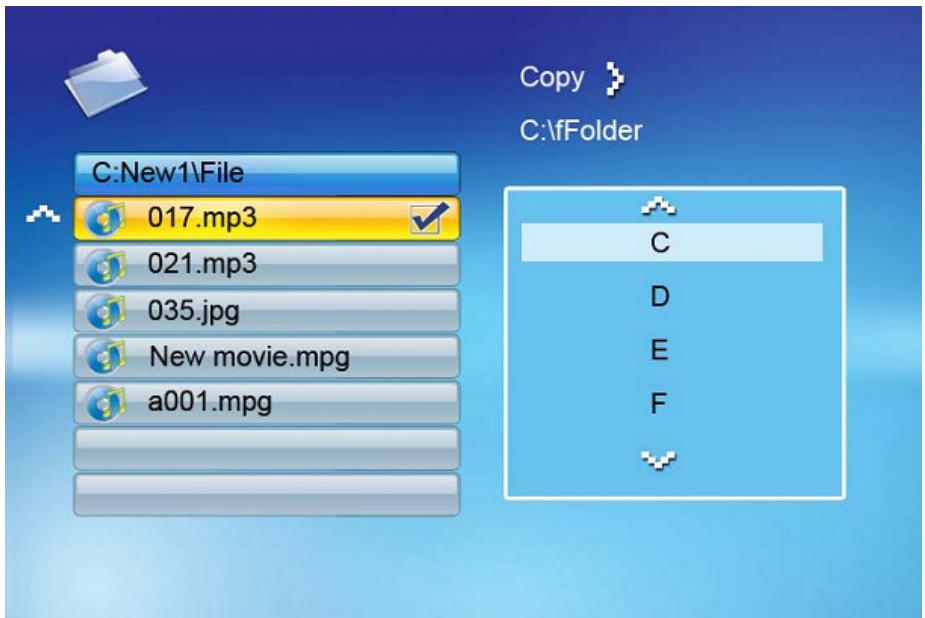
- Press Enter to start copying the file.
Delete
- Select the desired flash media on main menu. (SD/xD/CF/MS/USB/NAND-Internal Memory)
- Select the "FILE" option from the menu and press "ENTER"
- A list of available files will be displayed. Use the up and down arrows to highlight your required file and press the right arrow to highlight the desired file. Repeat for all files that you want to copy
- Press the "OSD" button to display the Copy and Delete menu. Select Delete function and press Enter. File will be deleted.
Using the SETUP option
The following options can be changed by using the "SETUP" option from the main menu:
| Function | Description |
| Language | Includes English, French, Spanish Deutsch, Swedish, Greek, Italian, Turkce. |
| Slideshow time | Slideshow duration: 3s/5s/15s/1mins/15mins/1hour |
| Slideshow mode | Off, Random, Fading, Bottom_to_top, Top_to_bottom, Left_to_right, Right_to_left, Door_close, Door_open, Hori CROSS, Verti CROSS |
| Music Repeat Mode | Repeat one, Repeat all, Repeat off |
| Movie Repeat Mode | Repeat one, Repeat all, Repeat off |
| Display mode | Crop, Stretch, Cinema |
| Time | Year/Month/Date/Time setup |
| Alarm | Alarm Time/Alarm Music/Alarm On/off setup |
| Default | Recover the factory default setup |
Calendar/Clock Display
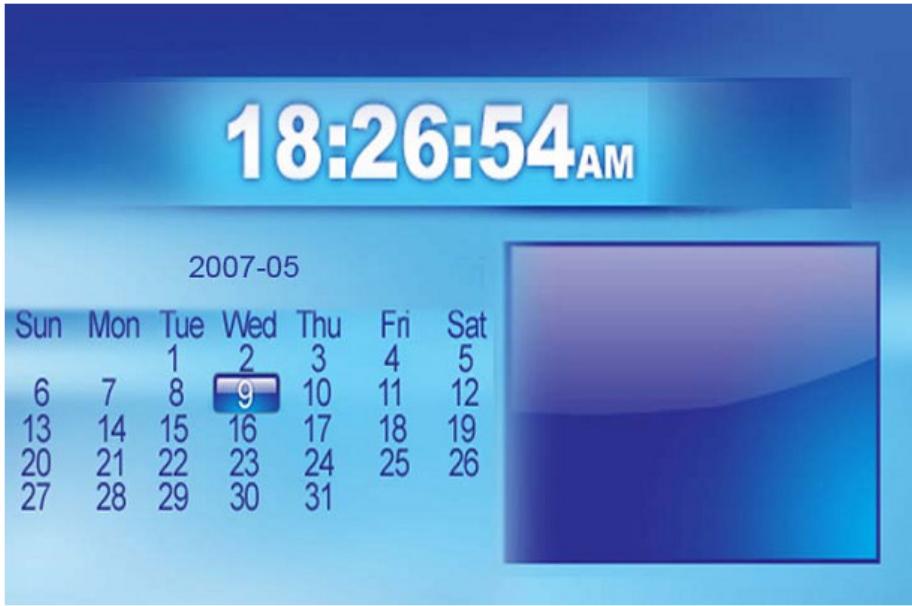
Upon turning on the Digital Picture Frame, you will go straight to the MENU screen. If you select the Calendar/Clock and press Enter, you will go to Calendar/Clock screen. If the Alarm is turned on, it will also show the alarm time. A picture slideshow will begin at the picture preview window at the right part of the screen.
Technical Support
Frequently asked questions
1) Q: Can I use touch-enabled technology for my Digital Picture Frame?
A: The LCD screen does not support touch-enabled technology. Please use the buttons or remote control to control the Digital Picture Frame.
2) Q: If I keep showing the same photo for a long time, will it damage the LCD screen?
A: No. The Digital Picture Frame can display the same photo continuously for a long time. But it is recommended not to show the same picture continuously for more than 1 month.
3) Q: How do I store music files?
A: First, use a personal computer and popular audio editing software to convert your music to MP3 format. The Digital Picture Frame will only play MP3 files so all Windows Media Player™ and/or iTunes™ files will have to be converted first. You can use a card reader or your digital camera to transfer those files to your memory card.
4) Q: Does the Digital Picture Frame have built-in memory?
A: Yes. The Digital Picture Frame has 128 MB built-in memory to store your files.
5) Q: What is the maximum picture size?
A: The Digital Picture Frame is able to display pictures up to 12 Mega Pixels.
7) Q: How come the Digital Picture Frame does not show some of my photos?
A: The Digital Picture Frame is designed to show photos following the same camera industry standards format as digital cameras. This format is a JPEG format. Images, such as web images scanned images, or photos in RAW format, are not stored according to camera industry standards and therefore cannot be displayed correctly on the Digital Picture Frame. Please use your PC applications to convert such images into standard JPEG format before viewing them on the Digital Picture Frame.
Troubleshooting
| Symptom | Cause | Corrective Actions |
| Digital Picture Frame doesn’t power on | The POWER connector to the unit is not securely inserted. | Make sure you connect the AC adapter to the frame properly. When you connect the AC adapter to the frame and power up the unit, even without a memory card, you should see a blank screen. If you don’t see the lit screen, check if the power is connected to the Digital Picture Frame and make sure it is securely attached. |
| No Start-up screen | Memory card is not inserted correctly. | Insert a supported memory card |
| The File doesn’t play | Incompatible File Format | Make sure there is at least one supported photo file on the memory card. • Compatible Photo format: Compatible Photo format: JPEG • Compatible Music format: MP3 • Compatible Video format: Motion JPEG (avi), MPEG1, MPEG2, MPEG4. |
| Video doesn’t play properly | Slow Memory Card | Make sure you use a high-speed memory card to play video files. |
| Small video size on the screen | Low Video Resolution | The best supported resolution of a photo or video is 1024x768. Use the Zoom button on the remote control to enlarge it. |
Specifications
| Type | 15 inch Digital Picture Frame |
| Internal Memory | 128 MB |
| Resolution | 1024x786 |
| Alimentation | 12 V |
| Consumption | 24 Watts |
| Luminosity | 450cd/m2max. |
| Contrast | 450:1 |
| Viewing Angle | 60/60/45/45 (CR=10) |
| Response Time | 10ms |
| Display Mode | 4:3 |
| File Format | JPEG, MPEG1, MPEG2, MP3, MPEG4 |
| Photo Size | 12 Mega Pixels |
| Current | AC110—240V (50HZ—60HZ) |
| Cards | SD/MMC/MS/CF/XD/USB |
| USB ports | USB Host, USB Slave |
| Package Contents | Digital Picture Frame AC/DC Adapter User Guide Remote control USB Cable Stand |
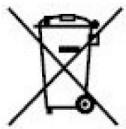
If at any time in the future you should need to dispose of this product please note that: Waste electrical products should not be disposed of with household waste. Please recycle where facilities exist. Check with your Local Authority or retailer for recycling advice. (Waste Electrical andElectronic Equipment Directive)
Inhouds opgave
Helder 15" TFT active matrix LCD scherm.
Secure DigitalTM Card (SD)
MultiMediaTM Card (MMC)
Memory StickTM
CompactFlashTM (CF) Card
XD Picture Cards
Support technique 61
Specifications techniques 63
Introduction
Cartes Secure DigitalTM (SD)
Cartes MultiMedia™ (MMC)
Cartes Memory StickTM
Cartes CompactFlash _TM (CF)
Cartes XD Image
m = 311
- Introduction
- Main Features
- Getting Started
- Package Contents
- Installing your unit
- Connecting to a PC
- Operation
- Controls
- Using your Remote Control
- Inserting Memory Cards
- Main menu
- Viewing Pictures
- Previous
- Play or Pause
- Next
- Rotate
- Stop
- Zoom
- Watching video
- Fast Forward
- Fast Backward
- Listening to MP3 music
- File Option
- Playing a slideshow with music
- VOL
- Copying and Deleting Files
- Copy
- Delete
- Using the SETUP option
- Calendar/Clock Display
- Technical Support
- Frequently asked questions
- Troubleshooting
- Specifications
- Inhouds opgave
Brand : LENCO
Model : DF-1520
Category : Disc player