USER MANUAL MPIX-355 STOREX
OTHERWISE, THE MPIX WOULDN'T WORK ON YOUR TV, THE FILES AND FOLDERS LIST WON'T BE DISPLAYED
CONTENTS
1.PRODUCT CONTENTS: 5
2. WARNING - BEFORE PROCEEDING THE INSTALLATION .... 6
3. INSTALLATION WITH WINDOWS 98/SE 7
4. INSTALLATION WITH WINDOWS ME/2000/XP 9
5. INSTALLATION WITH MAC 8.6, 9.0 X.1 10
6. « CRYPTEXT » SOFTWARE INSTALLATION AND USING INSTRUCTIONS 11
9.TROUBLESHOOTING GUIDE 22
- SPECIFICATIONS 24
- TERMS OF WARRANTY 25
- REGISTERING THE WARRANTY 26
1. Product contents:
the product has to be supplied with :
- The external hard drive Club MPiX-355 USB 2.0 pre-formatted
A remote control
An USB extension cable
Power supply adaptor
A scart plug adaptor
A video / audio cable
An installation CD ROM (PC and MAC)
This user manual
WARNING!
MPIX MUST BE FORMATED ON FAT32, otherwise it' can't be recognize by the computer
2. Warning - before proceeding the installation
- CLUB MPiX-355 is supplied tested and completed: any technical operations involving opening the product or changing the internal hard disk will automatically cancel the warranty contract that covers the product.
- When installing driver is required to use the Pocket-Disk Mpix you have to run all the installation software before connecting the CLUB MPiX-355 to the computer by USB port.
- Fell free to visit our web site www storex.eu in order to find any modification or update about this user's installation and instruction or new firmware for CLUB MPiX-355's peripheral devices.
- Connected by USB interface, CLUB MPiX-355 is compatible with USB 2.0 and USB 1.1 standard. However the data transfer rate up to 480 Mbits/sec is only possible if CLUB MPiX-355 is connected by USB 2.0 interface, otherwise its performance is only 12 Mbits/sec maximum rate with USB1.1 interface.
- Before contacting our technical support or After Sales services, please check first the « Frequently Asked Questions » (F.A.Q) in our website, because your requirement and the resolution according might already exist.
- More over, before return the product to the distributor for repair, we invite you to contact our technical Support to diagnosis your problem: several products returned from the field are not really defective that's what our after sale service has notified.
support@storex.eu
3. INSTALLATION with WINDOWS 98/SE
Before connecting the HDD, you have to run all software and driver, thanks to the supplied software on CD-ROM or from our Internet Web site.

1 - Click on « Install Driver » to run the driver
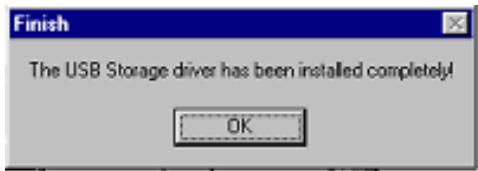
2 - Once the installation is done, the following windows will appear then click on OK
3 - Connect your CLUB MPiX-355
During the USB connection, several windows will appear like:
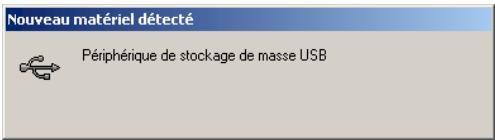
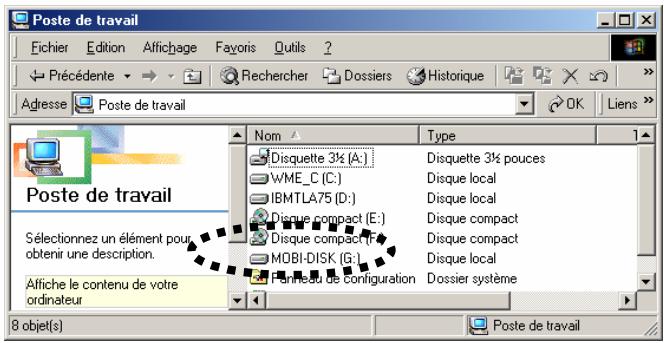
Then the MPIX is recognised as a removable HDD device:
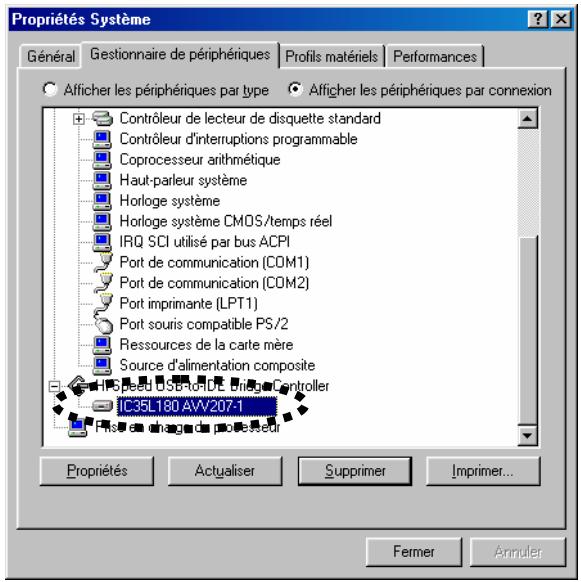
or in Peripherals management you will find:
4. INSTALLATION with WINDOWS ME/2000/XP
With USB interface, CLUB MPiX-355 is automatically recognized without any installation software
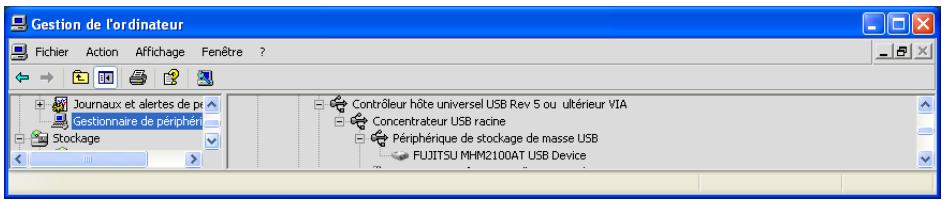
To verify a proper automatically installation, point the mouse to the start menu ["My computer"], , [Management], in the sub menu [Peripheral management], When you choose [Peripheral by connection], you'll get this.
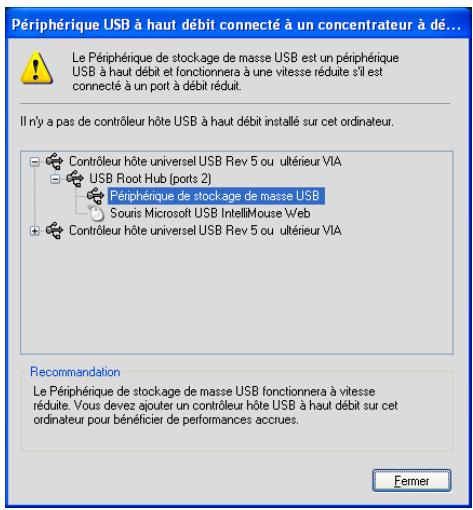
If this message appear :
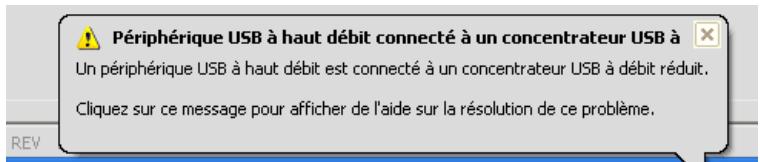
This simply indicates that your player with its USB 2.0 port interface, is connected into a USB 1.1. It will decrease (10 times) his performance but won't change its functioning, nor the data integrity. Then you can close the window by clicking on the cross (or on [Close]).
5. INSTALLATION with MAC 8.6, 9.0 X.1
- Initialise the product before connecting the CLUB MPiX-355.
- Run the driver from the installation CD ROM in the [Mac OS] directory, and in the sub directory which correspond to your new Operating System
- Restart the Mac, then connect the CLUB MPiX-355, which will appear directly on their desktop
MAC X.1
CLUB MPiX-355 is automatically detected by your OS without any other specific driver's installation
6. « Cryptext » software INSTALLATION and Using instructions
This window will appear :
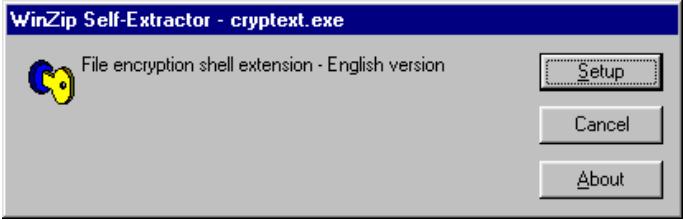
2- Click on « Setup » Icon to begin the installation
The following window will appear :
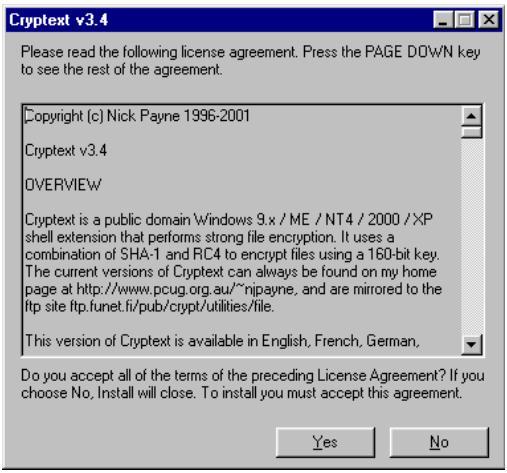
3 - Accept the License Agreement by click on « Yes »
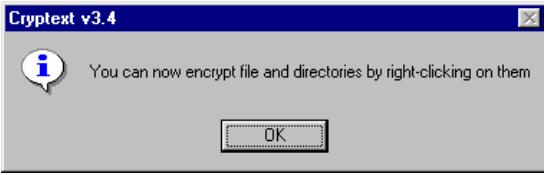
4 - Installation is running. Once it is finished, the following window will appear.
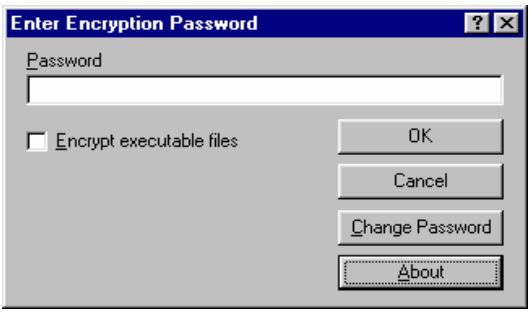
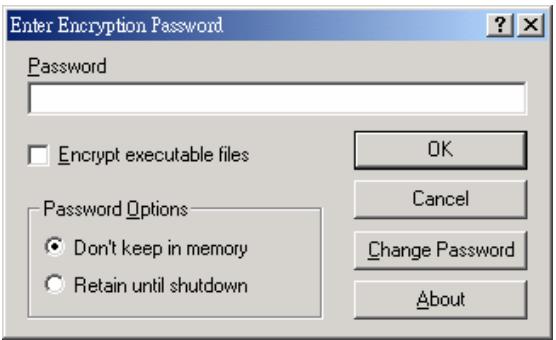
When you want to encrypt or decrypt a file, make a right click with your mouse then choose :
During the first use, choose a password in order to protect your files. This password will be asked each time you want to decrypt a file
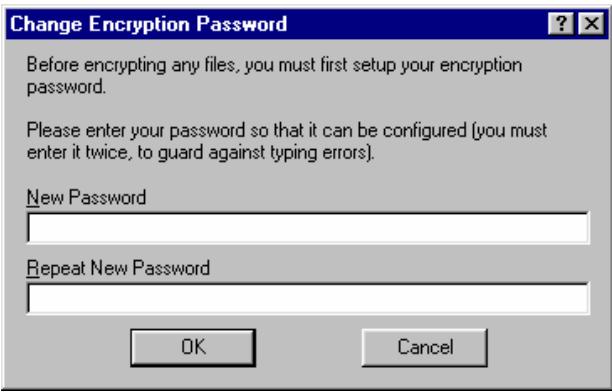
NOTE: Ensure not to forget your password because the program doesn't have a password reminder function.
Interface for Windows 98SE/ME. choose "Encrypt executable file when you want to encrypt files which can be run.
Interface with Windows 2000/XP. select "Encrypt executable file » when you want to encrypt files which can be run
7. How to Use your CLUB MPiX-355
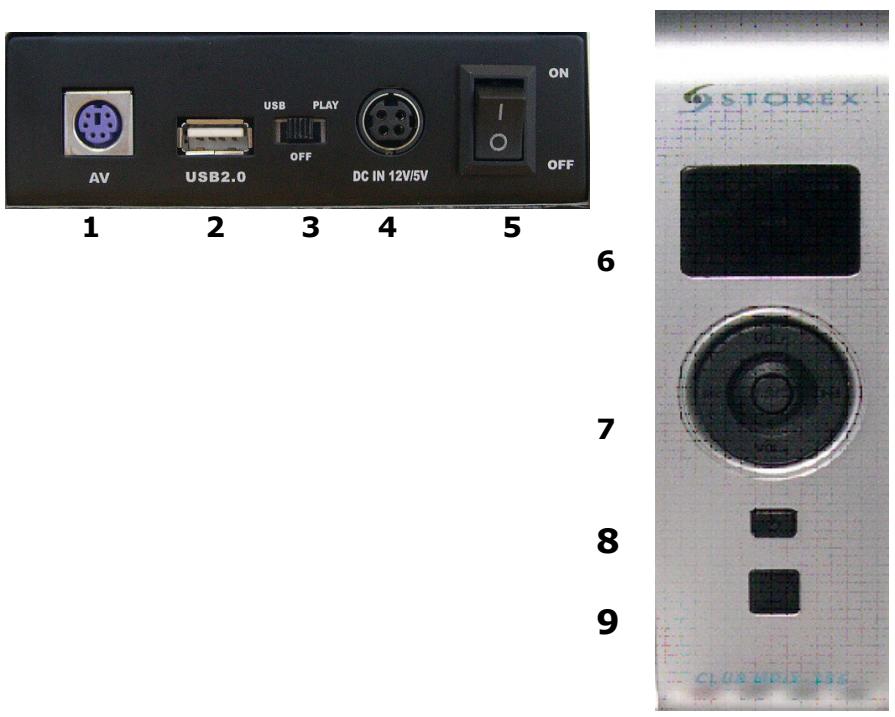
7-1 Buttons and connections
| 1 | AV output | Audio/Video signal output |
| 2 | USB2 | USB 2.0 connection plug |
| 3 | Mode / USB/PLAY | Button switcher to activate : PLAY or USB/OFF Mode |
| 4 | Power plug | Connected to the AC/ADAPTOR |
| 5 | POWER SWITCH | Power on and off the product |
| 6 | LED | ACCESS (Access disk) / STANDBY (Active when shut down the product by remote control or by power button) / POWER (Power ON ) |
| 7 | Menu and navigation buttons | VOL +,- (increase or decrease the volume);
↓/ ↑ (Previous/ Forward) ;
↓/ ↓ (Play/ Pause /STOP) |
| 8 | ON/OFF button | Put the enclosure into « OFF » and “ON” positions, please push at least 3 seconds |
| 9 | IR | I.R Sensor |
. VOL + : Direction key-Up, raise sound volume, keep pressing two seconds to enter into SETUP;
. VOL - : Direction key-Down, lower sound volume, keep pressing two seconds to power off
: Direction key-left, Play previous song, keep pressing two seconds to play fast forwards
: Direction key-right, Play next song, keep pressing two seconds to play fast backwards
Enter key, Pause function, keep pressing two seconds to stop when playing. Keep pressing two seconds to switch to hard disk partition function when no playing
7-2 Remote Control
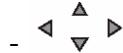
: Directional Key
- VOL +/--: Raise / Lower volume key
- PLAY / ENTER : Playback / Enter key
- PAUSE : Pause playback key
- REW : Fast backward key
- SKIP --: Skip to PREV title key
- MUTE : Audio mute key
- SETUP:Menu setup key
- STOP:Stop playback
- FF : Fast forward key
- SKIP + : Skip to next title key
7-3 Connection methods
. Connect to your computer
Connect HDD player USB2.0 output with computer USB output by USB connection cable HDD player becomes computer local HDD, WINDOWS management directly, can reserve files download from internet and other files.
Remind yourself to plug the second USB port of the « Y » USB extension cable with the 2^nd USB input port of your PC; it will help your MPIX to be power supplied efficiently.
Note :
- When the unit used as removable hard disk, it can't be connected to power supply DC 5.6V
- Supportable systems: WINDOWS XP / WINDOWS ME/WINDOWS 2000, etc. WINDOWS 9X (need to install driver)
- When hard disk is used at the first time, you must press FAT32 to system format.
- Do not simply pull out the USB cable at any time.
7-4 Warning: disconnect from computer
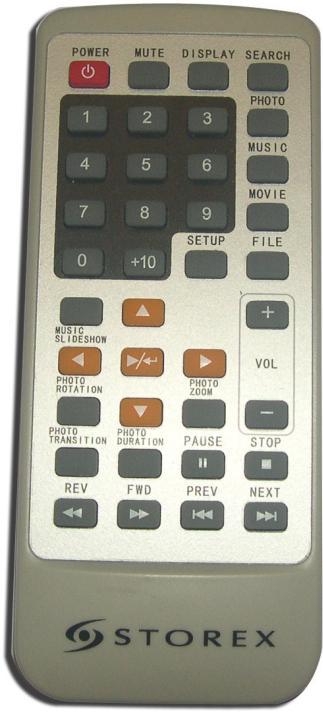
To safely disconnect the unit hard disk, click on the system tray remove icon (green arrow as shown below) and follow the instructions. Wait until you get a message saying that you can safely unplug the device disconnect the USB cable.
Using the green disconnect arrow in the system tray will then allow you to safely disconnect the unit.

then confirm the Disk you want to remove :
When it's done you can remove the device safely
7-6 Connect to TV
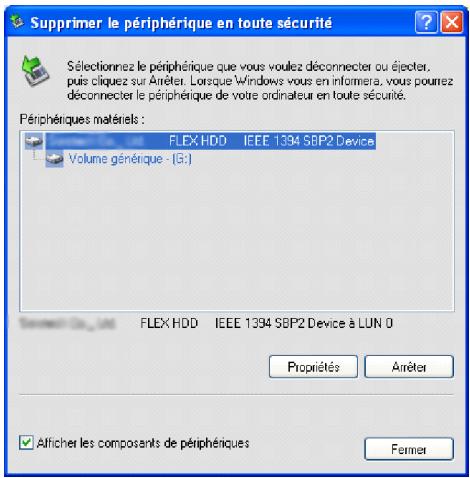
Prepare the AV cable and the scart plug adaptor:
Connect HDD player AV output with TV set AV output by AV cable, HDD player becomes a full set of AV entertainment system.
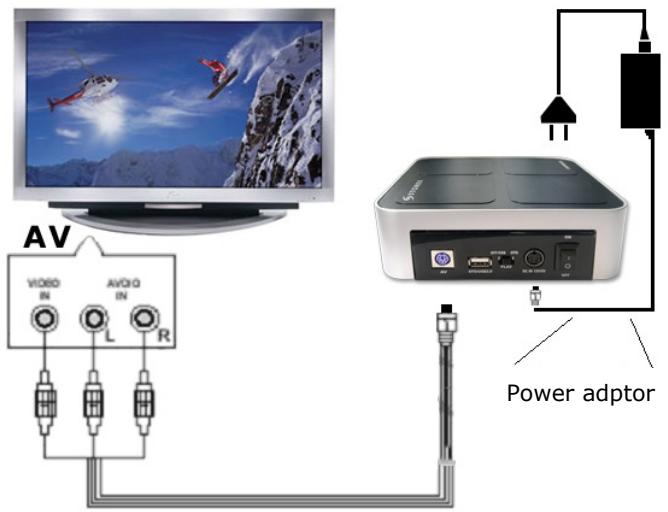
Note :
Use the scart plug adaptor if your TV screen has only a scart plug as AV input. Confirm the Video output is AV mode, not VGA mode. Or use "VGA" key to switch it.
8 Display movies, pictures and play music files
Setup menu makes HDD player characteristics; adjust TV format, languages, etc. Once you finish setup, the unit will work under it. The setup will be restored, even if power cut, except you reset it. General steps for original setup:
- Press remote control "SETUP" key setup menu appears on screen as follows :
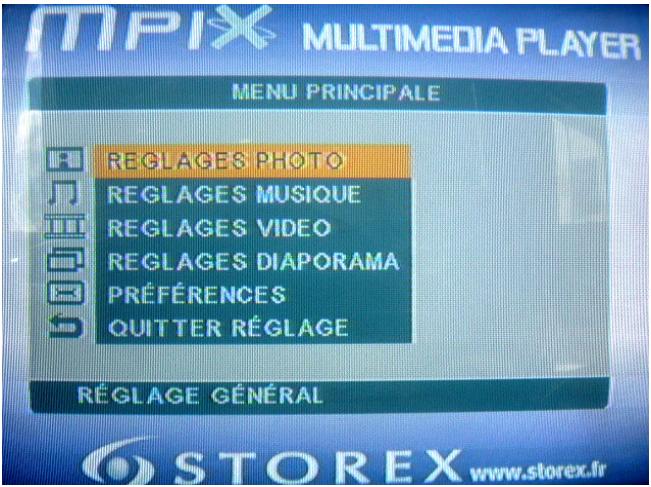
- Press directional keys UP DOWN LEFT RIGHT to select titles, then press "enter" key to confirm HIGHLIGHT selection.
- Press "Exit" or "SETUP" key to exit setup menu display.
8-2 Playing
- HDD player reads hard disk information, screen display: HDD SCANNING HDD player reads catalogues automatically, screen showing signal menu as follows, such as: folder name, file name, music name, etc.
-
Press numeric keys or directional keys UP/DOWN/ LEFT/RIGHT to move highlights to select catalogue or files then press "ENTER" key to confirm your selection
-
STOP / Change disk. Press "STOP" key on remote control or on unit, return to "SIGNAL MENU". Then press "STOP" key on unit to return root catalogue. If hard disk with multi sub-area, press "STOP" key on unit again to switch disk partition.
8-3 Useful keys
- SKIP+ / SKIP- : During playing, press "SKIP+" key on unit or remote control (skip to NEXT title) press it one time, skip to follow NEXT title forward accordingly. During unit playback press" SKIP-" key on unit or remote control ( skip to PREV title), press it one time, skip to PREV title accordingly.
- FAST : During playing, press "FF" or "SKIP+" key three seconds to adjust forward speed, there are 4 kinds of speeds: x2 x4 x6 x8. Press "PLAY" key to return normal playback speed. "REW" key on remote control or press "SKIP" three seconds, fast backward function is contrary with the above function
- PAUSE : During playing, press "PAUSE" key, it will be on the state of pause when press "PAUSE" again or press "PLAY" key to return to normal playback.
- MUTE : During playing, press "MUTE" key, the Audio output will be off, but Video output continually. Press "MUTE" key again to cancel the mute state and the audio output is on.
- Number Key : Press numeric keys to select your favourite program directly.
9.Troubleshooting guide
| Symptom | Possible reasons | Resolutions |
| No power | Power cable destroyed | DC power cable if connected correctly |
| Power on, But unit doesn’t work properly | Restart player | Plug in power supply, or press « RESET » key on unit (XYB-01) |
| No Image | Bad connection | Connecta gain your player as described before |
| Incompatibility Screen and video output | Press the « VGA » key of your remote control |
| Bad display’s format | Select correct display’s format |
| Video cable is not properly connected | Disconnect and reconnect video cable |
NOTE :
Defragment the unit hard disk may be useful after reading or writing to your computer via the USB connection. Make sure no other program is running while using the Windows defragmenter utility. If we find new file names or folder names that we never created, the unit FAT has been corrupted. This is due to the unit shutting down while reading or writing to your computer via the USB connection. You should use the Error Checking utility or the Check Disk utility in the Windows.
| Symptom | Possible reasons | Resolutions |
| No Sound | Audio cable not connected effectively | Connect audio cable effectively |
| Playing pictures rolling up, poor quality pictures | Reset up TV format such NTSC, PAL, ... | Power off first, select correct TV or display format. |
| Programs sources not good | Select good programs sources |
| Remote control doesn't work. | Battery with no power energy or not enough power energy | Install new batteries, ensure using same size of batteries : CR-2025, 3V |
| Battery not installed properly | Install batteries as per correct operation |
| Remote control not point at remote sensor (too long distance or too big angle | Remote control point at remote sensor at a proper distance : within 7m form the front panel ; angle : max 30° |
| Remote Control route malfunction | Remove obstacle |
| USB icon or disc-vol not shown in computer | The hard disk has not been formatted | Format the hard disc in FAT 32 |
| The power supply from computer USB port is not enough | Connect both of USB plugs to computer if it is still not workable please purchase a USB 2.0 HUB |
11. SPECIFICATIONS
| Compatible Operating System | Windows 98 SE, Windows ME, Windows 2000, Windows XP, Mac 8.6 or above (firewire), Mac OS 9.x or above (USB) |
| Power source | Via USB port (4.5V to 5.5V) - 8 watts |
| HDD 2.5 » Capacities | 20 / 40 / 80 / 100 /120 GB or more |
| Video files formats | AVI (Divx 3.x, 4.x, 5.x, Xvid), MPG, SVCD, VCD, VOB |
| Audio files formats | MP3, WMA |
| Picture files format | JPEG |
| LED Light | Green : Club MPiX-355® is connected
Red : data transfer is working |
| Using temperature | 0°C ~ +50°C |
| Transfer data speed | USB 1.1 : 12 Mbits/sec
USB 2.0 : 480 Mbits/sec |
| Storage Temperature | -20°C ~ +80°C |
| Dimensions | 150 mm x 255 mm x 68 mm |
| Certifications | FCC, CE, MIC |
| Warranty Terms | 1 year |
12. TERMS OF WARRANTY
Your CLUB MPiX- 355 player carries a limited one year warranty.
STOREX guarantees your product against any manufacturing and assembly faults. This warranty only applies to the first purchase of a CLUB MPiX-355 by the end-user, and is not transferable if the unit is subsequently sold. The warranty does not cover incompatibilities detected by the end user outside the recommendations for use printed on the box, or incompatibilities arising with other hardware or software installed on the computer to which product is connected.
Proof of purchase must be provided to our staff before STOREX will honour the warranty.
The warranty does not cover breakdowns or faults due to failure to comply with the instructions in this manual, negligence, transformation of the drive, faulty installation or handling, repairs or modifications that are not authorized by STOREX, inappropriate testing, accidents or external factors such as, but not limited to, excessive heat or humidity, power failures or incorrect installation /removal of the CLUB MPiX-355 player
STOREX's only contractual obligation is to repair or replace the faulty product. STOREX cannot be held liable for data loss or its consequences arising from the faulty operation or breakdown of the product. On under any conditions STOREX's financial liability amount won't be more than the price paid for the product by the end user.
The CLUB MPiX-355 player warranty is as defined in this document and its scope cannot be modified, reduced or extended without the written agreement of STOREX, and STOREX cannot be held liable for any technical advice or service provided in relation to your CLUB MPiX-355 player.
You are not the transferee of this guarantee. The warranty covers your CLUB MPiX-355 player, and is governed by French law.
Note: STOREX^TM is allowed to modify without any notice, this user's instructions following evolutions of the product. You can find the newest version of the manual on our company's web site: http://www storex.eu
13. REGISTERING THE WARRANTY
Please take a moment to register the guarantee for your CLUB MPiX-355 at our website:
http://garantie storex.eu
In the event of a breakdown, contact your retailer to have your product repaired under guarantee, or send your request via e-mail to the address support@storex.eu
NOTE :
It's forbidden to put any broken or used electronic products into the bin, please bring it back to the distributor in order to recycle the product.

NOTES :
CLUB MPiX-355
is a product line of

STOREX
www storex.eu
© STOREX -2007
All trademarks are the property of their respective owners.