
ATTIX 140 - Industrial vacuum cleaner NILFISK - Free user manual and instructions
Find the device manual for free ATTIX 140 NILFISK in PDF.

| Product type | Industrial vacuum cleaner |
| Brand | NILFISK |
| Model | ATTIX 140 |
| Power supply | 400 V, 50 Hz, 2.2 kW |
| Net weight | 102 kg |
| Dimensions (L x W x H) | 1530 x 1055 x 670 mm |
| Tank capacity | 60/100 L |
| Maximum vacuum | 3000 mmH2O |
| Maximum airflow | 5100 L/min |
| Primary filter surface area | 1.95 m² |
| Suction diameter | 70 mm |
| Sound level | 71 dB(A) |
| Protection rating | IP55 |
| Insulation class | F |
| Intended use | Suction of dry and liquid substances (with optional kit) |
| Available options | Liquid suction kit, extractable cyclone |
| Maintenance | Manual shaking of primary filter, filter replacement, cleaning of cooling fan |
| Safety | Emergency stop, IP55 protection, mandatory grounding, 30 mA residual current device recommended |
| Spare parts | Filters, gaskets, hoses (available from manufacturer) |
Frequently Asked Questions - ATTIX 140 NILFISK
User questions about ATTIX 140 NILFISK
0 question about this device. Answer the ones you know or ask your own.
Ask a new question about this device
Download the instructions for your Industrial vacuum cleaner in PDF format for free! Find your manual ATTIX 140 - NILFISK and take your electronic device back in hand. On this page are published all the documents necessary for the use of your device. ATTIX 140 by NILFISK.
USER MANUAL ATTIX 140 NILFISK
Operating Instructions
Mode d'emploi
Betriebsanleitung
MANUEL D'INSTRUCTIONS
F
BETRIEBSANLEITUNG
D
Instructions for use 2
Operator safety 2
General information for using the vacuum cleaner 2
Proper uses 2
Dust emissions into the environment 2
General recommendations 2
Vacuum cleaner description. 3
Labels 3
Optional kits. 3
Accessories 3
Packing and unpacking 3
Setting to work - connection to the power supply 4
Extensions 4
Wet and dry applications 5
Maintenance and repairs. 5
Technical data 6
Dimensions 6
Controls, indicators and connections 6
Inspection prior to starting 6
Starting up 6
Shaking the main filter 7
Emergency stopping 7
Emptying the container. 7
Wet vacuuming kit assembly 7
At the end of a cleaning session 8
Maintenance, cleaning and decontamination 8
Filter disassembly and replacement 8
Filter replacement. 8
Motor cooling fan inspection and cleaning 9
Seal inspection 9
Separator cleaning and replacement (if equipped) 9
Vacuum cleaner disposal 9
Wiring diagrams 9
Troubleshooting 10
Instructions for use
Read the operating instructions and comply with the important safety recommendations identified by the word WARNING!
Operator safety

WARNING!


Before starting the vacuum cleaner, it is absolutely essential to read these operating instructions and to keep them ready at hand for consultation.
The vacuum cleaner can only be used by people who are familiar with the way it works and who have been explicitly authorized and trained for the purpose. Before using the vacuum cleaner, operators must be informed, instructed and trained on how to work it and for which substances its usage is permitted including the safe method for removing and disposing of the vacuumed material.

WARNING!

The use of vacuum cleaner by people (including children) with limited physical and mental capacities or lacking in experience and knowledge is strictly forbidden, unless they are supervised by a person who is experienced in the use and safe handling of the machine.
Children must be supervised to make sure they will not play with the machine.
General information for using the vacuum cleaner
Use of the vacuum cleaner is governed by the laws in force in the country where it is used.
Besides the operating instructions and the laws in force in the country where the vacuum cleaner is used, the technical regulations for ensuring safe and correct operation must also be observed (Legislation concerning environmental and labour safety, i.e. European Union Directive 89/391/EC and successive Directives). Do not carry out any operation that could jeopardize the safety of people, property and the environment. Comply with the safety indications and prescriptions in this instruction manual.
Proper uses
The vacuum cleaners described in this instruction manual are designed for industrial use. The produced version (normal version) is not suitable for vacuuming hazardous, combustible/ explosive dust. This vacuum cleaner can also be produced in the variant for vacuuming liquids, with level monitoring function.
Dust emissions into the environment
Indicative values of performance:
normal version (not suitable for vacuuming hazardous dust): retains at least 99.1% of particles measuring ≥ 3 m
General recommendations

WARNING!

Risk of fire outbreaks and explosions.
The vacuum cleaner can only be used when it is certain that active sources of ignition are not going to be vacuumed.
It is forbidden to vacuum the following materials:
- burning materials (embers, hot ashes, lighted cigarettes, etc.);
- flammable liquids, aggressive fuels (e.g. gasoline, solvents, acids, alkaline solutions, etc.).
It is forbidden to vacuum the following materials: explosive dust or ones liable to ignite in a spontaneous way (such as magnesium or aluminium dusts, etc.).
The vacuum cleaner is not suitable for vacuuming explosive or similar substances, as established by the laws governing explosive substances, particularly: liquid fuels and mixtures of flammable dust and liquids.

WARNING!

Emergency
If an emergency situation occurs:
filter breakage;
■ fire outbreak;
short-circuit;
motor block;
electric shock;
etc.;
Turn off the vacuum cleaner, unplug it and ask for assistance from qualified personnel.

WARNING!

The vacuum cleaners must not be used or stored outdoors, or in damp places. Only versions with the level sensor can be used for liquids, if not, they can only be used to vacuum dry materials.

WARNING!

Version for liquids. If foam or liquid spills from the vacuum cleaner, switch it off immediately and check for the cause.
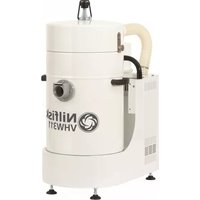
Vacuum cleaner description
Labels
Figure 1
1 Identification plate
Code of the model which includes technical specifications, serial number, EC marking, year of manufacture
2 Suction union hose
3 Control panel (normal version)
4 Control panel (version for vacuuming liquids)
5 Dust container
6 Filtering chamber
7 Exhaust
8 Attention plate
Draws the operator's attention to the fact that the filter must only be shaken when the vacuum cleaner is off. Failing this, the shaking would have no effect while the filter itself could be damaged.
9 Panel power plate
Indicates that the panel is powered by the voltage given on the data plate.
10 Inlet
This vacuum cleaner creates a strong air flow which is drawn in through the inlet (10) and blows out through the exhaust (7). After the hose and tools have been fitted, make sure that the motor turns correctly.
Before turning on the vacuum cleaner, fit the vacuum hose into the inlet and then fit the required tool on to the end part. Refer to the manufacturer's accessory catalogue or Service Centre.
This vacuum cleaner is equipped with an internal baffle plate which subjects the vacuumed substances to a circular centrifugal movement that makes them drop into the container. The vacuum cleaner is equipped with a filter which enables it to be used for the majority of applications.
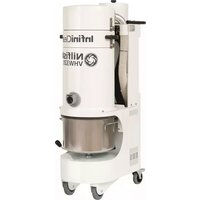
Optional kits
Various optional kits are available for converting the vacuum cleaner:
Level gauge for liquids suction/stop
Removable separator
On request, the vacuum cleaner can be supplied with optional kits already installed. However, they can also be installed at a later date.
Please contact the manufacturer's sales network for further details.
Instructions to install parts on request are included in the conversion kit.

WARNING!

Use only genuine optional supplied and authorized by the manufacturer.
Accessories
Various accessories are available; refer to the manufacturer's accessory catalogue.

WARNING!

Use only genuine accessories supplied and authorized by the manufacturer.
Packing and unpacking
Dispose of the packing materials in compliance with the laws in force.
Figure 2
| Model | A (mm) | B (mm) | C (mm) | Kg |
| ATTIX 140 | 1.200 | 700 | 1.700 | 122 |
| ATTIX 150 | 1,200 | 700 | 1,700 | 147 |
Setting to work - connection to the power supply

WARNING!

Make sure that the vacuum cleaner is in perfect condition before commencing work.
Before plugging the vacuum cleaner into the electrical mains, make sure that the voltage rating indicated on the data plate corresponds to that of the electrical mains.
Plug the vacuum cleaner into a socket with a correctly installed ground contact/connection. Make sure that the vacuum cleaner is off.
The plugs and connectors of the connection cables must be protected against splashed water.
Make sure that connections to the electrical mains and plug are correct.
Use the vacuum cleaners only when the cables that connect to the electrical mains are in perfect condition (damaged cables could lead to electric shocks!).
Regularly check that the electric cable does not show signs of damage excessive wear, cracks or ageing.

WARNING!

When the vacuum cleaner is operating:
- Do not crush, pull, damage or tread on the cable that connects to the electrical mains.
Only disconnect the cable from the electrical mains by removing the plug (do not pull the cable).
Only replace the electric power cable with one of the same type as the original: HO7 RN - F. The same rule applies if an extension is used.
The cable must be replaced by the manufacturer's Service Centre staff or by equivalent qualified personnel.
Extensions
If an extension is used, make sure it is fit for the power draw and protection degree of the vacuum cleaner.
Minimum section of extension cables:
Maximum length = 20m
Cable = HO7 RN - F.
| Max power (kW) | 3 | 5 | 15 | 22 |
| Minimum section (mm2) | 2.5 | 4 | 10 | 16 |

WARNING!

Sockets, plugs, connectors and installation of the extension cable must maintain the IP protection degree of the vacuum cleaner, as indicated on the data plate.

WARNING!

The vacuum cleaner's power socket must be protected by a differential circuit-breaker with surge current limitation, that shuts off the power supply when the current dispersed towards ground exceeds 30mA for 30 ms or an equivalent protection circuit.

WARNING!

Never spray water on the vacuum cleaner: such action constitutes a danger hazard for persons and could short circuit the power supply. Consult the latest edition of the European Union Directives, the Laws in the country of use and the current standards in force (UNI - CEI - EN), particularly European standard EN60335-2-69.
Wet and dry applications
[NOTE]
The supplied filter must be correctly installed.
If the vacuum cleaner is used to vacuum liquids, make sure that the liquid level sensor activates and operates in the correct way.
![NILFISK ATTIX 140 - [NOTE] - 1](/content/2024/12/153369/images/f448895f2fcde2c5959da55bdf28a04a07881de1ccd143dfd2326dc766121a9a.jpg)
WARNING!

Comply with the safety regulations governing the materials for which the vacuum cleaner is used.

WARNING!

If the version for liquids is used:
Make sure that the liquid level sensor operates correctly before vacuuming liquids.
If foam forms, stop the vacuum cleaner immediately and empty the container.
Warning: Switch off the vacuum cleaner immediately if foam or liquid leaks out.
Regularly clean the liquid level limiting device and check to make sure that there are no signs of damage.
Warning: the dirty liquid collected by the vacuum cleaner must be considered conductive.
Maintenance and repairs

WARNING!

Disconnect the vacuum cleaner from its power source before cleaning, servicing, replacing parts or converting it to obtain another variant, the plug must be removed from the socket.
- Carry out only the maintenance operations described in this manual.
Use only original spare parts. - Do not modify the vacuum cleaner in any way. Failure to comply with these instructions could jeopardize your safety. Moreover, such action would immediately void the EC declaration of conformity issued with the vacuum cleaner.

WARNING!

To carry out maintenance operations which are not described in this manual contact the manufacturer's Service Centre or our sales network.
Technical data
Dimensions
| Parameter | Unit | ATTIX 140 | ATTIX 150 |
| Voltage (50 Hz) | V | 400 | 400 |
| Power rating | kW | 2,2 | 4 |
| Noise level | dB(A) | 71 | 74 |
| Protection | IP | 55 | 55 |
| Insulation | Class | F | F |
| Capacity | L | 60/100 | 100 |
| Inlet (diameter) | mm | 70 | 70 |
| Max vacuum | mmH₂O | 3000 | 3000 |
| Maximum air flow rate (without hose and reductions) | L/min' | 5.100 | 8600 |
| Main filter surface | m² | 1,95 | 1.95 |
Figure 3
Figure 6
| Model | ATTIX 140 | ATTIX 150 |
| A (mm) | 1.530 | 1530 |
| B (mm) | 1.055 | 1055 |
| C (mm) | 670 | 670 |
| Kg (1) | 102 | 127 |
(1) Net weight
[NOTE]
Storage conditions:
Temperature: -10^ ÷ +40^
Humidity: ≤ 85%
Operating conditions:
Maximum altitude: 800 m
(Up to 2,000 m with reduced performances)
Temperature: -10^ ÷ +40^
Humidity: ≤ 85%
Controls, indicators and connections
Figure 4
1 Container release lever
2 Castor lever
3 Manual filter shaker knob
4 Start/stop switch (normal version)
5 Start/stop switch (version for vacuuming liquids)
Inspection prior to starting
Figure 5
1 Inlet
Prior to starting, check that:
The filter is installed.
All latches are tightly locked.
The vacuum hose and tools have been correctly fitted into the inlet (1).
The bag or safety container is installed, if applicable.
Do not use the vacuum cleaner if the filter is faulty.
Starting up
1 Castor brakes
2 Start switch (normal version)
3 Start switch (version for vacuuming liquids)
Lock the castor brakes before starting the vacuum cleaner (1).
Starting/stopping the vacuum cleaner
Normal version
Turn the switch (2) to "I" position to start the vacuum cleaner.
Turn the switch to "0" position to turn the vacuum cleaner off.
Version for vacuuming liquids
Turn the switch (3) to "1" position to start the vacuum cleaner.
Turn the switch to "0" position to turn the vacuum cleaner off.
Shaking the main filter
Figure 7
1 Main filter operating knob
Depending on the quantity of dust cleaned up, shake the main filter by means of the knob (1).

WARNING!

Stop the vacuum cleaner before shaking the filter. Do not shake the filter while the vacuum cleaner is on, as this could damage the filter itself.
Emergency stopping
Turn the main switch to "0" position.
Emptying the container

WARNING!

Before proceeding with these operations, turn off the vacuum cleaner and remove the plug from the power socket.
Before emptying the container it is advisable to clean the filter (see "Shaking the filter" paragraph).
Figure 8
1 Dust container
Normal version
Release the container (1), then remove and empty it.
Make sure that the gasket is in perfect condition and correctly positioned.
- Place the container back in position and use the lever to secure it again.
Version for vacuuming liquids
Make sure that the vacuum cleaner is equipped with a liquid level sensor and is suitable for vacuum liquids. Do not vacuum flammable liquids.
If foam forms, turn off the vacuum cleaner immediately and empty the container. The filter element will be wet after liquids have been vacuumed. A wet filter element can quickly become clogged if the vacuum cleaner is then used to vacuum dry substances. For this reason, make sure that the filter element is dry or replace it with another one before using the vacuum cleaner for dry materials.
Wet vacuuming kit assembly
Figure 9
1 Cable
2 Cable
3 Control panel
4 Support
5 Control panel
Control panel replacement
- Disconnect the cables (1) and (2) from the control panel (3).
Disassemble the control panel (3).
Install the support (4) on the frame.
Install the control panel (5) on the support (4). - Connect the cables (1) and (2) to the control panel (5).
Figure 10
1 Hole
2 Hole
Filtering chamber drilling
- Drill holes (1) and (2) as shown in the figure.
Figure 11
1 Hole
2 Hole
3 Hose
4 Hose
5 Pressure switch
Hose connection
Install the supplied unions into the holes
(1): control panel side
(2): opposite side of control panel
- Connect the hoses
(3): to the union installed into the hole (1) and to the pressure switch (5)
(4): to the union installed into the hole (2) and to the pressure switch (5) (electrical connection side).
Stop due to "container full"
When the liquid container is full, the vacuum cleaner automatically stops. To start the vacuum cleaner again:
Empty the container.
- Reinsert the container.
- Turn the switch to "0" position, then to "1" position.
At the end of a cleaning session
Turn off the vacuum cleaner and remove the plug from the socket.
Wind the connection cable around the cable carrier (Figure 12).
- Empty the container as described in the "Emptying the container" paragraph. Clean the vacuum cleaner as described in the "Maintenance, cleaning and decontamination" paragraph.
- Wash the container with clean water if aggressive substances have been vacuumed.
Store the vacuum cleaner in a dry place, out of reach of unauthorized people.
Maintenance, cleaning and decontamination

WARNING!

The precautions described below must be taken during all the maintenance operations, including cleaning and replacing of the filter.
To allow the user to carry out the maintenance operations, the vacuum cleaner must be disassembled, cleaned and overhauled as far as is reasonably possible, without causing hazards for the maintenance staff or other people. The suitable precautions include decontamination before disassembling the vacuum cleaner, adequate filtered ventilation of the exhaust air from the room in which it is disassembled, cleaning of the maintenance area and suitable personal protection.
Compartments that are not dust-tight must be opened with suitable tools (screwdrivers, wrenches, etc.) and thoroughly cleaned.
- Carry out a technical inspection at least once a year, e.g.: check the air filter to find out whether the air-tightness of the vacuum cleaner has been impaired in any way and make sure that the electric control panel operates correctly. This inspection must be carried out by the manufacturer or by a competent person.

WARNING!

Use only genuine spare parts supplied and authorized by the manufacturer.
Filter disassembly and replacement

WARNING!

When the vacuum cleaner is used to vacuum hazardous substances, the filters become contaminated, thus:
Work with care and avoid spilling the vacuumed dust and/or material;
Place the disassembled and/or replaced filter in a sealed plastic bag;
Close the bag hermetically;
Dispose of the filter in accordance with the laws in force.

WARNING!

Filter replacement is a serious matter. The filter must be replaced with one of identical filtering surface characteristics.
Otherwise the vacuum cleaner will not operate correctly.
Filter replacement
Figure 13
1 Vacuum hose
2 Lever
3 Cover
Before proceeding with these operations, turn off the vacuum cleaner and remove the plug from the power socket.
Remove the vacuum hose (1).
Use the lever (2) to remove the lid (3) together with the filter.
Remove the old filter from the cage.
Fit the new filter and secure it in the cage with special clamps.
Install the cover and the filter in the reverse order of removal.
Dispose of the old filter according to the laws in force.
Motor cooling fan inspection and cleaning
Periodically clean the motor cooling fan to prevent the motor from overheating, especially if the vacuum cleaner is used in a dusty place.
Seal inspection
Figure 14
1 Hose
2 Hose
Hoses check
Make sure that connecting hose (1) is in a good condition and correctly fixed.
If the hose is damaged, broken or badly connected to the unions, it must be replaced.
When sticky materials are treated, check for possible clogging along the hose (2), in the inlet and on the baffle plate inside the filtering chamber.
Scrape the inlet from the outside and remove the deposited waste as indicated in the figure.
Figure 15
1 Gasket
2 Screws
3 Filtering chamber
Filtering chamber tightness check
If the gasket (1) between the container and the filtering chamber (3) fails to guarantee tightness:
- Loosen the four screws (2) that lock the filtering chamber (3) against the vacuum cleaner structure.
- Allow the filtering chamber (3) to lower down and tighten the screws once it has reached the tightness position (2).
The gasket (1) must be replaced if it is torn, cut, etc...
Replace the gasket (1) if the degree of tightness is still not optimum.
Separator cleaning and replacement (if equipped)
Figure 16
1 Separator
2 Lever
3 Cover
4 Screws
[NOTE]
If there is only a dust deposit on the separator (1) allow the dust to drop through the central hole.
The separator (1) should first be disassembled in order to be perfectly cleaned:
Use the lever (2) to remove the lid (3) together with the filter.
- Unscrew the two screws (4) and remove it from the container.
Replace the part if it is excessively worn. Assemble the components in the reverse order of disassembly.
Vacuum cleaner disposal
Figure 17
Dispose of the vacuum cleaner in compliance with the laws in force.
- Proper disposal (electric and electronic waste) (applicable in the European Union and in countries providing a separate collection system)
The above symbol, which is present on the product or o in its documentation, indicates that the product can not be disposed of together with other domestic waste at the end of its cycle of life.
To prevent damages to the environment or the health caused by improper waste disposal, please separate this product from other waste and recycle it responsibly in order to support the sustainable reuse of material resources. Domestic users should contact the retailer or the local office providing information on separate collection and recycling of this product.
Companies should contact the supplier and check the purchase contract terms and conditions.
This product can not be disposed of together with other commercial waste.
Wiring diagrams
Basic vacuum cleaner
Figure 18
1 Plug
2 Vacuum cleaner
3 Circuit breaker
Figure 19
| Name | Part | Code | |
| ATTIX 140 | ATTIX 150 | ||
| Q1 | Circuit breaker | 8 391156 | 8 391157 |
| Box for Q1 | 8 391052 | 8 391052 | |
Wet vacuuming kit
1 Power supply
2 Transformer
3 Liquid sensor
4 Auto release
5 Vacuum cleaner
6 Circuit breaker
| Name | Part | Code | |
| ATTIX 140 | ATTIX 150 | ||
| Q1 | Circuit breaker | 8 39915 | 8 39916 |
| Handle for Q1 | 8 39954 | 8 39954 | |
| B1 | Auto release | 8 391142 | 8 391142 |
| PR1 | Pressure switch | 8 40841 | 8 40841 |
| F1 - F2 | Fuse holder | 8 39244 | 8 39244 |
| TR1 | Transformer | 8 391050 | 8 391050 |
Troubleshooting
| Fault | Causes | Remedies |
| The vacuum cleaner suddenly stops | Clogged main filter | Shake the filter. Replace it if this is not sufficient. |
| Clogged vacuum hose | Check the vacuum hose and clean it. | |
| Circuit breaker activation | Check the setting. Check the motor electrical input. Empty the container. Contact an authorized after-sales service centre if necessary. | |
| Dust leaks from the vacuum cleaner | The filter is torn | Replace it with another of identical category. |
| Electrostatic current on the vacuum cleaner | Non existent or inefficient grounding | Check all ground connections. Especially check the inlet. Lastly, the hose must be strictly antistatic. |
| Liquid leaks from the vacuum cleaner | The level monitoring function does not work | Contact an authorized Service Centre. |
| The vacuum cleaner does not start after emptying the container | The level monitoring hose is clogged | Release the container and clean the level sensor. |
Index
Mode d'emploi 2
Part of the Nilfisk-Advance Group
4080 B Sladeview Crescent, Unit 1
Mississauga, Ontario L5L 5Y5
Tel.: +1 905 569 0266
Fax: +1 905 569 8586
CHINA
Nilfisk-Advance (Shenzhen) Ltd.
Blok 3, Unit 130 1001 Honghua Road
Int. Commercial & Trade Center
Fuitian Free Trade Zone
518038 Shenzhen
Tel.: +86 755 8359 7937
Fax: +86 755 8359 1063
CZECH REPUBLIC
ALTO Ceska Republika s.r.o.
Zateckych 9
14000 Praha 4
Tel.: +420 24 14 08 419
Fax: +420 24 14 08 439
E-mail: info@alto-cz.com
DENMARK
Nilfisk-ALTO
Division of Nilfisk-Advance A/S
Industrivej 1
9560 Hadsund
Tel.: +45 7218 2100
Fax: +45 7218 2105
E-mail: salq@nilfisk-alto.dk
E-mail: service@nilfisk-alto.dk
www.nilfisk-alto.dk
Nilfisk-ALTO Food division
Division of Nilfisk-Advance A/S
Blytaekkervej 2
9000 Aalborg
Tel.: +45 7218 2100
Fax: +45 7218 2099
E-mail: scanio.techology@nilfisk-alto.dk
FINLAND
Division of Nilfisk-Advance BV
Camastraat 9
3322 BB Almere
Tel.: +31 36 546 07 60
Fax: +31 36 546 07 61
E-mail: info@nilfisk-alto.nl
www.nilfisk-alto.nl
HONG KONG
Nilfisk-Advance Ltd.
2001 HK Worsted Mills Ind'l Bldg.
31-39 Wo Tong Tsui St.
Kwai Chung
Tel.: +852 2427 5951
Fax: +852 2487 5828
HUNGARY
Nilfisk-Advance Kereskedelmi Kft.
Sintra Business Park
Zona Industrial Da Abrunheira
Edificio 1, 1^ A
P2710-089 Sintra
Vyatskaya str. 27, bld. 7
127015 Moskow
Tel.: +7 495 783 96 02
Fax: +7 495 783 96 03
E-mail: info@nilfisk-advance.ru
SINGAPORE
Nilfisk-Advance Pte. Ltd.
Nilfisk-ALTO Division
40 Loyang Drive
Singapore 508961
Tel.: +65 6 759 9100
Fax: +65 6 759 9133
E-mail: sales@nilfisk-advance.com.sg
SPAIN
Nilfisk-ALTO
Division of Nilfisk-Advance S.A.
Torre D'Ara
Member of Nilfisk-Advance Group
Aminogatan 18, Box 4029
431 04 Moindal
Tel.: +46 31 706 73 00
Fax: +46 31 706 @nilfisk-alto.se
www.nilfisk-alto.se
TAIWAN
Nilfisk-Advance Taiwan Branch
No. 5, Wan Fang Road
Taipei
Tel.: +886 227 002 268
Fax: +886 227 840 843
THAILAND
Nilfisk-Advance Co. Ltd.
89 Soi Chokechai-Ruammitr
Viphavadee-Rangsit Road
Layao, Jatuchak, Bangkok 10900
Tel.: +66 2 275 5630
Fax: +66 2 691 4079
TURKEY
Nilfisk-Advance Professional Temizlik
14600 21st Avenue North
Plymouth, MN 55447-3408
Tel.: +1 763 745 3500
Nilfisk-Advance Representative Office
No. 46 Doc Ngu Str.
Ba Dinh Dist.
Hanoi
Tel.: +84 4 761 5642
Fax: +84 4 761 5643
E-mail: nilfisk@vnn.vn

- Instructions for use 2
- Vacuum cleaner description. 3
- Troubleshooting 10
- Instructions for use
- Operator safety
- WARNING!
- General information for using the vacuum cleaner
- Proper uses
- Dust emissions into the environment
- General recommendations
- Vacuum cleaner description
- Labels
- Figure 1
- Optional kits
- Accessories
- Packing and unpacking
- Setting to work - connection to the power supply
- Extensions
- Wet and dry applications
- [NOTE]
- Maintenance and repairs
- Controls, indicators and connections
- Inspection prior to starting
- Starting up
- Starting/stopping the vacuum cleaner
- Normal version
- Version for vacuuming liquids
- Shaking the main filter
- Figure 7
- Emergency stopping
- Emptying the container
- Figure 8
- Wet vacuuming kit assembly
- Figure 9
- Figure 10
- Figure 11
- At the end of a cleaning session
- Maintenance, cleaning and decontamination
- Filter disassembly and replacement
- Filter replacement
- Figure 13
- Motor cooling fan inspection and cleaning
- Seal inspection
- Figure 14
- Figure 15
- Separator cleaning and replacement (if equipped)
- Figure 16
- Vacuum cleaner disposal
- Figure 17
- Wiring diagrams
- Basic vacuum cleaner
- Wet vacuuming kit
- Index
- Mode d'emploi 2
- CHINA
- CZECH REPUBLIC
- DENMARK
- FINLAND
- HONG KONG
- HUNGARY
- SINGAPORE
- SPAIN
- TAIWAN
- THAILAND
- TURKEY
Brand : NILFISK
Model : ATTIX 140
Category : Industrial vacuum cleaner