
WII SAMURAI WARRIORS 3 - Video game NINTENDO - Free user manual and instructions
Find the device manual for free WII SAMURAI WARRIORS 3 NINTENDO in PDF.
| Product type | Video game |
| Platform | Wii |
| Genre | Action, Hack and slash |
| Game mode | 1 to 2 players (local), online multiplayer (via Wi-Fi) |
| Game language | French, English, Spanish, etc. (according to console settings) |
| Number of save files | Up to 4 (requires 12 free blocks) |
| Audio | Dolby Pro Logic II |
| Compatible controllers | Wii Remote + Nunchuk, Classic Controller / Classic Controller Pro, Nintendo GameCube Controller |
| Main game modes | Story Mode, Free Mode, Murasame Castle, Online, Dojo, Character Creation |
| Box contents | Samurai Warriors 3 Wii disc, instruction manual |
| ESRB rating | T (Teen) – Violence |
| Release date | 2010 |
| Publisher | Nintendo |
| Developer | Koei Tecmo |
| System requirements | Wii console, broadband Internet for online play |
| Care and cleaning | Wipe the disc with a soft, dry cloth. Avoid exposure to heat and humidity. |
| Safety precautions | Read the warning about epilepsy and repetitive movements. Use the wrist strap. Take breaks. |
| Warranty | 12 months for the console, 3 months for the game/accessory (Nintendo) |
Frequently Asked Questions - WII SAMURAI WARRIORS 3 NINTENDO
User questions about WII SAMURAI WARRIORS 3 NINTENDO
0 question about this device. Answer the ones you know or ask your own.
Ask a new question about this device
Download the instructions for your Video game in PDF format for free! Find your manual WII SAMURAI WARRIORS 3 - NINTENDO and take your electronic device back in hand. On this page are published all the documents necessary for the use of your device. WII SAMURAI WARRIORS 3 by NINTENDO.
USER MANUAL WII SAMURAI WARRIORS 3 NINTENDO
The Official Seal is your assurance that this product is licensed or manufactured by Nintendo. Always look for this seal when buying video game systems, accessories, games and related products.
P.O. BOX 957, REDMOND, WA
98073-0957 U.S.A.
www.nintendo.com

71545A
PRINTED IN USA
PLEASE CAREFULLY READ THE Wii™ OPERATIONS MANUAL COMPLETELY BEFORE USING YOUR Wii HARDWARE SYSTEM, GAME DISC OR ACCESSORY. THIS MANUAL CONTAINS IMPORTANT HEALTH AND SAFETY INFORMATION.
IMPORTANT SAFETY INFORMATION: READ THE FOLLOWING WARNINGS BEFORE YOU OR YOUR CHILD PLAY VIDEO GAMES.
WARNING - Seizures
- Some people (about 1 in 4000) may have seizures or blackouts triggered by light flashes or patterns, and this may occur while they are watching TV or playing video games, even if they have never had a seizure before.
- Anyone who has had a seizure, loss of awareness, or other symptom linked to an epileptic condition should consult a doctor before playing a video game.
- Parents should watch their children play video games. Stop playing and consult a doctor if you or your child has any of the following symptoms:
Convulsions
Eye or muscle twitching
Altered vision
Loss of awareness
Involuntary movements
Disorientation
- To reduce the likelihood of a seizure when playing video games:
- Sit or stand as far from the screen as possible.
- Play video games on the smallest available television screen.
- Do not play if you are tired or need sleep.
- Play in a well-lit room.
- Take a 10 to 15 minute break every hour.
WARNING - Repetitive Motion Injuries and Eyestrain
Playing video games can make your muscles, joints, skin or eyes hurt. Follow these instructions to avoid problems such as tendinitis, carpal tunnel syndrome, skin irritation or eyestrain:
- Avoid excessive play. Parents should monitor their children for appropriate play.
Take a 10 to 15 minute break every hour, even if you don't think you need it. - If your hands, wrists, arms or eyes become tired or sore while playing, or if you feel symptoms such as tingling, numbness, burning or stiffness, stop and rest for several hours before playing again.
- If you continue to have any of the above symptoms or other discomfort during or after play, stop playing and see a doctor.
CAUTION - Motion Sickness
Playing video games can cause motion sickness in some players. If you or your child feel dizzy or nauseous when playing video games, stop playing and rest. Do not drive or engage in other demanding activity until you feel better.
IMPORTANT LEGAL INFORMATION
This Nintendo game is not designed for use with
any unauthorized device. Use of any such device will invalidate your Nintendo product warranty. Copying of any Nintendo game is illegal and is strictly prohibited by domestic and international intellectual property laws. "Back-up" or "archival" copies are not authorized and are not necessary to protect your software. Violators will be prosecuted.
WARRANTY & SERVICE INFORMATION
You may need only simple instructions to correct a problem with your product. Try our website at support.nintendo.com or call our Consumer Assistance Hotline at 1-800-255-3700, rather than going to your retailer. Hours of operation are 6 a.m. to 7 p.m., Pacific Time, Monday - Sunday (times subject to change). If the problem cannot be solved with the troubleshooting information available online or over the telephone, you will be offered express factory service through Nintendo. Please do not send any products to Nintendo without contacting us first.
HARDWARE WARRANTY
Nintendo of America Inc. ("Nintendo") warrants to the original purchaser that the hardware product shall be free from defects in material and workmanship for twelve (12) months from the date of purchase. If a defect covered by this warranty occurs during this warranty period, Nintendo will repair or replace the defective hardware product or component, free of charge.* The original purchaser is entitled to this warranty only if the date of purchase is registered at point of sale or the consumer can demonstrate, to Nintendo's satisfaction, that the product was purchased within the last 12 months.
GAME & ACCESSORY WARRANTY
Nintendo warrants to the original purchaser that the product (games and accessories) shall be free from defects in material and workmanship for a period of three (3) months from the date of purchase. If a defect covered by this warranty occurs during this three (3) month warranty period, Nintendo will repair or replace the defective product, free of charge.*
SERVICE AFTER EXPIRATION OF WARRANTY
Please try our website at support.nintendo.com or call the Consumer Assistance Hotline at 1-800-255-3700 for troubleshooting information and repair or replacement options and pricing.*
*In some instances, it may be necessary for you to ship the complete product, FREIGHT PREPAID AND INSURED FOR LOSS OR DAMAGE, to Nintendo. Please do not send any products to Nintendo without contacting us first.
WARRANTY LIMITATIONS
THIS WARRANTY SHALL NOT APPLY IF THIS PRODUCT: (a) IS USED WITH PRODUCTS NOT SOLD OR LICENSED BY NINTENDO (INCLUDING, BUT NOT LIMITED TO, NON-Licensed GAME ENHANCEMENT AND COPIER DEVICES, ADAPTERS, SOFTWARE, AND POWER SUPPLIES); (b) IS USED FOR COMMERCIAL PURPOSES (INCLUDING RENTAL); (c) IS MODIFIED OR TAMPERED WITH; (d) IS DAMAGED BY NEGLIGENCE, ACCIDENT, UNREASONABLE USE, OR BY OTHER CAUSES UNRELATED TO DEFECTIVE MATERIALS OR WORKMANSHIP; OR (e) HAS HAD THE SERIAL NUMBER ALTERED, DEFACED OR REMOVED.
ANY APPLICABLE IMPLIED WARRANTYES, INCLUDING WARRANTYES OF MERCHANTABILITY AND FITNESS FOR A PARTICULAR PURPOSE, ARE HEREBY LIMITED IN DURATION TO THE WARRANTY PERIODS DESCRIBED ABOVE (12 MONTHS OR 3 MONTHS, AS APPLICABLE). IN NO EVENT SHALL NINTENDO BE LIABLE FOR CONSEQUENTIAL OR INCIDENTIAL DAMAGES RESULTING FROM THE BREACH OF ANY IMPLIED OR EXPRESS WARRANTYES. SOME STATES DO NOT ALLOW LIMITATIONS ON HOW LONG AN IMPLIED WARRANTY LASTS OR EXCLUSION OF CONSEQUENTIAL OR INCIDENTIAL DAMAGES, SO THE ABOVE LIMITATIONS MAY NOT APPLY TO YOU.
This warranty gives you specific legal rights. You may also have other rights which vary from state to state or province to province.
Nintendo's address is: Nintendo of America Inc., P.O. Box 957, Redmond, WA 98073-0957 U.S.A.
This warranty is only valid in the United States and Canada.
DOLBY
PRO LOGIC II

Dolby, Pro Logic, and the double-D symbol are trademarks of Dolby Laboratories. Manufactured under license from Dolby Laboratories.
This game is presented in Dolby® Pro Logic II surround sound. Connect your game console to a sound system with Dolby Pro Logic, Dolby Pro Logic II, or Dolby Pro Logic IIx decoding to experience the excitement of surround sound. You may need to enable "Dolby Pro Logic II" in the audio options menu of the game.
© 2009-2010 KOEL Co., Ltd. All Rights Reserved. The Mysterious Murasame Castle: © 1986-2010 Nintendo. Trademarks are property of their respective owners. Wii is a trademark of Nintendo. © 2010 Nintendo. This product adopts the font of Ryobi.
This product is using MobicipTM, a software video codec of Mobicip, Inc. Mobicip is a trademark of Mobicip, Inc. © 2010 Mobicip. All rights reserved. www.mobicip.com

Getting Started
Main Menu
The Title Screen will appear when the title sequence has ended or has been skipped by pressing + / START Button (+ Button). The Main Menu will be displayed by pressing any button on the Title Screen.

Insert the SAMURAI WARRIORS™ 3 Disc into the disc slot. The Wii console will switch on. The Health and Safety Screen, as shown here, will be displayed. After reading the details, press the A Button. The Health and Safety Screen will be displayed even if the Disc is inserted after turning the Wii console's power on.
2 Point at the Disc Channel on the Wii Menu Screen, and press the A Button.
3 The Channel Preview Screen will be displayed. Point at Start and press the A Button.
4 The Strap Usage Screen will be displayed. Tighten the strap around your wrist, then press the a Button (A Button).
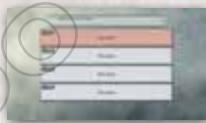
5 You will then be prompted to select a save data file. Once you have selected a save data file, the opening movie will begin to play. Note: You can create up to four save data files. To do so, there must be 12 blocks available in the Wii system memory.
LANGUAGE SELECTION
To play this game in English, change your language settings in Wii System Settings.
Contents
Getting Started 3
Battles 5
Classic Controller Pro/Classic Controller..5
Wii Remote and Nunchuk 7
- Nintendo GameCube Controller 8
Normal Attack/Power Attack 9
Special Skill 9
Spirit Charge 10
Musou Attack 10
Game Screen 11
Main Screen 11
- Battle Preparation Screen 13
- Pause Menu 13
Story Mode 14
- Playing Story Mode 14
- Battle Items 14
- Battlefield Items 15
- Battle Results 15


The primary controls described in this manual are for play using the Classic Controller Pro™ / Classic Controller™.
Controls for the Wii Remote™ and Nunchuk™ controllers are displayed in parentheses in the form "a Button (A Button)."
| STORY MODE | This is the main mode. Select a warrior and play a scenario specifically tailored to that character. Complete the scenario to unlock the next one. | P.14 | |
| FREE MODE | Play any scenario with a warrior of your choice. Choose from any of the playable scenarios in Story Mode. Note: Warrior development data is shared by Story Mode, Free Mode, and Murasame Castle Mode. You can upgrade your warrior and gather gems to upgrade equipment. | — | |
| MURASAME CASTLE | In this mode, take on strange opponents and discover the secrets of the mysterious Murasame Castle. | P.19 | |
| NETWORK | Connect to Nintendo Wi-Fi Connection and view your Friend Roster. | P.19 | |
| DOJO | UNLOCK BONUSES | Here you can unlock more warriors for use in Story Mode. You can also unlock max stats, weapons, and the ability to customize warriors' appearances. Note: The rice stipends you receive after battle are needed for this feature. | — |
| EDIT CHARACTERS | Create a new warrior or adjust the color settings for Musou characters. | — | |
| VAULT | View character information and movies. | — | |
| SETTINGS | Change various game settings. | — | |
| HISTORICAL MODE | Battle through the Warring States timeline in this mode. Can only be played using a new warrior. Note: Create a new warrior by selecting CUSTOM CHARACTERS under Edit characters within the Dojo. | — | |
| RESUME BATTLE | Resume your previously saved game. | — | |
About Saving
Game data is automatically saved when a scenario is cleared or when a character is upgraded.
Note: The game is saved after the results of a battle are shown and when returning from any of the menu items selected in the Dojo.
Saving During a Battle
Select SAVE on the Pause Menu (P.13) in Story Mode or Free Mode to save your progress. Free Mode and Story Mode share the same save data.
Note:
- Saving during a battle will overwrite any previous save.
- Starting a new game will delete any previously saved data.
- You cannot save during battle in Murasame Castle Mode or Historical Mode
- Once deleted or overwritten, save data cannot be restored.
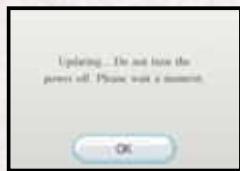
SYSTEM MENU UPDATE
Please note that when first loading the Game Disc into the Wii console, the system will check if you have the latest version of the system menu, and if necessary a Wii system menu update screen will appear. Select OK to proceed with the update. Please note that the Wii console must have the latest version of the Wii system menu in order to play the Game Disc. When the system menu is updated, unauthorized hardware and/or software modifications may be detected and unauthorized content may be removed, causing the immediate or delayed inoperability of your console. Failure to accept the update may render this game, and future games, unplayable. Please note that Nintendo cannot guarantee that unauthorized software or accessories will continue to function with the Wii console after this or future updates of the Wii system menu.
Classic Controller Pro/Classic Controller

L Button
Block
The view will change to forward facing, and while the button is pressed, attacks from the front will be blocked.
Strafe
Tilt the L Stick while blocking to move in that direction while facing forward.
Skilled Fall
Readjust your stance in midair after being knocked into the air by an opponent.

+Control Pad

+Control Pad Up
Call Horse
Call the horse selected before the battle. If no horse has been selected, an inferior horse, or the horse previously used will be called. There are some places, such as inside a castle, where a horse cannot be called.

+Control Pad Right
Item Display
Displays all of the items (P.14) currently held

+Control Pad Left/Right
Item Selection
Select which item to use when they are displayed.

+Control Pad Down
Use Item
Use the currently selected item (P. 14).

Z1 Button
Zoom Map (P.12)
Toggle between the Close-up and Overview maps.
Note: Your preference can be adjusted under
Settings in the Dojo. Select OPTIONS and set MAP ZOOM STYLE to CLOSE-UP or OVERVIEW.

ZR Button

Evade
Roll forward to avoid the enemy's attack. You will move in the direction you're facing when rolling.
R R Button
Special Skill (P.9)
Perform your character's unique Special Skill.
Wii Remote and Nunchuk
Vii Remote
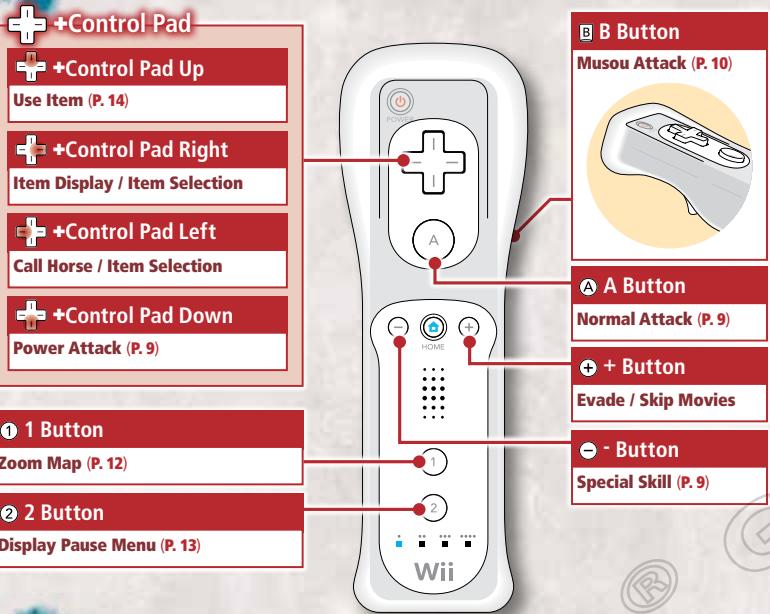
Nunchuk
Control Stick
Movement
Z Button
Block / Strafe / Skilled Fall
C Button
Jump / Sidestep / Spirit Charge (P.10)
Nintendo GameCube Controller

Note: Player 1's Nintendo GameCube™ controller should be connected to Controller Socket 1, and Player 2's Nintendo GameCube controller should be connected to Controller Socket 2.
Selecting a Controller
If more than one controller is connected to the Wii console, one of them must be selected before playing the game. The Controller Selection Screen will be displayed when selecting a game mode such as Story Mode from the Main Menu. Press the A Button (A Button) on the controller you wish to use to select it.
Note:
See the Wii Operations Manual - System Setup for details on how to synchronize the Wii Remote with the Wii console.
- If only one controller is connected to the Wii console, it will be automatically detected.

Normal Attack

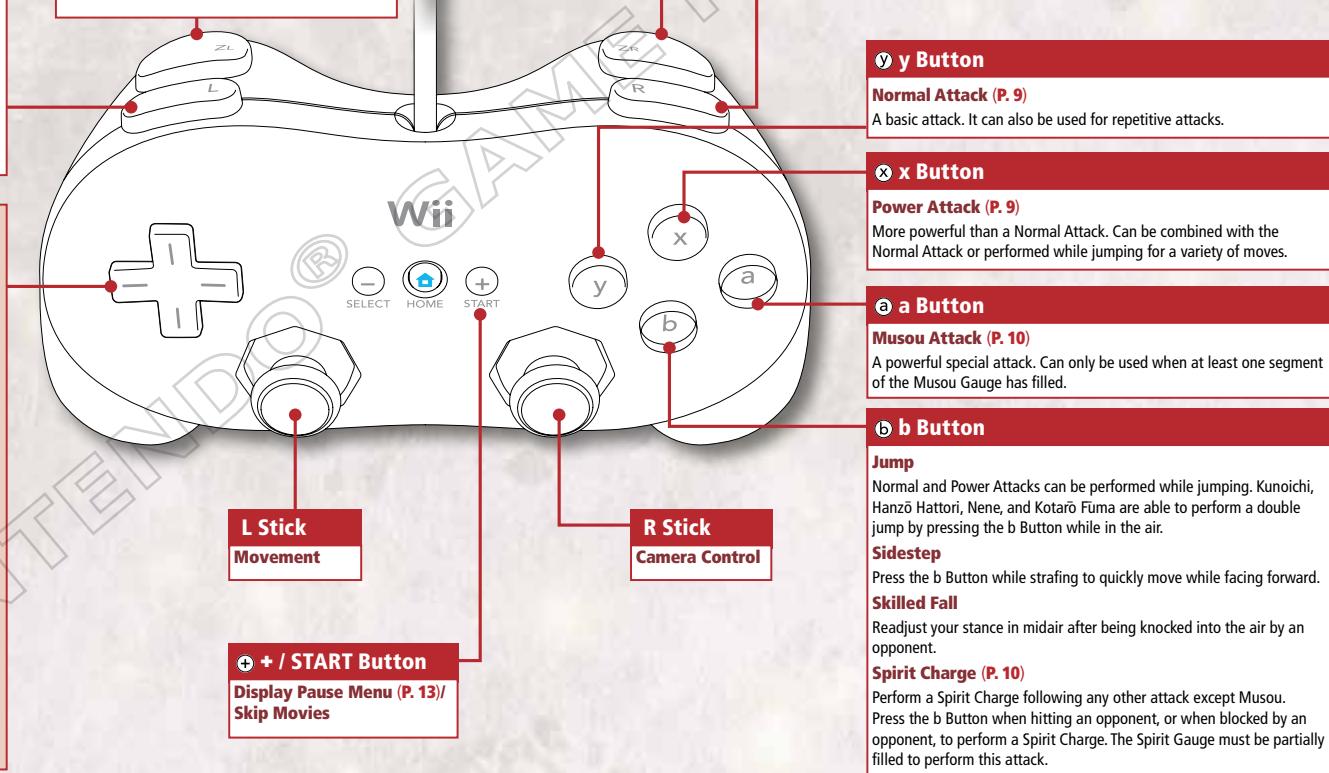
y Button
The Dash Attack can be performed after the "speed animation" has been shown while running.
A Button when using the Wii Remote and Nunchuk
This is the standard attack. The number of attacks you can string together increases as your character develops. This number can be found on the Move List Screen by selecting MORE INFO from the Battle Preparation Screen or Pause Menu.
Jump Attack y Button (A Button) while in the air
An attack performed while airborne.
Dash Attack y Button (A Button) while running
Power Attack

x Button
A Power Attack-oriented warrior has a variety of Power Attacks when developed.
+Control Pad Down when using the Wii Remote and Nunchuk
Upsteadp!

Stun!

Lay waste!

This attack is more powerful than a Normal Attack. This attack can be combined with the Normal Attack to produce a variety of attacks, depending on your warrior. The number of different Power Attacks will increase as the warrior develops.
Note: You can view available Power Attacks on the Move List Screen by selecting MORE INFO from the Battle Preparation Screen or Pause Menu.
Finishing Attack
x Button (+Control Pad Down) while airborne
Drive into the ground from the air using this powerful attack. This attack is also effective against fallen opponents.
Special Skill

R Button
- Button when using Wii Remote and Nunchuk
Press to unleash the character's Special Skill. Special Skill-oriented characters of a sufficiently high level are able to unleash a second Special Skill by pressing the R Button (-Button) in combination with the y Button / x Button (A Button /+Control Pad Down).
Note: Each character's Special Skill is very different.
Controlling your Horse
You can move around the battlefield much more quickly on horseback. If you have obtained a horse (P.17) and equipped it, you can begin the battle on horseback. Horses' abilities vary greatly.
Mount
b Button (C Button) when near a horse
Dismount
b Button (C Button) while mounted
Mounted Jump Attack
x Button (+Control Pad Down) after running for a while
Mounted Musou Attack
a Button (B Button) when at least one segment of the Musou Gauge has filled,
Note:
- Normal Attacks and Power Attacks can also be performed while on horseback.
- You can call a horse using the Call Horse feature (P.5) if no horse is nearby.
Spirit Charge

b Button when the Spirit Gauge is charged
C Button when using the Wii Remote and Nunchuk
This is a lightning-quick attack unleashed following other attacks. Press the b Button (C Button) after hitting an opponent, or when blocked by an opponent, to instantly close in and continue your attack. It can also break your opponent's guard. Each Spirit Charge depletes one segment of the Spirit Gauge. Other attacks can be carried out following a Spirit Charge.
What to do at times like this...
Weapon Lock
if your opponent locks weapons with you, repeatedly press the y Button (A Button). If you win the struggle, your opponent's guard will come down and you will deal massive damage. Be careful, because your Musou Gauge will be emptied if you lose!
Unconscious
If you pass out on the battlefield, repeatedly tilt the L Stick (Control Stick) or press the a Button/ b Button / x Button / y Button (A Button / B Button / C Button / Z Button) to speed up your recovery.
Repeatedly tap the y Button (A Button) to overcome your opponent.
Mason Attack
a a Button when the Musou Gauge is charged
C Button when using the Wii Remote and Nunchuk
Press and hold the a Button (B Button) to unleash your character's powerful Musou Attack. The warrior becomes invincible while performing this attack. After initiating the attack, release the button to move around freely. One segment of the Musou Gauge is used each time a Musou Attack is performed.
True Musou Attack
When your Health Gauge is red, you can unleash the more powerful True Musou Attack. Fire elemental effects (P.18) are added to this attack.
Double Musou Attack
If a Musou Attack is unleashed while linked to another warrior by electrical force, it will be more powerful. During the attack, you will also absorb the enemy's health.
Note: When playing a two-player game, this will only happen with the other player.
Ultimate Musou Attack
Unleashing a Musou Attack when the Spirit Gauge is full will result in an Ultimate Musou Attack. However, the Spirit Gauge will be completely drained.
Game Screen
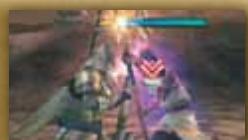
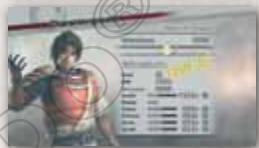
Main Screen
The Main Screen is shown when you start a battle. Press the +/START Button (2 Button) to display the Pause Menu (P.13).
Enemy Officer Information
Shows the name and health of the enemy Officer. Depending on the Officer, a Musou Gauge may also be displayed.
Combo Count
Your number of successful consecutive strikes. Your Spirit Gauge will increase more quickly as your Combo Count increases.

Player Information
Item Effects
These will flash rapidly when the time limit approaches.
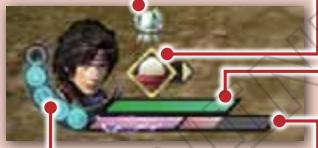
Spirit Gauge (P. 10)
Each time a Spirit Charge is used, one segment of this gauge is depleted.
Selected Items
Press the ^+ Control Pad Right to display items. Select them using the ^+ Control Pad Left / Right, and press ^+ Control Pad Down ( ^+ Control Pad Up when using the Wii Remote and Nunchuk) to use. Items can also be used from the Pause Menu.
Health Gauge
This shows the player character's health. It decreases if the player receives damage and the color changes from green to yellow and then to red. It is Game Over if the gauge empties. Restore health with items like Ricebowls or Dangos.
Musou Gauge (P. 10)
One segment is depleted each time a Musou Attack (P. 10) is used. As the warrior levels up, the number of segments will increase to a maximum of three. If more than one segment is filled, Elemental Damage (P. 18) will also be dealt.
K.O. Count
Number of opponents beaten.
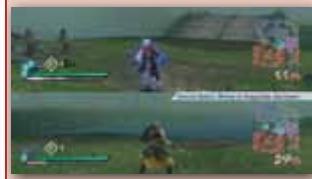
Two Player Mode
The Game Screen is split in two horizontally.
Map
Toggle between Close-up and Overview maps by pressing the ZL Button (1 Button).
| Player Character | Third Army | Objective Location | Stairway |
| Allied Army | Tactical Bonus Target Officer | Closed Gate | Cliff (progress only possible in the direction of the arrow) |
| Enemy Army | Key Objective Officer | Ninja Path |
Note:
- The Ninja Path is only available to Kunoichi, Hanzō Hattori, Nene, and Kotarō Fūma, who can all enter the path via a double-jump.
- The color of a Key Objective Officer will be the same as the color indicating their army.
- Map zoom style can be set under Settings in the Dojo. Select OPTIONS and set MAP ZOOM STYLE to CLOSE-UP or OVERVIEW.
Objective Information
Current Objective
No Entry Icon

No Entry

No Entry on Horseback
Double-Jump Icon

Only Kunoichi, Hanzō Hattori, Nene, and Kotoiro Fūma, who can perform a double-jump, are able to proceed past this icon.
Storage Boxes, Wooden Buckets, and Straw Bales
Break these open to find battlefield items (P. 15). Storage Boxes yield equipment, Wooden Buckets provide items to restore Health / Musou, and the Straw Bales contain items to restore health.
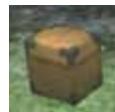
Storage Box

Wooden Bucket
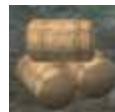
Straw Bales
Battle Preparation Screen
This screen is displayed after scenario selection. Preparations for the battle are made here.
Battlefield Map
Selecting OVERVIEW will display detailed information.
Time Limit
The time allowed for this battle. If it reaches zero, you will be defeated.
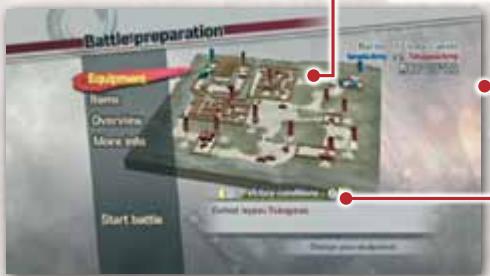
Victory / Defeat Conditions
Toggle between these by pressing L Button / R Button (1 Button / 2 Button).
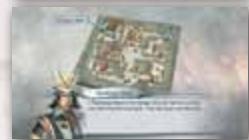
Overview Screen
This screen is displayed if OVERVIEW is selected while on the Battle Preparation Screen or the Pause Menu. Detailed information can be displayed by selecting an icon.
Note: Use L Button / R Button (1 Button / 2 Button) to view the information for the displayed icons in order.


Victory Conditions

Objectives

Allied Officers

Third Army Officers

Enemy Strongholds

Defeat Conditions

Tactical Bonuses

Enemy Officers

Allied Strongholds

Third Army
Strongholds
Pause Menu
Display this screen during battle by pressing the +/ START Button (2 Button).
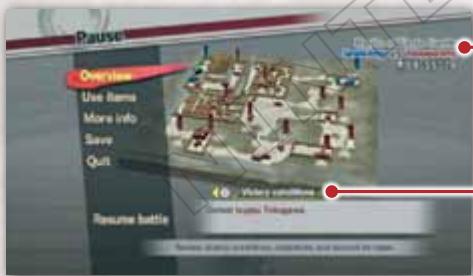
Time Limit
The time remaining for this battle. If it reaches zero, you will be defeated.
Victory Conditions / Defeat Conditions / Current Objective
Toggle between these by pressing L Button / R Button (1 Button / 2 Button).
mode
Playing Story Mode
1 Select Number of Players / Controller
Select 1P MODE or 2P MODE, and decide on the controller to be used (P.8).
2 Character Selection
Choose the warrior you wish to take into battle.
Note: As the game progresses, the number of playable characters can be increased at the Dojo.
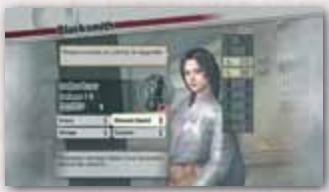
3 Scenario / Difficulty Selection
Select the scenario, and set the desired difficulty level.
If you have obtained any gems, the Blacksmith will also be available.
Note:
- Once certain conditions have been met, Chaos difficulty will become playable.
- When playing Hard or Chaos difficulty levels, the opponents become more powerful, but items with high abilities also become easier to obtain.
4 Narration and Route Confirmation
After the narration finishes, there will be an explanation of the strategy and overview. Take care to check the Objective details and conditions for victory.
5 Battle Preparation
Here you have the opportunity to change equipment, choose items, and check the Overview and Victory / Defeat Conditions.
6 Start
Be sure to bear in mind the Objectives and Tactical Bonuses as you proceed.
7 Start
Clear the scenario by fulfilling the victory conditions. Also, depending on your play, you may be awarded merits or items for your efforts.
Battle Items
Your item set is selected at the Battle Preparation Screen. The items available will vary according to the scenario.

Dango
Restores a small amount of health to you and allied troops around you.

Ricebow
Restores a large amount of health to you and allied troops around you.

Cup of Vitality
Completely fills your Musou Gauge.

Spiritstone
Completely fills your Spirit Gauge.
Note:
- There are additional items that are not shown above.
- There are also special items that only appear in two-player games.
Battlefield Items
Battlefield Items appear by defeating enemies, or from Storage Boxes, Wooden Buckets, and Straw Bales (P. 12) when you break them.
Health Restoration/
EXP Items
Equipment Items
| Rice Ball | Restores health a little. | Wooden Box | Contains a weapon. |
| Spiritual Water | Completely restores health and fills the Musou Gauge. | Treasure Box | Receive armor, gauntlets, boots, or a horse. |
| Scroll | Gives 100 EXP. | Gems | Used to upgrade equipment (P. 17). |
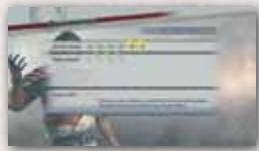
Battle Results
The Battle Results Screen will be displayed after winning or losing a battle.
Note:
- You keep any EXP and Equipment obtained during the battle, even if you have lost.
- The game data is automatically saved after the Battle Results Screen has been displayed.
Objectives/Tactical Bonuses
The results of your Objectives along with any Tactical Bonuses are displayed.
The number of successful Objectives will affect the amount of EXP you earn.
EXP (Experience)/Development ....
The EXP gained during battle is shown along with the bonus EXP received for winning. The win bonus EXP increases with the number of successfully completed objectives, as well as with special conditions, such as defeating 500 enemies.
New Action Moves
Any unlocked action moves will be indicated by NEW. Different warrior types develop in different ways (P. 16).
The number of action moves available will increase as your level increases.
Battle Rewards
Tons of rice, gems, and equipment are shown here. You can possess as many as eight of each type of equipment at one time, with the exception of your horse. You can trade these for gems instead of adding them to your collection.
Note:
- Equipment (armor, gauntlets, boots, and horses) are also shared by the other warriors.
- Tons of rice can be used to unlock characters at the Dojo.

It is possible to level up from the win bonus EXP.
When you have collected gems, visit the Blacksmith and have your equipment upgraded.
Your character will develop as they earn EXP. As their level rises, their abilities and number of moves increases.
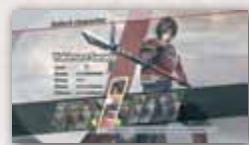
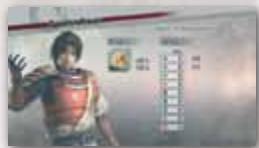
Warrior Growth
Warrior Abilities
A warrior's abilities can be viewed via EQUIPMENT on the Battle Preparation Screen (P. 13), or by selecting MORE INFO and then PLAYER from the Pause Menu (P. 13), or by selecting VAULT and then CHARACTER INFO from the Dojo.
| Level | Increases as EXP is gained. |
| EXP | Increases when opponents are defeated or when scrolls are gathered. |
| Health | The maximum value of the Health Gauge. |
| Musou | The number of segments in the Musou Gauge – maximum is 3. |
| Attack | As this figure increases, so too does the damage dealt to opponents. |
| Defense | As this figure increases, the damage taken from opponents decreases. |
| Horse | As this figure increases, your attack and defense skills increase while on horseback. |
| Speed | As this figure increases, so too does the speed at which your character moves and jumps. |
Warrior Type
There are three types of warrior – Normal Attack, Power Attack, and Special Skill. Action moves develop differently for each type.
| Normal Attack | The number of Normal Attacks a character can perform in quick succession increases more rapidly. |
| Power Attack | The number of Power Attack types a character can perform increases more rapidly. |
| Special Skill | A second Special Skill becomes available and they can both be improved. |
You can improve your warrior's performance on the battlefield by obtaining and equipping items. If an Ability (P. 18) is associated with your equipment, further special effects may be granted.
Note: After obtaining new equipment, it may be equipped by selecting EQUIPMENT on the Battle Preparation Screen (P. 13).
Obtaining Equipment
…
If you obtain a Wooden Box or Treasure Box during the battle, you will receive equipment after completion of the battle (P. 15). Equipment (armor, gauntlets, boots, and horses) is shared and may be equipped by the other warriors.
Note:
- The Wooden Box and Treasure Box can appear when an enemy Officer is defeated or when a Storage Box (P. 12) is broken open.
- Playing the game at a harder difficulty level makes it easier to obtain better equipment.
Equipment Types
Equipment comprises weapons and other equipment (armor, gauntlets, boots, and horses).
With the exception of the horses, all equipment has associated abilities. If you have gems, it is possible to upgrade the abilities of the equipment.

Weapons and Armor
Weapons
Weapons are divided into three types: Normal, Power, and Speed. They each have their own power and speed characteristics. If the weapon has an associated element, it may deal Elemental Damage (P. 18).
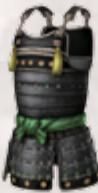
Armor
Improves the warrior's Defense.
Boots
Improves the warrior's Speed.

Gauntlets
Improves Horse ability.

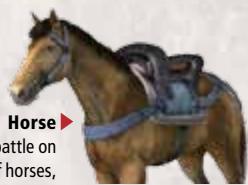
Horse
A horse allows you to start a battle on horseback. There is a wide variety of horses, each with differing abilities. The horse cannot be upgraded at the Blacksmith.
Upgrading Equipment
If the equipment you have obtained has an associated Ability, you can upgrade it at the Blacksmith.
Gems (P. 15) are required to make these upgrades.
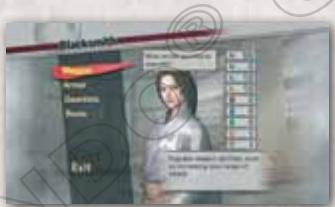
Visit the Blacksmith
In Story Mode or Free Mode, the Blacksmith can be accessed via the Scenario Selection Screen. When playing the Murasame Castle Mode, the Blacksmith can be visited by pressing the +/START Button (+ Button) while on the Murasame Map and selecting it from the Map Menu. If you are playing Historical Mode, visit the Blacksmith by pressing the y Button (C Button) at the Scenario Selection Screen.
Note: If you have no gems, the Blacksmith option will not appear in the menu.
Upgrading Equipment Abilities …
Get improved performance from your equipment by upgrading its Abilities. Gems are used when making these upgrades. The maximum Ability level is 3. Equipment can be upgraded as many times as indicated by the number of remaining upgrades set for each piece of equipment.
Upgrade Steps
1 Select the type of equipment.
2 Select the equipment to be upgraded.
3 Select the Ability to be upgraded. If you have the necessary number of gems, the Ability level will be upgraded.
Elemental Effects
When equipment with an elemental effect is equipped, elemental damage can be added to your attack. When there is at least one segment of the Musou Gauge filled, elemental damage of the kind shown below will be randomly added to your attack.
| Flame | Wraps the enemy in flames, causing continuous damage. |
| Lightning | Sends a flash of lightning toward nearby enemies, dealing damage over a wide area. |
| Ice | Temporarily freezes the enemy so they are unable to move. |
| Blowback | Breaks through an enemy's guard to deal damage. If the enemy does not have his guard up, extra damage is dealt. |
| Slay | Has a chance of knocking the enemy to the ground with one blow. In the case of an enemy Officer, the damage dealt is dependent on their current health. |
Types of Abilities
Some typical Abilities are detailed below. There are many more abilities in addition to these.
Weapon Abilities
| Weaponmaster | Increase the weapon's power. |
| Fury | Increase Normal Attack strength. |
| Power Fury | Increase Power Attack strength. |
| Element | Randomly inflict elemental damage with a Normal Attack. |
| Master Element | Increase the power of elemental attacks. |
| Shockwaves | Increase the power of shots and shockwaves. |
Armor Abilities
| Ironclad | Increase the armor's defense. |
| Brace | Maintain balance when hit by an enemy. |
| Elemental Guard | Decrease damage taken from enemies' elemental attacks. |
| Guardmaster | Move in and out of blocking stance more quickly. |
| Constitution | Increase the amount of health restored by items. |
| Spirit Leech | Increase the amount of Spirit gained when taking damage. |
GauNTlet Adilitie.
| Cavalry | Increase your horseback-riding skills. |
| Eternal Fist | Allow more time to elapse between combo strikes. |
| Momentum | Increase attack power with longer combos. |
| Roaring Beast | Restore some health after every 100 KOs. |
| Galloping Steed | Restore some Musou after every 100 KOs. |
| Sharp Eye | Acquire powerful weapons more easily. |
Boot Abilities...
| Fleet Foot | Increase the boots' speed. |
| Falcon | Increase the distance covered by the Spirit Charge. |
| Giant Step | Increase the distance covered when sidestepping. |
| Swift Strike | Increase damage inflicted with a Dash Attack. |
| Air Strike | Increase damage inflicted with a Jump Attack. |
| Swift Impact | Randomly stun enemies with a Dash Attack. |
Murasame Castle
Playing Murasame Castle Mode
Complete a number of quests and uncover the mystery of Murasame Castle in this mode. As a reward for successfully clearing a quest you will receive gems and equipment.
After selecting a character, the Map Screen will be displayed.
See quest information by moving your character around the map and pressing the a Button (A Button).
Note: When on the Map Screen, press the + / START Button (+ Button) to display the Map Menu. From this menu, you can return to the Title Screen or visit the Blacksmith.
3 Select YES to enter the Battle Preparation Screen. When you are ready, select START BATTLE to begin.
Note: As you progress through the quests and are joined by Takamaru, you will then be able to choose which character to play as.
The basic rules of battle in Murasame Castle Mode are the same as in Story Mode or Free Mode; however, the following two differences should be noted:
Move into the Ball of Light to Proceed to the Next Area
The battlefield in Murasame Castle Mode is divided into several areas. Once the first objective has been successfully cleared, a mysterious ball of light will appear somewhere in the first. Jump into this ball of light to proceed to the next area.
Free the Murasame Tanukis
Destroy the Murasame tanuki statues located around the battlefield to free the cursed tanukis. This emancipation will usually bring good fortune of some kind to the player. A tanuki icon will light up when a tanuki statue is destroyed.
Playing over Nintendo Wi-Fi Connection
Murasame Castle Mode can be played with others over Nintendo® Wi-Fi Connection.
Preparing for Network Play
Select NETWORK on the Main Menu. From here you can CONNECT / DISCONNECT and edit your Friend Roster.
Connect / Disconnect

Connect to or disconnect from the Network.
The icon shown here will appear in the top right of the screen while connecting.
Broadband Internet required for network play. More information on Nintendo Wi-Fi Connection can be found on page 22.
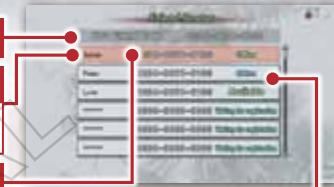
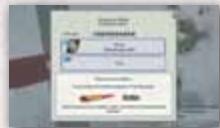
Friend Roster
Your Friend Code
Friend's Nickname
Assign a nickname for your friend. This information will not be shared.
Your Friend's Friend Code
Adding a New Friend
When a new slot is selected, a new friend can be added as follows:
- Input your friend's Friend Code.
- Add your friend's nickname (16 characters or less).
Editing
If you select an existing friend's name, you can edit their name or remove them from your Friend Roster.
Friend's Current Status - there are five possibilities:
Available Online, you can make a request.
Unavailable Online, but unavailable for request - for example, they may be visiting the Dojo.
Offline Not connected to the network.
Waiting for registration Friend Code not yet registered.
Busy
Friend is unavailable as they are already playing with another person.

Note: When the icon shown here appears, you will be unable to accept a request. This icon will not show
when playing in-game movies, but you will not be able to accept requests then either.
Select a Friend
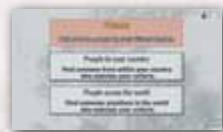
If you enter Murasame Castle Mode via Nintendo Wi-Fi Connection, the screen shown on the right will appear after you have chosen a quest. Then you can choose your search type.
- You can send a request to any friend from the Friend Roster.
- The player receiving the request will see a screen like the one shown on the right.
After accepting, the player will have to select a character to play.
People in your country
Play with someone within your country. You're less likely to experience connection problems when playing with someone from your own country.
People across the world
This will match you with players in your country or any other country.
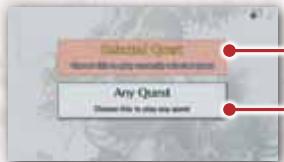
Select this to play the quest you have selected. Only a player willing to play this quest with you will be matched.
Play any quest available to you (for example, if you have not yet cleared Aosame Castle, you will not be able to play Akasame Castle).
During Network Play
Main Battle Screen
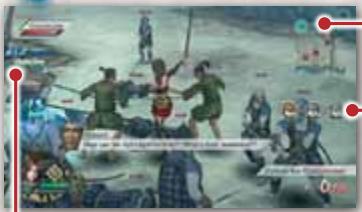
The other player's health bar.
The blue marker shows the position of the other player.
The tanukis are not shared. This means that you have to free your tanukis and the other player has to free theirs too.
Shared Items
In the case of items taken when an enemy is beaten, they will disappear from the game as soon as one of you takes them and will have the following effect:
Gems / Equipment
-
Both of you will receive the item.
-
Recovery items (such as Rice Balls). These will only affect the person who takes them.
Network Play Information Screen
Press the +/START Button (2 Button) at the Main Battle Screen to bring up the Information Screen. During network play, the game timer will not stop while this screen is up, which means that the player character will continue to receive damage from the enemy.
Move List
From the Information Screen, press the R Button (2 Button) to open the Move List Screen. Press the L Button (1 Button) to return to the Information Screen.
Warping
After completing an area in a quest, the next area is accessed by entering a warp point. If one player enters the warp point, both players will warp to the next area regardless of where the second player is.
After the Battle
There is no network connection to the other player while the Character Growth Screens and Equipment Acquisition Screens are being displayed after the battle, but you are still connected to the Nintendo Wi-Fi Connection. For this reason there is no time limit and your choices will not affect the other player.
Player Position on the Map after Network Play
Regardless of where the player was positioned on the map before network play, after network play the character will remain in the location played during network play. This also goes for the difficulty level being played. For example, if the player was on Aosame Castle on Chaos difficulty and then selected PEOPLE IN YOUR COUNTRY, then ANY QUEST, and played Akasame Castle on Normal difficulty, the player's position after the game will be Akasame Castle on Normal difficulty.
Nintendo Wi-Fi Connection
With SAMURAI WARRIORS 3 it is possible to play via the internet with your friends or anyone else using Nintendo Wi-Fi Connection (Nintendo WFC). In order to use Nintendo WFC, you need the following equipment and setup:
The Things You'll Need:
Wii console, Wii Remote, Nunchuk 1
Wii SAMURAI WARRIORS 3 Disc 1
Broadband internet connection
Internet Connection Using Wireless LAN (WLAN)
-
Access point or Nintendo Wi-Fi USB Connector (sold separately).
-
Broadband internet connection, such as DSL or cable.
Internet Connection Using LAN (Ethernet)
- Wii LAN Adapter (Ethernet), LAN cable (sold separately).
- Broadband internet connection such as broadband router or cable.
For detailed instructions regarding connection, please refer to the Wii Operations Manual – Channels and Settings (Wii Settings and Data Management).
Nintendo WFC Settings
In order to connect to the internet, you need to set up your connection to Nintendo Wi-Fi Connection.
Go to the Wii Menu, choose Wii OPTIONS, then Wii SETTINGS, and finally INTERNET. Please refer to the Wii Operations Manual - Channels and Settings (Wii Settings and Data Management).
If You Cannot Connect
If you cannot connect to Nintendo Wi-Fi Connection, error details and an error code will appear on the screen.
Please refer to the Troubleshooting section in the Wii Operations Manual - Channels and Settings, or go to support.nintendo.com for more information.
Nintendo Wi-Fi Connection is an online game-play system provided by Nintendo for people to connect and play games worldwide.
The nickname you use will be seen by others when playing multiplayer games using Nintendo Wi-Fi Connection. Please do not use any nickname that could help identify a user, or that may be offensive to others. Furthermore, it is important that you do your part to keep the service friendly. In particular, you may not use a nickname that is inappropriate, unlawful, harmful, harassing, or otherwise objectionable. Please note that inappropriate nicknames will be removed.
To protect your privacy, do not give out personal information such as your last name, phone number, date of birth, age, e-mail address, or home address when communicating with others.
The Wii Network Services Agreement that governs Wii online game play and sets forth the Wii Privacy Policy is available in the Wii console's System Settings and on the Nintendo website at http://wii.nintendo.com/terms.
VEUILLEZ LIRE ATTENTIVEMENT L'INTÉGRAlité DU MODE D'EMPLOI DE LA Wii™ AVANT D'UTILISER VOTRE CONSOLE, VOTRE DISQUE DE JEU OU VOS ACCESSOIRS Wii. CE MODE D'EMPLOI CONTIENT D'IMPORTANTES INFORMATIONS SUR VOTRE SANTÉ ET VOTRE SECURITÉ.
INFORMATIONS IMPORTANTES CONCERNANT VOITE SECURITE : VEUILLEZ LIRE LES PRECAUTIONS SUIVANTES AVANT QUE VOUS OU QUE VOITE ENFANT NE JOUIEZ À DES JEUX VIDÉO.

Movements involontaires
Perte de conscience
Désorientation
Talent special (p. 31)
Connect / Disconnect

I have en asas situations...
