
DPF 16934 LED, DPF 10933 6, DPF 10934, DPF10333 - Televisions TELEFUNKEN - Free user manual and instructions
Find the device manual for free DPF 16934 LED, DPF 10933 6, DPF 10934, DPF10333 TELEFUNKEN in PDF.
| Product type | Digital photo frame |
| Brand | TELEFUNKEN |
| Models | DPF 16934 LED, DPF 10933 6, DPF 10934, DPF10333 |
| Screen size | 10.1 inches (25.6 cm) |
| Resolution | 1024 x 600 pixels |
| Display type | LED |
| Aspect ratio | 16:9 |
| Internal memory | 2 GB |
| Photo formats | JPEG |
| Audio formats | MP3, WAV |
| Video formats | MPEG1, MPEG4, Motion JPEG |
| Compatible memory cards | SD, MMC, SDHC, MS, XD |
| USB port | Yes, for USB flash drive |
| Power supply | 100-240 V AC, 50/60 Hz |
| Adapter output | 5 V DC, 2 A |
| Standby power consumption | Less than 1 W |
| Operating power consumption | Less than 8 W |
| Dimensions (W x H x D) | 280 x 176 x 26 mm |
| Weight | 630 g |
| Main functions | Slideshow, clock, alarm, ECO LOGIC mode, brightness sensor |
| Cleaning | Use a soft, dry cloth; avoid abrasive products |
| Safety | Do not open the housing; avoid moisture and shocks |
| Spare parts | Power adapter, remote control (depending on model) |
| Warranty | 12 months from date of purchase |
Frequently Asked Questions - DPF 16934 LED, DPF 10933 6, DPF 10934, DPF10333 TELEFUNKEN
User questions about DPF 16934 LED, DPF 10933 6, DPF 10934, DPF10333 TELEFUNKEN
0 question about this device. Answer the ones you know or ask your own.
Ask a new question about this device
Download the instructions for your Televisions in PDF format for free! Find your manual DPF 16934 LED, DPF 10933 6, DPF 10934, DPF10333 - TELEFUNKEN and take your electronic device back in hand. On this page are published all the documents necessary for the use of your device. DPF 16934 LED, DPF 10933 6, DPF 10934, DPF10333 by TELEFUNKEN.
USER MANUAL DPF 16934 LED, DPF 10933 6, DPF 10934, DPF10333 TELEFUNKEN
I. Learn about and install your frame 2
- Box contents 2
- Frame diagrams 3
- Remote control 3
- Installation 4
II. Use your frame 4
- Selecting a language 4
- "ECO LOGIC" mode 5
- Reading a memory card or a USB key 5
- Copying photos to the internal memory 6
- Deleting photos 8
III. Selecting the type of files to play 10
- Internal memory/Removable media 10
- Selecting a folder/Multimedia mode 10
- Photos 10
- Videos 11
- Music 11
IV. Settings 12
- Photos Setup 12
- Music Setup 15
- Video Setup 16
- Calendar setup 16
- System configuration 19
V. Connecting to a computer 21
VI. Safety instructions 22
VII. Warranty 23
VIII. Specifications 25
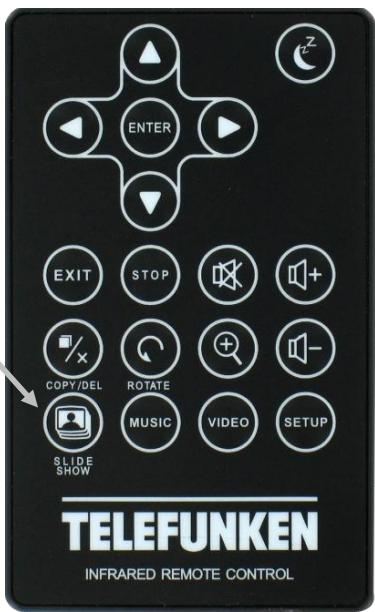
PRELIMINARY NOTICE
During the first use, the animated demo is played. To exit and go to the frame functions, simply press the "Slideshow" key on the remote control, or on "Left" key of the digital frame during 3 seconds.
I. Learn about and install your frame
Thank you for your recent purchase of a TELEFUNKEN DPF 10934 digital photo frame. Before using your device, please consult these operating instructions and keep them so you may refer to them later.
1. Box contents
- 1 digital photo frame
- 1 AC adaptor
- 1 remote control
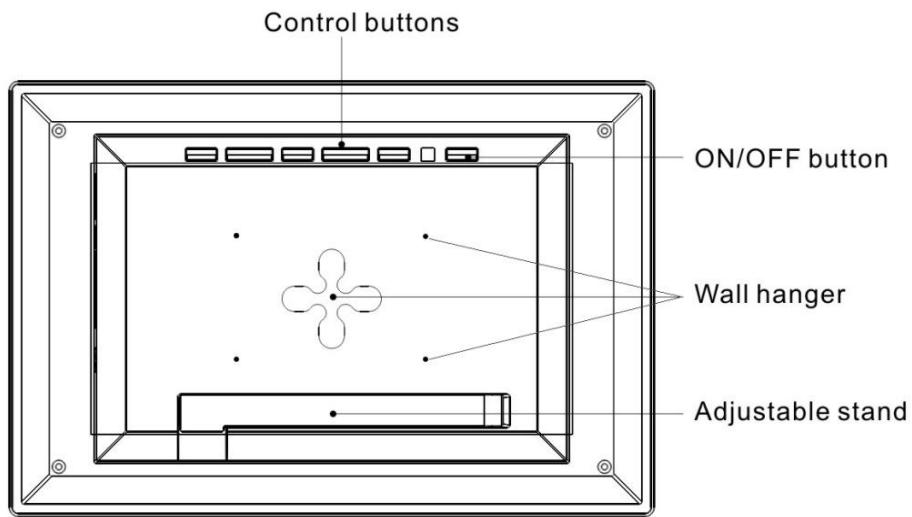
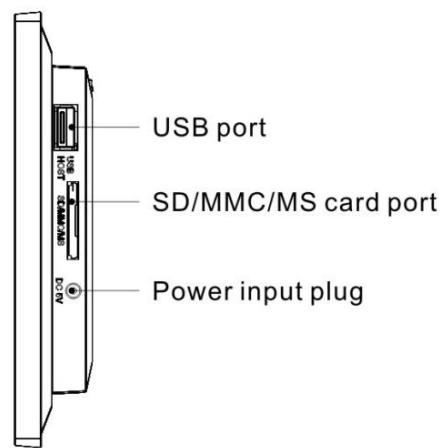
2. Frame diagrams
3. Remote control
All functions can be accessed with the remote control. Press the following keys to access the functions:
| Key | Function |
| ▲ | Navigation up in the menus |
| ← | Navigation left in the menus and skip to the previous file (photo, music or movie) |
| ▼ | Navigation down in the menus |
| ► | Navigation right in the menus and skip to the next file (photo, music or movie) |
| ENTER | Confirm your selection or switch modes |
| ◎ | Switch the digital photo frame on or to standby mode |
| EXIT | Exit current menu and return to previous menu |
| STOP | Stop file playback (photo, music or movie) and return to main menu |
| ◎ | Mute/unmute sound, in mute mode the mute icon is displayed |
| ◎+ | Increase volume, the volume level is displayed |
| ◎(COPY/DEL) | Access copy, delete and sort functions (only in main menu) |
| ◎(ROTATE) | Rotate photo clockwise 90° |
| ◎ | Enlarge image, press repeatedly to cycle through zoom modes x2, x4, x8 and x16; press again to return to normal size |
| ◎ | Decrease volume, the volume level is displayed |
| ◎(SLIDESHOW) | Start the photo slideshow directly |
| MUSIC | Access setup menu (MUSIC) directly |
| VIDEO | Access setup menu (VIDEO) directly |
| SETUP | Access setup menu (Settings) directly |
4. Installation
- Take your frame and its accessories out of their packaging.
- Remove the plastic film protecting the front of the frame.
- Pull the plastic tab protecting the contacts in the remote control.
- Stand the frame in the desired location, pulling the adjustable stand towards you (see diagram above).
- Connect the electrical cord to the frame in the space provided.
- Plug your frame into an outlet. Your frame will start up automatically.
II. Use your frame
1. Selecting a language
During the first use, the animated demo is played. To exit and go to the frame functions, simply press the "Slideshow" key on the remote.
The language selection screen then appears.
- Select your language using the arrow keys on the remote control, then press “ENTER”.
Once you have selected your language, the frame is ready for use.
Simply insert a memory card or flash drive to begin playback of your pictures.
Caution: The animated demo is contained in the folder named "DEMO". You must delete it for the frame to keep benefit of the 2 GB internal memory.

2. "ECO LOGIC" mode
ECO LOGIC mode combines 3 essential elements to reduce energy consumption by over 40% compared to a standard frame:
- A LED screen, which uses less energy while improving picture quality;
- A low-energy and 'Energy Star'-certified power adapter;
- A light sensor.
This sensor, on by default, will automatically turn off your picture frame at night and turn it on during the day.
You can deactivate the light sensor in your frame's system settings menu.
Caution: Depending on where you place the frame (for example, in furniture or under a shelf, there may not be enough light to turn on the frame or it may unexpectedly turn off. You can turn it back on by pressing the standby key on the top right of the remote. This will deactivate the sensor. To reactivate it, simply bring into bright light for 5 seconds.
3. Reading a memory card or a USB key
If your frame is off:
- Insert your card or USB key in the space provided.
- Switch on your frame: The slideshow will automatically play the contents of your memory card on USB key.
If your frame is on and playing the slideshow from the internal memory:
- Your memory card is automatically detected
- After a few seconds, a message will ask: "Copy files?" Select "Yes" and press "Enter" and select the directory you want to copy your pictures. Press "Enter"
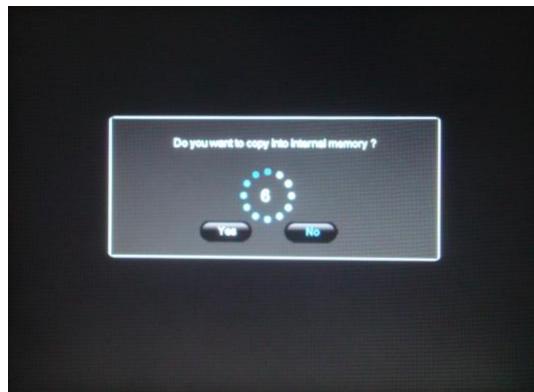
Your photos are now copied into the internal memory and sized to the frame's resolution. Resizing allows the copies to fit the resolution of your frame, considerably reducing their file size. Thanks to this system, you can store over 10,000 photos in the internal memory.
If your media (memory card, USB key or built-in memory) contains music and if you want to play a musical slideshow,

press the "Enter" key during the slideshow. The digital frame will display "Musical Slideshow".
4. Copying photos to the internal memory
If you did not select automatic copying when you inserted the card, you have 2 ways to copy pictures from your memory card to the frame's internal memory.
- Copy your photos from the file manager
If you use this method, you can only copy files one at a time, and you will not be able to resize them to
the frame's resolution.
- Press the “Exit” key on your remote as many times as necessary for the media selection screen to come up.
- Select the removable medium (memory card or USB key) storing the photos to be copied using the “Left/Right” keys on the remote. Press “Enter”.
- Using the "Left/Right" keys on the remote, select the "Files" icon and press "Enter".
- Select the folder to be copied using the “Up/Down” keys on the remote and press “Copy/Del”. The following message appears: “Copy?” Make your selection using the “Left/Right” keys and press “Enter”.

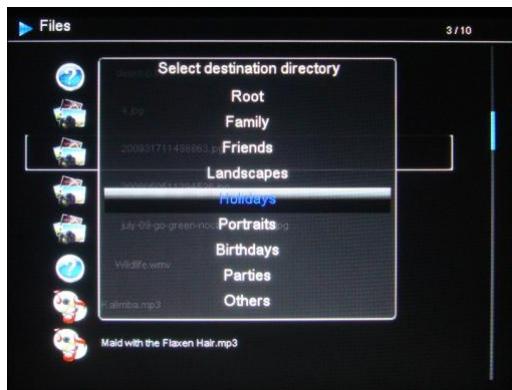
- Choose the directory where you want to store your file using the "Up/ Down" keys and press "Enter". Your file has been copied.
If your memory card contains one or more folders, you can copy them one by one in full. They will be stored in the internal memory folder of your choice, and you can play each back independently of the others.
- Copy your photos from the thumbnail mode
Using this method, you can copy all or a selection of photos, with the ability to resize them to the frame's resolution in order to optimize internal memory capacity.
- Press the “Exit” key on your remote as many times as necessary for the media selection screen to come up.
- Select the removable medium (memory card or USB key) storing the photos to be copied using the “Left/Right” keys on the remote. Press “Enter”.
- Using the "Left/Right" keys, select photo mode and press
- Press the “Exit” key on the remote to access the thumbnails.
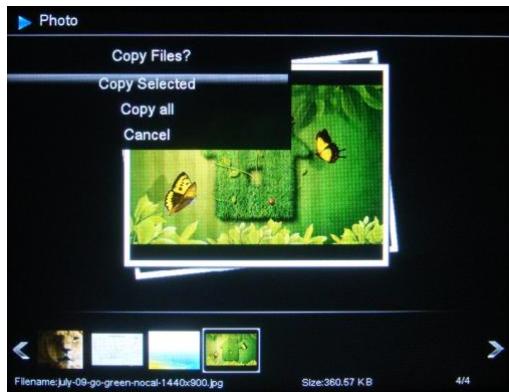
- Press the "Copy/Del" key. The screen will display "Copy files?" (Select or All). Select and press "Enter"
The thumbnails will reappear, with a check box in the top left corner of each picture. Select the photos to be copied using the “Left/Right” keys on the remote, pressing “Enter” for
"Enter". The slideshow will then start.

each photo you wish to select.. (If you have chosen "Copy all", every thumbnail will be checked).
Press the "Copy/Del" key. A confirmation message will appear.
Press "Enter" to confirm your selection.
The screen will show a dialog box asking you if you want to resize your images.
Select the desired option using the “Up/Down” keys on the remote and confirm the choice by selecting “Confirm”. Press “Enter”. Your photos are now copied into the internal memory and sized to the frame's resolution.
5. Deleting photos
You can delete photos that are in your frame's internal memory.
- Delete your photos from the file manager
If you use this method, you can only delete one file at a time.
- Press the "Exit" key on your remote as many times as necessary for the media selection screen to come up.
- Select the removable medium (memory card or USB key) storing the photos to be copied using the “Left/Right” keys on the remote. Press “Enter”.
- Using the "Left/Right" keys on the remote, select the "Files" icon and press "Enter".
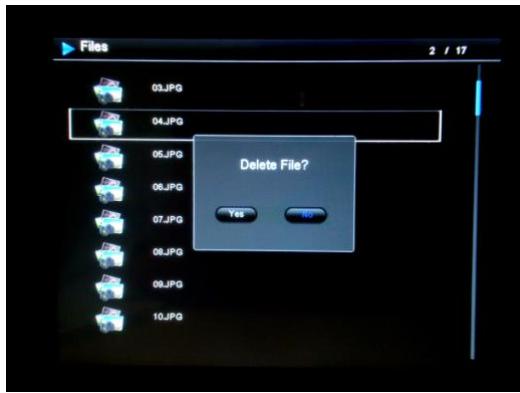
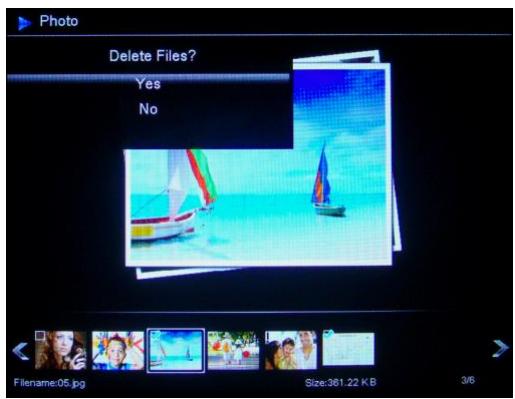
- Select the file using the “Up/Down” keys on the remote, and press the “Copy/Del” key. The screen will display “Delete file? YES/NO”. Choose the desired option and press “Enter”. Your file has been deleted.
You can also delete one of your personal folders located in one of the preset directories.
- Delete your photos from the thumbnail mode
With this method, you can delete all or a selection of photos in the internal memory.
- Press the “Exit” key on your remote as many times as necessary for the media selection screen to come up.
- Select the internal memory using the “Left/Right” keys on the remote. Press “Enter”.
- Using the "Left/Right" keys, select the photo mode and press "Enter". The slideshow will then start.
- Press the "Exit" key on the remote to access the thumbnails.
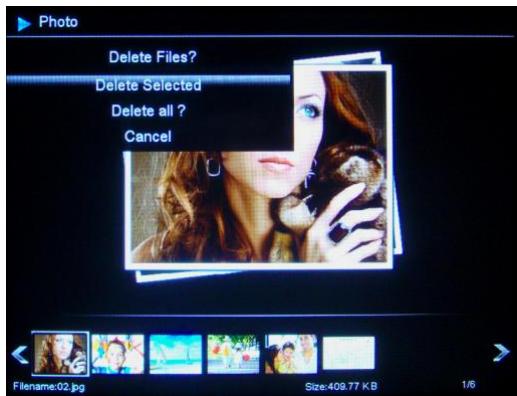
- Press the "Copy/Del" key. The screen will display "Delete?" (Select or All). Select and press "Enter".
- The thumbnails will appear, with a check box in the upper left corner of each picture. Select the photos to be deleted using the “Left/Right” keys on the remote, pressing “Enter” for each photo you wish to select. (If you have chosen the “Delete all” option, every thumbnail will be checked).
- Press the "Copy/Del" key, then press "Enter".
- The screen will display "Delete?"
- Select the desired option using the “Up/Down” keys on the remote. Press “Enter”. Your photos have now been deleted from the internal memory
III. Selecting the type of files to play
1. Internal memory/Removable media
If no media has been inserted, the slideshow from the internal memory will launch automatically whenever the frame is turned on.
If there is a memory card or a flash drive inserted when the frame is turned on, the card's content will be played.
In this case, you can toggle between the card and the internal memory as follows:
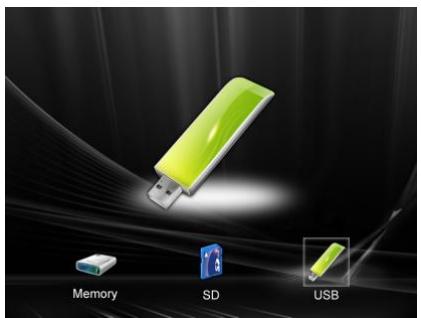
Keep pressing the "Exit" key on your remote to go to the select media screen.
Use the "Left/Right" keys on the remote to select the media you want to play, then press "Slideshow" on your remote. The slideshow will then start.
2. Selecting a folder/Multimedia mode
Thanks to its exclusive multimedia mode, the DPF 10934 lets you play the entire content of a folder, whether it is photo, video or music. The files are played in the order in which they have been stored in the folder.
You can play one of the preset folders in the internal memory, or play one of your personal folders, saved either on your removable media or in the internal memory.
To do this, keep pressing the "Exit" key on your remote until the main menu appears. Using the "Left/Right" keys, select the "Files" icon. If you want to play a pre-programmed folder, select it using the "Up/Down" keys, and press "Enter" twice. The slideshow of this folder will then launch.
If you want to play one of your own folders, first select its place (USB key or Memory card), then select the folder you want. Then, follow the steps above to launch the slideshow.
3. Photos
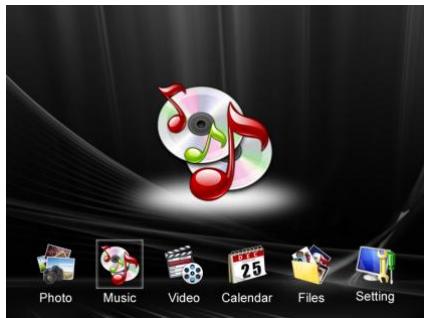
- Keep pressing the "Exit" key twice to display the main screen.
Using the "Left/Right" arrows on the remote, select the "Photo" icon.
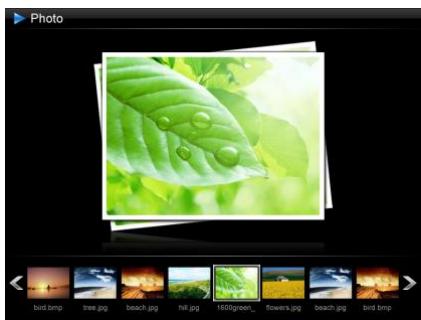
- Press the "Enter" key repeatedly to select the play mode as follows:
Photo Slideshow
Slideshow+Music
Single Photo

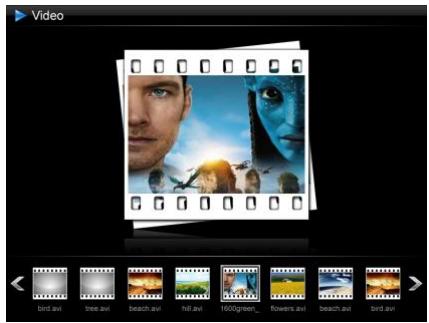
4. Videos
- Press the "Exit" key twice to display the main screen.
- Using the "Left/Right" arrows on the remote, select the "Video" icon.
- Press the "Enter" key: the video will start.
- Use the "Left/Right" keys to select / II (Play/Pause) on screen, and then press "Enter".
- Use the "Left/Right" keys to select the (Previous/Next) on screen, and then press "Enter".
- Use the "Left/Right" keys to select / (Rewind/Forward) on screen, and then press "Enter".
- Press the ^+ / ^- on the remote to adjust the sound level.
- Pressing the "VIDEO" key on the remote can also access the Video menu.

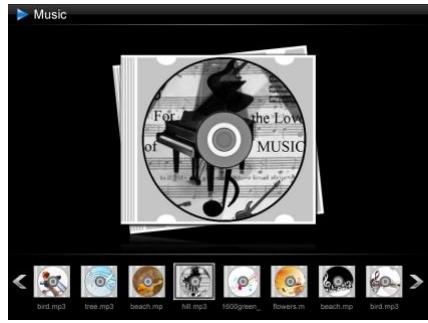
5. Music
- Press the "Exit" key twice to display the main screen.
- Using the "Left/Right" arrows on the remote, select the "Music" icon.
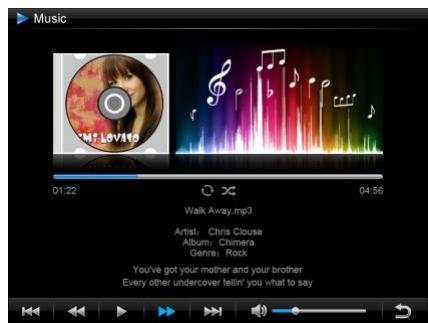
- Press the "Enter" key: the music will begin.
- Use the "Left/Right" keys to select / II (Play/Pause) on screen, and then press "Enter".
- Use the "Left/Right" keys to select / (Previous/Next) on screen, and then press "Enter".
- Use the "Left/Right" keys to select / (Rewind/Forward)) on screen, and then press "Enter".
- Use the "Left/Right" keys to select (Volume) on screen, and then press "Enter" keys to decrease the sound level.
- Use the "Left/Right" keys to select (Volume) on screen, and then press the "Enter" key to increase the sound level.
- To return to the previous settings, press the "Exit" key on the remote.
- Pressing / on the remote can also adjust the sound level.
- Press "MUSIC" on the remote to access the Music menu.
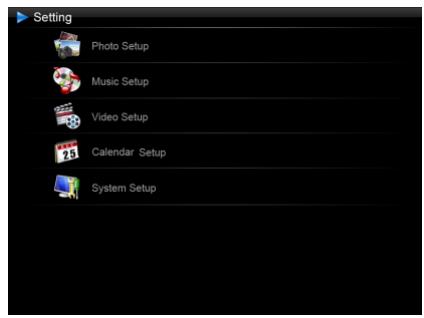
IV. Settings
On the main screen, select the "Settings" icon using the "Left/Right" remote to access the different settings for your frame.
If a slideshow is playing, simply press the “Setup” key on your remote to access the settings menus.
When you are into the settings menus, the "Up/Down" keys on the remote allow you to select the parameters to adjust, and the "Left/Right" keys allow you to choose the appropriate setting for the selected parameter.
and "Up/Down" keys on your
1. Photos Setup
Select "Photo Setup" using the "Up/Down" keys on the remote, then press "Enter". The opposite screen will appear:
You will then be able to change settings using the arrow keys on the remote.
- Display mode
Select "Display Mode" using the "Up/Down" keys on the remote and press "Enter", then use the "Up/Down" keys to choose between:
Slideshow: images scroll one after another
Thumbs: the images display as thumbnails. (Note: When your frame is in this mode, you can access Slideshow, Slideshow+Music or Single by pressing the “Enter” key repeatedly.)
Single: A single photo is displayed
Display ratio
Select the "Display Ratio" using the "Up/Down" keys on the remote and press "Enter", then use the "Up/Down" keys to choose between:
Fit to screen: the photo remains in its original format
Crop for fill: the photo is centered and cropped to fit the entire screen
Full-screen: the photo is altered in order to occupy the full screen
- Slideshow duration
Select the "Slideshow how duration" using the "Up/Down" keys on the remote and press "Enter", then use the "Up/Down" keys to choose between:
5 Sec.
15 Sec.
30 Sec.
60 Sec.
5 Min.
15 Min.
- Slideshow effect
Select the "Slideshow effect" using the "Up/Down" keys on the remote and press "Enter", then use the "Up/Down" keys to choose between the following effects:
Random
No transition
Fade
Snake
Partition
Erase
3D
Grid
Rect
Close
- Slideshow repeat
Select "Slideshow show repeat" using the "Up/Down" keys on the remote and press "Enter", then use the "Up/Down" keys to choose between:
Repeat: the slideshow plays in a loop
Once: the slideshow is played once
Random: the pictures will be displayed randomly
Magic Window
Select the "Magic Window" using the "Up/Down" keys on the remote, then press the "Enter" key to choose "On" or "Off".
Clock
Select "Clock" using the "Up/Down" keys on the remote, then press the "Enter" key to choose "On" or "Off".
- Resize
Select "Resize" using the "Up/Down" keys on the remote, then press the "Enter" key to choose "On" or "Off".
- Cut Out When Copy
Select "Cut Out When Copy" using the "Up/Down" keys on the remote, then press the "Enter" key to choose "On" or "Off".
Show tip When Copy
Select "Show tip When Copy" using the "Up/Down" keys on the remote, then press the "Enter" key to choose "On" or "Off".
2. Music Setup
In the settings menu, select the "Music setup" using the "Up/Down" keys on your remote, and then press "Enter".
You can set:
- Play mode
Select the "Play Mode" using the "Up/Down" keys on the remote and press "Enter", then use the "Up/Down" keys to choose:
Repeat: the tracks will be played in a loop
Random: the tracks will be played randomly
Once: each track will be played once
Repeat one: each track will be played twice
Music Effect
Your TELEFUNKEN frame has an equalizer to adapt the sound to the type of music being listened to. Select "Music Effect" using the "Up/Down" keys on the remote and press "Enter", then use the "Up/Down" keys to choose between:
Jazz
DBB
Normal
Rock
Pop
Classic
Soft
Show Spectrum
When playing a music file, you can display the equalizer on the screen of your TELEFUNKEN frame. Select "Show Spectrum" using the "Up/Down" keys on the remote, and then press "Enter" key to select "On" or "Off".
- Auto Play
When enabled, the frame plays automatically your audio files, as soon as audio mode is selected.
Select "Auto Play" using the "Up/Down" keys on the remote, and then press "Enter" key to select "On" or "Off".
3. Video Setup
In the settings menu, select the "Video Setup" using the "Up/Down" keys on your remote and press "Enter".
Display mode
Select "Display Mode" using the "Up/Down" keys on the remote and press "Enter", then use the "Up/Down" keys to choose between:
Full-screen: your video will be displayed in 4:3
Original Size: your video will be displayed in its original format
- Play mode
Select "Play Mode" using the "Up/Down" keys on the remote and press "Enter", then use the "Up/Down" keys to choose between:
Repeat: your video will play in a loop
Once: your video will only play once
- Auto play
When enabled, the frameautomatically plays your video files, as soon as video mode is selected.
Select "Auto Play" using the "Up/Down" keys on the remote, then press "Enter" key to choose "On" or "Off".
4. Calendar setup
Select the "Calendar Setup" into the Settings menu using the "Up/Down" keys on the remote and press "Enter".
You can use the arrow keys or the "Enter" key on the remote to adjust the:
The calendar's display mode
Select "Display Mode" using the "Up/Down" keys on the remote and press "Enter", then use the "Up/Down" keys to choose between:
Monthly Calendar
Calendar
Analog clock
- Date Format
Select "Date Format" using the "Up/Down" keys on the remote and press "Enter", then use the "Up/Down" keys to choose between:
MM/DD/YYYY
DD/MM/YYYY
YYYYY/MM/DD
- Date
Select "Date" using the "Up/Down" keys on the remote and press "Enter", then:
Use the "Up/Down" keys to choose between Month, Day, Year
Use the "Left/Right" keys to set the values for Month, Day, Year
Clock mode (12- or 24-hour)
Select “Clock Mode” using the “Up/Down” keys on the remote and press “Enter”, then press the “Up/Down” keys to choose 12- or 24-hr format, press “Enter” to confirm.
Clock Time
Select "Clock Time" using the "Up/Down" keys on the remote and press "Enter", then:
Use the "Up/Down" keys to choose between Hour, Min, AM, PM
Use the "Left/Right" keys to set the values for Hour, Min, AM, PM
Alarm status
Select "Alarm Status" using the "Up/Down" keys on the remote, then press "Enter" key to select "On" or "Off".
Alarm time
To set the time for the alarm, select "Alarm Time" using the "Up/Down" keys on the remote and press "Enter", then:
Use the "Up/Down" keys to choose between Hour, Min, AM, PM
Use the "Left/Right" keys to set the values for Hour, Min, AM, PM
Alarm frequency
Select "Alarm Frequency" using the "Up/Down" keys on the remote and press "Enter", then use the "Up/Down" keys to choose between:
Once
Everyday
Mon. to Fri.
Weekend
5. System configuration
This menu allows you to set the operating parameters of your frame.
Light sensor on/off
Select "Light sensor" using the "Up/Down" keys on the remote, then press "Enter" key to choose "On" or "Off".
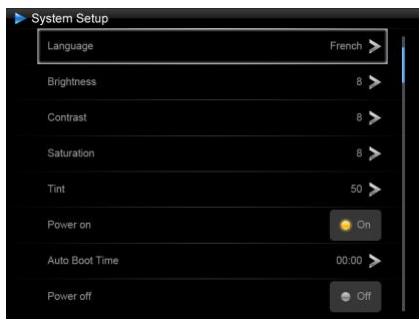
Language
Select "Language" using the "Up/Down" keys on the remote and press "Enter", then use the "Up/Down" keys to choose between:
English
French
German
Italian
Netherlands
Portuguese
Spanish
- Brightness
Select “Brightness” using the “Up/Down” keys on the remote and press “Enter”, then press the “Left/Right” keys to adjust the brightness level (1-16).
- Contrast
Select "Contrast" using the "Up/Down" keys on the remote and press "Enter", then press the "Left/Right" keys to adjust the contrast level (1-16).
- Saturation
Select "Saturation" using the "Up/Down" keys on the remote and press "Enter", then press the "Left/Right" keys to adjust the saturation level (1-16).
- Tint
Select “Tint” using the “Up/Down” keys on the remote and press “Enter”, then press the “Left/Right” keys to adjust the tint level (1-100).
Power on
Select "Power on" using the "Up/Down" keys on the remote, then press the "Enter" key to select "On" or "Off".
- Auto boot time
Select "Auto Boot Time" using the "Up/Down" keys on the remote and press "Enter", then:
Use the "Up/Down" keys to choose between Hour, Minute, AM, PM
Use the "Left/Right" keys to set the values for Hour, Minute, AM, PM
Power off
Select "Power off" using the "Up/Down" keys on the remote, then press the "Enter" key to choose "On" or "Off".
- Auto shut time
Select "Auto Shut Time" using the "Up/Down" keys on the remote and press "Enter", then:
Use the "Up/Down" keys to choose between Hour, Minute, AM, PM
Use the "Left/Right" keys to set the values for Hour, Minute, AM, PM
- Auto power frequency
Select "Auto-Power Frequency" using the "Up/Down" keys on the remote and press "Enter", then press the "Up/Down" keys to choose between:
Once
Everyday
Mon. to Fri.
Weekend
- Reset
If the frame is handled incorrectly, it may be useful to reset its default settings. To do so, select "Default" using the "Up/Down" keys on the remote and press "Enter", then use "Up/Down" keys to select "On" or "Off".
Note: After Resetting, the language selection screen will appear during the following start-up, just as it did for its first use.
- Version number of the internal software (for information only)
V. Connecting to a computer
It is possible to transfer files to the frame by connecting it to your personal computer. To do so, connect your frame via USB cable (mini-USB port on the frame, and standard USB port for the computer) to the computer, then turn on your frame: the frame's screen will show "PC connection..." Return to normal operation after disconnecting.
On your computer, the following dialog box will appear:

- Click “Open folder and display files” in order to view the contents of the internal memory. The following screen will appear:
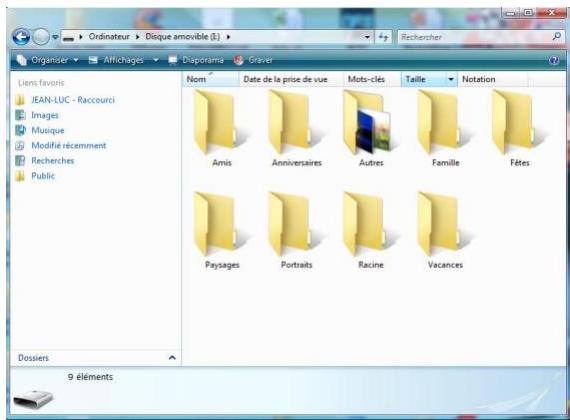
Open the directory storing the files you want to transfer to the frame, and place them in the desired folder using "Copy/paste" or "Drag and drop".
Caution! Photos transferred in this way will not be resized.
- Disconnect the USB cable: your frame will restart automatically.
VI. Safety instructions
Handle the digital photo frame with care, and avoid touching the screen; fingerprints are difficult to remove.
Always set the digital photo frame on a flat and stable surface to prevent it from falling and being damaged.
Avoid exposing the digital photo frame to the sun or high temperatures, as these may damage the frame or reduce its operational life. Do not place it near heat sources like radiators or space heaters. Do not position the frame facing direct sunlight in order to avoid reflections.
Avoid exposing the digital photo frame to rain, water, or moisture. Do not place it in a sink or basin where it may come in contact with water.
Never place heavy or sharp objects on the frame, the screen, or the frame's power supply.
Do not plug the digital photo frame into an outlet or cord with a power supply that is too high. This may cause overheating, a fire, or electrical shock.
Be careful of the location of the power cord; it must not be walked on or come in contact with other objects. Do not place the cord under a rug. Regularly check the condition of the cord to prevent damage. If the cord is damaged, unplug it and replace it.
Ventilation
Keep the digital frame at a sufficient distance from the wall to ensure its ventilation.
Do not place the digital photo frame on a bed or sofa to avoid overheat.
Caution!
Never remove the plastic cover on the back of the frame. The digital photo frame has electrical circuits and you could be hurt if you touch them.
Do not try to repair the digital photo frame by yourself.
VII. Warranty
The warranty does not cover damage caused if you (or any unauthorized person) tried to repair the frame.
If the frame is emitting smoke, noise, or an unusual smell, immediately turn it off and unplug it. Contact your store.
If you do not use the digital frame for a while, make sure to unplug the power cord.
The warranty concerns the digital photo frame and does not include the accessories. The following are considered accessories:
The power supply unit,
The remote (according to model).
However, these accessories may be ordered from our technical division:
By email: assistance@sopeg.fr
Warranty period
This digital frame is under warranty for 12 months. The warranty period begins on the date the frame is purchased.
The warranty must be proven by presenting the original invoice or receipt on which the date and model purchased appear.
Coverage
A defective digital frame must be returned complete to your distributor with an explanation.
If this digital frame presents a defect during the warranty period, the authorized After-Sales Service will repair any defective component or manufacturing defect. The After-Sales Service will unilaterally decide whether to repair or replace the digital frame, in part or in whole.
The initial purchase date will determine the starting date for the warranty period.
If the digital frame is repaired or exchanged by our After-Sales Service, the warranty period is not extended.
Exclusions
Damage or defects caused by the improper use or handling of the digital frame, or by the use of accessories, which are not original or not recommended in these instructions, are not covered by the warranty.
The warranty does not cover damage caused by outside elements, like lightning, water, or fire, or any other damage caused during transport.
No warranty coverage may be claimed if the digital frame's serial number has been modified, removed, erased, or made illegible.
No warranty coverage may be claimed if the digital frame has been repaired, altered, or modified by the buyer or any repair personnel not officially qualified and authorized.
The manufacturer does not guarantee the technical properties described in this manual. The hardware and accessories described in this manual are subject to change without advance notice. For this reason, the manufacturer reserves the right to change the related documents, components, options, and characteristics without advance notice.
Compliance with current regulations:
This digital frame complies with current CE marking standards, and is compatible with the RoHS standard.
Recycling end-of-life electrical equipment and electronics
Used electrical and electronic devices must not be discarded with ordinary household refuse.
The presence of the symbol on the product or its packaging serves as a reminder of this.
Some materials constituting this product may be recycled if you take them to an appropriate recycling centre. By reusing the components and raw materials of old devices, you contribute significantly to protecting the environment.
For further information on collection sites for used equipment, you can enquire at your city hall, the waste treatment department, or the shop where you purchased the product.
VIII. Specifications
| Specifications | DPF 10934 |
| Screen size | 10,1” (25,6 cm) |
| Resolution | 1024 x 600 |
| Screen type | LED |
| Image ratio | 16/9 |
| Internal memory | 2 GB |
| Audio/video | YES |
| Cards supported | SD/MMC,SDHC, MS, XD, USB sticks |
| Files supported | JPEG/WAV, MP3/MPEG1,4, MOTION JPEG |
| Auto resizing | YES |
| Auto rotation | YES |
| Power input | 100-240 V AC 50/60 Hz |
| Power output | 5V DC 2Ah |
| Energy consumption while in standby | <1W |
| Energy consumption while in use | <8W |
| Dimensions | 280*176*26mm |
| Weight | 630 g |
| System compatibility | Windows XP, Vista, 7, Mac OS 9.0 & followings |
MODE D'EMPLOI CADRE PHOTOS NUMERIQUES TELEFUNKEN DPF 10934
MM/JJ/AAAAA
JJ/MM/AAAAA
AAAA/MM/JJ