
PDS 150 - Electric grinder PARKSIDE - Free user manual and instructions
Find the device manual for free PDS 150 PARKSIDE in PDF.

| Product type | Bench grinder |
| Brand | Parkside |
| Model | PDS 150 |
| Rated voltage | 230 V |
| Frequency | 50 Hz |
| Power consumption | 150 W |
| No-load speed | 2,950 rpm |
| Grinding wheel diameter | 150 mm |
| Grinding wheel width | 16 mm |
| Grinding wheel bore | 12.7 mm |
| Maximum peripheral speed | 21.99 m/s |
| Weight | 7.3 kg |
| Sound pressure level | 73 dB(A) |
| Main functions | Grinding and sharpening of metal tools |
| Machinable materials | Metals (steel, tools, etc.) |
| Wheel type | Dry grinding wheel |
| Safety shields | Yes, adjustable |
| Workpiece support | Left and right, adjustable |
| On/off switch | Yes (positions 0/1) |
| Mounting | Four mounting holes (diameter not specified) |
| Safety | Mandatory use of eye and ear protection, keep cable away |
| Maintenance | Clean with soft cloth, no aggressive liquids or solvents |
| Warranty | 36 months |
| Intended use | Dry grinding only, no hazardous materials (asbestos) |
Frequently Asked Questions - PDS 150 PARKSIDE
User questions about PDS 150 PARKSIDE
0 question about this device. Answer the ones you know or ask your own.
Ask a new question about this device
Download the instructions for your Electric grinder in PDF format for free! Find your manual PDS 150 - PARKSIDE and take your electronic device back in hand. On this page are published all the documents necessary for the use of your device. PDS 150 by PARKSIDE.
USER MANUAL PDS 150 PARKSIDE
GB Operating and safety instructions
GB
Operating instructions
Page
4-7
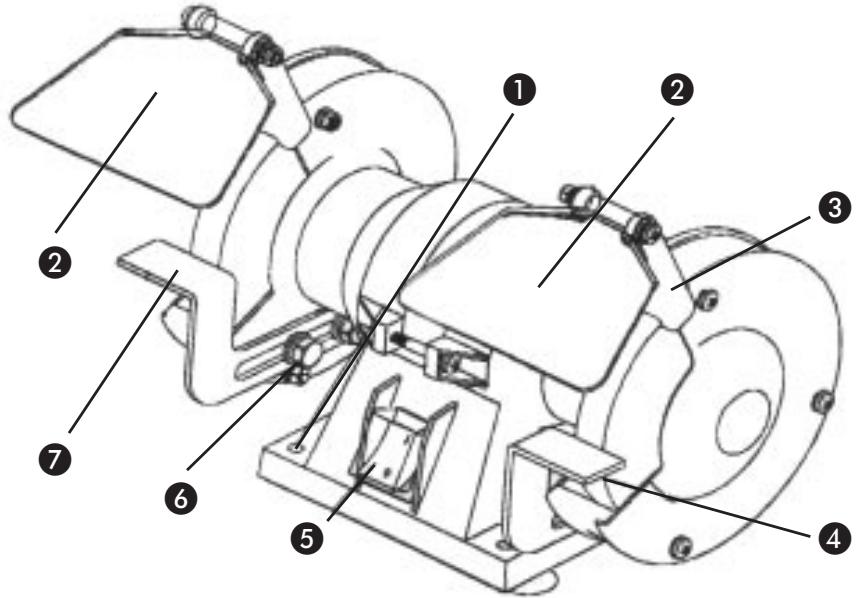
Abb./Fig. 1

Abb./Fig. 2
PARKSIDE
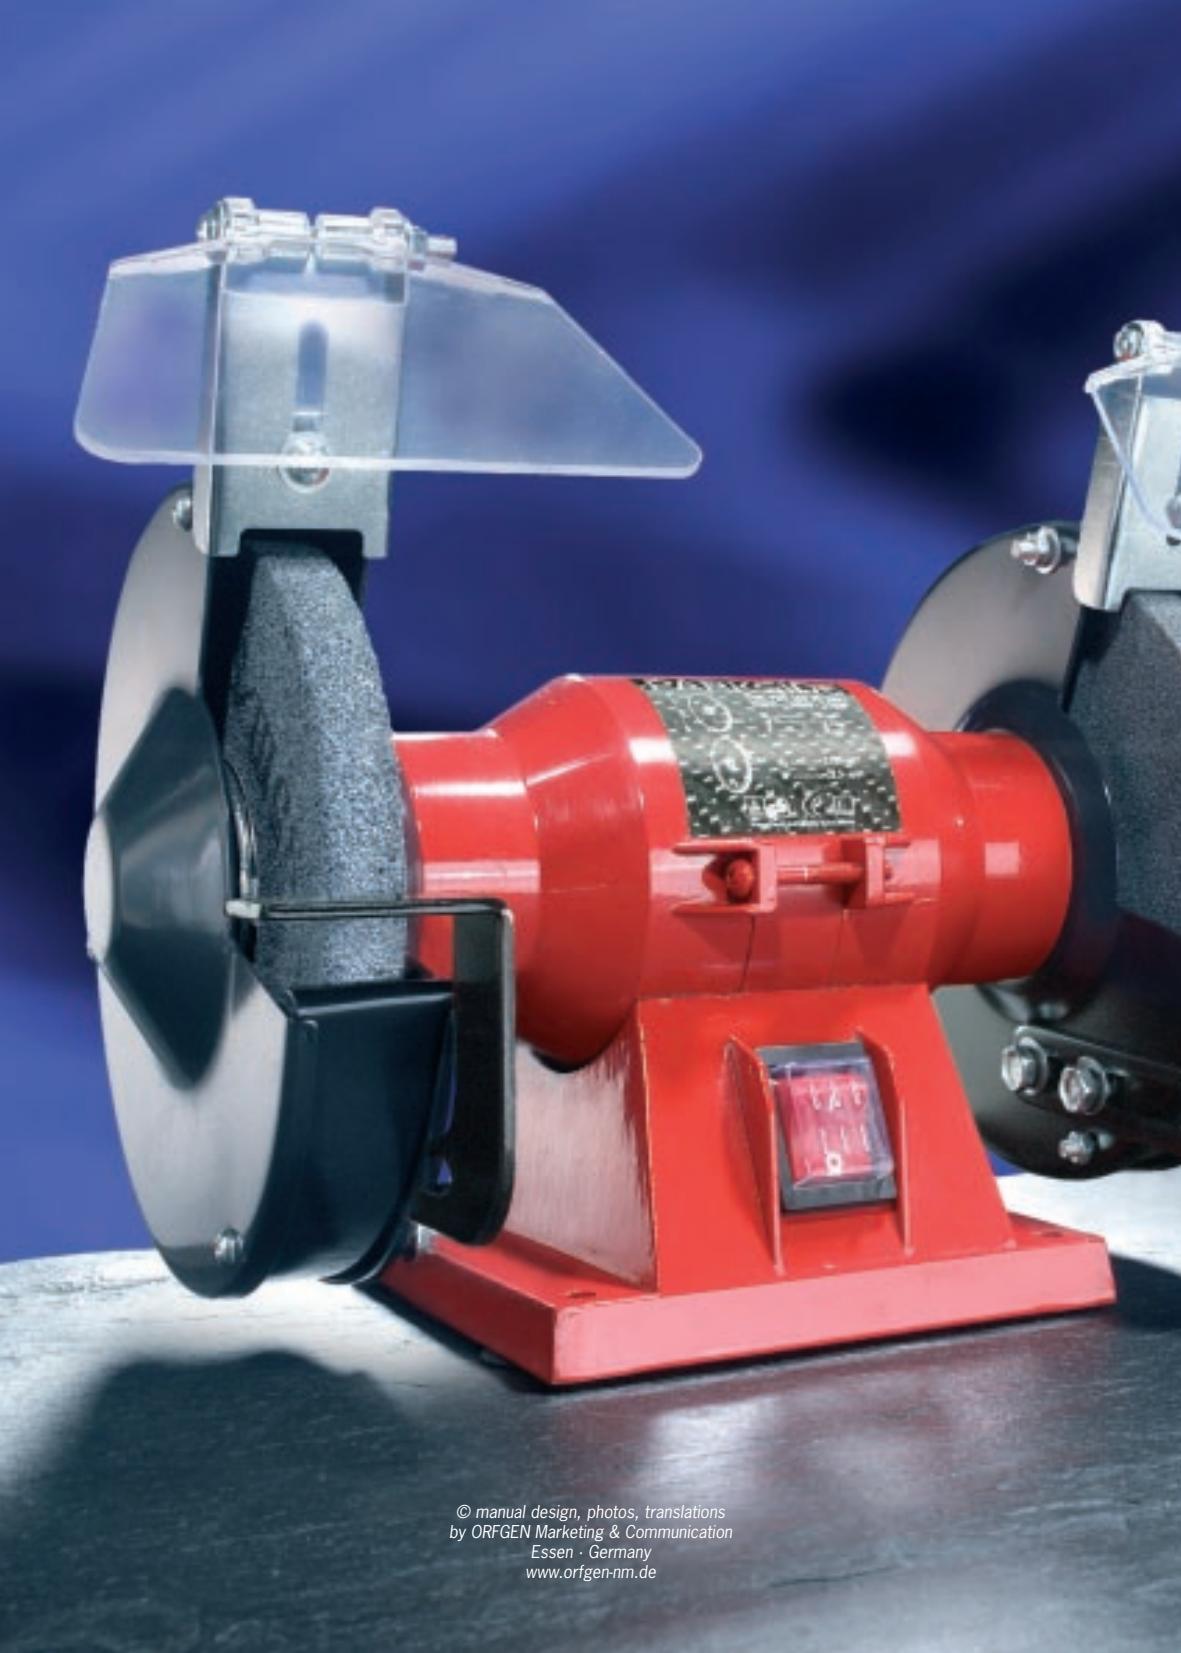
PDS 150 BENCH GRINDER
For grinding and sharpening metal tools
Dear Customer! We are delighted that you have decided to purchase our high quality PDS 150 Bench Grinding. Please make sure you familiarise yourself fully with the way the equipment works before you use it for the first time and that you understand how to handle electrical power
tools correctly. Please read the operating instructions below and the accompanying safety advice carefully.
Use the equipment only as described and for the indicated purposes. By doing this you will be able to work in complete safety and produce better results. We hope you enjoy using your bench grinder.
FEATURES OF THE PDS 150
1 Mounting holes (4x)
2 Protection shields
3 Protection shield mount
4 Workpiece support right
ON/OFF switch
Workpiece support adjustment screws
7 Workpiece support left
3 Wheel guard cover
Wheel edge cover
10 Grinding wheel
Machine-side flange (marked with notch)
Nut with notch
Outside flange (not marked)
14 Left-hand thread
TECHNICAL INFORMATION
Nominal voltage: 230V 50Hz
Power consumption: 150 watts
No load speed: 2,950 rpm
Grinding wheel diameter: 150 mm
Grinding wheel width: 16 mm
Grinding wheel bore: 12,7 mm
Circumferential speed max.: 21.99 m/s
Weight: 7.3kg
Sound pressure level: 73.00 dB (A) Noise level determined for normal operation /measured in accordance with DIN 45635-21
We reserve the right to make technical modifications to and changes to the appearance of the equipment in the course of further development without notice.
Hence no responsibility is accepted for any information such as dimensions, instructions etc. This does not affect your legal rights.
IMPORTANT SAFETY ADVICE
Ensure that you observe the following safety instructions specifically for this equipment and in addition that you read the advice in the accompanying booklet called "Safety advice" before using the equipment for the first time.
Not following the safety instructions and advice can lead to accidents, electric shock, injuries, risks to health, or burns.
This bench grinder is intended to be used exclusively for dry grinding.
Materials dangerous to health, such as asbestos are not to be abraded.
Wear ear protectors. Look after your health - please wear safety glasses and a breathing /dust mask.
Always keep the mains cable away from the working area of the grinder and lead the cable away from the rear of the grinder.
The equipment is not to be used by people under 16 years old.
WARNING - Danger of burning! The workpiece gets hot during grinding. Never touch the part being ground.
Allow the workpiece to cool sufficiently. When grinding for longer periods, stop grinding from time to time and allow the workpiece to cool before continuing.


AREA OF USE
The PDS 150 Bench Grinding is intended for grinding and sharpening metal tools such as drills, chisels etc. and metal items.
We do not take any responsibility for uses other than those given here. Similarly in this event the guarantee becomes null and void.
ASSEMBLY, COMMISSIONING AND USE
ASSEMBLY

Before commissioning for the first use, the equipment must be fully assembled with all its parts. Attach the eye shields 2, the workpiece support left 7 and the workpiece support right 4, see Fig. 1). The bench grinder must be mounted on to a robust level surface, and if at all possible on to a fixed support, e.g. working surface, workbench. Use the four mounting holes 1.
■ POSITIONING WORKPIECE SUPPORTS AND EYE SHIELDS
To ensure safe working, the workpiece supports 4/7 and the eye shield mounts 3 must be correctly positioned. Check and correct the settings at frequent intervals to ensure even wear on the grinding wheel 10.
The clearance between the grinding wheel 10 and the eye shield holder 3, and between the grinding wheel 10 and the workpiece support (4 or 7) must be no more than 2mm .
Pull out the mains plug and loosen the workpiece support adjustment screw ⑥ for setting. Bring the workpiece support close up to grinding wheel ⑩ until the wheel just not longer moves. This is the correct setting. Retighten the adjustment screw ⑧ and check using your hand that the grinding wheel ⑩ movement is true and free.
If the grinding wheel is worn so much that the above clearance can no longer be achieved even after adjustment of the workpiece support or the eye shield mount, then the grinding wheel must be changed.
COMMISSIONING

Ensure that the equipment is switched off and that the ON/ OFF switch 5 is in the "0" position. Take note of the mains voltage. The voltage must agree with that shown on the equipment rating plate (equipment shown as 230V can also be connected to 220V ).
ON/OFF switch 5 in position "1" = equipment runs at a constant speed
ON/OFF switch ⑤ in position "0" = equipment is switched off
USE
To grind metal tools or metal items, place the workpiece on the workpiece support 4/7 and slowly bring it close to the grinding wheel 10. Carefully press the workpiece against the grinding wheel 10. Too much pressure can lead to overloading of the bench grinder. Grinding should be carried out only on the circumference of the grinding wheels.
CHANGING A GRINDING WHEEL
Always make sure that the mains plug is out of the socket before doing any work on the equipment and when it is out of use.
You must only use grinding wheels on which the manufacturer's information, the type of adhesive, dimensions and permitted speed agree with the technical information specified for this bench grinder.
Do not use any damaged or distorted grinding wheels. If you install new grinding wheels carryout a ringing test before use. Grinding wheels in good condition give a clear ringing noise when struck lightly with a plastic hammer.
Take off the wheel guard cover ③, eye shield ② and the wheel edge cover ⑨, and slacken the workpiece mount 4/7. You must ensure that the left-hand side of the bench grinder (see Fig. 2) has a left-hand thread and the right-hand side has a right-hand thread. The notched nut ② indicates the left-hand thread. The nut without notches corresponds to the right-hand thread. This ensures that the nuts can only be screwed off in the direction of rotation of the spindle.
Now change the grinding wheels and reassemble all the components in the reverse order.
WARNING!
- Do not interchange the flanges when attaching the grinding wheels (see Fig.2).
- Use only the clamping flange supplied to mount the grinding wheels. Central fixing holes in grinding wheels are not to be redrilled.
- Never operate the bench grinder without the wheel guard cover ③, eye shields ② or the wheel edge cover ⑨ in place. Always fully reassemble the grinder before use.
- Check and correct the setting of the work piece supports 4/7 and eye shield mounts at frequent intervals (as described in the Section "Positioning workpiece support and eye shields").
- After changing a grinding wheel, the grinder must to be run for a test period under no load of at least 5 minutes. Ensure that there is no one in the danger area.
CARE AND MAINTENANCE
Always make sure that the mains plug is out of the socket before doing any work on the equipment.
The PDS 150 Bench Grinding does not generally require maintenance.
Clean the bench grinder frequently. For best results, immediately after you have finished using it.
Do not allow any liquids to enter the bench grinder. Use a soft cloth to clean the grinder. Do not under any circumstances use petrol or strong solvents.
Store the grinder in a dry room.
□ Repairs are only to be carried out at a specialist electrical repair centre. This electrical equipment complies with the relevant safety regulations. Repairs may only be carried out by a specialist electrical repair centre using original spare parts, otherwise injury could occur to the user.
You can find further practical tips on electrical tools in the accompanying booklet "Safety Advice".
STATEMENT OF CONFORMITY
We, Kompernaß Handelsgesellschaft mbH, Burgstr. 21, D-44867 Bochum, Germany, hereby declare that this product conforms with the following EC regulations:
EC machine guideline:
98/37 EEC
EC low voltage regulations:
73/23 EEC (with change EC directive 93/68 EEC)
Electromagnetic compatibility:
89/336 EEC (with change EC directive 93/68 EEC)
Applicable harmonised standards:
DIN VDE 0741/08.63
DIN 66069/06.73
VBG 7n/01.93
EN 61029-1:2000
PrEN 61029-2-4:1992
EN 55014-1:1993/A2:1999
EN 61000-3-2/1995/A2:1998
EN 55014-2:1997
EN 61000-3-3:1995
Manufacturer:
PARKSIDE
Model type:
PDS 150
Description:
BENCH GRINDING MACHINE
Bochum, 31.07.2002

Hans KompenaB
- Managing Director -
WARRANTY
This piece of equipment is covered by a 36-month warranty as of the date of purchase. The equipment was produced with the greatest of care and underwent thorough testing before delivery. In the unlikely event of detecting a functional defect, please return the equipment in its original packaging with the proof of purchase (if available) to the closest service address.
Damage caused due to improper handling as well as regular wear of the parts are not covered by this warranty.
Beaver Electronic Services \ The Lodge, Premier Business Park
Long Street, Walsall · West Midlands, WS2 9DY
Tel.: 01922/725554 Fax: 01922/725417
WARRANTY
This piece of equipment is covered by a 36-month warranty as of the date of purchase. The equipment was produced with the greatest of care and underwent thorough testing before delivery. In the unlikely event of detecting a functional defect, please return the equipment in its original packaging with the proof of purchase (if available) to the closest service address.
Damage caused due to improper handling as well as regular wear of the parts are not covered by this warranty.
Irish Web Specialists
1 Verbena Avenue · Dublin 13
Tel.: 01/8320492 Fax: 01/8396829


- PARKSIDE
- PDS 150 BENCH GRINDER
- For grinding and sharpening metal tools
- FEATURES OF THE PDS 150
- TECHNICAL INFORMATION
- IMPORTANT SAFETY ADVICE
- AREA OF USE
- ASSEMBLY, COMMISSIONING AND USE
- ASSEMBLY
- ■ POSITIONING WORKPIECE SUPPORTS AND EYE SHIELDS
- COMMISSIONING
- USE
- CHANGING A GRINDING WHEEL
- WARNING!
- CARE AND MAINTENANCE
- STATEMENT OF CONFORMITY
- WARRANTY
Brand : PARKSIDE
Model : PDS 150
Category : Electric grinder