
Heki 2 - Roof window DOMETIC - Free user manual and instructions
Find the device manual for free Heki 2 DOMETIC in PDF.
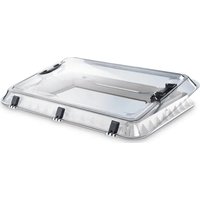


| Brand | Dometic |
| Model | Heki 2 |
| Product type | Roof window for motorhome or caravan |
| External dimensions (W x D) | 400 x 400 mm |
| Roof opening (W x D) | 300 x 300 mm |
| Weight | 4.5 kg |
| Main material | Double-walled polycarbonate |
| Frame color | White or gray (depending on version) |
| Main functions | Manual opening, integrated blind, insect screen |
| Blind | Integrated roller sun blind |
| Insect screen | Integrated, sliding |
| Power supply | None (manual operation) |
| Care and cleaning | Clean with a soft cloth and soapy water; avoid abrasive products |
| Safety | Safety lock in closed position for travel |
| Spare parts and repairability | Parts available via Dometic after-sales service; blind and insect screen replaceable |
| General information | Instruction manual available in several languages; professional installation recommended |
Frequently Asked Questions - Heki 2 DOMETIC
User questions about Heki 2 DOMETIC
0 question about this device. Answer the ones you know or ask your own.
Ask a new question about this device
Download the instructions for your Roof window in PDF format for free! Find your manual Heki 2 - DOMETIC and take your electronic device back in hand. On this page are published all the documents necessary for the use of your device. Heki 2 by DOMETIC.
USER MANUAL Heki 2 DOMETIC
EN Roof light
Installation and Operating Manual.....3
Dachfenster
Please read this instruction manual carefully before installation and first use, and store it in a safe place. If you pass on the product to another person, hand over this instruction manual along with it.
Table of contents
1 Explanation of symbols....3 2 Safety and installation instructions ....4 3 Scope of delivery ....5 4 Optional extras ....5 5 Intended use .... 5 6 Instructions before installation....6 7 Installing the Heki2....7 8 Using the Heki2 9 9 Troubleshooting....11 10 Maintaining and cleaning the Heki2....11 11 Guarantee....12 12 Disposal....12
1 Explanation of symbols

WARNING!
Safety instruction: Failure to observe this instruction can cause fatal or serious injury.

NOTICE!
Failure to observe this instruction can cause material damage and impair the function of the product.

NOTE
Supplementary information for operating the product.
2 Safety and installation instructions
Please observe the prescribed safety instructions and stipulations from the vehicle manufacturer and service workshops.
The manufacturer accepts no liability for damage in the following cases:
- Damage to the product resulting from mechanical influences • Alterations to the product without express permission from the manufacturer
- Use for purposes other than those described in the operating manual

WARNING! Beware of injury
Do not exceed the maximum allowable driving speed of 130 km/h, because this can damage the roof light. Parts that come loose may injure people in the vicinity.

NOTE
If you do not have sufficient technical knowledge for installing the components in vehicles, you should have a specialist install the roof window in your vehicle.
Please note the following:
• If faults or disturbances occur, consult a specialist workshop immediately. - Risk of breakage! Do not tread on the glass dome. - Before starting your journey, check that the roof window is locked properly. - Before starting your journey, check the roof window for damage (such as tension cracks in the acrylic glass). - Do not open the roof window while driving. - Do not open the window in strong wind or rain. - Close the roof window if it rains or snows. - Do not leave the vehicle with the roof window open. - Keep the roof window free of snow and ice.
3 Scope of delivery
No. in fig. 1
Quantity Designation
11 Outer frame with glass dome
21 Inner frame
| 3 | 16 | Fastening screw 4 × 25 mm |
| 16 | Fastening screw 2.5 × 12 mm |
4 16 Mounting bracket
(for roof thickness 25 - 32 mm)
5 9 Ventilation grille

NOTE
For roof thicknesses from 33 mm you will require an additional installation kit (chapter "Installing the Heki2" on page 7).
4 Optional
| Designation | Item no. |
| Spoiler, 800 mm | 9104100236 |
| Spoiler, 1100 mm | 9104100237 |
| Inner frame with lamps | 9104100241 |
5 Intended use
The Heki2 roof light (item no. 9104100235) is suitable for installing in caravans.
The maximum permissible speed is 130 km/h, as noise or damage could occur depending on the vehicle design or installation position. In case of excessive noise, a spoiler (accessory) can be used.
6 Instructions before installation
▶ Before installation, check the roof thickness of your vehicle. Consult the vehicle manufacturer if you have any questions. ▶ When choosing the installation location, observe the following:
- Adjoining components (roof rack or attachment and reinforcing parts), cables and cabinets in the vehicle interior must not get damaged when sawing the hole.
- Sufficient space needs to be available for installing the inner and outer frames.
- Only fit the roof light on flat and parallel interior and exterior roof areas with a maximum inclination of 15° to the horizontal.
- You may use an existing roof hole provided the roof light fits into it.
- You can fit the roof light sideways (hinge-side at front in direction of travel) or lengthways (hinge-side on left or right in direction of travel).
6.1 Pressing out the hole
See fig. 2
6.2 Using the reinforcing rails
Supplementary to fig. 3
▶Before installation, check whether the roof hole needs reinforcing. ▶Remove the foam according to the width of your reinforcing rail (not in scope of delivery) (A). ▶ Fit the reinforcing rails (B).
7 Installing the Heki2
Supplementary to fig. 4
The scope of delivery includes a mounting set, which is suitable for a roof thickness of 25 – 32 mm. For roof thicknesses of 33 – 60 mm, you need to have a suitable mounting set (see table).
▶Measure your roof thickness W. ▶Choose a suitable mounting set:
| Roof thickness | Mounting bracket colour | Screws Item no. | |
| 25 – 32 mm | Grey | 4 x 25 mm | Included in the scope of delivery |
| 33 – 39 mm | Black | 4 x 32 mm | 9104100245 |
| 39 – 46 mm | Yellow | 4 x 40 mm | 9104100246 |
| 46 – 53 mm | Blue | 4 x 46 mm | 9104100247 |
| 53 – 60 mm | Red | 4 x 52 mm | 9104100248 |
See fig. 5
▶ Check that the roof light has sufficient space around it (approx. 1 to 2 mm) in the roof opening.
See fig. 6
▶Clean the roof opening in the mounting area.
See fig. 7

Observe the instructions of the sealant manufacturer.
▶ Seal the mounting frame with a flexible non-hardening sealing compound (e.g. SikaLastomer-710).
See fig. 8
▶ Check the direction of travel when installing. You can fit the roof light sideways (hinge-side at front in direction of travel) or lengthways (hinge-side on left or right in direction of travel). ▶ Place the outer frame in the middle of the roof opening. ▶ Press the outer frame into the roof slightly so that the packing compound spreads out.
See fig. 9
Place the 16 mounting supports on the inside of the vehicle all the way into the recess of the outer frame. ▶ Attach the 16 mounting supports using the fastening screws ∅4. To do this use the large holes in the mounting supports. ▶ Tighten the screws 10 minutes after installation.
See fig. 10
▶ Place the inner frame on the outer frame and fasten it with the fastening screws ∅ 2.5 x 12 mm into the 16 mounting supports. To do this use the small holes in the mounting supports. Only fasten the screws slightly by hand. ▶ Check that the roller blinds can move freely. If they do not, then loosen the screws slightly.
See fig. 11
▶ Clip on the ventilation grille (1). It needs to click in. ▶ Remove the protective film from both sides of the acrylic glass.

NOTE
If the protective film is exposed to sunlight for too long, it cannot be taken off without leaving a residue.
▶ After installing, check the roof light works properly. ▶ If necessary, enter the new vehicle height and weight in the vehicle documents.
8 Using the Heki2
8.1 Opening in the tilting position (fig. 12)
Press the latches on both rotary bolts and turn them 90° (A). Hold the bracket in the middle and move it out of the original position (B). Tilt it downwards. Push the glass dome upwards (C). Opening the glass dome is supported by the two gas springs after approx. 150 mm. Swivel the bracket to the glass dome and press it back into the original position (D).
To close it, follow the instructions in the reverse order.
8.2 Opening in the half-way position (fig. 13)
Press the latches on both rotary bolts and turn them 90° (A). Hold the bracket in the middle and move it out of the original position (B). Tilt it downwards. Push the glass dome upwards (C). Opening the glass dome is supported by the two gas springs after approx. 150 mm. Open both the latches (D). Tilt the bracket to the half-way position. Pull the glass dome down until the bracket is lying in the holders. Secure the bracket with both latches.
To close it, follow the instructions in the reverse order.
8.3 Opening in the continuous ventilation position (fig. 14)
Press the latches on both rotary bolts and turn them 90° (A). Push the glass dome upwards with both hands approx. 2 cm on both rotary bolts. Turn the rotary bolt into the position provided for this (B).
To close it, follow the instructions in the reverse order.
8.4 Closing the roller blind (fig. 15)

NOTICE! Risk of damage due to a build-up of heat between the roller blind and the window.
In strong sunlight, only close the blackout roller blind two thirds of the way. Open the glass dome into the “continuous ventilation” position.
Take hold of the recessed grip on the rod and pull it towards the rod on the other side with the pivot until they both click into one another. Select the required position by moving the two latched-roller blinds at the same time.
8.5 Opening the roller blind (fig. 16)
Pull the roller blind so that the blind with the recessed grip is completely extended. Separate the roller blinds by pressing the pivot. Guide the roller blind back using the recessed grip. Do not let the roller blind spring back.
9 Troubleshooting
Fault Possible cause Suggested remedy
| The roof light does not close completely. | Dirt between the glass and frame | Clean the window.Remove any leaves and twigs between the glass and frame. |
| The flyscreen or black-out roller blind cannot be moved. | Dirt on the side guides Clean the side guides. | |
If you are unable to rectify the fault, get in touch with a specialist workshop.
10 Maintaining and cleaning the Heki2

NOTICE!
Do not use any sharp or hard objects for cleaning since they may damage the acrylic glass.
Only use cleaning agents that are approved by the manufacturer. Acrylic glass polish (ref. no. 9600000128), special polishing cloth (ref. no.
9600000130) and acrylic glass cleaning agent (ref. no. 9600000129).
▶ Clean the roller blind with mild soap and plenty of water.
11 Guarantee
The statutory warranty period applies. If the product is defective, please contact the service partner in your country (addresses on the back of the instruction manual).
Our experts will be happy to help you and will discuss the warranty process with you in more detail.
12 Disposal
▶ Place the packaging material in the appropriate recycling waste bins wherever possible.

If you wish to finally dispose of the product, ask your local recycling centre or specialist dealer for details about how to do this in accordance with the applicable disposal regulations.
8.4 Closing the blinds (fig. 15)

8.5 Opening the blinds (fig. 16)
8.1 Opening the stand (fig. 12)

- EN ROOF LIGHT
- DACHFENSTER
- TABLE OF CONTENTS
- EXPLANATION OF SYMBOLS
- WARNING
- NOTICE
- NOTE
- SAFETY AND INSTALLATION INSTRUCTIONS
- PLEASE OBSERVE THE PRESCRIBED SAFETY INSTRUCTIONS AND STIPULATIONS FROM THE VEHICLE MANUFACTURER AND SERVICE WORKSHOPS
- WARNING! BEWARE OF INJURY
- SCOPE OF DELIVERY
- NO. IN FIG
- QUANTITY DESIGNATION
- OPTIONAL
- INTENDED USE
- INSTRUCTIONS BEFORE INSTALLATION
- PRESSING OUT THE HOLE
- USING THE REINFORCING RAILS
- SUPPLEMENTARY TO FIG
- INSTALLING THE HEKI
- SEE FIG
- USING THE HEKI
- OPENING IN THE TILTING POSITION (FIG. 12)
- OPENING IN THE HALF-WAY POSITION (FIG. 13)
- OPENING IN THE CONTINUOUS VENTILATION POSITION (FIG. 14)
- CLOSING THE ROLLER BLIND (FIG. 15)
- NOTICE! RISK OF DAMAGE DUE TO A BUILD-UP OF HEAT BETWEEN THE ROLLER BLIND AND THE WINDOW
- OPENING THE ROLLER BLIND (FIG. 16)
- TROUBLESHOOTING
- MAINTAINING AND CLEANING THE HEKI
- GUARANTEE
- DISPOSAL
- CLOSING THE BLINDS (FIG. 15)
- OPENING THE BLINDS (FIG. 16)
- OPENING THE STAND (FIG. 12)
Brand : DOMETIC
Model : Heki 2
Category : Roof window