KM 3873 - Coffee grinder SEVERIN - Free user manual and instructions
Find the device manual for free KM 3873 SEVERIN in PDF.
User questions about KM 3873 SEVERIN
0 question about this device. Answer the ones you know or ask your own.
Ask a new question about this device
Download the instructions for your Coffee grinder in PDF format for free! Find your manual KM 3873 - SEVERIN and take your electronic device back in hand. On this page are published all the documents necessary for the use of your device. KM 3873 by SEVERIN.
USER MANUAL KM 3873 SEVERIN
Before using the appliance, please read the following instructions carefully and keep this manual for future reference. The appliance must only be used by persons familiar with these instructions.
Connection to the mains supply
Make sure that the supply voltage corresponds with the voltage marked on the rating label. This product complies with all binding CE labelling directives.
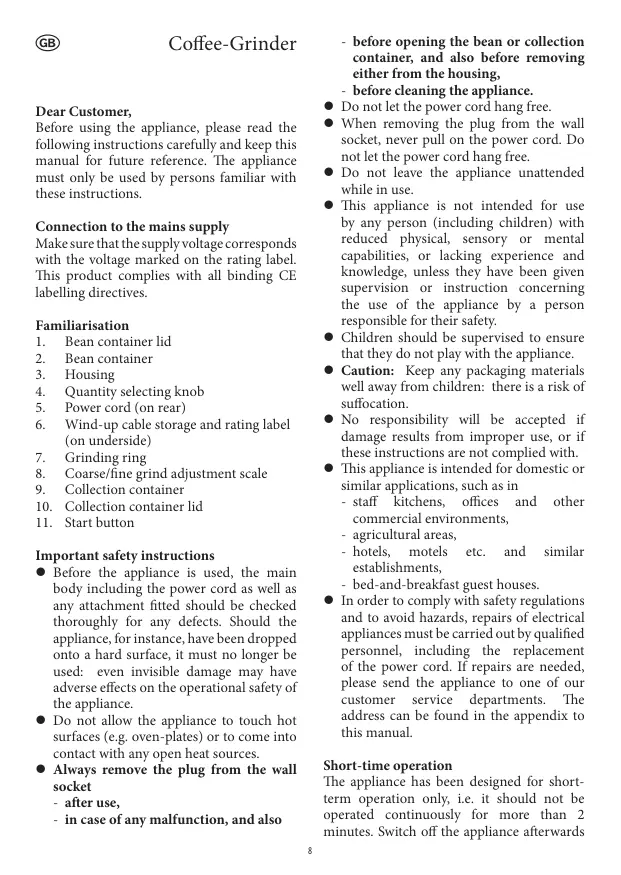
Familiarisation
- Bean container lid
- Bean container
- Housing
- Quantity selecting knob
- Power cord (on rear)
- Wind-up cable storage and rating label (on underside)
- Grinding ring
- Coarse/fine grind adjustment scale
- Collection container
- Collection container lid
- Start button
Important safety instructions
- Before the appliance is used, the main body including the power cord as well as any attachment fitted should be checked thoroughly for any defects. Should the appliance, for instance, have been dropped onto a hard surface, it must no longer be used: even invisible damage may have adverse effects on the operational safety of the appliance.
-
Do not allow the appliance to touch hot surfaces (e.g. oven-plates) or to come into contact with any open heat sources.
Always remove the plug from the wall socket -
after use,
- in case of any malfunction, and also
before opening the bean or collection container, and also before removing either from the housing.
-
before cleaning the appliance.
-
Do not let the power cord hang free.
- When removing the plug from the wall socket, never pull on the power cord. Do not let the power cord hang free.
- Do not leave the appliance unattended while in use.
- This appliance is not intended for use by any person (including children) with reduced physical, sensory or mental capabilities, or lacking experience and knowledge, unless they have been given supervision or instruction concerning the use of the appliance by a person responsible for their safety.
Children should be supervised to ensure that they do not play with the appliance. - Caution: Keep any packaging materials well away from children: there is a risk of suffocation.
- No responsibility will be accepted if damage results from improper use, or if these instructions are not complied with.
-
This appliance is intended for domestic or similar applications, such as in
-
staff kitchens, offices and other commercial environments,
- agricultural areas,
- hotels, motels etc. and similar establishments,
-
bed-and-breakfast guest houses.
-
In order to comply with safety regulations and to avoid hazards, repairs of electrical appliances must be carried out by qualified personnel, including the replacement of the power cord. If repairs are needed, please send the appliance to one of our customer service departments. The address can be found in the appendix to this manual.
Short-time operation
The appliance has been designed for shortterm operation only, i.e. it should not be operated continuously for more than 2 minutes. Switch off the appliance afterwards
and allow the motor to cool down (10 Min.) before switching it on again.
Before using for the first time
Before initial use, the grinding mechanism, grinding ring, bean and collection containers should be cleaned as described in the section General care and cleaning.
Operation
Adjusting the grind level
- The adjustment control allows for adjustment of the coarse/fine setting in several steps. Depending on the type of coffee and the preparation method used, the following information on grinding levels may be helpful
Adjustable grind settings:
-1 for espressomachines
-2-7 for automatic coffee makers
- 8-10 for brewing when no machine is used
- Caution: To prevent beans from getting caught in the grind mechanism and causing possible jamming of the motor, always set the grind level first before putting the beans into the container. If the beans have already been put in, the grind level should only be changed while the motor is running.
- Turn the bean container until the arrow on the container is aligned with the desired setting.
Loading the coffee beans
- Remove the lid of the bean container.
- Load the beans inside and replace the lid.
- The maximum capacity of the bean container is 150g
Selecting the right quantity
- Use the quantity selector knob to set the amount of ground coffee desired. Any amount from 2 to 10 cups can be processed in a single cycle. However, the quantity-per-cup information on the selecting knob is approximate only. Since different types of coffee as well as miscellaneous
factors such as the size of the cups and your personal preference may require a different setting, we recommend that you try out whatever suits your own personal taste.
- The maximum capacity of the collection container is 100g . Caution: Always make sure you empty the collection container in good time, as an over-full container may cause a blockage inside the appliance.
Grinding the beans
- Make sure that the collection container lid is properly fitted before attaching the container itself to the main unit.
- Insert the plug into a suitable wall socket.
- Press the start button.
- The grinding process begins and stops automatically once the selected amount of ground coffee has been produced.
- The process can be stopped at any time by pressing the start button again.
- Once grinding has finished, remove the plug from the wall socket and wait until the motor has come to a complete standstill before removing and opening the collection container.
- Note: To ensure optimum coffee flavour, only the required quantity of beans should be ground immediately before brewing. Any excess ground coffee should be stored in a suitable air-tight container.
General care and cleaning
Before cleaning the appliance, always remove the plug from the wall socket and wait until the motor has come to a complete standstill.
- To avoid the risk of electric shock, do not clean the housing or the power cord with water, and do not immerse them in water. The housing may be wiped with a slightly damp, lint-free cloth. Wipe thoroughly dry afterwards.
- Do not use abrasives, harsh cleaning solutions or hard brushes for cleaning.
Take off the collection container and its lid, and clean them with a mild detergent. Ensure they are thoroughly dry before
being replaced on the grinder.
- The bean container should only be taken off after any remaining beans have been removed. Caution: To take the container off, first turn it anti-clockwise until the arrows on the container and the scale are aligned and then lift it up. Rinse the container and lid and dry thoroughly. When replacing the container, the arrows on the container and the scale must be aligned again. Then turn the container clockwise to lock it.
-
The grinding mechanism can be opened up for cleaning, and also in case of any malfunction.
-
Take off the container as described above.
- Take out the grinding ring.
- Use a small, soft brush to clean the grinding mechanism and the ring.
- Caution: The grinding assembly and ring have sharp edges and care should therefore be taken to avoid injury.
- When inserting the grinding ring, ensure that the teeth on the ring fit into the corresponding recesses on the mounting for the grinding mechanism. With the ring inserted, you should only be able to move it slightly, but not turn it.
In case of problems
Ground coffee spills from the collection container:
This is a normal occurrence. Static charge is usually the cause.
- The beans are not being transported into the grind mechanism (the grinder makes a high-pitched, squealing sound):
Because of their particular shape, beans might get jammed inside the mechanism. Set the grind adjustment to position 1 and remove the plug from the wall socket. Move the beans about, using a spoon. This should free those caught in the mechanism.
- The motor does not start, or makes abnormal noises as if running under a heavy load:
The grind mechanism is choked or blocked. Remove the plug from the wall socket immediately and clean the mechanism as described in the section General care and cleaning.
Power cord wind-up storage
The wind-up power cord storage under the base facilitates limiting the length of the power cord during use and makes it easy to store the appliance.
Disposal

Do not dispose of old or defective appliances in domestic garbage; this should only be done through public collection points.
Guarantee
This product is guaranteed against defects in materials and workmanship for a period of two years from the date of purchase. Under this guarantee the manufacturer undertakes to repair or replace any parts found to be defective, providing the product is returned to one of our authorised service centres. This guarantee is only valid if the appliance has been used in accordance with the instructions, and provided that it has not been modified, repaired or interfered with by any unauthorised person, or damaged through misuse.
This guarantee naturally does not cover wear and tear, nor breakables such as glass and ceramic items, bulbs etc. This guarantee does not affect your statutory rights, nor any legal rights you may have as a consumer under applicable national legislation governing the purchase of goods. If the product fails to operate and needs to be returned, pack it carefully, enclosing your name and address and the reason for return. If within the guarantee period, please also provide the guarantee card and proof of purchase.
Chere cliente, Cher client,
Compartmento enrolla-cable
-1 ⅡIJIa3cIIpecco-MaIIHH
-2-7 IJIa aBTOMaTHUeCKNX KoΦeBaPOK
-8-10 IIa BapKu KoΦe 6e3
IcIOJIb3OBaHnKoΦeBaPOK
IpeynpekdenHe. TTo6bI He DoIpyCTnTb IOnaDaHnI 3epen Kofo Bpa3MOblnBnH MExaHmM BO3MOxHO 3aKJIINHBaHH BnIratEn, BcERda YctaHABINBaTe CTePiHb IOMoJa Ipepn 3acbIIaHem 3epen B EMcKoCTb.EcJIn 3epHa yKe 6bln 3acblnHb, CTePiHb IOMoJa MOxHO MeHrTb ToIbKO Bo BpEma pa6OtBu DnIratEn.
IIOBEPHNE EMKOCTb IJIa 3epeH KoPe TAK, YTObI cTpeJIKA H EMKOCTH Oka3aJIaCb HAPOTINB HYKHO YCTABKN.
3acbHnHe 3epen Kofo
- CHIMITE KpbIIKU eMKoCTN IJIa 3epeH KOfe.
- 3acbIbTe 3epHa I yCTaHOBITE KpbIIKHy HA MeCtO.
- MaKcHMaJIbHbA BMEcTHMoCTb EMcKoTn cOcTaBHe150 r.
Bb60 np HxKHO KOnueCTBa KoΦe
- YctahOBHTe HUxHoe KOJIInueCTBO KOFe pIIN IOMOUII pyuKPN PeryIIMPOBKN. 3a OIIHN IICIKI MOXHO HAOMIoTb KoFe dIa BAPKn O2 Do 10 uaiKeB. BMeCte C tem INHΦopMaIIH N OKIInueCTBe KoFe Ha OIDHy YaIiKy, IIpNBeJeHHaHa pyuKe, AJIaIeTcI pN6JIIN3HTeBHO. TaK KaP a3IINuHbIe copta KoFe, a TAKke CaMbIe pa3HbIe qakTopb KaK, HauPiMep, pa3Mep qaiIEK N BAIIN IINuHbIe IpeIIOHTEH MOrYT IOTpe6oBaT bYCTAHOBKY IpyTOH peryIINPOBKN, Ml PEKOMENyEM BMOpEJIeITb OIIbTHBM IYTEM To, YTO COOTBeTCTBYet BAIIeM NyIHINBIVaJIbHOMY BKCY.
MaKcMmaJIbHaB BMecTmOcTb EMcKoCTn IJIa MoIOTOrO KoPe coCTaJIbHT 100 r IIpeDuPckJeHne.BcerIacBoePeMeHHo OIIopOKHNeTe EMcKoT bIa MoIOTOrO KoPe, ta KAppeNoJIHeHne EMcKoCTn MOKeT pINBeCTN K3aeJaHNIO pIn6oba.
Помол Зерен
Ipey yCTaHOBKOe EMKoCTn IJMOIOTOro KoFe Ha OCHOBHO6IOK
Heo6xOJIMO y6eIITbc8yTO KpbIIka eMKoCTn HaJeKHO 3aKpbIta.
BCTaBbTeIITeIcIbHbYIO BnIKyB CteHHyO p03eTKy.
HaKMnTe KHOIIky BKJIIOUeHnIa.
- HauHHaETcI IIpoUcC IIOMOJa, KOTOpBIOCTaHOBHTcA IBTOMAtuYeCEKn IIcJIe IIOMOJa bIb6pAHORO KOJIHyueCTBa KOFe.
- IpoIeCC NOMOJIa MoXHO OCTaHOBITb B JIO6oe BpeMn IOBTOPbHM HaKaTHEM KHOIIKN.
- 3aKoHUNB IIOMOJI, BbIHbTe IIITEIceIbHyIOBILIKY IN3 POzETKNI IOJOKIIITcEb IOIHOINCTOABHOHN JBINATeJI, IIPEJKe YCMHTB EMKOCTbIJI MOJIoTOTO KOe
IpImeuaHue. Yo6b IIOJyUHTb OITIMaJIbHbI apOMaI, HeO6XoJIMHO CMIoTb HJxHHe KOINcTeBO 3epeH HeIOcpeDCTBeHHO IIepeI pIroTOBJeHNem KoPe. JIo6oe IINHeE KOJInCeTBo MOIOToTO KoPe MoKHO XpaHnB B IIOJTHOH BO3dYxoHEPiOnHuaMeOHm EMOKCTH.
UncTaHnO6nnyXoD
- 063aTeIbHo BbHMaIte BuIKy I3 pOeTKn IpePd NcCTKoN Ipn6Opa I IOJOKIITe IIOJIHO OCTaHOBNBnIgATEJ.
YTO6bI He IOnIyCTNtB IopaKeHHN 3JIeKTPuYeCKM TOKOM, HE MoITe KOpIyc IIpIbOpa HINI IINHyp IINTaHHN BOIO N HE IOpryKaJte IN B Oyo. KopIyc IIpIbOpa MOxHO IpoTnPaTb CJIerka YBlaJXHeHHo 6e3BOPCBOI TKAHbIO.
He\PnHMeHnIeJIaNcTKn 6bpa3aNBHbe BWeIeCTBa,CHIbHOJeCTBHyOIIneMoIOIIne pactTBoPbI NjcEKTKe IeTKn.
CHMNITeEMKOCBITJIMOIOIOTOKoE HcKbIKYHbMOJIteHXcIIPMHeHEm MEITKOHO MOIOIIEO CPeICTBA.
EMKoCTbIJI3eHKeOHe HUxHO CHIMATb TOJIbKO IIOcJIe YdaJIeHNa OCTaOIIXxCB HeI3eHp. BHHMaHne! YTO6b ChHTb EMKoCTb C IIpu6opa, CHaJIa IOBepHIte ee IIOPTN YaCobOBI CTpeIKN JO COBMeIeHNc CTpeLOK Ha EMKoCTn HA IIKAJIe, 3aTeM IOJaTbe
EMKOCtB BBepx. OIOIOCHHTe EMKOCtBu KpbIbKy I TIIaTeIbHO HX IIPOcOyIbIte. IPrn YCTaHOBKe EMKOCtHa MeCToCJIeIyET CHObA COBMeCTHb CTpeIKNHa EMKOCtN Ha IIkaJIe. IocJIe 3TOrO IOBepHITe EMKOCtB IO YacOBOI CTpeJIke IJINΦHKcaIIM.
P3AMMOJIbHbI MEXAHIN3M MOXHO OTKpbBaTbДЯИСТКИ, a TaKKe B CcIyae HENIOJAKN.
- CHNMMTe eMKoCTb, KaK yKa3aHO BbIIIE.
- IV3BJIeKHTpe pa3MOJIbHOe KOJIbIO.
-Почистпе pa3мольнь Мхаизм И КОлб IO MaJIeHbKOМЯГКО IITeTOчКO.
IpeynpekdenHe. ypa3MOJIbHOro
mexAHIN3Ma IM KOJIba OUHb OCTPbE
KpaI,IO3TOMy CIEJYET CO6IIaTaB
OCTOPOKHOCTb, YTO6bI He IOnIyHTb
TpaBMY.
- IIpy yctaHOBe pa3MOJIbHOrO KOJIbIa CJIeIITpe, YTO6bl 3y6IIb Ha KOJIbHe BOIIIIN B COOTBcTCTBYIOJIne BbIeMKN Ha IepKaTeIe pa3MOJIbHOrO MexAHN3Ma. YCTaHOBN KOIbIO, Yo6JIITecb, YTO OHO TOJIbKO CIeRka IIIEBEJIITCn, HO He BpaIIaETcI.
IIpi Bo3HnKHOBeHHn Ipo6IeM
- Monotby Kofoe BbCbHaeTcna H3 emKoCTn: 3TO HopMaJIbHoe ABLHeHne, IIpuuHoi KOtOporo 06bUHO ABHETc cTaTHueckn 3apJ.
- 3epha KoFe He IIOCTUHaOT B pa3MOJIbHbIe MEXAHIN3M (KoFemOJIka H3Jaet HOIOIIIN 3BYK BbICOKOI TOHaJIbHOCTN): 3epha MOIT 3aCTPraTb B pa3MOJIbHOM MexAHIN3Me I3-3a CBOeI OcO60f oOpMb.I YcTaHOBInTE peYJINPOBky CTeNEH IIOMOIa Ha I IN BbIbTe IITeINCeIbHyU BNIky H3 pO3eTKn. IIOIIeBEJIte 3epha IIOJXKO, YTO6bl yJaJIbTH 3epHa, IIOJIABIIHBe MEXAHIN3M.
ДИВГАТЕЛБе3aIyCkaTecHIIINH3daeT HeHOPMaJIbHbIbIbIbIbIbIMYKAMK6yITOn OHPaB0TaETIOI6OJIbIbONHarpy3KOnI IpOHI3OIIIO 3a6NbAHnE NII3aedJaHne
pa3MOIbHO MEXaHn3Ma. HEmeJIeHHO bIbHte IITeINCeIbHyU BnIKy n3 po3eTKn nIPOuHCTHe MEXaHm3K, KaK yKa3aHO B pa3JeNe Yucmka u o6uui yxod.
OTeIeHHe IINXpaHeHHcMToaHHoI OHHypaIIHTAHn
OTdienHeHne IInxpaHeHHn CMoTaHHoro IIHypa IIraHHN B OCHOBaHHn IIp6opa IIO3BOJIaET YKOpaYBaTb IINHy IINHp aIpn IINcIIb3OBAHHn IIp6Oba N 06Ierqaertero XpaHeHHe.
yTm3aun

He Bb6paBbAaTe cTapIe HnHnEMcIIpABHbIe 3JIeKtPOnPi6OpBi BmEcTe C 6bITOBbIM MycOpOM. OTHocNte INa HnIKbTI dIa c6opa CneIIaJIbHOrO Mycopa.
Fapantn
IapaHTnHbI cpoK ha np6OpbI pnpMbI "Severin" - 2 roa co IIN x npdaJN. B TeueHHne 3Toro BpeMeHH Mbl 6ecIIaTHo UcTpaHH BCE deEeKtB, BO3HNKIIHe Ppe3yIbTaTE IPOUN3BOIDCTBeHHORO 6paka II INI PPImeHHH NHEAueCTBEHHbIX MaTePNAIOB. IpaHTnHa paPiocTpAAHETc H aDeEeKtB, BO3HNKIIHe N3-3a HecO6IIIOeHHN pyKOBoDCTBa IIO EKIIYaTaAHIN, rpy600 ObaIeHHN C pIn6OpOM, a TAKKe Ha 6bIoUIEcC (CTekJIHnHbIe N kepaMHueckNe) Yactn. DaHnHa rapaHTnHa HapYsae BauHHX 3aOKHOHbIX IpaB, a TaKke IIOb6IbX IpyTHx IpiB IOTpe6HITeIH, yCTaHOBJIeHHbIX HauHOHALbHBIM 3aOKHOdAteBJCTBOM, peryIHypUOIMM OTOHIIeHHN, BO3HNkaIOuIIe MEkJy IOpt6BntEJIIMN I pOpaDaUIAMn Ipi pIpaDAKe TOabOB. IpaHTnHa HhUYHIpETcI, ecII pIn6Op pEmoHTpOBaIC He B yKa3aHbIXHAMI NYHKTAX cEPBCHORO 06cLJXbAHHHa. Bbl MoKTe IIO NoVTe OTpABNTb pIn6Op C IppeYHeM HEnCIpABHOCTeI I pNILOJKeHHbIM KacCOBBIM YekOM Ha NaHI 6IIKKAIIII INyKKT cEPBCHORO 06cLJXbAHHHa. KaKeIIb6 DOIOJIHNTeJIbhe rapaHTnPiOdaIIa 3AboOM-H3TOBOTHElEM He INPIHMAIOCTc.
Philippines Business Center
Aqias Anastasias & Laertou, Pilea
Service Post of Thermi
570 01 Thessaloniki, Greece
Tel.: 0030-2310954020
Iran
IRAN-SEVERIN KISH CO. LTD.
No.668,7th.Floor
Bahar Tower
Ave. South Bahar
TEHRAN-IRAN
Tel.:009821-77616767
Fax:009821-77616534
Info@iranseverin.com
www.iranseverin.com
Israel
Eatay Agencies
109 Herzel St.
Haifa
Phone: 050-5358648
Email: service@severin.co.il
Italia
via Dino Col 52r-54r-56r,
I-16149 Genova
Green Number: 800240279
Tel.: 010/6451102-010418609
Fax: 010/6425009
e-mail: videoelettronica@panet.it
Jordan
F.A. Kettaneh
P.O.Box 485
Amman, 11118, Jordan
Tel: 00962-6-439 8642
e-mail: app@kettaneh.com.jo
Korea
Jung Shin Electronics co., Ltd.
501, Megaventuretower 77-9
Moonrae-Dong 3ga, Yongdeungpo-Gu
Seoul, Korea
Tel: +82-22-637 3245~7
Fax: +82-22-637 3244
Service Hotline: 080-001-0190
Latvia
SERVO Ltd.
Mr. Janis Pivovarenoks
Tel: +371 7279892
servo@alpalo.lv
Lebanon
Khoury Home
7th Floor, Cité Dora 3 Building, Dora
P.O.Box 70611
Antelias, Lebanon
Telephone 01 244200, Fax 01 253535
eMail: info@khouryhome.com
Internet: www.khouryhome.com
Luxembourg
Ser-Tec
Ruedu Chateaud'Eua
3364 Leudelange
Tel.: 00352-379494402
Fax 00352-379494400
Macedonia
Agrotehna
St.Prvomajska bb
1000-Skopje
MACEDONIA
e-mail: servis@aqrotehna.com.mk
Tel: +389 2 / 24 45 009 or -019
Fax:+38922463270
Magyarorszag
TFK Elektronik Kft.
Gyar u.2
H-2040 Budaörs
Tel.: (+36) 23444266
Fax: (+36) 2344267
Nederland
HAS b.v.
Stedenbaan 8
NL-5121 DP Rijen
Tel: 0161-22 00 00
Fax: 0161-290050
Norway
Lokken Trading AS
Trollasveien 34
1414Trollasen
Tel: 40 00 67 34
Fax: 66 80 45 60
Österreich
Degupa
Sc.2 Et.1, Ap. 27, Sector 1
Bucuresti
Tel: +40 21 233 41 12
+40212334113
+40216886613
Fax: +40 21 233 4103
+40216886613
E-mail: office@forbrands.ro
Web site: www.forbrands.ro
Schweiz
Serbia and Montenegro
tel: +381-21-524-638
tel: +381-21-553-594
fax: +381-21-522-096
Slowak Republic
PREMT.s.r.o.
Skladova 1
917 01 Trmaya
Tel: 033/544 7177
Finland
Oy Harry Marcell Ab
Rälssitie 6, PL 63
01511 Vantaa
Tel.: 00358 / 207599860
Fax: 00358 / 207599803
Svenska
Rakspecialisten HS
Mollevangsgatan 34
214 20 Malmö
Tel.: 040/12 07 70
Fax: 040/6110335
Slovenia
SEVTIS d.0.0
Smartinska 130
1000 Ljubljana
Tel: 00386 1542 1927
Fax: 0038615421926
Stand:03.2010