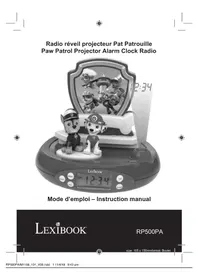
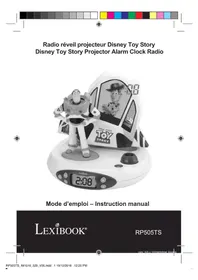
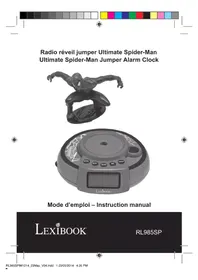
RADIO CLOCK - Radio LEXIBOOK - Free user manual and instructions
Find the device manual for free RADIO CLOCK LEXIBOOK in PDF.

| Product type | Radio alarm clock with digital display |
| Brand | LEXIBOOK |
| Model | RADIO CLOCK (DR900) |
| Power supply | DC 4.5V 300mA mains adapter (not included) or batteries: 2 AG13 batteries + 2 LR06/AA batteries |
| Radio frequency | FM 88-108 MHz |
| Display | LCD with switchable backlight |
| Temperature display | Yes, in Celsius or Fahrenheit |
| Time display | 12h or 24h, adjustable |
| Alarm function | Alarm with choice of 7 melodies and 2 ringtones |
| Snooze function | Yes, can be enabled/disabled |
| Birthday function | Program a date with playback of "Happy Birthday" |
| Countdown function | Programmable from 0 to 23h59, alarm at end |
| Music mode | Continuous playback of 7 tracks |
| Antenna | Telescopic FM antenna, adjustable |
| Speaker | Built-in |
| Reset button | Yes, using a thin object |
| Warranty | 2 years |
| Dimensions (estimated) | 200 x 120 x 60 mm |
| Weight (estimated) | 500 g |
| Care and cleaning | Wipe with a soft, dry cloth. Do not use liquids. |
| Safety | Do not expose to moisture or heat. Use the recommended adapter. |
| General information | Manual available in several languages. Technical support: 0892 23 27 26 (€0.34 inc. VAT/min). Website: www.lexibook.com |
Frequently Asked Questions - RADIO CLOCK LEXIBOOK
User questions about RADIO CLOCK LEXIBOOK
0 question about this device. Answer the ones you know or ask your own.
Ask a new question about this device
Download the instructions for your Radio in PDF format for free! Find your manual RADIO CLOCK - LEXIBOOK and take your electronic device back in hand. On this page are published all the documents necessary for the use of your device. RADIO CLOCK by LEXIBOOK.
USER MANUAL RADIO CLOCK LEXIBOOK
-
Volume knob - radio on/off button
-
Turn the volume knob clockwise to switch on the radio.
-
Scroll the volume wheel to increase or decrease the sound volume.
-
Channel button
Turn to change the radio frequency.
- Backlight switch
Use the backlight switch to turn on and turn off the backlight function.
(See Fig.B)
- MODE button
Under Normal mode, press MODE to go from one mode to another as follows:
Normal mode 12Hr/24Hr mode Alarm mode
Birthday Reminder mode Timer mode
-
SET button
-
Under Normal mode, press SET to toggle between Centigrade and Fahrenheit temperature display.
- Under Alarm mode, you can use SET together with and to set the alarm time and the alarm music. There are 7 world famous songs and 2 different "beep" sounds to be selected. Press SET to set the alarm clock, when the alarm sounds, the Alarm Music will play for one minute. If snooze function is enabled, the Alarm Music will sound totally four times, one time every three minutes.
-
Under Birthday Reminder mode, you can press SET together with and to adjust the date and time of birthday reminder, then press SET to close birthday reminder function. When the chosen time arrives, the song will be played for five minutes.
-
Under Timer mode, use SET to set the time at which you wish the unit to count down from. The maximum time is 23 hours, 59 minutes and 59 seconds. When the time set arrives at "0:00 00", the alarm will sound for one minute, and "0:00 00" will also flash continuously.
-
button
-
Press this button to decrease a setting.
- Under Normal status, press to open or close the music function. When opening this mode, 7 different popular songs will be played continuously.
7.▲button
- Press this button to increase a setting.
-
Under Normal mode, press to activate or deactivate the Snooze function.
-
RESET button
If abnormal conditions occur when the batteries are installed, please press RESET.
- DC plug (DC adaptor not included)
Power supply DC 4.5V input 230V AC 50Hz 4W output DC4.5V 300ma Centre+
-
Battery block (batteries not included)
-
Antenna
-
Speaker
Note: For all the above status, if the button is not pressed for one minute, the unit will automatically return to Normal mode.
SCREEN LAYOUT
(See Fig. C)
-
Temperature display
-
Time and date display
GETTING STARTED
Install two AG13 batteries and two AA batteries (not included) in the battery block at the back of the unit.
TIME SETTING
- When turning on the power for the first time, the normal time displayed is 12:00.
- Under Normal mode, press MODE to enter 12Hr/24Hr mode. Then press SET and use and to set separately the date, time, hour, minute, year, month and day as follows:
Hour Minute Year Month Day Exit
- Range: from 2000 to 2099 for year, 1 to 12 for month, 1 to 31 for day, 1 to 12 or 0 to 23 for hour, 0 to 59 for minute.
- Second gets reset to zero when adjusting hour or minute.
- When setting date, week (from MON to SUN) will change accordingly.
Note: The unit automatically exits from setting and displays current time and date if any button is not pressed for one minute.

ALARM CLOCK SETTING
- Under Normal mode, press MODE two times to enter Alarm Mode.
- Under Alarm Clock mode, press SET to enter the alarm setting. Use and to set separately the hour, minute and music as follows:
Hour Minute Music Exit
- At the preset alarm time, the alarm will sound for one minute if snooze mode is off. Press any button to stop the alarm. If Snooze function is enabled, the alarm will sound a total of four times, one time every three minutes and each time lasting for one minute.
- When the Snooze alarm sounds, you can press any button to switch off the alarm, but the snooze sign will still flash until 4 cycles of rings are finished or the alarm is cancelled.
- You can press MODE to cancel the snooze function (i.e. the sign stops flashing). The snooze sign will disappear if you press .
BIRTHDAY REMINDER SETTING
- Under normal status, press MODE to enter Birthday Reminder mode.
Under Birthday Reminder mode, press SET and use and to set the date and time. These settings can be performed separately as follows:
Hour Minute Year Month Exit Close
- When the selected date and time arrive, the song "Happy Birthday" will be played for five minutes.
Note: The unit automatically exits from setting and displays current time and date if any button is not pressed for one minute.
TIMER MODE SETTING
- Under Normal mode, press MODE to enter Timer mode.
- Under Timer mode, press SET to enter setting, and use and to set separately hour and minute as follows:
- Range: 0 to 23 for hour and 0 to 59 for minute.
- Start Timing: On the screen displaying the temperature, seconds will descend from 00 to 59, so will the current minute and hour.
- When timing arrives at 0:00: the alarm will sound for one minute.
Note: The unit automatically exits from setting and displays current time and date if any button is not pressed for one minute.
TEMPERATURE FUNCTION
Shows current ambient temperature. Under Normal mode, press SET to display the temperature in Centigrade or Fahrenheit.
MUSIC MODE
Under Normal mode, press to open or close the Music mode. When opening Music mode, 7 different popular songs can be played continuously.
BACKLIGHT FUNCTION
Under Normal status, use the backlight knob to switch on and switch off the backlight.
RADIO FUNCTION SETTING
- Turn the volume control knob to switch on or switch off the radio and adjust the volume.
- Use the channel button to choose your favorite radio station on the FM band.
- Power indicator will light up when switching on the radio.
- When listening to the radio, you can adjust the length of the antenna for best quality sound.
WARRANTY
NOTE: Please keep this instruction manual, it contains important information. This product is covered by our two-year warranty. To make use of the warranty or the after-sales service, please contact your retailer and supply proof of purchase. Our warranty covers material or installation-related defects attributable to the manufacturer, with the exception of wear caused by failure to respect the instructions for use or any unauthorised work on the equipment (such as dismantling, exposure to heat or damp, etc.).
LEXIBOOK UK Ltd,
Unit 10 Petersfield Industrial Estate,
Bedford Road, Petersfield, Hampshire,
GU32 3QA, United Kingdom
Freephone helpline: 0808 100 3015,
http://www.lexibook.com
Environmental Protection
Unwanted electrical appliances can be recycled and should not be discarded along with regular household waste! Please actively support the conservation of resources and help protect the environment by returning this appliance to a collection centre (if available).
PRÉSENTATION DU PRODUIT
(Voir fig. A)
MON = LUNDI, TUE = MARDI, WED = MERCREDI, THU = JEUDI, FRI = VENDREDI, SAT = SAMEDI, SUN = DIMANCHE.
Lexibook Ibérica S.L.
LEXIBOOK Electronica Lda,
Quinta dos Loios,
Praceta José Domingos dos Santos,
6B-8a, 2835-343 Lavradio-Barre, Portugal
LAYOUT DELLO SCHERMO
(Vedi Fig. C)
-
Display temperature
-
Display ora e data