DUSTY600+ - Robot vacuum Point - Free user manual and instructions
Find the device manual for free DUSTY600+ Point in PDF.


| Product Type | Robot Vacuum Cleaner |
| Brand | Point |
| Model | DUSTY600+ |
| Dimensions (LxWxH) | 12.6 x 12.6 x 3.5 inches |
| Weight | 6.5 lbs |
| Power Supply | Rechargeable Li-Ion battery, 14.8V / 2600mAh |
| Charging Time | Approx. 4-5 hours |
| Run Time | Up to 100 minutes (standard mode) |
| Dustbin Capacity | 0.5 L |
| Suction Power | 2500 Pa |
| Cleaning Modes | Auto, Spot, Edge, Scheduled Cleaning |
| Navigation System | Gyroscope + Drop Sensors |
| Filter Type | Washable HEPA Filter |
| Smart Features | Wi-Fi connectivity, mobile app control, voice assistant compatible |
| Battery | Li-Ion 14.8V / 2600mAh |
| Self-Emptying | Yes (base station included) |
| Maintenance | Empty dustbin after each use, clean filters weekly, replace brushes every 6 months |
| Safety Features | Auto-charging, drop sensor, collision sensor, surge protection |
| Spare Parts Availability | Replacement batteries, filters, side brushes, main brush available |
| Warranty | 12 months |
Frequently Asked Questions - DUSTY600+ Point
User questions about DUSTY600+ Point
0 question about this device. Answer the ones you know or ask your own.
Ask a new question about this device
Download the instructions for your Robot vacuum in PDF format for free! Find your manual DUSTY600+ - Point and take your electronic device back in hand. On this page are published all the documents necessary for the use of your device. DUSTY600+ by Point.
USER MANUAL DUSTY600+ Point
Robot vacuum cleaner
DUSTY600
User Manual
GB
Thank you for purchasing your new POINT Robot Vacuum Cleaner.
These operating instructions will help you use it properly and safely.
We recommend that you spend some time reading this instruction manual in order that you fully understand all the operational features it offers. Read all the safety instructions carefully before use and keep this instruction manual for future reference.
NO
Read all instructions before use.
Retain instructions for future reference.
Any operation inconsistent with this instruction manual may result in product damage.
Caution:
Only authorized technicians can disassemble this product. Users are not recommended to disassemble this product by themselves.
- This product can only use the charging equipment and other accessories provided by the manufacturer. Using other charging equipment and accessories may cause damage to the product.
- Do not charge the product using a damaged power cord or power outlet. Do not use the appliance when it cannot work properly due to fall, damage, outdoor use, or water intake.
To avoid harm, the appliance should be repaired by the manufacturer or its after-sales service provider.
- The appliance is an indoor household product, intended only for floor cleaning in rooms. Do not use it outdoors, or in commercial or industrial settings.
- Do not use the appliance in a wet or waterlogged environment (such as a bathroom).
- Use and store the robot in room temperature environments only.
- Do not use the appliance in a suspended area without protective fences.
- Do not touch electrical wires, sockets, or power adapters when your hands are wet.
- Do not use the appliance in environments with open flames or fragile objects.
- Hang up any power cables before use to avoid dragging the cables when the robot vacuum cleaner is operating.
- Do not use the appliance on uneven or non-floor surfaces.
- Ensure that the dust box and filter material are installed in place before using the product.
- Address any potential issues with the product's cleaning performance as soon as possible. Before using this product, remove all fragile items from the floor (such as glasses, lamps, etc.) and any surrounding objects (such as wires, paper, curtains) that could interfere with its operation.
- If there is an elevated area, such as stairs, a barrier should be installed at the edge to prevent the product from falling.
Ensure that the protective barrier does not pose a risk of personal injury, such as tripping.
- Before cleaning and maintaining the appliance, turn off the product and unplug it from the power outlet.
- If the appliance is not used for a long time, please power off the appliance.
- Do not use the product as a toy. Keep it away from children and individuals with cognitive impairments while it is operating.
- Do not use the product in areas where infants are present. The vacuum cleaner may pose a safety risk to young children.
- Never use the product in environments with open flame or fragile items.
- Never use the product to suck large items such as stones or large waste paper that may jeopardize the performance of the product.
- Keep arms, legs, and pets away from the product while it is operating to avoid injury.
- Do not allow the robot to pick up flammable substances such as oil, printer toner, and photocopier toner. Do not use the appliance in clean areas with flammable items.
Do not allow the product to suck any burning items, such as cigarettes, matches, ashes, and other items that may cause fire.
Do not place items at the suction entrance. Do not use the product when the suction entrance is blocked. Clean up the dust, cotton wool, hair, and so on at the suction entrance to ensure proper air circulation.
Handle the power cord carefully to avoid damage. Do not use the power cord to drag or pull the product or charging equipment, use it as a handle, clamp it in a door, or pull it around corners. Prevent the product from running over the power cord and keep it away from heat sources.
Never use any damaged charging equipment.
Incineration of the product is prohibited, even if it is severely damaged, as the battery could cause an explosion.
Battery safety
Users are not allowed to replace the lithium battery in the machine themselves. If the battery needs to be replaced or discarded, please contact the after-sales department for assistance.
Please remove the battery from the machine before the product is scrapped.
When the battery is removed, ensure that the product is not powered on.
- Please dispose of the waste batteries in accordance with the local laws and regulations.
Steps to removing the battery:
- Run the robotic vacuum cleaner until the battery is fully depleted.
- Remove the screws from the battery cover.
- Remove the battery cover plate.
- Disconnect the battery connector plug and remove the battery.
PRODUCT COMPONENTS

1x Robot

1x Charging Base

1x Adapter

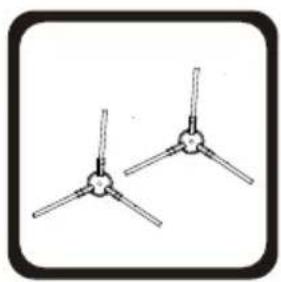
2x Side Brushes

1x Mopping Pad

1x Cleaning Brush

1x User Manual
PRODUCT OVERVIEW
FRONT
Bottom
PRODUCT OVERVIEW

Water insert port
INSTRUCTIONS

Notes
Before using the robot, pick up objects like clothing, loose papers, pull cords for blinds or curtains, power cords, and any fragile objects.
Set up protective barriers at the entrance of stairs, elevators, kitchens, bathrooms, and other rooms to prevent damage to the device.
If the appliance operates near double stairways or the edge of steps, place a guard rail to ensure its safety and smooth operation. If your home has carpets with fringed edges, roll the fringes under the carpet in advance.
Note: Do not use the robot to clean up standing water.

QUICK INSTALL GUIDE:
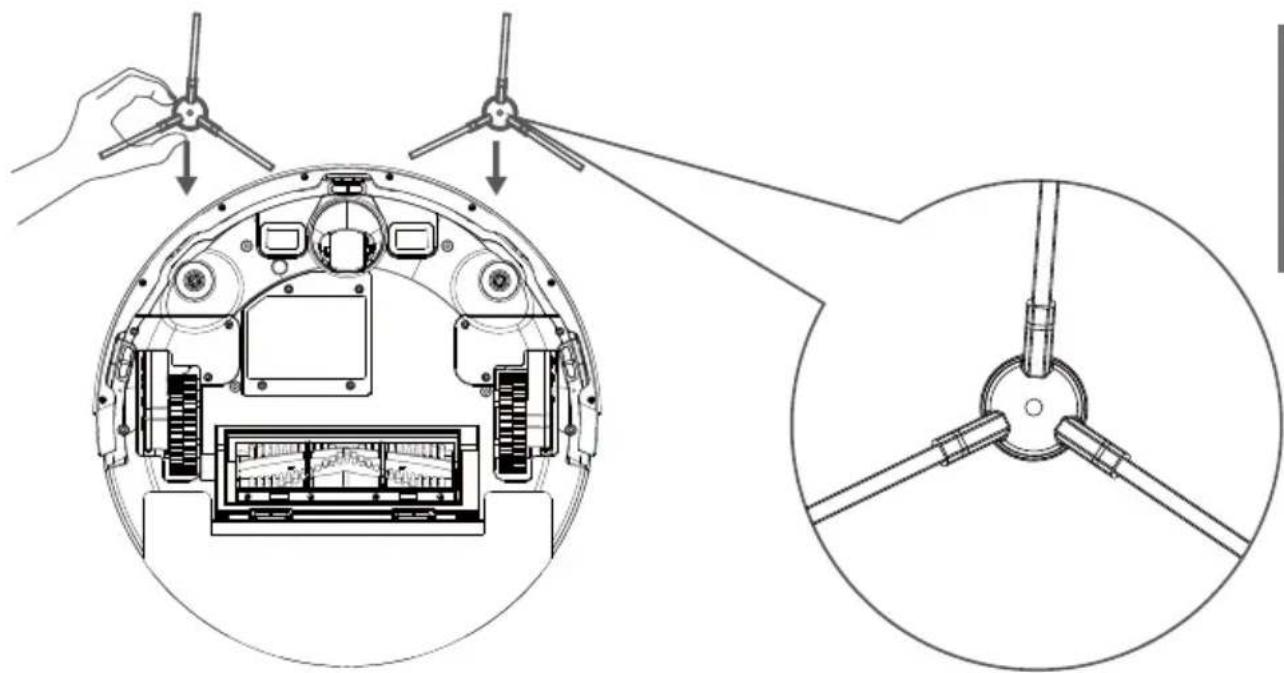
- Remove the protective foams from the main unit and install the side brush.


QUICK INSTALL GUIDE
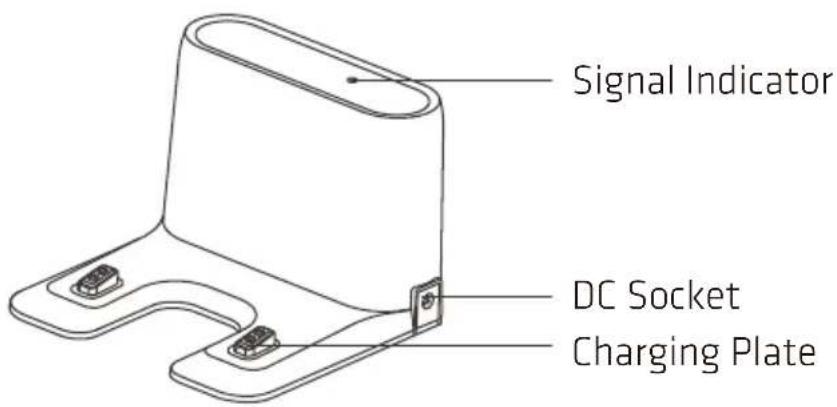
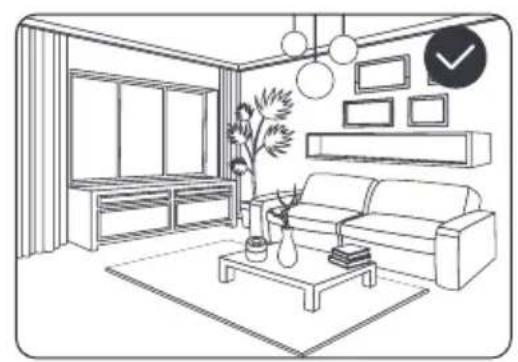
- Place the charging base on flat ground against the wall.
Do not place any objects within 0.5m on the sides and 1.5m in front of the charging base.

- Power on and fully charge the device before use.
Charging: Place the robot on the charging base for charging (the recharging indicator light flashes during charging and stays on when charging is finished. The charging time is about 5-6 hours.) During the cleaning process, the robot can sense that the power is insufficient and automatically start the recharging mode to find the charging base to charge. You can also command the robot to start the recharging mode through the APP.
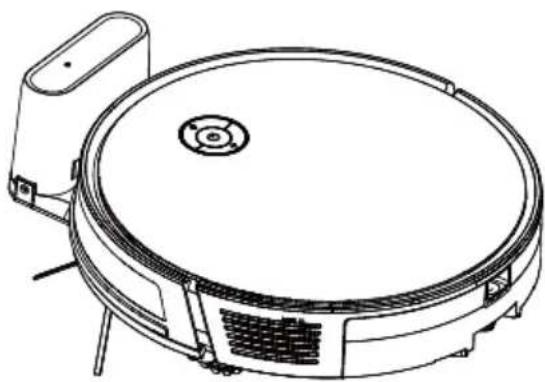
Caution!
- Do not use the charging base in a highly reflective environment such as areas exposed to direct sunlight or near mirrors.
- To ensure the normal working time of the robot, fully charge it before use. The charging time is about 5-6 hours.
INSTRUCTIONS
App Connection
- Download the Smart Life APP from your APP store, register and log in to the APP. Make sure that Wi-Fi is 2.4GHz before network connection.

- Preparation: tap "+" on the upper-right corner to add your robot.


INSTRUCTIONS
- Supports two network connection methods. Method 1 (BT mode, recommended):

1). Choose "Robot Vacuum (BLE)" in the Small Home Appliance column.
3). Ensure your mobile Bluetooth is ON, the APP will automatically search for the robot nearby, click "Add" after finding it.

2). Long press the Wi-Fi button on the robot for 3 seconds, make sure that the Wi-Fi indicator light is blinking. Tick "Confirm the indicator is blinking rapidly" in the APP interface and then click "Next".
![Adding device... Power on the device. 01:59 Add Device Dense [ Service not being added ] Top to add this device](/content/2026/07/1421823/images/ad658fa2667446cf8650f6631ad436edcf033f45adb56e1ea0d6a32f01845e5d.jpg)
4). Input the correct Wi-Fi name and password and then "Next".

Method 2 (AP mode):
- Choose "Robot Vacuum Cleaner (Wi-Fi)" in the Small Home Appliance column.

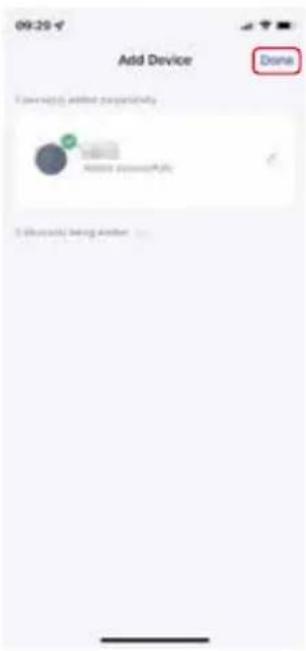
5). Wait for the connection and select done.

2). Make sure that Wi-Fi is 2.4GHz and input the correct Wi-Fi password.


3). Long press the Wi-Fi button on the robot for 3 seconds, make sure that the Wi-Fi indicator light is blinking. Tick "Confirm the indicator is blinking rapidly" in the APP interface, click "Next" and choose AP mode in the pop-up window.
4). Find the password-less hot-spot that starts with SmartLife-XXXX in your Wi-Fi list and click to connect to it.
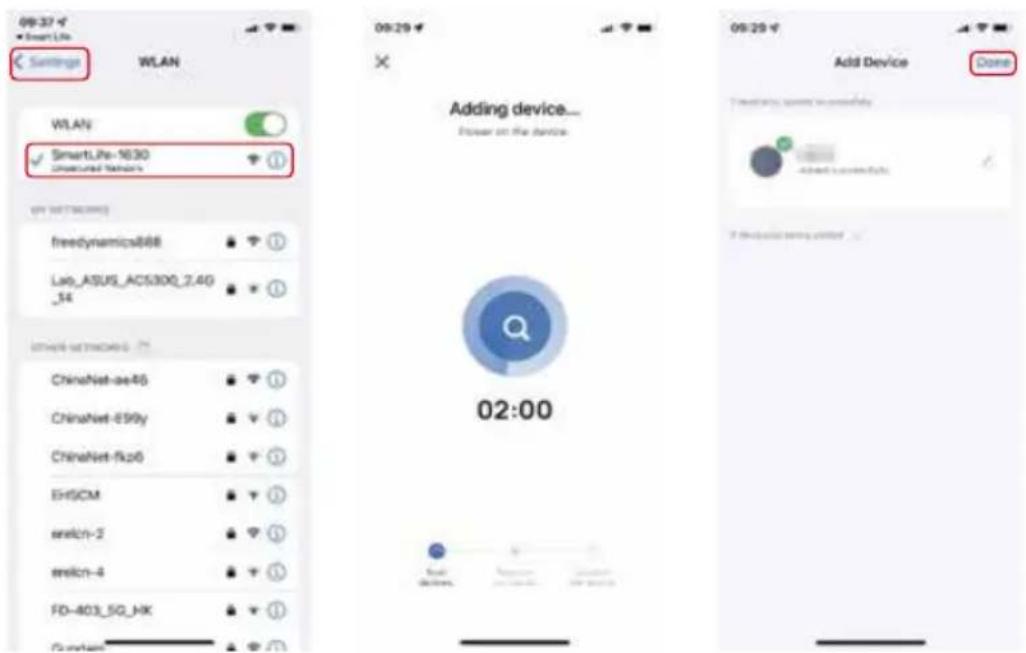
5). After successfully connecting to the hot-spot, return to the Smart Life APP, the APP will automatically jump to the robot connection interface. Wait for the connection and the robot can be operated after the connection is done.
INSTRUCTIONS
According to different cleaning needs, the device has a variety of cleaning modes to choose from. You can set the different cleaning modes through the APP.

1. Start/Pause
When the robot vacuum is powered on, short press the "ON/OFF" button on the device to start or pause.
Wake-up
The appliance automatically enters sleep mode if it remains inactive for more than 10 minutes (the robot's indicator will turn off). Press the ON/OFF button on the device to wake up the device.
Power-off
Press and hold the ON/OFF button ⏻ on the device. When the indicator light turns off, the device is powered off.
Tips: After the device has finished working, it is recommended not to shut it down but to keep it in charging mode to ensure better future operation.
2. Working Mode
2.1 Automatic Cleaning
Setting method: In the power-off state, press and hold the power button. After the indicator of the main unit is on, indicating that the main unit is powered on, press the power button again.
2.2 Fixed-point Cleaning
Applicable scenario: The cleaning mode is suitable for areas where rubbish is concentrated. The main unit cleans the ground in a spiral path in the specified area and returns to the original point after cleaning.
Applicable scenario: The cleaning mode is suited for indoor corners. The main unit cleans the ground along edges of fixed objects (for example, wall) and returns to the charging base after cleaning.
INSTRUCTIONS
Wake Up: If the robot stops working for more than ten minutes, it will automatically enter sleep mode (all the robot's lights are off). To wake up the robot, press the start button once, then press the start button again or use the app to restart it.
Turn Off: To turn off the robot, long press the start button after it has stopped working. The robot indicator lights will go out, indicating that the robot is turned off.
After the robot has finished working, it is recommended to keep it in charging mode rather than shutting it down. This ensures better performance for its next use.
INSTRUCTIONS
Mopping
Notes:
- Do not mop the carpets.
- Clean the mop after use.
- Replace the mop as needed to ensure the device maintains optimal performance.
- As the mop is a consumable product, please purchase replacements from the official website.
A. Open the water tank cover, add an appropriate amount of water and fasten the water tank cover.

B
B. Install the mopping pad.

C. Install the water tank to the device.

COMPONENT MAINTENANCE/SCHEDULED MAINTENANCE
Scheduled Maintenance
To achieve the best cleaning effect, clean and maintain the robot regularly according to the table below.
| Components Cleaning Frequency Replacement Frequency | ||
| HEPA filter Every week | Every 2 months | |
| Main brush Every week | Every 6 to 12 months | |
| Every weekSide brush | Every 3 to 6 months, or when it is obviously damaged | |
| Main brush cover | Every month | Every 3 to 6 months, or when the rubber silicone strip on the roller brush cover is obviously damaged |
| Sensor Every month | When the sensor is obviously damaged | |
| Charging electrode | Every month | / |
| Universal wheel | Every month | / |
MAINTAINING
A. Press the dustbin button and take out the water tank

C. Open the dustbin and dump the garbage

E. Wash the dustbin and the mop
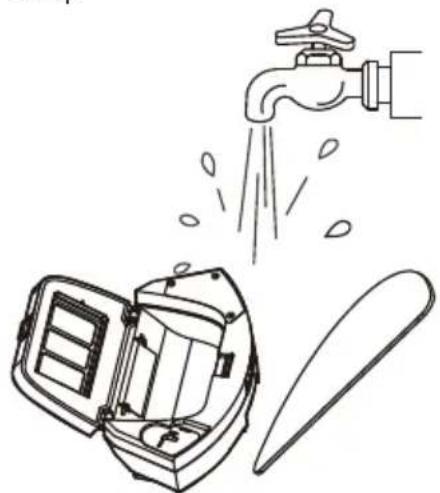
B. Empty the water tank

D. Remove the HEPA filter and primary filter. It is not recommended to wash the HEPA filter with water. Tap it gently to remove dust.

F. Dry the dustbin and filter components, and keep them dry to ensure their service life.

Notes:
- Before installing filters, ensure that the primary filter and HEPA filter are dry.
- Do not expose the primary filter and HEPA filter to sunlight.
MAINTENANCE
Clean the main brush and side brush.
A. Open the main brush cover assembly.
B. Remove the main brush.


C. Clean the main brush. Use the tool to clean tangled hair.
D. Clean the side brush.


MAINTENANCE

Notes: The charging electrode, anti-falling sensor, and bumper assembly contain sensitive electronic components. Use a dry cloth to clean them, and do not use a wet cloth to prevent damage caused by water.
Clean the charging plate.
Clean the drive wheels and universal wheel.


Clean the Anti-falling sensor


Notes:
- If you do not use the product for a long time, please fully charge it before storing. Turn off the robot and charge it every 3 months to prevent the battery from over discharging.
- If the battery is over discharged or not used for a long time, the product may be unable to charge. Please contact our after-sales service center, and do not disassemble it by yourself.
TOUBLESHOOTING
| Problem | Failure Cause | Solution |
| Wheel suspended in air | Robot suspended | Put the robot back to the ground and press the cleaning button again |
| Dustbin not installed | Dustbin removed and not installed | Install the dustbin and press the cleaning button again. |
| Left/Right wheel abnormal | Wheel jammed | Check whether the wheel is entangled with foreign objects and clean up the entangled |
| Bumper stuck | Bumper stuck | Check whether the bumper can rebound normally |
| Connection failed | Robot failed to connect to server | Check whether the Wi-Fi connected during networking can connect to the internet |
| Battery low, start to charge | Battery capacity less than 20% | Robot automatically enters the recharge mode |
| Side brush abnormal | Abnormal side brush | Check whether the side brush is wound by wire and clean up the entanglement |
| Robot stuck, please restart in new position | The robot failed to get out of trouble | Move the robot to an open area and press the cleaning button again. |
TECHNICAL SPECIFICATION Robot Vacuum
| Product name | Robot vacuum cleaner |
| Product model | Dusty600 |
| Product dimensions | 320*320*74mm |
| Input voltage | 19V---0.6A |
| operating voltage 14.4V | |
| Rated power 40W | |
| Battery type Lithium battery | |
| Battery capacity 2600mAh |
Charging Base
| Input | 19V---0.6A |
| Output | 19V---0.6A |
| 11.4WRated power | |
| 130*132*78mmProduct dim |
Correct Disposal of this product

This symbol on the product or in the instructions means that your electrical and electronic equipment should be disposed at the end of its life separately from your household waste. There are separate collection systems for recycling in the EU. For more information please contact the local authority or your retailer where you purchased the product.
Power International AS,
PO Box 523, N-1471 Lørenskog, Norway
Power Norge:
https://www.power.no/kundeservice/
T: 21 00 40 00
Expert Danmark:
https://www.expert.dk/kundeservice/
T: 70 70 17 07
Power Danmark:
https://www.power.dk/kundeservice/
T: 70 33 80 80
Punkt 1 Danmark:
https://www.punkt1.dk/kundeservice/
T: 70 70 17 07
Power Finland:
1x Robot

1x Charging base

1x Adapter

2x Side brushes

1x Mopping pad

1x User manual
PRODUCT OVERVIEW
FRONT
Bottom

PRODUCT OVERVIEW

Water inlet port



QUICK INSTALLATION GUIDE:
QUICK INSTALLATION GUIDE
! Caution!
INSTRUCTIONS
1). Select "Robot Vacuum (BLE)" in the Small Household Appliances column

2). Press and hold the Wi-Fi button on the robot for 3 seconds, and check that the Wi-Fi indicator light is blinking. Check "Confirm the indicator is blinking rapidly" in the app, and press "Next".
5). Wait for the connection, and select finish.
Method 2 (AP mode):
1). Select "Robot Vacuum Cleaner (Wi-Fi)" in the Small Household Appliances column.


3). Press and hold the Wi-Fi button on the robot for 3 seconds, and check that the Wi-Fi indicator light is blinking. Check "Confirm the indicator is blinking rapidly" in the app, press "Next" and select AP mode in the question that appears.

5). Once you have connected to the network, go back to the Smart Life app, and the app will automatically go to the interface for connecting to the robot. Wait for the connection. The robot can be used once the connection is complete.
INSTRUCTIONS
1. Start/Pause
B. Attach the mop pad.

MAINTENANCE OF PARTS / SCHEDULED MAINTENANCE
B. Empty the water tank

! Notes:


02
MAINTENANCE


Clean the anti-drop sensor


Notes:
PIKA INSTALLATION GUIDE
! Note!

INSTRUCTIONS
1). Select "Robot Vacuum (BLE)" from the Small Appliances category


COMPONENT MAINTENANCE / SCHEDULED MAINTENANCE
Periodic maintenance
! Notes:

MAINTENANCE

E

Notes:
1x Robot

1x Charging station

1x Adapter
2x Side brushes

1x Mopping pad

1x Cleaning brush

1 x User manual
PRODUCT OVERVIEW
FRONT
Charging electrode
Universal wheel
Battery
Roller brush
PRODUCT OVERVIEW


B
QUICK START GUIDE:
QUICK START GUIDE
! Caution!

INSTRUCTIONS
2). Hold down the Wi-Fi button on the robot for 3 seconds until the Wi-Fi indicator blinks. Mark "Confirm the indicator is blinking rapidly" in the app, and then click "Next".


1. Start/Pause
C. Attach the water tank to the product.

COMPONENT MAINTENANCE/SCHEDULED MAINTENANCE
C. Open the dust bin and empty it of debris

B. Empty the water tank

! Notes:
D. Clean the side brush

B
MAINTENANCE


Notes:
1x robot

1x charging base

1x adapter

2x side brushes

1x mopping pad

1x cleaning brush

1x user manual
PRODUCT OVERVIEW
FRONT
QUICK INSTALLATION GUIDE
QUICK INSTALLATION GUIDE
! Caution!
INSTRUCTIONS
1). Select "Robot Vacuum (BLE)" in the "Small Home Appliances" column
Method 2 (AP mode):
1). Select "Robot Vacuum Cleaner (Wi-Fi)" in the "Small Home Appliances" column.


1. Start/Pause

COMPONENT MAINTENANCE/SCHEDULED MAINTENANCE
B. Empty the water tank

! Note:
MAINTENANCE

! Note:
- ROBOT VACUUM CLEANER
- GB
- NO
- CAUTION
- BATTERY SAFETY
- STEPS TO REMOVING THE BATTERY
- PRODUCT COMPONENTS
- PRODUCT OVERVIEW
- INSTRUCTIONS
- NOTES
- QUICK INSTALL GUIDE
- APP CONNECTION
- METHOD 2 (AP MODE)
- START/PAUSE
- WAKE-UP
- POWER-OFF
- WORKING MODE
- AUTOMATIC CLEANING
- FIXED-POINT CLEANING
- MOPPING
- COMPONENT MAINTENANCE/SCHEDULED MAINTENANCE
- SCHEDULED MAINTENANCE
- MAINTAINING
- MAINTENANCE
- CORRECT DISPOSAL OF THIS PRODUCT
- QUICK INSTALLATION GUIDE
- MAINTENANCE OF PARTS / SCHEDULED MAINTENANCE
- PIKA INSTALLATION GUIDE
- NOTE
- COMPONENT MAINTENANCE / SCHEDULED MAINTENANCE
- PERIODIC MAINTENANCE
- QUICK START GUIDE
Brand : Point
Model : DUSTY600+
Category : Robot vacuum