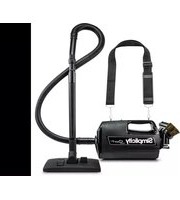
Sport S100 - Vacuum Cleaner Simplicity - Free user manual and instructions
Find the device manual for free Sport S100 Simplicity in PDF.


| Brand | Simplicity |
| Model | Sport S100 |
| Product type | Bagless handheld vacuum |
| Dimensions (L x W x H) | 25 x 20 x 110 cm |
| Weight | 3.5 kg |
| Power supply | Mains 220-240 V, 50-60 Hz |
| Suction power | 400 W |
| Tank capacity | 0.8 L |
| Filter type | Washable cyclonic filter |
| Noise level | 78 dB(A) |
| Cable length | 6 m |
| Included accessories | Long crevice tool, furniture brush, crevice nozzle |
| Main functions | Dry vacuuming, bagless cyclonic system |
| Maintenance and cleaning | Empty the tank after each use, wash the filter every month |
| Safety | Unplug before cleaning, do not vacuum liquids |
| Spare parts and repairability | Replacement filter available, battery non-replaceable (cordless model) |
| General information | 2-year warranty, made in China |
Frequently Asked Questions - Sport S100 Simplicity
User questions about Sport S100 Simplicity
0 question about this device. Answer the ones you know or ask your own.
Ask a new question about this device
Download the instructions for your Vacuum Cleaner in PDF format for free! Find your manual Sport S100 - Simplicity and take your electronic device back in hand. On this page are published all the documents necessary for the use of your device. Sport S100 by Simplicity.
USER MANUAL Sport S100 Simplicity
natural_image
Line drawing of a Simplicity Sport vacuum cleaner with handle and base (no text or symbols on device body)Getting Started
Important Safety Instructions 2
Polarization Instructions 3
Description of the Vacuum 4
Operation 6
Attachment Cleaning
Cleaning Tools 8
Adjusting the Suction Power for Tool Cleaning 9
Using the Blower Exhaust Port 9
Micro Tool Kit and Angle Adapter 10
Maintenance and Care
Replacing the Vacuum Bag 11
When to Change the Filter 12
Replacing the Charcoal Filter 12
Problem Solving Guide
Troubleshooting 13
Visit Simplicity Vacuums Online 13
How to Contact Your Authorized Retailer 13
Key Replacement Parts 13
For Best Performance 13
Warranty 14
IMPORTANT SAFETY INSTRUCTIONS
When using an electrical appliance, basic precautions should always be followed, including the following:
READ ALL INSTRUCTIONS BEFORE USING THIS APPLIANCE.
IMPORTANT:
IMPORTANT. The manufacturer cannot accept responsibility for damage caused when the appliance is not used according to the instructions, or for uses other than those for which it was intended.
WARNING:
To reduce the risk of fire, electric shock, damage or injury:
- Do not leave appliance when plugged in. Unplug from outlet when not in use and before servicing.
- WARNING: ELECTRIC SHOCK COULD OCCUR IF USED OUTDOORS OR ON WET SURFACES.
- Do not allow to be used as a toy. Close attention is necessary when used by or near children.
- Use only as described in this manual. Use only manufacturer's recommended attachments.
- Do not use with damaged cord or plug. If appliance is not working as it should, has been dropped, damaged, left outdoors, or dropped into water, return it to your Authorized Retailer for service.
- Do not pull or carry by cord, use cord as a handle, close a door on the cord, or pull cord around sharp edges or corners. Do not run appliance over cord. Keep cord away from heated surfaces.
-
Do not unplug by pulling on cord. To unplug, grasp the plug, not the cord.
-
Do not handle plug or appliance with wet hands.
- Do not put any object into openings. Do not use with any opening blocked; keep free of dust, lint, hair and anything that may reduce air flow.
- Keep hair, loose clothing, fingers and all parts of body away from openings and moving parts.
- Do not pick up anything that is burning or smoking, such as cigarettes, matches or hot ashes.
- Do not use without vacuum bag and/or filter in place.
- Turn off all controls before unplugging.
- Use extra care when cleaning on stairs.
- Do not use to pick up flammable or combustible liquids, such as gasoline, or use in areas where they may be present.
- Do not attempt to service the unit while appliance is plugged in.
Power Cord, 2-Wire Polarized Cord
To reduce the risk of electric shock, this product is equipped with a polarized alternating current line plug (a plug having one blade wider than the other). This plug will fit into the power outlet only one way. This is a safety feature. If you are unable to insert the plug fully into the outlet, try reversing the plug. If the plug should still fail to fit, contact a qualified electrician to replace the obsolete outlet. Do not defeat the safety purpose of the polarized plug.

natural_image
Line drawing of an electrical plug and its corresponding socket (no text or symbols)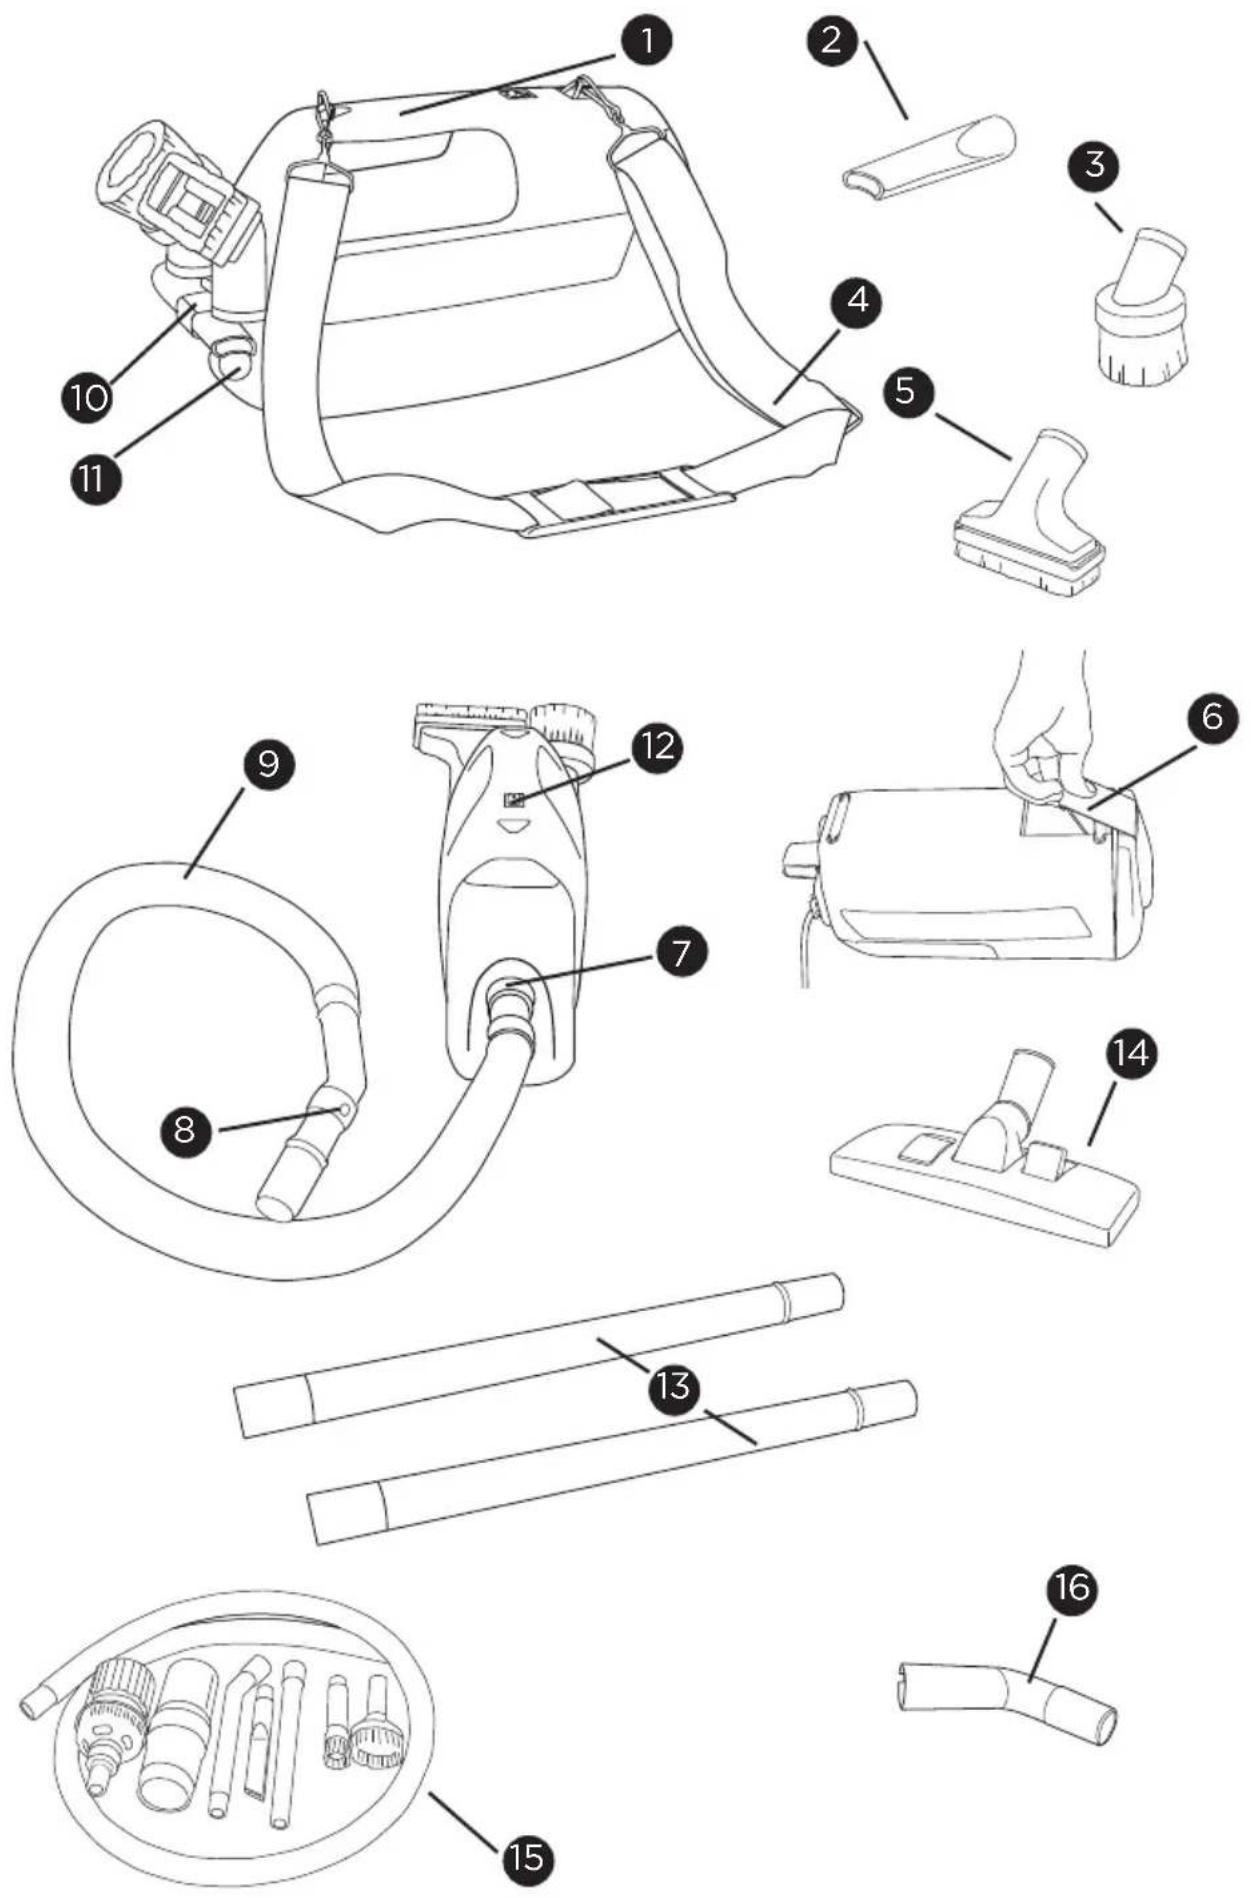
1 Carrying Handle
2 Crevice Tool
3 Deluxe Dusting Brush
4 Shoulder Strap
5 Upholstery Tool
6 Bag Compartment Cover and Retaining Latch
7 Suction Intake Port
8 Suction Relief Ring
9 Hose Assembly
10 Cleaning Tools Holder
11 Blower Exhaust Port
12 Main On/Off Power Switch
13 Extension Wands
14 Rug/Floor Tool
15 Micro Tool Kit
16 Adjustable Angle Adapter
Turning the Vacuum On/Off (Fig. 1)
- To start the vacuum cleaner, flip the "On/Off" switch located on the handle to the "On" (I) position.
- To stop the vacuum cleaner, flip the "On/Off" switch to the "Off" (O) position.
- Turn the vacuum cleaner off before unplugging from the electrical outlet.
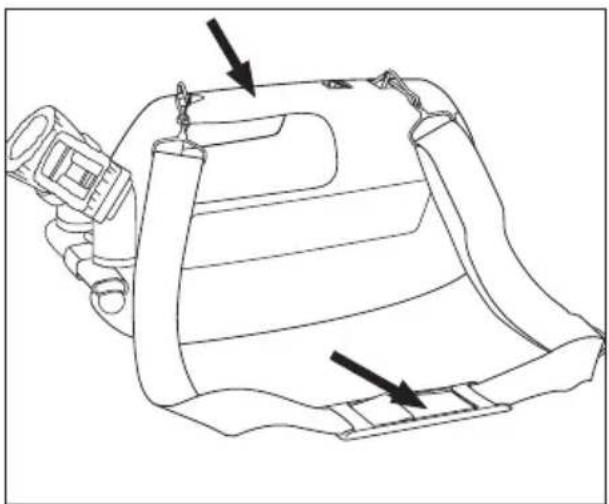
Carrying the Vacuum (Fig. 2)
To safely transport your vacuum use the carry handle and/or the shoulder strap.

natural_image
Line drawing of a hairbrush with a small square button on the handle (no text or symbols)Fig. 1
natural_image
Line drawing of a mechanical component with two arrows pointing to features (no text or symbols)Fig. 2
Vacuuming Floors
With the cleaning tools and vacuum wands, your vacuum is a comprehensive cleaning system.
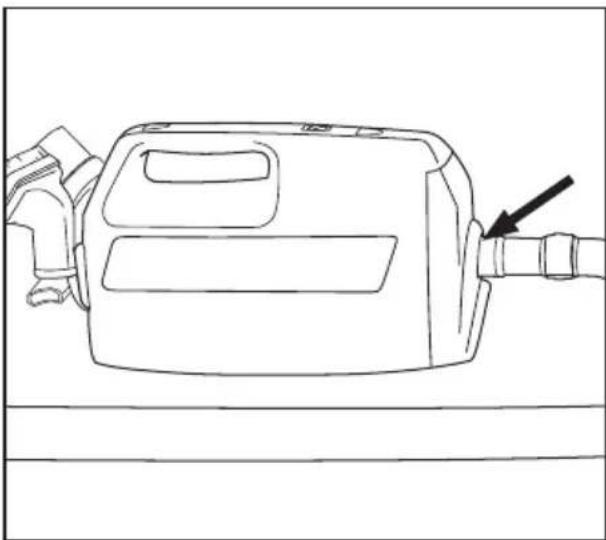
- Attach the vacuum hose to the suction intake port and twist to lock into place (Fig. 3).
- Attach the extension wand(s) to the curved handle end of the hose (Fig. 4).
- Attach the rug/floor tool to the end of the extension wand(s) for cleaning floors and area rugs (Fig. 5).
NOTE: You can connect any of the cleaning tools to the end of the extension wand(s) and twist for a secure fit. To remove the cleaning tool from the extension wand(s) simply twist and pull apart.
natural_image
Line drawing of a gas pump device with a black arrow pointing to the outlet (no text or symbols)Fig. 3

natural_image
Line drawing of a curved pipe or tube with multiple end caps and a straight end, no text or symbols present.Fig. 4

natural_image
Line drawing of a vacuum cleaner's side arm and base mount (no text or symbols)Fig. 5
Cleaning Tools
Your vacuum is equipped with a deluxe dusting brush, upholstery tool and crevice tool.
- Attach the vacuum hose to the suction intake port and twist to lock into place (Pg. 7, Fig. 3).
- Attach the extension wand(s) to the curved handle end of the hose (Pg. 7, Fig. 4).
- Insert any of the tools onto the end of the wand(s). Tools can be attached directly to the vacuum hose when the extension wands are not needed.
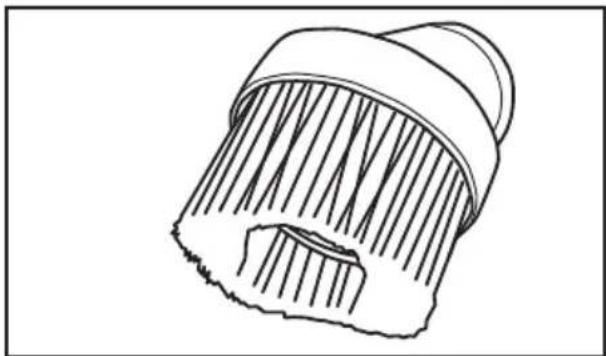
Dusting Brush (Fig. 6)
Ideal for table tops, shelves, blinds or baseboards.
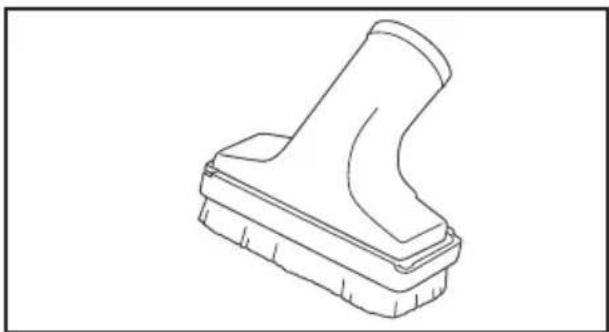
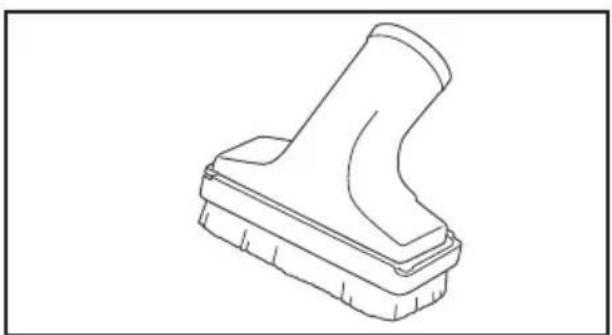
Upholstery Tool (Fig. 7)
Ideal for soft surfaces like chairs and couches.
Crevice Tool (Fig. 8)
Ideal for tight places like between seat cushions or corners.
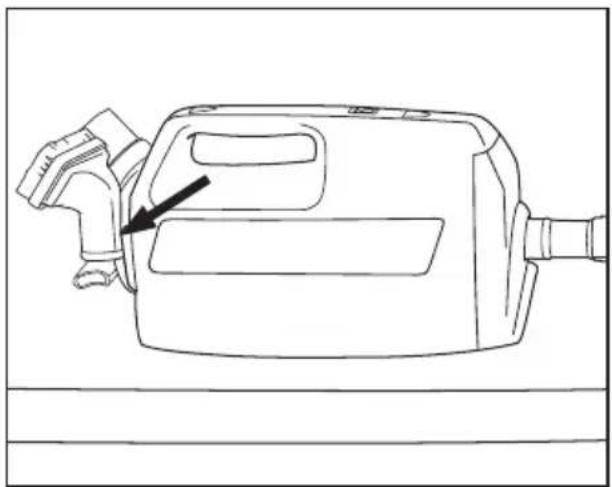
Cleaning Tools Holder (Fig. 9)
Your vacuum is equipped with a convenient holder for the cleaning tools.
- Slide the holder onto the clip above the blower exhaust port and attach the tools onto the holder.
natural_image
Line drawing of a brush head with bristles and a handle (no text or symbols)Fig. 6
natural_image
Line drawing of a mechanical component with a curved handle and rectangular base (no text or symbols)Fig. 7

natural_image
Simple line drawing of a cylindrical object with a curved handle and a curved end (no text or symbols)Fig. 8

natural_image
Line drawing of a gas pump device with a hand inserting a valve (no text or symbols)Fig. 9
Adjusting the Suction Power for Tool Cleaning (Fig. 10)
On the hose handle, locate the suction relief ring and turn it to the desired position. This reduces the suction power coming through the hose. Close the suction relief ring when finished to restore full suction power.
Using the Blower Exhaust Port
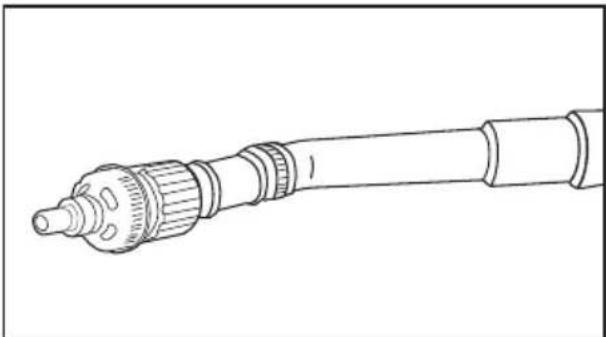
Attach the vacuum hose to the blower exhaust port (Fig. 11). Then attach the inflation adapter (included in the micro tool kit) to the end of the hose for inflating mattresses, rafts, etc (Fig. 12).

natural_image
Simple line drawing of a mechanical component with a black arrow pointing to a specific part (no text or symbols)Fig. 10

natural_image
Line drawing of a vehicle interior component with no visible text or symbolsFig. 11

natural_image
Line drawing of a mechanical tool or probe with multiple ports and threaded ends (no text or symbols)Fig. 12
Additional Cleaning Tools
The micro tool kit and adjustable angle adapter are standard accessories with your vacuum.
Micro Tool Kit (Fig. 13)
All the tools needed for cleaning delicate collectibles, computer keyboards or inflating an air mattress.
Adjustable Angle Adapter (Fig. 14)
Attach the angle adapter onto the end of the wand to clean hard to reach areas.

natural_image
Line drawing of a medical or laboratory device with multiple cylindrical and bulbous components arranged in an oval frame (no text or symbols)Fig. 13


natural_image
Technical line drawing of a pipe fitting with a 90-degree angle标注 (no text or symbols beyond the angle marker)
natural_image
Technical line drawing of a mechanical component with a curved shaft and flange (no text or symbols)Fig. 14
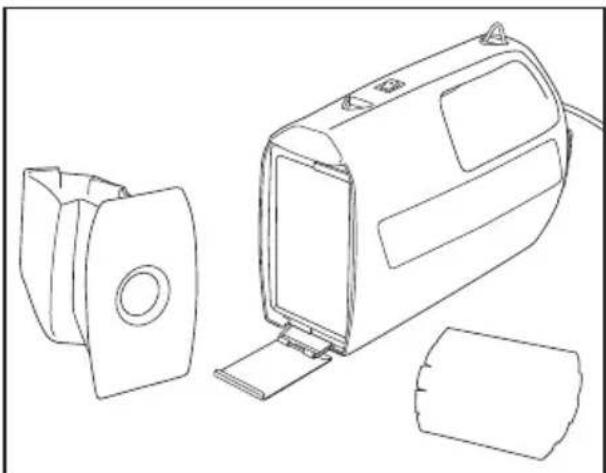
Replacing the Vacuum Bag
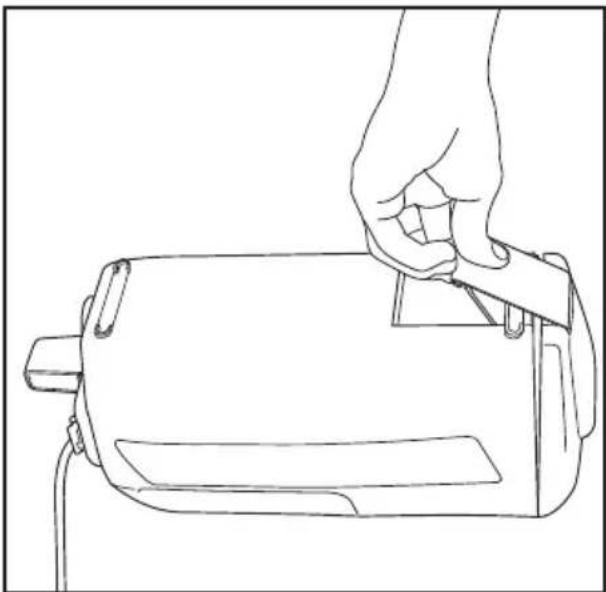
- Turn the vacuum over. Lift up the cover retaining clip to remove the cover (Fig. 15).
- Remove and discard the used bag.
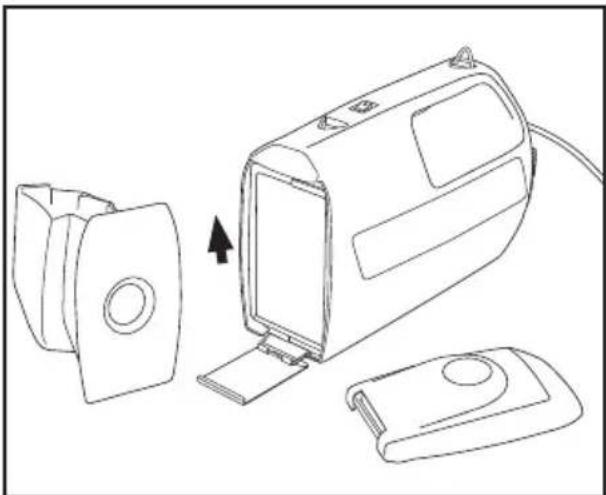
• Install a new bag with the arrow on the cardboard pointing to the top of the vacuum (Fig. 16). - Replace the cover and close the retaining latch.
NOTE: The vacuum bag cannot be reused.
natural_image
Line drawing of a hand using a tool to cut a rectangular device (no text or symbols)Fig. 15

natural_image
Line drawing of a device with open lid, showing part assembly and mounting mechanism (no text or symbols)Fig. 16
When to Change the Filter
At a minimum, it's recommended to replace the filters once a year or after using 12 vacuum bags, whichever comes first.
If someone in your household is sensitive to airborne allergens, it is recommended to change the filter after every six vacuum bags.
Replacing the Charcoal Filter
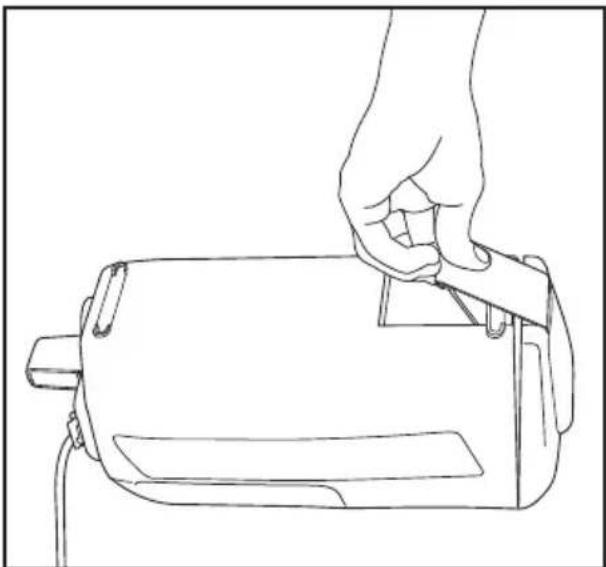
- Turn the vacuum over. Lift up the cover retaining clip to remove the cover (Fig. 17).
- Remove the bag (Fig. 18).
- Remove and discard the used filter from the inside back wall of the vacuum.
- Place the new charcoal filter in the back wall of the vacuum. It should fit snugly against the inside wall of the vacuum (Fig. 19).
- Replace the vacuum bag.
- Replace the cover and close the retaining latch.
natural_image
Line drawing of a hand inserting a card into a device (no text or symbols)Fig. 17

natural_image
Line drawing of a portable electronic device with cutaway views showing internal components (no text or symbols)Fig. 18

natural_image
Line drawing of a 3D printer or scanner device with internal structure and an arrow indicating a component (no text or symbols)Fig. 19
Troubleshooting
| PROBLEM CHECK | POINT POSSIBLE SOLUTION | |
| Vacuum won't turn on | • Power cord not firmly plugged in | • Plug unit in firmly |
| • Blown fuse or tripped breaker | • Check house fuse or breaker. Replace fuse / reset breaker | |
| • Needs service • Take to an | authorized service center | |
| Vacuum won't pick up or low suction | • Vacuum bag full • Install new | w bag |
| • Clogged filter • Install new | filter | |
| • Hose clogged • Remove obstacle | ||
| Dust escaping from vacuum | • Bag compartment cover not installed properly | • Reinsert the cover and secure latch |
| • Filter not installed correctly | • Review filter installation (page 12) | |
| • Vacuum bag not installed correctly | • Review bag installation (page 11) | |
Any other service should be performed by an Authorized Simplicity Vacuum Retailer. To locate your nearest Authorized Retailer, visit our website at SimplicityVac.com or call 888-974-6759.
Key Replacement Parts
• Genuine package of 6 paper bags and 1 filter Part # SS-6
For Best Performance
- Keep machine and all accessories clean and in good operating condition.
- Change vacuum bag and filter as recommended to maintain optimum cleaning efficiency.
- Always use genuine bags, filters and parts, as use of other products may result in poor cleaning or filtration performance. Simplicity filtration products are designed for maximum performance.
- Have machine checked periodically by the retailer where you purchased your Simplicity vacuum.
- Store machine carefully in dry area.
- For optimum cleaning performance and safety, follow your owner's manual.
What is Covered:
This warranty covers any defects in material and workmanship in the vacuum.
How Long Coverage Lasts:
Warranty coverage for the Simplicity Sport vacuum lasts one year. Domestic models used commercially are only guaranteed for 90 days.
What is Not Covered:
- Damage to the vacuum which occurs from neglect, abuse, alterations, accident, misuse or improper maintenance.
- Normal replacement items: disposable bags and disposable filters.
What We Will Do:
This warranty provides, at no cost to you, all labor and parts to keep this vacuum in correct operating condition during the warranted period.
How to Get Service:
Warranty service can only be obtained by presenting the vacuum to an Authorized Simplicity Retailer. A proof-of-purchase and product serial number will be required before service is rendered. To locate your nearest service center, please call 888-974-6759 or visit SimplicityVac.com.
THIS WARRANTY IS EXCLUSIVE AND IN LIEU OF ANY AND ALL OTHER WARRANTIES WHETHER WRITTEN, ORAL, EXPRESSED OR IMPLIED, (INCLUDING ANY WARRANTY OF MERCHANTABILITY OR FITNESS FOR A PARTICULAR PURPOSE). THIS WARRANTY DISCLAIMS LIABILITY FOR INCIDENTAL OR CONSEQUENTIAL DAMAGES.
How State Law Applies:
This warranty gives you specific legal rights, and you may also have other rights which vary from state to state.
Owner's Warranty Information (keep this for your records...)
Store Name
Store Address ____ City ____ State ____ Zip ____
Telephone Date of Purchase
Serial Number Model Number
Register your warranty online at SimplicityVac.com
Simplicity® VAGUUMS
VACUUMS

natural_image
Line drawing of a simple vacuum cleaner with attached armbag (no text or symbols)Sport™
natural_image
Line drawing of an electrical plug and its corresponding socket (no text or symbols)
natural_image
Line drawing of a hairbrush with a small square button on the handle (no text or symbols)Fig. 1

natural_image
Line drawing of a mechanical component with two arrows pointing to features (no text or symbols)Fig. 2
natural_image
Line drawing of a gas pump device with a black arrow pointing to the outlet (no text or symbols)Fig. 3

natural_image
Line drawing of a curved pipe or tube with multiple end caps and a straight end, no text or symbols present.Fig. 4

natural_image
Line drawing of a vacuum cleaner's side arm and base mount (no text or symbols)Fig. 5
natural_image
Line drawing of a brush head with bristles and a handle (no text or symbols)Fig. 6
natural_image
Line drawing of a mechanical component with a curved handle and rectangular base (no text or symbols)Fig. 7

natural_image
Simple line drawing of a cylindrical object with a curved end and a looped top (no text or symbols)Fig. 8
natural_image
Line drawing of a fuel pump device with a black arrow pointing to the handle (no text or symbols)Fig. 9
natural_image
Simple line drawing of a mechanical component with a black arrow pointing to a specific part (no text or symbols)Fig. 10

natural_image
Line drawing of a vehicle's internal structure with no text or symbolsFig. 11
natural_image
Line drawing of a mechanical tool or probe with multiple ports and threaded ends (no text or symbols)Fig. 12
natural_image
Line drawing of a medical or laboratory device with multiple cylindrical and bulbous components arranged in an oval frame (no text or symbols)Fig. 13


natural_image
Technical line drawing of a pipe fitting with a 90-degree angle标注 (no text or symbols beyond the angle marker)
natural_image
Technical line drawing of a mechanical component with a curved shaft and flange (no text or symbols)Fig. 14
natural_image
Line drawing of a hand using a tool to cut a rectangular device (no text or symbols)Fig. 15
natural_image
Line drawing of a device with open lid, showing part assembly and mounting mechanism (no text or symbols)Fig. 16
natural_image
Line drawing of a hand inserting a card into a device (no text or symbols)Fig. 17
natural_image
Line drawing of a portable electronic device with cutaway views showing internal components (no text or symbols)Fig. 18

natural_image
Line drawing of a 3D printer or scanner device with internal structure and an arrow pointing to a component (no text or symbols)Fig. 19
Dépannage

- Getting Started
- Attachment Cleaning
- Maintenance and Care
- Problem Solving Guide
- IMPORTANT SAFETY INSTRUCTIONS
- READ ALL INSTRUCTIONS BEFORE USING THIS APPLIANCE.
- IMPORTANT:
- WARNING:
- Power Cord, 2-Wire Polarized Cord
- Turning the Vacuum On/Off (Fig. 1)
- Carrying the Vacuum (Fig. 2)
- Vacuuming Floors
- Cleaning Tools
- Dusting Brush (Fig. 6)
- Upholstery Tool (Fig. 7)
- Crevice Tool (Fig. 8)
- Cleaning Tools Holder (Fig. 9)
- Adjusting the Suction Power for Tool Cleaning (Fig. 10)
- Using the Blower Exhaust Port
- Additional Cleaning Tools
- Micro Tool Kit (Fig. 13)
- Adjustable Angle Adapter (Fig. 14)
- Replacing the Vacuum Bag
- When to Change the Filter
- Replacing the Charcoal Filter
- Key Replacement Parts
- For Best Performance
- What is Covered:
- How Long Coverage Lasts:
- What is Not Covered:
- What We Will Do:
- How to Get Service:
- How State Law Applies:
- Owner's Warranty Information (keep this for your records...)
- Simplicity® VAGUUMS
- VACUUMS
- Sport™
Brand : Simplicity
Model : Sport S100
Category : Vacuum Cleaner