
CMS645X - Coffee machine SMEG - Free user manual and instructions
Find the device manual for free CMS645X SMEG in PDF.
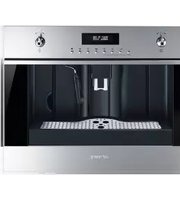


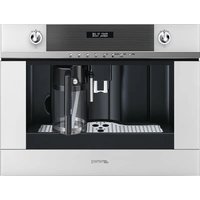
| Type of product | Espresso and cappuccino machine |
| Brand | Smeg |
| Model | CMS645X |
| Color | Stainless steel |
| Dimensions (W x H x D) | 200 x 300 x 400 mm |
| Weight | 5.5 kg |
| Power consumption | 1200 W |
| Voltage / Frequency | 220-240 V, 50/60 Hz |
| Water tank capacity | 1.4 L |
| Bean hopper capacity | 250 g |
| Pump pressure | 15 bar |
| Heating system | Thermoblock |
| Steam wand | Yes, adjustable |
| Cup warmer | Yes |
| Removable drip tray | Yes |
| Auto shut-off | Yes |
| Descaling indicator | Yes |
| Filter type | Ground coffee or ESE pods |
| Warranty | 2 years |
| Manual included | Yes |
Frequently Asked Questions - CMS645X SMEG
User questions about CMS645X SMEG
0 question about this device. Answer the ones you know or ask your own.
Ask a new question about this device
Download the instructions for your Coffee machine in PDF format for free! Find your manual CMS645X - SMEG and take your electronic device back in hand. On this page are published all the documents necessary for the use of your device. CMS645X by SMEG.
USER MANUAL CMS645X SMEG


INDEX
INTRODUCTION 7
Symbols used in these instructions .....7
Letters in brackets 7
Troubleshooting and repairs 7
SAFETY 7
Fundamental safety warnings .....7
Designated use....9
Instructions 9
DESCRIPTION......9
Description of the appliance 9
Description of control panel 9
PRELIMINARY CHECKS 9
Controls after transport 9
Installing the appliance....10
Connecting the appliance ....10
AUTOMATIC CUP TRAY LIGHT.....10
BUILT-IN INSTALLATION .....11
USING THE APPLIANCE FOR THE FIRST TIME ....13
Installing the filter 13
Replacing the filter 14
Removing the filter 14
TURNING ON AND HEATING UP ...14
MAKING COFFEE USING COFFEE BEANS 14
CHANGING THE QUANTITY OF COFFEE IN THE CUP ....16
ADJUSTING THE COFFEE MILL ....16
MAKING ESPRESSO COFFEE WITH PRE-GROUND COFFEE (INSTEAD OF BEANS) 17
DELIVERING HOT WATER .....17
MAKING CAPPUCCINO (USING THE STEAM FUNCTION) ....18
CLEANING AND MAINTENANCE .....18
Cleaning the coffee maker 18
Cleaning the coffee grounds container .....18
Cleaning the drip tray 19
Cleaning the water tank 19
Cleaning the spouts 19
Cleaning the pre-ground coffee funnel .....19
Cleaning the inside of the coffee maker....19
Cleaning the infuser 19
CHANGING AND SETTING MENU PARAMETERS ....20
Setting the clock 20
Setting auto-start time 21
Descaling 21
Changing coffee temperature 22
Changing the length of time the appliance remains on 22
Setting water hardness 22
Resetting default values (reset) ......23
CHANGING THE LANGUAGE .....23
TURNING THE APPLIANCE OFF .....23
TECHNICAL SPECIFICATION .....23
DISPOSAL 23
DISPLAYED MESSAGES ....24
TROUBLESHOOTING ....26
RECIPES ......28
INTRODUCTION
Thank you for choosing the automatic coffee and cappuccino maker. We hope you enjoy using your new appliance. Take a few minutes to read these instructions. This will avoid all risks and damage to the machine.
Symbols used in these instructions
Important warnings are identified by these symbols. These warnings must absolutely be respected. Failure to observe the instructions could result in electric shock, serious injury, burns, fire or damage to the appliance.

Danger!
Failure to observe the warning could result in possibly life threatening injury from electric shock.

Important!
Failure to observe the warning could result in injury or damage to the appliance.

Danger of burns!
Failure to observe the warning could result in scalds or burns.

N.B.!
This symbol identifies important advice or information for the user.
Letters in brackets
The letters in brackets refer to the legend in the Description of the Appliance on page 3.
Troubleshooting and repairs
If this does not resolve the problem or you require further information, you should consult Customer Services by calling the number given on the "Customer Service" sheet. If your country is not among those listed on the sheet, call the number given in the guarantee. If repairs are required, contact Customer Services only. The addresses are given in the guarantee certificate provided with the machine.
SAFETY
Fundamental safety warnings
The appliance is not intended for use by persons (including children) with reduced physical, sensory or mental capabilities, or lack of experience and knowledge, unless they have been given supervision or instruction concerning use of the appliance by a person responsible for their safety.
Children should be supervised to ensure that they do not play with the appliance.
Cleaning and user maintenance shall not be made by children without supervision.
Never immerse the appliance in water.
This is a household appliance only. It is not intended to be used in: staff kitchen areas in shops, offices and other working environments; farm houses; by clients in hotels, motels and other residential type environments; bed and breakfast type environments.
If the plug or power cable is damaged, it must be replaced by customer services only to avoid all risk.
For European markets only:
This appliance can be used by children aged from 8 years and above if they have been given supervision or instruction concerning use of the appliance in a safe way and if they understand the hazard involved. Cleaning and user maintenance shall not be made by children unless they are older than 8 and supervised. Keep the appliance and its cord out of the reach of children aged less than 8 years.
Appliances can be used by persons with reduced physical, sensory or mental capabilities or lack of experience and knowledge if they have been given supervision or instruction concerning use of the appliance in a safe way and understand the hazards involved.
Children shall not play with the appliance.
When not in use and before cleaning, always unplug the appliance.

Surfaces marked with this symbol become hot during use (the symbol is present in certain models only).

Danger! This is an electrical appliance. Because of the risk of electric shock, you should respect the following safety warnings:
- Never touch the appliance with damp hands. • Never touch the plug with damp hands.
- Make sure the socket used is freely accessible at all times, enabling the appliance to be unplugged when necessary.
- Unplug directly from the plug only. Never pull the power cable as you could damage it.
- To disconnect the appliance completely, place the main switch (A23) on the side of the appliance in the 0 position.
- If the appliance is faulty, do not attempt to repair. Turn it off using the main switch (A23), unplug from the mains socket and contact Customer Services.

Important! Keep all packaging (plastic polystyrene foam) away from children.

Danger of burns! This appliance produces hot water and steam may form while it is in operation. Avoid contact with splashes of water or hot steam. Avoid touching hot surfaces when the appliance is in use. Use knobs and handles.

Important! Do not grasp the coffee maker when it is out of the cabinet. Do not rest recipients containing liquids or inflammable or corrosive materials on top of the appliance. Place the accessories required to prepare the coffee (the measure for example) in the special holder. Do not rest large objects which could obstruct movement or unstable objects on the appliance.

Important! Never make drinks, hot water or steam when the appliance is extracted. Always make sure the appliance is inactive before extracting it. Failure to observe this precaution could lead to damage to the appliance. The only exception is adjusting the coffee mill which must be done with the machine out (see the section
"Adjusting the coffee mill").

N.B.: Use original or manufacturer recommended accessories and spare parts only.
Designated use
This appliance is designed and made to prepare coffee and heat drinks. All other use is considered improper. This appliance is not suitable for commercial use. The manufacturer is not liable for damage deriving from improper use of the appliance. This appliance can be installed in combination with a built-in oven if the latter is fitted with a cooling fan at the rear (maximum oven power: 3 kW).
Instructions
Read these instructions carefully before using the appliance.
- Keep these instructions. If the appliance is passed to other persons, they must also be provided with these instructions.
- Failure to follow these instructions may result in burns or damage to the appliance. The manufacturer is not liable for damage deriving from failure to respect these instructions.
DESCRIPTION
Description of the appliance
(page 3 - A)
A1. Cup tray A2. Service door A3. Coffee guide A4. Coffee grounds container A5. Infuser A6. Lights A7. ON-OFF/stand-by knob (*) A8. Control panel A9. Steam knob (*) A10. Cappuccino maker (removable) A11. Cappuccino maker nozzle A12. Water tank A13. Coffee spout (adjustable height) A14. Drip tray
A15. Beans container lid A16. Beans container A17. Grinding adjustment knob A18. Pre-ground coffee funnel door A19. Measure A20. Compartment for measure A21. Pre-ground coffee funnel A22. Power cable A23. Main switch A24. Tray A25. Water softener filter (if present) A26. IEC Connector (*) illuminated in certain models
Description of control panel
A number of buttons on the panel have a double function. This is indicated in brackets in the description.
B1. Display: guides the user in using the appliance.
B2. Coffee taste button.
B3. One/two cups short coffee button.
B4. One/two cups standard coffee button.
B5. One/two cups long coffee button.
B6. Menu button to activate or deactivate menu parameter setting mode
B7. Pre-ground coffee button . (When you access the MENU: NEXT button to display the next menu parameter).
B8. Rinse button : performs a brief rinse to heat the infuser.
(When you access the MENU: "CHANGE" button to modify menu parameters).
B9. button: to deliver hot water or confirm. (When you access the MENU: OK button to confirm menu parameters).
PRELIMINARY CHECKS
Controls after transport
After removing the packaging, make sure the product is complete and undamaged and that all accessories are present.
Do not use the appliance if it is visibly damaged.
Contact Customer Services.
Installing the appliance

Important! When installing the appliance, respect the following safety warnings:
- Installation must be performed by a qualified professional in compliance with legislation in force in the country of installation (see Built-in installation).
- The packing elements (plastic bags, polystyrene foam, etc.) should be kept out of reach of children as they are a safety hazard.
- Do not install the appliance in rooms where the temperature may drop to 0°C or lower (the water in the appliance could freeze and cause damage).
- You should customise the water hardness as soon as possible following the instructions in the "SETTING WATER HARDNESS" chapter.
Connecting the appliance

Danger! Check that the mains power supply voltage corresponds to the value indicated on the appliance rating plate.
Connect the appliance to an efficiently earthed and correctly installed socket with a minimum current rating of 10A only.
If the power socket does not match the plug on the appliance, have the socket replaced with a suitable type by a qualified professional.
To comply with safety directives, an omnipolar switch with a minimum contact distance of 3 mm must be installed.
Do not use multiple sockets or extensions.
To learn to use the appliance correctly, the first time you use it follow the detailed instructions in the following paragraphs.

Important! Safety cutout devices must be included in the mains power supply in compliance with the installation regulations in the country concerned.
When the appliance is turned on, the lights (A6) automatically illuminate the spout and cup tray. In some models the knobs are also illuminated. The lights stay on until the appliance is turned off. While coffee, steam or hot water is being delivered, the cooling fan comes on.
At the end of the function, the cooling fan remains on to avoid condensation forming inside the cabinet. After several minutes, the fan goes off automatically.

N.B.: The appliance completes this cycle
even if switched off by turning the knob (A7) to the left or right.


Important! Do not look at the lights directly using an optical instrument.
BUILT-IN INSTALLATION
Verify the minimum measurements required for correct installation of the appliance.
The coffee maker must be installed in a column and the column must be firmly fixed to the wall with commercially available brackets.
Important:
- Important: all installation or maintenance operations must be performed with the appliance disconnected from the mains electricity supply.
- Kitchen furniture in direct contact with the appliance must be heat resistant (65°C min).
- To guarantee correct ventilation, leave a gap at the bottom of the cabinet (see measurements in figure).


Position the rails on the sides of the cabinet as shown in the figure.
Fix with the screws, then extract completely. If the coffee maker is installed over a warmer drawer (500 W max.), use the top surface of this as a reference to position the rails.
In this case, there will be no surface to rest the rails on.

Fix the power cable with the clip to avoid it tangling when the appliance is inserted or extracted.
The power cable must be long enough to allow the appliance to be extracted from the cabinet to fill the coffee beans container.
The appliance must be earthed in compliance
with legislation.
Electrical connections must be performed by a qualified electrician in compliance with the manufacturer's instructions and legislation in force in the country of installation.
The mains socket should be easily accessible.

Position the appliance on the rails, making sure the pins are correctly inserted in the housings, then fix it with the screws supplied.

If necessary, correct alignment of the appliance by positioning the spacers supplied under or at the sides of the support.
USING THE APPLIANCE FOR THE FIRST TIME
- Coffee has been used to factory test the appliance and it is therefore completely normal for there to be traces of coffee in the mill. The machine is, however, guaranteed to be new.
- You should customise water hardness as soon as possible following the instructions in the "Setting water hardness" chapter.
- Connect the appliance to the mains electricity supply and press the main switch (A23). You must select the required language:
- To set English, wait for the appliance to display "PRESS OK TO INSTALL ENGLISH". While the message is displayed, press the OK button (B9) (fig. 1) for at least 3 seconds until "ENGLISH INSTALLED" is displayed. The appliance then displays the setting confirmed message in English.
If you set the wrong language by mistake, follow the instructions in the chapter "Changing the language" to choose the right language.
Follow the instructions indicated by the appliance:
- After 5 seconds, the appliance displays "FILL TANK". To fill the water tank, remove (fig. 2), rinse and fill with fresh water without exceeding the MAX line.
Replace the tank and push as far as it will go.
- Place a cup under the cappuccino maker (fig. 3).
The appliance now displays: "HOT WATER PRESS OK".
Press the OK button (B9) (fig. 1) and after a few seconds a little water comes out of the cappuccino maker. (Delivery stops automatically).
- The machine now displays "TURNING OFF... PLEASE WAIT" and goes off.
- Extract the appliance by pulling it out using the handles (fig. 4). Open the lid and fill the container with coffee beans, then close the lid and push the appliance in.

Important! To prevent malfunction, never lose pre-ground coffee, freeze dried coffee, elised beans or anything else which could be the appliance.
The coffee maker is now ready for normal use.

N.B.! When using the appliance for the first time, you need to make 4/5 cups of coffee or 5 cappuccinos before the appliance produces satisfactory results.

N.B.! Each time the coffee maker is turned on using the main switch (A23), the appliance performs a "SELF-DIAGNOSIS" cycle and goes off. To turn it on again, turn the knob

(A7) (to the right or left) (fig. 5).
Installing the filter
Some models are fitted with a water softener filter to improve the quality of the water used and extend the working life of the appliance.
To install, proceed as follows:
- Remove the filter from the packaging (A25).
- Slide the pointer of the date indicator (see fig. 28) until the months of use are displayed.

N.B.: The filter lasts about 2 months if the appliance is used normally. If the coffee maker is left unused with the filter installed, it will last a maximum of 3 weeks.
- Insert the filter in the water tank (A12) and press it until it touches the bottom of the tank (see fig. 28).
- Fill the tank and place it in the coffee maker.
- Turn the cappuccino maker (A10) outwards and place a container underneath (min. capacity 100 ml).

N.B.: When you install the filter, you must notify the appliance of its presence.
- Press the MENU button (B6) to enter the menu;
- Press the NEXT button (B7) until "INSTALL FILTER" is displayed.
- Press the OK button (B9).
- "HOT WATER PRESS OK" is displayed.
- Press the OK button (B9).
The appliance begins delivering hot water and the message "PLEASE WAIT..." is displayed.
After the flow of hot water stops, the appliance automatically resets to "READY" status.
Replacing the filter ("Filter Reset")
When "REPLACE FILTER" is displayed or after 2 months of use (see date indicator), the filter must be replaced:
- Remove the exhausted filter;
- Remove the new filter from the packaging.
- Slide the pointer of the date indicator (see fig. 28) until the months of use are displayed (the filter lasts about 2 months).
- Insert the filter in the water tank and press it until it touches the bottom of the tank (see fig. 28).
- Fill the water tank and insert it in the coffee maker;
- Turn the cappuccino maker outwards and place a container underneath (min. capacity 100 ml).
- Press the MENU button (B6) to enter the menu.
- Press the NEXT button (B7) until "FILTER RESET NO" is displayed.
- Press the CHANGE button (B8) until "FILTER RESET YES" is displayed.
- Press the OK button (B9) to confirm.
- "HOT WATER PRESS OK" is displayed.
- Press the OK button (B9) again. The appliance begins delivering hot water and the message "PLEASE WAIT..." is displayed. After the flow of hot water stops, the appliance automatically resets to "READY" status.
Removing the filter
If you want to use the appliance without a filter, you must remove it and notify the appliance of its removal as follows:
- Press the MENU button (B6) to enter the menu.
- Press the NEXT button (B7) until "UNINSTALL FILTER" is displayed.
- Press the OK button (B9). The appliance automatically resets to "READY" status.
TURNING ON AND HEATING UP
Each time the appliance is turned on, it performs an automatic preheat and rinse cycle which cannot be interrupted.
The appliance is ready for use only after completion of this cycle.

Danger of burns! During rinsing, a little
hot water flows from the coffee spouts.
Avoid contact with splashes of water.
To turn the appliance on, turn the knob (A7) (to the right or left) (fig. 5). "HEATING UP... PLEASE WAIT" is displayed.
After heating, the message "RINSING" is displayed. As well as heating the boiler, the appliance also heats the internal circuits by circulating hot water.
The appliance is at temperature when the message "READY STANDARD TASTE" is displayed.
MAKING COFFEE USING COFFEE BEANS
- The appliance is preset to make coffee with a standard taste. You can also choose coffee with an extra-light, light, strong or extra-strong taste. To choose the required taste, press the 📄 button (B2) (fig. 6). The required coffee taste is displayed.
- Place 1 cup under the spouts to make 1 coffee (fig. 7) or 2 cups for 2 coffees (fig. 8). Lower the spouts as near as possible to the cup for a creamier coffee (fig. 9).
- Press the ☐ button (B3) to make a short coffee (fig. 10), the ☑ button (B4) for a standard coffee and the ☑ button (B5) for
a long coffee. To make 2 coffees, press the button twice (within 2 seconds).
To change the quantity of coffee the appliance delivers automatically into the cup, proceed as described in the following chapter. (The appliance now grinds the beans and starts delivering the coffee into the cup.
Once the set amount of coffee has been delivered, the machine stops delivery automatically and expels the exhausted coffee grounds into the grounds container.
- After a few seconds, the ready message is displayed again and you can make another coffee.
- To turn the appliance off, turn the knob (A7) (to the right or left) (fig. 5).
Before going off, the appliance performs an automatic rinse cycle (a little hot water flows from the spouts and is collected in the drip tray beneath. Take care to avoid scalds).
NOTE 1: If the coffee is delivered a drop at a time or not at all, turn the grinding adjustment knob (A17) (fig. 11) one click clockwise (see "Adjusting the coffee mill").
Proceed one click at a time until coffee delivery is satisfactory.
NOTE 2: If the coffee is delivered too fast and the cream is not satisfactory, turn the grinding adjustment knob (A17) (fig. 11) one click anticlockwise (see "Adjusting the coffee mill").
Avoid turning the grinding adjustment knob excessively otherwise when you select 2 cups, the coffee may be delivered a drop at a time.
NOTE 3: Tips for a hotter coffee:
- When you turn the appliance on, if you want to make a short coffee (less than 60 cc), rinse the cups with hot water to preheat the cups. If more than 2/3 minutes have passed since the last coffee made, before requesting another coffee, you must preheat the infuser by pressing the 📂 button (B8) (fig. 12). Deliver the water into the underlying drip tray or alternatively use this water to fill (and then empty) the cup to be used for the coffee, so as to preheat it.
- Unless preheated, do not use excessively
thick cups as they will absorb too much heat.
- Preheat the cups by rinsing them with hot water.
NOTE 4: While the appliance is making coffee, delivery can be interrupted at any moment by pressing the previously selected button, (B3), (B4) or (B5).
NOTE 5: As soon as delivery is finished, to increase the quantity of coffee in the cup, just hold down the previously selected coffee button (☐, ☐ or ) until the required amount is reached (this must be done within 3 seconds after completion of delivery).
NOTE 6: When the appliance displays "FILL TANK", fill the tank with water or the appliance will not deliver coffee.
(It is normal for there to be a little water left in the tank when the message is displayed).
NOTE 7: After about 14 single (or 7 double) coffees, the appliance displays "EMPTY GROUNDS CONTAINER", indicating that the grounds container is full and must be emptied and cleaned. Until the grounds container has been cleaned, the appliance continues to display the message and coffee cannot be made. Even if not full, the empty waste coffee container message is displayed 72 hours after the first coffee has been delivered. For the 72 hours to be calculated correctly, the machine must never be turned off with the main switch in the 0 position.
To clean, open the service door on the front of the appliance by pulling the spout (A13) (fig. 13), extract the drip tray (A14) (fig. 14), empty and clean.

When cleaning, always extract the drip tray completely to avoid it falling when the grounds container is removed.
Empty the grounds container and clean thoroughly to remove all residues left on the bottom.

Important! When removing the drip tray, the grounds container must be emptied, even if it is not completely full. If this is not done, when you make the next coffees, the grounds container may fill up more than expected and clog the machine.
NOTE 8: Never extract the water tank while the machine is delivering coffee.
If it is removed, it will not be possible to make the coffee and the appliance will display "GROUND TOO FINE ADJUST MILL AND PRESS OK". To use the appliance again, replace the water tank, press the OK button (B9). "HOT WATER PRESS OK" is displayed. Press the OK button (B9) and deliver water from the cappuccino maker for a few seconds.
CHANGING THE QUANTITY OF COFFEE IN THE CUP
The appliance is set by default to automatically make the following types of coffee:
- Short coffee when the button (B3) is pressed.
- Standard coffee when the 📋 button (B4) is pressed.
- Long coffee when the Button (B5) is pressed. To change these quantities, proceed as follows:
- Press the button corresponding to the quantity you want to change ( □ , □ or □ ) for at least 10 seconds then release until the message "PROGRAM QUANTITY" is displayed and coffee delivery commences.
- When the coffee in the cup reaches the required level, press the same button again to memorise the new amount.
The appliance is now reprogrammed with the new settings and displays: "READY".
The coffee mill is preset in the factory to make coffee correctly and should not require adjusting initially.
However, if after making the first few coffees you find that delivery is either too fast or too slow (a drop at a time), this can be corrected by adjusting the grinding adjustment knob (fig. A17) (fig. 11).

Important! The grinding adjustment knob must only be turned when the coffee mill is in operation.

For slower delivery and creamier coffee, turn one click anticlockwise (finer pre-ground coffee).
For faster delivery (not a drop at a time), turn one click clockwise (coarser pre-ground coffee).
(Coffee has been used to factory test the appliance
and it is therefore completely normal for there to be traces of coffee in the mill.
It is, however, guaranteed to be new.)
MAKING ESPRESSO COFFEE WITH PRE-GROUND COFFEE (INSTEAD OF BEANS)
- Press the button (B7) (fig. 15) to select the pre-ground coffee function. This disables the coffee mill function. The appliance now displays the message: "READY PRE-GROUND".
- Extract the machine by pulling it outwards using the handles.
- Lift the central lid, place one measure of pre-ground coffee in the funnel (fig. 16), push the appliance in then proceed as described in the chapter "Making coffee using coffee beans". N.B.: You can make just one coffee at a time
by pressing the (B3), (B4) or (B5) button once only.

- After using the machine with pre-ground coffee, to go back to making coffee using beans, deactivate the pre-ground coffee function by pressing the button (B2) (fig. 6) again to enable the coffee mill.
NOTE 1: Never introduce pre-ground coffee when the machine is off or before pressing the button (B7) to avoid the coffee spreading through the inside of the appliance.
NOTE 2: Never add more than 1 level measure, otherwise either the appliance will not make the coffee and the pre-ground coffee will be dispersed inside the appliance, dirtying it, or the coffee will be delivered a drop at a time.
NOTE 3: Use the measure provided to add the right amount of coffee.
NOTE 4: Introduce only pre-ground coffee for espresso coffee machines into the funnel. Never fill with coffee beans, freeze dried coffee or other substance that could damage the appliance.
NOTE 5: If more than one measure of pre-ground coffee is used and the funnel clogs, push the coffee down with a knife (fig. 17) then remove and clean the infuser and machine as described in the "Cleaning the infuser" chapter.
DELIVERING HOT WATER
The appliance is set by default to automatically deliver 200 ml of hot water.
• Always make sure the appliance is ready. - Turn the cappuccino maker outwards and place a container underneath (fig. 3). - Press the 📋 button (B9) (fig. 1). "HOT WATER PRESS OK" is displayed. - Press the OK button and hot water is delivered from the cappuccino maker into the container underneath.
(You should not deliver hot water for more than 2 minutes at a time).
To interrupt the flow, press the button (B9).
Once the set quantity of hot water has been reached, delivery stops automatically.
MAKING CAPPUCCINO (USING THE STEAM FUNCTION)
- Turn the cappuccino maker (A10) towards the centre (fig. 3).
- Take a container, fill it with about 100 ml of milk for each cappuccino to be made and place it under the cappuccino maker. In choosing the size of the recipient, bear in mind that the milk doubles or triples in volume. You are recommended to use partially skimmed milk at refrigerator temperature.
- Turn the steam knob (A9) (Fig. 18) (to the right or left). "STEAM PRESS OK" is displayed.
- Press the OK button (B9) (fig. 1).
- To stop steam delivery, turn the steam knob (A9).
- Immerse the cappuccino maker (A10) in the milk container (fig. 19), taking care not to immerse the raised line on the cappuccino maker (shown by the arrow in fig. 19).
Steam comes out of the cappuccino maker giving the milk a creamy frothy appearance. For a creamier froth, immerse the cappuccino maker in the milk and rotate the container with slow upward movements.
(You should not discharge steam for more than 2 minutes at a time).
- Once the required froth has been reached, stop steam discharge by turning the steam knob (A9).
- Prepare the coffee as described above using sufficiently large cups, then fill them with the frothed milk prepared previously. The cappuccino is ready.
Sweeten to taste and if desired, sprinkle the froth with a little cocoa powder.
IMPORTANT: always clean the cappuccino system immediately after use.
Proceed as follows:
- Turn the steam knob (A9) and press the OK button (B9) to discharge a small amount of steam for a few seconds.
This empties the cappuccino maker of all traces of milk.
IMPORTANT: to ensure the hygiene of the appliance, you are recommended to carry out this procedure each time you make cappuccino to avoid stale milk remaining in the circuit.
- Wait a few minutes for the cappuccino maker to cool down, then holding the cappuccino maker lever firmly in one hand, unscrew the cappuccino maker itself with the other, turning it clockwise and removing it downwards (fig. 20).
- Remove the cappuccino maker nozzle (A11) by pulling it downwards (fig. 21).
- Wash the cappuccino maker and nozzle thoroughly in hot water.
- Make sure the two holes shown in figure 22 are not blocked. If necessary, clean with a pin.
- Replace the nozzle by inserting it and rotating it vigorously upwards into the cappuccino maker.
- Replace the cappuccino maker by pushing it upwards and rotating it anticlockwise.
CLEANING AND MAINTENANCE
Before performing any cleaning operations, leave the machine to cool down completely and unplug from the mains power supply. Never immerse the coffee maker in water. It is an electrical appliance. Do not use solvents or abrasive detergents to clean the coffee maker. A soft damp cloth will suffice. Never wash any of the components of the coffee maker in the dishwasher.
Cleaning the coffee maker
The following parts of the machine must be cleaned regularly:
• Coffee grounds container (A4). - Drip tray (A14). - Water tank (A12). - Coffee spouts (A13), cappuccino maker nozzle (A11) and cappuccino maker spouts
(A10).
• Pre-ground coffee funnel (A21). - Inside the machine, accessible after opening the service door (A2). - Infuser (A5).
Cleaning the coffee grounds container
When "EMPTY GROUNDS CONTAINER" is displayed, the grounds container must be emptied and cleaned.
Until the grounds container has been cleaned, the appliance continues to display the message and coffee cannot be made.
To clean:
- Open the service door (A2) on the front of the appliance (fig. 13), extract the drip tray (A14) (fig. 14), empty and clean.
- Empty the grounds container and clean thoroughly to remove all residues left on the bottom.

Important! If the drip tray is not emptied regularly, the water could overflow from the edge and seep inside or around the coffee maker.
This could damage the appliance and cabinet.
The drip tray is fitted with a level indicator (red) showing the level of water it contains (fig. 24).
Before the indicator protrudes from the cup tray, the drip tray must be emptied and cleaned.
Cleaning the drip tray

Important! If the drip tray is not emptied regularly, the water could overflow from the edge and seep inside or around the coffee maker.
This could damage the appliance and cabinet.
The drip tray is fitted with a level indicator (red) showing the level of water it contains (fig. 24).
Before the indicator protrudes from the cup tray, the drip tray must be emptied and cleaned.
To remove the tray:
- Open the service door (A2) (fig. 13).
- Remove the drip tray (A14) and the grounds container (A4) (fig. A14).
- Empty the drip tray and grounds container (A4) and wash them;
- Remove the drip tray complete with grounds container (A4).
- Close the service door.
Cleaning the water tank
- Clean the water tank (A12) regularly (about once a month) with a damp cloth and a little mild washing up liquid.
- Clean to remove all washing up liquid residues, then rinse the water tank thoroughly.
Cleaning the spouts
- Clean the spouts (A13) periodically using a sponge or cloth (fig. 25).
- Check regularly that the holes in the coffee spout are not blocked. If necessary, remove coffee deposits with a toothpick (fig. 23).
Cleaning the pre-ground coffee funnel
- Check regularly (about once a month) that the pre-ground coffee funnel (A21) is not blocked. If necessary, remove coffee deposits with a knife (fig. 17).

Danger! Before performing any cleaning operations, the machine must be turned off by pressing the main switch (A23) and unplugged from the mains power supply.
Never immerse the coffee maker in water.
Cleaning the inside of the coffee maker
- Check regularly (about once a week) that the inside of the appliance is not dirty. If necessary, remove coffee deposits with a knife and a sponge.
- Remove the residues with a vacuum cleaner (fig. 26).
Cleaning the infuser
The infuser (A5) must be cleaned at least once a month.

Important! The infuser (A5) must not be removed when the appliance is on. Do not attempt to use force to remove the infuser as this could damage the coffee maker.
- Make sure the machine is correctly turned off (see "Turning the appliance off").
- Open the service door (A2) (fig. 13).
- Remove the drip tray (A14) and the grounds container (fig. 14).
- Press the two red release buttons inwards and at the same time pull the infuser outwards (fig. 27).

Important! Do not use washing up liquid to clean the infuser. It would remove the lubricant applied to the inside of the piston, causing the infuser to seize up and become unusable. Do not put in the dishwasher.
- Soak the infuser in water for about 5 minutes, then rinse under the tap.
- After cleaning, replace the infuser (A5) by sliding it onto the internal support and pin at the bottom.

Then push the PUSH symbol fully in until it clicks into place.

N.B.! If the infuser is difficult to insert, you must first adapt it to the right dimension by pressing it forcefully from the bottom and top as shown in the figure.

- Once inserted, make sure the two red buttons have snapped out.
- Replace the drip tray (A14) and grounds container.
- Close the service door (A2).

CHANGING AND SETTING MENU PARAMETERS
After turning the knob (A7) and waiting for the appliance to be ready, you can use the internal menu to modify the following parameters and functions:
- CLOCK
- START TIME 7:30
- AUTO-START NO
- DESCALE NO • TEMPERATURE MEDIUM
- OFF AFTER 1 HOUR • WATER HARDNESS 4
- DEFAULT VALUES NO
- INSTALL/UNINSTALL FILTER
- FILTER RESET NO
- FILTER RESET (*) (certain models only)
- INSTALL FILTER/UNINSTALL FILTER (*)
Setting the clock
To set the clock, proceed as follows:
- Press the MENU button (B6) then press the NEXT button (B7) repeatedly until the appliance displays: "CLOCK... 00:00"
- Press the CHANGE button (B8) to set the clock. (If you hold the CHANGE button down, the time is changed rapidly).
- Press the OK button (B9) to confirm.
- Press the MENU button to exit programming
mode or NEXT to change other parameters. If auto-start is set, when the appliance is in stand-by, press any button to display the auto-start symbol for 5 seconds.
Setting auto-start time
This function programmes the time the machine will come on automatically to be ready for use.
- Make sure the clock on the appliance is set as described in the previous chapter.
- Press the MENU button (B6) (the light over the button comes on) then press the NEXT button (B7) repeatedly until the appliance displays: "START TIME... 00:00".
- Press the CHANGE button (B8) to set the auto-start time. (If you hold the CHANGE button down, the time is changed rapidly).
- Press the OK button (B9) to confirm.
- Press NEXT once and the appliance displays the message: "AUTO-START NO". Press the CHANGE button to modify the function (the machine displays "AUTO-START YES").
- Press the OK button to activate auto-start; NOTE: when the machine is off and an auto-start time has been set, the 🔊 symbol appears alongside the time on the unlit display.
- Press the MENU button to exit programming mode or NEXT to change other parameters.
Descaling

Important! Before descaling, make sure the water softener filter (if present) has been removed.

Important! Descaler contains acids which may irritate the skin and eyes.
It is vital to respect the manufacturer's safety warnings given on the descaler pack and the warnings relating to the procedure to follow in the event of contact with the skin and eyes.

N.B.! Use the descaler recommended by the manufacturer only.
Use of other descalers invalidates the guarantee. Failure to descale the appliance as described also invalidates the guarantee.
Over time, constant heating up of the water used to make the coffee leads to limescale building up in the inner circuits of the appliance.
When "DESCALE" is displayed, the machine requires descaling.
Proceed as follows:
- Make sure the appliance is ready for use and the water softener filter (if present) has been removed.
- Press the MENU button (B6) then press the NEXT button (B7) repeatedly until the appliance displays "DESCALE NO".
- Press the CHANGE button (B8) and the appliance displays "DESCALE YES".
- Press the OK button (B9). The message "ADD DESCALER PRESS OK" is displayed.
- Empty the water tank, pour the contents of the descaler bottle into the tank respecting the instructions given on the descaler pack, then add water. When descaling subsequently, use descaler of the same type and brand as supplied (available from the manufacturer's authorised Customer Services) or a descaler recommended by Customer Services. Always follow the instructions on the pack.
- Place a container with a minimum capacity of 2 litres under the cappuccino maker (fig. 3).
- Press the OK button. Descaler flows out of the cappuccino maker into the container below. "APPLIANCE IN DESCALE" is displayed.
- The descale programme automatically performs a series of deliveries and pauses to remove limescale deposits from inside the machine.
- After about 30 minutes, the appliance displays "RINSING FILL TANK". The appliance must now be rinsed through to eliminate residues of descaling solution from inside the appliance. Proceed as follows:
- Empty the water tank, rinse and fill with clean water.
- Replace the tank;
- Empty the full container and put back under the cappuccino maker.
- Press the OK button. Hot water flows out of the cappuccino maker spout into the container below and the appliance displays "RIN-SING".
- When the water tank is empty, the appliance displays the message "RINSING COMPLETE... PRESS OK".
- Press the OK button and refill the water tank with clean water.
- The descale programme is now terminated and the appliance is ready to make coffee again. NOTE: If descaling is interrupted before completion, the machine still displays the descaling message and the process must be begun again from the beginning. Empty the water tank, rinse with clean water and deliver a cup of hot water.

Important! Failure to descale the appliance regularly invalidates the guarantee.
Changing coffee temperature
To change coffee temperature, proceed as follows:
- Press the MENU button (B6), then press the NEXT button (B7) repeatedly until the appliance displays "TEMPERATURE HIGH...".
- Press the CHANGE button (B8) until the appliance displays the required coffee temperature.
- Press the OK button (B9) to confirm.
- Press the MENU button to exit programming mode or NEXT to change other parameters.
Changing the length of time the appliance remains on (Energy saving function)
The appliance is set by default to go off automatically 30 minutes after the last coffee has been
made.
To change this interval (max. 120 min), proceed as follows:
- Press the MENU button (B6) then press the NEXT button (B7) repeatedly until the appliance displays: "OFF AFTER ...".
- Press the CHANGE button (B8) to change the number of hours the appliance remains on.
- Press the OK button (B9) to confirm.
- Press the MENU button to exit programming mode or NEXT to change other parameters.
Setting water hardness
The descale message is displayed after the appliance has been operated for a factory set period of time calculated on the basis of the maximum quantity of limescale which may be contained in the water used.
The operating period can be extended if required, making descaling less frequent by programming the machine on the basis of the real lime content in the water used.
Proceed as follows:
- Remove the "Total Hardness Test" strip (attached to page 2) from its packaging then dip it fully in the water for a few seconds, Then remove and wait about 30 seconds (until it changes colour and forms red squares).
- Switch the machine on by turning the knob ① (A7) (fig. 5).
- Press the MENU button (B6) then press the NEXT button (B7) repeatedly until the appliance displays "WATER HARDNESS 4".
- Press the CHANGE button repeatedly until the number coincides with the number of red squares on the test strip (for example, if there are 3 red squares on the test strip, press the button until "WATER HARDNESS 3" is displayed).
- Press the OK button (B9) to confirm. The coffee maker is now programmed to provide the descale warning when necessary based on the actual hardness of the water.
| Table of water hardness levels | ||
| level | German degrees | French degrees |
| 1 = soft | 0-6 dH | 0-11 fH |
| 2 = soft/medium | 7-13 dH | 12-23 fH |
| 3 = medium/hard | 14-20 dH | 24-36 fH |
| 4 = hard | >21 dH | >37 fH |
Resetting default values (reset)
If you change the original values, the default values can be reset as follows:
- Press the MENU button (B6) then press the NEXT button (B7) repeatedly until the appliance displays RESET TO DEFAULT NO.
- Press the CHANGE button (B8) and the appliance displays "RESET TO DEFAULT YES".
- Press the OK button (B9) to reset the default values.
- The appliance is now reset to the default settings and the "READY" message is displayed.
CHANGING THE LANGUAGE
To change the language, press the CHANGE button for at least 5 seconds until the appliance displays the installation message in various languages.
Select the required language as described in the section "Using the appliance for the first time".
TURNING THE APPLIANCE OFF
Each time the appliance is turned off, it performs an automatic rinse cycle which cannot be interrupted.

Danger of burns! During rinsing, a little
hot water flows from the coffee spouts. Avoid contact with splashes of water.
To turn the appliance off, turn the ON/OFF/stand-by knob (A7). The appliance performs the rinse cycle then goes off.

NB! If the appliance is not used for an extended period, place the main switch on the back of the appliance in the 0 position (A23).
TECHNICAL SPECIFICATION
Voltage: 220-240 V~ 50/60 Hz max. 10A
Absorbed power: 1350 W
Pressure: 15 bars
Water tank capacity: 1.8 litres
Size LxHxD: 595x455x397 mm
Weight: 23 kg

The appliance complies with the following EC directives:
- Low Voltage Directive 2006/95/EC and subsequent amendments. • EMC Directive 2004/108/CE and subsequent amendments. • EC Regulation 1275/2008 for standby
Materials and accessories coming into contact with food conform to EEC regulation 1935/2004.
DISPOSAL
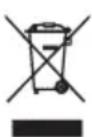
Electrical appliances must not be disposed of as household waste.
Appliances with this symbol are covered by European Directive 2002/96/EC.
All unused electric and electronic appliances must be disposed of separately from household waste by taking them to state authorised special centres.
Disposing of the unused appliance correctly avoids damage to the environment and a risk to health.
For more information on disposing of the unused appliance, contact the local administration, the waste disposal department or the shop where the appliance was bought.
ELECTRICAL CONNECTION (UK ONLY)
A) If your appliance comes fitted with a plug, it will incorporate a 13 Amp fuse. If it does not fit your socket, the plug should be cut off from the mains lead, and an appropriate plug fitted, as below. WARNING: Very carefully dispose of the cut off plug after removing the fuse: do not insert in a 13 Amp socket elsewhere in the house as this could cause a shock hazard. With alternative plugs not incorporating a fuse, the circuit must be protected by a 15 Amp fuse. If the plug is a moulded-on type, the fuse cover must be re-fitted when changing the fuse using a 13 Amp Asta approved fuse to BS 1362. In the event of losing the fuse cover, the plug must NOT be used until a replacement fuse cover can be obtained from your nearest electrical dealer. The colour of the correct replacement fuse cover is that as marked on the base of the plug.
B) If your appliance is not fitted with a plug, please follow the instructions provided below:
WARNING - THIS APPLIANCE MUST BE EARTHED
IMPORTANT
The wires in the mains lead are coloured in accordance with the following code:
Green and yellow:
Blue:
Brown:
Earth
Neutral
Live

As the colours of the wires in the mains lead may not correspond with the coloured markings identifying the terminals in your plug, proceed as follows:
The green and yellow wire must be connected to the terminal in the plug marked with the letter E or the earth symbol ± or coloured green or green and yellow.
The blue wire must be connected to the terminal marked with the letter N or coloured black.
The brown wire must be connected to the terminal marked with the letter L or coloured red.
DISPLAYED MESSAGES
DISPLAYED MESSAGE POSSIBLE CAUSE REMEDY
| FILL TANK • The water tank is empty or positioned incorrectly. | • Fill the tank with water and/or insert it correctly, pushing it as far as it will go. | |
| GROUND TOO FINE ADJUST MILL alternating with PRESS OK | • The grinding is too fine and the coffee is delivered too slowly.• The machine cannot make coffee as there is air in the hydraulic circuit. | • Turn the grinding adjustment knob one click clockwise towards "7".• Press the OK button (B9) and deliver water from the cappuccino maker |
| EMPTY GROUNDS CONTAINER | • The grounds container (A4) is too full or more than 3 days have passed since you last made coffee (this guarantees correct hygiene of the machine). | • Empty the grounds container and clean, then replace.Important: when removing the drip tray, the grounds container MUST be emptied, even if it is not completely full.If this is not done, when you make the next coffees, the grounds container may fill up more than expected and clog the machine. |
| INSERT GROUNDS CONTAINER | • After cleaning, the grounds container has not been replaced. | • Open the service door and insert the grounds container. |
| ADD PRE-GROUND COFFEE | • The "pre-ground coffee" function has been selected without placing any pre-ground coffee in the funnel.• The funnel (A21) is blocked. | • Extract the appliance and place pre-ground coffee in the funnel.• Empty the funnel with the help of a knife as described in the section "Cleaning the pre-ground coffee funnel". |
| DISPLAYED MESSAGE POSSIBLE CAUSE REMEDY | ||
| DESCALE | The machine must be de-scaled. | The descaling procedure described in the "Desca-ling" section needs to be performed as soon as possible. |
| LESS COFFEE | Too much coffee has been used. | Select a milder taste or re-duce the quantity of pre-ground coffee, then make the coffee again. |
| FILL BEANS CONTAINER • The coffee beans have run out. | Fill beans container | |
| INSERT INFUSER ASSEMBLY • The infuser has not been replaced after cleaning. | Insert the infuser as de-scribed in the chapter "Cleaning the infuser". | |
| CLOSE DOOR | The service door is open | Close the service door. |
| GENERAL ALARM | The inside of the ap-pliance is very dirty. | Clean the inside of the ap-pliance thoroughly, as de-scribed in the section "Cleaning and mainte-nance". If the message is still displayed after clea-ning, contact a service centre. |
| REPLACE FILTER! | The water softener filter (A25) must be replaced. | You must immediately re-place the filter following the instructions in the section "Replacing the fil-ter". |
TROUBLESHOOTING
Below is a list of some of the possible malfunctions.
If the problem cannot be resolved as described, contact Customer Services.
PROBLEM POSSIBLE CAUSE REMEDY
The coffee is not hot.
- The cups were not preheated.
- The infuser has cooled down because 2/3 minutes have elapsed since the last coffee was made.
- Warm the cups by rinsing them with hot water.
- Before making coffee, heat the infuser by pressing the button (B8) (fig. 12).
The coffee is not creamy enough.
• The coffee is ground too coarsely. - Wrong type of coffee
- Turn the grinding adjustment knob one click anticlockwise towards "1" while the coffee mill is in operation (fig. 11). • Use a type of coffee for espresso coffee makers.
The coffee is delivered too slowly or a drop at a time.
• The coffee is ground too finely.
- Turn the grinding adjustment knob one click anticlockwise towards "7" while the coffee mill is in operation (fig. 11). Continue one click at a time until coffee delivery is satisfactory. The effect is only visible after delivering two coffees.
PROBLEM POSSIBLE CAUSE REMEDY
The coffee is delivered too quickly.
• The coffee is ground too coarsely.
- Turn the grinding adjustment knob one click anticlockwise towards "1" while the coffee mill is in operation (fig. 11). Avoid turning the grinding adjustment knob excessively otherwise when you select 2 cups, the coffee may be delivered a drop at a time.
The effect is only visible after delivering two coffees.
Coffee does not come out of one of the spouts.
- The spouts are blocked. • Clean the spouts with a toothpick (fig. 23).
The coffee does not come out of the spouts, but from around the service door (A2).
- The holes in the spouts are clogged with dry coffee dust.
- If necessary, remove coffee deposits with a toothpick, sponge or stiff bristled kitchen brush (fig. 23).
- The coffee guide (A3) inside the service door is blocked and cannot swing.
- Thoroughly clean the coffee guide (A3), particularly near the hinges.
Water comes out of the spouts instead of coffee.
• The pre-ground coffee may be blocked in the funnel (A21).
- Clean the funnel (A21) with a wooden or plastic fork, clean the inside of the machine.
RECIPES
Coffee punch
Ingredients (serves 6):
1/2 l of hot coffee
1/2 l of white Port
1/2 l of rum
100 g of candied brown sugar
Method:
Pour the coffee into a pot, add the rum and the Port and heat until it reaches boiling point. Gradually add the candied sugar, tasting now and then until sufficiently sweet. When the sugar has dissolved serve in traditional, short stemmed glasses.
Emperor's coffee
Ingredients (serves 3):
3 espresso coffees
3 egg yolks
3 teaspoons of sugar
3 dl of milk
2 small glasses of brandy
Method:
Beat the egg yolks with the sugar and the brandy. Add hot milk and hot coffee.
RECIPE TIP: lightly whip the milk and add slowly at the very last ingredient. Best served accompanied by a chocolate cake.
Danish coffee
Ingredients:
6 eggs
grated rind of one lemon
100 g of sugar
3/4 I strong, cold coffee
1 large glass of brandy
Method:
Beat the eggs and the lemon rind, and then add the sugar a little at a time until the eggs become light and airy. Slowly add the coffee and the brandy, stirring constantly. Serve in chilled tea-cups or “Ballon” glasses.
Irish coffee
Ingredients (serves 3):
2 spoons of sugar
1 spoon of water
9 teaspoons of whipping cream
6 spoons of Irish Whisky
4 cups of hot coffee
Method:
Boil the water and the sugar for approximately one minute, then add to the whiskey and the hot coffee. Mix and pour into stem glasses. Carefully pour the cream onto the coffee (3 teaspoons per glass).
RECIPE TIP: lightly whip the cream so that it stays on top of the coffee. Grand Marnier or Calvados can also be added.
Coffee sorbet
Ingredients (serves 4):
200 g of granulated sugar
2 dl of espresso coffee
Method:
Combine 1/2 liter of water and the sugar to make a syrup and simmer for a few minutes; allow it to cool, then mix in the coffee. Filter as soon as a smooth mixture is obtained, then place in the freezer to set, mixing often until of a grainy consistency.
Iced coffee
Ingredients:
4 espresso coffees
4 teaspoons of sugar
12 ice cubes
Method:
Crush the ice and add to the pre-sugared coffee.
Shake in a shaker until a frothy, creamy mixture is obtained.
RECIPE TIPS: blend on a low blender setting and serve in a flute or glass tumbler.
- INDEX
- INTRODUCTION
- SAFETY
- DESCRIPTION
- PRELIMINARY CHECKS
- AUTOMATIC CUP TRAY LIGHT
- BUILT-IN INSTALLATION
- USING THE APPLIANCE FOR THE FIRST TIME
- TURNING ON AND HEATING UP
- MAKING COFFEE USING COFFEE BEANS
- CHANGING THE QUANTITY OF COFFEE IN THE CUP
- ADJUSTING THE COFFEE MILL
- MAKING ESPRESSO COFFEE WITH PRE-GROUND COFFEE (INSTEAD OF BEANS)
- DELIVERING HOT WATER
- MAKING CAPPUCCINO (USING THE STEAM FUNCTION)
- CLEANING AND MAINTENANCE
- CHANGING AND SETTING MENU PARAMETERS
- CHANGING THE LANGUAGE
- TURNING THE APPLIANCE OFF
- TECHNICAL SPECIFICATION
- DISPOSAL
- DISPLAYED MESSAGES
- TROUBLESHOOTING
- RECIPES
- SYMBOLS USED IN THESE INSTRUCTIONS
- DANGER
- IMPORTANT
- DANGER OF BURNS
- N.B
- LETTERS IN BRACKETS
- TROUBLESHOOTING AND REPAIRS
- FUNDAMENTAL SAFETY WARNINGS
- DESIGNATED USE
- INSTRUCTIONS
- DESCRIPTION OF THE APPLIANCE
- DESCRIPTION OF CONTROL PANEL
- CONTROLS AFTER TRANSPORT
- INSTALLING THE APPLIANCE
- CONNECTING THE APPLIANCE
- INSTALLING THE FILTER
- REPLACING THE FILTER ("FILTER RESET")
- REMOVING THE FILTER
- CLEANING THE COFFEE MAKER
- CLEANING THE COFFEE GROUNDS CONTAINER
- CLEANING THE DRIP TRAY
- CLEANING THE WATER TANK
- CLEANING THE SPOUTS
- CLEANING THE PRE-GROUND COFFEE FUNNEL
- CLEANING THE INSIDE OF THE COFFEE MAKER
- CLEANING THE INFUSER
- SETTING THE CLOCK
- SETTING AUTO-START TIME
- DESCALING
- CHANGING COFFEE TEMPERATURE
- CHANGING THE LENGTH OF TIME THE APPLIANCE REMAINS ON (ENERGY SAVING FUNCTION)
- SETTING WATER HARDNESS
- RESETTING DEFAULT VALUES (RESET)
- ELECTRICAL CONNECTION (UK ONLY)
- PROBLEM POSSIBLE CAUSE REMEDY
- COFFEE PUNCH
- EMPEROR'S COFFEE
- DANISH COFFEE
- IRISH COFFEE
- COFFEE SORBET
- ICED COFFEE
Brand : SMEG
Model : CMS645X
Category : Coffee machine