
CMS4101N - Coffee machine SMEG - Free user manual and instructions
Find the device manual for free CMS4101N SMEG in PDF.
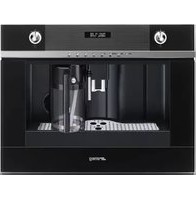


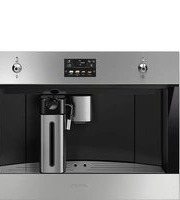
| Product Type | Espresso and Cappuccino Machine |
| Dimensions (H x W x D) | 33.5 x 15.0 x 33.0 cm |
| Weight | 4.5 kg |
| Power Consumption | 1200 W |
| Voltage | 220-240 V |
| Water Tank Capacity | 1.4 L |
| Pump Pressure | 15 bar |
| Pump Type | Vibratory pump |
| Compatible Coffee | Ground coffee |
| Functions | Espresso, Cappuccino, Hot water |
| Steam Wand | Pannarello steam wand |
| Material | Stainless steel and plastic |
| Control Type | Manual with knobs |
| Drip Tray | Removable |
| Auto Shut-off | Yes |
| Overheat Protection | Yes |
| Spare Parts Availability | Yes, from Smeg |
| Reparability Index | High |
| Manufacturer | Smeg |
| Model | CMS4101N |
Frequently Asked Questions - CMS4101N SMEG
User questions about CMS4101N SMEG
0 question about this device. Answer the ones you know or ask your own.
Ask a new question about this device
Download the instructions for your Coffee machine in PDF format for free! Find your manual CMS4101N - SMEG and take your electronic device back in hand. On this page are published all the documents necessary for the use of your device. CMS4101N by SMEG.
USER MANUAL CMS4101N SMEG
Tips & tricks for a perfect alignment
This installation manual is accompanied by a demonstration video that can be viewed at: www.youtube.com/user/SmegSpA


Positioning the products in 60 cm high recesses

Positioning the products in 45 cm high recesses
INSTALLATION - Products in 60 cm high recesses
If the DOMESTIC APPLIANCES are to be INSTALLED IN 60 CM HIGH RECESSES:
- Make sure that the unit is squared and level the support bases. (Fig. 1)
- Make sure that the individual shelves are perfectly horizontal. (Fig. 1)
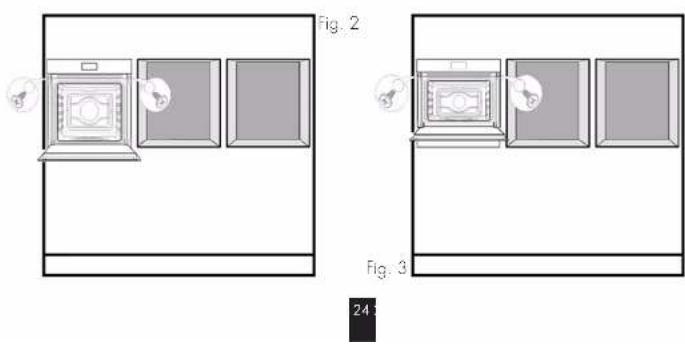
- If there is a 60 cm oven in the composition, this should be the first product to

be inserted, centred and fastened to the unit. (Fig. 2).
- If there is not a 60 cm oven in the composition, but there is a 45 cm oven plus a drawer, these should be the first products to be inserted, centred and fastened to the unit (Fig. 3).
IMPORTANT:
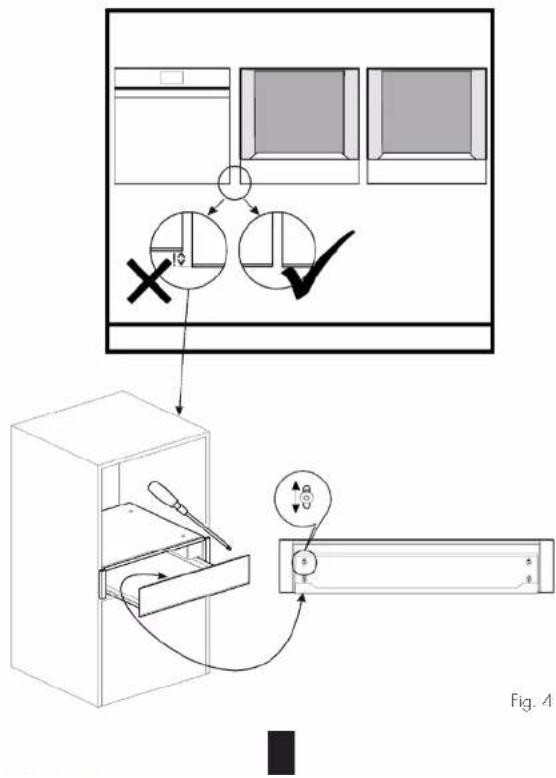
- Insert all the drawers into remaining recesses, level them and align the lower trims with the lower trim of the 60 cm oven (Fig.4).
- The height of the front glass of the drawer can be regulated by adjusting the screws (Torx insert screws) inside the drawer (loosen the screws, adjust the height and retighten the screws). [Fig. 4]
INSTALLATION - Products in 60 cm high recesses
- Make sure that the drawers are flush with the door of the oven. If necessary, carry out the following adjustments:
- Use a 5 mm hex wrench to regulate the drawer fastening mechanism. Turn it clockwise to move the drawer outwards, turn it anticlockwise to move the drawer inwards (Fig. S1)
- If the left or right hand sides of the front of the drawer are not perfectly flush, place a shim behind the drawer support bracket to compensate for any differences.
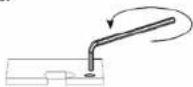


Fig. 5

IMPORTANT:
- After adjustment is complete, fasten the drawer to the unit using the side screws and then install the covers (Fig. 5A).

- Insert the first 45 cm product next to 60 cm oven that has already been installed.
• 45 cm Oven:
Align the upper trims of the ovens. If necessary, place shims* under the oven (Fig. 6) to compensate for any misalignment. Lastly, secure the product using the screws (Fig. 7)
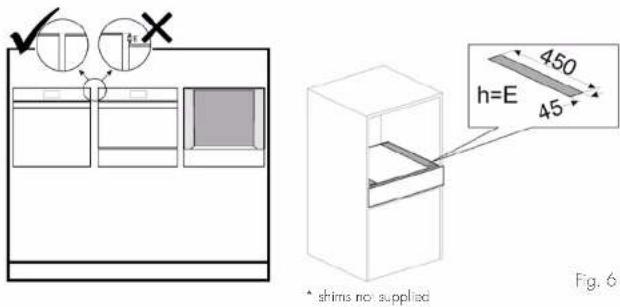

Fig. 7

INSTALLATION - Products in 60 cm high recesses
- Coffee machine:
If the width of the recess is 560 mm: there is no need to place shims behind the plate of the guides. (Fig. 8) If the width of the recess is 562 mm place the 1 mm shims provided behind the plates of the guides. (Fig. 8) If the width of the recess is 564 mm place the 2 mm shims provided behind the plates of the guides. (Fig. 8)

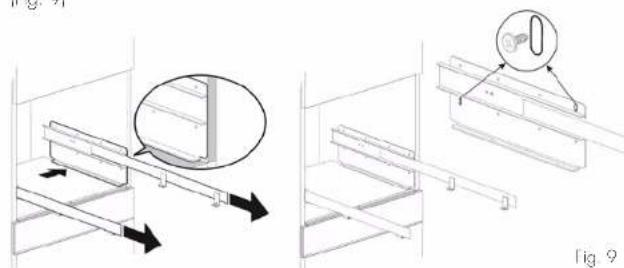
Place the runners on the casing of the drawer whilst keeping them flush with the side of the unit. Fix the brackets with the runners to the unit using 2 screws in the slotted holes. [Fig. 9]
28
Pull out the runners and place the coffee machine on them. (Fig. 10)

Make sure that it is aligned horizontally with the other products and the drawer (make sure that the gap between the coffee machine and the drawer is uniform). If necessary, place a shim under one or both brackets. (Fig. 11)
Fasten it in place using all the screws only after the front of the machine has been correctly aligned. (Fig. 12)

INSTALLATION - Products in 60 cm high recesses
Fasten the brackets using all the necessary screws.

- Wine cooler
Place the wine cooler on the drawer and check its horizontal alignment. If necessary, place shims* under the feet of the wine cooler. (Fig. 13) Fasten the wine cooler using the screws. (Fig. 14)


- Adjust the hinges of the doors around the products in order to make the gaps uniform.

INSTALLATION - Products in 45 cm high recesses
If the DOMESTIC APPLIANCES are to be INSTALLED IN 45 CM HIGH RECESSES:
- Make sure that the unit is squared and level the support bases. (Fig. 1)
- Make sure that the individual shelves are perfectly horizontal. Otherwise, any misalignment must be corrected after the product has been inserted. [Fig. 1]

- If there is a 45 cm oven in the composition, this should be the first product to be inserted, centred and fastened to the unit. (Fig. 2)

- Insert the second product next to the 45 cm oven that has already been installed:
• 45 cm Oven
Align the upper trims of the ovens. If necessary, place shims* under the oven to compensate for any misalignment.
Lastly, secure the product using the screws (Fig. 3)


INSTALLATION - Products in 45 cm high recesses
- Coffee machine:
If the width of the recess is 560 mm: there is no need to place shims behind the plate of the guides. (Fig. 5) If the width of the recess is 562 mm, place the 1 mm shims provided behind the plates of the guides. (Fig. 4) If the width of the recess is 564 mm, place the 2 mm shims provided behind the plates of the guides. (Fig. 4)
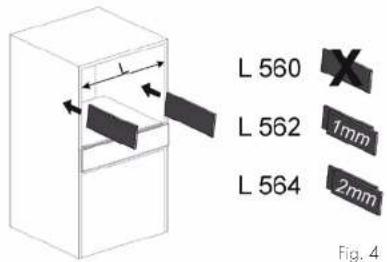
Place the runners on the shelf of the unit whilst keeping them flush with the side of the unit. Fix the brackets with the runners to the unit using 2 screws in the slotted holes. [Fig. 5]


Pull out the runners and place the coffee machine on them. (Fig. 6)

Make sure that it is aligned horizontally with the other products. If necessary, place a shim* under one or both brackets. (Fig. 7)
Fasten it in place using all the screws only after the front of the machine has been correctly aligned. (Fig. 8)

INSTALLATION - Products in 45 cm high recesses
Fasten the brackets using all the necessary screws.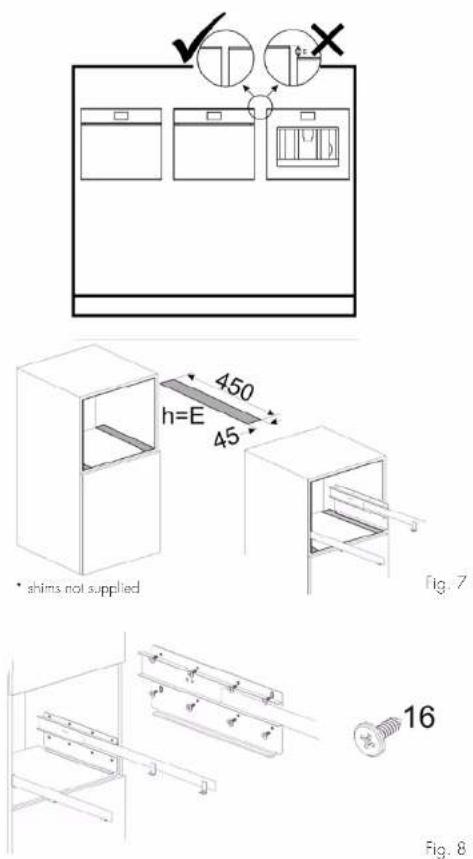
- Wine cooler:
Insert the product in the unit and centre it. Make sure that the upper trims of adjacent products are aligned. If necessary, place shims under the feet of the wine cooler (Fig. 9) to compensate for any misalignment. Lastly, secure the product using the screws. (Fig. 10)
5. Adjust the hinges of the doors around the products in order to make the gaps uniform.
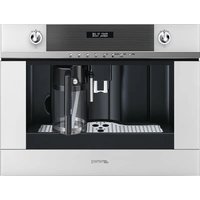
Brand : SMEG
Model : CMS4101N
Category : Coffee machine