
IAN 307252 - Weather Station AURIOL - Free user manual and instructions
Find the device manual for free IAN 307252 AURIOL in PDF.


| Product Type | Weather Station |
| Model | IAN 307252 |
| Brand | Auriol |
| Dimensions (approx.) | 120 x 80 x 20 mm (main unit) |
| Weight (approx.) | 150 g (main unit) |
| Power Supply | 2x AAA batteries (1.5V, not included) |
| Display Type | LCD with time, date, indoor/outdoor temperature, humidity |
| Temperature Range | -10°C to +50°C (indoor), -20°C to +60°C (outdoor) |
| Humidity Range | 20% to 95% RH |
| Wireless Sensor Range | Up to 30 meters (open area) |
| Functions | Indoor/outdoor temperature and humidity, time, date, alarm, forecast icons |
| Care and Cleaning | Wipe with a soft dry cloth; avoid liquids and abrasives |
| Safety Features | Battery polarity protection, low battery indicator |
| Spare Parts and Repairability | Batteries user-replaceable; no other spare parts available |
| General Information | Indoor use only; keep away from direct sunlight and heat sources |
Frequently Asked Questions - IAN 307252 AURIOL
User questions about IAN 307252 AURIOL
0 question about this device. Answer the ones you know or ask your own.
Ask a new question about this device
Download the instructions for your Weather Station in PDF format for free! Find your manual IAN 307252 - AURIOL and take your electronic device back in hand. On this page are published all the documents necessary for the use of your device. IAN 307252 by AURIOL.
USER MANUAL IAN 307252 AURIOL


RADIO-CONTROLLED WEATHER STATION·08/2018·Art.-Nr.: 4LD5009

RADIO-CONTROLLED WEATHER STATION
Usage and safety instructions

WEATHER STATION
Scope of delivery - 2 -
Specifications....- 2 -
Weather station - 2 -
Outdoor sensor - 2 -
Important safety information Important safety information.... - 2 -
Important safety information for users - 2 -
Important safety information for the batteries .... - 3 -
Display and control panel - 3 -
Outdoor sensor....- 4 -
Securely placing or mounting the weather station - 5 -
Securely placing or mounting the outdoor sensor .... - 5 -
Setup - 5 -
Time zone adjustment....- 5 -
Reception problems....- 6 -
Restart/turn off radio reception - 6 -
Light....-6-
12/24-hour time format....- 6 -
Temperature unit....- 6 -
Speed setting - 6 -
Basic settings....- 6 -
Location table -7-
Sunrise, sunset, moonrise and moonset times - 8 -
Moon phase....- 8 -
Alarm - 8 -
Snooze - 8 -
Weather forecast....- 8 -
Barometer - 9 -
12-hour air pressure history - 9 -
Outdoor sensor/channel setting - 9 -
Outdoor temperature tendency - 10 -
Indoor humidity - 10 -
Maximum and minimum values - 10
Battery level indicator - 10 -
Restart (RESET) - 10 -
Cleaning instructions - 10 -
Simplified EU declaration of conformity - 10
Disposal of the electronic appliance - 10 -
Disposal of the batteries - 10 -
digi-tech gmbh warranty - 11 -
Warranty conditions - 11 -
Warranty period and defects liability - 11
Scope of the warranty - 11 -
Warranty claim procedure - 11 -
Order service - 12 -
Service - 12 -
Supplier - 12 -
RADIO-CONTROLLED WEATHER STATION
Introduction
Congratulations on the purchase of your new weather station. You have chosen a high quality product. The instruction manual is part of the product - it contains important information about safety, use and disposal. Read the manual with all usage and safety notes before using the weather station. Only use the weather station in the intended way and for the intended applications. If the weather station is given to someone else, include all documentation with the weather station. Please keep the packaging and the instruction manual for future reference.
Intended use
This electronic appliance is intended for time display and the described additional features. Any other use or modification of the electronic appliance does not comply with the intended uses. The manufacturer is not liable for damages caused by improper use or misuse. The device is not intended for commercial use.
Scope of delivery
Please note: Check the scope of delivery after purchase. Please ensure that all parts are included and undamaged.
- 1 x weather station • 3 x battery 1.5 V AAA R03/LR03 1 x outdoor sensor
- 2 x battery 1.5 V AAA R03/LR03
- 3 x anchor/dowel
- 3 x screws
- 1 x instruction manual
Specifications
Weather station
- Operating temperature 0 – 50 °C • Temperature display: +/- 1 °C • Battery: 3 x 1.5 V AAA R03 / LRO3
Outdoor sensor
- Operating temperature -20 – 50 °C • Temperature display: +/- 1 °C
- Range: max. 100 m • Frequency: 433 MHz • Transmission power: 0.024 W
- Protection offered by the case (outdoor sensor): IPX4 (Water resistant according to IEC norm 60529) • Battery: 2 x 1.5 V AAA R03 / LRO3
- Symbol for direct current
Important safety information
Important safety information for users

WARNING! RISK OF INJURY!
This device may be used by persons (including children over 8 years of age) with reduced physical, sensory or mental abilities or lack of experience and knowledge, if they are supervised or instructed regarding the safe use of the device and understand the dangers that may arise. Children may not play with the device. Cleaning and user maintenance of the device may not be performed by children without supervision. Keep packaging films out of the hands of children. There is a danger of suffocation.
Important safety information for the batteries

WARNING!
HEALTH HAZARD!
RISK OF EXPLOSION!
Keep batteries out of reach of small children. If a battery is swallowed, seek medical attention immediately. Batteries/rechargeable batteries must always be inserted with the correct polarity. If necessary, clean the battery and device contacts. Never attempt to recharge non-rechargeable batteries. Never short-circuit or attempt to open batteries. Never throw batteries into fire as they may explode.
If the device will not be used for an extended period, remove the battery and store the device in a dry, dust-free area. Improper use of the battery can lead to explosion or leakage.
If the battery leaks, avoid contact with skin, eyes, and mucous membranes. Use gloves. If you are exposed to battery acid, rinse the affected areas with plenty of clean water and seek medical attention immediately. Remove discharged batteries from the device as they present an increased risk of leakage.
Display and control panel


GB
Outdoor sensor
| 1 Battery indicator 25 | RELATIVE/ABSOLUTE-air pressure-button | |
| 2 Outdoor temperature | 26 -/ -button | |
| 3 Signal of the outdoor sensor | 27 MAX/MIN - -button | |
| 4 Air pressure tendency | 28 MODE-button | |
| 5 SNOOZE/LIGHT-button 29 °C/°F + button | ||
| 6 Weather icon 30 ALARM/ON/OFF -button | ||
| 7 Air pressure bar | 31 HISTORY/WEATHER-button | |
| 8 Battery indicator 32 SUN/MOON-button | ||
| 9 Indoor temperature 33 CHANNEL-button | ||
| 10 Comfort icon | 34 | Hole for wall mounting (Weather station) |
| 11 Indoor humidity 35 RESET-button | ||
| 12 Moon phase 36 Buzzer | ||
| 13 Moonrise and Moonset 37 | Battery compartment (Weather station) | |
| 14 Location 38 Foldout stand (Weather station) | ||
| 15 Sunrise and Sunset 39 °C/°F-button | (Outdoor sensor) | |
| 16 Alarm symbol 40 TX-button | ||
| 17 Date (month, day, day of the week) | 41 | Hole for wall mounting (Outdoor sensor) |
| 18 Time display 42 | Channel selection switch (Outdoor sensor) | |
| 19 Radio control indicator 43 | Battery compartment (Outdoor sensor) | |
| 20 Air pressure for previous hours | 44 Stand (Outdoor sensor) | |
| 21 Relative / absolute air pressure | 45 | Radio control indicator (Outdoor sensor) |
| 22 Outdoor temperature tendency | 46 | Outdoor temperature / channel (Outdoor sensor) |
| 23 Selected channel | 47 LED indicator (Outdoor sensor) | |
| 24 +/-12/24-button | ||
Securely placing or mounting the weather station
The weather station with outdoor sensor is not designed for operation in rooms with high humidity (i.e., bathroom). Use the included screws and anchors for wall mounting. Make sure that:
- sufficient ventilation is always guaranteed (don't place the device on shelves or where curtains or furniture block the ventilation holes, and ensure that there are at least 10 cm of space on all sides);
- the device isn't placed on a thick carpet or bed during operation, no direct heat sources (i.e., radiators) influence the device; • no direct sunlight reaches the device;
- contact with splashing or dripping water must be avoided (don't place any items filled with liquids, i.e., vases, onto or next to the device);
- the device doesn't stand near magnetic fields (i.e. speakers);
- no foreign objects or dust penetrate the housing;
- candles and other open flames must be kept away from this product at all times to prevent the spread of fire
Securely placing or mounting the outdoor sensor
Place the sensor in a location where it is protected from the weather, for example under an awning or carport. The sensor has an IPX4 rating and is therefore protected from water splashes. Use the included screws and anchors for wall mounting. Make sure that:
• the sensor hangs or stands upright; - sufficient ventilation is always guaranteed (don't place the device on shelves or where curtains or furniture block the ventilation holes, and ensure that there are at least 10 cm of space on all sides); • no direct sunlight reaches the device; - the device doesn't stand near magnetic fields (i.e. speakers); - no foreign objects or dust penetrate the housing;
Setup

Insert batteries into the outdoor sensor 43 first and then insert batteries into the weather station 37.
Remove the protective film from the weather station and the outdoor sensor. Open the battery compartment of the outdoor sensor 43 and insert the included batteries in the correct polarity. The LED indicator 47 will briefly light up and the display will show the temperature. Close the battery compartment.
Open the battery compartment of the weather station 37 and insert the included batteries in the correct polarity. Close the battery compartment. The weather symbol 6 blinks and the weather station receives the signal from the outdoor sensor. This process may take several minutes to complete. During this time the signal 3 of the outdoor sensor will blink. If reception is successful, the selected channel 23 and the current outdoor temperature 2 will appear. After successful reception of the signal for the outdoor sensor, the reception of the DCF77 time signal will begin and the radio control indicator 19 will blink on the display next to the time. All buttons except the SNOOZE / LIGHT button 5 are disabled during the reception process. If reception fails after 10 minutes, please set the time manually. The weather station will reattempt reception at 04:00 and 05:00 and, if reception is successful, will correct the set time.
Note: Please do not move the weather station or the sensor during the reception process.
If the reception attempt is successful, the radio control indicator 19 will appear permanently on the display and the correct time, date, day of the week and the times of sunrise, sunset, moonrise and moonset will be set automatically. DST will appear on the display next to the radio control indicator 19 during daylight saving time.
Time zone adjustment
If you are in a country where the clock displays the wrong time even though it can receive the time signal, please use the time zone adjustment to use your weather station in a time zone other than the standard time zone (UTC+1 = Central European Time). Set the difference in hours (for example -01) to the desired time zone.
In normal time display mode, press and hold the MODE button 28 for 3 seconds.
The time zone will blink and can be set by pressing the -/▲ button 26 or the
+/12/24 button 24. Press the MODE button 28 to confirm your setting.
The hours blink and the weather station will display the changed time (for example 1 hour back) after a brief moment.
Reception problems
The DCF77 radio signal is transmitted from a location near Frankfurt am Main and can be received within a radius of approximately 1500 km around Frankfurt am Main. However, there are some obstacles and sources of interference that may substantially hinder reception. If your weather station does not correctly receive the DCF77 radio signal, please hang or place the weather station in a different location at your site. Please note that devices such as computers, telephones, radios, and televisions may cause electromagnetic radiation that can interfere with the DCF77 signal reception. Other possible detriments to reception are: strong building insulation (metal building materials), nearby mountains, or atmospheric interference. It may also be necessary to replace the batteries.
Restart/turn off radio reception
Manually restart the radio signal reception by pressing and holding the -/▲ button 26 for 3 seconds.
The radio reception can be turned off by pressing and holding the -/▲ button 26 for 3 seconds. The radio tower symbol 19 will blink. Press and hold the -/▲ button 26 again for 3 seconds during the reception attempt. The radio tower symbol 19 will disappear. The weather station will start a new reception attempt at 04:00 a.m. and 05:00 a.m., and if the reception attempt is successful, the manually set time will be corrected.
Light
Briefly activate the backlight by pressing the SNOOZE/LIGHT button 5.
12/24-hour time format
Select the 12- or 24-hour time format by pressing the +/12/24 button 24. AM will appear on the display in the morning, PM in the afternoon if the 12-hour time format is selected.
Temperature unit
Select the temperature unit Celsius (°C) or Fahrenheit (°F) by pressing the °C/°F+ -button 29.
Speed setting
Press and hold buttons to use the speed setting feature when setting numerical values.
Basic settings
The following values can be set: Time zone, time, date, language of the day of the week display and location.
Press and hold the MODE-button 28 for 3 seconds while in normal time display mode. The time zone will blink and can be set by pressing the -/■button 26 or the +/12/24 -button 24. Press the MODE-button 28, to confirm your setting. Set the hours, minutes, seconds, year, month, day, language of the day of the week display (GE=German, FR=French, ES=Spanish, IT=Italian, NE=Dutch, DA=Danish, RU=Russian, EN=English), your country and your city (see location table) in the same way. After changing the location, it will take some time for the weather station to update the times for sunrise, sunset, moonrise and moonset.
Location table
| Germany | GER | Nizza NIC | Portugal | POR | |
| Aacher | AAC | Orléans | ORL | Évorc | EVO |
| Berlir | BER | Paris | PAR | Coimbrc | COI |
| Düsseldorf | DUS | Perpignar | PER | Faro | FAR |
| Dresden | DRE | Lille | LIL | Leiric | LEI |
| Erfuri | ERF | Rouer | ROU | Lissaboi | LIS |
| Frankfur | FRA | Strasbourg | STR | Portc | POR |
| Flensburg FLE Toulouse | TOU | Poland | POL | ||
| Freiburg FRE | Finland | FIN | Danzig GDA | ||
| Hannove | HAN | Helsinki | HEL | Krakai | KRA |
| Bremen BRE | Great Britain | GB | Posen POZ | ||
| Hamburg | HAM | Aberdeer | ABD | Stettir | SZC |
| Rostocl | ROS | Belfas | BEL | Warschai | WAR |
| Stralsund STR Birmingham | BIR | Russia | RUS | ||
| Köln | KOE | Bristo | BRI | St. Petersburg | PET |
| Kiel KIE Edinburgh EDI | Sweden | SWE | |||
| Kasse | KAS | Glasgow | GLA | Göteborg | GOT |
| Leipzig | LEI | London | LON | Stockholm | STO |
| München | MUE | Manchester MAN | Slovakia | SLK | |
| Magdeburg | MAG | Plymouth | PLY | Bratislava | BRA |
| Nürnberg | NUE | Hungary | HUN | Slovenia | SLO |
| Regensburg | REG | Budapest | BUD | Ljubljana | LJU |
| Stuttgart | STU | Croatia | CRO | Serbia | SRB |
| Saarbrückei | SAA | Zagreb | ZAG | Belgrac | BER |
| Schwerin SCH | Italy | ITA | Austria | AUS | |
| Denmark | DAN | Ancona | ANC | Graz | GRA |
| Aalborg | ALB | Bari | BAI | Innsbrucil | INN |
| Aarhus | ARH | Bolognec | BOL | Linz | LIN |
| Kopenhagen | COF | Cagliar | CAG | Salzburg | SAL |
| Odense | ODE | Catanic | CAT | Wien | VIE |
| Spain/Andorra | ESP | Florenz | FIR | Belgium | BEL |
| Alicanti | ALI | Foggic | FOG | Antwerpei | ANT |
| Andorra | AND | Genua | GEN | Brügge | BRU |
| Badajoz | BAD | Lecce | LEC | Brüsse | BRL |
| Barcelonc | BAR | Messinc | MES | Charlero | CHA |
| Bilbac | BIL | Mailanc | MIL | Lütticl | LIE |
| Cádiz | CAD | Neapel | NAP | Switzerland/Liechtenstein | SWI |
| Córdoba | COR | Palermc | PAL | Base | BAS |
| Ibiza | IBI | Parmc | PAR | Bern | BER |
| La Coruña | LAC | Perugic | PER | Chur | CHU |
| León | LEO | Rom | ROM | Genf | GEN |
| Las Palmas | LPA | Turir | TOR | Locarnc | LOC |
| Madric | MAD | Triesl | TRI | Luzerr | LUC |
| Málaga | MAL | Venediç | VEN | St. Morit; | MOR |
| Palma de Mallorca | PDM | Verona | VER | St. Gallen GAL | |
| Salamanca | SAL | Ventimiglic | VTG | Sitter | SIO |
| Sevilla | SEV | Ireland | IRL | Vaduz | VAD |
| Valencix | VAI | Dublin | DUB | Zürich | ZUE |
| Zaragossa | ZAR | Luxemburg | LUX | Czech Republ | CZR |
| France | FRA | Norway | NOR | Prag | PRA |
| Besançon | BES | Bergen | BER | Greece | GR |
| Biarrit; | BIA | Oslo | OSL | Ather | AT |
| Bordeaux | BOR | Stavanger STA | Cyprus | CY | |
| Brest | BRE | Netherlands | NET | Nikosia | NI |
| Cherbourg | CHE | Amsterdam | AMS | Romania | RO |
| Lyon | LYC | Eindhoven | EIN | Bukares | BU |
| Marseille MAR | Enschede | ENS | Bulgaria | BG | |
| Monacc | MON | Groninger | GRO | Sofic | SO |
| Metz | MET | Den Haag | DHA | ||
| Nante: | NAN | Rotterdam | ROT | ||
Sunrise, sunset, moonrise and moonset times
After setting your country and city, the weather station will calculate the approximate times for sunrise, sunset, moonrise and moonset.
Note: The calculated times are approximate. Differences can also result from your local terrain and weather.
Briefly display the approximate number of hours of sunlight for the current day by pressing SUN/MOON-button 32. If you wish to see the sunrise or sunset times for another location or another date, press and hold the SUN/MOON-button 32. And 3 seconds. The country will blink and can be selected by pressing the -/ button 26 or the +/ 12/24 -button 24. Confirm your setting by pressing the SUN/MOON-button 32. Set the city, year, month and day in the same way and confirm each setting by pressing the SUN/MOON-button 32.
Moon phase
Your weather station is equipped with a moon phase display. The 8 phases of the moon are:

New Moon

Full Moon

Waxing Crescent

Waning Gibbous

First Quarter

Third Quarter

Waxing Gibbous

Waning Crescent
Alarm
The weather station has 2 alarms, which can be set separately. Press the MODE button 28 to select alarm 1 or alarm 2. The corresponding alarm symbols will appear. When displaying alarm 1 or alarm 2, press and hold the MODE button 28 to enter setting mode. The hours will blink on the display. Set the hours by pressing the -/▲ button 26 or the +/12/24 button 24 and confirm your setting by pressing the MODE button 28. Set the minutes in the same way. Press the ALARM/ON/OFF button 30 while displaying the alarm you wish to activate. Press the ALARM/ON/OFF button 30 to activate (on) or deactivate (oF) the alarm. If alarm 1 is activated, the symbol 📋 will appear. If alarm 2 is activated, the symbol 📋 will appear. If no button is pressed within 5 seconds, the weather station will return to normal time display mode.
Snooze
Press the SNOOZE/LIGHT button 5 to temporarily deactivate the alarm. The bell symbol will blink on the display. After 5 minutes, the alarm will sound again. Press any button except the SNOOZE/LIGHT button 5 to shut off the alarm.
Weather forecast
Note: The weather station will start the forecast approximately 6 hours after the current weather was entered.
The weather icons show a weather tendency for the next hours and not the current weather.
Should the forecast of your weather station be incorrect, you can adjust the display by pressing and holding the HISTORY/WEATHER button 31 for 3 seconds. The weather icon will blink. You can now select the correct weather icon by pressing the °C/°F + button 29 or the MAX/MIN - button 27. Confirm your selection by pressing the HISTORY/WEATHER button 31.
Please note: Set rain or downpour if it is snowing. After confirming your setting by pressing the HISTORY/WEATHER-button 31, the snow symbol will appear if the outdoor temperature is below 0°C.

Sunny

Downpour

Slightly cloudy
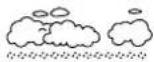
Rain

Cloudy

Heavy snowfall

Snow
Barometer
Your weather station can show the air pressure tendency 4.

Air pressure rising

Air pressure constant

Air pressure falling
You can also select absolute or relative air pressure by pressing the Relative/Absolute-button 25. Rel. or Abs. will appear on the display.
Note: The weather station measures the absolute air pressure. Your local weather service can supply you with the relative air pressure for your location, which you can input into the weather station.
To change the relative air pressure, press and hold the Relative/Absolute button 25 for 3 seconds. The air pressure value will blink on the display and can be set by pressing the °C/°F + - button 29 or the MAX/MIN button 27. Confirm your setting by pressing the Relative/Absolute button 25.
Select the air pressure unit Hectopascal (hPa) or Inches of mercury (inHg) by pressing and holding the °C/°F + - button 29 for 3 seconds.
12-hour air pressure history
Press the HISTORY/WEATHER button 31 to view the air pressure history for the last 12 hours.
0 - HR = current air pressure
- 1 HR = air pressure 1 hour ago
-2 HR = air pressure 2 hours ago... and so on
Outdoor sensor/channel setting
You can use the weather station with up to 3 outdoor sensors at the same time.
Open the battery compartment of the outdoor sensor 43 and select a channel (1-3) by using the Channel selection switch 42. Press and hold the CHANNEL button 33 for 3 seconds or until an audible signal sounds. The weather station will now attempt to receive the signal 3.
Now press the TX button 40 to manually transmit the temperature from the outdoor sensor to the weather station.
Close the battery compartment. Press the °C/°F button 39 to select °C-Celsius or °F-Fahrenheit.
Note: The outdoor sensor must be within a maximum distance of 100 m of the weather station with no obstructions.
If you are using multiple outdoor sensors: Press the CHANNEL button 33 to select the reception channel.
The rotation symbol C on the display at 23 indicates that the weather station is rotating through channels 1-3.
Only active outdoor sensors are displayed. Press and hold the CHANNEL button 33 to remove unused channels. When adding an additional outdoor sensor, the weather station will detect it automatically. You can also manually transmit the signal by pressing the TX button 40.
Outdoor temperature tendency
The temperature trend 22 is displayed upon successful reception from the outdoor sensor.

Outdoor temperature rising

Outdoor temperature constant

Outdoor temperature falling
Indoor humidity
The current indoor humidity 11 is shown on the display. The comfort icon 10 can show 3 levels of comfort:
| < 40 %DRY | 40 – 60 %COMFORT | > 60 %HUMID | |
| < 20 °C |  | / | [23KX] |
| 20 – 26°C |  | 😊 | [YCKX] |
| > 26 °C |  | / | [YTB0] |
Maximum and minimum values
The maximum and minimum temperature and humidity are stored as soon as the batteries are inserted.
Briefly press the Max/Min button 27 to display the maximum MAX, minimum MIN and current indoor temperature 9, outdoor temperature 2 and humidity 11 on the display. To delete the maximum and minimum values, press and hold the Max/Min button 27 for 3 seconds. An audible signal will sound and the stored values will be deleted. The weather station will immediately restart recording of the values.
Battery level indicator
If the batteries run too low to power the weather station, the outdoor sensor and signal transmission, the battery level indicator 1 will appear on the display. Replace the batteries in all devices as soon as possible. Restart the weather station.
Restart (RESET)
Press the RESET button 35 to reset the weather station.
Cleaning instructions
Clean the product with a soft, dry, lint-free cloth. A glasses cleaning cloth is ideal.
Simplified EU declaration of conformity
Hereby, digi-tech gmbh declares that the radio equipment type radio-controlled weather station 4-LD5009 is in
compliance with Directive 2014/53/EU. The full text of the EU declaration of conformity is available at the following internet address: http://www.digi-tech-gmbh.com/ce/307252_WS.pdf
Disposal of the electronic appliance
This weather station may not be disposed of with normal household waste. Dispose of the unit at an approved disposal facility or at your local recycling centre. Please observe the current rules and regulations when disposing of the appliance. Contact the disposal system if in doubt.

Disposal of the batteries
Please dispose of your batteries properly in containers especially set up at retailers. Batteries do not belong in household waste. Dispose of the batteries at an approved disposal facility or at your local recycling centre. Contact the disposal system if in doubt.

GB
digi-tech gmbh warranty
This weather station includes a 3 year warranty starting on the day of purchase. In case of defects of this weather station you have, by law, certain rights regarding the vendor of the weather station. These rights are not changed by the warranty which is described in the following paragraphs.
Warranty conditions
The warranty duration starts on the date of purchase. Please keep the receipt in a safe place. The receipt is needed as a proof of purchase. If a defect occurs in the weather station within 3 years, the weather station will be repaired or replaced (according to our choice) free of charge. This warranty requires that, within the 3 year warranty period, the weather station and the receipt can be made available to us along with a short written description of the defect and when it occurred. If the defect is covered by the warranty, you will receive the repaired weather station or a new weather station. Repair or replacement does not cause the warranty period to restart.
Warranty period and defects liability
The warranty period is not increased by the defect liability. This also applies to repaired or replaced parts. If defects are noticed at the time of purchase they must be reported immediately upon unpacking the item. Paid repair may be available after the end of the warranty period.
Scope of the warranty
The weather station was manufactured according to strict quality guidelines and was carefully inspected before delivery. The warranty does not include parts that experience normal wear and tear and can thus be seen as wear parts or fragile parts that are damaged. Examples include Switches, Batteries or parts made of glass.
This warranty becomes void if the weather station is damaged, is not used in the recommended way or is improperly repaired.
For proper use of the weather station all instructions in this manual must be adhered to exactly. Use of the weather station in a way that is discouraged in the manual must be avoided.
The weather station not intended for commercial use. Abusive or improper use, excessive force and changes that are made by non-authorized repair centers will void the warranty.
Warranty claim procedure
To ensure that your call is processed in a fast and efficient manner please note the following directions:
- Have your receipt (as proof of purchase) and the article number (307252) handy.
- The article number can be found on the type label, an engraving, the front page of the manual (bottom left) or a sticker on the back side or bottom side of the case.
- In case defects occur, please first contact the service center (see below) by phone or email.

Visit www.lidl-service.com to download this and many other manuals, product videos and software.

Order service
Additional outside sensors can be ordered by fax +49(0)6198-5770-99 or online at www.inter-quartz.de. The price for one sensor is 5.00 € excluding VAT and despatch.
Service
Please note that the following address is not a service address. Please first contact the service address (see above).
Name: digi-tech gmbh
Street: Valterweg 27A
Town: DE-65817 Eppstein
Country: GERMANY

-12-
GB
E-post: support@inter-quartz.de
Telefon: : +49 (0)6198 571825

FI 00800 5515 6616
SE 00800 5515 6616
PL 00800 44 11 493
LT 8800 33139
IAN 307252
Art.-Nr.: 4-LD5009

Supplier




- RADIO-CONTROLLED WEATHER STATION
- WEATHER STATION
- INTRODUCTION
- INTENDED USE
- SCOPE OF DELIVERY
- SPECIFICATIONS
- OUTDOOR SENSOR
- IMPORTANT SAFETY INFORMATION
- IMPORTANT SAFETY INFORMATION FOR USERS
- WARNING! RISK OF INJURY
- IMPORTANT SAFETY INFORMATION FOR THE BATTERIES
- WARNING
- HEALTH HAZARD
- RISK OF EXPLOSION
- SECURELY PLACING OR MOUNTING THE WEATHER STATION
- SECURELY PLACING OR MOUNTING THE OUTDOOR SENSOR
- SETUP
- INSERT BATTERIES INTO THE OUTDOOR SENSOR 43 FIRST AND THEN INSERT BATTERIES INTO THE WEATHER STATION
- TIME ZONE ADJUSTMENT
- RECEPTION PROBLEMS
- RESTART/TURN OFF RADIO RECEPTION
- LIGHT
- HOUR TIME FORMAT
- TEMPERATURE UNIT
- SPEED SETTING
- BASIC SETTINGS
- SUNRISE, SUNSET, MOONRISE AND MOONSET TIMES
- MOON PHASE
- ALARM
- SNOOZE
- WEATHER FORECAST
- BAROMETER
- HOUR AIR PRESSURE HISTORY
- OUTDOOR SENSOR/CHANNEL SETTING
- OUTDOOR TEMPERATURE TENDENCY
- INDOOR HUMIDITY
- MAXIMUM AND MINIMUM VALUES
- BATTERY LEVEL INDICATOR
- RESTART (RESET)
- CLEANING INSTRUCTIONS
- SIMPLIFIED EU DECLARATION OF CONFORMITY
- DISPOSAL OF THE ELECTRONIC APPLIANCE
- DISPOSAL OF THE BATTERIES
- DIGI-TECH GMBH WARRANTY
- WARRANTY CONDITIONS
- WARRANTY PERIOD AND DEFECTS LIABILITY
- SCOPE OF THE WARRANTY
- WARRANTY CLAIM PROCEDURE
- ORDER SERVICE
- SERVICE
- SUPPLIER
Brand : AURIOL
Model : IAN 307252
Category : Weather Station