KP1010 - Coffee machine KRUPS - Free user manual and instructions
Find the device manual for free KP1010 KRUPS in PDF.

| Product type | Pod coffee machine |
| Brand | KRUPS |
| Model | KP1010 |
| Usage | Exclusively with Home Cafe pods |
| Included filter holders | 2 standard filter holders and 2 for gourmet pods (one right-handed, one left-handed) |
| Water filtration system | Duo Filter (activated carbon and anticalc resin) |
| Brew selector | 1 cup or 2 cups of 9 oz |
| Auto shut-off | After 1 hour of inactivity |
| Indicator light | Indicates heating and end of cycle |
| Brew pause | Possible via the control button |
| Steam phase (purge) | Automatic at end of cycle |
| Cleaning filter holders | Dishwasher safe |
| Cleaning the appliance | Damp cloth, do not immerse |
| Recommended descaling | Every 3 months (or 4-5 months with filter) |
| Compatible descaling solution | KRUPS ref. F054 |
| Replacement water filter | KRUPS Duo Filter ref. F472 (pack of 2) |
| Safety | Do not open the lid during brewing; automatic shut-off |
| Warranty | 1 year against manufacturing defects |
Frequently Asked Questions - KP1010 KRUPS
User questions about KP1010 KRUPS
0 question about this device. Answer the ones you know or ask your own.
Ask a new question about this device
Download the instructions for your Coffee machine in PDF format for free! Find your manual KP1010 - KRUPS and take your electronic device back in hand. On this page are published all the documents necessary for the use of your device. KP1010 by KRUPS.
USER MANUAL KP1010 KRUPS
natural_image
Exterior view of a KRUPS home air fryer with control panel (no text or symbols on device body)www.krups.com
KRUPS
Home café
KP1000/1010
English 4
Instructions for Use
Limited Warranty
Français 15
Mode d'emploi
Garantie
English
IMPORTANT SAFEGUARDS
When using electrical appliances, basic safety precautions should always be followed to reduce the risk of fire, electric shock, and/or injury to persons including the following :
- Read the instructions carefully before using your appliance for the first time: use that does not comply with the instructions will release Krups from any responsibility.
- Do not touch hot surfaces. Use handles or knobs.
- To protect against fire, electric shock and injury to persons, do not place cord, plugs or appliance in water or other liquid.
- Close supervision is necessary when any appliance is used near children. Keep appliance out of reach of children.
- Unplug from outlet when not in use and before cleaning. Allow to cool before putting on or taking off parts, before cleaning the appliance, and before storing.
- Do not operate any appliance with a damaged cord or plug or after the appliance malfunctions, or has been damaged in any manner. Return appliance to the nearest KRUPS Service Center for examination, repair or adjustment.
- The use of accessory attachments not recommended by KRUPS may result in fire, electric shock or injury to persons.
- Do not use outdoors.
- Do not let cord hang over edge of table or counter, or touch hot surfaces.
- Do not place on or near a hot gas or electric burner, or in a heated oven.
- Before unplugging the appliance, check that it is not switched on (light off).
- Do not use the appliance for other than intended use.
- Do not pour liquids other than water and descaling solutions specified in this manual into the water tank.
- Do not operate the coffee maker without water.
- Make sure that the upper lid is properly locked before starting the brew process.
4 KRUPS
- Do not unlock the upper lid while coffee is being prepared.
- This appliance is for household use only. Any servicing, apart from cleaning and maintenance mentioned in the manual, should be carried out by a Krups approved service center.
The cord should be arranged so that it does not hang over the work top or table, in order to prevent children being able to pull on it or someone accidentally tripping and falling.
SAVE THESE INSTRUCTIONS SHORT CORD INSTRUCTIONS
A. The length of the cord has been chosen to reduce the risk of accidents.
B. Extensions are available and may be used with care.
C. If you use an extension,
1) If you use an extension, its electric capacity must be equal to or greater than that of the appliance,
2) The extension and the cord should be arranged so that they do not hang over the work top or table, in order to prevent children being able to pull on them or someone accidentally tripping and falling.
D. This appliance has a polarized plug (one blade is wider than other). To reduce risks of electric shock, this plug is intended to fit into a polarized outlet only one way. If the plug does not fit fully into the outlet, reverse the plug. If it still does not fit, contact a qualified electrician. Do not attempt to modify the plug in any way.
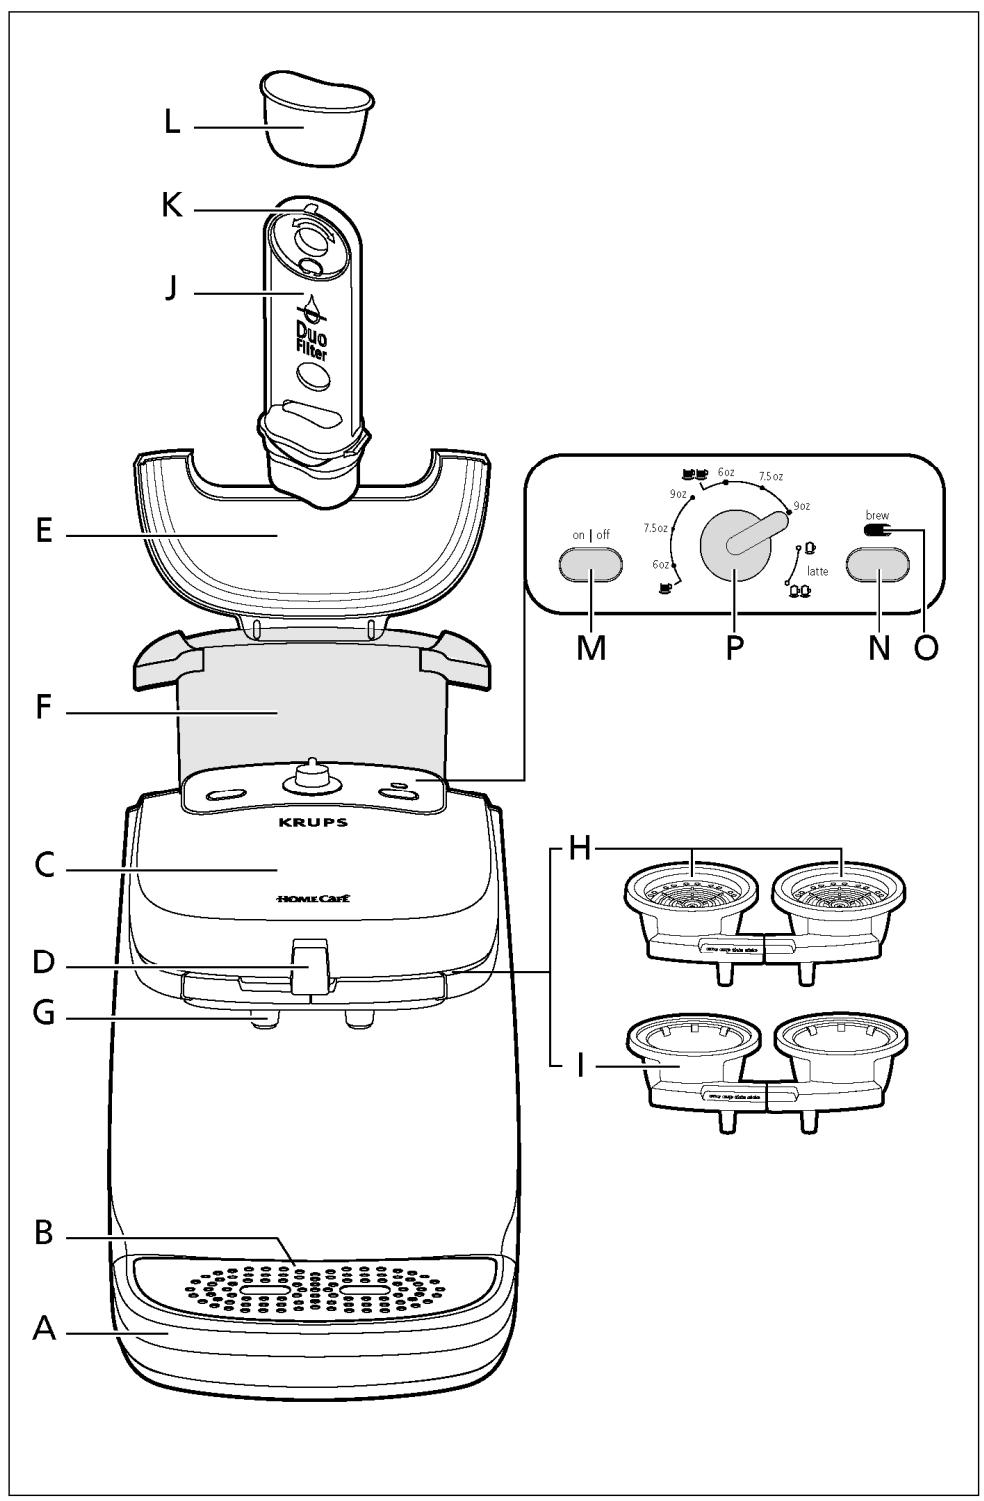
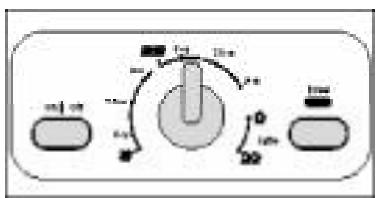
Description-
A Drip tray
B Drip tray plate
C Upper lid
D Lock button
E Tank lid
F Tank
G Spray head
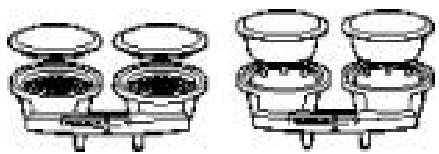
H Coffee pod holder (one left-hand and one right-hand)
I Specialty pod holders (one left-hand and one right-hand)
J Water filter holder
K Water filtration change indicator
L Water filter (Duo filter)
M On/Off button
N Indicator light
O Brew button
P Brew selection control
Before first use.
Read all instructions carefully.
- Remove all packaging.
- Rinse all components completely.
- Run through one brewing cycle.
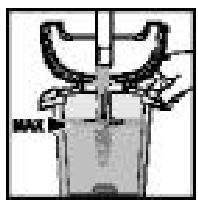
- Fill the tank (F) with cold drinking water up to the "max" mark.
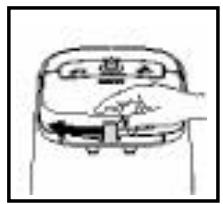
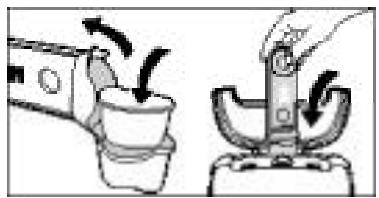
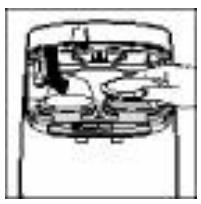
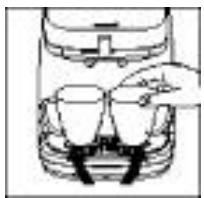
- Unlock the upper lid (C) using the button (D).
- Lift the upper lid.
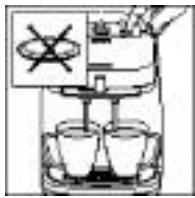
- Position 2 coffee pod holders without the pods.
This machine is designed exclusively to be used with Home Cafe pods.
natural_image
Simple line drawing of a car front view with a hand pointing to the side panel (no text or symbols)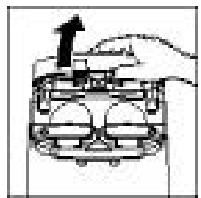
natural_image
Diagram of a hand pressing down on a car's front panel with an upward arrow (no text or symbols)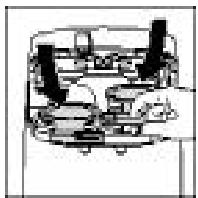
6 KRUPS
- Close and lock the upper lid (C) .

natural_image
Top-down schematic of a vehicle showing front and rear components (no text or labels)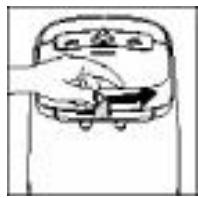
- Place a container on the drip tray.
- Turn the Brew Selection Control (P) to the setting for two 9-oz cups.
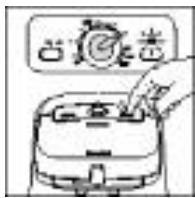
- Press the on/off button (M).
The indicator light blinks slowly and then glows consistently when the coffee machine is ready.
- Press the brew button (O).
natural_image
Illustration of a kitchen appliance with a hand operating the button (no text or symbols visible)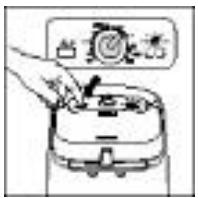
The indicator light blinks once and brewing starts, the container will be filled with hot water rinsing the system. Discard the hot water. Your Home Cafe is now ready for use.
You can interrupt the brewing cycle by pushing the brew button. The brewing will stop and go directly to the steam phase (purge). The indicator light will glow steadily at the end of this phase.
If, during the brewing, you stop your machine by pressing the on /off button (M), your coffee machine will stop. You will not have a steam (purge). Wait two minutes before opening the brew head.
Immediately clean the spray heads and the seals using a damp cloth, then thoroughly wash the pod holders.
If you change the volume during brewing by turning the selector (P) the new volume will be used.
If your coffee machine is equipped with a Water Filtration
The Water Filtration is a double action anti-chlorine and anti-scaling filter.
The filter's anti-chlorine action allows the most subtle flavors of the coffee to be released. The level of chlorine in tap water very often prevents the flavor of the coffee from fully developing.
The anti-scaling action means that descaling operations are less frequent.
The components of the “Duo Filter” (plant-based active charcoal and anti-scaling resin) comply with all food legislation.
The filter can be disposed of with household waste.
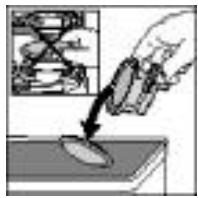
- Remove the “Duo Filter” (L) from its plastic bag. Rinse it under tap water for 1 minute.
- Lift the lid of your tank and remove the filter support (J).
- Release the lower part of this support and insert the filter in its housing.
- Replace the filter support in the coffee maker: your coffee maker is ready for use.
KRUPS 7


natural_image
Illustration of a hand using a tool to lift a cup, showing motion arrows (no text or symbols)Note: An indicator is located on the upper part of the filter support to remind you when to change the “Duo Filter” (K):
- indicate the number corresponding to the month when the “Duo Filter” (L) is to be changed on the indicator,
For example: If you insert the “Duo Filter” at the beginning of January, you should change it at the beginning of May or June depending on the hardness of the water in your area.
Preparing Coffee.
Do not use ground coffee or torn pods, as you risk damaging your coffee machine.
Do not put a regular coffee pod in the specialty pod holder.
- Fill the tank with fresh cold drinking water to the desired level.

(Never put milk or any other than water in the tank.)
- Press the on/off button (M) to start your appliance.

The indicator light blinks while the appliance is warming up.
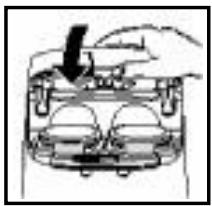
- Unlock the upper lid (C) using the button (D).
- Lift the lid.

natural_image
Diagram of a mechanical device with an arrow indicating upward motion (no text or symbols)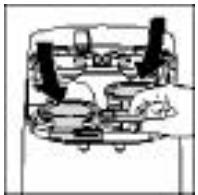
8 KRUPS
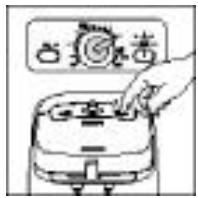
Choose the type of pod holder to insert:
natural_image
Two identical diagrams of a balance scale with three circular pans, each containing a black object (no text or symbols)- Insert pod holders.
- Use smaller pod holders for regular coffee.
- Use the larger for cappuccino or latte.
- Position the pod(s) with the flat surface facing upwards.
natural_image
Cross-sectional diagram of a mechanical device showing internal components (no text or labels)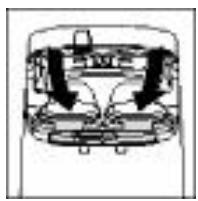
natural_image
Pure mechanical diagram showing internal components with arrows indicating direction (no text or symbols)If you are preparing one cup, use the left pod holder marked «ONE CUP THIS SIDE»
- Close and lock the upper lid (C).
natural_image
Diagram of a car interior with a hand holding an object, showing no text or symbols
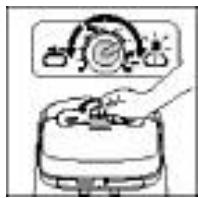
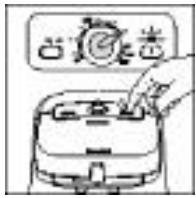
- Turn the brew selection control to the desired setting.
- Place the mug(s) on the drip tray.
natural_image
Simple line drawing of a hand pouring liquid into a container (no text or symbols)When the indicator light glows steadily, your appliance is ready.
KRUPS 9
- Press the brew button (O) to start the preparation. The indicator light will blink during the brewing process.
When the cycle is completed, the indicator light will be steady again and the machine will be ready for the next cycle.
At the end of the brew cycle there is a steam purge. You may see some steam dissipate from the unit.
If brewing stops check to see that there is water in the tank.
- Remove and discard the pod(s) using the pod holders when complete.
- After preparing a specialty beverage such as a latte or cappuccino, immediately clean the spray heads and the seals using a damp cloth, then thoroughly wash the pod holders. In addition, you can run a cycle without pods to rinse the appliance.
Never open the upper lid when the indicator light is blinking (brewing in progress).
The coffee machine will automatically shut off after 1 hour if not used.
Cleaning
- Run a brewing cycle without pod(s) to rinse the appliance.
- Unplug the appliance.
- Do not clean the appliance when hot.
- Clean with a damp cloth or sponge.
- Never put the appliance in water or under running water.
- The pod holders (H), the drip tray (A) and its plate (B) are dishwasher safe.
10 KRUPS
Descaling
- Turn the appliance off before descaling.
- Remove the water filter holder and discard the filter.
- We recommend that you use KRUPS descaling solution (ref: F054).
- Pour the mixture into the tank (F) and place the smaller pod holders in the coffee machine.
(Do not use the specialty pod holders for descaling.)
- Place a container that can hold up to 40 ounces on the drip tray.
- Press the brew button for at least 5 seconds.
The indicator light will begin to blink slowly. The solution will run through the system and disperse intermittently.
The cycle automatically stops when the tank is empty. The indicator light goes out.
After descaling rinse your coffee machine by running two brew cycles on the 2 cup 9 oz setting.
- Rinse the water tank before making coffee.
Never put the descaling agent directly into the tank, mix the solution first.
If used twice daily, descale your coffee machine every 3 months.
If your coffee machine is equipped with Water Filtration you generally only need to descale your appliance every 4 to 5 months.
The absence of the water filter does not prevent the coffee machine from working.
If you have not used your coffee machine for over a month, we advise you to rinse the “Duo Filter” under running water and to thoroughly clean the water tank.
It is recommended not to leave the water filter in place for over 5 months.
Caution: Do not leave the descaling solution within the reach of children.
The guarantee excludes coffee machines that are not working properly because they have not been descaled.
Accessories
Accessories can be purchased at most Krups retailers or by calling your respective country's customer service department.
- Duo Filter Water Filtration Cartridges - pack of 2 : Reference # F472
- Descaling Solution - pack of 2 : Reference # F054
Troubleshooting
| PROBLEM | SOLUTION |
| The brew cycle stops and the indicator light blinks rapidly during brewing : | · The water tank is empty and the brew cycle has been interrupted. Fill the water tank. Press “brew” to begin a new cycle. When you reach the volume required, press “brew” again to end the preparation.· The circuit is blocked: wait until your coffee maker has cooled down completely, then open the upper lid (C).- Check that the pod holders are not blocked. If this is the case, the pod holders should be cleaned.- Otherwise, descale the unit. |
| A large amount of steam is given off during the brewing : | · Descale the unit. |
| The tank is not emptied during the descaling cycle : | · Your coffee maker is heavily scaled, repeat the descaling cycle. |
| You cannot unlock the lid : | · Do not force the unlock button, wait until your coffee machine has cooled down completely and then try again. It is sometimes necessary to wait 24 hours before unlocking the lid. |
| Drinks prepared are not hot : | · Descale the unit. |
| Power cut during the preparation : | · Wait until your coffee machine has cooled down completely.· Throw away the pods, clean the pod supports and the spray heads and run 1 2*9-oz preparation cycle with empty coffee pod supports to rinse your appliance. |
| Clog | · If the nozzle of the pod holder is clogged clean it with a fine needle. |
| Leaks during the preparation : | · Check that lid is properly locked in the holder.· Check that your pods are correctly positioned in the holders.· Wipe the seals around the spray heads. |
| Coffee is not evenly distributed between the 2 cups : | · Could be due to the use of 2 different types of coffee pods.· Descale the unit.· Check to see if pod holders are not clogged. |
If your appliance still does not work, please contact an authorized Krups Service Center (see Limited Warranty).
12 KRUPS
LIMITED WARRANTY
This Krups product is warranted for 1 year from the date of purchase against defects in material and workmanship. During this period, the Krups' product that, upon inspection by Krups, is proved defective, will be repaired or replaced, at Krups' option, without charge to the customer. If a replacement product is sent, it will carry the remaining warranty of the original product. This warranty does not apply to any defect arising from a buyer's or user's misuse of the product, negligence, failure to follow Krups' instructions, use on current or voltage other than that stamped on the product, wear and tear, alteration or repair not authorized by Krups, or use for commercial purposes.
THE WARRANTIES SET FORTH HEREIN ARE EXCLUSIVE AND NO OTHER WARRANTIES, EXPRESS OR IMPLIED, INCLUDING BUT NOT LIMITED TO ANY WARRANTY OF MERCHANTABILITY OR FITNESS FOR A PARTICULAR PURPOSE OR USE, ARE MADE BY KRUPS OR ARE AUTHORIZED TO BE MADE WITH RESPECT TO THE PRODUCT.
Some states do not allow limitation on how long an implied warranty lasts or do not allow the exclusion of incidental or consequential damages, so the above limitations may not apply to you. This warranty gives you specific legal rights, and you may also have other rights, which vary from state to state.
If you believe your product is defective, bring the product (or send it, postage prepaid) along with proof of purchase to the nearest authorized Krups Service Center. (Please contact your respective country's customer service department, indicated below, for the address of the nearest authorized Krups Service Center.)
If you send the product, please include a letter explaining the nature of the claimed defect.
If you have additional questions, please call our Consumer Service Department:
USA: 1-800-526-5377;
Mon – Fri 8:30 a.m. – 6:30 p.m. (EST).
www.KrupsUSA.com
Canada: 1-800-418-3325;
Mon - Fri 8:30 a.m. - 4:30 p.m. (EST)
www.Krups.ca
Please note hours are subject to change.
Before calling the Consumer Service Department, please have the product code located on the bottom of the unit available. This will assist us in answering your questions. It is helpful if you have the appliance available at the time of your call.
General correspondence can be addressed to:
USA:
Krups
196 Boston Avenue
Medford, MA 02155
Only letters can be accepted at this address. Shipments and packages that do not have a return authorization number will be refused.
Canada:
455 Finchdene Square
Scarborough, Ontario M1X 1B7
14 KRUPS
Français
PRÉCAUTIONS IMPORTANTES
natural_image
Mechanical component diagram showing a piston and crankshaft mechanism (no text or labels)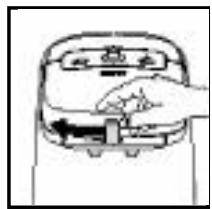
natural_image
Line drawing of a hand pressing down on a device (no text or symbols)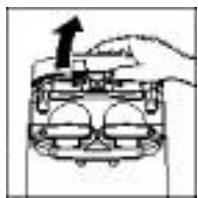
natural_image
Diagram of a hand pressing down on a mechanical component with an arrow indicating force (no text or symbols present)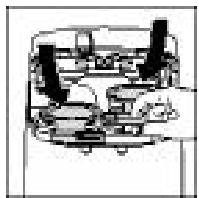
natural_image
Diagram of a mechanical assembly with gears and housing (no text or labels)KRUPS 17
natural_image
Mechanical assembly diagram showing a piston and cylinder head with a downward arrow indicating force or motion (no text or symbols)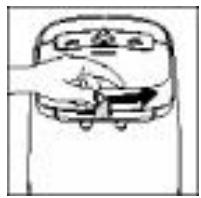
natural_image
Simple line drawing of a hand pressing down on a device (no text or symbols)natural_image
Illustration of a hand inserting a component into a device (no text or symbols visible)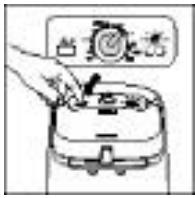
natural_image
Illustration of a hand pouring liquid into a container using a tool (no text or symbols)natural_image
Diagram of a hand pressing a component with an upward arrow (no text or symbols)
KRUPS 19
natural_image
Two identical diagrams of a balance scale with two circular pans and three cups, no text or symbols present.natural_image
Cross-sectional diagram of a mechanical device showing internal components (no text or labels)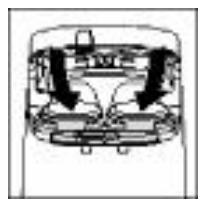
natural_image
Diagram of a mechanical or electrical component with arrows indicating direction (no text or symbols)natural_image
Diagram of a car interior showing a hand holding a tool, with no visible text or symbols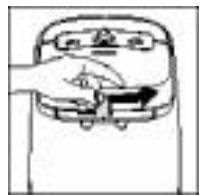
natural_image
Simple line drawing of a hand pressing down on a device (no text or symbols)natural_image
Simple line drawing of a hand pouring liquid into a container (no text or symbols)455 Finchdene Square
Scarborough, Ontario MIX 1B7