
NC260 - Surveillance Camera TP-LINK - Free user manual and instructions
Find the device manual for free NC260 TP-LINK in PDF.


| Type of product | Indoor surveillance camera |
| Brand | TP-Link |
| Model | NC260 |
| Image sensor | 1/4" CMOS |
| Maximum resolution | 1280 x 720 (720p HD) |
| Lens | IR-cut filter, f=3.6mm, F2.2 |
| Viewing angle | Horizontal: 52°, vertical: 35°, diagonal: 60° |
| Night vision | 10 IR LEDs, up to 10m |
| Two-way audio | Yes, built-in microphone and speaker |
| Motion detection | Yes, configurable sensitivity |
| Storage | microSD card (up to 32GB), cloud storage (optional) |
| Network interface | Wi-Fi 802.11b/g/n, 2.4GHz |
| Power supply | 5V DC, 1A (USB cable included) |
| Dimensions (W x D x H) | 110.5 x 60.2 x 58.8 mm |
| Weight | 98 g |
| Operating temperature | 0°C to 40°C |
| Humidity | 10% to 90% non-condensing |
| Security | WEP, WPA/WPA2 encryption |
| Compatibility | iOS and Android via tpCamera app |
| Mounting type | Tabletop or wall mount (mounting kit included) |
| Warranty | 3 years limited |
Frequently Asked Questions - NC260 TP-LINK
User questions about NC260 TP-LINK
0 question about this device. Answer the ones you know or ask your own.
Ask a new question about this device
Download the instructions for your Surveillance Camera in PDF format for free! Find your manual NC260 - TP-LINK and take your electronic device back in hand. On this page are published all the documents necessary for the use of your device. NC260 by TP-LINK.
USER MANUAL NC260 TP-LINK
Specifications are subject to change without notice. TP-LINK is a registered trademark of TP-LINK TECHNOLOGIES CO., LTD. Other brands and product names are trademarks or registered trademarks of their respective holders.
No part of the specifications may be reproduced in any form or by any means or used to make any derivative such as translation, transformation, or adaptation without permission from TP-LINK TECHNOLOGIES CO., LTD. Copyright © 2016 TP-LINK TECHNOLOGIES CO., LTD. All rights reserved.
www.tp-link.com
Quick Installation Guide
Cloud Camera
NOTE: The product model shown in this QIG for Cloud Camera is "NC250", as an example.
English Български Čeština Казакша Latviešu Lietuvių Magyar Polski Русский язык Română Slovenčina Srpski jezik Українська мова


MADE IN CHINA
/1065060/8 REV1.0.0
CONTENTS
English....1
Български....5
Čeština....9
Қазақша 13
Latviešu 17
Lietuvių....21
Magyar....25
Polski....29
Русский язык ....33
Română 37
Slovenčina....41
Srpski jezik 45
Українська мова 49
How to set up the camera
1 Connect the camera to the network your smartphone is on.
![graph LR A["Outlet"] --> B["Camera"] B --> C["WANLAN"] C --> D["Wireless Router"] D --> E["Smartphone"] F["Internet"] --> C style F fill:#f9f,stroke:#333 style D fill:#ccf,stroke:#333](/content/2026/06/1310999/images/b3c21f025115dc3bdf5d80ba5afc7df8217d253809162e5644e598e699940dc4.jpg)
System LED

Flashing red: System starting
Solid red: Network not connected
Solid green: Network connected

Smartphone requirements:
Android 3.0 or higher
iOS 7.0 or higher
2 Download and install the tpCamera app.

OR
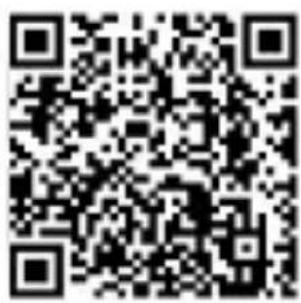
3 Launch tpCamera, log into your TP-LINK Cloud account or create one, then follow the app instructions to set up your new camera. 4 Relocate the camera to your desired location. You can simply place it on a flat surface, mount it with the provided adhesive or with screws (not included).
1
Unscrew the camera head.
2
Remove the base cover.
3
Use two screws to secure the base.
4
Put the base cover and camera head back on.
How to view the camera
Via Smartphone:
On the My Cam screen, tap your camera to view the live video.
Via Computer:
Log into the TP-LINK Cloud Website (https://www.tpcloud.com), and click your camera to view the live video.
How to use the WPS/RESET Button
WPS (Wi-Fi Protected Setup):
If your Wi-Fi router or access point supports WPS, you can connect the camera to your Wi-Fi network using WPS. For details, see the camera's User Guide.
Reset:
Note: Resetting a registered camera will remove it from your TP-LINK Cloud account.
While the camera is powered on, press the WPS/RESET button for 5 seconds until the System LED on the front panel goes off. The camera will reset and reboot.
Get more with the camera
Get notifications when motion is detected
Log into the web management page of your camera to set Motion Detection and Notification Delivery. For details and more advanced configurations, see the camera's User Guide.
View all of your cameras on one screen
Download and install the TP-LINK Camera Control utility to view and manage multiple cameras on one screen. For details, see the Camera Control User Guide.
Downloads
For related user guides, Camera Control utility, camera firmware, and other supports, please visit the product page at:
http://www.tp-link.com.

How to set up the camera
How to set up the camera
Unscrew the camera head.
2
How to set up the camera
Use the two screws to secure the camera cover.
4
Setting up the camera
WPS (Wi-Fi Protected Setup):
Camera configuration
WPS (Wi-Fi Protected Setup):
WPS (Wi-Fi Protected Setup):
How to set up the camera
Unscrew the camera head.
2
How to set up the camera
3 Launch tpCamera, log in to your TP-LINK Cloud account or create a new one, and then follow the instructions to set up your new camera. 4 Move the camera to the desired position. You can place it on a flat surface, attach it using the adhesive from the package, or use screws (not included).


How to access the camera
Via smartphone:
On the My Cam screen, select your camera to view live video.
Via computer:
Log in to the TP-LINK Cloud website (https://www.tplinkcloud.com) and select your camera to view live video.
How to use the WPS/RESET button
Camera connection


- QUICK INSTALLATION GUIDE
- CONTENTS
- HOW TO SET UP THE CAMERA
- SYSTEM LED
- HOW TO VIEW THE CAMERA
- VIA SMARTPHONE
- VIA COMPUTER
- HOW TO USE THE WPS/RESET BUTTON
- WPS (WI-FI PROTECTED SETUP)
- RESET
- GET MORE WITH THE CAMERA
- GET NOTIFICATIONS WHEN MOTION IS DETECTED
- VIEW ALL OF YOUR CAMERAS ON ONE SCREEN
- DOWNLOADS
- SETTING UP THE CAMERA
- CAMERA CONFIGURATION
- HOW TO ACCESS THE CAMERA
- CAMERA CONNECTION
Brand : TP-LINK
Model : NC260
Category : Surveillance Camera