
AR 4030 BT - Car radio AEG - Free user manual and instructions
Find the device manual for free AR 4030 BT AEG in PDF.
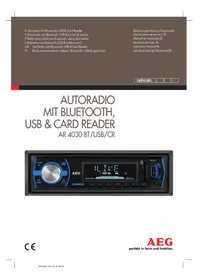


| Product Type | Car Stereo |
| Brand | AEG |
| Model | AR 4030 BT |
| Dimensions (W x H x D) | 178 x 50 x 100 mm (1-DIN) |
| Weight | 0.5 kg |
| Power Supply | 12 V DC (negative ground) |
| Bluetooth Version | 4.2 with A2DP, HFP, AVRCP |
| USB Port | 1 x USB 2.0 for playback and charging |
| AUX Input | 3.5 mm front auxiliary input |
| Radio Tuner | FM/AM with RDS, 30 presets |
| Maximum Power Output | 4 x 50 W Max power |
| RMS Power Output | 4 x 20 W |
| Equalizer | 5-band equalizer (presets + custom) |
| Playback Media | USB, AUX, Bluetooth audio streaming |
| Display | LCD dot matrix with adjustable illumination |
| Remote Control | Included wired remote or IR (optional) |
| Steering Wheel Control Compatible | Yes (requires adapter) |
| Installation | Standard 1-DIN sleeve installation |
| Operating Temperature | -20°C to +60°C |
| Safety Features | Detachable front panel for theft prevention |
| Maintenance | Clean with soft dry cloth; avoid liquids |
| Spare Parts Availability | Contact AEG support or authorized dealers |
| Repairability | Service by qualified technician; user-replaceable fuse |
Frequently Asked Questions - AR 4030 BT AEG
User questions about AR 4030 BT AEG
0 question about this device. Answer the ones you know or ask your own.
Ask a new question about this device
Download the instructions for your Car radio in PDF format for free! Find your manual AR 4030 BT - AEG and take your electronic device back in hand. On this page are published all the documents necessary for the use of your device. AR 4030 BT by AEG.
USER MANUAL AR 4030 BT AEG
GB Car Radio with Bluetooth, USB & Card Reader
Overview of the Components......Page 3
Instruction Manual......Page 46
Technical Data Page 53
Disposal Page 53
Index Page 55
Polish
Table of Contents
Overview of the Components
EQ (Equalizer / Digital Sound Processing) : EQ OFF, FLAT, POP, ROCK, CLASS
Transmission frequency 2.402–2.480 GHz
Protocols....A2DP/AVRCP
Installation tips....4
L
• BEEP OFF: No beep.
LOUD (Loudness)
SD card slot....40
Alternative Frequencies (AF)....39
Operation....38
Thank you for choosing our product. We hope you will enjoy using the appliance.
Symbols in these Instructions for Use
Important information for your safety is specially marked. It is essential to comply with these instructions in order to avoid accidents and prevent damage to the machine:

WARNING:
Warns of dangers for your health and indicates potential risks of injury.

CAUTION:
Indicates potential dangers for the device or other objects.

NOTE: Highlights tips and information for you.
Safety Information
Before using this device, carefully read this user manual and keep it together with the Warranty Certificate, cashier receipt and if possible, the original package inclusive its interior packing. If you hand on the device to any third person, include the user manual as well.
- Use the device only for the intended purpose.
- The device should be installed in such a way that existing ventilation holes are not covered.
- Never open the housing of the device. Incorrect repairs can constitute a considerable risk for the user. If the device is damaged it should not be used, but repaired by a specialist.
These symbols may be found on the machine and are intended to indicate the following:

The lightning symbol should advise the user of parts in the inside of the device which carry dangerously high voltage levels.
Children and Frail Individuals
In order to ensure your children's safety, please keep all packaging (plastic bags, boxes, polystyrene etc.) out of their reach.

WARNING:
Do not allow small children to play with the foil. There is a danger of suffocation!
Road Safety

WARNING:
- Road safety is of paramount importance. You should therefore use your car radio at all times in such a way that you are able to cope with the current traffic situation.

WARNING:
- Please remember that at a speed of 30 mph (50 kph) you travel 15 yards (14 metres) in one second.
- We advise you not to operate the radio in critical situations.
- It must be possible to hear the sirens of police and fire brigade vehicles etc. from inside the vehicle in good time.
- When driving you should therefore not turn the radio volume up excessively.
- In order to avoid serious road accidents, the device should be installed in such a way that you are not hindered when operating the steering wheel, gear lever etc.
- Similarly, safety aspects such as airbags and your clear view of the road must not be obstructed either.
Safety Notes for the Time of Assembly / Connection
- First disconnect the minus pole and then the plus pole of the battery. (Connection in the reverse order.) Please note: Once the battery has been disconnected the information is lost from all volatile memory. Please note the safety information provided by the vehicle manufacturer.
- The main fuse must be installed as closely as possible (not more than 30 cm away) to the plus pole of the battery so that the car is protected from any cable fire caused, for example, by an accident. If the above is not complied with the insurance protection no longer applies.
- The cross-section of the plus and minus cable must not exceed 1.5 mm2 .
Installation Tip:
- Cable protection sleeves protect cables against fraying on sharp body parts.
- The insulation of the cables must not be damaged during installation.
- It is essential to use the correct tools when installing car hi-fi.
Depending on the model, your vehicle may deviate from the above description. We do not accept any liability for damage caused by installation or connection errors or for consequential damage.
Important Additional Information for Installing your Carradio!
- The device is designed for the minus pole of the battery, which must be connected to the body of the vehicle. Please check this before installation.
- When installing/connecting your device, please note that not every vehicle is equipped with an "ISO connection". In this case, we recommend the use of an ISO adapter specifically designed for your vehicle.
Adapters are available from car accessory shops and/or from your vehicle workshop.
- Depending on the specific car type, different wiring connections for the "Duration +" wire (constant current connection) are available. (However, this is necessary for storing the radio stations).
In order to guarantee all functions, installation in line with these instructions is essential. In cases of doubt, please contact an authorized car workshop.
Due to the various types of motor vehicles and motor manufacturers, it is not possible to guarantee that the pin assignment of the ISO plug is correct, even if the ISO plug connections fit together mechanically. It may therefore be necessary to modify the electrical connection or use vehicle-specific adapters.

NOTE:
If the device is correctly connected, the radio can be switched on and off via the ignition. If the stored stations are lost, this indicates that the radio is not receiving any "continuous +" current, which is required for storing the stations.

CAUTION:
Where there is a connection to "continuous +" without the ignition being switched on, the car battery might be drained of power even if the radio is switched off. This may even result in the battery becoming completely flat.
- Depending on the specific car type, interferences may arise during operation. These interferences can be avoided easily with an additional interference filter. Your car radio is originally prepared with an interference filter already.
In these cases, please contact your authorized car dealer.
- When installing your radio, please ensure that there is enough space at the rear of the radio to ensure sufficient cooling.
- For the antenna connection there are two different norms. The first of these is the old (50 ohm) version with a long protruding round contact on the vehicle and a round socket on the radio end. The second is the ISO-standardised antenna plug (150 ohm). Adapters for both formats are available from accessory manufacturers and / or your car workshop.

NOTE:
Important information for VW / Audi vehicles: Your car may have an active antenna. It requires a power supply as it is provided only by original car radios. In this case, use a phantom-powered antenna adapter. Antenna adapters are available at car accessory suppliers and / or your automotive workshop.
Installation
Please install the car radio as shown below.

a Slide-in housing
b Extraction tool (spanner for dismantling)
48 English
Connection

CAUTION: Connection of an External Amplifier
- Please use loudspeakers with an impedance of 4 ohm. • The loudspeaker cables must be unearthed.
For connection of an external amplifier, use the audio cinch outputs LINE OUTPUT on the rear panel of the unit. Refer to the instruction manual concerning the external amplifier.
Connect the device as shown in the diagram:
![graph TD A["Radio Antenna Socket"] --> B["FUSE 5A"] B --> C["Front Left CH RCA Output (white)"] B --> D["Front Right CH RCA Output (red)"] B --> E["Rear Right CH RCA Output (red)"] B --> F["Rear Left CH RCA Output (white)"] C --> G["White/Black"] D --> H["White"] E --> I["Green/Black"] F --> J["Gray…](/content/2026/06/1305124/images/59b18130955989dc49792d81d417ab8bc79c18df53065d8f97a6c42d5274178f.jpg)
Operating Instructions
- Do not switch on the device if the car interior is extremely hot, for example after an extended parking in direct sunlight. Wait until the interior is cooled down after a short drive.
- Possible malfunctions during operation can be resolved by pushing the RESET button. Push the RESET button with a wire or similar (8) to reset the electronics (RESET).
- The time displayed in standby mode is set automatically as soon as you listen to a radio station.
Operation
In the following, the functions of the individual device buttons are described according to the illustration
→ "Overview of the Components".
1 MODE ⏻ (On/Off) - Button
a) Press this button to turn on the unit. The notification "WELCOME" will appear briefly on the display. Press and hold the button to switch off the unit. The notification "GOODBYE" will appear briefly on the display.
b) Press this button to select the different modes. (Radio, BT, USB, CARD and AUX IN)

NOTE:
The USB and CARD mode can only be selected if you have connected a corresponding medium.
2 Multicontrol/SEL-Button (Volume/Select)
a) During normal playback mode, the control is used to control the volume. Together with the previously pressed control (SEL button), changes can be made in the menu, e. g. the sound mode.
b) Press the SEL button shortly to enter the selection menu. Repeated pressing of the SEL button selects individual menu entries. You can change the settings of the individual menu entries by turning the volume control.
BAS (Bass)
TRE (Treble)
BAL (Balance)
FAD (Fader)
BEEP (Sound heard when a button is pressed)
- BEEP ON: A beep sounds whenever a button is pressed.
• BEEP OFF: No beep.
English
LOUD (Loudness)
The bass is amplified when the Loudness function is activated.
- LOUD OFF: Loudness function is deactivated.
- LOUD ON: Loudness function is activated.
EQ (Equalizer / Digital Sound Processing) : EQ OFF, FLAT, POP, ROCK, CLASS
VOLLAS/ADJ (switch-on volume)
• VOL LAS: The unit turns on with the previously set volume level. - VOL ADJ: Here, you can set a fixed volume, with which the unit should switch on (A – VOL).
CLK (time display format)
Select between the 24 or 12 hour display.

NOTE:
If 12 hour display is selected, the following is displayed:
AM = morning, PM = afternoon.
DX/LOC (Switches between local and more distant stations)
- DX: Receive other more distant stations. • LOC: Receive local stations.
STEREO/MONO (Switch between Stereo and Mono)
VOL (Volume)
More Settings via the Multicontrol
- Keep the multicontrol pressed for a few seconds to access more settings options. Press the multicontrol each time to select the next option.
- Turn the multicontrol to adjust the displayed setting.
The following settings are available:
AFON/AFOFF
AF (Alternative Frequencies) is a function working with RDS (Radio Data System) and can only be used with FM stations. In the background, the device searches the best frequency for the selected station.
- ON: If a certain broadcast station has bad reception, the device switches automatically to a broadcast station broadcasting the same program via the same RDS broadcast chain. • OFF: The function is deactivated.
TA OFF/TA ON (Traffic announcement settings)
TA OFF/ON (Radio traffic service / "Traffic Announcement")
• OFF: The function is deactivated. - ON: TA is displayed if this function is activated. In TA mode, once a traffic message is received, the unit switches to the radio station from a different mode (e.g., USB mode). The volume level is adjusted to the figure set in the menu for transmitting traffic information.
The notification "TRAFFIC" will appear on the display.
TA VOL (Traffic information volume)
REG OFF/REG ON
At certain times, some stations segment their programs into regional programs with different content.
- ON: Only the regional programs of the radio station will be played, or suggested as preferences when tuning to a selected station. • OFF: Play nationwide programs as well.
i NOTE:
When the feature is enabled, the radio station may no longer be received without interference in peripheral areas.
EON ON/OFF
The unit can receive RDS EON data. EON means the transmission of additional station information within a station group. In the event of a traffic announcement (TA), it will switch within a station group from a non-traffic broadcast to the corresponding traffic radio station of the station group.
- ON: The unit attempts to receive the EON TA information from a station within range and thus to improve the reception quality. • OFF: Prevents switching over to a station with too weak a signal level.
i NOTE:
The icon "TP" on the display signals that the station transmits traffic messages. Either directly or through a linked transmitter (EON).
3 PTY/MUTE - Button
a) Press the button to switch the unit to mute.
Press the button again to deactivate the function.
b) Radio operation:
PTY Selecting the program type
Besides the station name, some stations broadcast information about the program type of your program. This information can be displayed on your car radio.
The program can be of the following types, for example:
SPORT NEWS
POP
CLASSICS
Using the PTY function, you can select specific stations of a certain program type. The individual program types are divided into two categories: Music and Speech. You can find a list of program types on page 54.
- Hold down the PTY / MUTE button 1 x to switch on the function and to select the category "Speech".
- Hold down the PTY / MUTE button 2 x to select category "Music".
50 English
NOTE: Switch off the function
If you hold down the PTY / MUTE button for a third time, the function will be switched off.
Then, press station buttons 1 – 6 to make the PTY choice. The selected program type appears in the display.
If PTY is selected, the radio starts to search for respective PTY information and stops when the desired PTY information is found.
If the desired program type is not found, the message "NO PTY" appears on the display.
If the PTY information does not exist anymore, the PTY function will automatically switch to normal mode.
4 Microphone
5 LCD (liquid crystal display)
6 SD Card Slot
Insert the memory card with the label to the left into the opening provided for this purpose, until it "clicks" into place. The word CARD appears in the display.
The data are automatically played back.
i NOTE:
In order to search for/select certain tracks proceed as described under section 11–16.
To remove the memory card, press again onto the end of the memory card. It unlatches with a "click" and can be removed.
CAUTION:
Simple pulling out can damage the slot and/or the memory card.
7 USB Connection
If you would like to play back data contained on a USB stick, please insert the stick into the opening provided. The word USB appears in the display.
The data is played back automatically.
i NOTE:
• Always directly connect a USB storage medium to the USB port to prevent any malfunctions. - There is a huge variety of compression methods as well as quality differences for USB sticks. Furthermore, the music industry does not adhere to fixed standards (copy protection). For that reason you might experience problems in some rare cases when playing back MP3 files. This is not a malfunction of the device. - In order to search for / select certain tracks proceed as described under section 11 – 16.
i NOTE:
- Please note: The USB connection is only designed for playing back storage media and not for charging external devices. Only a low power (100 mA) supply can be provided. This USB connection is not designed for driving e.g. external 2.5" hard discs, needing starting currents of up to 1100 mA. For playing back your smartphone, iPod or iPhone, use the AUX-IN socket, intended for that purpose.
8 Reset - Button (reset)
See section "Operating Instructions" on page 48.
9 AUX Socket
To connect analogue replay devices. Using this socket it is possible to hear the sound of other playback devices such as MP3 players, CD players etc. through the loudspeaker.
- Please connect the external device with a 3.5 mm stereo jack plug to the AUX socket.
- Press the MODE / button (1) repeatedly until "AUX IN" appears in the display.
- You hear the playback from the external device via the loudspeakers. You can change the volume with the volume control.
- For the remaining procedure please see the operating instructions of the external sound source.
NOTE:
Adjust the volume of the external device to a comfortable level.
10 AMS - Button
Radio operation:
a) Press the button shortly to play the saved stations sequentially for approx. 5 seconds. Press the desired station to quit the operation and to play the radio station. b) Hold down this button to start the automatic station scanning. The search process can take some minutes. The stations are stored according to signal strength. Then, the saved stations are played for a short time. Press a station button to quit the operation.
USB/CARD mode:
Direct selection of a music file.
Press the AMS button. First "TRKSCH" and then "T - - -" will appear on the display. Turn the volume control and select the "first number". After approx. 3 seconds, this will move to the left. Enter the next number. When the desired track number appears, confirm your selection by pressing the SEL button.
NOTE: The maximum track selection is "999".
English 51
11-16 Button 6 +10, 5-10, 4 RDM, 3 RPT, 2 INT, 1▶ Station Buttons (1-6)
a) Radio operation:
- Hold down the desired station preset button to save a radio station.
- To choose a radio station, shortly press the respective station button.
- To select a program type → Page 49 "PTY / MUTE Button"
b) USB/CARD mode:
Direct selection of a music file. See page 50 "AMS Button"
Button 1
Press the button to interrupt the playback of a music title (pause function). Press this button again to continue playback.
Button 2 INT
Press the button. "INT ON" appears briefly on the display. All tracks will be played in succession for approx. 10 seconds. Press the button again to set the normal playback speed.
Button 3 RPT
All music tracks are repeated by default. Press the button to repeat the current track only. "RPT" will appear on the display.
Button 4 RDM
Press the button. "RDM" will appear on the display. A random playback of all tracks will start. Press the button again to set the normal playback.
Button 5 -10 / 6 +10
- Press the buttons to jump 10 tracks backward or forward. It is required that over 10 tracks be available on the storage medium.
- Press and hold the button briefly to select the previous or the next folder. (If there are folders on the storage medium)
17 ▶▶ Button
a) In radio mode to choose a radio station. b) In USB/CARD mode: Press the button to choose the next music title.
18 - Button
a) In radio mode, press to select a radio station. b) In USB/CARD mode: Press the button to select the previous music track.
19 CLK - Button
Radio operation:
a) Show display information (ID3 tag)
Press the button repeatedly to display the following information successively on the display:
Time (set automatically for RDS reception), frequency of the currently selected radio station, current program type (PTY), radio station.
i NOTE:
- If no corresponding information is available, NO PTY is shown on the display.
- If the information on the display is too long, it is shown as scrolling text.
b) Set time manually
The time is set automatically for RDS reception. If this is not the case, you can set the time manually as follows:
- Press and hold the 🔒 CLK button. The hour digits start flashing on the display.
- Set hours using the ▶▶ buttons.
- Press the 📋 CLK button again. The minute digits start flashing.
- Set the minutes using the ▶▶ buttons.
- Press the 🔒 CLK button to confirm your settings. The time is set.
Telephone operation:
Reject incoming call, end a conversation.
20 BAND - Button
a) Radio operation: Shortly press the 📞 BAND button to switch between the three FM (VHF) areas. The name of the corresponding level is shown in the LCD display when the frequency is indicated (see 🔒 CLK button). b) Telephone operation: Accept an incoming call, call the number dialed. c) USB/CARD mode: Press the button. The folder will be shown in the display.
Phoning via Bluetooth
Bluetooth is a technology for wireless radio connection of devices over short distances. Bluetooth technology enables hands-free use of mobile phones. The driver can hold a conversation via his mobile phone without having to hold it to his ear.
This unit offers you the option of using a Bluetooth-enabled mobile phone. The function radius is limited to around 3 metres depending on the device.
For optimum sound quality during a telephone call: Do not set the volume too high. Doing so may lead to feedback (whistling) from the speakers.
i NOTE:
The speaker setting depends on the installation positions of the speaker to the microphone and therefore cannot be specified.
Pairing Devices (PAIRING)
Before you can use the car radio to make phone calls, you must pair the units.
- Press the MODE ⏻ button to select BT mode. BT starts flashing on the display, indicating that the device is in pairing mode.
- Select the Bluetooth menu on your mobile phone and register the car radio. To do so, refer to the user manual of your mobile phone. The device "AEG AR 4030" will appear on your mobile phone.
- Depending on the device manufacturer, model, and software versions, you may need to enter the password "0000" on your mobile phone.
If the unit has been successfully paired, BT will be shown on the display, and MEDIA will be indicated.
NOTE:
- Depending on the mobile phone manufacturer, you may need to execute the (PAIRING) message again to pair your mobile phone to the car radio.
- Bluetooth compatibility cannot be guaranteed for mobile phones that may be available on the market in the future.
- To ensure an optimal connection, make sure that the battery of your mobile phone is fully charged.
- Some mobile phone models have a power saving mode. Please deactivate power saving mode, as it may cause problems when using Bluetooth for phone calls.
- To make or receive calls, you must keep Bluetooth activated on your mobile phone. Please refer to the user manual of your mobile phone.
- Please make sure you speak towards the integrated microphone (4). An external microphone cannot be connected.
Disconnecting the Devices
The devices are disconnected when you switch off the car radio via the ignition or on the unit.
Reconnecting the Devices
This unit supports automatic reconnection.
Requirements are:
• the devices have already been paired - Bluetooth is activated in your mobile telephone - your mobile telephone supports this function.
After the car radio has been switched off and switched on again via the ignition or on the unit, automatic reconnection is activated.
If a connection has been established, BT will light up on the display.
Redial
The unit stores the last dialed number. To access this, proceed as follows:
Press and hold the BRAND button. CALLING will appear on the display.
End Call
Press the 🔒 CLK button to end outgoing or incoming calls. END is shown on the display.
i NOTE:
Press the 🔒 CLK button also to reject an incoming call.
Incoming Call
If you receive an incoming call, the ring tone sounds from the speakers and if the caller has a CLIP "Calling Line Identification Presentation (Caller ID)" capable phone, the caller number appears on the car radio display. Otherwise, "0000" appears on the display.
To answer an incoming call, press the BAND button. You can hear the caller via the loudspeaker in your car.
Music Playback via A2DP (Advanced Audio Distribution Profile)
This involves a cross-manufacturer Bluetooth profile. Stereo-audio signals are transmitted wirelessly via streaming between the playback unit (source) and receiver unit. To control the source remotely, the playback unit must support the AVRCP profile (Audio Video Remote Control Profile).
Full functionality cannot be guaranteed due to the different unit manufacturers, models and software versions.
- After you have connected the units to each other, start playing the music in your mobile phone. "A2DP" will appear on the display.
- Use the button ▶▶ or ◀◀ to select the next or previous music title.
- Press the 1▶ button to pause the music playback (pause feature). "MEDIA" will appear on the display. Press the button again to cancel the feature.
Cleaning
Safety Advice
△ CAUTION:
Possible damage to the unit
Ensure that no moisture gets into the unit during cleaning to prevent irreparable damage to the unit.
Cleaning
Always clean the housing with a slightly damp cloth.
Troubleshooting
This chapter contains important advice on identifying faults and troubleshooting. Follow the instructions to prevent hazards and damage.
Safety advice

WARNING:
Follow the safety instructions below to prevent hazards and damage to property:
- Repairs to electrical devices may only be carried out by qualified persons who have been trained by the manufacturer. Significant risks for the user and damage to the unit may arise from faulty repairs.
Fault Causes and Troubleshooting
Before sending the unit to our customer services, use the following table to check whether you can repair the fault yourself.
| Fault Potential | Cause Solution | |
| Cannot switch on the unit. | The ignition is not turned on. | Turn the key to start the ignition. |
| No sound The | volume is set at the minimum level. | Increase the volume. |
| The cable is not connected properly. | Check the cable connections. | |
| Function button does not work. | There is a fault on the unit. | Press the RESET button (8). |
| Radio and/or the automatic station preset does not work | The antenna cable is not connected properly | Check that the antenna is connected securely. |
| The transmitter signals are too weak | Manually tune the stations. | |
| Manually tune the stations. | Connection 4 in the ISO connection A (permanent positive) is not properly connected. | Check the cable connections. To do so, refer to the "Connection" chapter |
| Unit does not work on the USB port. | The USB port is designed for devices which work according to the USB standard. Not all devices on the market conform to this standard. A device which does not function according to the USB standard may have been connected. | Connect a device which works according to the USB standard.Ensure that the data storage device is formatted with the FAT32 file system. |
| Fault Potential | Cause Solution | |
| SD memory card does not work. | The device is not reading the card. | Check the card.Ensure that the data storage device is formatted with the FAT32 file system. |
| A connection cannot be established via Bluetooth. | Bluetooth is turned off on your mobile phone. | Activate Bluetooth in your mobile phone. |
Technical Data
Model: AR 4030 BT/USB/CR
General
Supply voltage....DC 12V (negative ground)
Power consumption....5A Max.
Power....4x 40 W (PMPO)
playable file formats....MP3, WMA
Net weight..... approx. 0.45kg
Housing dimensions (Installation)....182 W x 52 H x 110 D
FM Band
Frequency range 87.5MHz ~ 108.0MHz
Effective sensitivity 10dB
I.F. frequency 10.7MHz
Bluetooth
Bluetooth support.....V2.0
Range....approx. 8 metres
Transmission frequency....2.402–2.480 GHz
Protocols....A2DP/AVRCP
The right to make technical and design modifications in the course of continuous product development remains reserved.
This device complies with all current CE directives, such as electromagnetic compatibility and low voltage directive and is manufactured according to the latest safety regulations.
Disposal
Meaning of the "Wheelie Bin" Symbol

Take care of our environment, do not dispose of electrical appliances via the household waste.
Dispose of obsolete or defective electrical appliances via municipal collection points.
Please help to avoid potential environmental
and health impacts through improper waste disposal.
You contribute to recycling and other forms of utilization of old electric and electronic appliances.
Your municipality provides you with information about collecting points.
PTY – Program Types
| Station Buttons | PTY of the Category "Speech" |
| 1 | NEWS |
| AFFAIRS | |
| INFO | |
| 2 | SPORT |
| EDUCATION | |
| DRAMA | |
| 3 | CULTURE |
| SCIENCE | |
| VARIED | |
| 4 | WEATHER |
| FINANCE | |
| CHILDREN | |
| 5 | SOCIAL |
| RELIGION | |
| PHONE IN | |
| 6 | TRAVEL |
| LEISURE | |
| DOCUMENT |
| Station Buttons | PTY of the Category "Music" |
| 1 | POP M |
| ROCK M | |
| 2 | LIGHT M |
| EASY M | |
| 3 | CLASSIC |
| OTHER M | |
| 4 | COUNTRY |
| JAZZ | |
| 5 | NATIONAL M |
| OLDIES | |
| 6 FOLK M |
Index
A
Adjust the volume....48
Alternative Frequencies (AF)......49
AMS button....50
AUX Socket....50
B
BAND button....51
C
Cleaning....52
Connection....48
|
Important Additional Information for Installing 46
Installation....47
Installation (Safety Information) 46
Installation Tips....46
M
MODE button....48
Music Playback via A2DP....52
MUTE button (mute)....49
Muting....49
O
Operating Instructions 48
Operation 48
P
Phoning via Bluetooth....51
Play / Pause (▶II)....51
Playback features....51
PTY-Program Types....54
PTY/MUTE button....49
▶▶/◀◀ buttons ....51
R
Radio Traffic Service (TA) 49
Regional programmes 49
Road Safety 46
S
Safety Information....46
SD Card Slot....50
SEL button 48
Settings (SEL button) 48
Switching off....48
Switching on....48
T
Technical Data....53
Time....51
Troubleshooting 52
U
USB Connection....50
CTC Clatronic Sp. z o.o


- POLISH
- TABLE OF CONTENTS
- L
- SYMBOLS IN THESE INSTRUCTIONS FOR USE
- WARNING
- CAUTION
- SAFETY INFORMATION
- CHILDREN AND FRAIL INDIVIDUALS
- ROAD SAFETY
- SAFETY NOTES FOR THE TIME OF ASSEMBLY / CONNECTION
- INSTALLATION TIP
- IMPORTANT ADDITIONAL INFORMATION FOR INSTALLING YOUR CARRADIO
- NOTE
- INSTALLATION
- ENGLISH
- CONNECTION
- CAUTION: CONNECTION OF AN EXTERNAL AMPLIFIER
- OPERATING INSTRUCTIONS
- OPERATION
- MODE ⏻ (ON/OFF) - BUTTON
- MULTICONTROL/SEL-BUTTON (VOLUME/SELECT)
- MORE SETTINGS VIA THE MULTICONTROL
- AFON/AFOFF
- REG OFF/REG ON
- I NOTE
- EON ON/OFF
- PTY/MUTE - BUTTON
- SPORT NEWS
- POP
- CLASSICS
- NOTE: SWITCH OFF THE FUNCTION
- MICROPHONE
- LCD (LIQUID CRYSTAL DISPLAY)
- SD CARD SLOT
- USB CONNECTION
- RESET - BUTTON (RESET)
- AUX SOCKET
- AMS - BUTTON
- USB/CARD MODE
- BUTTON 6 +10, 5-10, 4 RDM, 3 RPT, 2 INT, 1▶ STATION BUTTONS (1-6)
- BUTTON
- BUTTON 2 INT
- BUTTON 3 RPT
- BUTTON 4 RDM
- CLK - BUTTON
- BAND - BUTTON
- PHONING VIA BLUETOOTH
- PAIRING DEVICES (PAIRING)
- DISCONNECTING THE DEVICES
- RECONNECTING THE DEVICES
- REDIAL
- END CALL
- INCOMING CALL
- MUSIC PLAYBACK VIA A2DP (ADVANCED AUDIO DISTRIBUTION PROFILE)
- CLEANING
- SAFETY ADVICE
- △ CAUTION
- TROUBLESHOOTING
- FAULT CAUSES AND TROUBLESHOOTING
- TECHNICAL DATA
- GENERAL
- FM BAND
- BLUETOOTH
- DISPOSAL
- MEANING OF THE "WHEELIE BIN" SYMBOL
- PTY – PROGRAM TYPES
- INDEX
- A
- B
- C
- M
- O
- P
- R
- S
- T
- U
Brand : AEG
Model : AR 4030 BT
Category : Car radio