
AR 4026 - Car radio AEG - Free user manual and instructions
Find the device manual for free AR 4026 AEG in PDF.
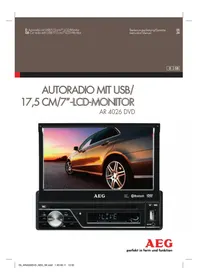


| Product Type | Car Stereo |
| Brand | AEG |
| Model | AR 4026 |
| Dimensions (W x H x D) | 182 x 50 x 160 mm |
| Weight | 0.8 kg |
| Power Supply | 12 V DC (negative ground) |
| Maximum Power Output | 4 x 50 W |
| RMS Power Output | 4 x 15 W |
| Supported Audio Sources | FM/AM tuner, CD, USB, AUX |
| Display | LCD with backlight |
| Radio Bands | FM (87.5-108 MHz), AM (531-1602 kHz) |
| RDS Function | Yes |
| CD Playback | CD, CD-R, CD-RW |
| USB Playback | MP3, WMA files |
| AUX Input | 3.5 mm jack |
| Equalizer | Preset EQ modes (Rock, Pop, Classic, etc.) |
| Remote Control | Included |
| Steering Wheel Control Compatible | Yes (requires adapter) |
| Detachable Faceplate | Yes |
| Additional Features | Clock, Sleep timer, Phone mute |
| Cleaning | Use a soft, dry cloth; avoid solvents |
| Safety | Fuse rating: 10A; disconnect battery before installation |
| Spare Parts / Repairability | Contact AEG service center for replacement parts; DIY repairs not recommended |
Frequently Asked Questions - AR 4026 AEG
User questions about AR 4026 AEG
0 question about this device. Answer the ones you know or ask your own.
Ask a new question about this device
Download the instructions for your Car radio in PDF format for free! Find your manual AR 4026 - AEG and take your electronic device back in hand. On this page are published all the documents necessary for the use of your device. AR 4026 by AEG.
USER MANUAL AR 4026 AEG
Overview of the Components....Page 3
Instruction Manual......Page 24
Safety Information......Page 25
Road Safety Page 25
Safety Information when installing and connecting the radio....Page 25
Important Information for installing your carradio!...... Page 26
Installation......Page 27
Connection Page 27
Operating Instructions Page 28
Starting up Page 28
Operation (Illustration 2: Control Panel)...... Page 29
PTY Selection of the Programme Type......Page 30
TA Traffic Announcement (Radio traffic service) ...... Page 31
AF (Alternative Frequencies) REG Function ...... Page 31
EON Function......Page 31
Touch-Screen Page 31
Telephoning via Bluetooth Page 35
Music Playback via A2DP (Advanced Audio Distribution Profile)...... Page 37
About the DVD-Player Page 37
DVD Playback Menu....Page 38
Dual Operation......Page 39
Technical Data......Page 39
Troubleshooting Page 39
Handling a CD/DVD Page 40
Index Page 42
Overview of the Components
4 Deutsch
D-47906 Kempen/Germany
Illustration 1: Remote Control
1 ▶ ||:
CD/MP3/DVD mode: Starting playback, stopping picture/track.
2 Bluetooth:
– Short press: To switch off the sound.
- Long press: Select Bluetooth mode.
3 MENU:
Call up the device menu. Read an explanation of the touch-screen menu in the „Touch-Screen" section on page 31.
4 SUB-T:
For changing the subtitle languages in DVD mode (if available).
5 SETUP: To start the setup menu.
6 /ANGLE:
Accept incoming call. To select the viewing angle (if available).
7 /INT:
For ending a call or rejecting an incoming call. In CD/USB/CARD mode: the first 10 seconds of each piece of music are played.
8 A-B/ZOOM:
Choose a passage to repeat. For zooming in and out in DVD Mode. Keep the button pressed down repeatedly in order to set the various zoom modes.
9 SEL: Display the sound menu.
10 AUDIO/GOTO:
DVD Mode:
Change audio languages (depending on the DVD).
Select a passage of a DVD or piece of music directly.
11 Numerical buttons:
a) Radio Mode:
Short press (0-6): Station selection.
- Long press (0-6): Station storage.
b) CD/MP3/DVD mode:
For direct selection of chapter or song number.
12 DUAL:
Switch between C/D dual and normal operation. Read an explanation in the "Dual Operation" section on page 39.
13 OPEN/TILT:
– Short press: extend/retract touch-screen monitor.
- Long press: change the viewing angle.
14 OSD: CD/MP3/DVD Mode:
CD/MP3/DVD Mode: Switching the display.
In radio mode:
briefly display the frequency and PTY program type.
15 ▼PBC:
Stop playback. Activate/deactivate Playback Control with VCD.
16 VOL +/-:
To increase/reduce the volume.
SEEK+/▶▶I:
Radio mode: Manual channel Search.
CD/MP3/DVD Mode: To jump to the next chapter or song.
SEEK-/I ◀:
Radio mode: Manual Station Search.
CD/MP3/DVD Mode: To return to the previous chapter or song.
17 AF/TA:
In radio mode:
– Short press: switch radio traffic service on/off.
- Long press: switch alternative frequency on/off.
18 SCN/RPT/#:
a) Radio Mode:
- Short press: The stations of the current frequency band are heard for 5 seconds.
- Long press: Automatic station storage.
b) DVD Mode: To repeat title, chapters, etc.
c) USB/CARD mode: repeat a single piece of music, pieces of music in the current folder or all pieces of music.
d) In Bluetooth mode: hash key
19 PTY/*
a) In radio mode: select program type.
b) In Bluetooth mode: asterisk key
20 EJECT: Eject CD/DVD.
21 Cursor buttons: Navigation in screen menu.
22 ENTER: Confirming the input.
23 BND/C/RDM:
a) Radio Mode: Switching the 3 FM and 2 MW levels.
b) CD/DVD/USB/CARD mode: switch random playback on/off.
c) In Bluetooth mode:
Short press: the numbers are deleted individually.
Long press: all of the entered numbers are deleted.
24 switch device on/off.
25 MODE:
Operating mode selection (CD/DVD, AV, Radio etc.).
Illustration 2:
Control Panel - see Operation.
Instruction Manual
Thank you for choosing our product. We hope you enjoy using our product.

Safety Information
Read the operating instructions carefully before putting the appliance into operation and keep the instructions including the warranty, the receipt and, if possible, the box with the internal packing.
• Use the device only for the intended purpose. - The device should be installed in such a way that existing ventilation holes are not covered. - Never open the housing of the device. Incorrect repairs can constitute a considerable risk for the user. If the device is damaged it should not be used, but repaired by a specialist.
These symbols may be found on the machine and are intended to indicate the following:

The symbol with an exclamation mark should advise the user of important operation or maintenance instructions in the accompanying documentation.

Devices bearing this symbol work with a "class 1 laser" for tracing the CD/DVD. The built-in safety switches should prevent the user being exposed to dangerous laser light, which is invisible to the human eye, when the CD compartment is opened.
Under no circumstances should these safety switches be bypassed or manipulated, as this could result in a danger of exposure to the laser light.
Symbols in these Instructions for Use
Important information for your safety is specially marked. It is essential to comply with these instructions in order to avoid accidents and prevent damage to the machine:

WARNING:
This warns you of dangers to your health and indicates possible injury risks.

CAUTION:
This refers to possible hazards to the machine or other objects.

NOTE: This highlights tips and information.
English
Children and Frail Individuals
In order to ensure your children's safety, please keep all packaging (plastic bags, boxes, polystyrene etc.) out of their reach.

WARNING!
Caution! Do not allow small children to play with the foil as there is a danger of suffocation!
Road Safety

WARNING:
- Road safety is of paramount importance. You should therefore use your car radio at all times in such a way that you are able to cope with the current traffic situation.
- Please remember that at a speed of 30 mph (50 kph) you travel 15 yards (14 metres) in one second. • We advise you not to operate the radio in critical situations.
- It must be possible to hear the sirens of police and fire brigade vehicles etc. from inside the vehicle in good time.
- When driving you should therefore not turn the radio volume up excessively.
- For safety reasons a lock connected to the handbrake of the vehicle prevents certain functions of the device from operating when the vehicle is moving. In order to be able to use these functions please stop in a safe place and put on the handbrake.
- Please note that it is not permitted to operate the DVD player when the vehicle is moving or if the engine is running!
- In order to avoid serious road accidents, the device should be installed in such a way that you are not hindered when operating the steering wheel, gear lever etc. • Similarly, safety aspects such as airbags and your clear view of the road must not be obstructed either
- Under no circumstances should any additional monitor that is connected be installed in such a way that it can be seen by the driver when the vehicle is moving!
Safety Information when installing and connecting the radio
- First disconnect the minus pole and then the plus pole of the battery. (Connection in the reverse order.)

NOTE:
Please note: Once the battery has been disconnected, the information is lost from all volatile memory. Please note the safety information provided by the vehicle manufacturer.
- The main fuse must be installed as closely as possible (not more than 30 cm away) to the plus pole of the battery so that the car is protected from any cable fire caused, for example, by an accident. If the above is not complied with, the insurance protection no longer applies.
- The cross-section of the plus and minus cable must not exceed 1.5 mm².
Installation Tips:
- Cable protection sleeves protect cables against fraying on sharp body parts.
- The insulation of the cables must not be damaged during installation.
- It is essential to use the correct tools when installing car hi-fi.
Depending on the model, your vehicle may deviate from the above description. We do not accept any liability for damage caused by installation or connection errors or for consequential damage.
Important Information for installing your car radio!
- The device is designed for the minus pole of the battery, which must be connected to the body of the vehicle. Please check this before installation.
- When installing/connecting your device, please note that not every vehicle is equipped with an "ISO connection". In this case, we recommend the use of an ISO adapter specifically designed for your vehicle.
Adapters are available from car accessory shops and/or from your vehicle workshop.
- Depending on the specific car type, different wiring connections of the "Duration +" wire (constant current connection) are available. (However, this is necessary for storing the radio stations.)
In order to guarantee all functions, installation in line with these instructions is essential. In cases of doubt, please contact an authorized car workshop.
Due to the various types of motor vehicles and motor manufacturers, it is not possible to guarantee that the pin assignment of the ISO plug is correct, even if the ISO plug connections fit together mechanically. It may therefore be necessary to modify the electrical connection or use vehicle-specific adapters.
i NOTE:
If the device is correctly connected, the radio can be switched on and off via the ignition. If the stored stations are lost, this indicates that the radio is not receiving any "continuous +" current, which is required for storing the stations.
CAUTION:
Where there is a connection to "continuous +" without the ignition being switched on, the car battery might be drained of power even if the radio is switched off. This may even result in the battery becoming completely flat.
- The angle of inclination when a car radio is installed must not exceed 20°, as in the case of greater angles of inclination the function of the car radio (CD player) can no longer be guaranteed.
- Depending on the specific car type, interferences can possibly arise during radio/CD/DVD operation. These interferences can be avoided easily with an additional interference filter. Your car radio is originally prepared with an interference filter already.
In this case, please contact your authorized car dealer.
- When installing your radio, please ensure that there is enough space at the rear of the radio to ensure sufficient cooling.
- For the antenna connection, there are two different norms. The first of these is the old (50 ohm) version with a long protruding round contact on the vehicle and a round socket on the radio end. The second is the ISO-standardized antenna plug (150 ohm). Adapters for both formats are available from accessory manufacturers and/or your car workshop.
i NOTE:
Important information for VW/Audi vehicles: The antenna in your vehicle may be an active antenna. This requires a power supply which is only provided by the original car radio. If this is the case, use an antenna adapter for phantom power supply.
Antenna adapters can be found in car accessory outlets and/or at your car repair shop.
Installation
Please install the car radio as shown below.

a Nut
b Spring washer
c Plain washer
d Screw
e Mounting bracket
f Slide-in housing
g Threaded bolt

h Extraction tool (spanner for dismantling) i Frame

Place the control panel in the correct position and then lock this into place on the left-hand side.
Connection
Connect the device as shown in the diagram.
![graph TD A["Antenna connection"] --> B["ISO connection"] B --> C["Constant current connection + Earth"] C --> D["Yellow fuse 15A"] C --> E["Black fuse 1A"] C --> F["Ignition + Automatic antenna (Blue)"] F --> G["Loudspeaker front left"] F --> H["White/Black"] F --> I["Green"] F --> J["rear left"] B…](/content/2026/06/1253631/images/6e76eb1fa6774fe7977342100d5a6c9ad333499c6d1c68bdb6fcfd103099664b.jpg)
CAUTION:
- Do not attach the removable control panel until after connection of the cables.
- Please use loudspeakers with an impedance of 4 ohms. • The loudspeaker cables must be unearthed. • If a subwoofer is connected, an amplifier is required.
- The earth connection cable (PARKING) must be connected in order for DVD pictures to be played back to the monitor. If the cable has not been properly connected, the message "WARNING! ENJOY SOUND ONLY WHILE DRIVING" appears.
28 English Operating Instructions
- If the front control panel is removed during operation, the device continues playing for a few more minutes and then switches off automatically.
- Any errors (ERROR) occurring during operation can be corrected by pressing the RESET button. Use a piece of wire or similar item to press the RESET button (18) in order to return the electronics to its original state.
- If the interior of the vehicle becomes very hot, for example after standing in direct sunlight for a prolonged period, do not switch on the player until the inside of the vehicle has cooled down a little after you have been driving for a few minutes.
- In order to keep the removable control panel in a safe place, you should always use the protective case provided.
- Playback of CDs/DVDs produced by the user cannot be guaranteed due to the large variety of software and CD/DVD media available.
- Playing back video files via USB or memory card: In rare cases, short-term audio or video interference may occur during playback of video files via USB or memory cards. Due to the different compression methods and bit rates depending on the content of the picture, the flow of data may be "sluggish". Should there be problems with playback, stop the file by using the Pause button. Wait a few seconds and start playing the file again.
Starting up
Remote control battery installation
WARNING:
Leaking battery acid can damage your health. Remove the battery from the battery compartment as soon as it is exhausted or if the remote control is not going to be used for a longer period of time. Wipe up leaked battery acid with a cloth. In case of skin contact, immediately wash the affected area. Seek medical advice if battery acid has been swallowed. In case of contact with your eyes, wash out the eyes and seek medical advice.
CAUTION:
When disposing of old batteries, you should strictly comply with the legal and environmental regulations applicable in your country. Do not throw batteries into fire!
NOTE:
- The lithium cell in the battery compartment of the remote control has been secured for transport with
a foil. Before initial use, please remove this foil so that the remote control is ready for operation.

- The lifetime of the enclosed battery may be shortened because of storage.
The battery of the remote control is a long-life lithium cell. If the range of the remote control is reduced during use, please proceed as follows:
- Open the battery compartment on the back of the remote control.

- Replace the cell with a battery of the same type (CR 2025). Ensure correct polarity.

- Then close the battery lid.
If the remote control is not used for a prolonged period, remove the batteries to prevent battery acid leaking.
WARNING:
Do not expose the batteries to high temperatures or direct sunlight. Never throw batteries into the fire. There is a danger of explosion!
CAUTION:
Batteries are not to be disposed of together with domestic wastes. Dispose of the used batteries at the relevant collection bin or at your dealer's.
NOTE:
The signals from the remote control are transmitted to the device by infrared light. You should therefore ensure that the device is not in direct sunlight. This might make transmission of the signals from the remote control to the device impossible.
Effective range of the remote control
Point the remote control at the remote control sensor on the right next to the display on the front of the device. The distance between remote control and sensor should not exceed 5 m. The angle of the remote control to the remote control sensor to right, left, top and bottom should not exceed 30°.
Operation (Illustration 2: Control Panel)
i NOTE:
Some keys are found not only on the device, but also on the remote control and touch-screen. Keys with the same designation have the same function.
1 Touch Screen
In addition to operation by means of the keys on the device and the remote control, it is also possible to use the "touch-screen". Here you can lightly touch the key shown with your finger. Read an explanation of the touch-screen menus in the "Touch-screen" section on page 31.

CAUTION:
Do not obstruct the touch-screen while it is being retracted or extended. This could result in damage to the monitor mechanism.
2 MIC (Microphone)
During a telephone call you should speak in the direction of the built-in microphone.
3 ▲ Eject Button
Press this button to eject the CD/DVD.
4 OPEN Button
For retracting and extending the touch-screen monitor.
5 USB Connection
If you would like to play back data contained on a USB stick, please insert the stick into the opening provided. The word USB PLAY appears in the display. The data is played back automatically.
i NOTE:
- Due to the large number of different types of USB storage media that are available today, it is unfortunately not possible to guarantee full compatibility with all USB storage media. For this reason, there may in rare cases be problems with the playback of USB storage media. This is not a malfunction of the device.
- Should the USB storage device not be automatically selected, press the MOD button again.
i NOTE:
- To select a specific track, navigate using the cursor buttons in the File menu and select the track with ENTER.
- Please note: The USB connection is only designed for playing back data from storage devices and not for charging other external devices (such as smartphones). Only a low power (100 mA) power supply can be guaranteed. This USB connection is not designed for the use of e.g. external 2.5" hard drives, which may have starting currents of up to 1100 mA. For playback with your smartphone, iPod or iPhone, please use the AV IN socket provided, unless music playback via Bluetooth is supported.
6 AV IN Jack
To connect analogue replay devices. Using this socket, it is possible to hear the sound of other playback devices such as MP3 players, CD players, etc. through the loudspeaker.
- Please connect the external device with a 3.5 mm stereo jack plug to the AV IN socket.
- Press the MOD button (13) repeatedly until "AV IN" appears in the display.
- You now hear the sound from the external device played back through the loudspeakers.
- With the multifunction controller (11), you can change the volume.
- For the remaining procedure, please see the operating instructions of the external sound source.
NOTE:
- Adjust the volume of the external device to a comfortable level.
- With the help of the adapter cable supplied you can also play back the picture and sound of other playback devices such as cameras, video players etc. Connect the playback device in accordance with the coloured cinch connectors of the adapter cable (red = audio right, white = audio left, yellow = video).
7 LCD Display (liquid crystal display)
8 IR (Infrared)
Sensor for the remote control.
9 ▶▶▶ Button
a) In Radio mode: For manually setting the radio station. b) In CD/DVD mode: To jump forwards, press the key briefly. To spool through the titles, keep the key pressed down. c) In Bluetooth mode: In order to end a call or reject an incoming call.
10 ▶II Button
Press the ▶II button to interrupt playback of the CD/DVD (pause function). Press this button again to continue listening to the CD.
30 English
NOTE:
Playback of CDs produced by the user cannot be guaranteed due to the large variety of software and CD media available.
Playing back Music in MP3 Format
With this device it is possible to play back pieces of music in MP3 format. The device also supports all standard CD types: CD, CD-RW, CD-R.
This machine can play MP3 CDs. Up to 200 tracks can be compressed and stored on these CDs. Your machine detects an MP3 CD automatically (MP3 appears in the display).
Please note:
There are a number of different recording and compression methods, as well as quality differences between CDs/DVDs and self-recorded CDs/DVDs.
Furthermore, the music industry does not adhere to fixed standards (copy protection).
For these reasons it is possible that in rare cases there are problems with the playback of CDs/DVDs and MP3 CDs. This is not a malfunction of the device.
11 VOL Multifunction controller
(Volume / Switch the device on/off)
Turn:
In the standard playback mode the Multifunction controller is used for adjusting the volume.
Short press:
to switch the device on or off.
Long press:
to switch between dual and normal operation.
12 I Button
a) In radio mode:
to set a radio station manually.
b) In CD/DVD mode:
to jump backwards, press the key briefly. To spool through the titles, keep the key pressed down.
c) In Bluetooth mode:
to accept an incoming call.
13 MOD Button
Press this key repeatedly to select the radio, CD/DVD, USB, SD, Bluetooth and AV IN mode.
i NOTE:
The CD/DVD, USB and CARD Mode can only be selected if you have connected or inserted the corresponding storage device.
14 (Mute) Button
Switches off the volume quickly. "VOL MUTE" appears on the display. To cancel this function, press the
button again.
15 REL Button
Press the REL key to remove the front control panel.
16 BND/TILT Button
Radio Operation
Short press:
Briefly press the BND/TILT button to switch between FM (FM) and AM (medium wave) bands. The designation of the corresponding level F 1, F2, F3, M1, M2 appears in the LCD display.
Long press:
For adjusting the viewing angle when the touch-screen monitor is extended (ANGLE 1-4).
17 CD/DVD Slit
Insert the CD/DVD with the labelled side facing upwards gently into the CD/DVD slot until the device draws in the CD/DVD automatically.
CAUTION:
Only 12 cm discs can be played with this device!
18 RESET (Reset)
See Section "Operating Instructions" point 2 on page 28.
19 SD/MMC Card Slot
i NOTE:
The large number of different memory cards which are available today mean that it is unfortunately not possible to guarantee full compatibility with all memory cards. For this reason it is possible that in rare cases there may be problems with the playback from memory cards. This is not a malfunction of the device.
- Remove the control panel by pressing the REL (15) key.
- Push a memory card with the writing facing upwards into the card slot until it clicks into place. Then put the control panel back into position. "SD PLAY" appears in the display. Playback of the MP3 or WMA titles on the memory card begins automatically.
Press down the SD/MMC Card again to remove it.
i NOTE:
- Should the memory card not be automatically selected press the MOD button again.
- To select a specific track navigate using the cursor buttons in the File menu and select the track with ENTER.
PTY Selection of the Programme Type
Besides the station name, some FM stations also transmit information on the type of programme. This information can be displayed by your car radio.
Examples of such types of programme are:
With the PTY function you can specifically select stations transmitting a particular type of programme. Press the PTY button, to activate the function. Then choose between the six types of program displayed on the touch-screen. SEARCH
is displayed on the touch-screen and the selected program type flashes.
i NOTE:
If you do not make your selection after approximately 5 seconds, the list disappears again.
When PTY has been selected the radio starts searching for corresponding PTY information and stops when the PTY information has been found.
If the searched program type is not found, the device returns to the last listened to radio station. "PTY NONE" flashes in the display.
If the PTY information being searched for no longer exists, the PTY function automatically switches to normal mode.
TA Traffic Announcement (Radio traffic service)
(Priority for Traffic Information)
The TA function is activated by pressing the AF/TA button briefly. The TA symbol appears in the display. During radio operation in one FM frequency band the search for a traffic announcement station is started automatically (SEEK).
If an FM station is being received which transmits the latest traffic announcements from time to time, the TP display lights up.
When the TA function is switched on, the FM traffic announcements automatically interrupt CD/USB/CARD/BT operation (The word TRAFFIC appears in the display).
i NOTE:
The volume of the traffic announcements can be adjusted using "TA VOLUME" in the "RADIO" settings menu.
After the traffic announcement has finished, the programme that was previously running is resumed.
Interruption of the TA Function:
If you would like to interrupt the current traffic announcement, press the AF/TA button briefly. The TA mode is switched off as a result.
AF (Alternative Frequencies) REG Function
AF is a function that works with the help of RDS (Radio Data System) and can only be used with FM stations. The radio searches in the background for the best frequency reception of the station that has been tuned into.
If the AF function has been switched on, the radio continuously tests the signal strength of the AF frequency. The test interval for each AF frequency depends on the signal strength of the current station and varies from a few minutes in the case of a strong signal to a few seconds in the case of weak signals. Whenever the new AF frequency is stronger than the station that is currently set, the device changes over
English
to this frequency for a short time. As the mute time during the frequency change and the test time is very short, this is almost inaudible during the normal programme.
The AF function is activated by holding down the AF/TA button and the status of the AF function is indicated by an AF symbol in the display.
- If the AF symbol appears in the display, the AF function is switched on and RDS transmission data is being received.
- If the AF symbol flashes in the display, the AF function is selected but no RDS signal can be received at the moment.
- Press the AF/TA button long again to switch off this function. The AF symbol in the display goes off.
EON Function
The device can receive RDS EON data. EON refers to the transmission of additional station information within a transmitter chain. In the case of a traffic announcement (TA) the device changes within a transmitter chain from a station without radio traffic service to a corresponding station with radio traffic service in the transmitter chain.
In the "RADIO" settings menu you can select between the following options:
- DX: the device attempts to obtain the EON TA information from a station that is within range and thereby improve the reception quality.
- LOCAL: switching over to a station whose signal level is too weak is prevented.
Touch-Screen
The individual menus are displayed via the touch-screen. The following settings can be carried out or changed. Change the settings by lightly touching the screen with your finger.
Main Menu
• RADIO: select radio mode • DISC: select CD/DVD mode • USB: select USB mode • SD: select CARD mode - BLUETOOTH: select Bluetooth mode • AV-IN: select audio/video input • SETTING: call up the settings menu
32 English
NOTE:
You can also call up the main menu with the MENU key (3) on the remote control.
Radio Operation
- AF: switch an alternative frequency on and off. For an explanation of the function see page 31. TA: priority circuit for switching radio traffic service on and off. For an explanation of the function see page 31.
- PTY: selection of the program type. For an explanation of the function see page 31. S/M: switching between stereo and mono.
LOC:
- LOCAL: reception is improved in regions where the signal is too strong. The letters "LOC" appear in the display.
- DX: reception is improved in regions where the signal is too weak. The letters "LOC" go off in the display.
or turning off the volume quickly.
- - 50 +: reduce the volume / current volume / increase the volume
BAND: switching between the 3 FM and 2 MW levels.
AS/PS:
Short press: the stations in the current frequency band are heard for 5 seconds.
Long press: automatic station storage.
- Search function with the frequency descending to the next station.
- ◀: manual search function with the frequency descending in 0.05 MHz steps.
- ▶: manual search function with the frequency ascending in 0.05 MHz steps.
- ▶▶1: search function with the frequency rising to the next station.
• 1-6: station buttons
- MENU: call up the device menu.
DVD Playback Menu
See the section "DVD Playback Menu".
USB/SD/MP3 CD Menu
- INT: intro function.
- Press once: all of the pieces of music in the current folder are played for 10 seconds. INTRO DIR appears briefly in the display.
- Press twice: all of the pieces of music on the storage medium are played for 10 seconds. INTRO ALL appears briefly in the display.
- Press three times: the intro function is deactivated. INTRO OFF appears briefly in the display.
• RPT: repeat function.
- Press once: repeat the current piece of music. RPT 1 appears briefly in the display.
- Press twice: repeat the current folder. RPT DIR appears briefly in the display.
- Press three times: repeat everything. RPT ALL appears briefly in the display.
• RDM: random playback.
- Press once: random playback of the current folder. RANDOM DIR appears briefly in the display.
- Press twice: random playback of all files. RANDOM ALL appears briefly in the display.
- Press three times: random playback is deactivated. RANDOM OFF appears briefly in the display.
• /: call up the previous or next page.
- MDC: switches the display between MP3, video and image files (if these are contained on the storage medium).
• For switching off the volume quickly.
- -22 +: reduce the volume / current volume / increase the volume.
- ■: stop playback.
- ▶II: stop playback. Press the key again to continue playback.
• jump to the previous chapter.
- ◀◀/▶▶: start fast rewind or fast forward. Press one of the keys again to change the spooling speed. Press the ▶II key to start normal playback.
• ▶: jump to the next chapter.
Bluetooth Menu
See the section "Telephoning via Bluetooth".
AV-IN Menu
In AV-IN mode, touch the screen to display the menu.
• ▼/▲: select the viewing angle of the touch-screen.
• display the device menu.
Settings Menu
In this menu you can change the default settings for the device. The respective submenu is shown on the left-hand edge of the screen.

NOTE:
- You can also call up the settings menu with the SETUP key (Fig. 1/5) on the remote control.
- In some menus the settings are spread over two pages. Tap the ☑ key on the touch-screen in order to display the other settings.
SOUND

- EQ: Here you can set the desired sound characteristics. You can choose between: FLAT, CLASSIC, POP, ROCK and USER.
- BASS/TREBLE: Here you can set the bass and treble levels. If sound characteristics other than USER are selected, the device switches over to USER when adjustments are made here. • BALANCE: Select the balance between the right-hand and left-hand loudspeakers.
- FADER: Set the cross-fading between the front and rear loudspeakers.
- BEEP: Here you can set the beep when a key is pressed.
- OFF: no beep
- 2ND: A beep is heard if a key with more than one function is held down.
- ALL: A beep is heard whenever a key is pressed.
- LOUDNESS: Switch the loudness function on (ON) or off (OFF). • SUBWOOFER: Switch the subwoofer on (ON) or off (OFF).
DISPLAY

- SCREEN: Here you can select the aspect ratio of the screen. Choices available: 4:3, 16:9 and FULL.
- BACKLIGHT: Here you can set the brightness of the touch-screen. Select between LOW, MID (medium) and HIGH).
RADIO

• AREA: Here you can set the region in which the device is being operated. • STEREO: Switch stereo operation on (ON) or off (OFF). - LOCAL:
- OFF: In regions where the signal is too weak the reception is improved. The letters "LOC" go off in the display.
- ON: In regions where the signal is too strong the reception is improved. The letters "LOC" appear in the display.
• TA VOLUME: Here you can set the volume of the traffic announcements. - RETUNE: Select the period of time for the automatic station search function with traffic announcements or program information:
- SHORT: after approximately 30 seconds
- LONG: after approximately 90 seconds
- PI: If you travel through an area in which two stations can be received with the same AF but different PI codes (PI = program information), reception becomes unstable. In this situation you have the choice between:
- SOUND: If switching should take place between the two stations the sound of the other station is heard for less than one second.
- MUTE: The sound of another station is suppressed.
- REGION: Some stations divide up their programs at certain times into regional programmes with varying content.
– OFF: The multiregional programs are also heard. - ON: Only the regional programs of the station are heard.
- MASK: For setting which stations should be excluded during the station search:
- DPI: Alternative frequencies with a different PI code are excluded from the search.
- ALL: Alternative frequencies with a different PI code and without RDS information with a high signal level are excluded.
- EON TA: Switches between the EON functions "DX" and "LOCAL". For an explanation of the function see page 31" • TA: Traffic announcements settings
- SEEK: When the TA function is activated the device attempts to tune into a station transmitting traffic announcements.
- ALARM: There is no automatic station adjustment. If no traffic announcements are being received an alarm is heard and NO TP/TA appears in the display.
GENERAL

- DUAL: Select between dual (ON) and normal operation (OFF). For an explanation of the function, see page 39.
- KEY: In dual operation, you can select between CURRENT and DVD. TILT MODE:
- AUTO: The touch-screen is automatically retracted when the radio is switched off.
- MANUAL: The touch-screen is not automatically retracted when the radio is switched off.
- TILT ANGLE: Select the viewing angle of the touchscreen.
- CLOCK DISPLAY: Select ON to show the time on the touch-screen. When turned to OFF, no time is displayed.
- CLOCK HOUR: Select between the 12-hour and 24-hour clock. If the 12-hour clock is used, the following appear on the screen: AM = before noon, PM = after noon.
- CLOCK SETTING: Here you can set the clock manually if necessary. AUTO CONNECT: Automatic Bluetooth connection to a previously connected mobile telephone.
- OFF: The mobile telephone has to be connected manually to the car radio.
- ON: The mobile telephone is connected automatically to the car radio (if your mobile telephone supports this function).
DVD

- OSD LANG: Here you can select the language of the DVD OSD menu.
- SUBTITLE LANG: Here you can select the preferred language of the film's subtitles. AUDIO LANG: Here you can select the preferred language for the sound.
- DVD MENU LANG: Here you can select the preferred language for the DVD menu.
PASSWORD: Here you can change the password for the parental control (RATING). The settings for the parental control are protected by a password so that these can only be changed by you. In order to change the password, you have to enter the current password. The master password is "8888".
NOTE:
If you have forgotten your password, you can use the master password to deactivate the parental control.
Please proceed as follows in order to change the password:
- Touch the lock symbol on the touch-screen. The PASS-WORD window appears on the screen. Enter the current password with the number keys. In order to prevent unauthorised persons from reading the password, only the symbols "****" appear on the screen. Confirm your entry with OK.
- Touch the lock symbol again on the touch-screen. Enter the new password. Confirm your entry with OK.
- RATING: Many DVDs provide information on the target group. The procedure here is similar to that of the certification system for cinema films ("Suitable for children aged 12 and over" for example).
If you have activated the child protection option, the corresponding information is read out from the DVD, if available, and compared with your pre-set value. If the DVD is intended for an older age group than that which has been pre-set by you, the DVD cannot be played.
The following child protection options can be selected after the password lock has been unlocked:
- 1 KID SAFE: Suitable for children.
- 2 G: Suitable for all age groups.
- 3 PG: Parental supervision is recommended. Some parts of the film may be unsuitable for small children.
- 4 PG 13: Parental supervision is strongly recommended. Some parts of the film may be unsuitable for children under the age of 13.
- 5 PG-R: Parental supervision is necessary.
- 6 R: Young people under the age of 17 may only see the film if accompanied by an adult.
- 7 NC17: Children and young people under the age of 17 may not see the film.
- 8 ADULT: The film may only be seen by adults.
After you have entered the settings, you have to lock the password lock again so that unauthorized individuals cannot change the settings again.
- TV SHAPE: Here you can select the aspect ratio of the DVD player. Note: the 4:3PS setting is not supported by all DVDs.
- NTSC/PAL: Here you can adjust the output of the color transmission system.
- DEFAULT: The DVD menu is returned to the factory settings.
SYSTEM INFO

- The different version numbers of the device are displayed. • CALIBRATION: Here you can carry out the screen calibration.
- In the calibration window, touch the crosshairs for approximately 1 second lightly with your finger. The next crosshairs appear.
- Follow the same procedure as described above for the other three corners.
- Once the calibration has been completed, the device switches back to the previous operating mode.
Telephoning via Bluetooth
Bluetooth is a technology used for the wireless connection of devices via radio over a short distance. Bluetooth technology enables the hands-free operation of mobile telephones. This means that while driving the car it is possible for the driver to conduct a conversation on his or her mobile telephone without having to hold it to his or her ear.
This device offers you the possibility of using a mobile phone which is Bluetooth-compliant. The function radius is limited to approximately 3 m, depending on the device.
Obtaining optimum sound quality during a telephone call
Do not set the volume too high. Otherwise feedback (a whistling sound) from the loudspeakers could be the result.
i NOTE:
The volume setting depends on the installation positions of the loudspeakers relative to the microphone, so that it is not possible to specify it here.
Selecting Bluetooth mode
There are various ways of selecting Bluetooth mode.
- Press the MODE key (Fig. 2/13) on the device or remote control (Fig. 1/25) repeatedly until BT MODE appears in the display (Fig. 2/7) BT MODE.
- Hold down the "Bluetooth" key (Fig. 1/2) on the remote control.
- On the touch-screen tap the word "MENU" or press the MENU key (Fig. 1/3) on the remote control in order to call up the device menu. Touch the BLUETOOTH key on the touch-screen.
Pairing devices (PAIRING)
Before you can use the car radio to telephone, you have to register the devices with one another.
- Select the Bluetooth menu on your mobile telephone and register the car radio on your mobile telephone. Please consult the operating manual of your mobile telephone. The device "SCE_DVD" appears for selection on your mobile telephone.
- Depending on the device manufacturer, models and software versions, you should now enter the password "0000" in your mobile telephone.
- If the registration has been completed successfully, the name of your mobile telephone appears in the display of the car radio. The “✗” symbol appears in the display (Fig. 2/7).
i NOTE:
- If the registration has not been completed successfully, the words “Not Connected” appear on the touchscreen (Fig. 2/1), and the “BT” symbol and “Pairing” flash.
- Depending on the mobile telephone manufacturer, you may have to repeat the registration (PAIRING) process in order to register your mobile telephone in the car radio.
- Bluetooth compatibility cannot be guaranteed for mobile telephones which are launched on the market in the future.
- In order to guarantee an optimum connection, please ensure that the battery of your mobile telephone is fully charged.
- Some mobile telephone brands have an energy-saving mode. Please deactivate the energy-saving mode, as otherwise there may be problems when telephoning via Bluetooth.
- In order to be able to conduct an incoming or outgoing telephone call, Bluetooth has to remain activated on your mobile telephone. Please consult the operating manual of your mobile telephone.
- Please ensure that you speak in the direction of the built-in microphone (Fig. 2/2). It is not possible to connect an external microphone.
Separating devices
The devices are separated when you switch off the car radio via the ignition or on the device itself.
Reconnecting devices
This device has an automatic reconnection function.
The precondition for this is:
• the devices have already been paired with one another - Bluetooth is activated in your mobile telephone - your mobile telephone supports this function.
After the car radio has been switched off and on again, either by the ignition or on the device itself, the renewed automatic connection is activated. This may take a few seconds. The word "Connecting" is shown on the touch-screen (Fig. 2/1).
Once the connection has been successfully established, the name of your mobile telephone appears in the display of the car radio.
Ending a telephone call
In order to end an outgoing or incoming telephone call, please press one of the following buttons:
• ▶▶1 (Fig. 2/9) on the device • JNT (Fig. 1/7) on the remote control • on the touch-screen of the BT menu
CALL END appears on the touch-screen.
i NOTE:
In order to reject an incoming call you can also press one of the above buttons.
Bluetooth menu
The submenus CALLING, MUSIC, HISTORY and PHONE BOOK are shown on the left-hand edge of the touch-screen.
- CALLING
In this menu
i NOTE:
If you have entered one or more numbers incorrectly, you can delete the numbers with the BND/C/RDM (Fig. 1/23) key or with "CLEAR" on the touch-screen.
- Short press: the numbers are deleted individually.
- Long press: all of the numbers that have been entered are deleted.
- MUSIC
In this menu you can control music playback. See the section on "Music Playback via A2DP (Advanced Audio Distribution Profile)" on page 37.
• HISTORY
If this is supported by your mobile telephone, you can access the dialled, received and missed calls on your mobile telephone. By pressing the green key "or with "SEND" on the touch-screen you can call the selected telephone numbers.
i NOTE:
If this function is not supported by your mobile telephone, DOWNLOAD FAIL. is shown briefly on the touch-screen.
DIALED Here you can display the last telephone numbers that have been dialled.
RECEIVED Here you can display a list of the last telephone numbers received.
MISSED Here you can display the calls received in your absence.
- PHONE BOOK
If this is supported by your mobile telephone, you can access the telephone numbers stored on your mobile phone. By pressing the green key or with "SEND" on the touch screen you can call the selected number.
i NOTE:
If this function is not supported by your mobile telephone, "Download Fail." is shown briefly on the touch-screen.
Outgoing calls
- Select Bluetooth mode.
- The telephone number you are calling is entered via the number keys. The number entered is shown on the display of the car radio.
i NOTE:
If you have entered one or more numbers incorrectly, you can delete the numbers with the BND/C/RDM (Fig. 1/23) key or with "CLEAR" on the touch-screen.
• Short press: the numbers are deleted individually. - Long press: all of the numbers that have been entered are deleted.
- In order to call the desired number, then press the green key or with on the touch-screen. The word CALLING is shown on the touch-screen and then TALKING HANDS FREE.
Re-dialling
The device stores the last telephone number that has been dialled. In order to call this up, please proceed as follows:
- Press the green key (on the device or remote control) or on the touch-screen. The words LAST CALL and the last telephone number that was dialled are shown in the display
- Press the green key again or in order to dialled the number.
Incoming telephone calls
In the case of incoming telephone calls a ringing tone is heard from the loudspeakers and - if the caller has a telephone which supports CLIP "Calling Line Identification Presentation - the caller's number appears in the display of the car radio . Otherwise the word RINGING appears in the display.
- In order to receive an incoming telephone call, press the key or You can then hear the caller through the loudspeakers in your car.
Transferring telephone calls between the car radio and mobile telephone
It is possible to transfer a call back to your mobile telephone.
- In order to do this, press the "TRANSFER" key on the touch-screen. CALL TRANSFER appears on the display (Fig. 2/7). The car radio activates the MUTE mode.
- Press this key again to transfer the call to the car radio.
Music Playback via A2DP (Advanced Audio Distribution Profile)
This is a manufacturer-independent Bluetooth profile. By means of streaming, stereo audio signals are transferred without a cable connection between the playback device (source) and receiving device. In order that the source can be remotely controlled, the playback device must support the AVRCP profile (Audio Video Remote Control Profile).
Due to the large number of different device manufacturers, models and software versions, it is not possible to guarantee full functionality.
- After you have connected the devices to one another, start music playback with the ▶II key. Depending on the device manufacturer, models and software versions, you have to start music playback on your mobile telephone beforehand.
- With the ▶▶I/▶◀ keys you can select the next or previous music tracks.
- With the ▶II key you can interrupt music playback.
- With the ■ key you can stop playback.
About the DVD-Player
With this DVD-Player you can play a vast variety of DVD formats ⇒ "Technical data".
However, you must be aware that in many cases DVDs are encrypted with a so-called "Regional Code". This specifies for which region in the world the DVD is intended. As an example, the DVDs marked with regional code "1" are intended for the USA and Canada. DVDs with regional code "2" are for use in Europe.
NOTE:
With your DVD player, you can only play DVDs with regional code "2". There are many burning and compression methods, as well as high quality differences in (burned) CDs/DVDs. Moreover, the music industry has not yet agreed on a fixed standard for copy protection. This may, in very isolated cases, result in problems when playing CDs, DVDs, and MP3 CDs. This is not a malfunction of the player.
Furthermore, there may be isolated problems when playing CDs or DVDs that were created on a PC (e.g., holiday photographs). In case of problems, check the settings of the DVD writing program on your computer. You should in particular make sure that the DVD has been finalized. For further information on this matter, please refer to the operating manual of your recorder.
Terminology
- Track: "Track" means the sections of an Audio CD. This may be, for example, a song, the suite of a symphony, etc.
English
37
- Title/Chapter: Video DVDs are subdivided into "Title" and "Chapter". A "Title" may be, e.g., a specific film, while the "Chapter" may be subsections of this film.
- MPEG4: Also suitable for playing back files that are MPEG-4 (short for Moving Picture Experts Group-4) compressed. MPEG-4 is a compression method through which a large amount of data can be reduced without a noticeable loss of picture and sound quality.
NOTE:
Full compatibility with globally available compression methods cannot be guaranteed, in particular if there are several sound tracks or subtitles in play. Even MPEG-4 files with integrated special functions such as menu, subtitles, etc. are not always supported. This is not a malfunction of the device.
Input Not Possible
If an input or function selected by you is not possible, the words "INVALID KEY" appear on the screen.
Using the DVD Menu
Normally each DVD has its own menu. Here you can choose the chapter, make settings, etc. This menu is specific for the DVD and can thus not be explained in detail.
Tap the touch-screen to call up the DVD playback menu. Press the MENU button to access the DVD menu. Select an option in the menu by tapping the touch-screen, or navigate using the arrow keys (Fig. 1/21). Press the ENTER button (Fig. 1/22).
If you are in a menu area for direct chapter selection, you can enter the chapter number using the numerical buttons (Fig. 1/11) on the remote control.
Changing audio language
Press the AUDIO/GOTO button (Fig. 1/10) several times to change the audio language. The available audio languages depend on the DVD.
Showing subtitles
Press the SUB-T button (Fig. 1/4) to display the current subtitle status. Press the button several times to activate or deactivate the subtitle function or to choose a different subtitle language. The available subtitle languages depend on the DVD.
Stopping playback
- Press the "■/PBC" button (Fig. 1/20) during playback. The playback stops.
- Press the "▶II" button (Fig. 1/1) again to continue playback from the last position.
- Press the "■/PBC" button (Fig. 1/20) twice to stop playback completely. Press the "▶II" button (Fig. 1/1) again to replay the CD/DVD from the beginning.
Selecting previous chapter/track
Press the "I◀SEEK-" button (Fig. 1/16) to jump to the start of the previous chapter or track.
Selecting next chapter/track
Press the "▶▶I SEEK+" button (Fig. 1/16) to jump to the start of the next chapter or track.
Selecting track directly
Enter the number of the desired chapter/track with the Numerical Buttons on the remote control (Fig. 1/11).
Replay of the track starts after a short while.
Using fast forward or reverse
The DVD-Player has a fast forward and a fast reverse feature.
- Quickly press ▶I SEEK+ (Fig. 1/16) or ◀ SEEK- (Fig. 1/16), to start fast forward or fast rewind. The current replay direction and the speed, e.g. "FF X 2" is now displayed on screen.
- Quickly press the ▶I SEEK+ or ◀ SEEK- button repeatedly, to change the speed. The speed can be accelerated by factor 2x, 4x, 8x or 20x.
- Press the "▶II" button (Fig. 1/1) to restart the "normal" replay when the desired section is reached.
Start Passage via the menu
You can conveniently control any passage of a medium using the screen menu. Proceed as follows:
- Hold down the AUDIO/GOTO (Fig. 1/10) key. The menu appears on the screen.
- Now enter the point from which playback should start. Use the numerical buttons (Fig. 1/11) to enter the point. Then press the ENTER button (Fig. 1/22).
Enlarging a screen section
You can change the screen section when viewing DVDs, VCDs or images.
Hold down the A-B/ZOOM (Fig. 1/8) key in order to change the image section. Hold down the key again to select the appropriate zoom factor or return to the original zoom factor.
i NOTE:
With the cursor buttons (Fig. 1/21) you can move through the zoomed image.
Changing the viewing angle
Some DVDs offer the possibility to select the viewing angle.
Press the 7ANGLE button (Fig. 1/6) to change the viewing angle.
i NOTE:
If changing the viewing angle is not possible, the message "INVALID KEY" will be displayed.
Repeat pressing the button to choose a different viewing angle, or to return to the original viewing angle.
DVD Playback Menu

Tap the screen during playback in order to display the operating keys on the touch-screen.
• ▼/▲: Select the viewing angle of the touch-screen. - ▶II: Stop playback. The picture is "frozen". Press the key again to continue playback. - ■: Stop playback. Press the ▶II key to continue playback from the same point. If you press the ■ key again in PRE STOP mode, playback begins at the beginning of the film again after the ▶II key has been pressed. - ◀◀/▶▶: Start fast rewind or fast forward. Press one of the keys again to change the spooling speed. Press the ▶II key to start normal playback. - Repeat function. - Press once: Repeat chapter. RPT: [CHAPTER] appears briefly in the display. - Press twice: Repeat title. RPT: [TITLE] appears briefly in the display. - Press three times: Repeat function is deactivated. RPT: [OFF] appears briefly in the display. • SUBT: Select subtitle language. • AUD: Select audio language. - MENU: Show main menu of the DVD. • I◄/►►: Jump to the previous or next chapter. • Display the device menu.
Dual Operation
In dual operation you can play back the DVD signal on an externally connected monitor even when the vehicle is moving. There are two different versions of dual operation: C-Dual and D-Dual.
- Connect an external monitor to the RCA sockets VIDEO OUT, DUAL L OUT and DUAL R OUT.
C-Dual in Radio/AV-IN/BT mode
- In Radio/AV-IN or BT mode, press the DUAL key (Fig. 1/12). The display on the touch-screen changes to dual operation. C-DUAL is shown on the screen.
- The signal of the DVD that has been inserted is transmitted to the external monitor.
- The radio sound continues to be heard through the front loudspeakers. The volume of the radio is regulated with the VOL multifunction control and the MUTE key.
D-Dual in Radio/AV-IN/BT mode
- In Radio/AV-IN or BT mode, press the DUAL key (Fig. 1/12) twice. The display on the touch-screen changes to dual operation. D-DUAL is shown on the screen.
- The signal of the DVD that has been inserted is transmitted to the external monitor.
- The radio sound continues to be heard through the front loudspeakers at the volume that was last set and cannot be changed.
C-Dual in DVD/USB/SD mode
- In DVD/USB or SD mode, press the DUAL key (Fig. 1/12). The display on the touch-screen changes to dual operation. C-DUAL is shown on the screen.
- The signal of the DVD that has been inserted is transmitted to the external monitor.
- The sound with which dual operation was activated continues to be heard through the front loudspeakers. The volume of the radio sound is regulated with the VOL multifunction control and the MUTE key.
D-Dual in DVD/USB/SD mode
- In Radio mode, press the DUAL key (Fig. 1/12) twice. The display on the touch-screen changes to dual operation. D-DUAL is shown on the screen.
- The signal of the inserted DVD is transmitted to the external monitor.
- The sound with which dual operation was activated continues to be heard through the front loudspeakers at the volume that was last set and cannot be changed.
Technical data
General
Supply voltage....DC 12 V (negative earthing)
Power consumption....10 A max.
Power....4 x 40 W PMPO
Monitor....17.5 cm / 7" TFT
Operating temperature....-10°C to +60°C
FM band
Frequency range....87.5 MHz ~ 108.0 MHz
AM band
Frequency range 522 kHz ~ 1600 kHz
(Line-Out)
Signal format....PAL/NTSC
CD/DVD player
System....MP3 Audio System
Suitable CDs: CD, CD-R, CD-RW, MP3, DVD, VCD disks (12 cm disks)
Playable bit rates: 32 - 320 kBit/s
Housing dimensions: 178 W x 50 H x 165 D
Regional code: 2 (= Europe, Greenland, South Africa, Egypt and Middle East, Japan)
Net weight: 2.04 kg
This device has been tested according to all relevant current CE guidelines, such as electromagnetic compatibility and low voltage directives, and has been constructed in accordance with the latest safety regulations.
Subject to technical changes without prior notice!
Troubleshooting
Before going through the checklist, please make all the connections first. If you still have questions after going through the checklist, please consult your local customer service representative.
| Fault Symptoms Cause Solution | ||
| After inserting a CD the device automatically switches to Radio mode. | The CD is inserted the wrong way round. | Insert the CD right way round. |
| CD cannot be selected using the MODE button. | There is no CD inserted. | Insert a CD. |
| Fault Symptoms Cause Solution | ||
| The CD does not play back after being inserted into the device. | The volume control is set too low. | Turn up the volume. |
| The device has not been correctly connected. | Check the +12V and earth connection. | |
| CD works intermittently (dropouts). | The surface of the road is uneven. | Wait until the road becomes smoother before playing the CD. |
| The device is not firmly installed. | Install the device firmly. Ensure that the rear attachment is used if the vehicle does not have any suitable retainer for the rear section of the device. | |
| The CD is damaged. | Try another CD. If this works correctly, the first CD is probably damaged. | |
| The CD is dirty. Clean the CD. | ||
| The device may have been installed in the vehicle at the wrong angle. | Please note that a maximum inclination of 20° degrees should not be exceeded! | |
| No function. The ignition is Turn the ignition key to “ON” or “ACC”. | ||
| switched off. Replace the fuse by another 15 A fuse. | ||
| Device cannot be switched on or off via the ignition. | Incorrect connection (each car manufacturer wires the ISO connection in the vehicle differently). | Please contact your car workshop or a vehicle specialist for connection adapters may specifically for your model. |
| The device does not work correctly (EJECT, LOAD, PLAY). | The microcomputer has been interfered with by electromagnetic fields. | Remove the CD and insert it again. |
| Switch the device off and on again. | ||
| The device cannot be operated, but “hangs up”. | The control processor of the device may have been blocked by overvoltage or undervoltage in the vehicle electrical system. | Press the RESET button. |
| Fault Symptoms Cause Solution | ||
| No radio reception. | The antenna cable is not connected. | Insert the antenna cable firmly into the antenna socket of the device. |
| Poor radio reception. | It is possible that your vehicle has a special antenna (phantom-powered antenna.) | Please contact your car workshop or a vehicle specialist. (For other manufacturers there are specific phantom power supply adapters and voltage adapters available.) |
| In automatic search mode the radio does not stop at a transmitting station. | The transmission signals are too weak. | Tune in to a radio station manually. |
| DVD cannot be played. | DVD not finalised. | Use a finalised DVD. |
| Audio or Video interference from video files which are played back via USB or memory card. | Data flow is "sluggish". (See section "Operating Instructions" on page 7 for a detailed explanation). | Pause play using the ▶II button. Wait a few seconds and re-start playback. |
Handling a CD/DVD
Cleaning the CD

Before playing a CD, wipe it off with a clean, dust-free cleaning cloth. Pull out the CD in the direction of the arrow.
CAUTION:
Do not use any solvents such as petrol or thinning agents. Commercially available cleaning substances or antistatic sprays will damage the device.
Inserting the CD

If the CD is inserted with the printed side facing downwards, the device may be damaged. Always insert the CD with the label facing upwards.
CAUTION:
If there is already a CD in the CD slit, do not try to insert a second CD. This may damage the device.
Touching the CD

Always hold CDs by the edge. In order to keep the CD clean, do not touch the surface.
CAUTION:
• Do not attach any stickers or adhesive tape to the CD. - Do not expose the CD to direct sunlight or sources of heat such as heating pipes. Do not leave CDs in the car if it is parked in direct sunlight as this will lead to a considerable rise in the temperature inside the car. - Check all CDs for cracks, scratches and warping before you play them. It is possible that CDs that are damaged in this way cannot be played back correctly. Such CDs should not be used. - Use only standard commercially available circular CDs with a 12 cm diameter! CDs with an 8 cm diameter or CDs with contours, e.g. of a butterfly or heart, are not suitable. It is possible that such CDs may not only be destroyed themselves, but may also destroy the drive of the CD player. We cannot accept liability for damage caused by the use of unsuitable CDs.
42 English
Index
A
A2DP Operation Page 37
Adjust the volume Page 30
AF Page 31
AV IN Page 29
B
BND Button Page 30
C
CD Handling Page 40
Connection Page 27
D
Dual Operation Page 39
DVD Player.... Page 37
E
Eject button Page 29
Ejecting the CD Page 29
|
Installation...... Page 27
Installation (Safety Information) Page 25
Installation Tips......Page 26
M
Memory card....Page 30
MODE Button Page 30
Mono Switch Page 32
MUTE button (Mute switch).... Page 30
O
Operation Page 29
Operating instructions Page 28
P
Play / Pause (▶II) Page 29
PTY Page 30
R
RDM button (Random playback) Page 32
RESET button (Reset) Page 30
Remote control batteries.... Page 28
Remote control buttons...... Page 24
Removing the control panel ...... Page 30
Road Safety Page 25
RPT button (Repeat) Page 32
S
Safety Information...... Page 25
Starting up Page 28
Stereo Switch Page 32
Switching off Page 30
Switching on.... Page 30
T
TA (Traffic Announcements)...... Page 31
Technical Data......Page 39
Telephoning via Bluetooth Page 35
Touch-Screen Page 31
Traffic channel (see TA)...... Page 31
Troubleshooting Page 39
U
USB Port Page 29
V
VOL Multifunction controller.... Page 30
W
Important Additional Installation Information......Page 26
Repeat function (RPT)...... Page 32
GARANTIE-KARTE


- DEUTSCH
- ILLUSTRATION 1: REMOTE CONTROL
- INSTRUCTION MANUAL
- SAFETY INFORMATION
- SYMBOLS IN THESE INSTRUCTIONS FOR USE
- WARNING
- CAUTION
- ENGLISH
- CHILDREN AND FRAIL INDIVIDUALS
- ROAD SAFETY
- SAFETY INFORMATION WHEN INSTALLING AND CONNECTING THE RADIO
- NOTE
- INSTALLATION TIPS
- IMPORTANT INFORMATION FOR INSTALLING YOUR CAR RADIO
- I NOTE
- INSTALLATION
- CONNECTION
- ENGLISH OPERATING INSTRUCTIONS
- STARTING UP
- REMOTE CONTROL BATTERY INSTALLATION
- EFFECTIVE RANGE OF THE REMOTE CONTROL
- OPERATION (ILLUSTRATION 2: CONTROL PANEL)
- TOUCH SCREEN
- MIC (MICROPHONE)
- ▲ EJECT BUTTON
- OPEN BUTTON
- USB CONNECTION
- AV IN JACK
- LCD DISPLAY (LIQUID CRYSTAL DISPLAY)
- IR (INFRARED)
- BUTTON
- II BUTTON
- PLAYING BACK MUSIC IN MP3 FORMAT
- PLEASE NOTE
- VOL MULTIFUNCTION CONTROLLER
- I BUTTON
- MOD BUTTON
- (MUTE) BUTTON
- REL BUTTON
- BND/TILT BUTTON
- CD/DVD SLIT
- RESET (RESET)
- SD/MMC CARD SLOT
- PTY SELECTION OF THE PROGRAMME TYPE
- TA TRAFFIC ANNOUNCEMENT (RADIO TRAFFIC SERVICE)
- (PRIORITY FOR TRAFFIC INFORMATION)
- INTERRUPTION OF THE TA FUNCTION
- AF (ALTERNATIVE FREQUENCIES) REG FUNCTION
- EON FUNCTION
- TOUCH-SCREEN
- DVD PLAYBACK MENU
- BLUETOOTH MENU
- AV-IN MENU
- SETTINGS MENU
- SOUND
- DISPLAY
- RADIO
- GENERAL
- DVD
- SYSTEM INFO
- TELEPHONING VIA BLUETOOTH
- OBTAINING OPTIMUM SOUND QUALITY DURING A TELEPHONE CALL
- SELECTING BLUETOOTH MODE
- PAIRING DEVICES (PAIRING)
- SEPARATING DEVICES
- RECONNECTING DEVICES
- ENDING A TELEPHONE CALL
- CALLING
- MUSIC
- HISTORY
- PHONE BOOK
- OUTGOING CALLS
- RE-DIALLING
- INCOMING TELEPHONE CALLS
- TRANSFERRING TELEPHONE CALLS BETWEEN THE CAR RADIO AND MOBILE TELEPHONE
- MUSIC PLAYBACK VIA A2DP (ADVANCED AUDIO DISTRIBUTION PROFILE)
- ABOUT THE DVD-PLAYER
- TERMINOLOGY
- INPUT NOT POSSIBLE
- USING THE DVD MENU
- CHANGING AUDIO LANGUAGE
- SHOWING SUBTITLES
- STOPPING PLAYBACK
- SELECTING PREVIOUS CHAPTER/TRACK
- SELECTING NEXT CHAPTER/TRACK
- SELECTING TRACK DIRECTLY
- USING FAST FORWARD OR REVERSE
- START PASSAGE VIA THE MENU
- ENLARGING A SCREEN SECTION
- CHANGING THE VIEWING ANGLE
- DUAL OPERATION
- C-DUAL IN RADIO/AV-IN/BT MODE
- D-DUAL IN RADIO/AV-IN/BT MODE
- C-DUAL IN DVD/USB/SD MODE
- D-DUAL IN DVD/USB/SD MODE
- TECHNICAL DATA
- FM BAND
- AM BAND
- (LINE-OUT)
- CD/DVD PLAYER
- TROUBLESHOOTING
- HANDLING A CD/DVD
- CLEANING THE CD
- INSERTING THE CD
- TOUCHING THE CD
- INDEX
- A
- B
- C
- D
- E
- M
- O
- P
- R
- S
- T
- U
- V
- W
- GARANTIE-KARTE
Brand : AEG
Model : AR 4026
Category : Car radio