USER MANUAL FA-4812 FAGOR
CARE & INSTRUCTIONS MANUAL GUIDE D'UTILISATION ET D'ENTRETIEN MANUAL DE INSTRUCCIONES Y MANTENIMIENTO
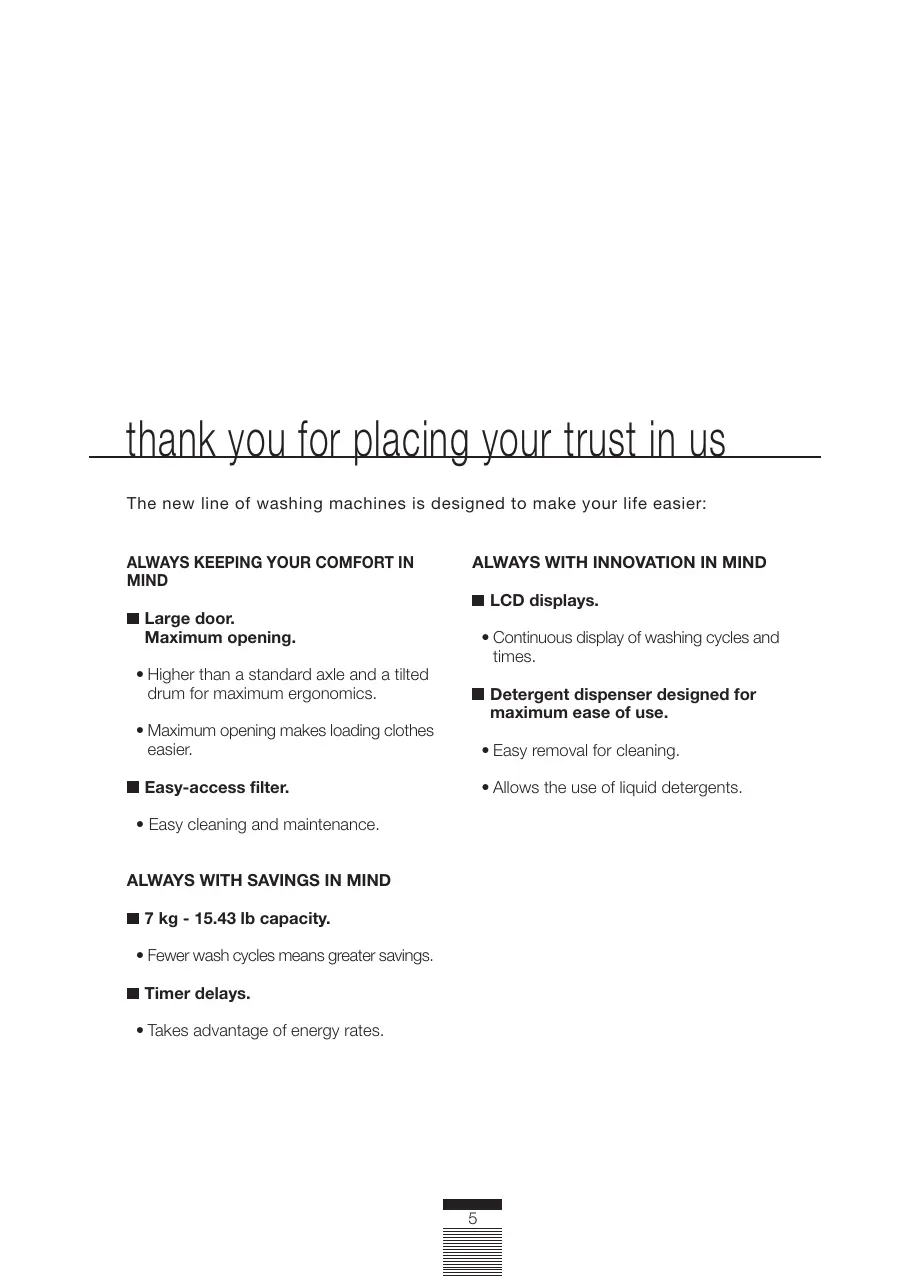
WASHING MACHINE • LAVEUSE • LAVADORA
FA-4812·FA-4812X
NOTE: To avoid accident and damage, please read these instructions carefully before operating the appliance.
INSTALLATION AND SETUP 8
MACHINE OPERATION
AND USEFUL TIPS 14
MAINTENANCE AND
CLEANING 25
SAFETY AND TROUBLESHOOTING 27
ENVIRONMENTALWARNINGS 30
table des matières
MISES EN GARDE ET CONSIGNES
DE SÉCURITÉ 32
SPÉCIFICATIONS 33
INSTALLATION ET MONTAGE 34
UTILISATION DE L'APPAREIL
ET CONSEILS PRATIQUES 40
ENTRETIEN ET NETTOYAGE
DE L'APPAREIL 51
thank you for placing your trust in us
The new line of washing machines is designed to make your life easier:
ALWAYS KEEPING YOUR COMFORT IN MIND
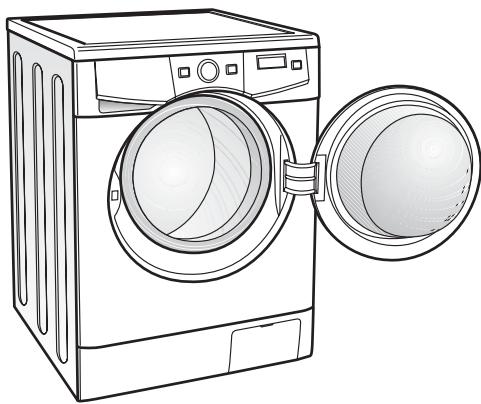
Large door. Maximum opening.
- Higher than a standard axle and a tilted drum for maximum ergonomics.
- Maximum opening makes loading clothes easier.
Easy-access filter.
- Easy cleaning and maintenance.
ALWAYS WITH SAVINGS IN MIND
7kg -15.43 lb capacity.
- Fewer wash cycles means greater savings.
Timer delays.
- Takes advantage of energy rates.
ALWAYS WITH INNOVATION IN MIND
LCD displays.
- Continuous display of washing cycles and times.
Detergent dispenser designed for maximum ease of use.
- Easy removal for cleaning.
- Allows the use of liquid detergents.
warnings
To avoid fire hazards, electric shocks, personal injury, or other types of damage, take the following precautions when using your washing machine:
The washing machine comes with a manual, which includes installation, operation, and maintenance instructions. Please read all instructions carefully before using the washing machine.
- Do not wash garments that have been previously cleaned, washed, soaked or treated with gasoline, dry-cleaning solvents, or other flammable or explosive substances. They could give off vapors that may ignite or explode.
- Do not add gasoline, dry-cleaning solvents or any other flammable or explosive substances to the wash water, since these give off vapors that may ignite or explode.
- Do not attempt to repair the machine, replace any of its components, or service it in any way, unless it is recommended in the maintenance instructions included in the manual.
- Do not climb over the machine or lean on the open door.
-
Do not use an extension or adapter to connect the washing machine to the wall outlet.
The machine may only be used for its intended purposes.
■ Follow the washing instructions recommended by the garment manufacturer.
Before operating the machine, ensure that:
-
It has been installed according to the installation instructions.
- All water lines, drain tubes, electrical connections and ground lines are connected according to local laws and/or other applicable regulations.
safety instructions
Under certain conditions, hydrogen gas may be produced in a hot-water system that has not been used for two weeks or more. Hydrogen gas is explosive. If the hot-water system has not been used for two weeks or more, turn on the hot-water faucets and let water flow for a few minutes before operating the washing machine. This will cause any built-up hydrogen gas to dissipate. Since the gas is flammable, do not smoke or keep an open flame on while the faucets are running.
- Do not allow children to play over or inside the machine. Strict supervision is required when using the machine around children.
The door must be removed before the machine is disposed of or taken out of service.
- Do not access the inside of the machine if the drum or the agitator are moving.

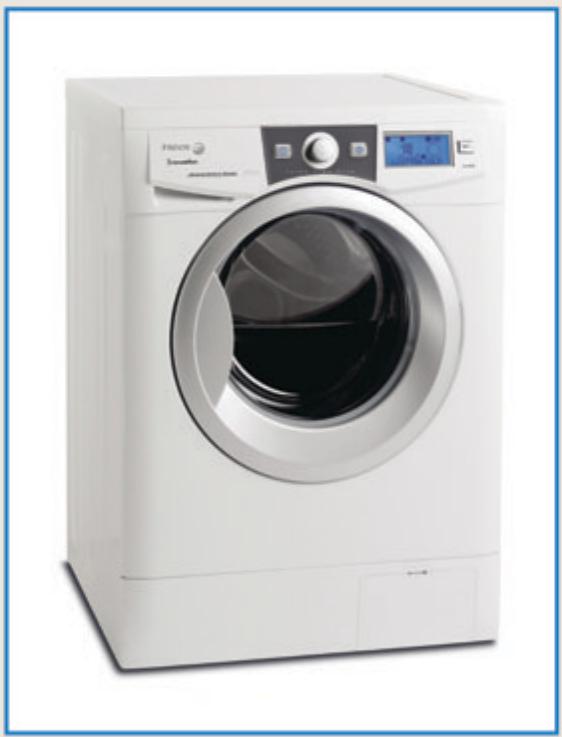
ACCESSIONS LOCATED
INSIDE THE DRUM
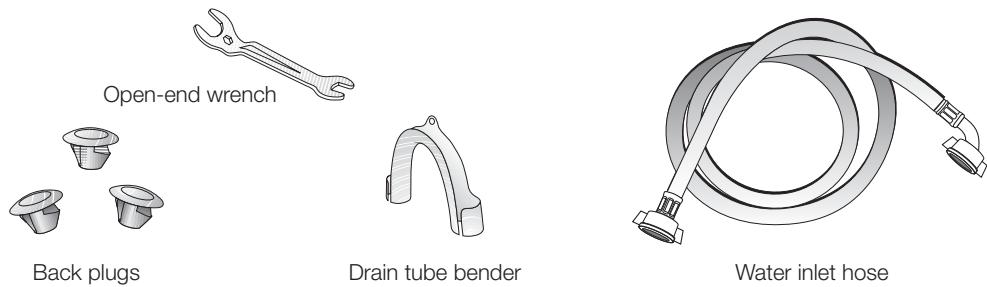
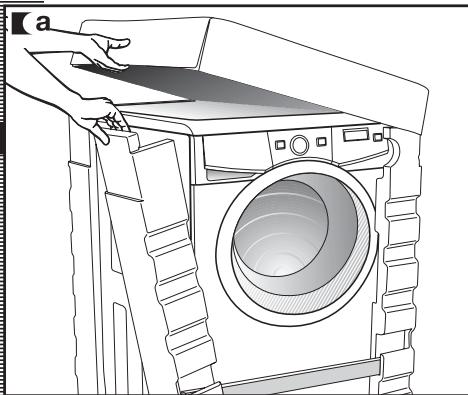
1 UNPACKING AND UNLOCKING THE WASHING MACHINE
UNPACKING
a Remove the base, corner protectors, and the top cover.
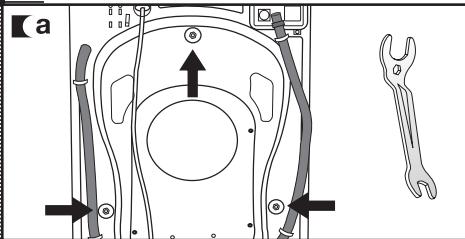
UNLOCKING
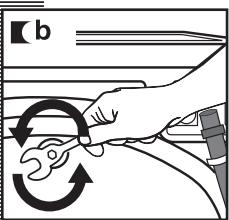
a There are 3 locking screws located at the back of the washing machine.
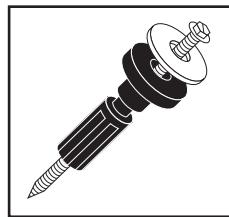
Using the wrench provided, loosen the 3 screws and remove them completely, along with the metal washer and the black rubber and plastic tubes which make up the locking system.
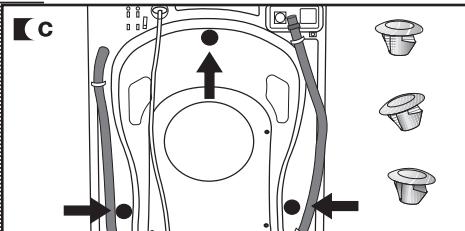
Insert the 3 plastic plugs provided in the holes from which you removed the locking screws.
Keep the locking screws in case you need to move the machine in the future.
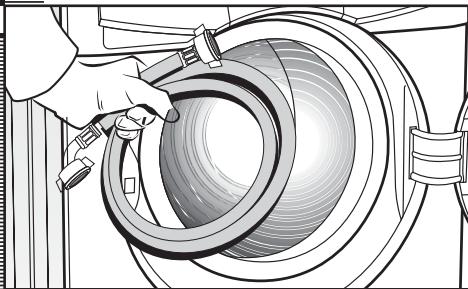
CONNECTING
WATER SYSTEM
The water inlet tube is located inside the drum:
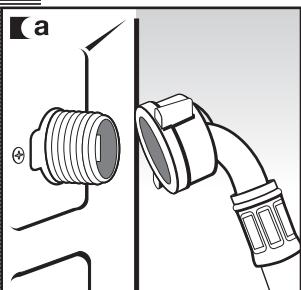
a Connect the elbow end of the tube to the threaded intake of the electro valve located at the back of the machine.
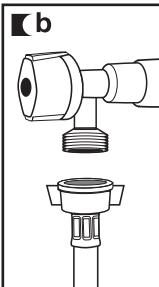
Connect the other end of the tube to the water intake. Once you have completed this operation, tighten the connecting bolt firmly.
The elbow part of the drain tube must be firmly connected to the outlet, so it does not fall off, in order to avoid the risk of flooding.
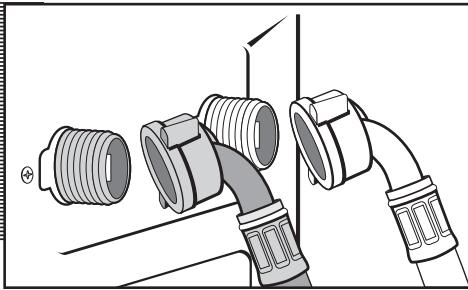
If your washing machine has an inlet for hot water, connect the red threaded tube to the hot water faucet, and to the electro valve with a red filter.
The washing machine must be connected to the water inlet system using the new inlet tubes provided with the machine. The previously used water inlet tubes must not be used.
For the washing machine to function properly, the water pressure should be 0.05 - 1MPa (0.5 - 10kg / cm^2 /1.10 - 22.05 psi).
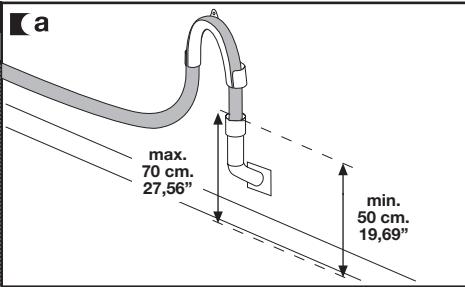
CONNECTING
DRAINAGE SYSTEM
a It is recommended to have a fixed drain outlet, 50-70cm/19.69-27.56in from the floor.
The supplied elbow should be used to prevent the drain tube from being too tight, bent or pinched.
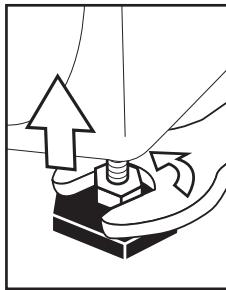
LEVELING THE MACHINE
a We recommend seating and leveling the back first. Once these are well seated, firmly fix the metal locknut to the top section.
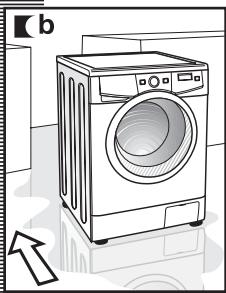
Place the washing machine in the recess. A wet floor may help you drag the machine to its final location.
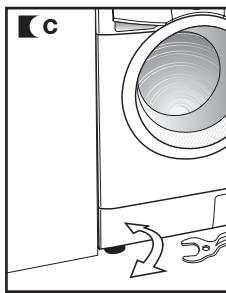
c Level and fix the front feet in the same manner as the back feet. Be sure to keep the supplied wrench, you might need it again.

ELECTRICAL CONNECTION
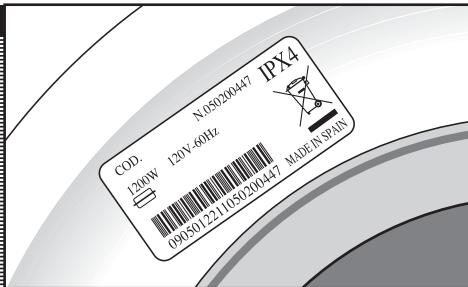
Before making any electrical connections, refer to the data indicated on the specifications label attached to the machine's door. Make sure that the voltage supplied to the plug's base is the one indicated on the label. Do not remove the specifications label, as the information on it is important.
The washing machine must be connected to a properly grounded power outlet.
The electrical installation, plug, outlet, fuses, or automatic switch and counter must be adjusted to the maximum power indicated on the specifications label.
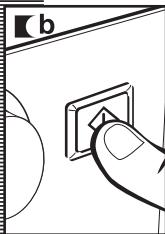
Do not insert the machine's plug into the outlet with wet or moist hands.
To remove the cable from the outlet, pull out the pin body, do not pull from the cable.
If the power supply cable is damaged, it must be replaced with a special cable or assembly supplied by the manufacturer or after-sales service department.
On recessed washing machines, the outlet pin must be accessible after installation.
Connect to individual branch circuit.
Now that you have successfully installed the washing machine, we recommend you set the configuration menu with a series of general functions, such as:
- Language selection
- Tone selection
- Message end tone
- Time setting
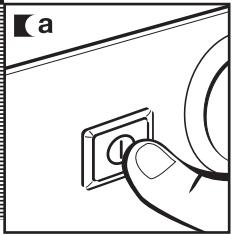
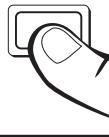
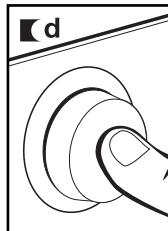
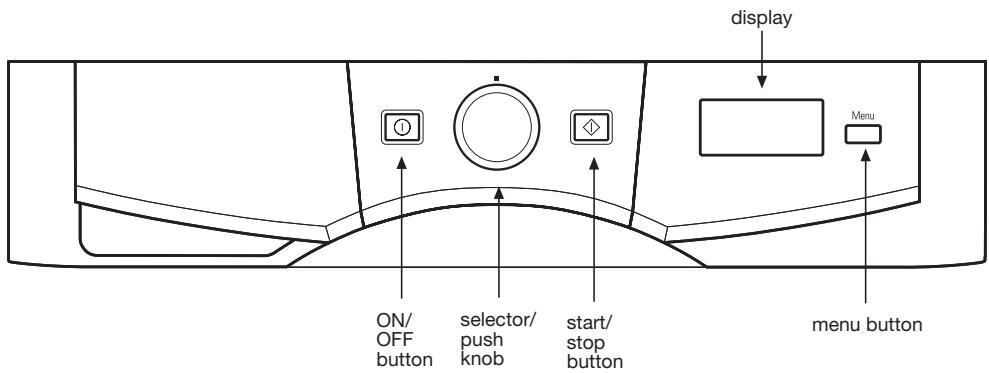
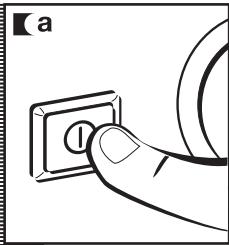
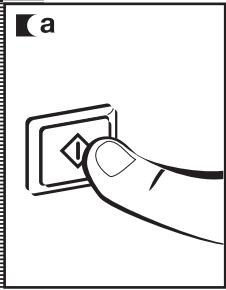
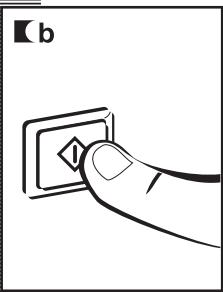
a Press the ON/OFF button.
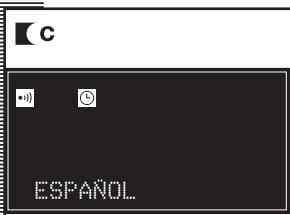
LANGUAGE SELECTION
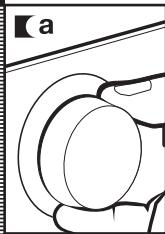
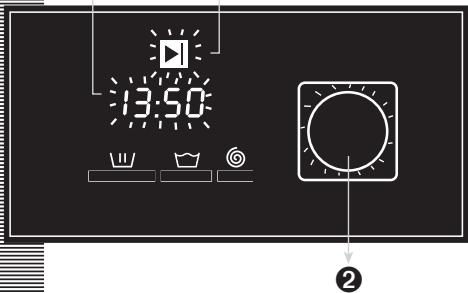
Press the Menu button. A language name appears on the display located on the control panel.
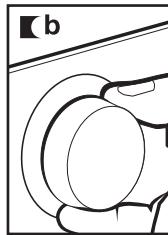
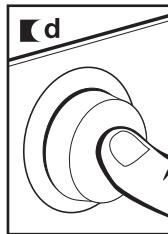
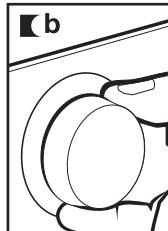
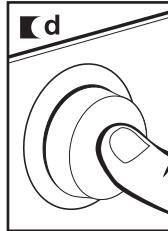
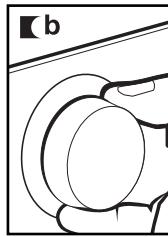
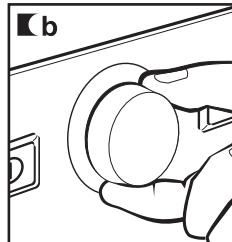
b Turn the selector knob until the desired language is selected.
c The language name appears.
Push the selector knob to accept the language selected.

a
Menu
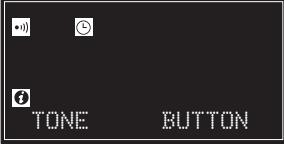
TONE SELECTION
a "Tone YES" appears on the display panel.
b Turn the selector knob until the desired option is selected:
- Tone YES
- Tone NO
- Button press tone
Push the selector knob to accept the tone option selected.
a

i
TONE
C
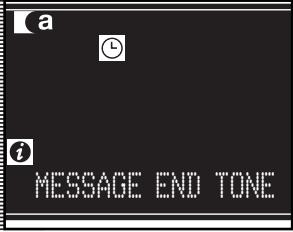
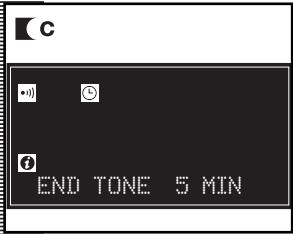
MESSAGE END SETTING
a "Message End Tone" appears on the display panel.
b Turn the selector knob until the desired option is selected:
Push the selector knob to accept the option selected.

CLOCK TIME SETTING
a "Clock Time" appears on the display panel.
b Turn the selector knob to set the time. First, the hour is set and then the minutes.
Push the selector knob to accept the time selected.


To exit the configuration menu, press the Menu button on any of the screens.
BEFORE WASHING CLOTHES
We recommend that you pre-clean the washing machine.
This is meant to check the installation, connections and drainage system, as well as to fully clean the inside of the machine before starting a wash cycle (see operation instructions on the following pages).
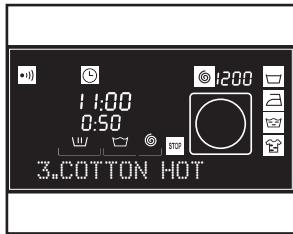
a Select cotton hot, program 3, at 60^ / 140^, by turning the selector knob. The program appears on the display panel.
b Press the Start/Pause button.
operating the machine and useful tips
CHECKING
CLOTHING BEFORE WASHING
PREPARING CLOTHES
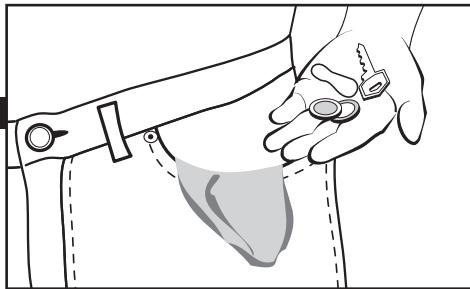
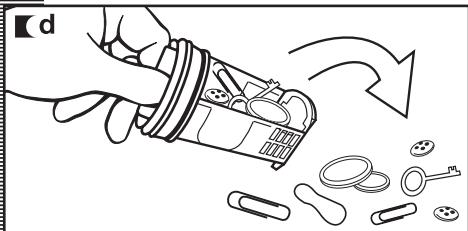
Before loading clothes into the drum, make sure that all pockets are empty.
Small objects may obstruct the water discharge motor pump.
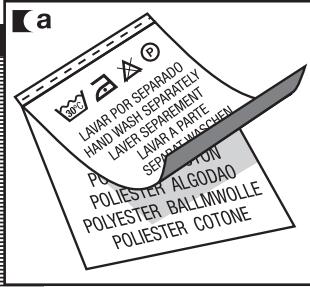
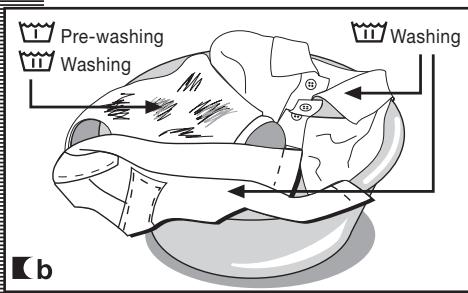
SORTING CLOTHES
a Sort clothes by fabric or type.
We recommend the use of gentle cycles for delicate garments. Wool garments may be washed with a special cycle for wool fabrics.
b Sort clothes by degree of soiling.
- Use a short cycle time for slightly soiled garments.
- Use a cycle time without pre-cleaning for medium soiled garments.
- You may use a long cycle time with pre-cleaning for heavily soiled garments.
c Sort clothes by color.
Wash white clothes and colored clothes separately.
We recommend you load the machine to its maximum capacity. That way you will save water and energy.
Whenever possible, we recommend you wash different-sized garments on the same wash cycle, in order to maximize the washing action. This also helps to distribute the clothes inside the drum during the spin cycle, so the machine works more quietly.
It's useful to put smaller garments in a wash bag.

Important!
Before washing your wool garments, confirm that they can be machinemashed.
DETERGENT
AND ADDITIVES
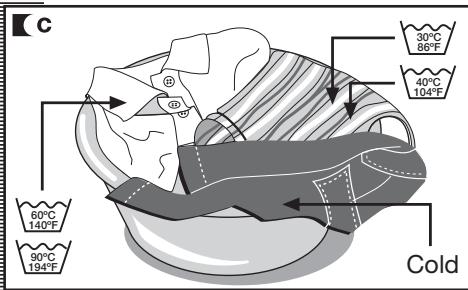
a Your washing machine's detergent dispenser has three compartments: washing, softener and pre-washing compartments.
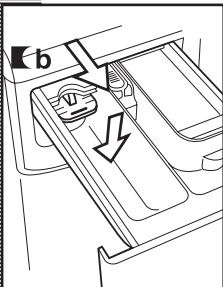
If you're using liquid detergent, you should close the door to the washing compartment. Using two fingers, pick the blue tab that protrudes from the bottom of that compartment and pull outwards completely. Release the flip top lid so it is in a horizontal position. This will prevent the liquid detergent from leaking out. To use powdered detergent, this lid should be open. Place it on a vertical position by pressing the top tab with one finger, and push it backwards completely.
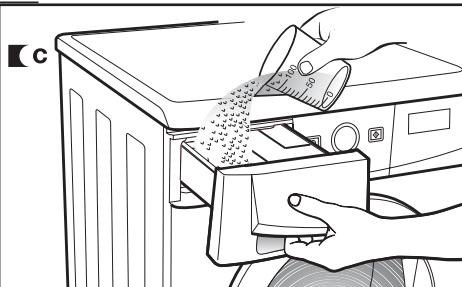
Before starting the wash cycle, pour liquid or powdered detergent, or additive, in the appropriate compartment.
Important!
The level of liquid must never exceed the MAX reference mark stamped on the dispenser wall.
Remember that the amount of detergent to be used always depends on the following:
Amount of clothes to be washed.
Degree of soiling.
Water hardness (you can obtain information on the degree of water hardness through the corresponding local authorities).
Important!
We recommend you use a lime-treating product if water hardness in your area is high.

a
WASHING

SOFTENER

PRE-WASHING


environmental notice
Keep in mind that some concentrated detergents are friendlier to nature and the environment.
Using more detergent does not help improve wash results,

and, besides being more expensive, it adversely affects the environment.
Therefore, we recommend you follow the detergent manufacturer's instructions.
Once you have programmed the configuration menu, you should follow these steps to select the wash cycle:
a Using the ON/OFF button, turn on the machine.
b Select the wash cycle (see table of cycles) by turning the selector knob.
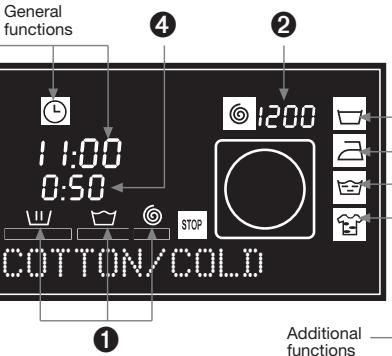
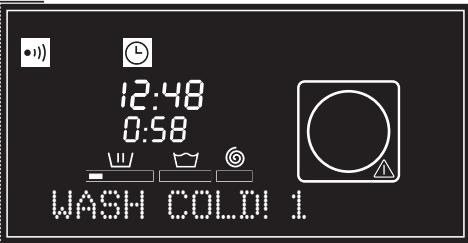
When selecting the program, you will see the following information:
1 Wash cycle stages:
Wash
Rinse
Spin
Number of revolutions
3 Cycle number
4 Cycle duration
General functions:
Tone
Clock time
Stop time
Child lock
Door open
Additional functions:
Anti-wrinkling
Easy ironing
Extra rinsing
Intensive washing
There are 3 types of cycles available:
Normal cycles
Delicate cycles
Special cycles
environmental notice
Whenever possible, we recommend you choose the right cycle to avoid pre-washing. That way you will save money and help protect the environment.


PROGRAMS
| Normal | Delicate | Special |
| 1 Cotton cold | 6 Synthetic cold | 12 Quick cold |
| 2 Cotton warm | 7 Synthetic warm | 13 Quick warm |
| 3 Cotton hot | 8 Synthetic hot | 14 Rinse |
| 4 Intensive hot | 9 Delicate warm | 15 Spin |
| 5 Prewash hot | 10 Handwash cold | 16 Drain |
| 11 Handwash warm | |
| Program | Fabric type | Possible option buttons |
| Extra rinse | Intensive wash | Easy-iron | Son speed selection | No spin | Anti-cage |
| Normal programmes | 1 | Cotton cold | | Cotton/Linen delicate colors very light soil | YES |
| 2 | Cotton warm | | Cotton/Linen delicate colors light soil | YES |
| 3 | Cotton hot | | Cotton/Linen fast colors medium soil | YES |
| 4 | Intensive hot | | Cotton/Linen fast colors heavy soil | YES |
| 5 | Prewash hot | | Cotton/Linen fast colors heavy soil | YES |
| Delicate programmes | 6 | Synthetic cold | | Synthetic delicate colors very light soil | YES |
| 7 | Synthetic warm | | Synthetic delicate colors light soil | YES |
| 8 | Synthetic hot | | Synthetic delicate colors medium soil | YES |
| 9 | Delicate warm | | Curtains/wool mix white/color very light soil | YES | NO | YES |
| 10 | Handwash cold | | Wool/wool mix white/color light soil | YES | NO | YES |
| 11 | Handwash warm | | Wool/wool mix white/color light soil | YES | NO | YES |
| Special programmes | 12 | Quick cold | | Synthetic/mix cotton white/fast colors very light soil | YES | NO | YES |
| 13 | Quick warm | | Synthetic/mix cotton white/fast colors light soil | YES | NO | YES |
| 14 | Rinse | - | Cotton/cotton mix Synthetic/Delicate Wool/wool mix | YES | NO | YES |
| 15 | Spin | - | Cotton/cotton mix Synthetic/Delicate Wool/wool mix | NO | YES | NO |
| 16 | Drain | - | Cotton/cotton mix Synthetic/Delicate Wool/wool mix | NO |
| Max. load of clothes (kg/lb) | Wash product compartment | Program description | Approx. duration (minutes) |
| 7/15,43 | m m | Normal wash, rinses, automatic additive absorption if desired and long final spin | 50 |
| 7/15,43 | 60 |
| 7/15,43 | 60 |
| 7/15,43 | 90 |
| 7/15,43 | m m | Prewash, normal wash, rinses, automatic additive absorption if desired and long final spin | 90 |
| 3,5/7,72 | m m | Delicate wash, rinses, automatic additive absorption if desired and gentle final spin | 50 |
| 3,5/7,72 | 55 |
| 3,5/7,72 | 55 |
| 3,5/7,72 | 50 |
| 2/4,41 | WOOL wash, rinses, automatic additive absorption if desired and gentle final spin | 33 |
| 2/4,41 | 50 |
| 2/4,41 | SHORT wash, one rinse, automatic additive absorption if desired and final long spin | 30 |
| 2/4,41 | 35 |
| 7/15,43 | m m | Rinses, automatic additive absorption if desired and long final spin | 21 |
| 7/15,43 | - | Final long spin | 10 |
| 7/15,43 | - | Drain | 2 |
NOTE: the programme durations may vary depending on the type and amount of clothes, mains water pressure, etc.
Once you have selected the wash cycle, you may activate a series of options, depending on the chosen cycle.
To activate options:
- Push the selector knob.
- Turn the selector knob to choose the desired option.
- Push the selector knob again to enable/disable that option.
Options:
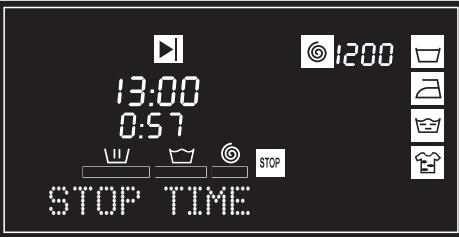
STOP TIME
A time delay of up to 24 hours can be selected. The time delay should be selected after choosing the wash cycle.
Turn the selector knob to select the time delay periods. The setting is in half-hour intervals.
Canceling the time delay
To cancel the time delay, press and hold the ON/OFF button until you exit the options menu.
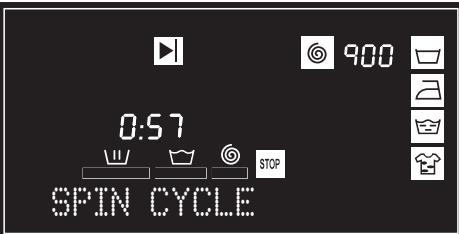
SPIN CYCLE
The wash options must always be selected after choosing the wash cycle. Any change in the cycle during the selection overrides the previously selected options.
The selected cycle is associated with spin revolutions, in this example it is 900, as shown in the display.
To change a asselected option, turn the selector knob until the desired revolutions appear on the display. The number of revolutions will decrease in intervals of 100 revolutions, up to 400. Push the selector knob to validate the option.
5 SELECTING ADDITIONAL FUNCTIONS
operating the machine and useful tips
You may choose among several additional functions:
- Anti-wrinkling
- Easy ironing
-Extra rinsing
- Intensive washing
Turn the selector knob to view the desired function. Once the option has been selected, push the selector knob to enable/disable it. You may choose among several additional functions at a time, according to the selected cycle.
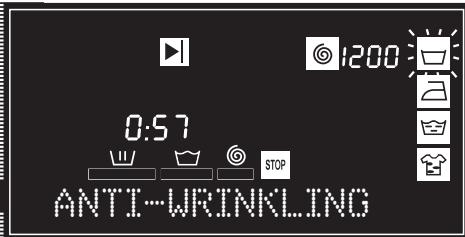
ANTI-WRINKLING
The machine stops on the last rinse cycle, leaving clothes in a certain amount of water. When the function is disabled (by pushing the Start/Pause button), the machine continues with the cycle, draining the water and spinning. You may use this option, for instance, when you're not at home and you want to delay the spin cycle until you arrive, so as to prevent the clothes from getting wrinkled until you remove them from the machine.
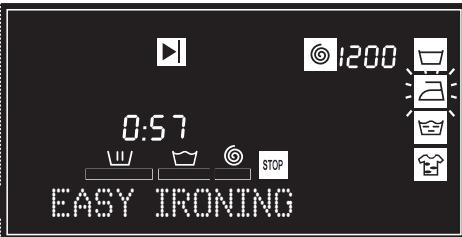
EASY IRONING
This option prevents the garments from getting wrinkled by executing a cycle with special spins intended to fluff clothes after spinning, and make ironing easier.
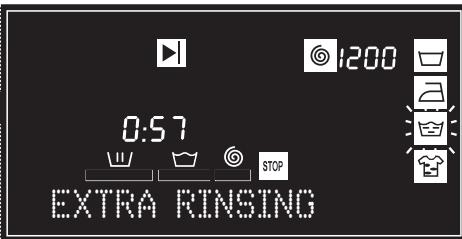
It increases the final rinse cycle. It is intended for large loads and clothes worn by people with sensitive skin. It increases the amount of water used.
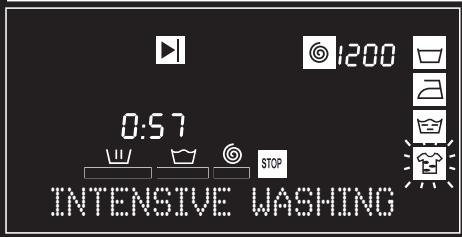
INTENSIVE WASHING
This option, specially recommended for heavily soiled and stained garments. It offers better results by prolonging the normal wash cycle.
LOCKING
Lock selection
The lock is used to prevent handling of the various buttons from affecting the wash cycle. It's used to prevent children from touching the buttons, etc.
Enabling the lock
a Enable the lock by pressing and holding the Start/Pause button for 2 seconds. A visual confirmation appears on the display.
Disabling the lock
The lock is disabled when the wash cycle ends.
If you wish to disable the lock without waiting for the cycle to end, press and hold the Start/Pause button again for 2 seconds. After 2 seconds have elapsed, the lock indicator no longer appears on the display and remains paused.


If you have selected a STOP TIME, the information that appears blinking on the display until the cycle starts is:
STOP TIME option selected.
2 Illustration.
3 ON indicator.
0
3
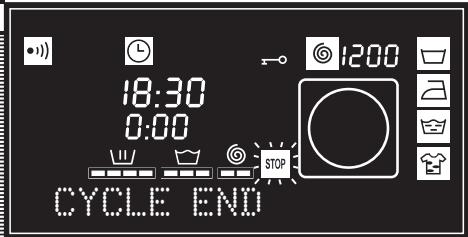
CYCLE
END
When the wash cycle ends, "STOP" appears on the display and the remaining time is indicated as "0:00", along with an audible tone, if the machine has been set up this way.
You may now remove the clothes from the machine.
POWER
OUTAGES
If there is a power outage, the machine will continue its normal operation after the power has been restored, starting from the point in which it had stopped (it holds several hours in memory).
warnings
To reduce noise during the spin cycle, level the machine with the adjustable feet.
Try washing different-sized garments on the same wash cycle, to better distribute clothes inside the drum for the spin cycle.
To avoid the machine being subjected to excessive vibration, all models have a safety system for the spin cycle. The safety system prevents it from starting whenever clothes are too tightly distributed inside the drum.
MAINTENANCE
After each wash cycle, leave the door open for a while, to let air circulate freely inside the machine.
It is a good practice to periodically run a full wash cycle using a lime-treating product, depending on the water hardness.
This helps to extend the life of your washing machine.
Before performing any cleaning or maintenance operation, it's advisable to disconnect the machine from the outlet.
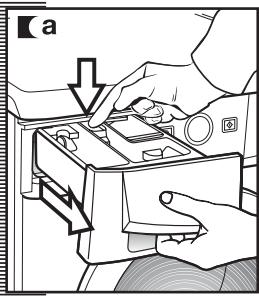
1 CLEANING THE DETERGENT DISPENSER
Clean the detergent dispenser whenever you find deposits of any cleaning product.
a Fully extend the detergent dispenser by pulling out the handle and pushing the blue lever with your finger.
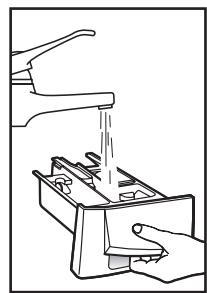
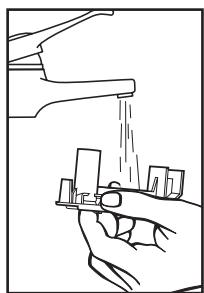
Clean the dispenser's compartments. Use lukewarm water and a brush.
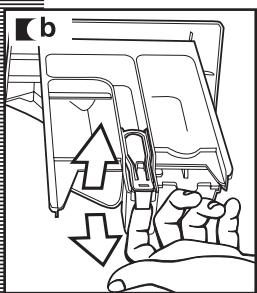
■ b Also clean the pump in the additive dispenser. To remove it, pick the tab at the back and pull it out. Once it is clean, replace it by pressing downwards until it is firmly inserted. Re-insert the dispenser into the washing machine.
A dirty or incorrectly inserted pump prevents additives from flowing and lets water remain inside the compartment at the end of the wash cycle.
CLEANING THE FILTER
Clean the accessible filter in case foreign matter is obstructing the drain pump.
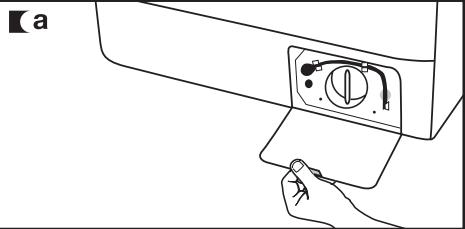
a Using a coin, open the baseboard cover by pulling it slightly.
To collect the water that will flow after detaching the drain tube, place a dish or container underneath it. Detach the drain tube, place it on the dish, and open the cover. Water will start to flow out.
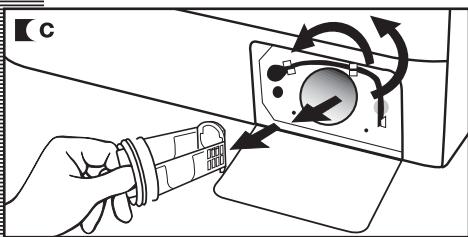
When you have finished draining water from the machine, turn the filter several times until you're able to remove it completely by pulling it slightly.
Remove the objects or lint that may have gotten caught in the filter or inside the drain pump. Replace the filter, the drain tube, and the cover.

To avoid burns, do not perform this operation when the wash water temperature is above 30^ / 86^ . We recommend that the filter be cleaned at least once a year.
OUTER CLEANING
To clean the outer surfaces of the machine, use lukewarm soapy water or a mild, non-abrasive detergent. Do not use solvents. Afterwards, wipe dry with a soft cloth.
Whenever detergents or additives leak from the dispenser onto the machine's surfaces, clean them immediately, as they're corrosive.
safety and troubleshooting
If you experience any problem while using your washing machine, you might be able to solve it by following the instructions below.
If you are not successful unplug the machine and contact TECHNICAL SUPPORT.
Do not open the back of the machine under any circumstance. There aren't any user-replaceable fuses or similar components inside.
TROUBLESHOOTING
Why is the washing machine not starting up?
This may happen due to the following:
The machine is not connected to the wall outlet, or there is no voltage present at the outlet.
The Start/Pause button has not been pressed.
The machine's door has not been closed properly, the display shows the message "Door open!" for 4 seconds, and the following message appears at 2-second intervals: Close the door. Check that the door is firmly closed.
Why is the machine vibrating or making excessive noise?
The cause could be one of the following:
The lock and transport screws have not been removed.
The machine has not been correctly leveled when placed on the floor.
During the spin cycle, the motor makes a "whistling" noise, which is normal, due to the motor's mechanical drive.

CLOSE THE DOOR
Why is the machine not loading water?
- When water is not loading, the display shows the message "Not loading water!" for 4 seconds, the following messages appear at 2-second intervals: Is the faucet turned off? Has the water been cut off? Water filter?
The reason for water not loading may be that the water service has been cut off, the water intake faucet to the machine is closed, or the water intake filter to the machine is blocked.
Therefore, you could take one of the following measures: wait until the water service has returned, open the water intake faucet, and release the water intake hose to clean its filter.
Why is the washing machine not draining water or spinning?
- When the display shows the message "Not draining water!" for 4 seconds, the following messages appear at 2-second intervals: Has the filter been drained? Home drain?
Causes for the display may be: the machine's drain motor pump or the building's drain pipe are blocked, or the motor pump is not properly connected.
Procedure: if the cause is found to be a blocked motor pump, proceed according to section 2, maintenance and cleaning.
Why are clothes wetter than usual?
The display shows the message "Clothes too wet!" for 4 seconds, and the following messages appear at 2-second intervals: Run cycle 15.
This is caused by an uneven distribution of clothes inside the drum, which has triggered a safety device that prevents the washing machine from spinning at the maximum number of revolutions. This prevents the machine from vibrating excessively and, therefore, provides greater reliability.


12:48
0:58


NOT LOADING WATER!
IS THE FAUCET TURNEOFF?


12:48
0:58


NOT DRAINING WATER!
HAS THE FILTER BEEN DRAINED?


12:48
0:58


CLOTHESTOO WET!
RUN CYCLE 15
Why is there no water in the drum during the wash cycle?
This is because the washing machine has a system that adapts to the load of clothes and the type of fabric, and adjusts the water and energy consumption accordingly, in order to protect the environment.
Therefore, even though you may think the water level that you see through the door is low, there is no cause for concern, as the wash and rinse cycles will run at optimum performance.
Why does water remain in the detergent dispenser?
It could be that the detergent dispenser needs cleaning. This simple operation is described under Maintenance and Cleaning.
1-Cleaning the detergent dispenser
Other messages
The washing machine is capable of detecting other problems. Whenever this happens, a message appears on the display.
This information may be due to very different reasons.
- Check if the malfunction is repetitive, and if that is the case, call TECHNICAL SUPPORT.
environmental notice
INFORMATION ON THE CORRECT HANDLING OF WASTE OF ELECTRICAL AND ELECTRONIC EQUIPMENT (WEEE)
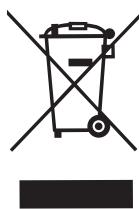
When the machine reaches the end of its life, it should not be discarded along with general domestic waste.
It may be taken, free of charge, to specific collecting centers, assigned by local authorities, or to dealers that offer this service.
The separate collection of waste of electrical and electronic equipment means avoiding possible adverse effects on the environment and on human health, derived from improper disposal, and allows for treating and recycling the component materials, to realize substantial savings on energy and resources.
To stress the obligation to cooperate with this separate collection, a mark on the product warns about not using conventional containers for disposal.
For more information, please contact your local authorities or the store where you purchased the product.

SIEMPRE PENSANDO EN INNOVAR
Pantallas LCD.
Write the model and serial number on the lines below, you'll need them in the event of a service call. The model and serial number are located in the hatch.
Model:
Serial:
Date Purchased:
Store:
Should you need service or have any questions about this product, don't hesitate to contact FAGOR AMERICA Customer Service at 1-800-207-0806.
PRODUCT WARRANTY
ONE-YEAR LIMITED WARRANTY
For one year from the date of purchase, provided this product is operated and maintained in accordance with the instructions attached to or furnished with the product, Fagor America Inc. will replace parts and provide labor to correct defects in materials or workmanship. Service has to be provided by a Fagor America Inc. designated service company. Please contact Fagor America at 1 877 743 2467 or by email at infoappliances@fagoramerica.com
THIS LIMITED WARRANTY DOES NOT COVER:
- Repairs when the product is used for other than normal, single family household use.
- Damage resulting from accident, alteration, misuse, abuse, fire, acts of God, improper installation, installation not in accordance with local electrical and plumbing codes, or use not approved by Fagor America.
- Replacement parts or repair labor costs if the product is operated outside of the United States/Canada
- Pick up/delivery. This product is designated to be repaired in the home.
FAGOR AMERICA WILL NOT BE LIABLE FOR INCIDENTAL OR CONSEQUENTIAL DAMAGES
Some states do not allow the exclusion or limitation of incidental or consequential damages so this exclusion or limitation may not apply to you. This warranty gives you specific legal rights and you may also have other rights which vary from state to state.
IF YOU NEED SERVICE
Please contact Customer Care at Fagor America at 1 877 743 2467 or email Fagor America at infoappliances@fagoramerica.com
WASHING MACHINE WARRANTY REGISTRATION CARD Register your warranty on line at www.fagorama.com

IMPORTANT NOTICE: PLEASE COMPLETE AND MAIL THIS WARRANTY REGISTRATION CARD IMMEDIATELY TO PROTECT YOUR WARRANTY SERVICE
| Mr./Mrs./Ms.: |
| Address: |
| City: | State: |
| Phone: | E-mail: |
| Date of purchase: |
| Name of Dealer: |
| Model number**: | Serial Number**: |
| Comments: |
FAGOR AMERICA
APPLIANCES DIVISION
P.O. BOX 94
LYNDhurst, NJ 07071
HRE
STAMP
PLACE
FAGOR

FAGOR AMERICA, INC. PO BOX 94
LYNDHURST, NJ 07071
Toll Free: 1.800.207.0806
Email: infoappliances@fagoramerica.com
www.fagoramerica.com