BV-2006X - Blender FAGOR - Free user manual and instructions
Find the device manual for free BV-2006X FAGOR in PDF.
User questions about BV-2006X FAGOR
0 question about this device. Answer the ones you know or ask your own.
Ask a new question about this device
Download the instructions for your Blender in PDF format for free! Find your manual BV-2006X - FAGOR and take your electronic device back in hand. On this page are published all the documents necessary for the use of your device. BV-2006X by FAGOR.
USER MANUAL BV-2006X FAGOR
The manufacturer reserves the right to modify the models described in this User's Manual.
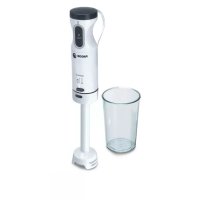
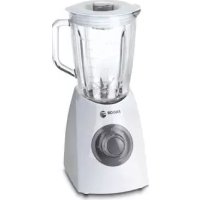
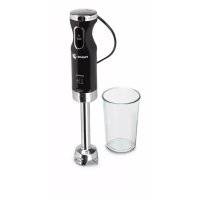
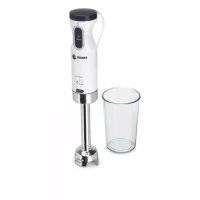
1.DESCRIPTION OF THE APPLIANCE
A. Top lid
B. Jug lid
C. Jug
D. Closing ring
E. Rubber seal
F. Blade
G. Blade support connector
H. Motor base
I. Selector
2. TECHNICAL DETAILS
Voltage - Frequency: 230V - 50 Hz
Power: 500W
Maximum jug capacity: 1.5l
3. SAFETY WARNINGS
These instructions contain important information regarding both safety and the correct functioning of the appliance. Please read these instructions carefully, keep them in a safe place and pass them on to the next owner of the mixer. The safety instructions provided should always be taken into account when switching the appliance on.
- Check that the voltage of the domestic network coincides with the voltage indicated for the appliance.
- Connect the appliance to an efficient earth installation. If in doubt, contact a qualified professional.
- In the event of failure and/or improper working, turn the appliance off, unplug it and do not attempt to repair it. Contact an authorised Technical Assistance Centre and request that they use original replacement parts and accessories.
- Do not use the mixer if the cable or plug are damaged.
- Do not attempt to replace the cable, as this may be dangerous. Send it immediately to an authorised technical assistance service.
-
Do not plug the appliance in or unplug it with wet hands.
-
Do not unplug the mixer by pulling on the cable.
- This mixer has been designed for domestic use only. The manufacturer accepts no responsibility for any damage caused by the use of the appliance for other purposes, incorrect use or repairs carried out by unauthorised personnel.
- Do not let the cable come into contact with sharp edges or to hang over the edge. Do not place the cable near heat or dampness.
- Place the mixer on a flat, stable surface, far from hot areas or heat sources (gas burners, electrical hotplates or ovens).
Safety instructions that should be borne in mind when switching the mixer on.
- Do not leave the mixer unattended while in operation. Keep out of the reach of children.
Make sure that the selector (I) is set to the '0' position (disconnected) before plugging the mixer in to the mains supply or before unplugging it.
People with nervous dysfunctions should not use the appliance unless accompanied by another person.
Make sure the jug (C), closing ring (D), blade (F) and blade support connector (G) are correctly positioned before switching the mixer on. - Do not expose the appliance to the elements (rain, wind, etc.).
- Never insert your hands or other utensils into the mixer recipient while in operation.
Make sure the lid is correctly in place when using the mixer. - THE BLADES ARE SHARP, HANDLE THEM WITH CARE. To avoid injury, never place the blades in the base without first ensuring that the jug is properly in place.
- When mixing hot liquid, remove the top lid (A) from the jug lid (B). Do not fill the mixer over the maximum level.
Always start working at the lowest speed. - Keep your hands away from the central opening in order to avoid possible burns.
- Do not mix excessively hot ingredients.
DO NOT KEEP THE MIXER SWITCHED ON FOR MORE THAN 3 MINUTES AT
A TIME. SWITCH IT OFF AND LET THE MOTOR COOL FOR AT LEAST 1 MINUTE. Otherwise you risk damaging the motor.
- Do not remove the jug from the motor base while the appliance is in operation.
- Do not use the mixer while empty, as this may damage it.
4. HOW TO USE THE APPLIANCE
Before using the mixer for the first time, wash the removable parts: the top lid (A), the jug lid (B), the jug (C) and the blade (F) in warm soapy water and dry well before reassembling.
Assembly
All assembly and disassembly operations should be carried out while the appliance is unplugged.
- Place the rubber seal (E) on the edge of the blade (F) and place the blade on the support connector (G) (Fig. 2).
- Attach to the jug by turning in an anticlockwise direction (Fig. 3)
- Place the top lid (A) in the jug lid (B) by inserting its flaps into the lid grooves and then turning in a clockwise direction (Fig.4)
- Place the mounted jug on the base (Fig. 5)
- Place the ingredients in the jug and fit the lid into place.
NOTE: To disassemble the mixer, follow the above steps in reverse order.
Set up
- Place the assembled mixer on a stable surface.
- Before switching the mixer on, make sure that the jug is correctly fitted into its place on the base.
Make sure that the selector (I) is set to its '0' position.
Plug the appliance in. - Place or pour the ingredients or beverages to be mixed into the jug through the jug opening or lid (B).
-
Replace the lid (B) along with the top lid (A) (Fig. 6) and switch the mixer on.
To work continuously, place the selector (I) in position '1', '2' or '3'. -
To work at a low speed, turn the selector to position '1'.
- To work at a medium speed, turn the selector to position '2'.
-
To work at a high speed, turn the selector to position '3'.
-
To work in programmable mode, which causes the mixer to work in a discontinuous fashion, turn the selector to the position and hold there. When the selector is released, the mixer will automatically return to the '0' position.
5. PRACTICAL ADVICE
When using the mixer for making drinks, wash all ingredients well and cut them into pieces so that they fit into the mixer opening.
- For optimum results, it is best to mix small rather than large quantities of food, especially when the item in question is very thick or heavy.
- Remove the top lid (A) from the jug lid (B) in order to add ingredients to the jug (C) while the motor is running.
- To avoid spillage, it is best to insert a small quantity of food into the jug through the lid opening, and then top up little by little as the food is mixed.
- Do not fill the jug up to more than 2/3 of its capacity, since the action of the blades may cause it to overspill.
It is best to place liquid ingredients into the jug before solid ones. The liquid helps to mix the items more quickly and at a lower speed. -
Mix the ingredients for short times only (between 5 and 30 seconds). Then check the consistency and continue processing until you obtain the consistency you require.
If the consistency you require is not obtained rapidly, stop the appliance by turning the selector to '0' and: -
Turn the selector to the position a few times in a row, or
- Remove the jug lid and mix the food items using a spatula, or
- Reduce the quantity of food to be mixed.
All fruit should be peeled and chopped
and all stones, pips, etc. removed before being placed in the jug.
- Some vegetables, such as tomatoes, should also be peeled and chopped before being processed.
- When you begin mixing, hold the mixer lid down firmly.
- Remove any dampness or liquid on the mixer base immediately, using kitchen paper.
-
Do not work with thick mixtures or heavy food items. If the motor is unable to work freely, it will stop. If this happens:
-
Add a little liquid to the mixture; or
- Set to mode; or
- Stop the mixer for a few seconds and use a spatula to clean the sides of the jug and push the ingredients towards the blades; or
Empty the jug a little.
NOTE: CUT ALL INGREDIENTS INTO CUBES (OF APPROX. 2-3 CM) IN ORDER TO ENSURE A UNIFORM MIX.
To mix ice, follow the steps outlined below:
- Insert the ice cubes into the jug.
- Replace the lid and press and ho until the mixture obtains a snow-like texture.
NOTE: WHEN MIXING ICE, ALWAYS HOLD THE JUG LID IN PLACE WITH YOUR HAND.
Always add a cup of liquid when mixing ice.
6. MAINTENANCE AND CLEANING
MAKE SURE THAT THE MIXER IS SWITCHED OFF AND UNPLUGGED BEFORE ADDING OR REMOVING ANY OF THE PARTS.
- We recommend that you clean the appliance immediately after use. Remove the jug. Remove the lid and blades before inserting your hand or fingers into the jug in order to clean it.
- Never try to assemble or disassemble the mixer for cleaning purposes without first unplugging it from the mains.
-
Use a small toothbrush (not provided) to remove any food that may have become wedged under the blades.
-
Clean the motor housing with a damp cloth. Do not use abrasive cleaners or metal scourers.
- It is easier to clean the mixer immediately after use. Pour warm soapy water into the jug and switch the mixer on for a few seconds. Switch the mixer off ('0') and remove the jug from the base. Rinse and dry thoroughly.
If you want, you can remove the blade as indicated in Fig. 7. - IMPORTANT: Do not wash the blades in the dishwasher. The pressure and heat of the water may damage the assembly and prevent it from rotating, which in turn may provoke other damage in the mixer.
- Unplug the mixer from the mains after each use and before carrying out any maintenance or cleaning operation.
- Do not let the cable or plug become damp or wet.
7. INFORMATION FOR THE CORRECT DISPOSAL OF ELECTRICAL AND ELECTRONIC APPLIANCES
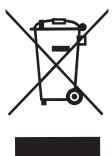
At the end of its working life, the product must not be disposed of as urban waste. It must be taken to a special local authority differentiated waste collection centre or to
a dealer providing this service. Disposing of a household appliance separately avoids possible negative consequences for the environment and health deriving from inappropriate disposal and enables the constituent materials to be recovered to obtain significant savings in energy and resources.
To remind you that you must collaborate with a selective collection scheme, the symbol shown appears on the product warning you not to dispose of it in traditional refuse containers.
For further information, contact your local authority or the shop where you bought the product.