
RCR-3650UMP - Cd player/recorder ROADSTAR - Free user manual and instructions
Find the device manual for free RCR-3650UMP ROADSTAR in PDF.


| Product type | CD player/recorder |
| Brand | Roadstar |
| Model | RCR-3650UMP |
| Dimensions (W x D x H) | Approx. 200 x 250 x 50 mm |
| Weight | Approx. 1.2 kg |
| Power supply | Mains adapter 230 V / 50 Hz (included) or 8 LR14 batteries |
| Power consumption | 15 W during operation |
| Supported CD formats | CD, CD-R, CD-RW, MP3 |
| Main functions | Playback, recording on CD-R/RW, programming, repeat, random playback |
| Connectivity | 3.5 mm auxiliary input, headphone output, USB port (for USB drive) |
| Display | Backlit LCD display |
| Built-in speakers | Yes, 2 x 2W RMS |
| Care and cleaning | Clean with a soft dry cloth. Do not use solvents. |
| Safety | Do not expose to moisture or extreme temperatures. Disconnect during thunderstorms. |
| Spare parts | Available on the manufacturer's website or from authorized dealers. |
| Repairability | Repairability index: 7.7/10 (according to manufacturer). |
| Included accessories | Remote control, audio cable, mains adapter, user manual |
| Warranty | 2 years, parts and labor |
Frequently Asked Questions - RCR-3650UMP ROADSTAR
User questions about RCR-3650UMP ROADSTAR
0 question about this device. Answer the ones you know or ask your own.
Ask a new question about this device
Download the instructions for your Cd player/recorder in PDF format for free! Find your manual RCR-3650UMP - ROADSTAR and take your electronic device back in hand. On this page are published all the documents necessary for the use of your device. RCR-3650UMP by ROADSTAR.
USER MANUAL RCR-3650UMP ROADSTAR
- Your new unit was manufactured and assembled under strict ROADSTAR quality control. Thank-you for purchasing our product for your music enjoyment. Before operating the unit, please read this instruction manual carefully. Keep it also handy for further future references.
You can power your portable system by plugging the detachable AC power cord into the AC inlet at the back of the unit and into a wall AC power outlet. Check that the rated voltage of your appliance matches your local voltage. Make sure that the AC power cord is fully inserted into the appliance.
BATTERY POWER
Insert 6 x UM2 size batteries into the BATTER. Be sure that the batteries are inserted correctly to avoid damage to the appliance. Always remove the batteries when appliance will not be used for a long period of time, as this will cause leakage to the batteries and subsequently damage to your set.
INTRODUCTION
This unit has two working modes:
- STANDBY MODE: The display shows the current time and the speakers and backlight are off.
- PLAYBACK MODE: The blue backlight is on and you can listen to music.
When no sound is produced, the unit will switch to STANDBY MODE automatically after 15 minutes.
VOLUME CONTROL
- Press VOLUME KNOB (17) repeatedly to select the desired volume level.
- To listen to different music genres, there is a preset equalizer. Press and hold M+/EQ/
FOLDER BUTTON (4) to change between ROCK / POP / CLASSIC / JAZZ.
SETTING THE CORRECT TIME
- Connect the unit to the power supply. "00:00" will be shown on the display.
- Press and hold M-/MODE/CLOCK BUTTON (5). 12/24 digits will flash on the display.
- Press SKIP+/- BUTTON (2)/(3) repeatedly to select between 12 and 24. Press M-/MODE/CLOCK BUTTON (5) again to confirm.
- The hour digits will flash on the display. Press SKIP+/- BUTTON (2)/(3) repeatedly to set the correct hour. Press M-/MODE/CLOCK BUTTON (5) again to confirm.
- The minute digits will flash on the display. Press SKIP+/- BUTTON (2)/(3) repeatedly to set the correct minute. Press M-/MODE/CLOCK BUTTON (5) again to confirm.
FM RADIO OPERATIONS
- Press ON/OFF/FUNCTION BUTTON (16) to turn the unit ON. Press ON/OFF/FUNCTION BUTTON (16) repeatedly to select FM mode. The current station frequency will be shown on the display.
- For FM reception there is a built in telescopic antenna. You may need to adjust the position of the antenna to get optimum reception.
- Select a station using one of the following methods:
- Long pressing SKIP+/- BUTTON (2)/(3) for 2 seconds or more, the frequency changes down or up automatically until a station is found.
- Repeatedly press SKIP+/- BUTTON (2)/(3) to change the frequency until you find the station you want.
PRESET STATIONS
You can program a maximum of 30 preset radio stations. Press M+/M- BUTTON (4)/(5) to navigate through the stored presets.
Automatic Preset:
Press PLAY/PAUSE/SCAN BUTTON (6) for 2 seconds or more to activate automatic program mode. All available stations are programmed. The first programmed radio station is broadcast automatically.
Manual Preset
- Repeatedly press SKIP+/- BUTTON (2)/(3) to change the frequency until you find the station you want.
- Press STOP/MEMO/SLEEP BUTTON (7). "P XX" will be shown on the display. Press M+/M- BUTTON (4)/(5) to select the chosen preset number, from 1 to 30.
- Press STOP/MEMO/SLEEP BUTTON (7) again to confirm.
TAPE OPERATIONS
- Press ON/OFF/FUNCTION BUTTON (16) to turn the unit ON. Press ON/OFF/FUNCTION BUTTON (16) repeatedly to select TAPE mode. The clock will be shown on the display.
- Press the STOP/EJ BUTTON (9) to open the cassette door and insert your tape. Close the CASSETTE DOOR (19).
- Press the PLAY BUTTON (12) to start playing tape.
- Press FFD/REW (10)/(11) to start rapid tape winding either forward or reverse direction.
- Press PLAY BUTTON (12) to start playing tape.
- Press the PAUSE BUTTON (8) when you want to stop playing tape operation temporari-
3
English
ly.
- Press the STOP/EJ BUTTON (9) when finished. Press again to open the cassette door after the tape spools stop turning.
CD PLAYBACK
- Press ON/OFF/FUNCTION BUTTON (16) to turn the unit ON. Press ON/OFF/FUNCTION BUTTON (16) repeatedly to select CD mode. "CD" will be shown on the display.
- Open the CD DOOR (15) and place a CD/MP3 disc with the label up on the CD compartment. Close the CD DOOR (15).
- Focus search is performed if disc is inside. Total number of tracks is read and appears on the display. Playback will start automatically from the first track.
- Press SKIP+/- BUTTON (2)/(3) to go to the next track or back to the previous track. Press and hold while playing until you find the point of the sound.
- Press the PLAY/PAUSE/SCAN BUTTON (6) again when you want to stop playback temporarily.
- Press the M+/EQ/FOLDER BUTTON (4) when finished.
REPEAT / RANDOM MODE
Press the M-/MODE/CLOCK BUTTON (5) before or during playing CD / MP3 disc, each press switches the mode function as follows:
- REPEAT 1: the current track will be played over an over again till you press STOP/MEMO/SLEEP BUTTON (7).
- REPEAT ALL: all tracks on the disc will be played over and over again till you press STOP/MEMO/SLEEP BUTTON (7).
- RANDOM: the random play will start from next track automatically.
- NORMAL MODE.
USB PLAYBACK
- Plug or slot in USB device to the USB SOCKET (1).
- Press ON/OFF/FUNCTION BUTTON (16) to turn the unit ON. Press ON/OFF/FUNCTION BUTTON (16) repeatedly to select USB mode. "USB" will be shown on the display.
- Playback will start automatically from the first track.
- Press SKIP+/- BUTTON (2)/(3) to go to the next track or back to the previous track. Press and hold while playing until you find the point of the sound.
- Press M+/EQ/FOLDER BUTTON (4) repeatedly to select the desired folder.
- Press the STOP/MEMO/SLEEP BUTTON (7) when finished.
The operation of PROGRAM, MODE are as the same as that of CD/MP3. Please refer to CD/MP3 OPERATION.
AUX-IN
This unit provides an auxiliary audio input jack for connecting external audio device like MP3 players, CD players and allow playback of your external source through the system speakers.
- Use an audio cable (not included) with 3.5 mm stereo plugs on each end of the cable. Plug one end into the AUX-IN jack on the main unit and plug the other end of the cable into the LINE OUT or HEADPHONE Jack of your external audio device.
-
Turn ON the unit and your external audio device. Press ON/OFF/FUNCTION BUTTON (16) repeatedly to select AUX-IN mode. "AUX" will be shown on the display.
-
Start to play the external device (see the user manual of the external device).
SLEEP
This function enables you to go to sleep listening to the Radio.
- Press and hold STOP/MEMO/SLEEP BUTTON (7).
- Press STOP/MEMO/SLEEP BUTTON (7) repeatedly to select between OFF / 120 / 90 / 60 / 45 / 30 / 15.
- The Radio turns on and will turn off automatically after the selected sleep timer.
EARPHONES
Headphones should have a 3.5 mm diameter stereo plug and an impedance of 8-32 ohms, and should be connected to EARPHONES SOCKET (23). When headphones are connected, the speaker is automatically disconnected.
SPECIFICATIONS
AC: 230V \~ 50Hz
Batteries: 6 x UM-2
FM: 87.5 - 108 MHz
Specifications and the design are subject to possible modifications without notice due to improvement.
WARNINGS


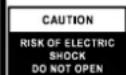


The exclamation point within the triangle is a warning sign alerting the user of important instructions accompanying the product.
The lightening flash with arrowhead symbol within the triangle is a warning sign alerting the user of “dangerous voltage” inside the unit.
To reduce the risk of electric shock, do not remove the cover. No user serviceable parts inside the unit. Refer all servicing to qualified personnel.
This unit operates on 230V \~ 50Hz. If the unit is not used for a long period of time, remove the plug from the AC mains.
Ensure all connections are properly made before operating the unit.
This unit must not be exposed to moisture or rain.
This unit should be positioned so that it is properly ventilated. Avoid placing it, for example, close to curtains, on the carpet or in a built-in installation such as a bookcase.
Do not expose this unit to direct sunlight or heat radiating sources.
natural_image
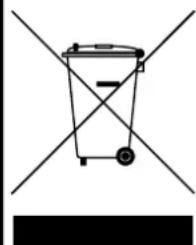
Simple line drawing of a trash bin with two crossed lines and a black rectangular base (no text or symbols)CORRECT DISPOSAL OF THIS PRODUCT (Waste Electrical & Electronic Equipment)
This marking shown on the product or its literature, indicates that it should not be disposed with other household wastes at the end of its working life. To prevent possible harm to the environment or human health from uncontrolled waste disposal, please separate this from other types of wastes and recycle it responsibly to promote the sustainable reuse of material resources. Household users should contact the retailer where they purchased this product, or their local government office, for details of where and how they can take this item for environmentally safe recycling. Business users should contact their supplier and check the terms and conditions of the purchase contract. This product should not be mixed with other commercial wastes for disposal.
LAGE DER BEDIENUNGSELEMENTE
- USB-EINGANG
- ÜBERSPRINGEN +
- ÜBERSPRINGEN -
- M+/EQUALIZER/MAPPE-TASTE
- M-/MODUS/UHR-TASTE
- PLAY/PAUSE/SCAN-TASTE
- STOP/MEMO/SLEEP-TASTE
- KASSETTE PAUSE TASTE
- KASSETTE STOP / EJECT TASTE
- KASSETTE FAST FORWARD TASTE
- KASSETTE REWIND TASTE
- KASSETTE PLAY TASTE
- FM-ANTENNE
- GRIFF
- CD-FACH
- AN/AUS/FUNKTIONSTASTE
- LAUTSTÄRKEREGLER
- LAUTSPRECHER
- KASSETTENFACH
- LCD-DISPLAY
- ZUSATZEINGANG
- BATTERIEFACH
- EARPHONES AUSGANG
- AC-STECKDOSE
natural_image
Simple line drawing of a trash bin with no text or symbolsKORREKTE ENTSORGUNG DIESES PRODUKTS (Elektromüll)
natural_image
Simple line drawing of a trash bin with two crossed lines and a black bar below (no text or symbols)MODALITÀ REPEAT/RANDOM
natural_image
Simple line drawing of a trash bin with two crossed lines and a black bar below (no text or symbols)natural_image
Simple line drawing of a trash bin with two crossed lines and a black bar below (no text or symbols)natural_image
Simple line drawing of a trash bin with two crossed lines and a black bar below (no text or symbols)natural_image
Simple line drawing of a trash bin with two crossed lines and a black bar below (no text or symbols)Roadstar Management SA, via Passeggiata 7 CH 6883 Novazzano (Switzerland)


- BATTERY POWER
- INTRODUCTION
- VOLUME CONTROL
- SETTING THE CORRECT TIME
- FM RADIO OPERATIONS
- PRESET STATIONS
- Automatic Preset:
- Manual Preset
- TAPE OPERATIONS
- 3
- English
- CD PLAYBACK
- REPEAT / RANDOM MODE
- USB PLAYBACK
- AUX-IN
- SLEEP
- EARPHONES
- SPECIFICATIONS
- WARNINGS
- CORRECT DISPOSAL OF THIS PRODUCT (Waste Electrical & Electronic Equipment)
- LAGE DER BEDIENUNGSELEMENTE
- KORREKTE ENTSORGUNG DIESES PRODUKTS (Elektromüll)
- MODALITÀ REPEAT/RANDOM
Brand : ROADSTAR
Model : RCR-3650UMP
Category : Cd player/recorder