
MW-145BT - Label printer BROTHER - Free user manual and instructions
Find the device manual for free MW-145BT BROTHER in PDF.


| Product Type | Mobile Thermal Label Printer |
| Brand | Brother |
| Model | MW-145BT |
| Print Technology | Direct Thermal |
| Print Resolution | 300 dpi |
| Max. Print Width | Up to 12 mm |
| Print Speed | Up to 60 mm/s |
| Connectivity | Bluetooth 2.0 |
| Power Supply | Rechargeable lithium-ion battery (7.4 V, 700 mAh) |
| Battery Life | Approximately 2 hours continuous |
| Dimensions (L × W × H) | 170 × 115 × 55 mm |
| Weight | Approximately 400 g (with battery) |
| Housing Material | Durable ABS plastic |
| Cassette Capacity | Up to 12 mm width |
| Main Functions | Printing labels, barcodes, text, symbols |
| Maintenance and Cleaning | Clean the print head with a cotton swab moistened with isopropyl alcohol |
| Safety | Do not expose to moisture, use only the provided adapter |
| Spare Parts and Repairability | Label cassettes available, replaceable battery |
| General Information | Portable printer ideal for mobile professionals |
Frequently Asked Questions - MW-145BT BROTHER
User questions about MW-145BT BROTHER
0 question about this device. Answer the ones you know or ask your own.
Ask a new question about this device
Download the instructions for your Label printer in PDF format for free! Find your manual MW-145BT - BROTHER and take your electronic device back in hand. On this page are published all the documents necessary for the use of your device. MW-145BT by BROTHER.
USER MANUAL MW-145BT BROTHER
(Europe/Turkey only)
(Europe/Turquie uniquement)
(Nur Europa/Türkei)
● Before using this printer, be sure to read this Quick Reference Guide.
- Lisez sans faute ce Guide de référence rapide avant d'utiliser cette imprimante.
- Vor der Inbetriebnahme des Druckers das Kurzanleitung gründlich lesen.
- Prima di usare questa stampante, assicurarsi di leggere questa Guida Rapida.
- Antes de utilizar esta impresora, asegúrese de haber leído esta Guía de referencia rápida.
- Lees deze Snelgids voordat u de printer gebruikt.
● Pass på å lese denne hurtigveiledningen før du tar skriveren i bruk.
- Se till att läsa snabbreferensen, innan skrivaren tas i bruk.
- Læs Hurtig vejledning, inden denne printer tages i anvendelse.
English
brother
Declaration of Conformity for R&TTE Directive 1999/5/EC (Europe/Turkey only)
We, Brother Industries, Ltd.
15-1, Naeshiro-cho, Mizuho-ku,
Nagoya 467-8561 Japan
declare that these products are in conformity with the provisions of the R&TTE Directive 1999/5/EC. A copy of the Declaration of Conformity can be downloaded by following the instructions in the Declaration of Conformity (Europe/Turkey only) section.
How to enable/disable Bluetooth
To activate the Bluetooth function:
Set the interface switch to Bluetooth, the meanwhile Bluetooth is on.
To deactivate the Bluetooth function:
Set the interface switch to IrDA, the meanwhile the Bluetooth is off.
Bluetooth
This printer supports Bluetooth.
Frequency band(s): 2402-2480 MHz.
Maximum radio-frequency power transmitted in the frequency band(s):
Less than 20 dBm (e.i.r.p).
CAUTION
RISK OF EXPLOSION IF BATTERY IS REPLACED BY AN INCORRECT TYPE.
DISPOSE OF USED BATTERIES ACCORDING TO THE INSTRUCTIONS.
Trademarks
The Bluetooth word mark and logos are owned by the Bluetooth SIG, Inc. and any use of such marks by Brother Industries, Ltd. under license.
All other software and product names mentioned are trademarks or registered trademarks of their respective companies.
For the latest infomation and updates on the Brother mobile printer feature, visit support.brother.com
Manual structure
A User's Guide and a Software User's Guide are provided on the CD-ROM included with this printer.
Read the User's Guide before operating the printer.
It is recommended you save the User's Guide onto your Windows® PC for future reference.
User's Guide
The User's Guide provides precautions for using this printer, details on the printer's setup, the procedures for installing and uninstalling the software onto a Windows PC or onto a Windows Mobile device.
Software User's Guide
The Software User's Guide describes how to use the software for Windows® PC or Windows Mobile® device and their printing procedures.
Enclosed accessories
MW-145BT mobile printer
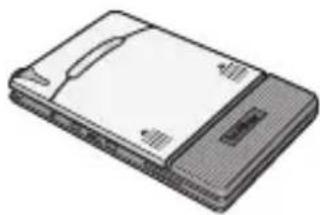
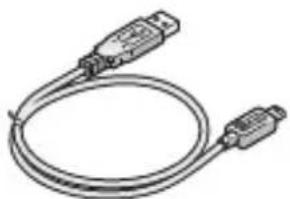
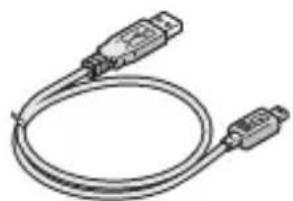
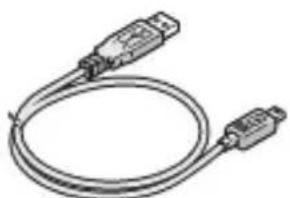
USB cable

Paper cassette
filled with C-11 thermal paper (50 sheets).

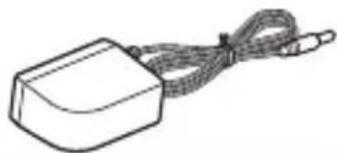
AC adapter
(AD-210UK)
Brother Industries, Ltd.
CD-ROM
(contains the software, the User's Guide and the Software User's Guide)

Quick Reference Guide
(This guide)

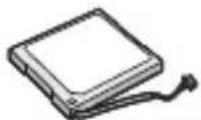
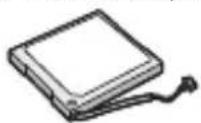
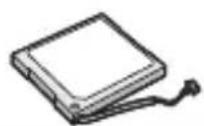
Lithium ion Rechargeable battery pack
(BT-100)
Brother Industries, Ltd.
Getting Started
Installing the battery

Danger


Do not use this printer with any rechargeable battery other than that specified (BT-100), otherwise a fire or damage may result.

• DO NOT take off the black plastic that covers the battery.
- The battery connector should not be frequently unplugged and reconnected, otherwise it may become damaged or the battery cord may break.
The battery should only be removed when replacing it at the end of its service life, or when the printer will not be used for a long period of time.
1 Press the area indicated ① on the battery cover ② and slide it off the MW-145BT.

2 Insert the connector ① of the battery ② in the direction shown right.


- Insert the connector fully, without using excessive force.
- Be sure you insert the connector in the correct orientation, otherwise it may be damaged.
3 Fit the battery cord into the groove as shown in the illustration.
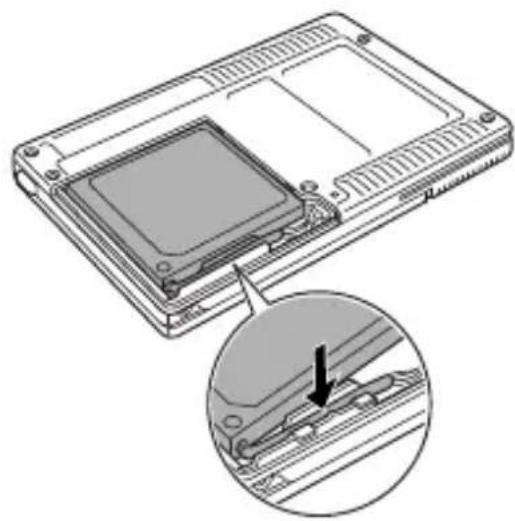
4 Install the battery cover by sliding it onto the back of the MW-145BT.
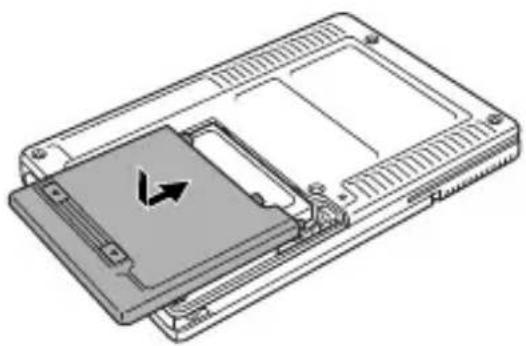

Be careful that you do not catch the battery connector cord.
Charging
Use the AC adapter designed specifically for this printer to charge the battery.
After purchasing this printer, be sure to charge the battery fully before using it.
1 Plug the AC adapter cable into the printer.
2 Plug the AC adapter plug into a household electrical outlet (AC 220 V - 240 V).
Charging of the lithium ion battery automatically begins.

The plug may differ by country.
→ The orange charging LED is lit.
→ When charging is finished, the charging LED goes off.
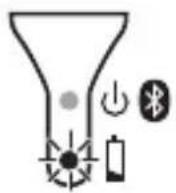

- It takes approximately three hours for the battery to be recharged from completely empty to fully charged (with the printer turned off).
- Recharge the battery in an environment with a temperature between 5 °C and 40 °C. (The battery will not recharge if the ambient temperature is outside of this range.)
3 After charging is finished, disconnect the AC adapter.

The MW-145BT cannot be operated solely with the AC adapter. The rechargeable battery must be installed.
■ Charging LED (Orange)
With the charging LED, the status of the power supply can be checked.
The charging LED has two functions.

(1) Checking the charging status
(when the AC adapter is connected)
| LED status Printer status | |
| Constantly lit Charging | |
| Off Finished charging | |
| Flashing Malfunctioning battery | |
(2) Checking the battery level
(while running off the lithium ion battery)
| LED status Battery level | |
| Off More than 60% charged | |
| Flashes once Less than 60% charged | |
| Flashes twice Less than 30% charged | |
| Continues to flash 3 times Almost empty | |

- Please try to discharge the battery completely before recharging it, to increase battery lifetime.
- If the charging LED flashes while the printer is printing, immediately connect the AC adapter and charge the battery. The printer may stop printing.
- Due to the characteristics of batteries, even though the battery is fully charged, using them in locations at low temperatures greatly reduces the number of prints possible.
- In order to maintain the efficiency and life of the rechargeable battery, remove the AC adapter from the printer when charging is completed.
- In order to maintain the efficiency and life of the rechargeable battery, do not place or use the printer in direct sunlight, near heaters or other hot appliances, in any location exposed to extremely high temperatures (e.g. on the dashboard or in the back of your car).
Turning on/off the printer
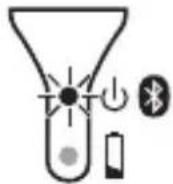
Press and hold the power button for a short while, until the green or blue status LED illuminates.
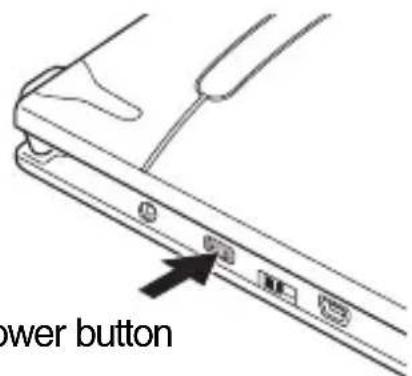
Power button
→ When the printer is turned on, the status LED is: Green (if Bluetooth is switched off) Blue (if Bluetooth is switched on)


In order to prevent this printer from accidentally being turned on, it will not come on if the power button is lightly pressed.
Preparing the paper cassette
Use only the paper cassette designed exclusively for this printer. Use of any other paper will result in damage.
Prepare the paper cassette before installing it into the printer.
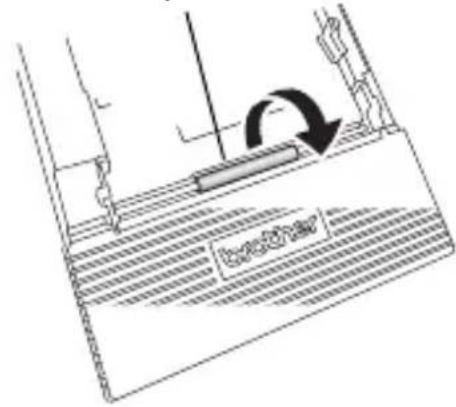
1 Firmly fold the lid back along the fold (①).


Make sure that the lid is firmly folded, otherwise a paper misfeed may result.
2 Insert the tab on the lid into the slit (②) at the back of the cassette.
Installing the paper cassette
1 Slide the paper cassette cover (on the top of the printer) in the direction shown in ①.
→ The paper cassette cover will open in the direction indicated by ②.
2 Insert the paper cassette.
The paper type indication on the paper cassette should face up. The end of the paper should point toward you.
3 Close the paper cassette cover in the direction shown in ③.
4 Slide the paper cassette cover in the direction shown in ④. If the paper cassette is correctly loaded, the paper type indication on the cassette can be seen through the paper check window, and the paper cassette cover will be locked.

Paper type indication
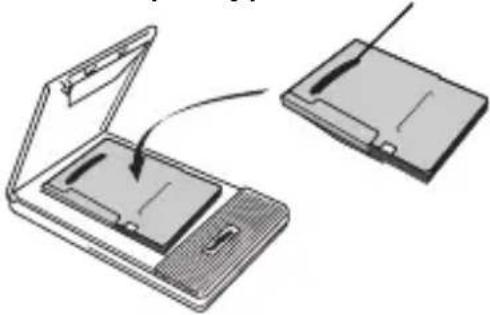

Paper check window

Paper type indication
■ If the paper is not fed correctly
Clean the pick-up roller.
1 Open the paper cassette cover.
2 Rotate the pick-up roller in the feed direction until it stops.
Pick-up roller
3 Attach a piece of cellophane tape to the rubber pick-up roller.

4 Remove the cellophane tape, and turn the pick-up roller 3 to 4 mm in the opposite direction of the feed direction.
→ Any dirt on the pick-up roller is removed with the tape.
5 Repeat steps 3 and 4 until the pick-up roller is clean.
Français
brother
15-1, Naeshiro-cho, Mizuho-ku,
Nagoya 467-8561 Japan
Câble USB

CD-ROM
(BT-100) Brother Industries, Ltd.


15-1, Naeshiro-cho, Mizuho-ku,
Nagoya 467-8561 Japan
USB-Datenkabel
CD-ROM
Kurzanleitung
(diese Anleitung)
Brother Industries, Ltd.

Vor der Verwendung
Akku einlegen

Noi, Brother Industries, Ltd.
15-1, Naeshiro-cho, Mizuho-ku,
Nagoya 467-8561 Japan
Brother Industries, Ltd. in licenza.
Cavo USB

Cassetto carta
riempito con carta termica C-11 (50 fogli).

Caricabatterie
(adattatore CA: AD-210EU) Brother Industries, Ltd.

CD-ROM
(BT-100) Brother Industries, Ltd.


15-1, Naeshiro-cho, Mizuho-ku,
Nagoya 467-8561, Japan
Cable USB

Paquete de papel
CD-ROM
(BT-100) Brother Industries, Ltd.


15-1, Naeshiro-cho, Mizuho-ku,
Nagoya 467-8561, Japan
USB-kabel

Papiercassette
Cd-rom
Brother Industries, Ltd.
De accu plaatsen

De stekker kan per land verschillen.
15-1, Naeshiro-cho, Mizuho-ku,
Nagoya 467-8561 Japan
USB-kabel
Papirkassett
CD-ROM
Hurtigveiledning
(Denne håndboken)

Lithium ion oppladbar batteripakke
(BT-100) Brother Industries, Ltd.

Komme i gang
Sette inn batteriet


2 Sett inn papirkassetten.
3 Lukk papirkassettdekselet i retningen vist på ③.

4 Skyv papirkassetdekselet i retningen vist på ④.
15-1, Naeshiro-cho, Mizuho-ku,
Nagoya, 467-8561, Japan
USB-kabel

Papperskassett
Cd-rom-skiva
Snabbguide
(denna handledning)

Laddningsbart
litiumjonbatteri
(BT-100) Brother Industries, Ltd.
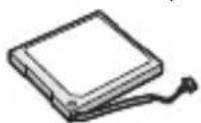
Installera batteriet

15-1, Naeshiro-cho, Mizuho-ku,
Nagoya, 467-8561, Japan,
USB-kabel
Papirkassette
fyldt med C-11 termisk papir (50 ark).

Oplader
(AC-adapter: AD-210EU) Brother Industries, Ltd.

Cd-rom
Kort vejledning
(Denne vejledning)

(BT-100) Brother Industries, Ltd.


Kontroller, at låget er helt foldet, eller kan papiret indføres forkert.
2 Sæt fanen på låget ind i slidsen (②) på kassettens bagside.
Installation af papirkassetten
1 Skub låget til papirkassetten (oven på printeren) i den retning, der er vist i ①.

4 Fjern cellofantapen, og drej opsamlingsrullen 3-4 mm modsat indføringsretningen.
→ Eventuelt snavs på opsamlingsrullen fjernes med tapen.
- ENGLISH
- BROTHER
- DECLARATION OF CONFORMITY FOR R&TTE DIRECTIVE 1999/5/EC (EUROPE/TURKEY ONLY)
- HOW TO ENABLE/DISABLE BLUETOOTH
- BLUETOOTH
- CAUTION
- TRADEMARKS
- MANUAL STRUCTURE
- USER'S GUIDE
- SOFTWARE USER'S GUIDE
- ENCLOSED ACCESSORIES
- PAPER CASSETTE
- AC ADAPTER
- CD-ROM
- QUICK REFERENCE GUIDE
- LITHIUM ION RECHARGEABLE BATTERY PACK
- GETTING STARTED
- INSTALLING THE BATTERY
- DANGER
- CHARGING
- CHARGING LED (ORANGE)
- CHECKING THE CHARGING STATUS
- CHECKING THE BATTERY LEVEL
- TURNING ON/OFF THE PRINTER
- PREPARING THE PAPER CASSETTE
- INSTALLING THE PAPER CASSETTE
- IF THE PAPER IS NOT FED CORRECTLY
- FRANÇAIS
- VOR DER VERWENDUNG
- AKKU EINLEGEN
- CASSETTO CARTA
- CARICABATTERIE
- PAQUETE DE PAPEL
- DE ACCU PLAATSEN
- KOMME I GANG
- SETTE INN BATTERIET
- INSTALLERA BATTERIET
- PAPIRKASSETTE
- OPLADER
- KORT VEJLEDNING
- INSTALLATION AF PAPIRKASSETTEN
Brand : BROTHER
Model : MW-145BT
Category : Label printer