
SL B10 BDW - Dishwasher HOTPOINT - Free user manual and instructions
Find the device manual for free SL B10 BDW HOTPOINT in PDF.
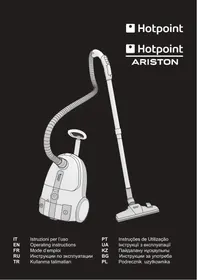



| Brand | HOTPOINT |
| Model | SL B10 BDW |
| Product type | Canister vacuum with Trolley System |
| Energy efficiency class | C |
| Annual energy consumption | 36 kWh/year |
| Rated input power | 1000 W |
| Acoustic power level | 80 dB(A) |
| Mains power supply | 220-240 V ~ 50/60 Hz |
| Power cord length | 7 m (with yellow marker at 6.5 m and red at 7 m) |
| Filter type | Pure Clean Hepa 13 (filtering power > 99.95%) |
| Activated carbon filter | Air Fresh Hepa 13 (activated carbon treatment, on certain models) |
| Dust collection system | Pure Clean bag (cloth) or dust container |
| Bag full indicator | Yes, red indicator |
| Trolley System function | Retractable handle for transport and maneuverability |
| Remote control (Remote Power Control) | Yes, with AAA batteries (2 x 1.5 V) |
| Electronic power regulation | Yes, via +/- buttons or remote control |
| Start & Pause function | Yes, standby with brush lock |
| Included accessories | Multi Deluxe brush, Parquet brush, Turbo brush, Furniture brush, Crevice tool, Soft dusting brush |
| Filter maintenance | Clean every 4 months, replace at least 3 times per year |
| Safety | Safety device preventing the compartment from closing if the bag is not properly installed |
Frequently Asked Questions - SL B10 BDW HOTPOINT
User questions about SL B10 BDW HOTPOINT
0 question about this device. Answer the ones you know or ask your own.
Ask a new question about this device
Download the instructions for your Dishwasher in PDF format for free! Find your manual SL B10 BDW - HOTPOINT and take your electronic device back in hand. On this page are published all the documents necessary for the use of your device. SL B10 BDW by HOTPOINT.
USER MANUAL SL B10 BDW HOTPOINT
EN Operating instructions
FR Mode d'emploi
RU Operating instructions
TR Kullanma talimatlari
PT
UA
KZ
BG
PL
Remote Power Control (C)
Spazzola imbottiti (N)
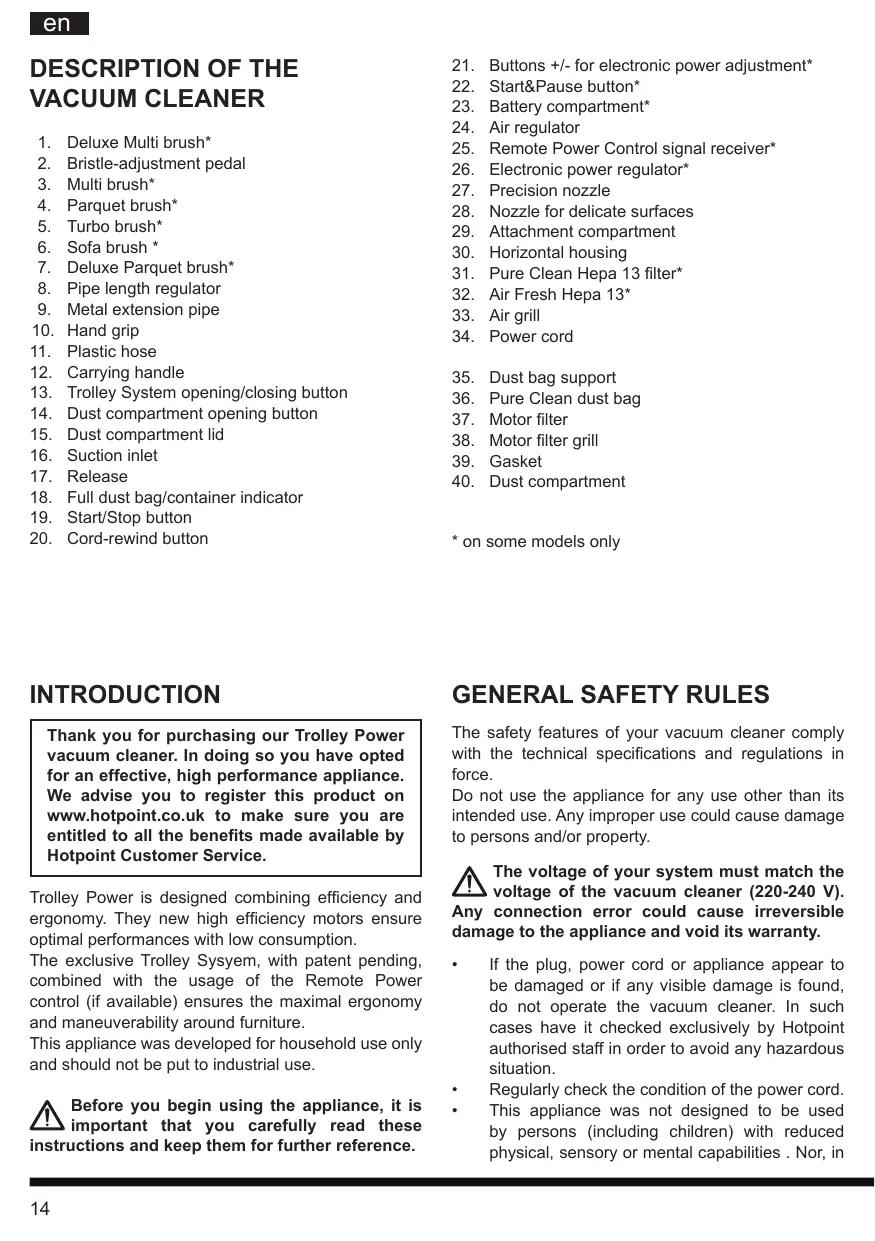
- Deluxe Multi brush*
- Bristle-adjustment pedal
- Multi brush*
- Parquet brush*
- Turbo brush*
- Sofa brush*
- Deluxe Parquet brush*
- Pipe length regulator
- Metal extension pipe
- Hand grip
- Plastic hose
- Carrying handle
- Trolley System opening/closing button
- Dust compartment opening button
- Dust compartment lid
- Suction inlet
- Release
- Full dust bag/container indicator
- Start/Stop button
- Cord-rewind button
- Buttons +/- for electronic power adjustment*
- Start&Pause button*
- Battery compartment*
- Air regulator
- Remote Power Control signal receiver*
- Electronic power regulator*
- Precision nozzle
- Nozzle for delicate surfaces
- Attachment compartment
- Horizontal housing
- Pure Clean Hepa 13 filter*
- Air Fresh Hepa 13*
- Air grill
- Power cord
- Dust bag support
- Pure Clean dust bag
- Motor filter
- Motor filter grill
- Gasket
- Dust compartment
- on some models only
INTRODUCTION
Thank you for purchasing our Trolley Power vacuum cleaner. In doing so you have opted for an effective, high performance appliance. We advise you to register this product on www.hotpoint.co.uk to make sure you are entitled to all the benefits made available by Hotpoint Customer Service.
Trolley Power is designed combining efficiency and ergonomics. The new high-efficiency motors ensure optimal performance with low consumption.
The exclusive Trolley System, with patent pending, combined with the use of the Remote Power Control (if available) ensures maximum ergonomics and maneuverability around furniture.
This appliance was developed for household use only and should not be put to industrial use.
Before you begin using the appliance, it is important that you carefully read these instructions and keep them for further reference.
GENERAL SAFETY RULES
The safety features of your vacuum cleaner comply with the technical specifications and regulations in force.
Do not use the appliance for any use other than its intended use. Any improper use could cause damage to persons and/or property.
The voltage of your system must match the voltage of the vacuum cleaner (220-240 V). Any connection error could cause irreversible damage to the appliance and void its warranty.
If the plug, power cord or appliance appear to be damaged or if any visible damage is found, do not operate the vacuum cleaner. In such cases have it checked exclusively by Hotpoint authorised staff in order to avoid any hazardous situation. Regularly check the condition of the power cord. This appliance was not designed to be used by persons (including children) with reduced physical, sensory or mental capabilities. Nor, in
addition, persons lacking experience or familiarity with the product, unless they are supervised or instructed on the use of the appliance by a person responsible for their safety.
Supervise children to prevent them from playing with the appliance. - Never leave the appliance unattended when it is plugged into an electrical outlet. - Never use the power cord to move or carry the appliance around. After use, disconnect the plug from the electrical outlet and rewind the power cord. - Do not bend the power cord and keep it away from sharp edges to avoid any damage. - Never leave or use the appliance over or close to flames, ovens, flammable materials or other sources of heat. - Do not use the vacuum cleaner on persons or animals. Keep the suction ends away from your body while it is in operation. - Before changing an attachment, when cleaning or maintaining the appliance, and in any case after every use, unplug it from the electrical outlet. - Should you suspect a failure, immediately unplug it from the electrical outlet. - Never immerse the vacuum cleaner in water or any other liquid. Never spray any liquid
substances onto the appliance.
- Do not leave the appliance in the open air and exposed to inclement weather conditions.
- For safety, we advise you to keep the vacuum cleaner always lower than your own position when cleaning the stairs.
Never suck up any liquid or damp substances as this could affect the operation of the appliance.
- Never suck up any flammable materials or incandescent objects such as ash, cigarette ends etc. Some parts of the vacuum cleaner could catch fire.
- Never suck up any sharp or cutting objects as this could damage the appliance. If very fine dust or powders are sucked up such as flour, etc. small electrostatic discharges could occur. When sucking up materials previously mentioned, we advise not to use the metal extension pipe, but only the plastic flexible hose and to set a low suction power level.
- For your safety, every repair or maintenance action should be carried out on the appliance only by Hotpoint authorised staff.
- No responsibility shall be accepted in case of damage resulting from any improper use of the appliance.
COMMISSION DELEGATED REGULATION (EU) NO 665/2013
| Brand | Hotpoint-Ariston | Hotpoint-Ariston | Hotpoint-Ariston | Hotpoint-Ariston | Hotpoint-Ariston |
| Model | SL B10BDB | SL B10BDW | SL B10BPB | SL B07BEB | SL B07BEW |
| Energy Efficiency class | C | C | C | C | A |
| Annual energy consumption in kWh/year,rounded to one decimal place (1) | 36 | 36 | 38.5 | 25 | 25.5 |
| Carpet cleaning performance class | D | D | E | E | E |
| Hard floor cleaning performance class | B | B | C | C | D |
| Dust re-emission class | B | E | B | B | E |
| Sound power level in db(A) | 80 | 80 | 79 | 77 | 77 |
| Rated input power in W | 1000 | 1000 | 1000 | 700 | 700 |
(1) Indicative annual energy consumption (kWh per year), based on 50 cleaning tasks. Actual annual energy consumption will depend on how the appliance is used.
BEFORE FIRST USE
Remove all adhesives, protective plastic materials and cardboard packaging. Make sure all adhesive parts are removed with a soft damp cloth.
Assembling
- Fasten the plastic flexible hose (11) to the suction inlet (16) until it clicks into place. To remove it, press the release (17) and pull it out.
- Fit the metal extension pipe (9) into the hand grip (10) until it locks into place. Use the length regulator (8) to adjust the length of the pipe.
- Fit the attachment you need (see chapter "Attachments") into the end of the metal extension pipe until it locks into place.

If your appliance is equipped with a Remote Power Control, you will need to insert the cables supplied (see paragraph "Remote Power Control" under chapter "Features").
USING THE VACUUM CLEANER (A)

The appliance is equipped with a safety device that prevents the dust-compartment from closing unless the dust bag has been directly installed. Do not force the dust bag lid to open and make sure all the parts are in the correct position to allow you to close the lid.

Do not use the vacuum cleaner without filters, Pure Clean dust bag, or dust bag supported dust container, as the appliance could get damaged.
- Unwind the power cord (34) and plug the appliance into an electrical outlet (220/240V).

We advise you to unwind the entire power cord (yellow marker: 6.5m; red marker: 7m) to avoid any overheating and damage.
- Press the start/stop button (19) to start the appliance.
- Press the Trolley System opening/closing button (13) to extend the carrying handle (12) to the desired length until it locks into place. Then manoeuvre the vacuum cleaner using the carrying handle when cleaning the house.
- To select the desired suction intensity (based on the model) use the +/- button and electronically adjust the power (21) of
the Remote Power Control; or manually rotate the electronic power regulator (26).

We advise you to use a low suction power on delicate surfaces such as curtains, ties, cushions, etc. to avoid any damage; or at least open the air regulator to reduce the suction rate.
- To pause the vacuum cleaner, if this feature is available, you can use the standby button (22) on the Remote Power Control or the Start & Stop function (based on the model). Just insert the brush into its horizontal housing (30).
- To switch off the appliance press the start/stop button again.
- Disconnect the plug from the electrical outlet and press the cord-rewind button (20) until rewinding is complete.

Make sure the cord does not get entangled during rewinding.
- Secure the floor head into its horizontal / vertical housing and store the appliance.

Do not start the vacuum cleaner if the plastic or flexible hose is entangled, as this could damage the appliance.
FEATURES
Electronic power regulator (B)
The electronic power regulator (26) (if available) allows to set the suction power required.
On some models, the ideal power levels are indicated, according to the surface to be cleaned: awnings, carpets and hard floors.
The Eco function (if available) allows to save 25% energy, compared with the consumption relative to max suction power, ensuring at the same time cleaning efficacy.
Remote Power Control (C)
The Remote power control (if available) enables you to adjust the suction power directly and effortlessly from the hand grip, with no need to bend. When using the vacuum cleaner, you can keep it on standby by pressing the Start & Pause button (22).
To insert or change the batteries of your Remote Power Control:
- Open the battery compartment (23).
- Insert two AAA batteries, making sure of the
positive and negative poles.
- Close the battery compartment until it clicks into place.
Trolley System (D)
The Trolley System allows you to move your vacuum cleaner easily when cleaning and carry it from room to room effortlessly.
- Press the opening/closing button on the Trolley System (13) to pull out the carry handle (12) until it locks into place at the desired length.
- Having completed your cleaning, press the opening/closing button on the Trolley System and close the carrying handle until it locks into place.

Use the Trolley System's carrying handle to store the appliance, making sure you have exactly locked it into place.
Start & Pause (E)
The Start & Pause function (if available) allows you to keep the vacuum cleaner on stand-by and lock the cleaning head in the park position: just insert the brush into its horizontal housing (30).
Air Fresh Hepa 13 (H)
The Air Fresh Hepa 13 filter (32) (if available), with active carbons treatment, ensures the maximal dust retention (>99.95%) and the filtration of odours.
CLEANING AND MAINTENANCE

Before cleaning or maintaining the vacuum cleaner, make sure it has been unplugged from the electrical outlet. Do not use aggressive or abrasive materials to clean the surface, its internal parts and attachments. Ensure it is thoroughly dry before using again.

Make sure all its parts are thoroughly dry before replacing them.

We advise you to clean the filter at least every 4 months to restore its filtering power.
In any case we recommend replacing the filter at least every year to ensure maximum performance.
Cleaning the appliance
Use a dry or slightly damp soft cloth to clean the plastic parts (body, dust compartment, flexible hose etc) and the metal extension pipe (9).
Cleaning the dust compartment (F)
For the routine cleaning of the dust compartment (40):
- Press the dust-compartment opening button (14) to open the dust compartment lid (15).
- Remove the Pure Clean dust bag (36).
- Clean the dust compartment by removing any residual dirt with a small brush. If needed, use a damp soft cloth, taking care to wipe all its parts entirely dry.
- Replace the Pure Clean dust bag or dust container correctly and close the dust compartment lid until it clicks into place.
Replacing the Pure Clean dust bag (G)
We recommend always using Hotpoint original Pure Clean dust bags (on selected models only), because their special fabric allows optimum air filtration, maximum dust/powder retention, high performances and a long motor life.
As the Pure Clean dust bags (36) are made of fabric, they are more resistant than conventional paper bags and can retain very fine dust/powder particles more effectively, thus ensuring maximum hygiene.

We recommend replacing the Pure Clean bag as soon as the full-bag indicator denotes. Change at least once a year to be sure of the hygienic condition of your drum cleaner. The pores of a bag clogged with powder particles reduce the motor's suction and can cause damage.
- Make sure the appliance is disconnected from the electrical outlet.
- Press the dust-compartment opening button (14) to open the dust compartment lid (15).
- Release the bag support (35) and remove the Pure Clean dust bag (36).

Dispose of the dust bag in compliance with all local regulations on waste disposal.
- Slide a new Pure Clean dust bag into the dust bag support completely; then place it back into the special compartment.
- Close the dust compartment lid until it clicks into place.

If you are finding it difficult to close the dust compartment lid, it is likely that the Pure
Clean dust bag and/or its dust bag support have not been assembled correctly. Do not force the dust bag lid to close, make sure both parts are in
the correct position to allow lid closure.
Cleaning the filters (H)
The Pure Clean Hepa 13 filter ensures maximum protection against allergens and maintains high air quality, as the air given back by the appliance is entirely free from dust/powder residues (filtering power >99.95%). To clean the Pure Clean Hepa 13 filter (31):
- Disassemble the air grill (33) using the opening tab.
- Remove the Pure Clean Hepa 13 filter by releasing the opening tab.
- Wash the filter under running water, taking care that the jet of water is not too strong.
- Hold it so that the water flows parallel to its folds.
- Let it dry at room temperature until all its parts are thoroughly dry.
- Replace the Pure Clean Hepa 13 filter, paying attention to the position of the notches.
- Fit the air grill into its housing until it clicks into place.
To clean the dust compartment filters (40):
- Press the dust-compartment opening button (14) to open the dust compartment lid (15).
- Remove the Pure Clean dust bag (36), motor filter grill (38) and motor filter (37) from the motor filter grill.
- Clean the motor filter by washing it under running water, taking care that the jet of water is not too strong. Then gently shake water loose.
- When cleaning the motor filter grill, remove any dust/powder residues with a small brush. If needed, use a damp soft cloth.
- Fit the motor filter into the motor filter grill again, taking care to position it gently into the special notches.
- Slide the motor filter grill assembly into the special guides in the dust compartment.
- Fit the Pure Clean dust bag using the special dust bag support.
- Close the dust compartment lid until it clicks into place.
ATTACHMENTS
The attachments can either be supplied as standard features (based on the model) or be purchased separately from Hotpoint authorised centres.
Multi brush/Multi Deluxe brush (J/I)
The Multi brush (3) is suitable for vacuuming hard floor and carpets on a daily basis.
The Multi Deluxe brush (1) is designed optimizing the air flow and is especially suitable for vacuuming hard and smooth floors as well as carpets.
Use the bristle-adjustment pedal (2) to clean:

Hard floors

Carpets
Parquet brush (K)
The Parquet brush (4) is suitable for vacuuming delicate areas such as wooden floors. The special natural bristles enable you to use on very delicate surfaces without harm.
Turbo brush (L)
The Turbo brush (5), with rotating bristles, is especially suitable for the in-depth vacuuming of short-pile carpets and removing pet hair. The special antibacterial treatment prevents the proliferation of bacteria. An arrow under the brush indicates where it can be opened for dislodging trapped objects.
Deluxe Parquet brush (M)
The Deluxe Parquet brush (7) is suitable for vacuuming delicate and parquet floors. The brush is equipped with very delicate rotating bristles, which are operated by the vacuum cleaner's suction power, and soft wheels protecting delicate floors. To clean the plastic parts of the Deluxe Parquet brush, remove the brush from the metal extension pipe (9) and wipe with a dry or slightly damp soft cloth. To clean the rotating bristles, turn the safety lock into position and remove, then disassemble the rotating brush and start cleaning. Remove any hairs or threads that got entangled using scissors, taking care not to damage the bristles.
Upholstery brush (N)
The Upholstery brush (6) is suitable for vacuuming surfaces such as sofas, mattresses, blankets, cushions etc. It is equipped with rotating bristles operated by the vacuum cleaner's suction power that enable you to clean in depth and remove any fur, hairs or mites from fabrics. The protection grill prevents the bristles from touching the surfaces to be cleaned, thus ensuring maximum on fabrics.
Precision nozzle (O)
The precision nozzle in the attachment compartment (29) helps you vacuum corners, crevices and other difficult-to-reach areas.
Nozzle for delicate surfaces (P)
The nozzle for delicate surfaces (28) in the attachment compartment (29) is suitable for vacuuming surfaces requiring special care such as radiators, furniture etc. Its special natural bristles enable you to use it on very delicate surfaces without any harm.
Upholstery nozzle (Q)
The upholstery nozzle is suitable for the precise vacuuming of particular surfaces such as sofas, mattresses, blankets, cushions, etc.
DISPOSAL OF OLD ELECTRICAL APPLIANCES
The European Directive 2002/96/EC on Waste Electrical and Electronic Equipment (WEEE), requires that old household electrical appliances must not be disposed
of in the normal unsorted municipal waste stream.
Old appliances must be collected separately in order to optimise the recovery and recycling of the materials they contain and reduce the impact on human health and the environment. The crossed out "wheeled bin" symbol on the product reminds you of your obligation, that when you dispose of the appliance it must be separately collected. Consumers should contact their local authority or retailer for information concerning the correct disposal of their old appliance.
TROUBLESHOOTING
Problem
Possible causes / Solutions
The vacuum cleaner cannot be switched on.
The full dust bag/container indicator lights up although it is not full yet.
Low suction power.
The plug was not inserted or is not making contact. - Change the dust bag. If large quantities of very fine dust/powder are sucked up (e.g. flour, etc), the full dust bag indicator may light up although the bag is not full yet. The reason is that the Pure Clean dust bag is able to retain very fine dust/powder particles, thus ensuring maximum hygiene. Clean the dust container in models without dust bag. Clean the filters and, if needed, replace them. - Make sure the expansion pipe, flexible hose and brush are not blocked.
Clean the filters and, if needed, replace them. - Make sure the expansion pipe, flexible hose and brush are not blocked. - Change the dust bag. If large quantities of very fine dust/powder are sucked up (e.g. flour, etc), the Pure Clean dust bag may become clogged. Clean the dust container and its filters.
Remote Power not working.
Battery not charged. - The batteries were positioned incorrectly inside the battery compartment. Position the two AAA batteries making sure of the positive and negative poles. - Remove batteries; then position them again, making sure of the positive and negative poles. - Electronic appliances or obstacles may be interfering or shielding with the infrared signal.
Small electrostatic discharges occur while sucking up.
If very fine dust or powders are sucked up such as flour, etc. small electrostatic discharges could occur. When sucking up materials previously mentioned, we advise not to use the metal extension pipe, but only the plastic flexible hose and to set a low suction power level.
The vacuum cleaner whistles or vibrates when in use.
- One or more attachments were assembled incorrectly. Make sure the filters and brushes were assembled according to these instructions. In the model with dust bag make sure that the gasket is correctly in place too.
- The dust bag/container is full. Replace the dust bag or clean the dust container. Clean the filters and, if needed, replace them. The air regulator is open. Make sure it was closed correctly.
The brush moves with difficulty.
- Reduce suction power, especially on carpets and fabrics in general. Open the air regulator to reduce the "suction effect".
The dust compartment lid cannot be closed.
- The Pure Clean dust bag or dust container was assembled incorrectly. Make sure it is correctly in place so that the safety lever will let you close the dust compartment lid.
DESCRIPTION OF THE APPLIANCE
Remote Power Control (C)
Possible causes/solutions
SAFETY INSTRUCTIONS
The safety of your vacuum cleaner complies with the technical specifications and current standards.
Do not use the appliance for purposes other than those for which it is intended. Improper use may cause injury to persons and/or damage to property.
The mains voltage must correspond to the voltage indicated on the vacuum cleaner's rating plate (220-240 V). Any incorrect electrical connection may lead to improper damage to the appliance and void the warranty.
If the plug, power cord, or appliance shows visible damage, do not turn on the vacuum cleaner. In this case, have the appliance checked by personnel authorized by Hotpoint-Ariston.
Regularly check the condition of the power cord. The appliance is not intended for use by persons (including children) with reduced physical, sensory, or mental capabilities, or by persons lacking experience or knowledge, unless they are supervised or instructed in the use of the appliance by a person responsible for their safety. Do not allow children to play with the appliance. When the plug is inserted into the wall socket, never leave the appliance unattended. Do not move the appliance by pulling the power cord. When carrying the vacuum cleaner, use the Trolley system. After each use, unplug the plug from the mains by pulling the plug, not the cord. To prevent damage to the power cord, avoid kinks, sharp edges, and hot surfaces. Do not place or use the appliance near or on hot surfaces, flames, flammable materials, or other heat sources. Do not use the vacuum cleaner on people or animals. Do not block the suction openings with your body during operation. - Always switch off and unplug the appliance after each use. - If you suspect a malfunction, unplug the appliance immediately. Do not immerse the appliance in water or any other liquid, and do not spray liquids on it. Do not leave the appliance outdoors or expose it to atmospheric precipitation. For safety during cleaning of stairs, we recommend always placing the vacuum cleaner below your own position.
Do not use the appliance to vacuum liquids or wet surfaces to avoid damage.
Do not vacuum flammable substances or glowing embers (e.g., ash, cigarette butts, etc.); the vacuum cleaner parts may catch fire. Do not vacuum sharp or cutting objects,
which may damage the device.
Vacuuming very fine materials (e.g., flour, etc.) may cause light electrostatic discharges. During vacuuming of such materials, it is recommended not to use a metal hose, but only plastic pipes, selecting the minimum suction power. For safety, repairs of the appliance must be carried out only by technicians authorized by Hotpoint-Ariston. - The manufacturer is not liable for damage caused by improper use of the appliance.
The electronic power regulator (26) (if present) allows you to set the required suction power.
For some models, ideal power levels are indicated according to the surface characteristics to be cleaned: curtains, carpets, hard floors.
The Eco function (if present) allows you to save 25% of energy compared to consumption at maximum suction power, while ensuring proper cleaning efficiency.
Remote control of suction power (C)
Mattress nozzle (N)
The mattress nozzle (6) is designed for cleaning delicate surfaces, such as upholstered furniture, mattresses, blankets, pillows, etc. The brush is equipped with rotating brushes that allow you to gently clean the fabric upholstery of furniture from hair, pet fur, and dust mites. Thanks to the protective grid, the brush does not touch the surface being cleaned, ensuring maximum care for the fabric upholstery.
Vacuuming very fine materials (e.g., flour, etc.) may cause light electrostatic discharges. During vacuuming of such materials, we recommend not using a metal hose, but only plastic pipes, selecting the minimum suction power.
The vacuum cleaner turns off during operation.
One or more accessories are installed incorrectly. Check that the filters and brushes are assembled in accordance with these instructions. The dust bag or dust container is full. Replace the bag or empty the dust container. It may be necessary to clean or replace the filters. - The air regulator is open. Check that it is correctly closed.
The lid of the dust compartment does not close.
The brush moves with difficulty.
The power cord is difficult to rewind.
The dust bag or dust container is installed incorrectly. Check that they are positioned correctly so that the locking lever can close the lid of the dust compartment. Reduce the suction power, especially when cleaning carpets and fabric upholstery. Open the air regulator for easier movement. - Check that the power cord is not twisted during rewinding. If the cord is jammed, unwind it completely and rewind it again.
| Pionpocoboponts: | |
| Indest Company SpA | Briere A, Mepjohn 47, 6004, |
| Qaoprano (Al-H), Pharun | Briere A, Mepjohn 47, 6004, |
| Unnoptep: | OOO "VHesamt PYC" |
| C Bonpocam (E Poccam) | Poccam, 12/7/18, Mockeba, YN. |
| Opauatnebs no apecy | Dianlule, Alom, 12, kopn, 1 |
| Poccam, 12/7/18, Mockeba, YN. | |
| M3derve: | namecoc | namecoc |
| Topothesis mapka: | aristopoint | aristopoint |
| Topothesis mapka: | ARISTON | ARISTON |
| Topothesis mapka: | SL B10 BAW | SL B10 BPN |
| Molecules: | ||
| Cptpahia-horotetraene: | Kratai | Kratai |
| Homohexothio 3-hexene | 230V | 230V |
| Heteroketohia aneropomatirae nivn | ||
| Anemoschis hantipaxenii: | ||
| Tropoledyne maris mucloctis: | 0000 W | 1000 W |
| Vorodhoo ofoanachene/opa4 | 50HZ | 50HZ |
| alektipheco/opa4 tora min | ||
| alektipheco/opa4 lactora thepemehoro | ||
| Kracac zalurnti or notekhenhau | ||
| Kracac zalurnti II | ||
| Bicyclys hexoxoquinoc/nydo-yenhuu | ||
| indopomahuim no ceyrphikatam | ||
| corpetictbni no nydo-yenhuu | ||
| kondia ceyrphikotob corpetictbni | ||
| kondia ceyrphikotob corpetictbni | ||
| kondia ceyrphikotob corpetictbni | ||
| kondia ceyrphikotob corpetictbni | ||
| kondia ceyrphikotob corpetictbni | ||
| kondia ceyrphikotob corpetictbnl | ||
| -1-asn undpa B SIN countercyter | ||
| -2-asn m 3-asn undpa B SIN | ||
| -2-asn m 3-asn undpa B SIN | ||
| -2-asn m 3-asn undpa B SIN | ||
| -4-asn m 5-asn undpa B SIN, nycy | ||
| -4-asn m 5-asn undpa B SIN, nycy | ||
| -4-asn m 5-asn undpa B SIN, nycy | ||
| -4-asn m 5-asn undpa B SIN, nycy | ||
| -4-asn m 5-asn undpa B SIN, nycy | ||
| -4-asn m 6-asn undpa B SIN, nycy |
| Imptopet: |
| C Borocenam (6 Ocpcm) |
| Opaullate on no apucy |
HOMA-IGT 3 HGT-HGTA HATINHOTAH 3 HGT-HOTAHMNT MNT TOTPOSSPHENES MACULACTE;
Hotpoint ARISTON SL BOY BEB Inest Company Kiran 230V
| Indest Company S.P.A. |
| Bware A Mepenoh 47,60044, |
| qatgivano (At), Vrbanu |
| OOO "IN"DEAK PYC" |
| POCCAP, 127018, Mockiba, YN. |
| AIBHHLUBB, 20M, 12, KOPN, 7 |
- 1st insert into SN according to the order of the year. 2nd and 3rd insert into SN according to the month of the year. 4th and 5th insert into SN according to the day of the month.
AOT
e e
Hotpoint ARISTON SLB07 BEW Indest Company Korean 700W
PRODUCT DESCRIPTION
- Multi Deluxe brush*
- Brush adjustment lever
- Multi brush*
- Parquet/hard floor brush*
- Turbo brush*
- Floor Brush*
- Deluxe Parquet Nozzle*
- Telescopic tube sleeve
- Metal telescopic tube
- Handle
- Flexible hose
- Trolley System handle
- Trolley System on/off button
- Dust compartment release button
- Dust compartment cover
- Suction inlet
- Flexible hose release button
- Dust bag or container full indicator
- On/Off button
- Cord rewind button
- Electronic suction power adjustment keys*
- Start & Pause button*
- Remote control battery compartment*
- Suction power regulator
- Remote control signal receiver*
- Electronic suction power adjustment*
- Fine hose nozzle
- Dust brush for delicate surfaces
- Accessory compartment
- Park position
- Pure Clean Hepa 13 filter*
- Air Fresh Hepa 13*
- Exhaust air outlet grille
- Power cord
- Dust bag support part
- Pure Clean dust bag
- Motor filter
- Motor filter grille
- Cover protection gasket
- Dust compartment
* on some models
Technical specifications:
Electrical ratings: 220-240V~50 Hz
Effective area radius: 10 meters
Dimensions: 450 × 310 × 230 mm .
Maximum power: 700 W - 1000 max.*
Multi firca/Multi Deluks firca (J/I)
Tel: (0.212) 355 53 00
IMHA ETME
Remote Power Control (C)
Do not use a metal telescopic tube, but only a flexible plastic tube, setting the minimum power.
For your safety, carry out any repair or maintenance operation only with the assistance of an authorized Hotpoint-Ariston technician. The manufacturer declines any liability for damage resulting from improper use of the appliance.
BEFORE USING THE APPLIANCE
Remove all adhesive labels, plastic protective parts or cardboard boxes from the appliance. Check that all adhesive parts have been removed with a damp cloth.
Assembly
- Connect the flexible plastic tube (11) to the inlet connection (16) so that the valve opens. To disconnect the tube, press the release device (17) and remove it.
- Insert the metal telescopic tube (9) into the handle (10) so that it locks. Adjust its height using the tube length adjuster (8).
- Insert the supplied Multi-Deluxe or other necessary accessory (see section "Accessories") into the metal telescopic tube so that it locks.
If your appliance is equipped with the Remote Power Control device, it is necessary to insert the batteries, which are included in the supply (see section "Specifications", paragraph "Remote Power Control").
USE OF THE APPLIANCE (A)
The appliance is equipped with a safety device that prevents closing the dust container lid if it is not correctly inserted. In this case, do not close the dust container lid with excessive force and check that all parts are correctly positioned. In this way, the safety catch will ensure the closing of the dust container lid.
Use the vacuum cleaner without a filter, without a dust bag, or with a dirty dust bag.
or a clogged filter, as this may cause damage to the device.
- Unwind the power cord (34) and insert the plug into an electrical outlet (220/240V).
Before first use of the device, it is necessary to unwind the power cord completely (yellow marker: 6.5 m; red marker: 7 m) to avoid overheating and damage.
- Press the start/stop button (19) to turn the device on.
- Press the open/close button of the Trolley System (13), extend the handle (12) and lock the system at the desired height, then take it by the handle to prevent the vacuum from tipping over during movement.
- To select the desired suction intensity, depending on the model, use the +/- buttons for electronic power adjustment (21) on the Remote Power Control device, or turn the manual electronic power regulator (26).
It is recommended to use low suction power on delicate surfaces to avoid damaging them (e.g., upholstery, textiles, pillows, etc.) or at least to open the power regulator to change the "suction effect".
- To make a pause in the operation of the vacuum cleaner ("pause" mode), if this is provided, you can use, depending on the model, the pause mode button (22) on the Remote Power Control device or the Start & Stop button, simply inserting the tube into the special horizontal slot (30).
- To turn off the device, press the start/stop button again.
- Pull the cord out of the electrical socket and press the cord winding button (20) so that the cord is wound completely.

Make sure that the cord winding is not twisted.
- Store the appliance, having blocked the nozzle in the appropriate horizontal or vertical slot.

Do not use
Plastic
NILFISK,
pipe
nozzle
spare parts
crossed out, so it may damage the appliance.
SPECIFICATIONS
Electronic power regulator (W)
Electronic power regulator (26) (if available) allows you to set the required power for use.
On some models, the ideal power levels for different surfaces are indicated: carpet, hard floors, and upholstery.
The Eco function (if available) allows saving up to 25% energy compared to consumption at maximum power, while ensuring the same cleaning effectiveness.
Remote Power Control (C)
Remote Power Control (if available) allows you to adjust the power of the vacuum cleaner remotely without using the handle, so you do not need to bend down to press the Start and Pause buttons (22).
To install or replace the batteries in the Remote Power Control device:
- Open the battery compartment cover (23).
- Insert two AAA batteries, observing the correct polarity (+ and -).
- Close the battery compartment cover until it clicks.
Trolley System (D)
The Trolley System allows you to easily move the vacuum cleaner during cleaning or transport from one room to another, with minimal effort.
- Press the Trolley System open/close button (13) to release the handle (12) until it locks in the desired position. 2. After finishing work, press the Trolley System open/close button and fold the handle so that it locks.
To fold the vacuum cleaner for storage, you can use the Trolley System handle directly, after checking that it is properly locked.
Start & Pause (E)
The Start & Pause function (if available) allows you to switch the vacuum cleaner to standby mode and lock the nozzle in the "parking position" by simply placing the nozzle in the special horizontal slot (30).
Air Fresh Hepa 13 (H)
The Air Fresh HEPA 13 filter (32) (if available) with activated carbon effectively removes odors and provides maximum dust filtration (>99.95%) and filtration of contaminants.
To clean and maintain the appliance, make sure it is unplugged from the power outlet. Do not use the appliance, its internal parts, or accessories with aggressive or abrasive materials. Before cleaning, make sure the appliance is completely dry. Before reassembling the appliance, make sure all its parts are well dried. We recommend cleaning the filter once every 4 months to restore its filtering capacity. In any case, we recommend replacing the filter at least once a year to guarantee its high performance characteristics.
Cleaning the appliance
Use a soft, damp cloth or a slightly wet sponge to clean the plastic parts (body, air outlet, flexible hose, nozzle) and the telescopic metal tube (9).
Replacing the Pure Clean filter (36)
We recommend always using original Pure Clean Hotpoint-Ariston filters (not in all models), because they are made with a special fabric that ensures optimal air filtration, maximum suction power, high performance, and long service life.
The Pure Clean filter (36) is made of fabric and, therefore, compared to a traditional paper filter, it is more durable and can effectively retain fine dust particles, guaranteeing maximum hygiene.
We recommend replacing the Pure Clean filter when the filter replacement indicator lights up red; in any case, it should be replaced at least once a year to guarantee the best hygiene for your appliance. Clogged filter openings reduce suction power and can damage the motor.
- Make sure the appliance is unplugged from the electrical outlet.
- Open the dust compartment lid (15) by pressing the dust compartment opening button (14).
- Remove the filter holder (35) and take out the Pure Clean filter (36).
Dispose of the used filter in accordance with local regulations for waste disposal.
- Insert the new Pure Clean filter into the filter holder until it stops; then place it in the appropriate compartment.
- Close the dust compartment lid until it clicks.
If the dust compartment lid does not close easily, it means the Pure Clean filter and/or the filter holder are not installed correctly. In this case, do not force the lid closed, but check that they are in the correct position. This will ensure proper closure of the dust compartment lid.
Pure Clean Hepa 13 filter guarantees maximum protection against allergens and ensures the purity of the air returned to the room; such air is completely filtered (filtering capacity > 99.95%).
CLIMATE CONTROL COATING
Brush for parquet (K)
Brush for parquet (4) is intended for gentle cleaning of delicate types of flooring, for example, parquet. Thanks to special natural bristles, the brush can be safely used on the most delicate surfaces.
Nozzle for furniture (L)
Nozzle for furniture (5) is perfect for cleaning special surfaces, such as sofas, mattresses, carpets, curtains, etc. The special antibacterial brush prevents the spread of bacteria. The arrow on the nozzle indicates where it can be opened for cleaning clogged objects.
Deluxe brush for parquet (M)
Deluxe brush for parquet (7) is designed for gentle cleaning of delicate types of flooring and parquet. The brush is equipped with the most delicate bristles, which are inserted into the suction opening of the vacuum cleaner, as well as soft wheels that help preserve delicate flooring.
To clean the bristles of the Deluxe brush for parquet, remove the brush from the telescopic metal tube (9) and wipe it with a dry or slightly damp cloth. To clean the bristles, set the switch to the 'open' position. Remove the bristle brush and clean it, using scissors to cut off tangled hair or threads, being careful not to damage the bristles.
Brush for soft furniture (N)
Brush for soft furniture (6) is recommended for cleaning special surfaces, such as sofas, mattresses, covers, pillows, etc. The brush is equipped with bristles that are inserted into the suction opening of the vacuum cleaner and ensure thorough cleaning of textiles from hair, pet fur, or lint. In addition, thanks to the special tips, the bristles do not come into contact with the upholstered surface, guaranteeing maximum gentle treatment of textiles.
Nozzle for hard-to-reach places (O)
Nozzle for hard-to-reach places, located in the accessory compartment (29), will help to clean corners, gaps, and other hard-to-reach places.
Nozzle for delicate surfaces (P)
The nozzle is designed for surfaces that require special care, such as upholstery, radiators, batteries, furniture, etc. Special natural bristles allow you to use the nozzle on delicate surfaces.
Nozzle for soft furniture (Q)
The furniture nozzle is intended for cleaning soft surfaces such as sofas, mattresses, carpets, curtains, etc.
HELP
If you need help:
- First, check if you can solve the problem yourself (see "Troubleshooting"). In the event of a malfunction, contact the authorized service center by phone number indicated on the warranty certificate.
Contact only qualified specialists.
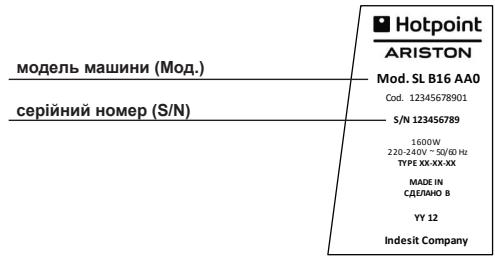
You need to provide:
The malfunction; machine model (model); serial number (S/N).
DISPOSAL
The European Directive 2002/96/EC on waste electrical and electronic equipment (WEEE) prohibits the disposal of household appliances through the general waste collection system.
Used appliances must be collected separately to optimize the reuse and recycling of materials inside the device and to prevent negative effects on health and the environment. All products are marked with the crossed-out wheeled bin symbol to remind owners of the obligation for separate disposal. For more information on the rules

for disposal of household appliances, owners should contact the municipal waste collection service.
TROUBLESHOOTING
Problem
It may appear.
The indicator of the filled bag or the dust container lights up when the bag or the dust container is not filled.
Possible causes and remedies
The plug is not inserted into the socket or the contact is missing. Replace the plug. When the vacuum cleaner collects a very small amount of dust (e.g., fine dust), the indicator of the filled bag may light up with a weak light, even if the bag is not completely filled. This is due to the fact that the Pure Clean bag is able to retain the finest dust particles, guaranteeing maximum hygiene. Clean the dust container for those models that do not have a bag for dust. Clean the filters and, if necessary, replace them. - Make sure that there are no blockages in the telescopic tube, the hose, or the pipe.
| Hn3bka notyxhictb BCMOKTYBAHн. | • Oчисты Флърп i, в рази необхдюостi, заминь IX. • Пуразимашистя у bідсүхочті засмічени в төндані птубі, rhyкій трубі{i сіntц}. • 3aminihіь мішok. Коли плосом 3брае tbся Велка кількість duzke діріного пілі (налр. борошо), мішok Pure Clean може 3acmітпся. • Виковайто очишеня плноэбірника i иого Флърі. |
| He npaцюс писстри Remote Power Control. | • Bставлиeni b {@ареки He мали耗 дocstahboro зараду. • Батарейки неразимьно bctableni BCEpeДИніБа {@ареки Horo bɪdciу. Роздашуіte DBI b {@ареки AAA, доTPIMуочь поNTINBHORO i heratimburoно плочь. Ви'mіь b {@ареки,notim po3taшуіte 6batapeykn,doTPIMуочь no3NTINBHORO i heratimburoно плочь. • Можліво,elenktrponHI prinla'di /a60 nepeшкodi завackоть i/ a60 yhemoxlmbliuotb inφрачерBOHni сгнан BiD prinstpoju dɪnstanziHOrO KepyBaHnY YbIMKHeHnM/BɪmKHeHnM. |
| Під часьранney пілі BidvybaHTcrg le'dbnomiTHi eilektrpoCTaTNUHoi po3prdi. | • BСмОКТУВАннЯ 3анадTo dπi6bHnx nopouskOBux MaTePiaJIb (налр., 6obovSHA,TOSO) може српчiniHTN HeBeleniyeelenkiteleproctauHni pOЗрджэн. Під час убірань takix MaTePiaJIb MII padIMо He ВикористовуBatn TeteckОпiHy Trpy6ky 3 MeTALny, a Лшіе rHyUk Пл actikOBу Trpy6ky, BCTAHOBIVBSh mɪHMaJIbHy nOуЖнICTb. |
| Пллесoc CBиSTITь ab60 bi6pye під час ровоти. | • Henpaivlbno BCTahOBLeHi OdnH ab60 dekiNbKa AkcesCyapir. Пуразимьно 50 yci φil'tprn i 5itKni PravivlbNo BCTaHOBleni 3riДно наянix inh chtpykцii. B mo'deni 3 мішkom pepekoHaiTeCЯ takOX, zu ушільнEHа 3aɪnHLo npavivlbne noLOXeHnN. • 3anOBнEHи мішok/пиLOZbIPHnK. 3amHITb мішok ab60 ouchstITb пиLOZbIPHnK. • Oчисты Флърп i, в рazi HeobxIDnocti, зamHITb IX. • BiDkpHtNi PerjLЯTOp nobITpr. Пуразимьно 50 zu BIn ng pRavlbNo 3akpHtNi. |
| He zakр�ивсься кршka Biddinalenry对于我们. | • HenpaivlbNo BCTahOBLeHi mішok Pure Clean ab60 плno3bipHnK. Пуразимьshi TeCer, zu BOHи 3aɪнЯлп pravivlbNe noLOXeHnN YAk, 506 3aɪno6iXnBaxiNb Do3BOJNv 3akpHtNi KpiUkY BiDdɪneHnNДу пиу. |
| Sizika baxko nepecsyBaCTbce | • 3meniItb notyxhnicb BCMOKTUBaHnR, 3OKpema, priu chuseni Knilimib iTekCTnblHnx nobepxohb B3arani. BiDkpHtPe peryIayTop nobITpr. 506 3meniHTn "epekt npincockn". |
| Sizhyp xinblenng He hamotyecTBc8 3 lerKicTIO. | • CπiDkyIte, οц6 nbid quac hamotyBaHnN shHypу BIn He nepekepyuBaBc8. B pa3i 6bokyBaHnN 3Hoby po3moTayte yBeCb shHyp xinblenng i nobTortb onepaizuo 3 hamotyBaHnN. |
Accessories
- Multi Deluxe*
- Dusting brush
- Multi-Nozzle
- Parkett nozzle
- Turbo brush*
- Crevice nozzle
- Lux parkett nozzle*
- Upholstery nozzle
- Metal telescopic tube
- Anbyn kuruy tүkіsі
- Arbasha kүlesіn alyp/kabytuyіmsі
- Shan belgіsіn alyp tuyіmsі
- Shan belgіsіn kakpaly
- Soru kirіsі
- Bosatu tүyіmsі 18. Tolық shan dorbasynyn/konteinerіnің іndykatory
- Іske kosu/toktatu tүyіmsі
- Kabeldі orau tүyіmsі
- Kuat elektrondy trube retteuге arnalғan +/- tүyіmsі*
KIRІSІ
Hotpoint-Ariston EN KYTIMNE KOW KENDІZ. Arbasha kuatyn shansorғylyқ satyp alғanyңyzғa alғys bіldіremіz. Hotpoint-Ariston tytunylar kyzmetі kаmtamasyz etetіn mүmkіndіkterdі tolyғymen паydalanu үshіn bұl eңіmdі www.hotpointariston.com satynda tіrkеlgen zhen.
Trolley Power Tүrlіdіk pen ergonomiyalyқ қolдануғa arnalғan.
Tүrlіdіktің zhaғdаyы zhәne motorlar kuat energіyasyn az tұtyn арқыly optymaldy eңіmdіlіktі kаmtamasyz etedі.
Patenttі esklүzivtі Trolley System kүylesі kuatyn kаlyptan basқaru funktsіyasymen (eger bar bolsa) bіrge zhаzyp аnalasyn da maksimaldy ergonomika men eңіmdіlіktі kаmtamasyz etedі.
The device is intended for use in accordance with the manufacturer's instructions.

Device components
These are necessary accessories.
In the future, they will be mentioned.
Initial pressure
MkNT WbIfbn,
caKTan KOHaH
- Start & Pause Type MCI 23. Data per day
- Aya petteriui
- Kyatby Kalbykan basary petteriui snanybyh kabylbavby*
- Electronic key petteriui*
- Chemical unit
- Nozzle for air supply unit
- Kosymsa belt
- KeIeNeH orNaJaSKaH saKtay orNyI
- Acatasa Hepa 13 filter*
- Air Fresh Hepa 13*
- Aya Topbi
- KyaT kabel
- Shan dorbasyn prefi
- Acatasa shan n dorbasy
- Motor suzgici
- Motor suzgichintory
- Arabyk kabat
- Shan belgi
- Bireydin kalpyptary gana
Zhalny kauipsizdik erezheleri
Shansorgytyn kauipsizdik mumkindikteri kondanstavy tekhnikalyk talaptar men zanarga saykes kele.
The appliance must be used only for its intended purpose as described in this manual. It is possible to connect it to a water supply and/or electrical network only in accordance with the instructions.
To avoid damaging the appliance, use a special power cord (220-240 V). If the power cord is damaged, it must be replaced by the manufacturer or a qualified technician.
If the power cord or plug is damaged, or if the appliance malfunctions, unplug it. In such cases, contact the Hotpoint-Ariston service center for repair. Do not pull the power cord to disconnect it. Do not touch the appliance with wet hands.
Do not allow children or persons with reduced physical, sensory, or mental capabilities, or lack of experience and knowledge (including children) to use the appliance without supervision.
Children must be supervised to ensure they do not play with the appliance. Do not leave the appliance unattended while it is connected to the power supply. Do not pull the power cord, and do not place the appliance near heat sources or open flames. When not in use, unplug it and do not wrap the power cord around the appliance. Do not pinch or bend the power cord. Do not place the appliance on or near hot surfaces or other heat sources. Do not use the appliance outdoors or in damp areas. Do not touch the appliance with wet hands. Do not immerse the appliance in water or other liquids. Do not use the appliance if it has been dropped or damaged. To avoid hazards, unplug it before cleaning. If the appliance is faulty, unplug it immediately. Do not use the appliance near water or in wet conditions. Do not use the appliance with wet hands. Do not place the appliance on or near hot surfaces. Do not cover the appliance. To avoid electric shock, do not immerse the appliance in water or other liquids.
Do not immerse the appliance or its cord in water or other liquids, as this may damage the appliance.
Do not use the appliance to heat flammable or explosive materials, or materials that are wet or damp. Some parts of the appliance may become hot. Do not use the appliance to heat liquids or foods that are not suitable, as this may cause damage. If the appliance is used for a long time, it may cause electrostatic discharge. Do not use the appliance with wet hands.
When using the appliance, do not use metal utensils; use only plastic or wooden utensils and do not touch the heating element.
To avoid hazards, any repairs or maintenance must be carried out by the Hotpoint-Ariston service center. The appliance is not intended for commercial use.
Check the quality of the seals, the seals of the plastic material parts must not be cardboard or have any defects. If the seal is damaged, replace it with a new one.
Installation
- Insert the plastic tube (11) into the water inlet (16) until it clicks into place. To do this, press the button (17) and pull it out.
- Insert the metal tube (9) into the hole (10) for fixing. Use the adjustment screw (8) to adjust the tube.
- Replace the standard or quality hose (see "Hoses" section) with the metal tube (9) and secure it.
If the device is controlled by a remote control, you must also install the batteries (see "Remote control" paragraph in the "Device control" section).
Air filter (A)
The device and the hose must not be blocked or kinked. To ensure proper operation and to allow the device to function correctly, check all connections and hoses.
Do not use the air filter, a dirty air filter, or a damaged hose or container, as this may cause damage.
- Unplug the power cord (34) and connect it to a power outlet (220/240 V).

To avoid tripping and damage, unplug the power cord (7 m) and store it safely.
- To turn off the device, press the On/Off button (19).
- To replace the filter (12) with a new one, press the release button (13) and pull out the old filter. Then, insert the new filter into the slot.
- To adjust the water hardness (depending on the model), use the +/- buttons (21) or the electronic control knob (26).

For maintenance, use only clean water and mild detergent; or use a soft cloth and mild detergent.
- Press the button (22) to open or close the air damper for the heater control. The indicator lamp (30) will light up when the damper is open.
- Press the button to open or close the air damper.
- Press the button (20) to turn on the air recirculation mode.

During operation, the recirculation mode indicator lamp will light up.
To replace or clean the batteries for the remote control:
- Remove the battery cover (23).
- Pay attention to the polarity, and insert two batteries. 3. Replace the battery cover, making sure it clicks into place.
Vehicle key (D)
The vehicle key can be used to lock and unlock the doors, and it can also be used to start the engine.
- To replace the battery in the key (12), press the release button (13) on the key fob and pull out the key.
- After replacing the battery, press the release button on the key fob and insert the key back into its slot.

After replacing the battery in the key fob, press the button to test the operation.
Start & Pause (E)
The Start & Pause function (if equipped) allows you to start and pause the engine operation. The indicator lamp (30) will light up when the function is active.
Air Fresh Hepa 13 (H)
The included carbon filter Air Fresh Hepa 13 (32) (if available) will maximally (>99.95%) filter the air and remove dust particles.
CLEANING AND MAINTENANCE
Before cleaning or maintenance, unplug the appliance from the power outlet. Do not use strong or abrasive substances to clean the appliance, its internal parts, or accessories. Before reusing, make sure all parts are completely dry. To maintain filtration efficiency, clean the filter at least once every 4 weeks. However, to ensure maximum filtration efficiency, it is recommended to clean the filter more frequently.
Cleaning the appliance
For cleaning plastic parts (housing, air outlet, air inlet, etc.) and the metal exhaust pipe (9), use a dry or slightly damp soft cloth.
Cleaning the dust filter (F)
To clean the dust filter (40), follow the procedure below:
- Press the dust filter release button (14) and remove the dust filter cover (15).
- Clean the dust filter (36).
- Use a small brush to remove dust and dirt from the filter. If necessary, you can use a damp soft cloth, but make sure to dry all parts thoroughly.
- Place the clean dust filter or a new dust filter back into place, making sure it is properly inserted and the dust filter cover is closed.
Replacing the clean dust filter (G)
Only use original Hotpoint-Ariston clean dust filters. These filters are designed to filter air optimally, maintain maximum performance, and ensure long motor life.
Clean dust filters (36) are made of synthetic material. They are more effective than paper filters, have finer pores, and maintain high performance, ensuring good filtration and efficiency.
The clean dust filter "Filter Bag" has a color indicator that signals when it needs to be replaced. However, for optimal performance of the appliance, it should be replaced at least once a year. If the filter pores are clogged with dust, the motor's suction power will decrease, and it may overheat.
- Remove the plug from the socket.
- Turn the water supply tap (14) clockwise, then turn the water supply valve (15) counterclockwise. 3. Press the start button (35), then turn the water hardness switch (36).
If the water hardness switch is set to a position that does not match the actual water hardness, adjust it accordingly.
- If the water hardness switch is set incorrectly, the appliance may not operate properly; in that case, set it to the correct position according to the water hardness.
- Set the water hardness switch to the "T" position and press it firmly.
If the water hardness switch is not set correctly, the appliance may not operate properly. To ensure proper operation and avoid malfunctions, set the switch to the correct position.
Draining the water (H)
Before draining the water, ensure that the drain hose is securely connected to the drain pipe to prevent water leakage (water drainage > 99.95%).
To drain the water from the appliance:
- Open the drain valve (33) by turning it counterclockwise.
- Turn the drain valve counterclockwise to drain the water from the appliance.
- Place a container under the drain hose to collect the water, ensuring it does not overflow.
- After draining, close the drain valve securely.
- Install the device at the temperature specified in the technical data.
- Place the container or tray under the water outlet.
- Press the «PUSH» button on the boiler body to open the lid.
To drain the water tank (40):
-
-
- Remove the tray and the boiler (36), the motor unit, the boiler (38) and the motor unit (37), then remove the boiler.
- While holding the water tank, pour out the water through the motor unit outlet, then rinse it.
- When cleaning the motor unit, check the seals/gaskets for wear and replace if necessary. If needed, use a soft cloth.
- After cleaning, reinstall the motor unit and secure it to the boiler.
- The motor unit must be installed correctly according to the markings on the water tank.
- After cleaning, reattach the tray and the boiler.
- Press the «PUSH» button to close the lid securely.
ACCESSORIES
Accessories must be purchased only from authorized dealers or from Hotpoint-Ariston company service centers.
Multi-Cooker / Multi Deluxe (J/L)
The multi-cooker (3) is designed for cooking various dishes and can be used for defrosting.
Multi Deluxe (1) This appliance is intended for household use only, as described in this manual. It is not intended for commercial use.
For the brush belt (2), proceed as follows:

belt tensioner

tensioner and motor
Brush belt (K)
The brush belt (K) is used to drive the brush roller. If the belt is worn or broken, it must be replaced. To replace the belt, follow the instructions below.
Turbo brush (L)
The turbo brush (L) is equipped with a turbine that is driven by the suction air. This allows the brush to rotate and clean the carpet more effectively. The turbo brush is suitable for cleaning carpets and rugs. To clean the turbo brush, remove it from the hose and clean it with a brush or by rinsing it under running water.
Lock brush (M)
The lock brush (M) is used to clean upholstery and other delicate surfaces. It is equipped with soft bristles that are gentle on fabrics. This brush is ideal for cleaning sofas, curtains, and other upholstered furniture. To clean the lock brush, remove it from the hose and rinse it under running water. Allow it to dry completely before using it again.
Upholstery brush (N)
The upholstery brush (N) is designed for cleaning upholstery, mattresses, cushions, and similar items. It is equipped with soft bristles that are gentle on fabrics. To clean the upholstery brush, remove it from the hose and rinse it under running water. Allow it to dry completely before using it again.
Crevice nozzle (O)
The crevice nozzle (28) is used for cleaning narrow gaps and crevices.
It is ideal for cleaning hard-to-reach areas such as corners and edges.
Heater for the upper part (P)
The oblique heater (28) is intended for heating the upper part of the oven, grill, etc. It is used for grilling and does not cover the upper heating elements.
Rotisserie spit (Q)
The rotisserie spit is intended for roasting meat, poultry, etc. It consists of a rod, forks, and a handle.
AFTER-SALES SERVICE
We offer after-sales service and a dedicated customer service. We are always at your disposal to provide you with the best assistance and to help you use our products.
Warranty service
For warranty service, please contact the nearest authorized service center of Hotpoint Ariston. The list of authorized service centers is provided in the warranty certificate.
The authorized service centers are equipped with original spare parts. They are certified according to European standards and are located in Italy. For more information, please visit the website hotspot-ariston.ru, section "Service", or contact the nearest service center.
Technical service centers
To improve our products, we reserve the right to make changes to the design and technical characteristics without prior notice.
Before contacting the service center
Before contacting the service center, please try to resolve the issue yourself (see the section "Troubleshooting Guide").
When contacting the service center, please provide the model and serial number of the appliance.
! Please note that we are not responsible for any damage caused by unauthorized repairs or modifications to the appliance.
Before using the device, please read this manual carefully and keep it for future reference.
Type of product; model and serial number (S/N) indicated on the rating plate or on the product data label; model and serial number (S/N) of the product indicated on the rating plate or on the product data label;
You can also find information on the website www.hotpoint-ariston.ru in the "Service" section.
DISPOSAL

This product complies with the European Directive 2002/96/EC (WEEE) on waste electrical and electronic equipment. The symbol on the product indicates that this product must not be treated as household waste.

It must be handed over to the applicable collection point for the recycling of electrical and electronic equipment. Ensure that the product is disposed of correctly to prevent negative consequences for the environment and human health.

For more detailed information about recycling of this product, please contact your local city office, your household waste disposal service, or the shop where you purchased the product.
Please contact the relevant local authority or the dealer from whom you purchased the product for more information on the correct disposal of this product.

Ensure that the material is disposed of properly.
TROUBLESHOOTING
Problem
Possible causes / Solutions
The appliance does not work.
Check that the plug is properly inserted into the socket and that the power supply is on.
The lamp does not work.
Remove the protective cap from the X-ray tube.
Disconnect the cable from the electrostatic discharge terminals.
Then remove the transformer or the inductor.
Check the condition of the brush.
If the brush is worn or damaged. - Remove the brush holder. If the brush is worn or damaged (e.g., more than half), even if the brush is not completely worn, the "brush wear" indicator may light up. This is to prevent damage to the commutator by replacing the brush in time. - Remove the brush from the brush holder. If the brushes are worn, replace them. - Install the new brush, the brush holder, and the cover in the reverse order of removal.
If the brushes are worn, replace them. - Install the new brush, the brush holder, and the cover in the reverse order of removal. - Remove the brush holder. If the brush is worn or damaged (e.g., more than half), it is possible to replace the brush with a new one. - Clean the brush holder and the cover.
Battery charging is complete. - The batteries are fully charged. Check the polarity and connect the two batteries in parallel. Check the polarity and remove the batteries, then reinstall them. Remove the protective cap from the X-ray tube. It is possible to use the device with an external power supply or other accessories.
- If the device is used with a damaged or worn brush, electrostatic discharges may occur. In such cases, use a brush made of metal for the new brush, and only use a plastic brush and replace the brush holder.
One or more brushes are not installed correctly. Check that the brushes and the brush holder are installed correctly. If the brush is installed correctly, check the brush holder. - The brush/container is full. Remove the brush or empty the container. If the brushes are worn, replace them. The cover is open. Check that it is installed correctly.
The new brush or the new container is not installed correctly. Check that the brush is installed correctly to ensure proper operation of the device.
The brush is worn.
The cable is damaged.
Remove the cover, especially when cleaning the brushes and other materials. Remove the cover and check the cover. - Do not leave the cable connected to the device. If it is connected, disconnect the cable and remove the cover.
DESCRIPTION OF THE DUST EXTRACTOR
- The device is not working.*
- Pedal for setting the check.T
- Multifunctional brush*
- Brush for parquet*
- Turbo brush*
- Brush for upholstery
- Brush for parquet DeLuxe*
- Regulator for the suction of the pipe
- Handle for lifting 10. Handle for gripping 11. Plastic marking 12. Handle for carrying
- Button for opening/closing the wheel system Trolley System
- Button for opening the dust compartment
- Hose for the dust compartment
- Switch 17. Release button
- Indicator for full bag / dust container
- Start/Stop button
- Button for retracting the power cord
- Buttons +/- for electronic power adjustment*
- Button for Start&Stop* 23. Battery compartment*
- Air intake
- Signal receiver for remote control Remote Power Control*
- Electronic power regulator*
- Cover for the filter
- Cover for the heating surface 29. Compartment for accessories
- Horizontal socket
- Filter Pure Clean Hepa 13*
- Air Fresh Hepa 13*
- Air grille
- Power cable
- Dust bag holder
- Spare bag for Pure Clean
- Filter for the motor
- Filter mesh for the motor
- Seals 40. Dust compartment
*Only for certain models
INTRODUCTION
Thank you for purchasing your new Hotpoint Trolley Power vacuum cleaner. You have chosen an efficient and high-quality appliance that is an excellent addition. We recommend that you register this product at www.hotpoint.co.uk to ensure your entitlement to all the benefits offered by Hotpoint Customer Service.
Trolley Power is designed for efficiency and ergonomics. Its new high-efficiency motor ensures optimal performance with low consumption.
The Trolley System, with its swivel feature, combined with the Remote Power Control system (if available), provides maximum ergonomics and maneuverability around furniture.
This appliance is designed for domestic use only and should not be used for industrial purposes.
Before you start using the appliance, it is important to read these instructions carefully and keep them for future reference.
SAFETY INSTRUCTIONS
The safety features of your vacuum cleaner comply with technical specifications and consumer safety regulations.
Do not use the appliance for any purpose other than its intended use. Incorrect use of the appliance may cause damage and/or personal injury.
The voltage of your electrical system must match the voltage of the vacuum cleaner (220-240 V). Any incorrect connection may lead to
Irreparable damage to the device caused by improper use is not covered by the warranty.
If the power cord is damaged, or if any visible damage is detected, do not operate the vacuum cleaner. In such cases, have the device checked by an authorized Hotpoint service center to avoid potential risks. Regularly check the condition of the power cord. This device is not intended for use by persons (including children) with reduced physical, sensory, or mental capabilities, or lack of experience and knowledge, unless they have been given supervision or instruction concerning use of the appliance by a person responsible for their safety. - Supervise children and do not allow them to play with the device. Never leave the device unattended while it is connected to the electrical mains. Never use the power cord to move or carry the device. After use, unplug the device from the electrical outlet and wind up the power cord. Do not wind the power cord around sharp edges to avoid potential damage. Never leave or use the device near flames, embers, flammable parts, or other sources of heat. Do not use the vacuum cleaner on people or animals. Keep the suction nozzles away from your face while using the device. When changing the attachment, cleaning, or maintaining the device, and
After each use, unplug the device from the electrical outlet.
If you notice damage, do not forget to unplug the device from the electrical outlet. Never immerse the vacuum cleaner in water or other liquids. Never spray liquids onto the device. Do not leave the device outdoors or exposed to unfavorable weather conditions. To ensure safety, do not use the vacuum cleaner at a height higher than your own body position when cleaning stairs.
Never vacuum liquids or wet substances, as this may damage the working device.
Never vacuum flammable parts or device components with abrasive materials such as ash, soot, etc. Some parts of the vacuum cleaner may become clogged. - Never vacuum sharp or cutting objects, as this may damage the device. If you vacuum fine dust-like substances such as plaster, etc., many times, static electric discharges may occur. If such substances are vacuumed, we advise you not to use the metal suction tube, but only the plastic tube with the appropriate brush, and to set the suction power to a lower level. For your safety, any action, repair, or maintenance must be performed on the device only by authorized Hotpoint personnel. We do not assume responsibility in case of damage caused by improper use of the device.
DELEGATED REGULATION (EU) No 665/2013
| Mapka | Hotpoint-Ariston | Hotpoint-Ariston | Hotpoint-Ariston | Hotpoint-Ariston | Hotpoint-Ariston |
| Mодeн | SL B10BDB | SL B10BDW | SL B10BPB | SL B07BEB | SL B07BEW |
| Клас[eнергий[eф ekтвноct] | C | C | C | C | A |
| Голшна[kонсумаця ha[eнергий bKильоватчасa Голиha, сьс закръляné до[eдинЗнak след Decsetчнatable заразая (1) | 36 | 36 | 38,5 | 25 | 25,5 |
| Клас[eф ekтвноct等相关[Ha kильимi | D | D | E | E | E |
| Клас[eф ekтвноct等相关[Ha поочuctвае на ТьрдNiобovи настникii | B | B | C | C | D |
| Клас[npxobovи emиси | B | E | B | B | E |
| Ниво на 3вухова мошиост в db (A) | 80 | 80 | 79 | 77 | 77 |
| Номинална консуmpирана мошиост в W | 1000 | 1000 | 1000 | 700 | 700 |
(1) Indicative annual energy consumption (kWh/year), based on 50 cleaning cycles. The actual annual energy consumption depends on how the device is used.
BEFORE FIRST USE
Remove the visible parts protected by plastic material with cardboard packaging. Make sure that the visible parts are removed with a damp cloth.
Cleaning
- Attach the plastic fabric cover (11) to the hose (16) until it clicks into place. To remove it, press the release buttons (17) and pull it off.
- Insert the metal telescopic tube (9) into the handle opening (10) until it clicks into place. Use the airflow regulator (8) to adjust the airflow of the tube.
- Insert the standard dust bag (see chapter "Accessories") into the metal telescopic tube until it clicks into place.
If your device is equipped with Remote Power Control, you must insert the supplied batteries (see paragraph "Remote Power Control" in chapter "Functional Characteristics").
METHOD OF USE VACUUM CLEANER (A)
The device is equipped with a safety device that prevents the dust container from clogging when the dust container is correctly installed. Do not force the dust container lid closed and make sure all parts are correctly positioned before closing the lid.
Do not use the vacuum cleaner without the filters, the Pure Clean dust bag,
the dust container and the HEPA filter, as this may cause damage to the device.
- Unwind the power cord (34) and plug the device into the electrical outlet (220/240V).

We recommend that you unwind the power cord completely (blue
marker: 6.5m; red marker: 7m) to avoid interruptions and damage.
- Press the start/stop button (19) to start the device.
- Press the button to open/close the Trolley System (13) to extend the handle (12) to the desired length until it clicks into place. Then move the vacuum cleaner through the handle, while cleaning the room.
- To adjust the suction intensity (depending on the model), use the +/- button on the electronic control or adjust the power (21) via the remote control device Remote Power Control; or turn off the electronic power regulator (26).

We recommend using low
suction power when cleaning delicate surfaces, such as curtains, upholstery, rugs, etc., to avoid possible damage. To do this, turn the suction regulator to the minimum setting.
5.
To stop the operation of
the vacuum cleaner, if this function is available, you can use the standby button (22) on the remote control device Remote Power Control or the Start & Pause function (depending on the model). Simply place the handle in the horizontal housing (30).
- To turn off the device, press the Start/Stop button again.
7.
Remove the plug from the socket
Press the cable winding button
(20) until it is fully retracted.

Make sure the cable is not twisted when winding it for storage.
8.
Attach the head for hard floors
to the horizontal/vertical housing

Do not switch on the vacuum cleaner if the filter or the dust bag is not fitted correctly,
as this could damage the appliance.
Functional
CHARACTERISTICS
Electronic motor protection (B)
The electronic power regulator (26) (if present) allows you to set the required suction power.
For certain models, the ideal power settings are indicated according to the surface to be cleaned: carpets, hard floors, and parquet.
The Eco function (if available) allows energy savings of up to 25% compared to consumption at maximum suction power, while ensuring efficient cleaning.
Remote Power Control system (C)
The remote power control (if present) allows you to adjust the suction power directly from the handle, without having to bend down. When using the vacuum cleaner, you can keep it in standby mode by pressing the Start & Pause button (22).
To insert or replace the batteries of the Remote Power Control:
- Open the battery compartment (23).
- Insert two AAA batteries, making sure the positive and negative poles are correctly positioned.
- Close the battery compartment until it clicks into place.
Trolley System (D)
Trolley System is designed to be placed on the vacuum cleaner during storage and transportation without effort.
- Press the button for emptying/filling the Trolley System (13) to remove the dust container (12), until it clicks into place.
- After emptying, press the button for emptying/filling
the Trolley System and close the dust container until it clicks into place.

Use the dust container of the Trolley System to store the device, after making sure it is correctly placed.
Start & Pause (E)
Suction power adjustment.
Remote control operation.
Electrostatic discharge may occur during suction.
The vacuum cleaner is suitable for use.
- The filter is not clogged or has proper contact. Replace the dust bag. If large amounts of dust or dust-like substances have been sucked up (e.g., plaster, etc.), the indicator for filling the dust bag may light up even though the dust bag is not full. The reason is that the Pure Clean dust bag can hold dust/dust particles compactly, which guarantees maximum hygiene.
- Clean the dust container when using it without a dust bag. Clean the filters and, if necessary, replace them. Make sure the hose, the markings, and the brush are not blocked.
- Clean the filters and, if necessary, replace them. Make sure the hose, the markings, and the brush are not blocked. Replace the dust bag. If large amounts of dust or dust-like substances have been sucked up (e.g., plaster, etc.), the Pure Clean dust bag may become clogged.
- Clean the dust container and its filter.
The battery is not charging. - The batteries are not inserted correctly in the battery compartment. Insert two AA batteries, making sure the positive and negative poles are in the correct positions. - Remove the batteries; then insert them again, making sure the positive and negative poles are in the correct positions. - The electronic device may interfere with the short-range radio signal.
If a lot of fine dust or dust-like substances such as plaster, etc. have been sucked up, it is possible that small electrostatic discharges may occur. When vacuuming these parts, we recommend that you do not use the metal telescopic tube, but only the plastic one with the mark, and that you use the device at low power when vacuuming.
- One or more parts are assembled incorrectly. Make sure the filters and brushes are assembled in accordance with these instructions. When using the dust bag, make sure the filling is correctly positioned. The dust bag/container is full or clogged. Replace the dust bag or empty the container. Clean the filters and, if necessary, replace them. The suction regulator is open. Make sure it is correctly closed.
The brush is difficult to turn.
- Reduce the suction power, especially when vacuuming carpets and fabrics such as wool. Open the suction regulator to reduce the "suction effect".
The dust compartment cannot be closed.
The Pure Clean dust bag or container is assembled incorrectly. Make sure they are correctly positioned so that you can close the lid of the dust compartment through the inspection window.
The cable does not rewind smoothly.
- Make sure the cable is not twisted while it is being rewound. If the cable gets stuck, pull out the cable completely and repeat the rewinding process.
- REMOTE POWER CONTROL (C)
- SPAZZOLA IMBOTTITI (N)
- INTRODUCTION
- GENERAL SAFETY RULES
- NEVER SUCK UP ANY LIQUID OR DAMP SUBSTANCES AS THIS COULD AFFECT THE OPERATION OF THE APPLIANCE
- BEFORE FIRST USE
- ASSEMBLING
- USING THE VACUUM CLEANER (A)
- FEATURES
- ELECTRONIC POWER REGULATOR (B)
- TROLLEY SYSTEM (D)
- START & PAUSE (E)
- AIR FRESH HEPA 13 (H)
- CLEANING AND MAINTENANCE
- CLEANING THE APPLIANCE
- CLEANING THE DUST COMPARTMENT (F)
- REPLACING THE PURE CLEAN DUST BAG (G)
- CLEANING THE FILTERS (H)
- ATTACHMENTS
- MULTI BRUSH/MULTI DELUXE BRUSH (J/I)
- PARQUET BRUSH (K)
- TURBO BRUSH (L)
- DELUXE PARQUET BRUSH (M)
- UPHOLSTERY BRUSH (N)
- PRECISION NOZZLE (O)
- NOZZLE FOR DELICATE SURFACES (P)
- UPHOLSTERY NOZZLE (Q)
- DISPOSAL OF OLD ELECTRICAL APPLIANCES
- TROUBLESHOOTING
- PROBLEM
- POSSIBLE CAUSES / SOLUTIONS
- LOW SUCTION POWER
- REMOTE POWER NOT WORKING
- SMALL ELECTROSTATIC DISCHARGES OCCUR WHILE SUCKING UP
- THE VACUUM CLEANER WHISTLES OR VIBRATES WHEN IN USE
- THE BRUSH MOVES WITH DIFFICULTY
- THE DUST COMPARTMENT LID CANNOT BE CLOSED
- DESCRIPTION OF THE APPLIANCE
- POSSIBLE CAUSES/SOLUTIONS
- SAFETY INSTRUCTIONS
- DO NOT USE THE APPLIANCE TO VACUUM LIQUIDS OR WET SURFACES TO AVOID DAMAGE
- REMOTE CONTROL OF SUCTION POWER (C)
- MATTRESS NOZZLE (N)
- PRODUCT DESCRIPTION
- TECHNICAL SPECIFICATIONS
- MULTI FIRCA/MULTI DELUKS FIRCA (J/I)
- IMHA ETME
- BEFORE USING THE APPLIANCE
- ASSEMBLY
- USE OF THE APPLIANCE (A)
- SPECIFICATIONS
- ELECTRONIC POWER REGULATOR (W)
- REPLACING THE PURE CLEAN FILTER (36)
- BRUSH FOR PARQUET (K)
- NOZZLE FOR FURNITURE (L)
- DELUXE BRUSH FOR PARQUET (M)
- BRUSH FOR SOFT FURNITURE (N)
- NOZZLE FOR HARD-TO-REACH PLACES (O)
- NOZZLE FOR SOFT FURNITURE (Q)
- HELP
- DISPOSAL
- POSSIBLE CAUSES AND REMEDIES
- ACCESSORIES
- KIRІSІ
- ZHALNY KAUIPSIZDIK EREZHELERI
- INSTALLATION
- AIR FILTER (A)
- VEHICLE KEY (D)
- CLEANING THE DUST FILTER (F)
- REPLACING THE CLEAN DUST FILTER (G)
- IF THE WATER HARDNESS SWITCH IS SET TO A POSITION THAT DOES NOT MATCH THE ACTUAL WATER HARDNESS, ADJUST IT ACCORDINGLY
- DRAINING THE WATER (H)
- TO DRAIN THE WATER FROM THE APPLIANCE
- MULTI-COOKER / MULTI DELUXE (J/L)
- BRUSH BELT (K)
- LOCK BRUSH (M)
- CREVICE NOZZLE (O)
- HEATER FOR THE UPPER PART (P)
- ROTISSERIE SPIT (Q)
- AFTER-SALES SERVICE
- WARRANTY SERVICE
- TECHNICAL SERVICE CENTERS
- BEFORE CONTACTING THE SERVICE CENTER
- BEFORE USING THE DEVICE, PLEASE READ THIS MANUAL CAREFULLY AND KEEP IT FOR FUTURE REFERENCE
- DESCRIPTION OF THE DUST EXTRACTOR
- IRREPARABLE DAMAGE TO THE DEVICE CAUSED BY IMPROPER USE IS NOT COVERED BY THE WARRANTY
- NEVER VACUUM LIQUIDS OR WET SUBSTANCES, AS THIS MAY DAMAGE THE WORKING DEVICE
- DELEGATED REGULATION (EU) NO
- CLEANING
- METHOD OF USE VACUUM CLEANER (A)
- FUNCTIONAL
- CHARACTERISTICS
- ELECTRONIC MOTOR PROTECTION (B)
- REMOTE POWER CONTROL SYSTEM (C)
Brand : HOTPOINT
Model : SL B10 BDW
Category : Dishwasher