
SCM-2937 - Coffee machine SINBO - Free user manual and instructions
Find the device manual for free SCM-2937 SINBO in PDF.


| Product type | Drip coffee machine |
| Brand | Sinbo |
| Model | SCM-2937 |
| Power supply | 220-240 V ~ 50 Hz |
| Power | 800 W |
| Capacity | 1.2 L (about 10 cups) |
| Dimensions (L x W x H) | 245 x 195 x 305 mm |
| Weight | 1.6 kg |
| Material | Plastic and glass |
| Functions | Brewing, keep warm, auto shut-off |
| Anti-drip system | Yes |
| Permanent filter | Yes (reusable) |
| Removable water tank | Yes |
| Water level indicator | Yes |
| Indicator light | Yes |
| Maintenance | Regular descaling recommended |
| Safety | Auto shut-off in case of overheating |
Frequently Asked Questions - SCM-2937 SINBO
User questions about SCM-2937 SINBO
0 question about this device. Answer the ones you know or ask your own.
Ask a new question about this device
Download the instructions for your Coffee machine in PDF format for free! Find your manual SCM-2937 - SINBO and take your electronic device back in hand. On this page are published all the documents necessary for the use of your device. SCM-2937 by SINBO.
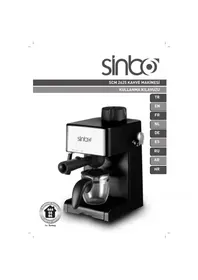
USER MANUAL SCM-2937 SINBO
TR
EN
FR
NL
DE
ES
RU
AR
HR
Değerli Müşterimiz,
This appliance is not intended for use by persons (including children) with reduced physical, sensory or mental capabilities, or lack of experience and knowledge, unless they have been given supervision or instruction concerning use of the appliances by a person responsible for their safety. Children should be supervised to ensure that they do not play with the appliance.
This appliance is intended to be used in household and similar applications such as:
- staff kitchen areas in shops, offices and other working environments;
- farm houses;
- by clients in hotels, motels and other residential type environments;
- bed and breakfast type environments.
Şekil 1
Read this booklet thoroughly before using and save it for future reference
IMPORTANT SAFEGUARDS
Before using the electrical appliance, the following basic precautions should always be followed including the following:
- Read all instructions.
- Before using check that the voltage of wall outlet corresponds to rated voltage marked on the rating plate.
- This appliance has been incorporated with a grounded plug. Please ensure the wall outlet in your house is well earthed.
- To protect against fire, electric shock and injury to persons do not immerse cord, plug, in water or other liquid.
- Remove plug from wall outlet before cleaning and when not in use. Allow appliance cool down completely before taking off, attaching components or before cleaning.
- Do not operate any appliance with a damaged cord or plug or after the appliance malfunctions, or is dropped or damaged in any manner. Return appliance to the nearest authorized service facility for examination, repair or electrical or mechanical adjustment.
- The use of accessory attachments not recommended by the appliance manufacturer may result in fire, electric shock or injury to persons.
- Place appliance on flat surface or table, do not hang power cord over the edge of table or counter.
- Ensure the power cord do not touch hot surface of appliance.
- Do not place the coffee maker on hot surface or beside fire in order to avoid to be damaged.
- To disconnect, remove plug from wall outlet. Always hold the plug. But never pull the cord.
- Do not use appliance for other than intended use and place it in a dry environment.
- Close supervision is necessary when your appliance is being used near children.
- Be careful not to get burned by the steam.
- Do not touch the hot surface of appliance (such as steam wand, and the steel mesh just boiling). Use handle or knobs.
- Do not let the coffee maker operate without water.
- Warning: the filling aperture must not be opened during use.
- Do not remove the metal funnel when appliance in brewing coffee or when steam and hot water escape from metal funnel and ensure to release the pressure in water tank before removing metal funnel.
- Connect plug to wall outlet before using and turn any switch off before plug is removed from wall outlet.
- This appliance is not intended for use by persons (including children) with reduced physical, sensory or mental capabilities, or lack of experience and knowledge, unless they have been given supervision or instruction concerning use of the appliances by a
IMPORTANT SAFEGUARDS
person responsible for their safety.
- Children should be supervised to ensure that they do not play with the appliance.
- This appliance is intended to be used in household and similar applications such as:
- staff kitchen areas in shops, offices and other working environments;
- farm houses;
– by clients in hotels, motels and other residential type environments; - bed and breakfast type environments.
- Do not use outdoors.
- Save these instructions.
(Product may be subject to change without prior notice)
A. ON/OFF switch
B. Steam switch
C. coffee switch
D. Steam control knob
E. water tank cover
F. Water
G. top cover
H. Steam wand water tank
I. Froth device
J. Main body
K. Removable shelf
L -1. Coffee powder mesh
L -2. Coffee pod mesh
M. Metal funnel
N. Bottom cover
0. Metal funnel handle
P. Measuring spoon and tamper
Q. Power indicator
R. Ready indicator
BEFORE THE FIRST USE
To ensure the first cup of coffee tastes excellent, you should rinse the coffee maker with warm water as follows:
- Pour water into water tank, the water level should not exceed the "MAX" mark in the tank. Then replace the water tank cover.
Note: the appliance is supplied with a detachable tank for easy cleaning, you can fill the tank with water firstly, and then put the tank into the appliance. - Set coffee powder mesh into metal funnel (no coffee in the mesh).
- Insert the funnel into the appliance from the "Insert" position and release the press bar, and you can fix them into coffee maker firmly through turn it anticlockwise until it is at the lock position.
- Place a jug on removable shelf. Make sure the steam control knob is on the minimum
BEFORE THE FIRST USE
position.
Note: the appliance is not equipped with jug, please use yourself jug or coffee cup.
- Connect to power source, turn the ON/OFF switch to the “—” position. The power indicator will be illuminated.
- Turn the coffee switch to the “—” position, the pump will pump water, when there is water flowing out and turn the coffee switch to the “O” position, turn the steam switch to the “O” position and waiting for a moment, the appliance begins to be pre-heated until the ready indicator is illuminated, it shows the pre-heating is finished. Turn the coffee switch to “I” position again, and water will flow out.
- After water not dropping out any more, you can pour the water in each container out then clean them thoroughly, now you can start brewing.
Note: There may be noise when pumping the water on the first time, it is normal, the appliance is releasing the air in the appliance. After about 20s, the noise will disappear.
PRE-HEATING
To make a cup of good hot Espresso coffee, we recommend you preheating the appliance before making coffee, including the funnel, filter and cup, so that the coffee flavour can not be influenced by the cold parts.
Note: The appliance is equipped with two steel meshes of coffee powder mesh and coffee pod mesh. Select desired steel mesh according to your desired.
- Remove the detachable tank and open the tank cover to fill it with desired water, the water level should not exceed the "MAX" mark in the tank. Then place the tank into the appliance properly.
- Set coffee powder mesh into metal funnel, then insert the funnel into the appliance from the "Insert" position and release the press bar, and you can fix them into coffee maker firmly through turn it anticlockwise until it is at the lock position.(See fig. 1).
- Place an espresso cup (your cup) on removable shelf.
- Then connect the appliance to power supply source. Make sure the steam control knob is on the minimum position.
- Turn the ON/OFF switch to the “—” position, the power indicator will be illuminated, make sure the steam switch on the “O” position. Turn the coffee switch to the “—” position, when there is water flowing out, turn the coffee switch to the “O” position immediately. The purpose of the step is to pump the water of the tank into the housing.
- When the ready indicator is illuminated, you should turn the coffee switch to the “—” position again, there will be hot water flowing out. When the ready indicator is extinguished, turn the coffee switch to the “0” position. The pre-heating is finished.
MAKE ESPRESSO COFFEE
- Remove the metal funnel by turning it in clockwise, set coffee powder mesh into metal funnel. Add ground coffee to the mesh with measuring spoon, a spoon ground coffee power can make about a cup of top-grade coffee, then press the ground coffee powder tightly with the tamper. If you use the coffee pod, you shall use the coffee pod mesh instead of the coffee powder mesh.
MAKE ESPRESSO COFFEE
- Then insert the funnel into the appliance from the "Insert" position, and you can fix them into coffee maker firmly through turn it anticlockwise until it is at the lock position.(See fig. 1).
- Pour out the hot water in the cup. Then place the hot cup (your cup) on removable shelf.
- At the time, the ready indicator is illuminated, once the ready indicator is illuminated, you should turn the coffee switch to the “—” position, waiting for a moment, there will be coffee flowing out.
Note: During brewing coffee or making steam, it is normal that the ready indicator is likely to extinguish, it only means that the heater is heating up to keep the temperature at the standard range.
- You should turn the ON/OFF switch to "O" position manually when desired coffee is obtained or the colour of coffee changes weak obviously, the power indicator and ready indicator go out and the coffee maker stops working, your coffee is ready now.
WARNING: Do not leave the coffee maker unattended during making the coffee, as you need operate manually sometimes!
- After finishing making the coffee, you can take the metal funnel out by turning it clockwise, and then pour the coffee residue or the brewed coffee pod out with the mesh pressed by press bar.
- Let them cool down completely, then rinse under running water.
MAKE CAPPUCCINO
You get a cup of cappuccino when you top up a cup of espresso with frothing milk.
Note: during making steam, the metal funnel must be assembled in position.

Fig. 1
Method:
- Prepare espresso first with container big enough according to the part "MAKE ESPRESSO COFFEE", make sure that the steam control knob is on the minimum position.
- Turn the steam switch to the “—” position, waiting for until the ready indicator is illuminated.
- Fill a jug with about 100 grams of milk for each cappuccino to be prepared, you are recommended to use whole milk at refrigerator temperature (not hot!).
Note: In choosing the size of jug, it is recommended the diameter is not less than 70 ± 5 mm, and bear in mind that the milk increases in volume by 2 times, make sure the height of jug is enough.
- Insert the frothing device into the milk about two centimetres.
- Turn the steam control knob slowly in anti-clockwise, steam will come out from the frothing device. Froth milk in the way moving vessel round from up to down.
Note: Never turn the steam control knob rapidly, as the steam will accumulate rapidly in short time which may increase the potential of the risk of explosion. - When the required purpose is reached, you can turn the steam control knob to the minimum position.
Note: Clean steam outlet with wet sponge immediately after steam stops generating,
MAKE CAPPUCCINO
but care not to hurt!
- Pour the frothed milk into the espresso prepared; now the cappuccino is ready. Sweeten to taste and if desired, sprinkle the froth with a little cocoa powder.
- Turn the ON/OFF switch to the "O" position to cut off the power source.
Note: After making steam, we recommend you allow the coffee maker to cool down at least for 5 min before making coffee again. Otherwise burnt odor may occur in your Espresso coffee. If you do not want to wait for 5 minutes, you only need turn the steam switch to the "O" position and dip the steam wand into you cup firstly, then turn the steam control knob in anti-clockwise, turn the coffee switch to the "—" position to pump water, once the ready indicator is extinguished, you shall turn the coffee switch to the "O" position and turn the steam control knob to the minimum position, wait for a moment, once the ready indicator is illuminated again, you can make coffee again.
PRODUCING STEAM TO HEAT LIQUIDS OR FROTH MILK SINGLY
The steam wand can be used to froth milk singly or make hot beverages like drinking chocolate, water or tea.
Method:
- Open the tank cover, remove the detachable tank and fill it with desired water, the water level should not exceed the "MAX" mark in the tank. Then place the tank into the appliance properly.
- Replace the tank cover, and then connect the appliance to power supply source.
- Turn the ON/OFF switch to the “—” position, the power indicator is illuminated.
- Turn the coffee switch to the “—” position, make the steam switch to the “O” position, when there is water flowing out, turn the coffee switch to the “O” position immediately, turn the steam switch to the “I” position and waiting for a moment, the appliance begins to be heated until the ready indicator is illuminated, it shows the heating is finished.
- Dip the steam wand into the liquid to be heated or into the prepared froth milk. Turn the steam control knob in anti-clockwise slowly to start making steam.
- When the required temperature is reached or the frothing milk is obtained, you can turn the steam control knob to the minimum position.
- Press the ON/OFF switch to the "O" position to cut off the power source.
CLEAN AND MAINTENANCE:
- Cut off power source and let the coffee maker cool down completely before cleaning.
- Clean housing of coffee maker with moisture-proof sponge often and clean water tank, drip tray and removable shelf regularly then dry them.
Note: Do not clean with alcohol or solvent cleanser. Never immerse the housing in water for cleaning.
- Detach the metal funnel through turn it clockwise, get rid of coffee residue inside, then you can clean it with cleanser, but at last you must rinse with clear water.
- Clean all the attachments in the water and dry thoroughly.
CLEANING MINERAL DEPOSITS
- To make sure your coffee maker operating efficiently, internal piping is cleanly and
CLEANING MINERAL DEPOSITS
the peak flavor of coffee, you should clean away the mineral deposits left every 2-3 months.
- Fill the tank with water and descaler to the MAX level (the scale of water and descaler is 4:1, the detail refers to the instruction of descaler. Please use "household descaler", you can use the citric acid (obtainable from chemist's or drug stores) instead of the descaler (the one hundred parts of water and three parts of citric acid).
- According to the program of pre-heating, put the metal funnel (no coffee powder in it) and carafe (jug) in place. Brewing water per "PRE-HEATING".
- Press the ON/OFF switch to “—” position, the power indicator will be illuminated, you should turn the coffee switch to the “—” position, make sure the steam switch to the “0” position, when there is water flowing out and turn the coffee switch to the “0” position, and waiting for a moment, the coffee maker begins to be heated.
- When the ready indicator is illuminated, it shows the heating is finish. Turn the coffee switch to the “—” position and make two cups coffee (about 20z). Then turn the coffee switch to the “0” position and wait for 5s.
- Turn the steam switch to the “—” position, waiting for until the ready indicator is illuminated. Make steam for 2min, then turn the steam control knob to the minimum position to stop making steam. Turn the ON/OFF switch to the “O” position to stop the unit immediately, make the descalers deposit in the unit at least 15 minutes.
- Restart the unit and repeat the steps of 4-6 at least 3 times.
- Then turn the steam switch to "0" position, when the ready indicator is illuminated, turn the coffee switch to the "—" position to brew until no descaler is left.
- Then brewing coffee (no coffee powder) with tap water in the MAX level, repeat the steps of 4-6 for 3 times (it is not necessary to wait for 15 minutes in step of 6), then brewing until no water is left in the tank.
- Repeat the step of 9 at least 3 times to make sure the piping is cleanly.
FEATURES
*15bar powerful pressure italian pump
*Die-casting aluminum alloy boiler
*1.8L large detachable water tank
*Aluminum alloy filter holder with dual-stainless steel filter
*Can make espresso with perfect crema
*With high pressure frothing function for making cappuccino or other hot beverage
*3 switches with indicator lights
*Elegant design with stainless steel decoration
*Safe and reliable, with overheating and overpressure protected device
*Detachable frothing nozzle and drip tray
*230V\~50Hz 850W
Accessories
- 1pc Coffee spoon
- 1pc of 2-cup ground coffee filter
- 1pc of ESE pod filter
TROUBLESHOOTING
| Symptom | Cause | Corrections |
| Water leaks from the bottom of coffee maker. | There is much water in the drip tray. | Please clean the drip tray. |
| The coffee maker is malfunction. | Please contact with the authorized service facility for repairing. | |
| Water leaks out of outer side of filter. | There is some coffee powder on filter edge. | Get rid of them. |
| Acid (vinegar) taste exists in Espresso coffee. | No clean correctly after cleaning mineral deposits. | Clean coffee maker per the content in “before the first use” for several times. |
| The coffee powder is stored in a hot, wet place for a long time. The coffee powder turns bad. | Please use fresh coffee powder, or store unused coffee powder in a cool, dry place. After opening a package of coffee powder, reseal it tightly and store it in a refrigerator to maintain its freshness. | |
| The coffee maker cannot work any more. | The power outlet is not plugged well. | Plug the power cord into a wall outlet correctly, if the appliance still does not work, please contact with the authorized service facility for repairing. |
| The steam cannot froth. | The steam ready indicator is not illuminated. | Only after the steam ready indicator is illuminated, the steam can be used to froth. |
| The container is too big or the shape is not fit. | Use high and narrow cup. | |
| You have used skimmed milk | Use whole milk or half-skimmed milk |
Do not take apart the appliance by yourself if the cause of failure is not found, you had better contact certified serving center.
Environment friendly disposal
You can help protect the environment!
Please remember to respect the local regulations: hand in the non-working electrical equipments to an appropriate waste disposal center.
FRANÇAIS
SINBO SCM 2937 MACHINE À CAFÉ MODE D'EMPLOI
Illustration 1
Fig. 1
Verlengsels (Accessoires)
- 1 paar Koffielepel
- 1 paar 2 borden vermalen koffie filter
- 1 paar ESE schaalfilter
PROBLEMEN OPLOSSEN
Figura 1
Рис. 1
Vidi sliku 1
- Uspite toplu vodu u salicu. Nakon toga va su toplu salicu postavite na policu.
- Upali'ce se indikator spremnosti. Kada se upali indikator spremnosti gumb za kavu podesite u poziciju "—" i malo sa'cekajte. Kava'ce po'ceti da curi u 'salicu.
Napomena: U vrijeme pripreme kave ili stvaranja pare normalno je da se indikator spremnosti gasi. To zna`ci da grija`c povremeno vr`si zagrijavanje, odnosno aparata odr`zava u toplom stanju.
- Nakon pripreme željene kave ili ako je boja kave o čigledno oslabila gumb za UKLJUČITI/ISKLJUČITI(ON/OFF) podesite u poziciju "O". Ugasi'ce se i indikator spremnosti i indikator napajanja i aparat za kavu'ce prestati da radi. Va'sa kava je spremna.
UPOZORENJE: U vrijeme pripreme kave potrebna je povremena manualna intervencija pa stoga nije preporu cljivo da se odvajate od aparata za kavu dok radi.
United Favour Development Limited
Unit B, 10/F Lee May Building 788-790
Nathan Road, Mongkok, Kowloon, HK.

- UYGUNLUK BEYANI / CE CONFORMITY -
TÜV SÜD Product Service GmbH
AE 11
- DEĞERLI MÜŞTERIMIZ
- IMPORTANT SAFEGUARDS
- BEFORE THE FIRST USE
- PRE-HEATING
- MAKE ESPRESSO COFFEE
- MAKE CAPPUCCINO
- METHOD
- PRODUCING STEAM TO HEAT LIQUIDS OR FROTH MILK SINGLY
- CLEAN AND MAINTENANCE
- CLEANING MINERAL DEPOSITS
- FEATURES
- ACCESSORIES
- ENVIRONMENT FRIENDLY DISPOSAL
- FRANÇAIS
- SINBO SCM 2937 MACHINE À CAFÉ MODE D'EMPLOI
- VERLENGSELS (ACCESSOIRES)
Brand : SINBO
Model : SCM-2937
Category : Coffee machine