
d-Copia 2000 - Photocopier OLIVETTI - Free user manual and instructions
Find the device manual for free d-Copia 2000 OLIVETTI in PDF.


| Product Type | Multifunction Copier |
| Brand | Olivetti |
| Model | d-Copia 2000 |
| Main Functions | Copy, scan, print |
| Print technology | Laser |
| Maximum paper size | A3 |
| Paper tray capacity | 500 sheets (estimated) |
| Copy speed | 20 pages per minute (estimated) |
| Copy resolution | 600 x 600 dpi |
| Monthly duty cycle | 20000 pages (estimated) |
| Dimensions (W x D x H) | 600 x 600 x 600 mm |
| Weight | 50 kg |
| Power supply | 230 V, 50 Hz |
| Power consumption | 1500 W (max) |
| Noise level | < 65 dB (estimated) |
| Display | LCD touchscreen (estimated) |
| Connectivity | USB, Ethernet |
| Maintenance and cleaning | Use a soft dry cloth; avoid solvents |
| Safety | Do not open while operating |
| Spare parts | Toner, drum, maintenance kit |
| Repairability | Repairability index: 7/10 (estimated) |
Frequently Asked Questions - d-Copia 2000 OLIVETTI
User questions about d-Copia 2000 OLIVETTI
0 question about this device. Answer the ones you know or ask your own.
Ask a new question about this device
Download the instructions for your Photocopier in PDF format for free! Find your manual d-Copia 2000 - OLIVETTI and take your electronic device back in hand. On this page are published all the documents necessary for the use of your device. d-Copia 2000 by OLIVETTI.
USER MANUAL d-Copia 2000 OLIVETTI
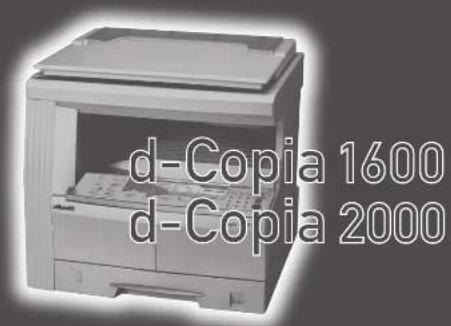
d-Copia 1600/2000 copier manual cover - Color: black - Size: A4
olivetti
natural_image
Exterior view of a D-Copia 2000 printer with open lid and control panel (no visible text or symbols on device body)d-Copia 1600
d-Copia 2000
OPERATION MANUAL
PUBLICATION ISSUED BY:
Olivetti S.p.A.
Copyright © 2006, Olivetti
All rights reserved
February 2006
The Ⓐ mark affixed to the product certifies that the product satisfies the basic quality requirements.

The manufacturer reserves the right to carry out modifications to the product described in this manual at any time and without any notice.

ENERGY STAR is a U.S. registered mark.
The ENERGY STAR program is an energy reduction plan introduced by the United States Environmental Protection Agency in response to environmental issues and for the purpose of advancing the development and utilization of more energy efficient office equipment.
Your attention is drawn to the following actions which could compromise the conformity attested to above, as well as the characteristics of the product:
- incorrect electrical power supply;
- incorrect installation, incorrect or improper use or use not in compliance with the warnings provided in the User's Manual supplied with the product;
- replacement of original components or accessories with others of a type not approved by the manufacturer, or performed by unauthorised personnel.
All rights reserved. No part of this material may be reproduced or transmitted in any form or by any means, electronic or mechanical, including photocopying, recording or by any information storage and retrieval system, without permission in writing from the Publisher.
In areas of the GEEA, the available setting for the Sleep Mode to engage is between 1 and 120 minutes, and the available setting for the Low Power Mode to engage is any 1 minute, 5 minutes, 15 minutes, 30 minutes, 45 minutes, 60 minutes, 90 minutes or 120 minutes.
This Operation Guide is for 1600 and 2000. This Operation Guide mentioned that the 1600 is a 16-sheet copier and the 2000 is a 20-sheet copier.
All rights reserved. No part of this material may be reproduced or transmitted in any form or by any means, electronic or mechanical, including photocopying, recording or by any information storage and retrieval system, without permission in writing from the Publisher.
Legal Restriction On Copying
- It may be prohibited to copy copyrighted material without permission of the copyright owner.
- It is prohibited under any circumstances to copy domestic or foreign currencies.
- Copying other items may be prohibited.
Contents
Making Full use of this copier's advanced functions.... iii
Energy Star Program....v
Safety Conventions in This Guide.... vi
Caution Labels . . . . . . . . . . . . . . . . . . . . . . . . . . . . . . . . . . . . . . . . . . . . . . . . . . . . . . . . . . . . . . . . . . . . . . . . . . . . . . . . . . .
INSTALLATION PRECAUTIONS ix
PRECAUTIONS FOR USE xi
About the Operation Guide....xix
Conventions xx
1 N a m e o f P a r t s
Main Body 1-2
Operation Panel 1-4
Message Display.... 1-6
2 Preparations
Loading Paper....2-2
3 Basic Operation
Basic Copying Procedure 3-2
Zoom Copying....3-5
Interrupt Copying....3-7
Low Power Mode 3-8
Auto Sleep Mode. 3-9
4 Copying Functions
Making 2-Sided copies from various originals. 4-2
Split Copy Modes 4-6
Making a margin space on the copies. 4-8
Making copies with clean edges 4-10
Copying 2 or 4 originals onto a single page .... 4-12
Automatic Collating of copy sets 4-19
Saving on toner use 4-21
Program Function....4-22
5 System Setting
System Menu 5-2
System Menu Items 5-2
System Menu Operations Procedures 5-7
Procedure for Changing the Default Settings 5-8
Checking the Total Counter....5-24
6 Job Accounting
Overview of Job Accounting 6-2
Job Accounting Operations Procedures 6-2
Department ID Code Registration....6-3
Deleting Department ID Codes 6-3
Clearing the Job Accounting Count. 6-4
Outputting the Job Accounting List 6-4
How to set the Job Accounting 6-5
Making copies in the Job Accounting 6-6
7 Optional Equipment
8 Maintenance
Cleaning the Copier 8-2
Replacing the Toner Container and Waste Toner Box 8-5
9 Troubleshooting
If other trouble occurs 9-2
If one of the following indications is Displayed 9-5
If paper jams 9-9
Specifications .....Appendix-1
Environmental Specifications ....Appendix-4
Functions and Settings Combination Chart. . . . . . . . . . . . . . . . . . . . . . . . . . . . . . . . . . . . . . . . . . . . . . . . . . . . . . . . . . . . . . . . . . . . . . Appendix-5
Making Full use of this copier's advanced functions
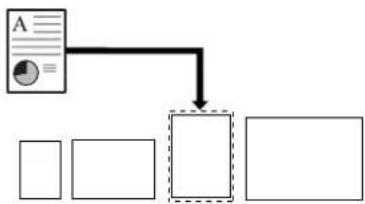
Auto Paper Selection Mode
The copier will automatically select the paper that is the same size as the original
Image Quality Selection
Making clear copies of photograph originals
Auto Zoom
Reduction/Enlargement for specified cassette sizes
flowchart
graph TD
    A["Document"] --> B{Output Box}
    B --> C["Blank Box 1"]
    B --> D["Blank Box 2"]
    B --> E["Blank Box 3"]

natural_image
Three-panel image showing a white square with a single white flower and two gray squares with a single flower, all without any text or symbols.
flowchart
graph TD
    A["Letter (A4)"] --> B["Ledger: 129% (A3: 141%)"]
    B --> C["Statement: 64% (A5: 70%)"]
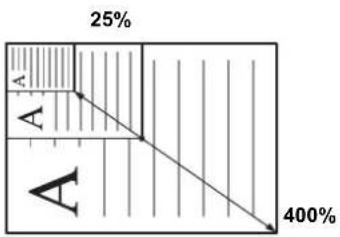
Zoom Mode
Reduction/Enlargement in the range from 25 to 400%
bar
| Category | Value (%) | |---|---| | A | 25 | | B | 400 |2-Sided Copy Mode
Making 2-Sided Copies from various types of originals

Split copy
Copying each image of open-faced (book, etc.) or 2-Sided originals onto separate sheets

flowchart
graph TD
    A["1"] --> B["2"]
    B --> C["1"]
    C --> D["2"]
    D --> E["1"]
    E --> F["2"]
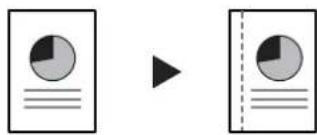
Margin Mode
Shifting the image to create margins for copies
flowchart
graph LR
    A["Pie Chart"] --> B["Right Arrow"]
    B --> C["Pie Chart"]
Border Erase Mode
Eliminate unnecessary borders on the original for cleaner output

Combine Mode
Combine two or four originals on a single page
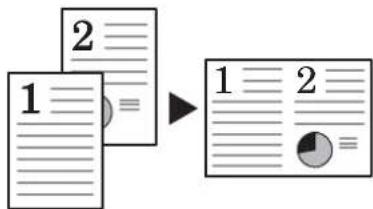
flowchart
graph LR
    A["1"] --> B["2"]
    B --> C["1 2 = pie chart icon"]
Collate Mode
Automatic collating can be performed
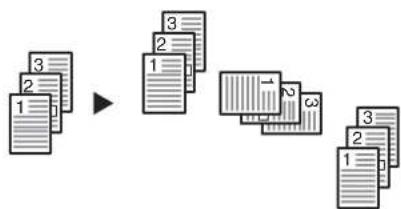
flowchart
graph TD
    A["1"] --> B["2"]
    B --> C["3"]
    D["1"] --> E["2"]
    E --> F["3"]
    G["1"] --> H["2"]
    H --> I["3"]
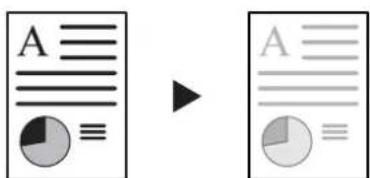
EcoPrint
The amount of toner consumed can be reduced
Program Function
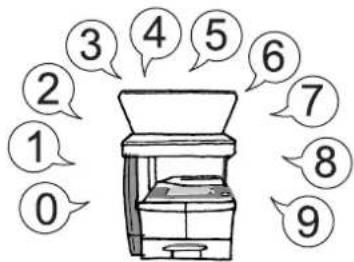
Memorizing frequently used settings
Job Accounting Mode
Using ID-codes to control the number of copies mode

Language Selection
Changing the language used in the message display

A full range of optional equipment is available
Document Processor Paper Feeder Duplex Unit
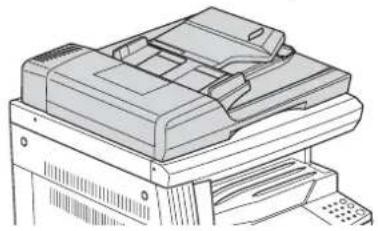
natural_image
Illustration of a printer with paper feeding into a stack (no text or symbols visible)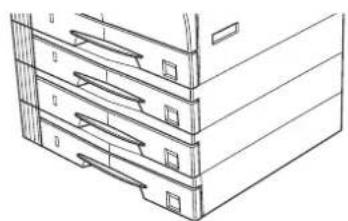
natural_image
Line drawing of a multi-level office cabinet with drawers (no text or symbols)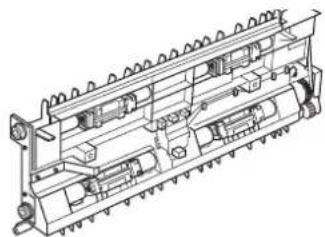
natural_image
Technical line drawing of a mechanical assembly with multiple components and no visible text or symbolsKey Counter Printer Kit Print server
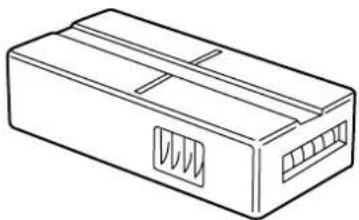
natural_image
Line drawing of a rectangular electronic component with internal slots and ventilation slots (no text or symbols)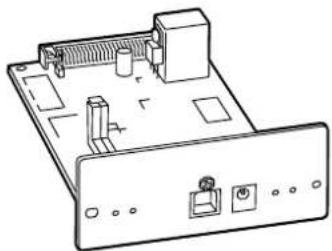
natural_image
Line drawing of an electronic device rear panel with ports and connectors (no text or symbols)
Additional memory
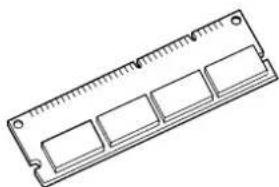
natural_image
Line drawing of a rectangular electronic component with four slots and a ruler, no text or symbols present.Energy Star Program

We have determined as a participating company in the International Energy Star Program that this product is compliant with the standards laid out in the International Energy Star Program.
About the International Energy Star Program
International Energy Star Program has as its basic goals the promotion of efficient energy use and the reduction of the environmental pollution that accompanies energy consumption by promoting the manufacture and sale of products that fulfill program standards.
International Energy Star Program standards require that copies come equipped with a Low Power Mode where energy consumption is reduced after a certain amount of time elapses since the device was last used, as well as a Sleep Mode where the device automatically turns itself off after there is no activity within a set amount of time. When the copier includes printer and fax functions, the printer and fax must enter a Low Power Mode where power consumption is automatically reduced after a certain amount of time elapses since they were last used, and they must also support a Sleep Mode where power consumption is reduced to a minimum when there is no activity within a set amount of time. This product is equipped with the following features as a result of its compliance with International Energy Star Program standards.
Low Power Mode
The device automatically enters Low Power Mode when 15 minutes have passed since the device was last used. The amount of time of no activity that must pass before Low Power Mode is activated may be lengthened. Refer to Low Power Mode Transition Time on page 5-22 for more information.
Sleep Mode (If the copier has printer and/or facsimile function)
The device automatically enters Sleep Mode when 30 minutes have passed since the device was last used. The amount of time of no activity that must pass before Sleep Mode is activated may be lengthened. For more information refer to Auto Sleep Setting on page 5-21.
Automatic 2-Sided Copy Function
The Energy Star Program encourages the use of 2-sided copying which reduces the load on the environment and this device includes 2-sided copying as a optional function. For example, by copying two 1-sided originals onto a single sheet of paper as a 2-sided copy, it is possible to lower the amount of paper used. For more information refer to Making 2-Sided copies from various originals on page 4-2.
Paper Recycling
The Energy Star Program encourages the use of environmentally friendly recycled paper. Your sales or service representative can provide information about recommended paper types.
Safety Conventions in This Guide
Please read this Operation Guide before using the copier. Keep it close to the copier for easy reference.
The sections of this guide and parts of the copier marked with symbols are safety warnings meant to protect the user, other individuals and surrounding objects, and ensure correct and safe usage of the copier. The symbols and their meanings are indicated below.

DANGER: Indicates that serious injury or even death will very possibly result from insufficient attention to or incorrect compliance with the related points.

WARNING: Indicates that serious injury or even death may result from insufficient attention to or incorrect compliance with the related points.

CAUTION: Indicates that personal injury or mechanical damage may result from insufficient attention to or incorrect compliance with the related points.
Symbols
The symbol indicates that the related section includes safety warnings. Specific points of attention are indicated inside the symbol.

......[General warning]

......[Warning of danger of electrical shock]

......[Warning of high temperature]
The Ⓧ symbol indicates that the related section includes information on prohibited actions. Specifics of the prohibited action are indicated inside the symbol.

......[Warning of prohibited action]

......[Disassembly prohibited]
The ● symbol indicates that the related section includes information on actions which must be performed. Specifics of the required action are indicated inside the symbol.

......[Alert of required action]

......[Remove the power plug from the outlet]

......[Always connect the copier to an outlet with a ground connection]
Please contact your service representative to order a replacement if the safety warnings in this Operation Guide are illegible or if the guide itself is missing. (fee required)
Labels related to safety have been attached to the product in the locations shown below. Please observe the warnings to prevent accidents such as burns and electrical shock while clearing paper misfeeds and adding toner.

Environment

Caution
Avoid placing the copier on or in locations which are unstable or not level. Such locations may cause the copier to fall down or fall over. This type of situation presents a danger of personal injury or damage to the copier.
Avoid locations with humidity or dust and dirt. If dust or dirt become attached to the power plug, clean the plug to avoid the danger of fire or electrical shock.
Avoid locations near radiators, heaters, or other heat sources, or locations near flammable items, to avoid the danger of fire.
To keep the copier cool and facilitate changing of parts and maintenance, allow access space as shown below. Leave adequate space, especially around the left and right sides, to allow air to be properly ventilated out of the copier.



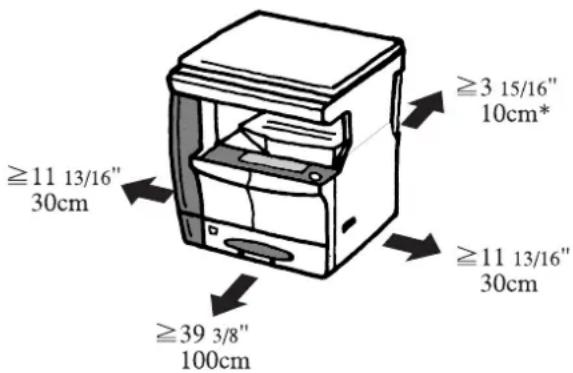
* Additional space will be required when the Document Processor is to be installed.
Other precautions
Adverse environmental conditions may affect the safe operation and performance of the copier. Install in an air-conditioned room (recommended room temperature: around 71.6°F (22°C), humidity: around 60% RH) and avoid the following locations when selecting a site for the copier.
- Avoid locations near a window or with exposure to direct sunlight.
-
Avoid locations with vibrations.
-
Avoid locations with drastic temperature fluctuations.
- Avoid locations with direct exposure to hot or cold air.
- Avoid poorly ventilated locations.
If the floor is delicate, when this product is moved after installation, the floor material may be damaged.
During copying, some ozone is released, but the amount will not cause any ill effect to one's health. If, however, the copier is used over a long period of time in a poorly ventilated room or when making an extremely large number of copies, the smell may become unpleasant. To maintain the appropriate environment for copy work, it is suggested that the room be properly ventilated.
Power supply/Grounding the copier

Warning
DO NOT use a power supply with a voltage other than that specified. Avoid multiple connections in the same outlet. These types of situations present a danger of fire or electrical shock.
Plug the power cord securely into the outlet. If metallic objects come in contact with the prongs on the plug, it may cause a fire or electric shock.
Always connect the copier to an outlet with a ground connection to avoid the danger of fire or electrical shock in case of an electric short. If an earth connection is not possible, contact your service representative.


Other precautions
Connect the power plug to the outlet closest to the copier.
The power supply cord is used as the main disconnect device. Ensure that the socket/outlet is located/installed near the equipment and is easily accessible.
Handling of plastic bags

Warning
Keep the plastic bags that are used with the copier away from children. The plastic may cling to their nose and mouth causing suffocation.

Cautions when using the copier

Warning
DO NOT place metallic objects or containers with water (flower vases, flower pots, cups, etc.) on or near the copier. This type of situation presents a danger of fire or electrical shock should they fall inside.
DO NOT remove any of the covers from the copier as there is a danger of electrical shock from high voltage parts inside the copier.
DO NOT damage, break or attempt to repair the power cord. DO NOT place heavy objects on the cord, pull it, bend it unnecessarily or cause any other type of damage. These types of situations present a danger of fire or electrical shock.
NEVER attempt to repair or disassemble the copier or its parts as there is a danger of fire, electrical shock or damage to the laser. If the laser beam escapes, there is a danger of it causing blindness.
If the copier becomes excessively hot, smoke appears from the copier, there is an odd smell, or any other abnormal situation occurs, there is a danger of fire or electrical shock. Turn the power switch OFF (O) immediately, REMOVE THE POWER PLUG from the outlet and then contact your service representa
If anything harmful (paper clips, water, other fluids, etc.) falls into the copier, turn the power switch OFF (O) immediately. Next, BE ABSOLUTELY CERTAIN to remove the power plug from the outlet to avoid the danger of fire or electrical shock. Then contact your service representative.
DO NOT remove or connect the power plug with wet hands, as there is a danger of electrical shock
ALWAYS contact your service representative for maintenance or repair of internal parts.



Caution
DO NOT pull the power cord when removing it from the outlet. Pulling on the power cord may break the wires and start a fire or cause an electrical shock. (ALWAYS grasp the power plug when removing the power cord from the outlet.)

ALWAYS remove the power plug from the outlet when moving the copier. If the power cord is damaged, there is a danger of fire or electrical shock.

If the copier will not be used for a short period of time (overnight, etc.), turn the power switch OFF (O).

If it will not be used for an extended period of time (vacations, etc.), remove the power plug from the outlet for safety purposes during the time the copier is not in use.
HOLD the designated parts only when lifting or moving the copier.

For safety purposes, always REMOVE the power plug from the outlet when performing cleaning operations.

If dust accumulates within the copier, there is a danger of fire or other trouble. It is therefore recommended that you consult with your service representative in regard to cleaning of internal parts. This is particularly effective if accomplished prior to seasons of high humidity. Consult with your service representa regard to the cost of cleaning the internal parts of the copier.

DO NOT leave the Document Processor open as there is a danger of personal injury.

Other precautions
DO NOT place heavy objects on the copier or cause other damage to the copier.
DO NOT open the front cover, turn off the power switch, or pull out the power plug during copying.
When lifting or moving the copier, contact your service representative.
Do not touch electrical parts, such as connectors or printed circuit boards. They could be damaged by static electricity.
DO NOT attempt to perform any operations not explained in this handbook.
CAUTION: Use of controls or adjustments or performance of procedures other than those specified herein may result in hazardous radiation exposure.
Do not look directly at the light from the scanning lamp. Doing so may cause pain in the eyes or eyestrain.
Cautions when handling consumables

Caution
DO NOT attempt to incinerate the toner containers or the waste toner box. Dangerous sparks may cause burns.
Keep the toner containers and the waste toner box out of the reach of children.
If toner happens to spill from the toner container or the waste toner box, avoid inhalation or ingestion, as well as contact with your eyes and skin.

- If you do happen to inhale toner, move to a place with fresh air and gargle thoroughly with a large amount of water. If coughing develops, contact a physician.
- If you do happen to ingest toner, rinse your mouth out with water and drink 1 or 2 cups of water to dilute the contents of your stomach. If necessary, contact a physician.
- If you do happen to get toner in your eyes, flush them thoroughly with water. If there is any remaining tenderness, contact a physician.
• If toner does happen to get on your skin, wash with soap and water.
DO NOT attempt to force open or destroy the toner containers or the waste toner box.

Other precautions
After use, ALWAYS dispose of the toner containers and the waste toner box in accordance with Federal, State and Local rules and regulations.
Store all consumables in a cool, dark location.
If you will not be using the copier for a prolonged period of time, remove all paper from the cassette and the MP tray and seal in its original packaging.
Laser Safety (Europe)
Laser radiation could be hazardous to the human body. For this reason, laser radiation emitted inside this machine is hermetically sealed within the protective housing and external cover. In the normal operation of the product by user, no radiation can leak from the machine.
This machine is classified as Class 1 laser product under IEC 60825.
CAUTION: Performance of procedures other than those specified in this manual may result in hazardous radiation exposure.
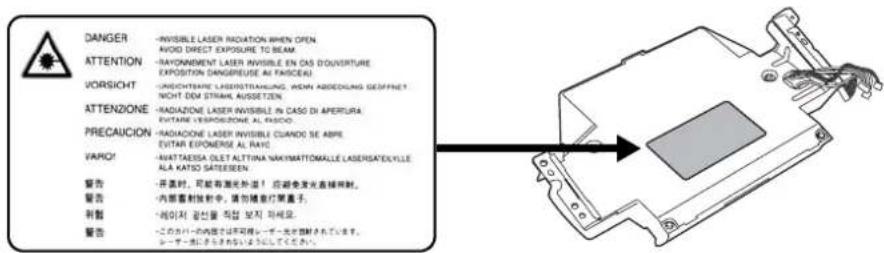
This label is attached to the laser scanner unit inside the machine and is not in a user access area.
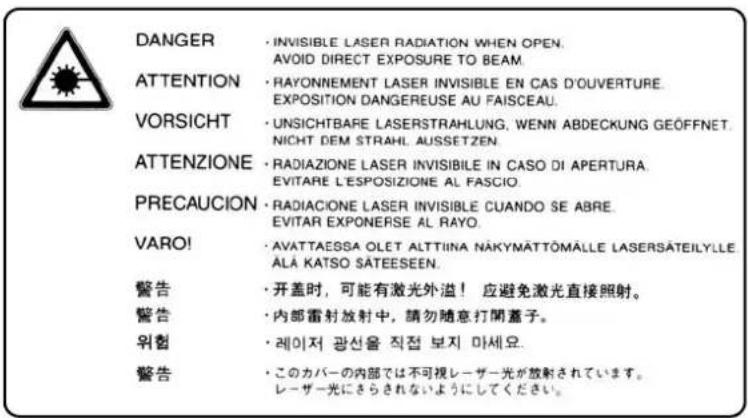
The labels shown below are attached on the rear side of the machine.
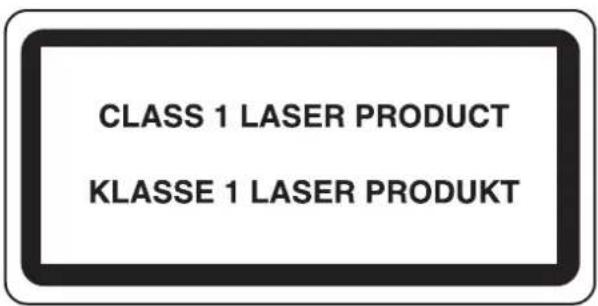
Safety Instructions Regarding the Disconnection of Power (Europe)
CAUTION: The power plug is the main isolation device! Other switches on the equipment are only functional switches and are not suitable for isolating the equipment from the power source.
DECLARATION OF CONFORMITY
TO
89/336/EEC, 73/23/EEC and 93/68/EEC
We declare under our sole responsibility that the product to which this declaration relates is in conformity with the following specifications.
Limits and methods of measurement for immunity characteristics of information technology equipment EN55024
Limits and methods of measurement for radio interference characteristics of information technology EN55022 Class B equipment
Limits for harmonic currents emissions for equipment input current ≤ 16A per phase EN61000-3-2
Limitation of voltage fluctuations and flicker in low-voltage supply systems for equipment with rated current ≤ 16A EN61000-3-3
Safety of information technology equipment, including electrical equipment EN60950
Radiation Safety of laser products, equipment classification, requirements and user's guide EN60825-1
Safety of Laser Beam (USA)
1. Safety of laser beam
This copier has been certified by the manufacturer to Class 1 level under the radiation performance standards established by the U.S.DHHS (Department of Health and Human Services) in 1968. This indicates that the product is safe to use during normal operation and maintenance. The laser optical system, enclosed in a protective housing and sealed within the external covers, never permits the laser beam to escape.
2. The CDRH Act
A laser-product-related act was implemented on Aug. 2, 1976, by the Center for Devices and Radiological Health (CDRH) of the U.S. Food and Drug Administration (FDA). This act prohibits the sale of laser products in the U.S. without certification, and applies to laser products manufactured after Aug. 1, 1976. The label shown below indicates compliance with the CDRH regulations and must be attached to laser products marketed in the United States. On this copier, the label is on the side.
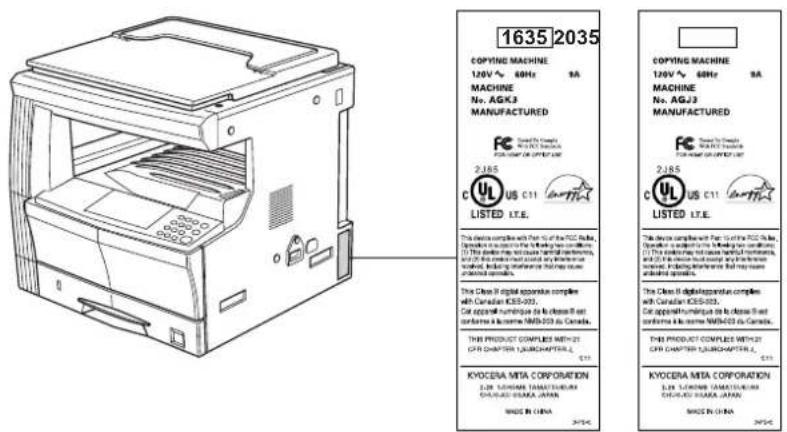
3. Optical unit
When checking the optical unit, avoid direct exposure to the laser beam, which is invisible.
Shown at left is the label located on the cover of the optical unit.
For safety of the service personnel, follow the maintenance instructions in the other section of this manual.
5. Safety switch
The power to the laser unit is cut off when the upper front cover is opened.
Safety Instructions Regarding the Disconnection of Power
CAUTION: The power plug is the main isolation device! Other switches on the equipment are only functional switches and are not suitable for isolating the equipment from the power source.
The lamp(s) inside this product contain mercury and must be recycled or disposed of according to local, state or federal laws.
About the Operation Guide
This Operation Guide has the following chapters:
Chapter 1 - Name of Parts
This chapter explains the names of parts.
Chapter 2 - Preparations
This chapter explains the preparations required before using the copier.
Chapter 3 - Basic Operation
This chapter describes the procedures for basic copying.
Chapter 4 - Copying Functions
This chapter describes the full-featured copying functions of the copier.
Chapter 5 - System Setting
This chapter explains how to configure various settings of the copier.
Chapter 6 - Job Accounting
This chapter explains how to manage job accounting on copier use shared among various departments.
Chapter 7 - Optional Equipment
This chapter introduces optional equipment available for the copier.
Chapter 8 - Maintenance
This chapter describes cleaning and toner replacement.
Chapter 9 - Troubleshooting
This chapter explains how to handle printer problems that may occur, such as paper jams.
Conventions
This manual uses the following conventions.
| Convention Description Example | ||
| Italic Typeface Used to emphasize a key word, phrase or references to additional information. | Close the front cover.Refer to Toner Container Replacement on page 3-3. | |
| Courier Typeface Used to denote messages or names displayed on the operation panel. | System menu will be displayed. | |
| Bold Typeface Used to indicate operation panel keys. | Press [Start]. | |
| Notes Used to provide additional or useful information about a function or feature. | NOTE: For information about storing the pin, refer to step 10. | |
| Important Used to provide important information. | IMPORTANT: Ensure paper is not folded, curled, or damaged. | |
| Caution Cautions are statements that suggest mechanical damage as a result of an action. | CAUTION: Do not pull the cassette out when holding the front of the machine. | |
| Warning Used to alert users to the possibility of personal injury. | WARNING: High voltage is present in the charger section. | |
1 Name of Par
This chapter identifies copier parts and operation panel keys.
- Main Body 1-2
• Operation Panel 1-4 - Message Display.... 1-6
Main Body
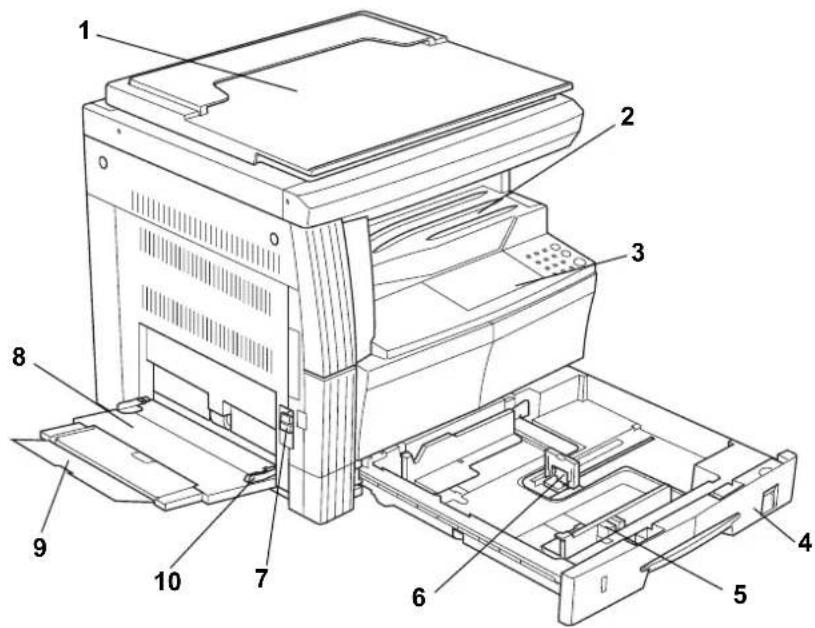
1 Original Cover
2 Output Tray
3 Operation Panel
4 Cassette
5 Paper Width Guides
6 Paper Stopper
7 Left Cover Handle
8 MP Tray (multi-purpose tray)
9 MP Tray Extension
10 Paper Width Guides
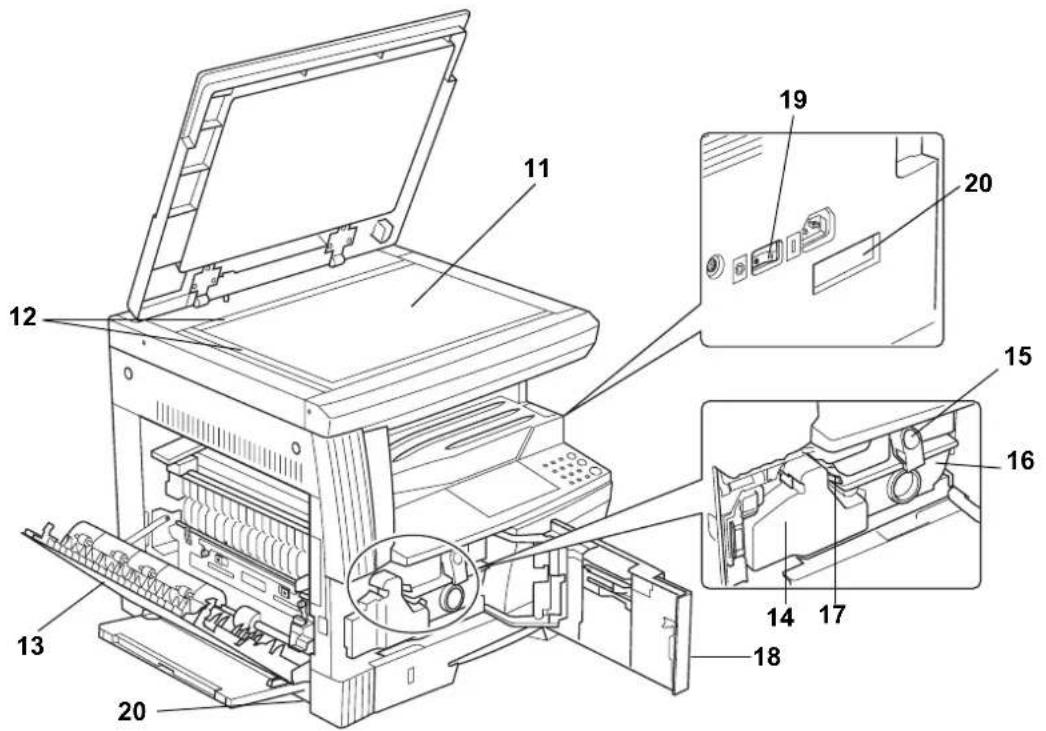
11 Platen
12 Original Size Indicator Plate
13 Left Cover
14 Waste Toner Box
15 Toner Container Release Lever
16 Toner Container
17 Cleaning shaft
18 Front Cover
19 Power Switch
20 Handles
Operation Panel
Inch specifications
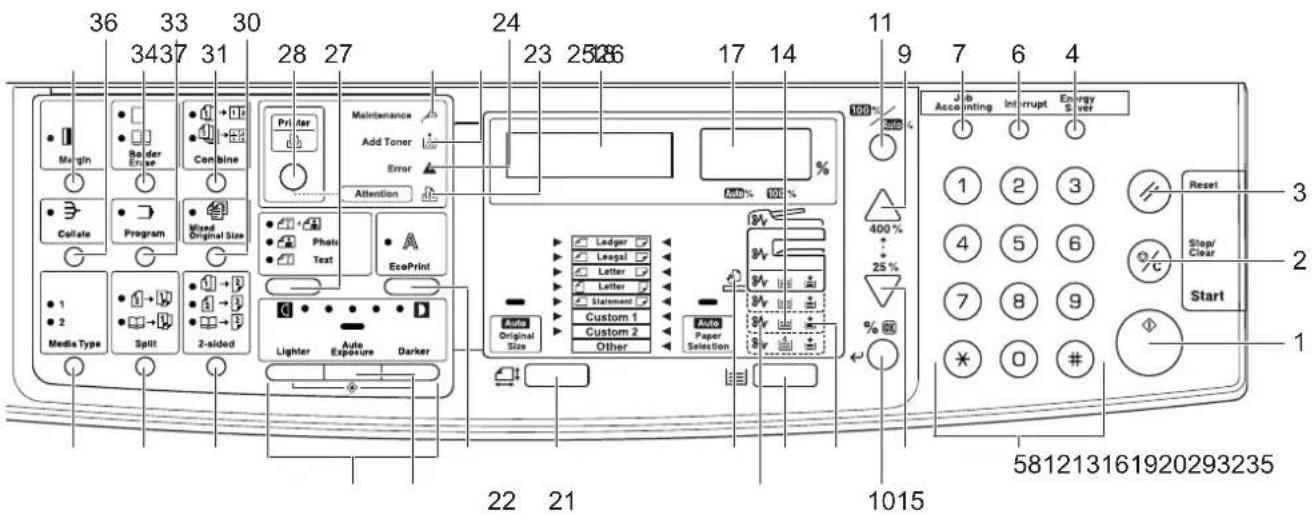
1 Start Key (Indicator)
2 Stop/Clear Key
3 Reset Key
4 Energy Saver Key
5 Numeric keys
6 Interrupt Key
7 Job Accounting Key
8 ▽
9 △
10%/OK Key
11 100%/Auto% Key
12 Paper Supply Indicator
13 Paper Selection Key
14 Paper Supply Level Indicator
15 Paper Misfeed Indicator
16 MP Indicator
17 No. of Copies/Zoom Display
18 Message Display
19 Original Size Key
20 EcoPrint Key
21 Auto Exposure Key
22 Exposure Adjustment Key/Exposure Display
Metric specifications
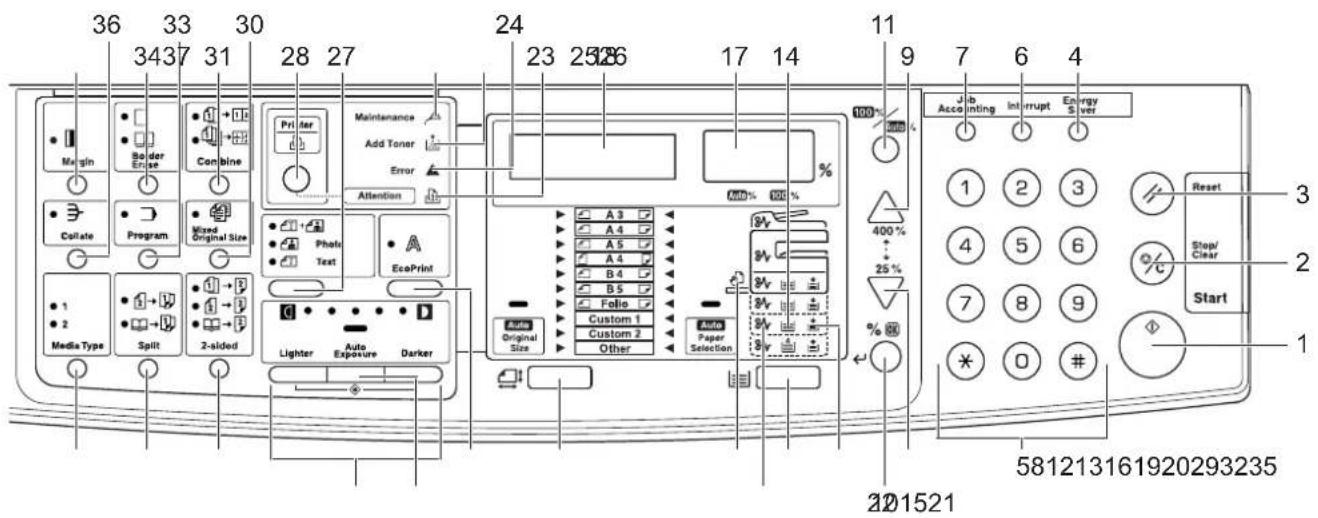
23 Attention Indicator
24 Error Indicator
25 Add Toner Indicator
26 Maintenance Indicator
27 Image Quality Selection Key
28 Printer Key (Indicator)
Press this to switch the message display between copier mode and printer mode, when optional printer kit is installed.
29 2-sided Key
30 Mixed Original Size Key
31 Combine Key
32 Split Key
33 Program Key
34 Border Erase Key
35 Media Type Key
36 Collate Key
37 Margin Key
Message Display
The message display on the operation panel shows:
- Status information, the messages listed below which are displayed during normal operation.
- Error codes, when the printer requires the operator's attention, refer to If one of the following indications is Displayed on page 9-5.
Status Information
| Message Meaning | |
| Self test | The copier is performing self-diagnostics after power-up. |
| Please wait. The copier is warming up and is not ready.When the copier is switched on for the first time, this message will take approximately 20 seconds. | |
| Ready to copy. The copier is ready to copy. | |
Error codes
Refer to If one of the following indications is Displayed on page 9-5.
System Menu (the mode after warm-up processing has been completed or [Reset] pressed)
The copier has been set at the factory to automatically select a magnification ratio of 1:1 for the same size of paper as the original in the Auto Mode with the No. of Copies at "1" and for the Image Quality.
NOTE: The Default Settings can be changed in the System Menu.
In the case where an optional cassette is present, the cassette selected in the System Menu can be changed. (Refer to Selected Cassette on page 5-14.)
The Image Quality Mode selected in the System Menu can be changed. (Refer to Original Image Quality on page 5-9.)
The Default Setting for the copy density can be changed to the Auto. (Refer to Initial Density on page 5-9.)
Auto Clear function
After the copy has been produced and a fixed interval (10 to 270 seconds) has elapsed, the copier will automatically revert to the state it was in when warm-up processing was completed.(However, the copy density mode and the Image Quality will not revert back to their original state. Copies can still be repeatedly produced with the same Copy Mode, No. of Copies, copy density and other settings if the Auto clear function has not been activated.
NOTE: Please refer to Auto Clear Time on page 5-21. Turning Off the Auto clear Function Auto Clear Setting on page 5-20 for information on changing the time interval before the Auto clear function activates.
Custom Sizes
Paper and original sizes that are not displayed on the Operation Panel can be registered as Custom Sizes. (Inputting Custom Size on page 2-9.)
Automatic Cassette Switching Function
If multiple cassettes contain the same size paper and the paper in one cassette runs out during copying, the automatic cassette switching function will switch paper feed from the empty cassette to the other cassette that still contains paper.
NOTE: An optional cassette is required to do this.
The Automatic Cassette Switching Function can also be turned off if not needed. (Refer to Auto Cassette Switching on page 5-15.)
The paper has to be oriented in the same direction.
2 Preparations
This chapter explains the preparations required before using the copier.
- Loading Paper 2-2
Loading Paper
Paper can be loaded into the copier via the cassette or MP tray.
Before Loading Paper
When you open a new package of paper, fan through the sheets to separate them slightly prior to loading. If the paper is curled or folded, straighten it before loading. Paper that is curled or folded may cause paper jams.

natural_image
Line drawing of two hands holding a stack of papers (no text or symbols present)IMPORTANT: If you copy onto used paper (paper already used for copying), do not use paper that is stapled or clipped together. This may damage the copier or cause poor image quality.
Set the paper in the cassette with the side which faced the top of its packaging facing up.
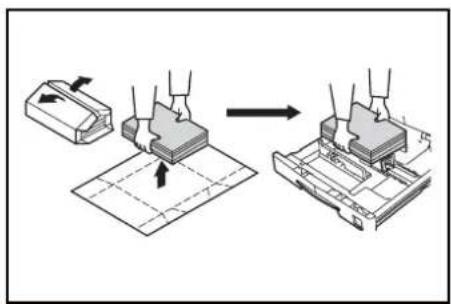
IMPORTANT: When using paper that has been run through a copier before, check it to make sure that all staples and paper clips have been removed. Attempting to copy paper that has fasteners attached may result in poor images or malfunctions.
Straighten out any creases or curls in the paper before loading it into the cassette. Failure to straighten out creases and curls may lead to paper misfeeds.
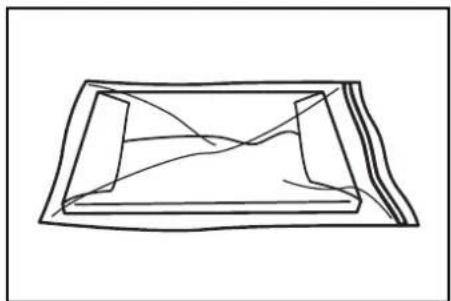
Leaving paper out of its package under high temperature and high humidity conditions may lead to problems caused by ambient moisture. After loading paper into cassette, store the remaining paper sealed in the paper storage bag. Also, before leaving the copier in disuse for a prolonged period of time, remove the paper
natural_image
Simple line drawing of a rectangular object with internal lines, no text or symbols presentfrom the cassette and seal it in the paper storage bag to protect it from moisture.
Special Types of Paper
The size of the paper to be accommodated by the cassette or MP tray can
be set. (Refer to Inputting MP Tray Size and Media Type on page 2-7 and Inputting Custom Size on page 2-9.)
Loading Paper into the Cassette
Standard paper, recycled paper and colored paper can be loaded into the cassette. Up to 300 sheets of standard paper (80 g/m ^2 ) or 100 sheets of thick paper (90 to 105 g/m ^2 ) can be set. Sizes which can be loaded are: Ledger to Statement, Oficio 2, A3 to A5R and Folio.
IMPORTANT: When loading paper for the first time or when changing paper sizes, use the operation panel to indicate the cassette size. (Refer to Cassette Size Detection on page 2-5.) This can also be set in the System Menu. (Refer to Inputting Custom Sizes on page 5-15.)
[Inch specifications]
When using sizes that are Oficio 2, A3 to A5R, set the size. (Refer to Inputting Custom Sizes on page 5-15.)
[Metric specifications]
When using sizes that are Oficio 2, Ledger to Statement, set the size. (Refer to Inputting Custom Sizes on page 5-15.)
1 Pull the cassette all the way out towards you.
NOTE: Do not pull out several cassettes at one time.
![OLIVETTI d-Copia 2000 - [Metric specifications] - 1](/content/2026/06/1281396/images/04bb0a6d9d08ba1928d944945fe3b7ede57a563ee7cec307176c7eaf3849c5bb.jpg)
natural_image
Diagram of a printer's internal structure showing a slot and printer tray (no text or symbols)2 Push down on the cassette base plate and secure it.
![OLIVETTI d-Copia 2000 - [Metric specifications] - 2](/content/2026/06/1281396/images/581b4f81468d81b0f6e46b7d05c6120d5316824739574f403de7ef5fa355d7c0.jpg)
natural_image
Technical line drawing of a mechanical assembly with internal components and a directional arrow (no text or symbols)3 Grasp the Width Size Adjustment tab and match the paper size to the Width Guide.
The paper sizes are impressed in the cassette.
![OLIVETTI d-Copia 2000 - [Metric specifications] - 3](/content/2026/06/1281396/images/ed1328188aff8aa473650042f95dd1d2f4af006cc0fdbba2ac0828f954cc409a.jpg)
natural_image
Technical line drawing of a mechanical assembly with a hand operating a component (no text or symbols visible)4 Grasp the Length Size Adjustment tab and match the paper size to the Length Guide.
The paper sizes are impressed in the cassette.
![OLIVETTI d-Copia 2000 - [Metric specifications] - 4](/content/2026/06/1281396/images/7693ca823c4c4a339a8b371842fa252bb2a998cfd3869faab4683095bb92ae7f.jpg)
natural_image
Technical line drawing of a mechanical assembly with internal components and directional arrows (no text or symbols)IMPORTANT: When setting Ledger paper, move the length size adjustment tab to the right side end and push it down as shown in the illustration below.
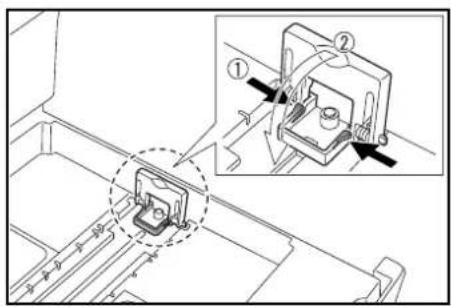
5 Set the paper straight from the upper part.
![OLIVETTI d-Copia 2000 - [Metric specifications] - 6](/content/2026/06/1281396/images/ab45b99884d2d20164ca9e6574784a284c6d06b85a6f13ecfde67f46e1d3fd91.jpg)
natural_image
Technical line drawing of a mechanical assembly with hands and a downward arrow indicating a process (no text or symbols)IMPORTANT: Be careful not to bend and crease the paper when inserting it into the cassette. Creases in the paper may lead to paper misfeeds.
The maximum paper limit indicator (1) is on the Width Guide. Make sure that the paper loaded is below the maximum limit indicator.
![OLIVETTI d-Copia 2000 - [Metric specifications] - 7](/content/2026/06/1281396/images/66631c8334aecd99c54296b32618e8a833574479cc6bc2db04c96dd8d38ea5df.jpg)
natural_image
Technical line drawing of a mechanical component with labeled part (1), no readable text or symbols presentWhen loading paper into the cassette, set it so that the side which was facing upwards in its packaging faces up.
Always match the Width and Length Guides to the paper size before loading the paper. Failure to do so may result in paper skewing or jamming.
Make sure that the Length and Width Guides are flush against the paper. If there is space between the Guide and the paper, adjust the Length or Width Guide to eliminate it. If the Guides are not firmly set against the paper, a size that is different from that in the cassette may be displayed on the Paper Selection display.
When the paper has become wrinkled from moisture, set the paper so that the wrinkled side is towards the Length Guide.
NOTE: When loading paper into the cassette, set it so that the side that is to be copied faces upwards.
6 Set the accompanying paper sheet so that the paper size set in the cassette can be identified from the front of the cassette.
![OLIVETTI d-Copia 2000 - [Metric specifications] - 8](/content/2026/06/1281396/images/f20bf94747d5acbe6d2dfe56f5b0c9096168bedcbd1474a6f9057799871535e3.jpg)
natural_image
Line drawing of a hand inserting a card into a printer holder (no text or symbols)7 Gently push in the cassette.
NOTE: When the copier will not be used for a long period of time, remove the paper from the cassette, put it in a storage bag and seal the bag in order to protect the paper from humidity.
Cassette Size Detection
Set the Size Detection on the operation panel to match the size of the paper loaded in the cassette. The copier has been set at the time of shipping for automatic detection in inch units for inch specifications, or in centimeter units (A·B columns) for metric specifications.
1 Press [Paper Selection] for 3 seconds. The System Menu will be displayed.
2 Press or to display the 19.Cassette1Size.
System Menu: 19.Cassette1Size
NOTE: When setting the size of the optional cassette (2 to 4), display 20. Cassette2Size, 21. Cassette3Size and 22. Cassette4Size.
3 Press [OK].
4 Press or and select Auto Detect mm, AutoDetect inch or Oficio 2.
5 Press [OK]. The display will blink and copying can begin.
Setting paper on the MP tray
In addition to standard paper and recycled paper, special paper (45 to 160 g/m ^2 ) can also be set.
Up to 50 sheets of standard (80 g/m ^2 ) paper (25 sheets of Ledger R, Legal R or A3, B4, Oficio 2, Folio) can be set. The paper sizes that can be used are: Ledger R to Statement, A3 to B6R, A6R, Oficio 2, Cardstock, Folio R, 8k, 16k, 16k R, Executive, ISO B5, Envelope #10, Envelope #9, Monarch, Envelope #6.75, Envelope C5, Envelope C4, Envelope DL, OuhukuHagaki, Youkei 2gou and Youkei 4gou.
When making copies onto special paper, always use the MP tray.
NOTE: The types of special paper that can be loaded and their respective quantities are as follows.
Color Paper: 50 sheets
Postcards: 10 sheets
Vellum Paper/Thick Paper (45 to 160 g/m²): 50 sheets to 5 sheets
(quantity differs depending on paper size and thickness)
IMPORTANT: Set the paper size and type according to that set in the Paper Feed. (Refer to Inputting MP Tray Size and Media Type on page 2-7.)
This can also be set in the System Menu. (Inputting MP Tray Size and Media Type on page 2-7)
When using non-standard size paper, register the paper size as Custom. (Refer to Inputting Custom Size on page 2-9.)
When loading the thick paper (90 to 160 g/m ^2 ) or vellum paper (45 to 63 g/m ^2 ), set the Media Type. (Refer to Selecting Special Media Types on page 2-10.)
1 Open the MP tray.
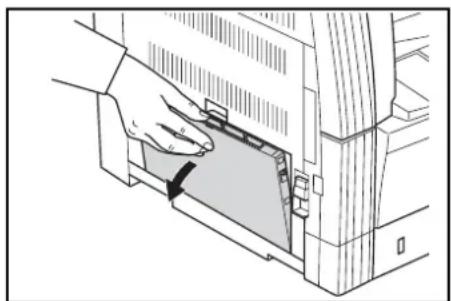
natural_image
Illustration of a hand inserting a device into a computer case (no text or symbols visible)NOTE: When setting paper greater than Letter/A4R, pull out the MP tray extension to match the paper size.
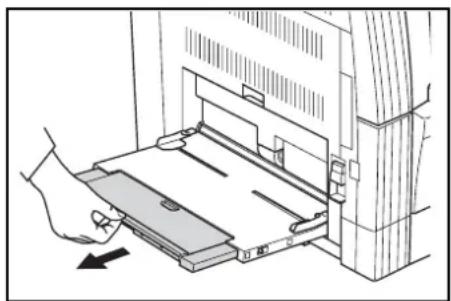
natural_image
Illustration of a hand inserting a card into a device, showing mechanical components and a directional arrow (no text or symbols)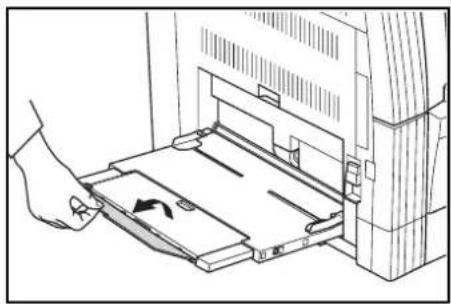
natural_image
Illustration of a hand inserting a device into a rack, showing a scroll with an arrow (no text or symbols)2 Adjust the paper width guide to the width of the paper to be set.

natural_image
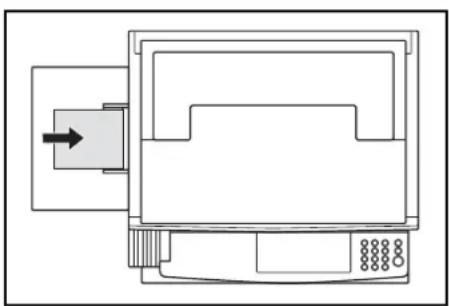
Technical line drawing of a mechanical assembly with directional arrows indicating movement or force (no text or symbols)3 Use the paper width guide to push the paper in until it reaches the point where it stops.

natural_image
Diagram of a printer or printer holder with an arrow indicating the paper plane (no text or symbols present)IMPORTANT: Always straighten out postcards and other types of thick paper that are curved before using them. There may be cases in which the feeding operation cannot be carried out due to the quality of the paper.
When loading paper into the MP Tray, set it so that the side which was facing upwards in its packaging faces downwards. If the front of the paper is bent backwards, straighten it out before setting it.
Check to make sure there are no creases, etc. in the paper. Creases in the paper may lead to paper misfeeds.
Inputting MP Tray Size and Media Type
Adjust the paper in the MP Tray and register the paper size using the Operation Panel. And specifies the media type.
1 Press [Paper Selection] for 3 seconds. The System Menu will be displayed.
2 Check to make sure that 23.MPTray Config is displayed and then press [OK].
System Menu: 23.MPTray Config
3 Press or and select the paper size. The paper sizes displayed are as given in the table below. In the case of the selection of Other Standards or Custom Size, proceed to Inputting Other Standards on page 2-9 or Inputting Custom Size on page 2-9.
| Inch specifications Metric specifications | |
| Universal size Universal size | |
| Ledger R A3 R | |
| Legal R A4 R | |
| Letter R A4 | |
| Letter A5 R | |
| Statement R B4 R | |
| Other Standards B5 R | |
| Customized Size Folio R | |
| Other Standards | |
| Customized Size | |
IMPORTANT: Use the illustration as a reference when setting the paper in the ## R in the MP Tray.
natural_image
Pure technical line drawing of a mechanical assembly without any text, numbers, or symbols4 Press [OK].
5 Press or and select the media type. The media types displayed are as given below.
| Plain Letterhead | |
| Transparency Colour | |
| Preprinted Prepunched | |
| Labels Envelope | |
| Bond Cardstock | |
| Recycled Thick Paper | |
| Rough High Quality |
Vellum Custom (1 to 8)
6 Press [OK]. The display will blink and the copier will return to the System menu.
7 Press or to display 00. Setting done.
8 Press [OK]. Copying can be begun.
Inputting Other Standards
1 Select the Other Standards. (Refer to Inputting MP Tray Size and Media Type on page 2-7.)
2 Press [OK].
3 Press or and select the paper size. The paper size displayed are as given below.
Inch specifications
A3 R, A4 R, A4, A5 R, A6 R, B4 R, B5 R, B5, B6 R, Folio R, Oficio 2, Executive, ISO B5, Envelope #10, Envelope #9, Monarch, Envelope #6.75, Envelope C5, Envelope C4, Envelope DL, Hagaki, OufukuHagaki, Youkei 2gou, Youkei 4gou, 8k R, 16k R, 16k
Metric specifications
A6 R, B5, B6 R, Ledger R, Legal R, Letter R, Letter, Statement R, Oficio 2, Executive, ISO B5, Envelope #10, Envelope #9, Monarch, Envelope #6.75, Envelope C5, Envelope C4, Envelope DL, Hagaki, OufukuHagaki, Youkei 2gou, Youkei 4gou, 8k R, 16k R, 16k
4 Proceed to Step 4 (Inputting MP Tray Size and Media Type on page 2-7).
Inputting Custom Size
1 Select the Customized Size. (Refer to Inputting MP Tray Size and Media Type on page 2-7.)
2 Press [OK].
3 Press or and input the Length Size. 3.88 to 11.63(")/98 to 297(mm): The range in which setting is possible.
Non-std size L 297mm
4 Press [OK].
5 Press or and input the Width Size. 5.88 to 17.00(")/148 to 432(mm): The range in which setting is possible.
Non-std size W 148mm
6 Proceed to Step 4 (Inputting MP Tray Size and Media Type on page 2-7).
Selecting Special Media Types
Select the media type when copying on special types of paper such as thick paper (1) and vellum paper (2). When the media type has been selected, the copier will change the fixing temperature to match the paper.
1 Press [Media Type] and select the media type. The indicator for the media type selected will light up.
2 Proceed with the copying operation.
NOTE: When media type has been selected, the copying speed is reduced.
3 Basic Operation
This chapter explains the following operations.
- Basic Copying Procedure.... 3-2
- Zoom Copying.... 3-5
- Interrupt Copying.... 3-7
- Low Power Mode.... 3-8
• Auto Sleep Mode 3-9
Basic Copying Procedure
1 Warm-up
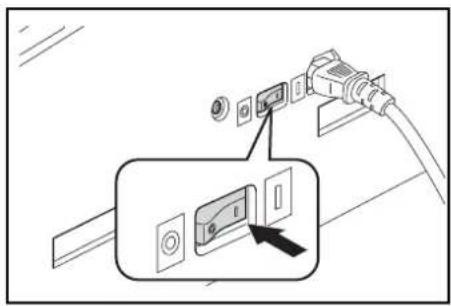
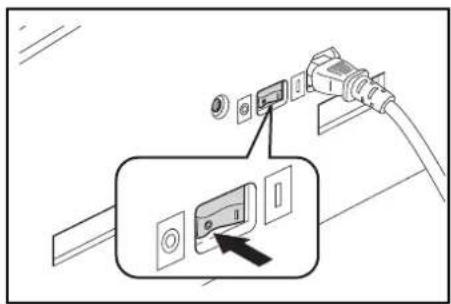
Turn ON (|) the Power Switch. Start will light up after warm up has been completed.
2 Setting the Original
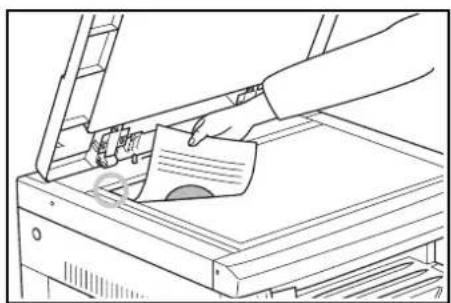
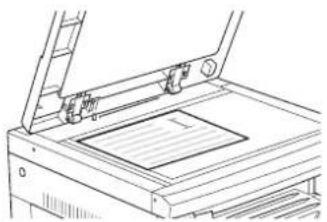
Set the copy original on the glass platen. Align the original so that the left rear corner is flush against the original size indicator.

natural_image
Line drawing of a hand inserting a card into a printer (no text or symbols)NOTE: Please refer to Setting Originals in the Document Processor on page 7-3 for the procedure used for placing the original when using the optional Document Processor.
3 Selecting Functions
Select any of the various functions available.
- Making enlarged and reduced copies (Refer to page3-5.)
- Interrupt Copying (Refer to page3-7.)
- Making 2-Sided copies from various types of originals (Refer to page4-2.)*
- Split Copy Modes (Refer to page4-6.)
- Making a margin space on the copies (Refer to page4-8.)
- Making copies with clean edge (Refer to page4-10.)
- Fitting the image of either two or four originals onto a single copy page (Refer to page4-12.)
• Automatic Collating of copy sets (Refer to page4-19.)
*. The Duplex Unit (option) is necessary.
4 Paper Selection
When Automatic Paper Selection is lit, a paper size identical to the original will be automatically selected. Press [Paper Selection] in order to select a different paper size to copy.
NOTE: It is possible to turn off the Automatic Size Selection function. (Refer to Cassette Selection on page 5-13.)
It is also possible to select the cassette that is to be automatically given priority for use. (Refer to Selected Cassette on page 5-14.)
5 Image Quality Selection
The Image Quality can be selected to match the type of original to be copied. Press [Image Quality Selection] to light up the Image Quality Mode to be used.
- 📄+💡: Use this when the original contains a mixture of text and photos.
• : Use this when copying a photograph. - : Use this when copying originals that contain a large amount of text.
NOTE: The Image Quality Mode selected in the System Menu can be changed. (Refer to Original Image Quality on page 5-9.)
The density of each of the Image Quality Modes can be adjusted. (Refer to Text + Photo Mode Exposure Adjustment on page 5-11, Photo Exposure Adjustment on page 5-11 and Text Exposure Adjustment on page 5-12.)
When horizontal lines stand out in Photo Mode, select Dithering (Refer to Photo Processing on page 5-12). Note, however, that the images will be rougher when Dithering is used.
6 Adjusting Copy Exposure
The Copy Exposure (density) is adjusted manually. To make the copy darker, press [Exposure Adjustment] on the right and move the exposure scale to the right. To make the copy lighter, press [Exposure Adjustment] on the left and move the exposure scale to the left.
Pressing [Auto Exposure] will detect the copy exposure and set it to the optimal setting.
NOTE: The exposure can be adjusted when the overall exposure is too light or too dark using Auto Exposure. (Refer to Auto Exposure Adjustment on page 5-11.)
The Copy Exposure Adjustment can be set to Auto Exposure Mode when setting the Default Settings. (Refer to Initial Density on page 5-9.)
Pressing [Exposure Adjustment] will move the scale in increments of 0.5 and allow even finer adjustment of the exposure. (Refer to Exposure Steps on page 5-10.)
When the Photo Mode has been selected using Image Quality Selection, Auto Exposure cannot be selected.
7 Setting the Number of Copies
Press the numeric keys to input and display the desired number of copies. Up to 999 copies can be set at a single time.
NOTE: The maximum number of copies that can be made at one time can also be restricted. (Refer to Copy Limit on page 5-19.)
8 Start Copying
Press [Start]. When the Start indicator lights green copying can be begun.
9 Completion of the Copying Procedure
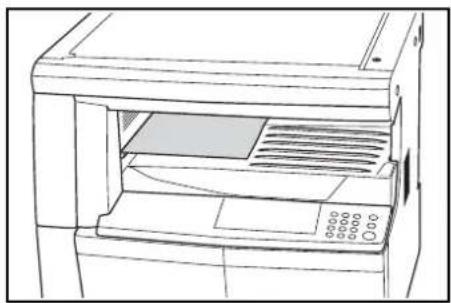
The finished copy will be ejected into the output tray.
natural_image
Line drawing of a printer with ventilation slots and control panel (no text or symbols)IMPORTANT: Up to 250 standard paper copies (80 g/m ^2 ) can be stored. Note, however, that the number of copies that can be stored may differ with the condition of the paper used.

CAUTION: When the copier will not be used for a period of time, such as at night, turn off the power switch. When it will not be used for longer periods of time such as during long holiday periods, remove the plug from the outlet in the interest of safety.
Zoom Copying
Auto Zoom Ratio Selection Mode
Original images are reduced or enlarged according to the selected paper size.

flowchart
graph LR
    A["Letter (A4)"] --> B["Ledger: 129% (A3: 141%)"]
    B --> C["Statement: 64% (A5: 70%)"]
IMPORTANT: When this is to be used as the default Mode, set the Auto Sizing on page 5-15 to on.
1 Set the original.
The original's size will be automatically detected.
natural_image
Line drawing of a hand using a laptop to press documents on a printer (no text or symbols visible)2 Press [100%/Auto%] to light up the Auto% indicator.
3 Press [Paper Selection] and select the paper.
4 Press [Start] to begin copying.
Zoom Mode
With this mode, the zoom ratio can be set between 25% and 400% (25% to 200% with the document processor) in 1% increments.

bar
| Category | Value (%) | |---|---| | A | 25 | | B | 400 |IMPORTANT: When the zoom ratio is changed in the Auto Paper Select Mode, the zoom ratio for the selected paper size is also changed to match the zoom ratio.
1 Set the original.
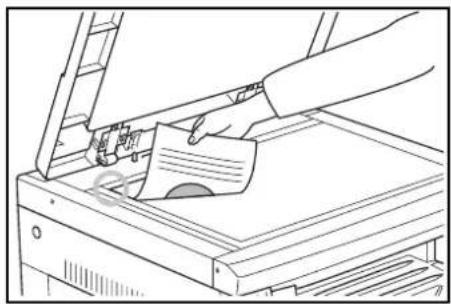
natural_image
Line drawing of a hand using a laptop to press documents on a printer (no text or symbols present)2 Press , or [%/OK].
The copy magnification will be displayed in the No. of Copies display and “%” will light up.
3 Change the zoom percentage displayed using or .
The percentage can also be input using the numeric keys.
4 Press [OK]. After the zoom percentage has been confirmed the display changes back to the No. of Copies display.
5 Press [Start] to begin copying.
Interrupt Copying
Interrupt Copying is useful when you want to make a copy of a different original at different settings during copying operations. After the Interrupt Copy has been produced, the copying operation resumes at the same settings in effect prior to the interruption.
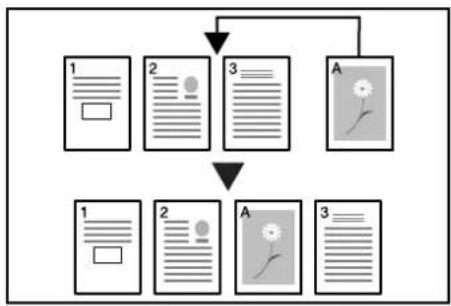
flowchart
graph TD
    A["1"] --> B["2"]
    B --> C["3"]
    C --> D["A"]
    D --> E["1"]
    E --> F["2"]
    F --> G["A"]
    G --> H["3"]
    H --> I["End"]
1 Press [Interrupt]. The Interrupt indicator will blink. It will stay lit when the Interrupt operation becomes possible.
2 Temporarily storing the original during copy operations.
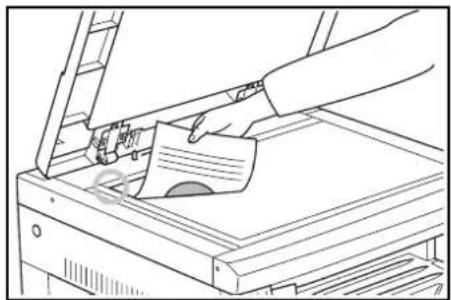
3 Set the original for the Interrupt operation and copy it.
natural_image
Line drawing of a hand using a paper to press down an open printer (no text or symbols visible)4 After the Interrupt copy has been produced, pressing [Interrupt] will cause the display to light up. Replace it with the original that had been put aside and press [Start] to resume copying.
Low Power Mode
Pressing [Energy Saver] will put the copier into a resting state even when the Power Switch is ON. The No. of Copies display on the Operation Panel will change to “-- -”, the Energy Saver indicator will light up and all other indicators and message display will be turned off.
Press any key on the Operation Panel or open and close the Original Cover in order to resume copying operations. In the case where the optional Document Processor is installed, placing an original in the Document Processor will also revert the copier to the state where copies can be made. The recovery time before copies can be made is within 10 seconds.
NOTE: A function to automatically enter the Low Power Mode after a set interval in which no copies have been produced has passed is also included. (Refer to Low Power Mode Transition Time on page 5-22.)
Auto Sleep Mode
The Auto Sleep Function is a function that automatically turns the copier off after a set period of time (1 to 240 minutes) has passed. “-” is displayed in the No. of Copies display and all other indicators and message display will be turned off.
This has been set to 30 minutes at shipping.
NOTE: In the Sleep Mode state, the supply of electrical power to everything except the operating section is stopped. When the Power Switch is turned off, the supply of power to everything, including the operating section, is stopped.
The No. of Copies display will show a “-” for approximately 5 seconds after the Power Switch has been turned off.
Press [Energy Saver] in order to resume copying operations. The recovery time before copies can be made is less than 20 seconds.
Auto Sleep Mode
The Auto Sleep Function is a power-saving function that automatically puts the copier into Sleep Mode when no copying operations have been performed for a set period of time.
In the case of copiers, the amount of time spent idling rather than copying is large, so the amount of power consumed during idle operation makes up the largest share of their power usage. The consumption of power during idling or when someone forgets to turn the copier off after work can be reduced through the copier unit automatically entering the Sleep Mode and the electric bill reduced as a result.
NOTE: The time interval before the Auto Sleep Mode engages can be changed. (Refer to Sleep Mode Transition Time on page 5-22.)
The Auto Sleep Mode can be deselected. (Refer to Auto Sleep Setting on page 5-21.)
4 Copying Functions
This chapter explains the following topics.
- Making 2-Sided copies from various originals...... 4-2
- Split Copy Modes 4-6
- Making a margin space on the copies.... 4-8
- Making copies with clean edges.... 4-10
- Copying 2 or 4 originals onto a single page .... 4-12
• Automatic Collating of copy sets 4-19 - Saving on toner use 4-21
- Program Function...... 4-22
Making 2-Sided copies from various originals
Copies of both sides can be made from open-faced originals as well as from 2-in-1 originals.
NOTE: The Duplex Unit (option) is necessary.
Making 2-Sided copies from a 2-Sided original
Front and Back side copies are made in the same way as duplex copies.
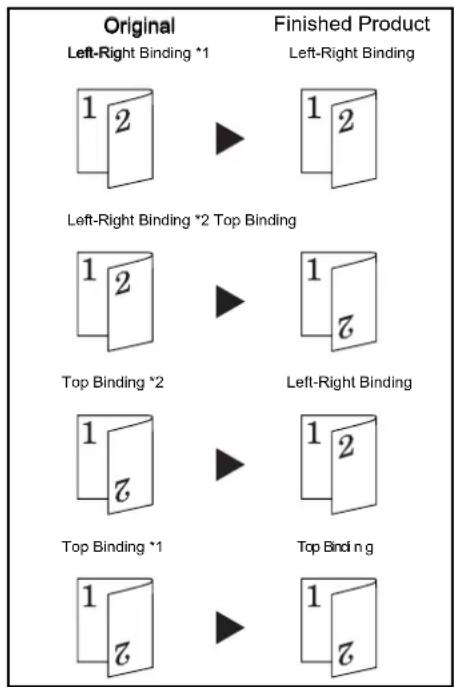
flowchart
graph LR
    A["Original Left-Right Binding *1"] --> B["Finished Product Left-Right Binding"]
    C["Top Binding *2"] --> D["Finished Product Top Binding"]
    E["Top Binding *1"] --> F["Finished Product Bottom Binding"]
    G["Finished Product Bottom Binding"] --> H["Finished Product Top Binding"]
*1 2-Sided Copy reverse side rotation setting: OFF
*2 2-Sided Copy reverse side rotation setting: ON
NOTE:
[Inch specifications]
The paper sizes that can be used are Ledger, Legal, Letter, Letter R and Statement sizes. A3 to A5R sizes can also be used when Custom Size is set.
The Duplex Unit (option) is necessary.
[Metric specifications]
The paper sizes that can be used are from A3 to A5R. Ledger, Legal, Letter, Letter R and Statement sizes can also be used when Custom Size is set.
The Duplex Unit (option) is necessary.
Making 2-Sided copies from an open-faced (book, etc.) original
The double-page original of books, magazines, etc. can be copied onto both sides of the paper by pressing [Start] one time.
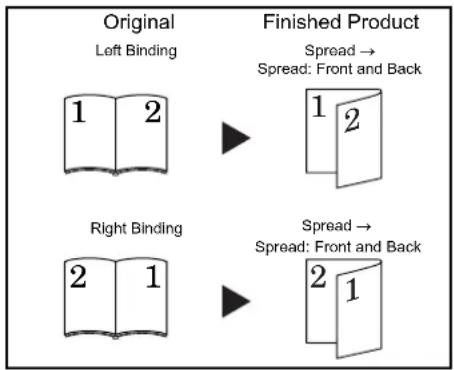
flowchart
graph TD
    A["Original Left Binding"] --> B["Finished Product"]
    C["1 2"] --> D["1 2"]
    E["Right Binding"] --> F["2 1"]
    G["Finished Product"] --> H["2 1"]
    style A fill:#f9f,stroke:#333
    style C fill:#f9f,stroke:#333
    style E fill:#f9f,stroke:#333
    style G fill:#f9f,stroke:#333
NOTE:
[Inch specifications]
The original sizes that can be used are Ledger and Letter. The paper sizes that can be used are Letter. A3, B4, A4R, B5R and A5R Original sizes can also be used when Custom Size is set.
The paper size can be changed and the magnification adjusted to fit the size of the paper.
[Metric specifications]
The original sizes that can be used are A3, B4, A4R, B5R and A5R. The paper sizes that can be used are A4 and B5. Ledger and Letter Original sizes can also be used when Custom Size is set.
The paper size can be changed and the magnification adjusted to fit the size of the paper.
Making 2-Sided copies from one-sided originals
2-Sided Copy one side of an original to the front and back sides. When the number of pages is an odd number, the back side of the last page is copied as a blank page.
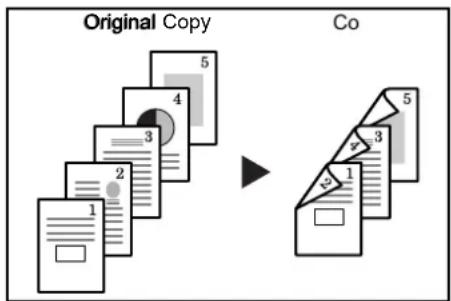
NOTE: The back side copy can also be rotated 180 degrees and copied.
Original Left/Right Binding → Finished Left/Right Binding:
Setting the 2-Sided Copy reverse side setting to OFF will result in the reverse side being copied as is.
Original Left/Right Binding → Finished Top Binding: Setting the 2-Sided Copy reverse side setting to ON will result in the reverse side being copied after being rotated 180 degrees. The finished copy is bound at the top, and each page spread copied in the same direction.
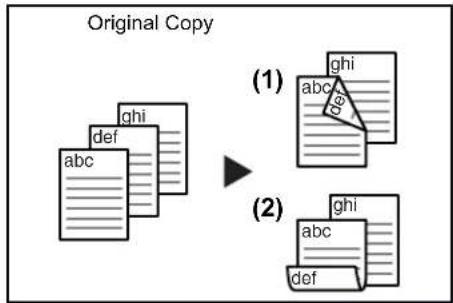
flowchart
graph TD
    A["Original Copy"] --> B["(1)"]
    A --> C["(2)"]
1 Set the original.

natural_image
Line drawing of a hand using a tool to press or spread documents on an open printer (no text or symbols visible)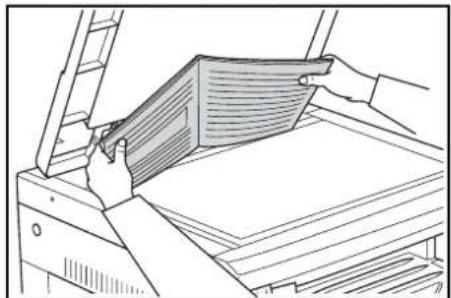
natural_image
Line drawing of hands handling a folded document or folder on a machine (no text or symbols visible)NOTE: The underside Rotate Copy can also be set in the System Menu. (Refer to 2-Sided Copy Reverse Side Rotation Setting on page 4-5.) The value set in the System Menu will inherit the value that is set at the time when the copy is made.
2 Press [2-sided], select the type of original, and select 1 → 2, 3 → 4 or 5 → 6 to light up the corresponding display.
3 Input the number of sets of copies using the numeric keys.
4 Press [Start]. The copier will begin scanning the original.
Scanning.
When an original has been set in the optional Document Processor copying will begin automatically.
When the original has been set on the platen and the scanning of the original completed, Place next original. is displayed and the 2-Sided Copy display blinks. When this occurs, carry out the following procedure.
Place next original.
5 Replace the original with the next one and press [Start].
The copier will scan the original.
6 If there are no more originals to be scanned, press [2-sided] or [OK]. The copier will begin copying.
2-Sided Copy Reverse Side Rotation Setting
Follow the procedure below to change the rotation setting for the reverse side when making 2-Sided copies.
1 Press [2-sided] for 3 seconds. The System Menu for the reverse side setting of 2-Sided Copies will be displayed.
- Duplex 2nd Rotation On
2 Press or and select Rotation On in the case where the reverse side is to be rotated or Rotation Off when it isn't to be rotated.
3 Press [OK]. The display will blink and the copier will return to the state where copying can be continued.
Split Copy Modes
Split copy from book originals
Copy books, magazines, etc. with two facing pages of an open-faced original onto separate sheets of paper.
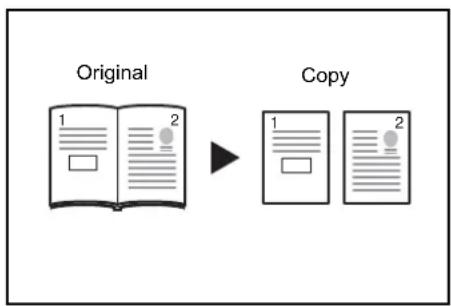
flowchart
graph LR
    A["Original\n1\n2"] --> B["Copy\n1\n2"]
NOTE:
[Inch specifications]
The original sizes that can be used are Ledger and Letter. The paper sizes that can be used are Letter. A3, B4, A4R, B5R and A5R Original sizes can also be used when Custom Size is set.
The paper size can be changed and the magnification adjusted to fit the size of the paper.
[Metric specifications]
The original sizes that can be used are A3, B4, A4R, B5R and A5R. The paper sizes that can be used are A4 and B5. Ledger and Letter Original sizes can also be used when Custom Size is set.
The paper size can be changed and the magnification adjusted to fit the size of the paper.
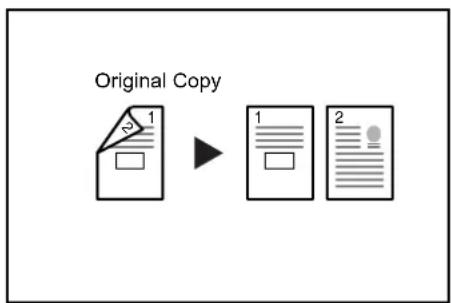
Split copy from 2-sided originals
The original is copied separately as simplex pages.
flowchart
graph LR
    A["Original Copy"] --> B["1"]
    B --> C["2"]
1 Set the original.

natural_image
Line drawing of hands handling a folded paper or document on a machine (no text or symbols)2 Press [Split], select the type of original, and select 21 or 01 to light up the corresponding display.
3 Press [Start]. The copier will begin copying.
In the case where Collate Copies has been set, proceed to Step 4.
4 Replace the original with the next one and press [Start]. The copier will scan the original.
5 If there are no more originals to be scanned, press [OK]. The copier will begin copying.
Making a margin space on the copies
Standard Margin
[Inch specifications]
The position of the image of the original is shifted for copying and a 0.13/0.25/0.38/0.50/0.63/0.75 (") (1/8-inch increments) width binding margin created.
[Metric specifications]
The position of the image of the original is shifted for copying and a 1 to 18 mm (1 mm increments) width binding margin created.
![OLIVETTI d-Copia 2000 - [Metric specifications] - 1](/content/2026/06/1281396/images/ea5f78d9be6cf1128fcb03f9f5eaccd660580fa1be322355a7f0682c90215ba4.jpg)
flowchart
graph TD
    A["Original Copy"] --> B["Pie Chart"]
    B --> C["Divided into two separate pie charts"]
NOTE: If the left width of the Binding Margin is set when setting the 2-Sided Copy, the right side of the Binding Margin will be set automatically for the reverse side by the 2-sided copy rotational setting in the case where it is rotated.
1 Set the original.
![OLIVETTI d-Copia 2000 - [Metric specifications] - 2](/content/2026/06/1281396/images/4124357f0d250d884da83a11a6b83ec05313bd1c3d49145a8d2aa60c07b1c647.jpg)
natural_image
Line drawing of a hand using a tool to press or spread materials from an open machine (no text or symbols visible)IMPORTANT: Place the original so that the side to be set for the Margin shift is on the right side (on the left side, in the case of the optional Document Processor) and check its position after setting it. If the original is placed in the wrong direction, the Binding Margin will not be produced in the position set.
NOTE: The Binding Margin can also be set in the System Menu. (Refer to Setting the Margin on page 4-9.)
The value set in the System Menu will inherit the value that is set at the time when the copy is made.
2 Press [Margin]. The Margin indicator will light up.
3 Press [Start]. The copier will begin copying.
Setting the Margin
Use the procedure given below to change the Margin.
1 Press [Margin] for 3 seconds. The System Menu for the Margin will be displayed.
43.Stitch Width 1mm
2 Press or and select the binding margin width.
[Inch specifications]
0.13/0.25/0.38/0.50/0.63/0.75(“): the range in which the margin can be set.
[Metric specifications]
A margin from 1 to 18 (mm) can be set.
3 Press [OK]. The display will blink and the copier will return to the state where copying can be continued.
Making copies with clean edges
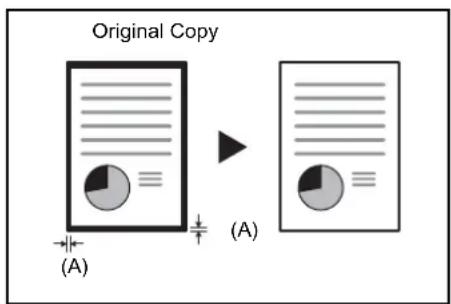
Erasing blemishes from edges of copies (Sheet erase mode)
[Inch specifications]
Use this to remove the dark shading that appears around sheet originals during copying. Select the border width to be erased from among 0.13/0.25/0.38/0.50/0.63/0.75 ("). ((A) in the illustration is the Border Width.)
[Metric specifications]
Use this to remove the dark shading that appears around sheet originals during copying. Select the border width to be erased from 1 to 18 (mm). ((A) in the illustration is the Border Width.)
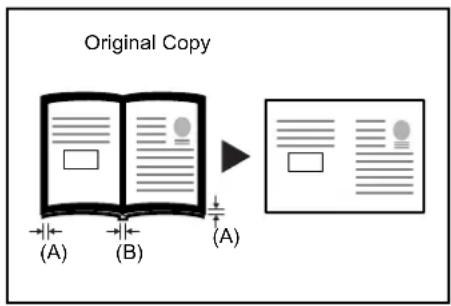
Erasing blemishes from the edges and middle of copies made from books (Book erase mode)
[Inch specifications]
Use this to get a clean copy of thick books. Select the outer border width from among 0.13/0.25/0.38/0.50/0.63/0.75 ("). The center border width will be 2-times that of the outer border width ((A) in the illustration is the outer border width and (B) is the center border width.)
[Metric specifications]
Use this to get a clean copy of thick books. Select the outer border width from 1 to 18 (mm). The center border width will be 2-times that of the outer border width ((A) in the illustration is the outer border width and (B) is the center border width.)
NOTE: Only standard sizes can be used as the Original size.
1 Set the original.
![OLIVETTI d-Copia 2000 - [Metric specifications] - 1](/content/2026/06/1281396/images/6c7c1934c7d7d23f8bd2ccf9d4ffb3b5a3e93ef00249ddec4a15ec4cbe29a3fe.jpg)
natural_image
Line drawing of hands operating a laptop with a folded paper or document on top (no text or symbols)NOTE: The Border Width can also be set in the System Menu. (Refer to Setting the Border Width on page 4-11.)
The value set in the System Menu will inherit the value that is set at the time when the copy is made.
2 Press [Border Erase] and select the type of border erase to be performed to light up the pr indicator.
3 Press [Start]. The copier will begin copying.
Setting the Border Width
Use the procedure given below to change the Border Width.
1 Press [Border Erase] for 3 seconds. The System Menu for the Border Width will be displayed.
- Border Erase 1mm
2 Press or and select the border width.
[Inch specifications]
Select from 0.13 ("), 0.25 ("), 0.38 ("), 0.50 ("), 0.63 (") or 0.75 (").
[Metric specifications]
Select from 1 to 18 (mm).
3 Press [OK]. The display will blink and the copier will return to the state where copying can be continued.
Copying 2 or 4 originals onto a single page
The sizes of 2-sheet or 4-sheet originals can be reduced and copied together onto a single sheet. In addition, the borders of each original can be separated with a solid or dotted line.

flowchart
graph LR
    A["1"] --> B["2"]
    B --> C["1 2 ="]
NOTE: Only standard paper sizes and originals can be used for this.
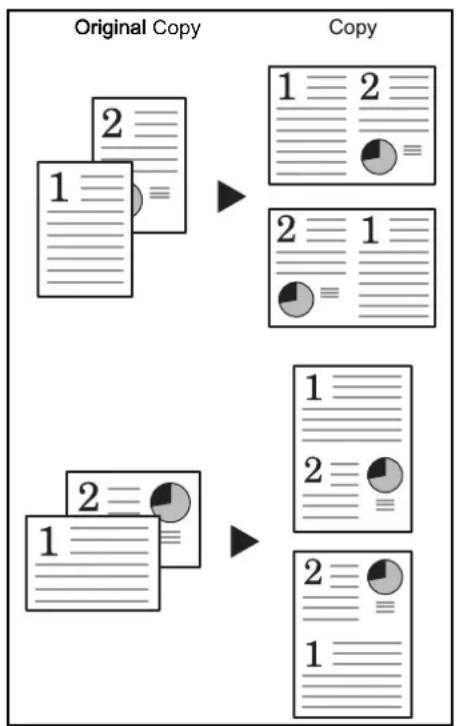
2 in 1
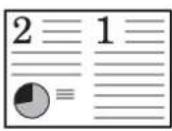
2 sheets of originals can be copied onto a single sheet. If used together with 2-Sided Copy, 4 sheets of originals can be copied onto both sides of a single sheet.
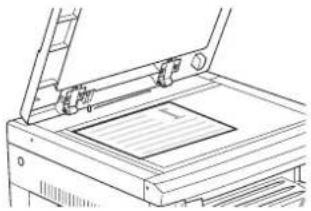
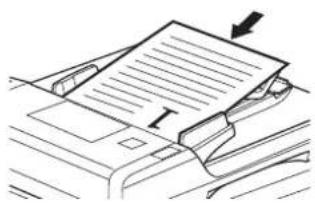
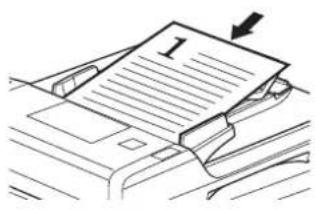
(Follow the order shown in illustrations 1 → 2 in placing the originals on the platen.)
flowchart
graph TD
    A["Original Copy"] --> B["1"]
    A --> C["2"]
    D["Copy"] --> E["1"]
    D --> F["2"]
    G["Copy"] --> H["1"]
    G --> I["2"]
    J["Copy"] --> K["1"]
    J --> L["2"]
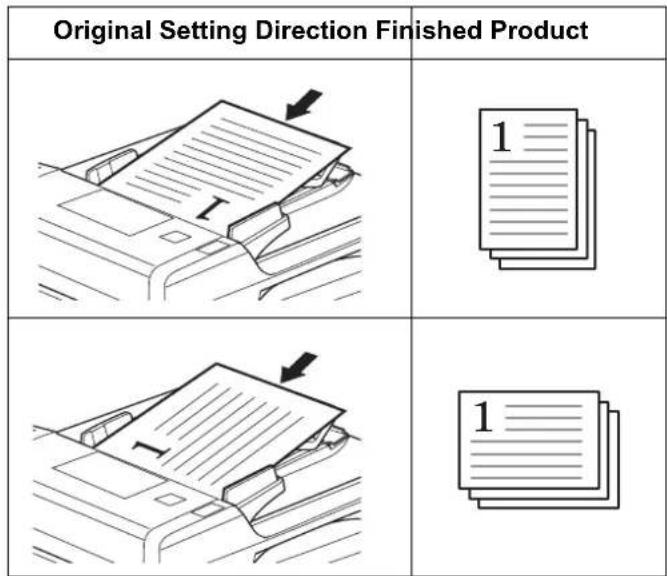
The directions for setting the original and the finished copy are as follows.
When the original is set on the platen
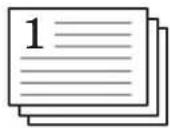
| Original Setting Direction Finished Product | |
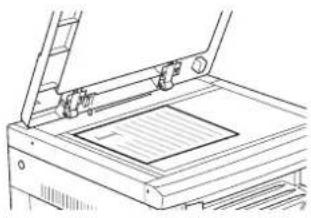 | 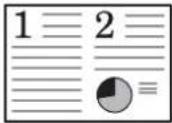 |
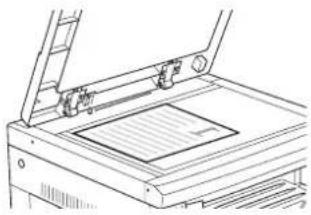 | 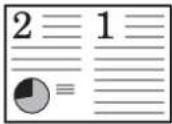 |
 |  |
 |  |
When the original is set in the Document Processor
| Original Setting Direction Finished Product | |
 |  |
 |  |
 |  |
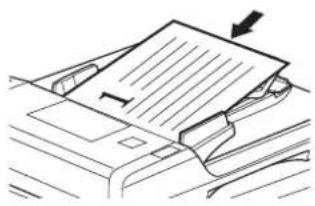 | 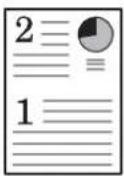 |
4 in 1
4 sheets of originals can be copied onto a single sheet. If used together with 2-Sided Copy, 8 sheets of originals can be copied onto both sides of a single sheet.
(Follow the order shown in illustrations 1 2 3 4 in placing the originals on the platen.)
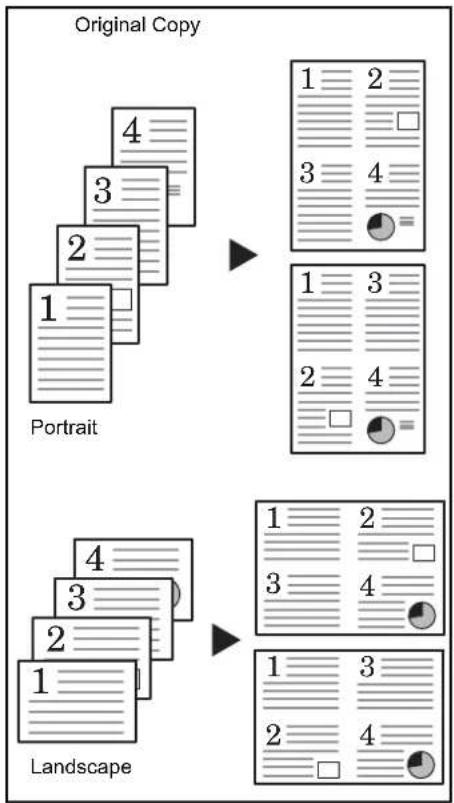
flowchart
graph TD
    A["Original Copy"] --> B["Portrait"]
    A --> C["Landscape"]
    B --> D["1 2 3 4 ="]
    B --> E["1 3 2 4 ="]
    C --> F["1 2 3 4 ="]
    C --> G["1 3 2 4 ="]
The directions for setting the original and the finished copy are as follows.
When the original is set on the platen
| Original Setting Direction Finished Product | |
 |  |
 |  |
When the original is set in the Document Processor
1 Set the original.

natural_image
Line drawing of a hand using a laptop to press documents on a printer (no text or symbols visible)NOTE: The 4 in 1 layout setting (refer to 4 in 1 Layout Order on page 4-17) and the setting of border lines when setting Combine mode (refer to Setting the Combine mode Border Lines on page 4-17) can also be set in the System Menu.
The value set in the System Menu will inherit the value that is set at the time when the copy is made.
2 Press [Combine] to light up the 1→1:2 or 1→ indicator.
3 Input the number of sets of copies using the numeric keys.
4 Press [Start]. The copier will begin reading in the original.
When an original has been set in the optional Document Processor copying will begin automatically.
Scanning.
When the original has been set on the platen and the scanning of the original completed, Place next original. is displayed and the Combine indicator blinks. When this occurs, carry out the following procedure.
Place next original.
5 Replace the original with the next one and press [Start]. The copier will read in the original.
6 If there are no more originals, press [Combine] or [OK]. The copier will begin copying.
4 in 1 Layout Order
Follow the procedure below to change the order in which pages are to be laid out within the copied page when making 4 in 1 copies.
1 Press [Combine] for 3 seconds. The System Menu will be displayed.
45.4 in 1 Layout Portrait 1
2 Confirm that 45.4 in 1 Layout is displayed and then press [OK].
3 Press or and select the layout.
Portrait 1 Portrait 2


Landscape 1 Landscape 2


4 Press [OK]. The display will blink and copying can be begun.
Setting the Combine mode Border Lines
Use the procedure given below to change the Combine mode Border Lines.
1 Press [Combine] for 3 seconds. The System Menu will be displayed.
2 Press to display 46. Combine Border.
System menu: 46. Combine Border
3 Press the [OK].
4 Press or and select the type of border line.
Off
Solid
Dotted
5 Press [OK]. The display will blink and the copier will return to the state where copying can be continued.
Automatic Collating of copy sets
It is possible to Collate the number of copy sets needed from multiple sheets of originals.
NOTE: Whether or not to collate while changing the direction for each set at the time of collating can be changed using the System Menu. (Refer to Rotate Collate Setting on page 5-19.)
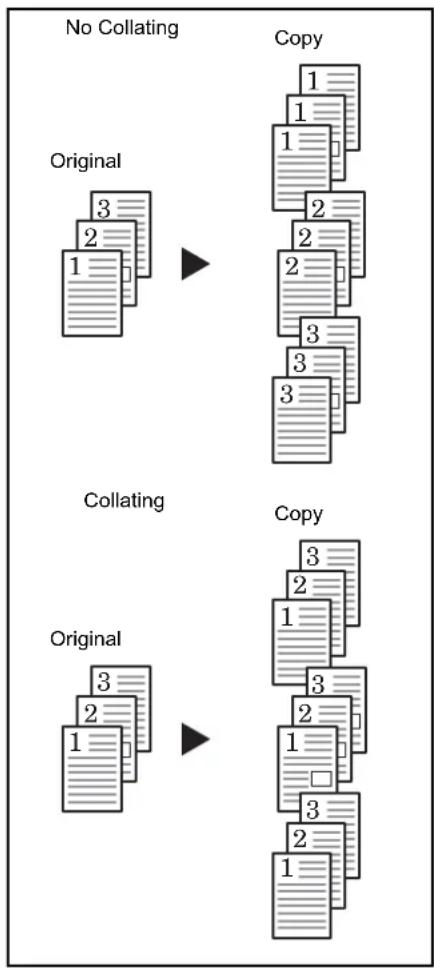
flowchart
graph TD
    A["Original 1"] --> B["Copy 1"]
    C["Original 2"] --> D["Copy 2"]
    E["No Collating"] --> F["Copy 3"]
    G["Collating"] --> H["Copy 3"]
    I["Original 1"] --> J["Copy 2"]
    K["Original 2"] --> L["Copy 1"]
1 Set the original.
NOTE: When an original is set in the optional Document Processor, the Collate indicator will light and Collate Copies will be set. In this case, proceed to Step 3.
2 Press [Collate].
3 Input the number of sets of copies using the numeric keys.
4 Press [Start]. The copier will begin reading in the original.
Scanning.
When an original has been set in the optional Document Processor copying will begin automatically.
When the original has been set on the platen and the scanning of the original completed, Place next original. is displayed and the Collate display blinks. When this occurs, carry out the following procedure.
Place next original.
5 Replace the original with the next one and press [Start]. The copier will read in the original.
6 If there are no more originals, press [Collate] or [OK]. The copier will begin copying.
Saving on toner use
Setting EcoPrint will result in a reduced amount of toner being consumed.
Use this to make test copies or copies where high-quality printing is not required. Refer to EcoPrint on page 5-10 for instructions on how to select or deselect EcoPrint in the System Menu.
The image will become slightly lighter.

flowchart
graph LR
    A["EcoPrint Not Set"] --> B["EcoPrint Set"]
    style A fill:#f9f,stroke:#333
    style B fill:#bbf,stroke:#333
1 Set the original.
2 Press [EcoPrint].
3 Press [Start]. The copier will begin copying.
Program Function
Copy settings that are frequently used can be registered and then recalled by pressing [Program]. Even types of copies can be stored.
Registering a program
1 Set the Copy Mode to be registered.
2 Press [Program] for 3 seconds.
3 Input the program number (0 to 9) using the numeric keys and press the [Program] key for 3 seconds.
The display of the number input will blink 2 times and the program will be registered.
NOTE: If the same number as a program already registered is input, the prior program is overwritten.
Using programmed setting to make copies
1 Press [Program].
2 Press or , select the number of the program to be used and then press [OK]. Input can also be done using the numeric keys.
3 Set the original and press [Start]. The copy will be made using the program that has been set.
5 System Setting
This chapter covers how to configure various settings of the copier using the menus on the operation panel.
- System Menu 5-2
- System Menu Items.... 5-2
- System Menu Operations Procedures 5-2
• Procedure for Changing the Default Settings...... 5-8 - Checking the Total Counter...... 5-24
System Menu
The copier will enter System Menu after warm up has been completed or when [Reset] has been pressed. The settings automatically set for the copier in System Menu are called the Default Settings. These settings can be freely changed to match the usage of the copier.
System Menu Items
The following are the System Menu Items.
Change the settings as necessary in order to achieve the most efficient use of the copier. The factory default setting is indicated by an asterisk (*).
| System Menu Items | Description Available settings | Reference Page | |
| 01.Copy Status Outputs | the content of the Default Settings. --- 5-8 | ||
| 02.Language Set the language of the message display. [Inch specifications] | English*FrancaisEspanolJapanesePortugues[Metric specifications]EnglishDeutschFrancaisEspanolItalianoРусский | 5-8 | |
| 03.Image Quality Sets the manuscript image quality that will be selected at the time the copier is turned on. | Text + Ph Dens.*Photo DensityText Density | 5-9 | |
| 04.Initial Dens. Sets the copy exposure at the time the copier is turned on to Manual or Automatic.There will be no display when Photo Density has been selected in 03.Image Quality. | Manual*Auto | 5-9 | |
| 05.EcoPrint Selects the initial value of the EcoPrint Mode when the power is turned on. The initial value of the Eco Mode can be set to on (Enable). Exposures will be lighter and less toner will be consumed when the EcoPrint Mode is used. | On: EnabledOff: Disabled* | 5-10 | |
| 06.Density steps Changes the number of the adjustment steps for the copy's exposure. 0.5 - Setting this step enables even finer adjustment of the exposure. | 1 Step*0.5 Step | 5-10 | |
| 07.Auto Density Adjusts the overall exposure of the copy when Auto Exposure Mode is used. | 1(lightest) to 7(darkest)(*4) | 5-11 | |
| 08.Text+Ph Dens. Adjusts the central exposure value for the copier's manual exposure (Text and Photo). | 1(lightest) to 7(darkest)(*4) | 5-11 | |
| 09.Photo Density | Adjusts the central exposure value for the copier's manual exposure (Photo). | 1(lightest) to 7(darkest)(*4) | 5-11 |
| System Menu Items | Description Available settings | Reference Page | |
| 10.Text Density Adjusts | the central exposure value for the copier's manual exposure (Text). | 1(lightest) to 7(darkest) (*4) | 5-12 |
| 11.ReduceStreaks It is possible to make black streaking less noticeable when it appears when using the optional Document Processor. | Off*WeakStrong | 5-12 | |
| 12.OptimizePhoto Setting this to Error Diffusion when copying originals with text and photos and Dithering when copying originals with mainly photos will result in clearer images. | ErrorDiffusion*Dither Matrix | 5-12 | |
| 13.OptimizBackgr The background color can be lightened when it is found to be too dark after copying. | 1(lightest) to 5(darkest) (*3) | 5-13 | |
| 14.Initial Paper Selects whether the cassette with the same size of paper as the original size will be automatically selected or whether a selected cassette level is to be used. | Auto*DefaultCassette | 5-13 | |
| 15.AutoSel Paper Specifies the media type when the copier automatically selects the paper. | Plain*TransparencyRoughVellumLabelsRecycledPreprintedBondCardstockColor (Colour)PrepunchedLetterheadThick paperEnvelopeHigh QualityCustom 1 to 8 | 5-14 | |
| 16.DefaultCasset Selects the cassette that is automatically given priority for use.Manual paper feeding cannot be set using the Selected cassette function.Cassettes 2 to 4 will be displayed only when the optional Paper Feeder is installed. | Cassette 1*Cassette 2Cassette 3Cassette 4 | 5-14 | |
| 17.AutoCassetSet Switches feeding automatically to a cassette holding paper of the same size/orientation and copying continues when the paper in the cassette being used runs out.This will be displayed when the optional Paper Feeder is installed. | Disting. paperNot dist. paper* | 5-15 | |
| 18.PriorAutoZoom Sets whether or not to use automatic magnification (zoom/reduction percentage) when a paper cassette has been selected. | On: EnabledOff: Disabled* | 5-15 | |
| 19.Cassette1Size Automatically detects the paper size in the supply cassettes (1 to 4).When it is to be detected in inches, set this to AutoDetect inch; when paper size is to be detected in centimeters, (A·B columns) set this to Auto Detect mm and when Oficio 2 size is to be used set this to Oficio 2.Cassettes 2, 3 and 4 will be displayed only when the optional Paper Feeder is installed. | Auto Detect mm (*Metric specifications)AutoDetect inch (*Inch specifications)Oficio 2 | 2-5 | |
| 20.Cassette2Size | |||
| 21.Cassette3Size | |||
| 22.Cassette4Size | |||
| 23.MPTray Config Sets the size of paper to be manually fed in. Paper Size | [Inch specifications]Universal size*Ledger RLegal RLetter RLetterStatement ROther StandardsCustomized Size [Metric specifications]Universal size*A3 RA4RA4A5 RB4 RB5 RFolio ROther StandardsCustomized SizeMedia TypePlain*TransparencyPreprintedLabelsBondRecycledRoughVellumLetterheadColourPrepunchedEnvelopeCardstockThick PaperHigh QualityCustom (1 to 8) | 2-7 | |
| 24.Custom Size 1 Sets the size to be set to the Custom size (1 to 2).This makes it possible to set the size that do not appear on the operation panel. | [Inch specifications]A3 RA4 RA4A5 RB4 RB5RB5B6 RA6 RHagaki11 × 15" R Folio ROficio 2Customized SizeYYY × XXX (mm)Y-direction: 98 to 297mmX-direction: 148 to 432mm [Metric specifications]B5 RB6 R*A6 RCardstockLedgr RLegal RLetter RLetterStatement ROficio 211 × 15" RCustomied SizeYYY × XXX (" )Y-direction: 3.88 to 11.63"X-direction: 5.88 to 17" | 5-15 | |
| 25.Custom Size 2 | |||
| 26.Casst1MedType Specifies the media type to the cassettes (1 to 4).Cassette 2, 3 and 4 will be displayed only when the optional Paper Feeder is installed. | Plain*RecycledPreprintedBondRoughColor (Colour)LetterheadPrepunchedHigh QualityCustom 1 to 8 | 5-17 | |
| 27.Casst2MedType | |||
| 28.Casst3MedType | |||
| 29.Casst4MedType | |||
| 30.CustmMedType1 Sets the paper weights and 2-sided copying to the Custom paper. 2-sided copying will be displayed only when the optional Duplex Unit is installed. | Paper weightsExtra HeavyHeavy 3Heavy 2Heavy 1Normal 3Normal 2*Normal 1Light (Vellum)2-sided copyingOn: Enabled*Off: Disabled | 5-17 | |
| 31.CustmMedType2 | |||
| 32.CustmMedType3 | |||
| 33.CustmMedType4 | |||
| 34.CustmMedType5 | |||
| 35.CustmMedType6 | |||
| 36.CustmMedType7 | |||
| 37.CustmMedType8 | |||
| 38.Hagaki/A6RDet Select the paper size when copying an original document of non-standard size. | HagakiA6 R* | 5-18 | |
| 39.B4R/Folio Det Select the paper size when copying an original document of non-standard size. | B4 RFolio R* | 5-18 | |
| 40.11x15" Detect When the size of original document is 11 x 15", the original document is automatically zoomed. | OnOff* | 5-18 | |
| 41.Copy Limit Limits the number of copies or sets of copies that can be made at one time. | 1 to 999 (*999) 5-19 | ||
| 42.Duplex 2nd Rotates the paper 180 degrees and copies it when both sides of a sheet are to be copied.This will not be displayed when the optional Duplex Unit is not installed. | Rotation OnRotation Off* | 4-5 | |
| 43.Stitch Width Sets the initial value for the Binding Margin. [Inch specifications] | 0.13/0.25/0.38/0.50/0.63/0.75 (*)(0.25)[Metric specifications]1 to 18 (mm) (*6) | 4-9 | |
| 44.Border Erase Sets the initial value for the border width that will be lightened to remove shadows from the sheet or book. | [Inch specifications]0.13/0.25/0.38/0.50/0.63/0.75 (*)(0.25)[Metric specifications]1 to 18 (mm) (*6) | 4-11 | |
| 45.4 in 1 Layout Sets the layout for the order in which the originals will appear in the 4-in-1 Layout mode. | Portrait 1*Portrait 2Landscape 1Landscape 2 | 4-17 | |
| 46.Combine Border Selects the type of borderline to be used in the Layout mode. | Off*SolidDotted | 4-17 | |
| 47.Rotate/Offset Sets the copier so that each copy set is rotated and collated when it is collate copied. | On: Rotational Collating EnabledOff: Rotational Collating Disabled* | 5-19 | |
| 48.Auto Rotation Sets of copied documents are output landscape/portrait alternately, allowing easy separation of each set from the other. | On: Enabled*Off: Disabled | 5-20 | |
| 49.Silent mode Shortens the amount of time the internal motor continues to run after the copy is produced. Use this setting in cases when the motor noise is bothersome. | 0, 5, 10, 15, 30(seconds) (*10) | 5-20 | |
| 50.Auto Clear Sets the copier so that automatic clearing is executed after a set amount of time has elapsed after the copy is produced. (Refer to Auto Clear function on page 1-6.) | On: Enabled*Off: Disabled | 5-20 | |
| 51.Auto Sleep The Auto | Sleep mode will be entered after a set period of time has passed after the final copy has been produced or during which no operations have been performed.If the Auto Sleep function interferes with your copy operations, disable the function. Before disabling the Auto Sleep function, you may want to try lengthening the amount of time before the Auto Sleep function engages (Sleep Mode Transition Time). | On: Enabled*Off: Disabled | 5-21 |
| 52.AutoClearTime Sets | the time interval prior to the automatic operation of the Auto Clear function when On (Enable) has been selected as the 50.Auto Clear setting.This will not be displayed when 50.Auto Clear is set to Off. | 10 to 270 (10-second units) (*90) | 5-21 |
| 53.LowPower Time Sets | the time interval prior to the automatic engagement of the Low Power mode after copy operations have been completed. | 1, 5, 15, 30, 45, 60, 90, 120, 180, 240 (minutes) (*15) | 5-22 |
| 54.AutoSleepTime Sets | the time interval prior to the automatic operation of the Auto Sleep function when On (Enable) has been selected as the 51.Auto Sleep setting.This will not be displayed when 51.Auto Sleep is set to Off. | 1, 5, 15, 30, 45, 60, 90, 120, 180, 240 (minutes) (*30) | 5-22 |
| 55.Alarm The Alarm can | be set to sound when a key on the Operation Panel is pressed or in cases when errors occur, etc. | On: Enabled (sound alarm)*Off: Disabled (no alarm) | 5-23 |
| 56.CoverageRepo Prints | out a report that shows the number of copies made and the average amount of toner used (blackness ratio %) for each paper size. | --- 5-23 | |
System Menu Operations Procedures
Follow the procedure listed below to operate in the System Menu.
1 Press [Exposure Adjustment] on both sides for 3 seconds. System Menu will be displayed.
System Menu: 00.Setting done
2 Press or and select System Menu Items.
NOTE: Each of System Menu Items can be selected by pressing the numeric keys.
Refer to "Procedure for Changing the Default Settings" regarding the following.
3 After completing each operation, press or to display 00. Setting done.
NOTE: The message display will return to the Ready to copy. by pressing [Reset].
You can cancel the setting by pressing [Stop/Clear].
4 Press [OK].
Procedure for Changing the Default Settings
The procedure for changing each of the items in the System Menu is described below.
User Status Report
Outputs a list of the values set for the System Menu items.
NOTE: Check to make sure that Letter/A4 size paper is loaded in the cassette.
System Menu: 01.Copy Status
1 Display the System Menu. (Refer to System Menu Operations Procedures on page 5-7.)
2 Press or to display 01. Copy Status.
3 Press [OK].
4 Press or and select Yes.
5 Press [OK]. The report will be output.
Sample: User Status Report
![F00: [ ] ================= F01: [ ] ================= F02: [ ] ================= F03: [□ ----□] ================= F04: [□ ----□] ================= F05: [□ ----□] ================= F07: [□ ----□] ================= F08: [□ ----□] ================= F09: [□ -□] ================= F10: [□ -□] ================= F11: [□ -□] ================= F12: [□ -□] ================= F13: [□ ----□] ================= F14: [□ ----□] ================= F15: [□ ----□] ================= F16: [□ ----□] ================= F17: [□ ----□] ================= F18: [□ ----] =================](/content/2026/06/1281396/images/3569bea4887e4ef0e2c0dbf91475a89cb919038a3f78b4b12218a4af1153d54f.jpg)
Message Language
You can select the language of the message display by following the procedure given below.
1 Display the System Menu. (Refer to System Menu Operations Procedures on page 5-7.)
2 Press or to display 02. Language.
System Menu: 02.Language
3 Press [OK].
4 Press or . The display cycles through the available selection in the following order:
| Inch specifications Metric specifications | |
| English English | |
| Francais Deutsch | |
| Espanol Francais | |
| Japanese Espanol | |
| Portugues Italiano | |
| Русский | |
5 Press [OK]. The display will return to that of Step 2.
Original Image Quality
Sets the original image quality that will be selected at the time the copier is turned on.
1 Display the System Menu. (Refer to System Menu Operations Procedures on page 5-7.)
2 Press or to display 03. Image Quality.
System Menu: 03.Image Quality
3 Press [OK].
4 Press or and select Text+Ph Dens, Photo Density or Text Density.
5 Press [OK]. The display will return to that of Step 2.
Initial Density
Sets the copy density at the time the copier is turned on to Manual or Automatic.
1 Display the System Menu. (Refer to System Menu Operations Procedures on page 5-7.)
2 Press or to display 04. Initial Dens.
System Menu: 04.Initial Dens.
3 Press [OK].
4 Press or and select Manual or Auto.
5 Press [OK]. The display will return to that of Step 2.
EcoPrint
Selects the initial value of EcoPrint when the power is turned on. The initial value of the EcoPrint can also be set to on (Enable).
1 Display the System Menu. (Refer to System Menu Operations Procedures on page 5-7.)
2 Press or to display 05.EcoPrint.
System Menu: 05.EcoPrint
3 Press [OK].
4 When EcoPrint is to be used as the initial value press and select On (Enable).
5 Press [OK]. The display will return to that of Step 2.
Exposure Steps
Changes the number of steps for the copy's exposure.
1 Display the System Menu. (Refer to System Menu Operations Procedures on page 5-7.)
2 Press or to display 06. Density steps.
System Menu: 06.Density steps
3 Press [OK].
4 Press or and select 1 Step, or 0.5 Step.
5 Press [OK]. The display will return to that of Step 2.
Auto Exposure Adjustment
Adjusts the overall exposure of the copy when Auto Exposure Mode is used.
1 Display the System Menu. (Refer to System Menu Operations Procedures on page 5-7.)
2 Press or to display 07. Auto Density.
System Menu: 07.Auto Density
3 Press [OK].
4 Press or and select an exposure from 1 to 7.
5 Press [OK]. The display will return to that of Step 2.
Text + Photo Mode Exposure Adjustment
Adjusts the median exposure value of the copy for the Text + Photo original.
1 Display the System Menu. (Refer to System Menu Operations Procedures on page 5-7.)
2 Press or to display 08.Text+Ph Dens.
System Menu: 08.Text+Ph Dens.
3 Press [OK].
4 Press or and select an exposure from 1 to 7.
5 Press [OK]. The display will return to that of Step 2.
Photo Exposure Adjustment
Adjusts the median exposure value of the copy for the Photo original.
1 Display the System Menu. (Refer to System Menu Operations Procedures on page 5-7.)
2 Press or to display 09. Photo Density.
System Menu: 09. Photo Density
3 Press [OK].
4 Press or and select an exposure from 1 to 7.
5 Press [OK]. The display will return to that of Step 2.
Text Exposure Adjustment
Adjusts the median exposure value of the copy for the Text original.
System Menu: 10.Text Density
1 Display the System Menu. (Refer to System Menu Operations Procedures on page 5-7.)
2 Press or to display 10.Text Density.
3 Press [OK].
4 Press or and select an exposure from 1 to 7.
5 Press [OK]. The display will return to that of Step 2.
Processing to Reduce Black Line
It is possible to make black line less noticeable when it appears when using the optional Document Processor. Using processing to reduce black line decreases the reproduction quality of small characters, so it is recommended that the copier normally be used at the factory default setting.
NOTE: When Photo Mode has been selected in Image Quality Mode, processing to reduce black line is not possible.
1 Display the System Menu. (Refer to System Menu Operations Procedures on page 5-7.)
2 Press or to display
11. ReduceStreaks.
System Menu:
11.ReduceStreaks
3 Press [OK].
4 Press or and select Off, Weak or Strong.
5 Press [OK]. The display will return to that of Step 2.
Photo Processing
Select the processing method for photo originals.
1 Display the System Menu. (Refer to System Menu Operations Procedures on page 5-7.)
2 Press or to display 12.OptimizePhoto.
System Menu: 12.OptimizePhoto
3 Press [OK].
4 Press or and select ErrorDiffusion, or Dither Matrix.
5 Press [OK]. The display will return to that of Step 2.
Background Adjustment
The background can be lightened when it is found to be too dark after copying.
1 Display the System Menu. (Refer to System Menu Operations Procedures on page 5-7.)
2 Press or to display 13.OptimizBackgr.
System Menu: 13.OptimizBackgr
3 Press [OK].
4 Press or and select a background color exposure from 1 to 5.
5 Press [OK]. The display will return to that of Step 2.
Cassette Selection
Selects whether the cassette with the same size of paper as the original size will be automatically selected or whether a selected cassette level (fixed) is to be used.
1 Display the System Menu. (Refer to System Menu Operations Procedures on page 5-7.)
2 Press or to display 14. Initial Paper.
System Menu: 14. Initial Paper
3 Press [OK].
4 Press or and select Auto, or DefaultCassette.
5 Press [OK]. The display will return to that of Step 2.
Selecting Media Types for Automatic Paper Selection
Specifies the type of media when the copier automatically selects the copy paper according to the size of the original. The type of media can be specified from the following types of paper supported.
Plain, Transparency, Rough, Vellum, Labels, Recycled, Preprinted, Bond, Cardstock, Color (Colour), Prepunched, Letterhead, Thick paper, Envelope, High Quality and Custom 1-8
When Plain is selected in the following example, the copier looks for the cassette or MP tray in which the paper of the matching type (plain) and size (of the original document) is loaded and begins copying.
NOTE: To assign media type to cassette according to the type of the media loaded, refer to Selecting Media Type (Cassettes 1 to 4) on page 5-17 for details.
1 Display the System Menu. (Refer to System Menu Operations Procedures on page 5-7.)
2 Press or to display 15. AutoSel Paper.
System Menu: 15. AutoSel Paper
3 Press [OK].
4 Press or to select the desired media type.
5 Press [OK]. The display will return to that of Step 2.
Selected Cassette
When the optional Paper Feeder is installed, priority will be assigned to the cassette that is selected automatically. Manual paper feeding cannot be set using the Selected Cassette function.
1 Display the System Menu. (Refer to System Menu Operations Procedures on page 5-7.)
2 Press or to display 16.DefaultCasset.
System Menu: 16.DefaultCasset
3 Press [OK].
4 Press or and select the cassette to be given priority for use.
NOTE: The range of selection will vary in accordance with the number of cassettes installed.
5 Press [OK]. The display will return to that of Step 2.
Auto Cassette Switching
When the optional Paper Feeder has been installed, select whether or not to use the Auto Cassette Switching function.
1 Display the System Menu. (Refer to System Menu Operations Procedures on page 5-7.)
2 Press or to display 17. AutoCassetSet.
System Menu: 17.AutoCassetSet
3 Press [OK].
4 Press or and select Disting. paper when the Auto Cassette Switching function is to be used and Not dist. paper when it will not be used.
5 Press [OK]. The display will return to that of Step 2.
Auto Sizing
Sets whether or not to use automatic sizing (zoom/reduction percentage) when a paper cassette has been selected.
1 Display the System Menu. (Refer to System Menu Operations Procedures on page 5-7.)
2 Press or to display 18. PriorAutoZoom.
System Menu: 18.PriorAutoZoom
3 Press [OK].
4 Press or and select On when the Automatic Sizing function is to be used and Off when copies are to be taken at a 1:1 ratio.
5 Press [OK]. The display will return to that of Step 2.
Inputting Custom Sizes
Sizes that are not displayed on the Operation Panel are registered as Custom Sizes.
The setting of Custom Size 1 is shown here as an example. To set Custom Size 2 select 25.Custom Size 2 in the System Menu and then perform the same settings.
1 Display the System Menu. (Refer to System Menu Operations Procedures on page 5-7.)
2 Press or to display the 24.Custom Size1.
System Menu: 24.Custom Size 1
3 Press [OK].
4 Press or and select the size. The paper sizes displayed are as shown in the table below. When selecting Irregular Sizes, carry out the following procedure. In the case of the selection of other sizes, proceed to Step 9.
| Inch specifications Metric | specifications |
| A3 R B5 R | |
| A4 R B6 R | |
| A4 A6 R | |
| A5 R Cardstock | |
| A6 R Ledger R | |
| B4 R Legal R | |
| B5 R Letter R | |
| B5 Letter | |
| B6 R Statement R | |
| 11×15" R Oficio 2 | |
| Folio R 11×15" R | |
| Cardstock Customized Size | |
| Customized Size |
5 Press [OK]. The Width can be input after 2 blinks.
6 Press or and input the Length Size. 3.88 to 11.63(")/98 to 297 (mm): The range in which setting is possible.
Non-std size L 297mm
7 Press [OK]. The Width can be input after 2 blinks.
8 Press or and input the Width Size. 5.88 to 17.00(")/148 to 432 (mm): The range in which setting is possible.
Non-std size W 148mm
9 Press [OK]. The display will return to that of Step 2.
Selecting Media Type (Cassettes 1 to 4)
Specifies the media type to the cassette 1 to 4. These cassettes support the following media type.
Plain, Preprinted, Bond, Recycled, Rough, Letterhead, Color (Colour), Prepunched, High Quality and Custom 1-8
The setting of Cassette 1 is shown here as an example, select 27. Casst2MedType, 28. Casst3MedType and 29. Casst4MedType in the System Menu before selecting Cassette 2, 3 and 4 (option), respectively.
1 Display the System Menu. (Refer to System Menu Operations Procedures on page 5-7.)
2 Press or to display 26. Casst1MedType.
System Menu: 26.Casst1MedType
3 Press [OK].
4 Press or to select the desired media type.
5 Press [OK]. The display will return to that of Step 2.
Specifying the Paper Weight and 2-sided Copying to Custom Paper
Assigns one of the following paper weights to the Custom paper. And you can determine whether 2-sided copying is allowed to the custom paper. Up to 8 custom paper are configurable.
Extra Heavy, Heavy3, Heavy2, Heavy1, Normal3, Normal2, Normal1 and Light (Vellum)
The setting of Custom 1 is shown here as an example, select 31. CustmMedType2, 32. CustmMedType3, 33. CustmMedType4, 34. CustmMedType5, 35. CustmMedType6, 36. CustmMedType7 and 37. CustmMedType8 in the System Menu before selecting Custom 2, 3, 4, 5, 6, 7 and 8, respectively.
NOTE: 2-sided Copying setting will be displayed only when the optional Duplex Unit is installed.
Refer to the following media types and weights (g/m ^2 )
• Extra Heavy - OHP sheet
• Heavy 3 - from 171 g/m ^2 to 209 g/m ^2
• Heavy 2 - from 136 g/m ^4 to 170 g/m ^2
• Heavy 1 - from 106 g/m² to 135 g/m²
• Normal 3 - from 91 g/m² to 105 g/m²
• Normal 2 - from 76 g/m² to 90 g/m²
• Normal 1 - from 60 g/m ^2 to 75 g/m ^2
• Light (Vellum) - from 60 g/m ^2 to 64 g/m ^2
1 Display the System Menu. (Refer to System Menu Operations Procedures on page 5-7.)
2 Press or to display 30.CustmMedType1.
System Menu: 30.CustmMedType1
3 Press [OK].
4 Press or to select the desired media type.
5 Press [OK]. When the optional Duplex Unit is not installed, the display will return to that of Step 2.
6 Press or and select on when the 2-sided Copying is to be used and off when it will not be used.
7 Press [OK]. The display will return to that of Step 2.
Auto Detect Originals
Allows you to predetermine what paper size is selected for printing when copying an original document of non-standard sizes (Refer to below). This feature is applicable when the size of the original is either Hagaki, A6R, B4R or Folio. The menu also provides the means to determine whether 11 x 15" is recognized as a standard size.
The setting of Hagaki or A6R is shown here as an example, select 39.B4R/Folio Det and 40.11x15" Detect in the System Menu before selecting B4R and 11 x 15", respectively.
NOTE: This setting is only available for metric models.
1 Display the System Menu. (Refer to System Menu Operations Procedures on page 5-7.)
2 Press or to display 38. Hagaki/A6RDet.
System Menu: 38.Hagaki/A6RDet
3 Press [OK].
4 Press or to select the paper size to set up.
When the size of the original document is Hagaki or A6R, choose Hagaki to copy it on Hagaki size or A6 R to copy it on A6R size.
When the size of the original document is B4R or Folio, choose B4 R to copy it on B4R size or Folio R to copy it on Folio size.
When the size of the original document is 11 x 15" (computer form), you can choose whether the original document is automatically zoomed to the currently selected paper (On) or the copier halts and prompts you to investigate the size of the original document (Off).
5 Press [OK]. The display will return to that of Step 2.
Copy Limit
Limits the number of copies or sets of copies that can be made at one time.
1 Display the System Menu. (Refer to System Menu Operations Procedures on page 5-7.)
2 Press or to display 41.Copy Limit.
System Menu:
41.Copy Limit
3 Press [OK].
4 Press or and set the copy limit value (1 to 999). This can also be input using the numeric keys.
5 Press [OK]. The display will return to that of Step 2.
Rotate Collate Setting
Set whether or not to change the direction for each copy set and collate it when collating copies.
1 Display the System Menu. (Refer to System Menu Operations Procedures on page 5-7.)
2 Press or to display 47. Rotate/Offset.
System Menu: 47. Rotate/Offset
3 Press [OK].
4 Press or and select On to change the direction for each copy set and collate it or Off to collate in the same direction.
5 Press [OK]. The display will return to that of Step 2.
Selecting Auto Rotation
The auto rotation delivers the sets of copied documents perpendicular to each other, allowing an easy separation of each set from the others.
1 Display the System Menu. (Refer to System Menu Operations Procedures on page 5-7.)
2 Press or to display 48. Auto Rotation.
System Menu: 48. Auto Rotation
3 Press [OK].
4 Press or and select On when the sets of copied documents are to be rotated and Off when no rotation is to be performed.
5 Press [OK]. The display will return to that of Step 2.
Silent Mode Transition Time
Shortens the amount of time the internal motor continues to run after the copy is produced. Use this setting in cases when the motor noise is bothersome.
1 Display the System Menu. (Refer to System Menu Operations Procedures on page 5-7.)
2 Press or to display 49.Silent mode.
System Menu: 49.Silent mode
3 Press [OK].
4 Press or and select the amount of time for transition into Silent Mode.
5 Press [OK]. The display will return to that of Step 2.
Auto Clear Setting
Set whether or not to automatically return the copier to Ready to copy. state when copying is finished.
1 Display the System Menu. (Refer to System Menu Operations Procedures on page 5-7.)
2 Press or to display 50. Auto Clear.
System Menu: 50.Auto Clear
3 Press [OK].
4 Press or and select On in the case where the transition to Auto Clear is to be made or Off when it is not.
5 Press [OK]. The display will return to that of Step 2.
Auto Sleep Setting
Set whether or not to automatically enter Sleep Mode when copying is completed or after operations have been finished.
1 Display the System Menu. (Refer to System Menu Operations Procedures on page 5-7.)
2 Press or to display 51. Auto Sleep.
System Menu: 51.Auto Sleep
3 Press [OK].
4 Press or and select on in the case when the transition to Auto Sleep is to be made or off when it is not.
5 Press [OK]. The display will return to that of Step 2.
NOTE: If the Auto Sleep function interferes with your copy operations, disable the function. Before disabling the Auto Sleep function, you may want to try lengthening the amount of time before the Auto Sleep function engages.
Auto Clear Time
Set the time interval to automatically return the copier to Ready to copy. state when copying is finished.
1 Display the System Menu. (Refer to System Menu Operations Procedures on page 5-7.)
2 Press or to display 52.AutoClearTime.
System Menu: 52.AutoClearTime
3 Press [OK].
4 Press or and select a time interval from 10 to 270 (seconds).
NOTE: Set the time interval to a longer length of time in the case where the copier is used often and to a shorter time interval when it is used infrequently.
This can be set when the Auto Clear setting has been set to On. (Refer to Auto Clear Setting on page 5-20.)
5 Press [OK]. The display will return to that of Step 2.
Low Power Mode Transition Time
Set the time interval from the time operations end to the automatic engagement of the Low Power Mode.
1 Display the System Menu. (Refer to System Menu Operations Procedures on page 5-7.)
2 Press or to display 53. LowPower Time.
System Menu: 53.LowPower Time
3 Press [OK].
4 Press or and select a time interval from 1 minute to 240 minutes.
NOTE: The time intervals available are: 1, 5, 15, 30, 45, 60, 90, 120, 180 and 240 minutes.
5 Press [OK]. The display will return to that of Step 2.
Sleep Mode Transition Time
Set the time interval for automatically entering Sleep Mode when copying is completed or after operations have been finished.
1 Display the System Menu. (Refer to System Menu Operations Procedures on page 5-7.)
2 Press or to display 54. AutoSleepTime.
System Menu: 54. AutoSleepTime
3 Press [OK].
4 Press or and select a time interval from 1 minutes to 240 minutes.
NOTE: This can be set when the Auto Sleep setting has been set to On. (Refer to Auto Sleep Setting on page 5-21.)
The time intervals that can be set are 1, 5, 15, 30, 45, 60, 90, 120, 180 and 240 minutes.
5 Press [OK]. The display will return to that of Step 2.
Alarm
The Alarm can be set to sound when a key on the Operation Panel is pressed or in cases when errors occur, etc.
1 Display the System Menu. (Refer to System Menu Operations Procedures on page 5-7.)
2 Press or to display 55. Alarm.
System Menu: 55.Alarm
3 Press [OK].
4 Press or and select On in the case where the alarm is to be sounded or Off when it isn't to be sounded.
5 Press [OK]. The display will return to that of Step 2.
Toner Coverage Report
Output the report that shows the number of copies made and the average concentration of toner used for each paper size.
1 Display the System Menu. (Refer to System Menu Operations Procedures on page 5-7.)
2 Press or to display 56. CoverageRepo.
System Menu: 56.CoverageRepo
NOTE: Check to make sure that Letter/A4 size paper is loaded in the cassette.
3 Press [OK].
4 Press or and select Yes.
5 Press [OK]. The report will be output and the display will return to that of Step 2.
Sample: Toner
Coverage Report
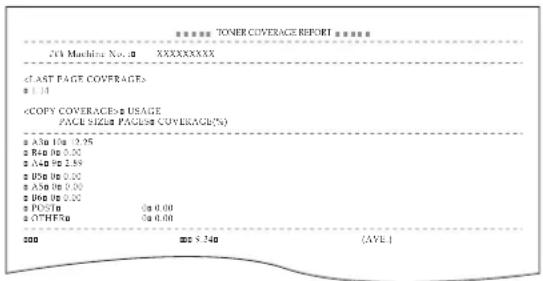
Checking the Total Counter
The Total Count can be viewed on the Operation Panel. A Counter Report can also be output.
1 Press [Stop/Clear] for 3 seconds. The Copy Count will be displayed on the message display.
NOTE: Pressing on [Start] while the Copy Count is displayed will output the Counter Report. Check to make sure that Letter/A4 paper is available in the cassette before printing out the Counter Report.
Sample: Counter Report

2 The copier will return to the state where copying can be continued after the Copy Count has been displayed.
6 Job Accounting
This chapter explains how to manage job accounting on copier use shared among various departments.
• Overview of Job Accounting...... 6-2
• Job Accounting Operations Procedures...... 6-2
• Department ID Code Registration 6-3
- Deleting Department ID Codes 6-3
- Clearing the Job Accounting Count...... 6-4
- Outputting the Job Accounting List...... 6-4
• How to set the Job Accounting...... 6-5
- Making copies in the Job Accounting.... 6-6
Overview of Job Accounting
The Job Accounting allows you to manage the number of copies for each department through the setting of the Department ID Code separately for each department.
This copier has the following features available through the Department ID Code.
- A maximum of 100 Sections can be managed.
• ID Codes can be set from 0 to 99999999 for a maximum of 8 digits. - The accumulated totals of pages copied according to ID Code can be printed out on paper.
The factory default setting is indicated by an asterisk (*).
| Job Accounting Description | Available settings | Reference Page | |
| 01.JobAccounting | In order to carry out Job Accounting, set this to on (set), Set this to oFF (no setting) when Department Management is not needed. | On: SetOff: No Setting* | 6-5 |
| 02.Register code | Registers the Department ID Code up to the line. Up to 100 sections can be registered as Department ID Codes. | 6-3 | |
| 03.Delete code | Deletes Department ID Codes that will not be used anymore. | Yes: DeleteNo: No Deletion | 6-3 |
| 04.Count Clear Batch | ch-clears the copy count after a set amount of copies have been managed. The counts cannot be deleted separately in accordance with the Department ID Codes. | 6-4 | |
| 05.Print list Outputs | the number of copies produced by Department in a report format. | 6-4 | |
Job Accounting Operations Procedures
Follow the procedure listed below to operate the Job Accounting.
1 Press both of [Exposure Adjustment] for 3 seconds while pressing on [Job
Accounting]. Job Accounting: will be displayed.
Job Accounting: 00.Set Completed
2 Press or and select each of the mode displays.
NOTE: Refer to each of the following setting procedures and make the settings.
Each of the Modes can be selected by pressing the numeric keys.
3 After completing each setting, press or to display 00.Set Completed.
Job Accounting: 00.Set Completed
4 Press [OK].
Department ID Code Registration
A Department ID Code of up to 8 digits can be entered.
1 Display the Job Accounting. (Refer to Job Accounting Operations Procedures on page 6-2.)
2 Press or to display 02.Register code.
Job Accounting: 02.Register code
3 Press [OK].
4 Input the Department ID Code to be registered (up to a maximum of 8 digits) using numeric keys.
Number from 0 to 99999999 can be input.
NOTE: If a mistake is made during input it can be cleared by pressing [Stop/Clear] and the value reentered.
5 Press [OK]. The code that was input will flash on and off.
6 After confirming the code that was input, press [OK]. The display will return to that of Step 2.
NOTE: If an existing Department ID Code is attempted to be registered, an error will occur and Already registered. will display in the message display. In this case, register a different Department ID Code.
Deleting Department ID Codes
Deleting a registered Department ID Code.
1 Display the Job Accounting. (Refer to Job Accounting Operations Procedures on page 6-2.)
2 Press or to display 03.Delete code.
Job Accounting: 03.Delete code
3 Press [OK].
4 Input the Department ID Code to be deleted using the numeric keys.
NOTE: If a mistake is made during input it can be cleared by pressing [Stop/Clear] and the value reentered.
5 Confirm the code to be deleted and then press [OK].
6 Press or and select Yes. To cancel deletion, select No.
7 Press [OK]. The display will return to that of Step 2.
Clearing the Job Accounting Count
The Total No. of Copies Count for all departments can be cleared.
1 Display the Job Accounting. (Refer to Job Accounting Operations Procedures on page 6-2.)
2 Press or to display 04. Count Clear.
Job Accounting: 04.Count Clear
3 Press [OK].
4 Press and select Yes. To cancel the clearing of the count, select No.
5 Press [OK]. The counter will be cleared and the display will return to that of Step 2.
Outputting the Job Accounting List
The Total No. of Copies by department can be output.
1 Display the Job Accounting. (Refer to Job Accounting Operations Procedures on page 6-2.)
2 Press or to display 05.Print list.
Job Accounting: 05.Print list
NOTE: Check to make sure that Letter/A4 size paper is loaded in the cassette.
3 Press [OK]. The list will be output and the display will return to that of Step 2.
Sample: Department Management List
| DEPT. TOTAL 100 | |||
| DEPT. NO. | COPY COUNT | DEPT. NO. | COPY COUNT |
| 1 | 0 | 55 | 0 |
| 2 | 0 | 56 | 0 |
| 3 | 0 | 57 | 0 |
| 4 | 0 | 58 | 0 |
| 5 | 0 | 59 | 0 |
| 6 | 0 | 60 | 0 |
| 7 | 0 | 61 | 0 |
| 8 | 0 | 62 | 0 |
| 9 | 0 | 63 | 0 |
| 11 | 0 | 64 | 0 |
| 12 | 0 | 65 | 0 |
| 13 | 0 | 66 | 0 |
| 14 | 0 | 67 | 0 |
| 15 | 0 | 68 | 0 |
| 16 | 0 | 69 | 0 |
| 17 | 0 | 70 | 0 |
| 18 | 10 | 71 | 0 |
| 19 | 0 | 72 | 0 |
| 20 | 0 | 73 | 0 |
| 21 | 0 | 74 | 0 |
| 22 | 0 | 75 | 0 |
| 23 | 0 | 76 | 0 |
| 24 | 0 | 77 | 0 |
| 25 | 0 | 78 | 0 |
| 26 | 0 | 79 | 0 |
| 27 | 0 | 80 | 0 |
| 28 | 0 | 81 | 0 |
| 29 | 10 | 82 | 0 |
| 31 | 0 | 83 | 0 |
| 32 | 0 | 84 | 0 |
| 33 | 0 | 85 | 0 |
| 34 | 0 | 86 | 0 |
| 35 | 0 | 87 | 0 |
| 36 | 0 | 88 | 0 |
| 37 | 0 | 89 | 0 |
| 38 | 0 | 90 | 0 |
| 39 | 0 | 91 | 0 |
| 41 | 0 | 92 | 0 |
| 42 | 0 | 93 | 0 |
| 43 | 0 | 94 | 0 |
| 44 | 0 | 95 | 0 |
| 45 | 0 | 97 | 0 |
| 46 | 0 | 98 | 0 |
| 47 | 0 | 99 | 0 |
| 48 | 0 | ||
How to set the Job Accounting
Set Job Accounting to enable or disable it.
1 Display the Job Accounting. (Refer to Job Accounting Operations Procedures on page 6-2.)
2 Press or to display 01.JobAccounting.
Job Accounting: 01.JobAccounting
3 Press [OK].
4 Press or and select On when Job Accounting is to be used and Off when it will not be used.
5 Press [OK]. The display will return to that of Step 2.
Making copies in the Job Accounting
When Job Accounting is being carried out “===” will be displayed in the No. of Copies display and copy operations can be carried out by entering the assigned Department ID Codes using the numeric keys.
IMPORTANT: Always remember to press [Job Accounting] after completing copying.
1 Confirm the ID code to be deleted and then press [OK]. "1" will be displayed on the No. of Copies display.
NOTE: When an error has been made in input, press [Stop/Clear] and input the data again.
When the Department ID Code that is input does not match any of the Department ID Codes registered, Illegal Account. is displayed and the copier returns to the “===” display. Input the correct Department ID Code.
2 Carry out regular copy operations.
3 Press [Job Accounting] after completing copying. “===” will be displayed on the No. of Copies display.
7 Optional Equipment
This chapter introduces optional equipment available for the copier.
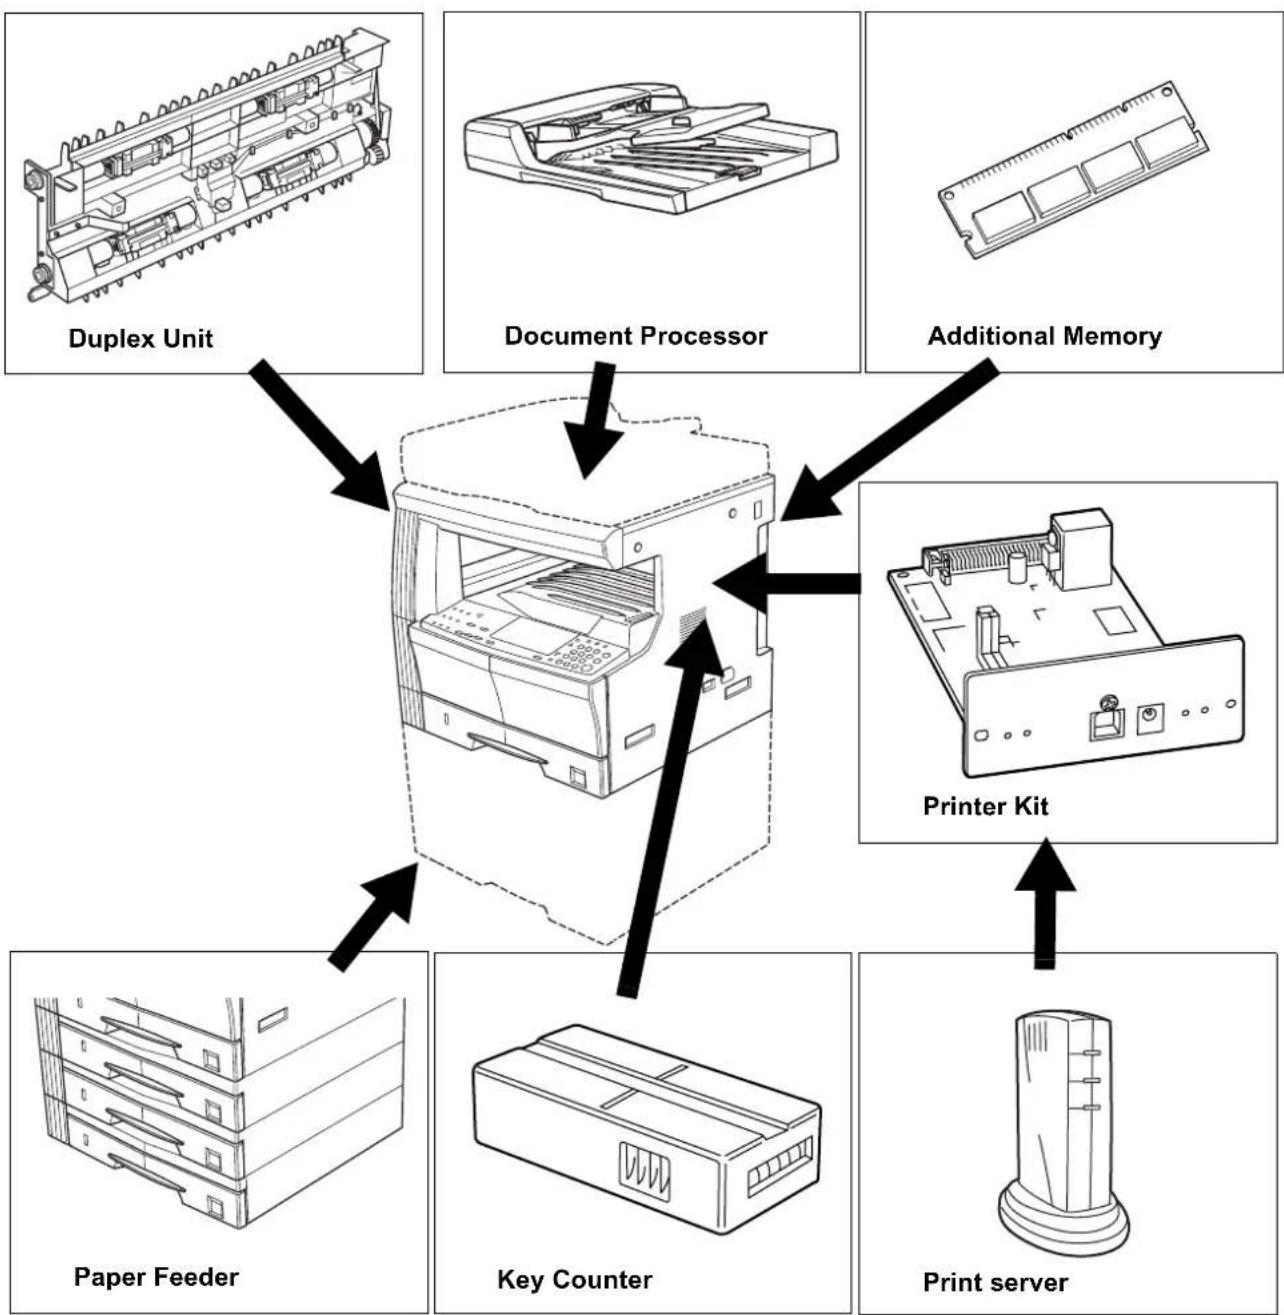
flowchart
graph TD
    A["Printer Kit"] --> B["Key Counter"]
    B --> C["Paper Feeder"]
    C --> D["Document Processor"]
    D --> E["Duplex Unit"]
    D --> F["Additional Memory"]
    A --> G["Print server"]
    G --> H["Printer Kit"]
Document Processor
The Document Processor automatically feeds one-sided originals one by one for scanning. It also reverses two-sided originals automatically for duplex copying and split copying.
Originals that can be used with the Document Processor
- Sheet originals only.
- Single-sided originals that have a paper weight within the range of 45g / m^2 to 160g / m^2 . Two-sided originals that have a paper weight within the range of 50g / m^2 to 120g / m^2 .
- Sizes: Ledger to Statement, Oficio 2, A3 to A5R, Folio
- No. of Sheets that can be loaded: 50 sheets (50 to 80 g/m ^2 ) (Note, however, that when in Mixed Size Mode, this number is reduced to 30 sheets.)
Notes on acceptable documents
Be sure NOT to use the following as originals in the Document Processor. In addition, originals with punched holes or perforations should be set so that the edge of the paper with the holes or perforations is facing away from the direction of insertion into the Document Processor.
• OHP film or other transparencies.
- Soft originals such as carbon or vinyl paper, or other originals that are curled, wrinkled or creased.
- Irregularly shaped originals, wet originals, or originals that have adhesive tape or glue on them.
- Originals bound with clips or staples. (If you must use such originals, be sure to remove the clips or staples, and straighten any curls, wrinkles or creases, before setting them in the Document Processor. Failure to do so may result in the originals being misfed.)
- Originals with cut-out sections or that have a slippery surface on either side.
- Originals on which any correction fluid is still wet.
- Originals with strong folds. (If you must use such originals, be sure to smooth out the folds before setting them in the Document Processor. Failure to do so may result in the originals being misfed.)
- Originals with sharp curves (when use of a curved original is unavoidable, straighten out the curves before setting it).
Section Names
1 Left Cover
2 Original Width Guides
3 Original Table
4 Original Eject Table
Originals that have been copied are stored here.
5 Ejection Extension
6 Ejection Tray
The original will be temporarily ejected when copies of both sides are made.

7 Document Processor Open/Close Handle
Setting Originals in the Document Processor
1 Adjust the original width guides to match the size of the original.
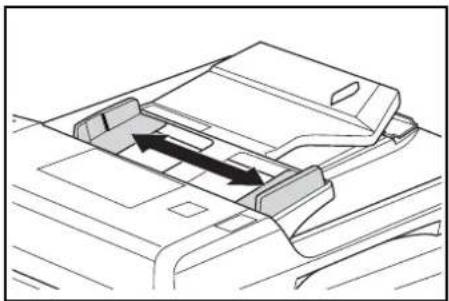
natural_image
Technical line drawing of a mechanical component with directional arrows indicating movement or force (no text or symbols)NOTE: Check to make sure that there are no ejected originals remaining on the Original Eject Table before setting the original. Originals left on the Original Eject Table may cause the original to jam.
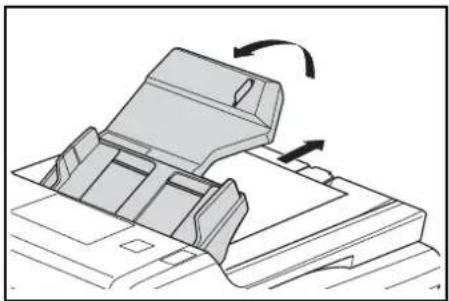
natural_image
Diagram of a printer or printer with an open lid and directional arrows indicating motion (no text or symbols present)When setting multiple originals at the same time, make sure that they are all of the same size. Note, however, that when setting originals in the Mixed Original Sizes Mode, originals with the same width, such as Ledger to Letter R, A3 or A4, can be set at the same time. (Refer to Mixed Original Sizes Mode on page 7-5.)
2
Place the originals to be copied with the side to be copied facing up (in the case of 2-Sided copies, place them with the Front side facing up) and place them in order on the Originals Table.
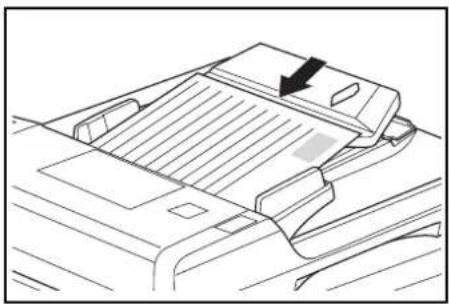
natural_image
Line drawing of a printer or printer cover with a black arrow pointing to the cover (no text or symbols present)IMPORTANT: Set the originals below the scale gradation pasted on the rear original width guide. Setting more than the acceptable number of originals may lead to the originals jamming. (Refer to Originals that can be used with the Document Processor on page 7-2 for the number of originals that can be set.)
When setting Ledger, Legal, A3 or B4 originals open the Ejection Extension to prevent the originals from falling after ejection.
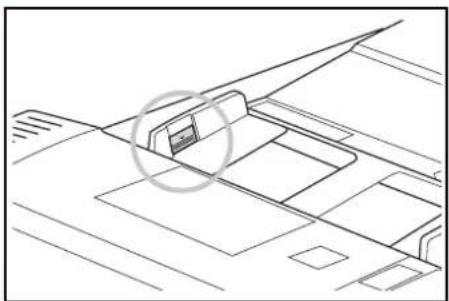
natural_image
Technical line drawing of a mechanical component with no visible text or symbols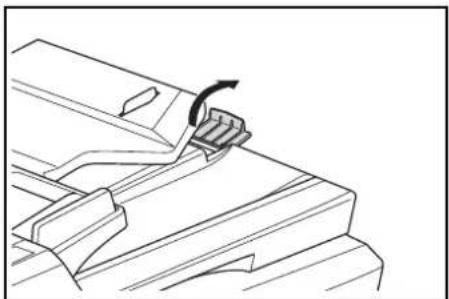
natural_image
Technical line drawing of a mechanical component with a curved arrow indicating rotation (no text or symbols)In the case of Front and Back originals, the originals will be turned over so the originals will be temporarily ejected into the Ejection Tray. Do not handle the originals during this temporary ejection. Trying to pull an original out by force may cause a paper misfeed.
Setting the Original on the Platen
When copying items such as books or magazines that cannot be set in the Document Processor, open the Document Processor and place the original on the platen.
1
Open the Document Processor by grasping the Document Processor Open/Close handle.
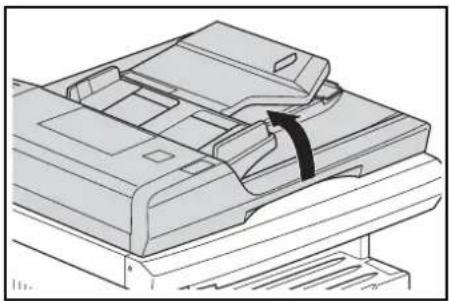
natural_image
Technical line drawing of a printer or scanner with a black arrow indicating a component (no text or symbols present)NOTE: Check to make sure that there are no originals remaining on the Original Table or on the Original Eject Table before opening the Document Processor. Originals left there may fall out when the Document Processor is opened.
2
Place the side to be copied so that it faces down. At this time, adjust the Original Size Indicator Plate to match the size of the original.
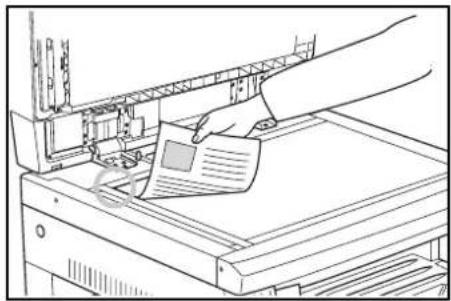
natural_image
Line drawing of a hand inserting a document into a printer (no text or symbols present)3
Shut the Document Processor by grasping the Document Processor Open/Close handle.
IMPORTANT: Do not use excessive force to press the Document Processor onto the platen. The platen glass may break if excessive force is used.

CAUTION: Do not leave the copier with the Document Processor open. Doing so may lead to injuries.
Mixed Original Sizes Mode
When the original size has not been specified using [Mixed Original Size] while using the Document Processor, the original sizes are detected one by one and each original is automatically copied to a sheet of the same size.
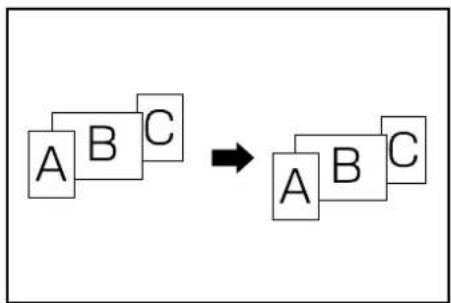
flowchart
graph TD
    A["A"] --> B["B"]
    B --> C["C"]
    C --> D["A"]
    D --> E["B"]
    E --> F["C"]
IMPORTANT: The maximum number of sheets that can be set in the Document Processor in this mode is 30 sheets.
[Inch specifications]
Only Letter R and Ledger, or Legal and Letter sizes.
[Metric specifications]
Only A4 and A3, B5 and B4, or A4R and Folio sizes.
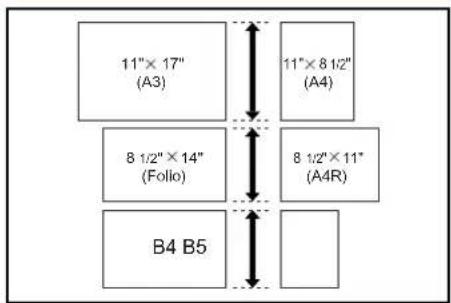
1 Set the originals in the Document Processor.
2 Press [Mixed Original Size]. The Mixed Original Sizes Indicator will light up.
3 Press [Start]. The copier will begin copying.
Paper Feeder
In addition to the cassettes provided with the copier, a Paper Feeder (a 3-level device with a cassette that can hold 300 sheets) can also be used.
• The number of sheets that can be accommodated: 300 sheets (standard paper, 64 to 105 g/m ^2 ).
- Sizes that can be set are:
Ledger to Statement, Oficio 2, A3, B4, A4, A4R, B5, B5R, A5R and Folio.
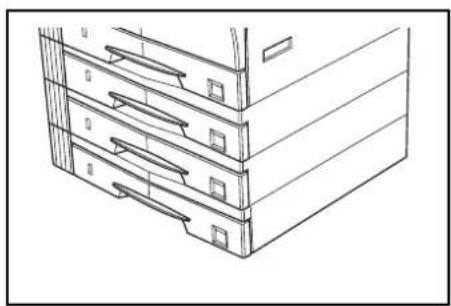
natural_image
Line drawing of a file cabinet with multiple drawers (no text or symbols)The cassette is set in the same way as the standard cassette provided with the main unit. Refer to Loading Paper on page 2-2.
* The Left Cover has been provided to allow for the extraction of sheets when jamming occurs.
Duplex Unit
2-Sided copies can be made when the Duplex Unit is installed. 2-Sided copies of sizes from Ledger to Statement, Oficio 2, A3 to A5R, Folio (64 to 90g / m^2 ) can be made.

natural_image
Technical line drawing of an electronic component with internal components and mounting holes (no text or symbols)Key Counter
The Key Counter is used to confirm the amount of usage of the copier. It is useful in managing copier usage for each department, section, etc. as well as in the company overall.
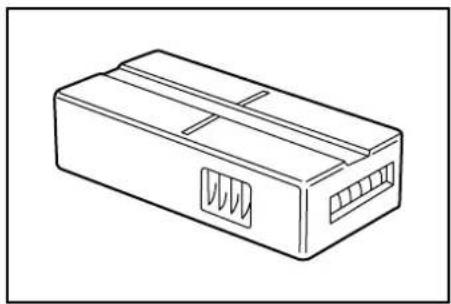
natural_image
Line drawing of a rectangular electronic component with slots and ports (no text or symbols)Setting the Key Counter
Set the Key Counter securely in the Key Counter Slot.
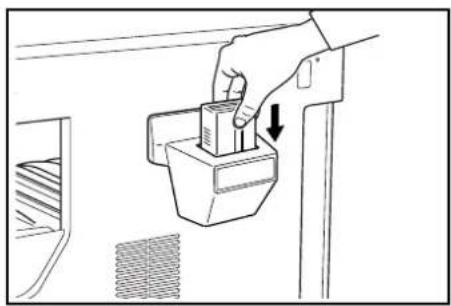
natural_image
Hand placing a small object into a container with an arrow indicating motion (no text or symbols)NOTE: In the case where the Key Counter is used, no one will be able to make copies until it is installed in the copier. "U1" will be displayed when the Key Counter has not been securely inserted.
Printer Kit
Install the printer kit to use the copier as a printer as well.
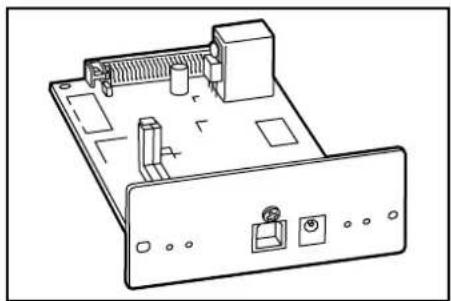
natural_image
Line drawing of an electronic device chassis with ports and connectors (no text or symbols)Print server
The print server provides an optimal printing network so that all users on the network can take advantage of them. The print server's USB interface offers easy external connections. Our original utility simplifies configuring your Ethernet network to offer printing to users.

natural_image
Line drawing of a cylindrical mechanical component with three vertical slots, mounted on a base (no text or symbols)Additional Memory
Memory can be increased. Increasing the amount of memory will increase the maximum number of originals that can be read in. 64MB and 128MB are effective in reading in photo originals at low compression ratios.
(16MB, 32MB, 64MB, 128MB)
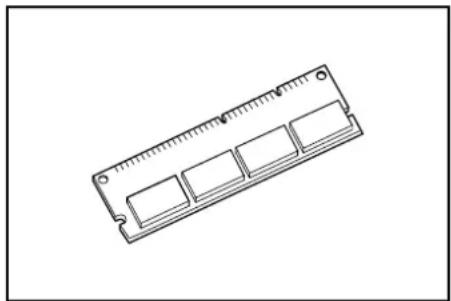
natural_image
Line drawing of a rectangular RAM module with four slots and a central pin (no text or symbols)16MB: 250 sheets, 32MB: 250 sheets, 64MB: 250 sheets, 128MB: 250 sheets (Letter blackness ratio 6% originals)
8 Maintenance
This chapter describes cleaning and toner replacement.
- Cleaning the Copier.... 8-2
- Replacing the Toner Container and Waste Toner Box.. 8-5
Cleaning the Copier

CAUTION: Remove the power plug from the outlet during cleaning operations as a safety precaution.
Cleaning the Original Cover
Open the Original Cover and use a cloth dampened with alcohol or a dilute neutral detergent to clean the underside of the Original Cover.

natural_image
Line drawing of a hand cleaning a blank board with a cloth (no text or symbols)IMPORTANT: Do not use thinner, organic solvents etc.
Cleaning the Platen
Open the Original Cover and use a cloth dampened with alcohol or a dilute neutral detergent to clean the Platen.

natural_image
Line drawing of a hand using a cleaner machine to clean material (no text or symbols)IMPORTANT: Do not use thinner, organic solvents etc.
Cleaning the Slit Glass
When black streaks appear on copies when using the optional Document Processor, this means that the Slit Glass (a) is dirty. Use a soft dry cloth to clean the slit glass.
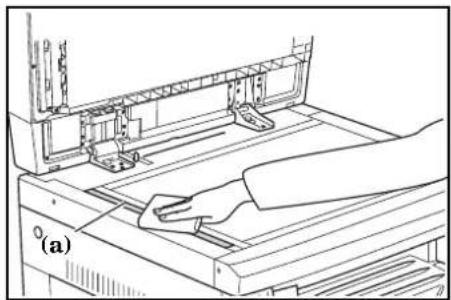
natural_image
Line drawing of a person using a computer to press or install electronic components (no text or symbols visible)IMPORTANT: Do not use water, thinner, organic solvents, alcohol, etc.
* Refer to Replacing the Toner Container and Waste Toner Box on page 8-5 for instructions for cleaning the inside of the copier.
Cleaning the Separation Pawl
1 Open the front cover.
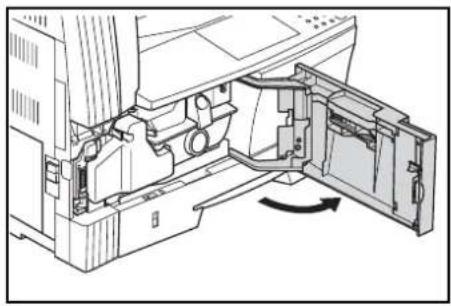
natural_image
Technical diagram of a mechanical assembly with internal components and an arrow indicating rotation (no text or symbols present)2 Remove the cleaning brush.

natural_image
Technical line drawing of a mechanical assembly with a black arrow indicating a component (no text or symbols present)3 Grasp the Left Cover handles to lift the cover and open it.
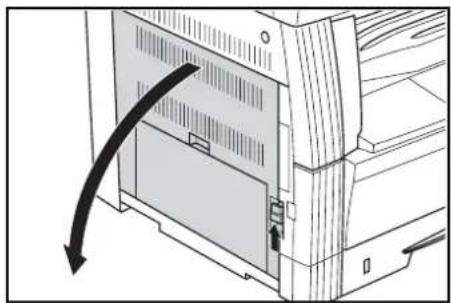
natural_image
Diagram of a computer monitor with an arrow indicating a directional change (no text or symbols present)4 Brush from the left side to the right side along the separation pawl as shown in the illustration to remove any dirt or dust.

5 Close the left cover.
Cleaning the Transfer Rollers
1 Open the front cover.

natural_image
Technical diagram of a mechanical assembly with internal components and an arrow indicating rotation (no text or symbols present)2 Remove the cleaning brush.
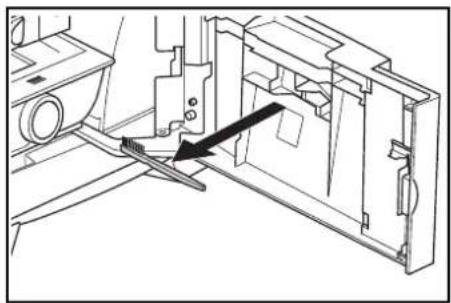
natural_image
Technical line drawing of a mechanical assembly with a black arrow indicating a component (no text or symbols present)3 Grasp the Left Cover handles to lift the cover and open it.
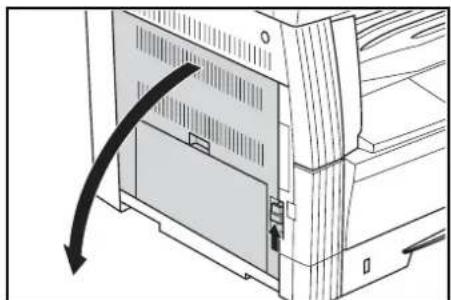
natural_image
Diagram of a computer monitor with an arrow indicating a directional change (no text or symbols present)4 Turn the Left Transport Roller gear as shown in the illustration and move the brush from left to right while turning the gear to remove any dust or dirt on the rollers.
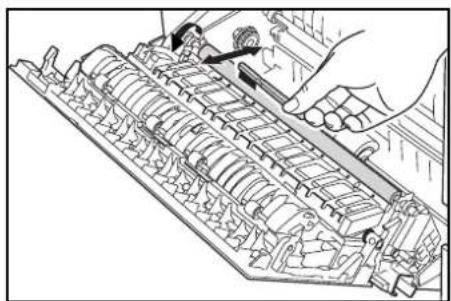
natural_image
Technical line drawing of a mechanical assembly with no visible text or symbols5 Close the left cover.
Replacing the Toner Container and Waste Toner Box
When the Add Toner Indicator on the Operation Panel lights up and the copier stops, replace the Toner. Replace the Waste Toner Box at the same time you replace the Toner Container.
- Replenish the Toner only when the Add Toner Indicator lights up or blinks.
- Whenever the Toner Container is changed, always carry out the procedures listed from Step 7 on page8-7 through Step 11 on page8-8. If any section is left dirty, the performance of the product cannot be maintained.

CAUTION: Do not attempt to incinerate the toner cartridge or waste toner box. Doing so will generate sparks and may lead to burns. Do not try to force open or crush the toner container or waste toner box.
1 Open the front cover.
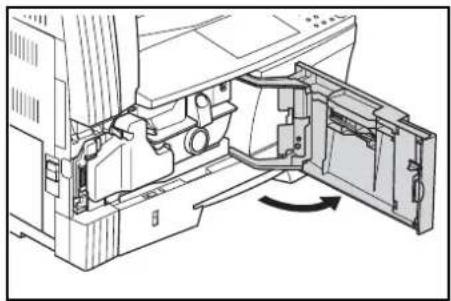
natural_image
Technical diagram of a mechanical assembly with internal components and an arrow indicating rotation (no text or symbols present)2 Push the Waste Toner Box holder to the left and remove the Waste Toner Box while pushing the holder.

natural_image
Technical diagram of a mechanical assembly with no visible text or symbolsIMPORTANT: Do not invert the old Waste Toner Box.

WARNING: The electrically charged section inside the main unit of the copier uses high voltage. Exercise caution in handling it to prevent electric shock.
3 Use the cap attached to the center of the old Waste Toner Box to cover the opening.

natural_image
Technical line drawing of a mechanical part with two ports and a valve (no text or symbols)4 Turn Toner Container release lever (1) to the left and remove the Toner Container.
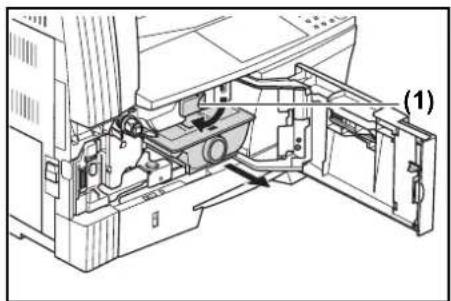

CAUTION: Do not attempt to incinerate the toner cartridge or waste toner box. Doing so will generate sparks and may lead to burns. Do not try to force open or crush the toner container or waste toner box.
5 Place the old Waste Toner Box in the plastic bag provided for disposal.
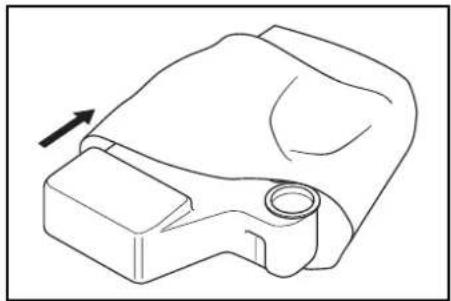
natural_image
Technical line drawing of a mechanical component with an arrow indicating direction (no text or symbols)6 Place the old Toner Container in the plastic bag provided for disposal.

natural_image
Line drawing of a mechanical component with a directional arrow indicating motion (no text or symbols)7 Grasp the Cleaning Rod and pull gently pull it out as far as it will go and then push it in again.
Repeat this operation several times.
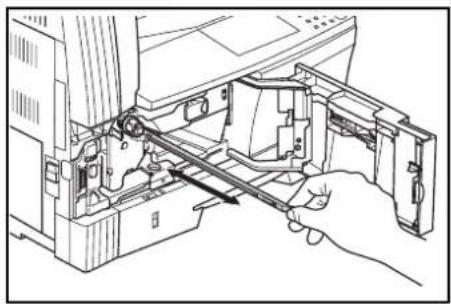
natural_image
Technical line drawing of a mechanical assembly with a hand holding a tool, no visible text or symbolsNOTE: Do not use excessive force to pull the rod or attempt to pull it out.
8 While pushing the electrical charge section to the right, pull it out approximately 5 cm (2 inches).
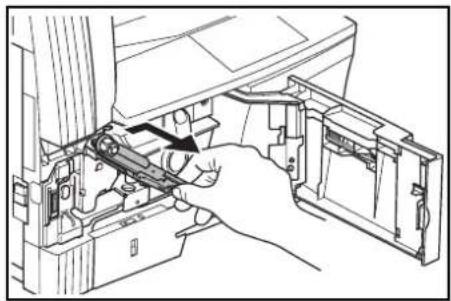
natural_image
Line drawing of a hand inserting a component into a device housing (no text or symbols visible)9 Remove the accompanying Grid Cleaner from its package and remove its cap.
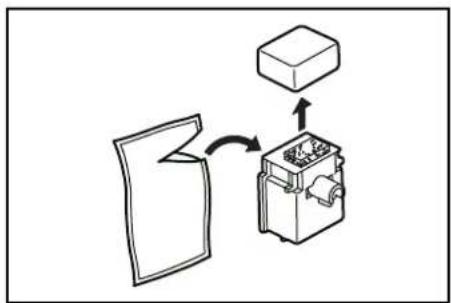
10 Match the Grid Cleaner to the notch and install it in the copier main unit.
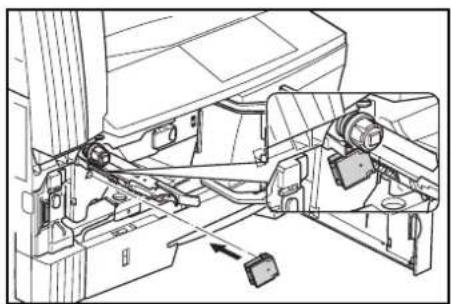
natural_image
Technical line drawing of a mechanical assembly with no visible text or symbols11 While holding gently the Grid Cleaner with your left hand, pull out the Electrical Charge Section as far as it will go and push it back until the portion (2) does not touch the white pad of the Grid Cleaner. Repeat this operation several times.

NOTE: When pushing back the Electrical Charge Section, do not push it all the way into the main body. Copying trouble may occur.
After cleaning the Electrical Charge Section using the Grid Cleaner, wait more than 5 minutes before using the machine.
12
When the Electrical Charge Section is pulled out approximately 5 cm (2 inches), remove the Grid Cleaner and then push back the Electrical Charge Section all the way into the main body.
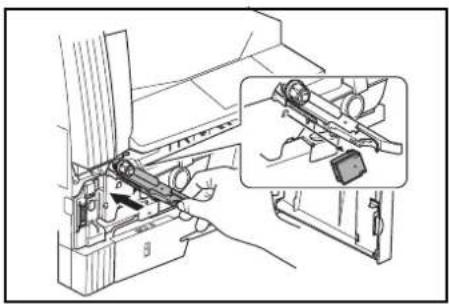
natural_image
Technical line drawing of a mechanical assembly with an inset showing a close-up of a component (no text or symbols present)13
Hold the new toner container vertically and tap the upper part five times or more.
Turn the toner container upside down and tap the upper part five times or more.

14
Shake the toner container up and down five times or more.
Turn the toner container upside down and shake it five times or more.
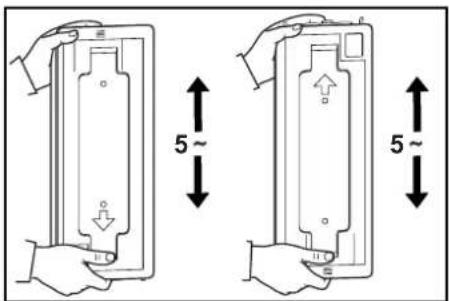
15
Hold the toner container horizontally and shake it from side to side five times or more.

natural_image
Line drawing of two hands pressing down on a rectangular tray with a 5-inch angle indicator (no text or symbols)16 Set the new Toner Container in place, and turn Toner Container Release Lever (1) to the right.

natural_image
Technical diagram of a mechanical assembly with labeled parts (1), showing internal components without any readable text or symbols.17 Install the new Waste Toner Box.
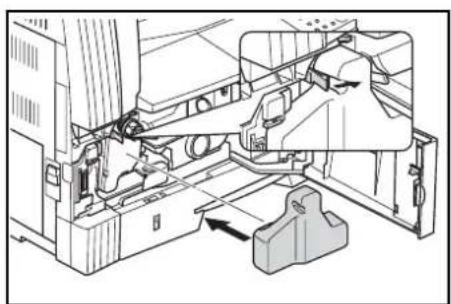
natural_image
Technical line drawing of a mechanical assembly with no visible text or symbols18 Close the front cover.
Return used toner containers and waste toner boxes to the dealer you purchased them from or to a sales representative. Recovered toner containers and waste toner boxes will be either reused, recycled or disposed of in accordance with the law.
NOTE: In order to ensure maximum copier performance, in addition to the cleaning done when changing the Toner Container, regularly (about 1 time per month) carry out Step 7 described in page8-7 and Step 10 described in page8-7.
9 Troubleshooting
This chapter explains how to solve problems with the copier.
- If other trouble occurs.... 9-2
- If one of the following indications is Displayed...... 9-5
- If paper jams.... 9-9
If other trouble occurs
Check the following items when trouble occurs. If the problem is not resolved after checking these items, contact your service representative.
| Symptom Items | to Check Corrective Procedure | Reference Page | |
| Nothing displays on the Operation Panel even though the Power Switch is ON. | Check to make sure the copier is plugged into the outlet. | Plug the copier power cord into the outlet. | - |
| No copy is produced when [Start] is pressed. | Check to see if something has been displayed on the Operation Panel. | Check the corrective procedure for the error display and carry it out. | 9-5 |
| Nothing appears on the copy. | Check to see that the original has been set properly. | Place the original face down on the platen and adjust the Original Size Indicator Plate to match its size. Place the original face up when setting it in the optional Document Processor. | 3-2 7-3 |
| A light copy is produced. | Check to see if the copier is in Auto Exposure Mode. | When the exposure is to be changed overall, perform out the “Auto Exposure Adjustment”. | 5-11 |
| Check to see if the copier is in Manual Exposure Mode. | Use Exposure Adjustment to set the proper exposure. | 3-3 | |
| When the exposure is to be changed overall, perform the Manual Exposure Adjustment in each original mode. | 3-3 | ||
| Check to see if the toner in the toner container is canted. | Shake the Toner Container left and right for approximately 10 times. | 8-8 | |
| Check to see if the Add Toner Indicator is lit. | Replace the Toner Container. 8-5 | ||
| Check to see if the paper is damp or not. | Replace the paper with new paper. | - | |
| Check to see if the electrical charge section is dirty or not. | Open the front cover and use the Cleaning Rod to clean the electrical charge section. | 8-7 | |
| Dark copies are produced. | Check to see if the copier is in Auto Exposure Mode. | When the exposure is to be changed overall, perform out the “Auto Exposure Adjustment”. | 5-11 |
| Check to see if the copier is in Manual Exposure Mode. | Use Exposure Adjustment to set the proper exposure. | 3-3 | |
| When the exposure is to be changed overall, perform the Manual Exposure Adjustment in each original mode. | 3-3 | ||
| Spotting (the shading fails to line up uniformly and spots occur). | Check to see whether the original is a printed original or not. | Select “Photos” in the Image Quality Mode. | 3-3 |
| The copy is not clear. | Check to see whether an Image Quality Mode that matches the type of original being copied has been selected or not. | Select the appropriate Image Quality Mode. | 3-3 |
| The copy is dirty. Check to see if the Platen or Original Cover is dirty. | Clean the Platen and Original Cover. | 8-2 | |
| The copy image is skewed. | Check to see that the original has been set properly. | Make sure that the original is correctly set against the Original Size Indicator Plate when placing the original on the platen. When setting the original in the optional Document Processor make sure that the original is correctly aligned with the original insertion guide. | 3-27-3 |
| Check to see that the paper has been set properly. | Check the position of the Width Guide in the cassette. | 2-2 | |
| Symptom Items to Check Corrective Procedure | Reference Page | ||
| Paper misfeeds occur frequently | Check to see that the paper has been loaded properly in the cassette. | Set the paper correctly. 2-2 | |
| Depending on the type of paper and its storage condition, there may be cases in which the copies curl. This may lead to paper misfeeds. Remove the paper, turn it over and then replace it. | - | ||
| Check to see if the paper is curled, creased or wrinkled. | Replace the paper with new paper. | - | |
| Check to see if fragments of paper or a jammed sheet is in the copier. | Use an appropriate method to remove the fragment or jammed sheet of paper. | 9-9 | |
| Check to see if the paper size actually set in the MP Tray and the MP Tray Size set are different or not. | Match the paper size of the paper set in the MP Tray and the MP Tray Size setting. | - | |
| Black streaks appear on the copy when the optional Document Processor is used. | Check to see if the slit glass is dirty. | Clean the slit glass if it is dirty. In addition, you can set the Processing to Reduce Black Streaks when black streaking occurs to make the streaking unnoticeable. | 8-25-12 |
| Wrinkling occurs in copies. | Check to see if the separation pawl is dirty. | Clean the separation pawl if it is dirty. | 8-3 |
| A white or black lengthwise line shows up on copies. | Check to see if the electrical charge section is dirty or not. | Open the front cover and use a cleaning rod to clean it. | 8-7 |
| White spots appear on copies. | Check to see if the transfer rollers are dirty. | Scrub the transfer rollers with a cleaning brush to clean them. | 8-4 |
If one of the following indications is Displayed
Carry out the corresponding corrective procedure when any of the error messages shown in the table below are displayed.
| Display Corrective Procedure | Reference Page | |
| Add paper in cassette #. | There is no paper in the cassette. Load paper into the cassette as displayed in place of #. | 2-2 |
| Add toner. | Copies cannot be produced because there is no toner. Replace the toner container with a new one. | 8-5 |
| Cannot copy this paper size. | An original size that cannot be copied has been set. Check the original. ·The original was set in a vertical direction during the Book Border Erasure copying operation. Set the original horizontally. ·An irregular size original was set during the Border Erase or Combine mode operation. ·An original size other than Letter, Ledger, A3, A4R, A5R, B4 or B5R was set to make a split copy or a 2-Sided Copy from a double-page spread original. | 4-10 4-10, 4-12 4-6 |
| Cannot duplex this paper size | A size that cannot be copied on both sides has been specified. 2-Sided copies cannot be taken when A6R, B6R, Postcard, Irregular Size or the paper size has not been specified. Specify a paper size that can be used. | 4-2 |
| Call service. C#### | Make a note of the C and the number (C# # # #). Turn the power switch OFF, unplug the power cord and contact your service representative. | - |
| Close document processor. | The Document Processor is open. Close the Document Processor. | - |
| Close document processor cover. | The left cover of the Document Processor is open. Close the left cover. Close the front cover. | - |
| Close front cover. | The front cover of the copier is open. Close the front cover. | - |
| Close left cover #. | The left cover of the cassette is open. Close the left cover as displayed in place of #. | |
| Insert key counter. | Check the key counter and make sure it is set properly. 7-7 | |
| No matching paper available. | No Letter/A4 size paper was available in either the cassette or the Paper Feeder (MP tray) at the time when the report was attempted to be output. Press [Paper Selection] and select the supply cassette, then press [Start]. Paper will be supplied from the cassette selected. | - |
| MainPower Off/On A#### | Turn the power switch OFF/ON. Usage will be possible again once the regular display returns. When A and the number (A# # # #) are again displayed, make a note of the A and the number. Turn the power switch OFF, unplug the power cord and contact your service representative. | - |
| Memory is full. Cannot continue. | Copies cannot be produced because memory is full during the interrupt copy operation. Interrupt Copying cannot be carried out so press [Stop/Clear] and then press [Interrupt] again after the data read in has been deleted to exit the Interrupt Copying. After the copying operation for the interrupted copy has been completed, repeat the procedure again. | - |
| Memory is full. Press OK. | Memory is full. Press [OK] to start outputting the copies read in. Press [Reset] or [Stop/Clear] to delete the data read in. Reduce the number of originals and repeat the copying procedure. | - |
| MP tray empty. Add paper. | Check the MP Tray paper. Set paper in the MP Tray in the event there is no paper present there. When the MP Tray paper fails to be fed, reset the paper. | 2-6 |
| Paper jam | A paper misfeed has occurred. Remove the jammed paper. | 9-9 |
| Place the original on DP. | The copier will try to make copies of the originals it could not copy before. Return all of the originals to the original table and try copying them again. | - |
| Replace waste toner box. | The waste toner box is full. Replace it with a new waste toner box. | 8-5 |
| Remove paper on top tray; Start. | 250 copies have been stored on output tray. Remove the paper, press [Start] and resume copying. | - |
| Reseat originals on DP. | Originals were set in the optional Document Processor when copying on 2-sides (front and back sides), when copying from the platen in 2-Sided copy, 2 in 1, 4 in 1 or when collating copies. Remove the originals from the Document Processor, replace the originals on the Original Table after exiting the front and back copying, 2-Sided copy, 2 in 1, 4 in 1 or Collate Mode and resume copying. | - |
| Return all originals to DP. | If the optional Document Processor is being used, there are originals left on the original table. Remove the originals, return them to the original table and try copying them again. | - |
| Set paper cassette. | Check the paper cassette that corresponds to the lighting indicator. Set the cassette. | 2-2 |
| Set toner container. | The Toner Container has not been set. Set the Toner Container. | 8-5 |
| The Add Toner indicator blinks on and off. | There is very little toner remaining. Copying can be continued for a short while before running out of toner. Replace the toner container with a new one as soon as possible. | 8-5 |
| The Periodic Maintenance indicator blinks on and off. | This is a notification that the time for periodic maintenance is approaching. | - |
| The Periodic Maintenance indicator lights up. | It is time for Periodic Maintenance. Contact your service representative. | - |
| “= = =” appears on the copy quantity display. | Job Accounting being set. Use the numeric keys to enter the assigned Section Code to perform copying operations. Press [Job Accounting] after copying is finished to display “= = =” again. | 6-6 |
| “-” appears on the copy quantity display. | The copier is in the Sleep Mode setting. Press [Energy saver] to exit the mode. | 3-9 |
| Display Corrective Procedure | Reference Page |
| “---” appears on the copy quantity display. | The copier is in the Low Power mode setting. Press any key to exit the mode or in the case where the optional Document Processor is installed, set an original in the Document Processor. |
If paper jams
Stop copying operations when a paper misfeed occurs. When a paper misfeed occurs, the indicator for the location of the paper misfeed will light up on the Operation Panel and either "J" plus a 2-digit number will be displayed as notification of the location of the paper misfeed.
With the Power Switch in the ON (|) position, refer to Removal Procedure on page 9-9 and clear the paper misfeed.
Misfeed location indicators
1 Paper misfeed in the paper supply section – Refer to page9-9.
2 Paper misfeed in the left cover internal section – Refer to page9-11.
3 Paper misfeed in the optional Document Processor – Refer to page9-12.
4 Paper misfeed in the optional cassette – Refer to page9-13.
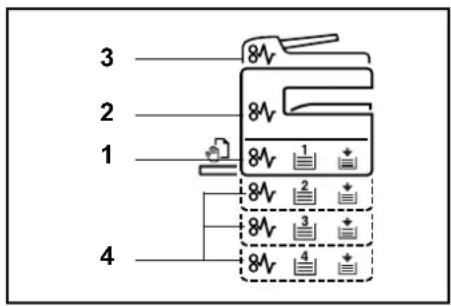

WARNING: The electrically charged section inside the main unit of the copier uses high voltage. Exercise caution in handling it to prevent electric shock.

CAUTION: The fixation section inside the main unit of the copier is extremely hot. Exercise caution in handling it to prevent getting burned.
*Do not attempt to reuse paper that has jammed before.
*When a sheet gets torn during removal, make sure that the remnants do not remain in the machine. Failure to completely remove remnants of torn pages can lead to paper misfeeds.
*The copier will start warm up operations after the paper misfeed processing has been completed. The paper misfeed indicator lamp will go off and the copier will be restored to the state it was in before the paper misfeed occurred.
Removal Procedure
Paper misfeed in the paper supply section
Paper misfeed in the cassette (J11, J21)
When the paper misfeed has occurred in the cassette, use the procedure below to clear it.
1 Pull the cassette out.

natural_image
Diagram of a printer's internal structure showing paper feeding into a slot (no text or symbols)2 If a sheet of paper is jammed inside, remove it carefully so as not to tear it.
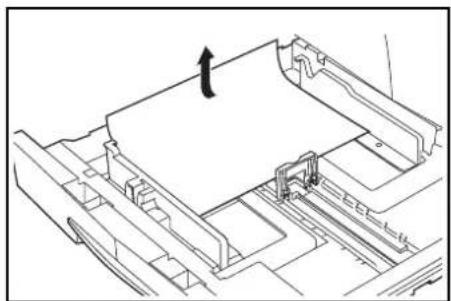
natural_image
Technical line drawing of a mechanical assembly with no visible text or symbolsNOTE: If the paper is torn, be sure to remove all remnants or fragments from the cassette.
3 Firmly push the cassette back into its original position.
NOTE: Check to see that there is no paper sticking out from the guides in the cassette. If paper is sticking out, recheck the cassette.
In the case where "J21" is displayed, refer to Paper misfeed in the Left Cover internal section (J20, J30, J40 to 45, J50, J52 to 56, J60, J61) on page 9-11 and remove the paper.
Paper misfeed in the MP Tray (J10)
When the paper misfeed has occurred in the MP Tray, use the procedure below to clear it.
1 Remove all of the MP Tray paper.

natural_image
Diagram of a printer or printer holder with an arrow indicating left motion (no text or symbols present)2
Check to see that the paper misfeed indicator lamp has gone out and then set the MP Tray paper again.

natural_image
Diagram of a mechanical assembly with a central component and an arrow indicating direction (no text or symbols present)IMPORTANT: Paper misfeed in the MP Tray (except J10)
In the case where "J20" is displayed, refer to Paper misfeed in the Left Cover internal section and remove the paper.
In the case where "J40" is displayed, refer to Paper misfeed in the Left Cover internal section and remove the paper.
When removing jammed paper, do not pull it out from the MP tray side.
Paper misfeed in the Left Cover internal section (J20, J30, J40 to 45, J50, J52 to 56, J60, J61)
When the paper misfeed has occurred in the Left Cover internal section, use the procedure below to clear it.
NOTE: Supplementary Information
The drum section inside the main unit is sensitive to scratches and contaminants. When removing paper, be careful not to touch it or scratch it with your watch, ring, etc.
1
Grasp the Left Cover handles to lift the cover and open it.
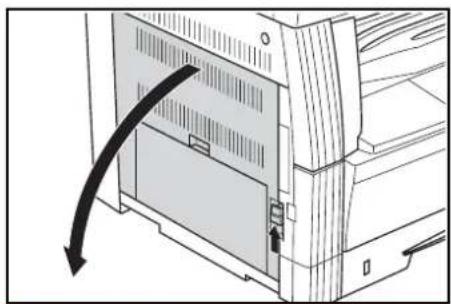
natural_image
Diagram of a computer monitor with an open door and a curved arrow indicating motion (no text or symbols)
CAUTION: The fixation section inside the main unit of the copier is extremely hot. Exercise caution in handling it to prevent getting burned.
2
Remove jammed sheets of paper carefully so as not to tear them.
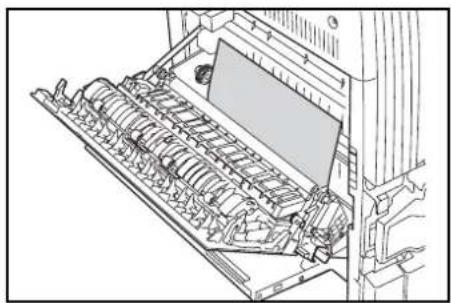
natural_image
Technical line drawing of a mechanical assembly with internal components (no text or symbols)NOTE: If the paper is torn, be sure to remove all remnants or fragments from the cassette.
3 If the Duplex Unit (option) is installed, lift it up and remove the paper.
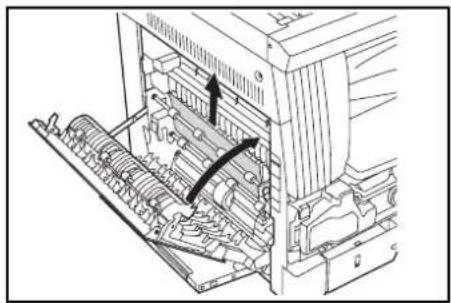
natural_image
Technical line drawing of an internal mechanical assembly with no visible text or symbolsNOTE: If the paper is torn, be sure to remove all remnants or fragments from the cassette.
4 Close the left cover.
Paper misfeed in the Document Processor (option) (J70 to 75)
When the paper misfeed has occurred in the optional Document Processor, use the procedure below to clear it.
1 If there are originals on the Original Table, remove them.
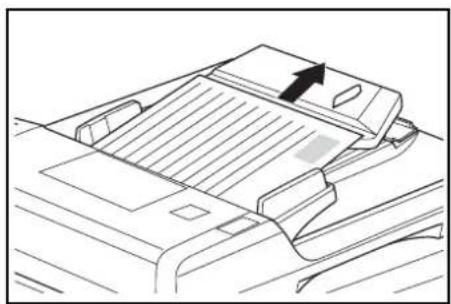
natural_image
Line drawing of a printer's front panel with an arrow indicating the paper edge (no text or symbols present)2 Open the Left Cover.
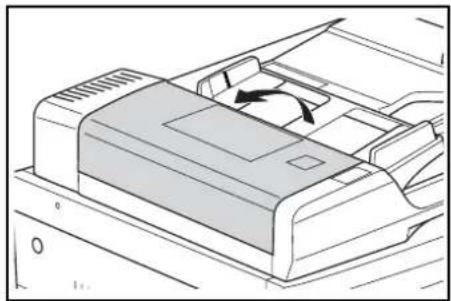
natural_image
Diagram of a printer or printer casing with an arrow indicating rotation (no text or symbols present)3 If an original is jammed inside, remove it carefully so as not to tear it.
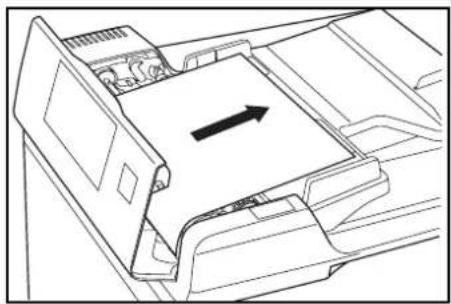
natural_image
Technical line drawing of a mechanical component with an arrow indicating direction (no text or symbols)NOTE: If the original is torn, be sure to remove all remnants or fragments of it from the cassette. Failure to completely remove remnants of torn pages can lead to paper misfeeds.
4 Lift up the Paper Supply Unit (1).
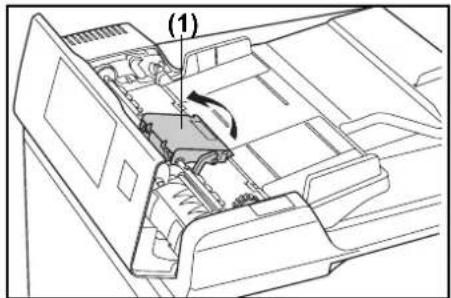
natural_image
Technical diagram of a printer internal structure showing internal components and a labeled section (1), with no readable text or symbols beyond the label.5 If an original is jammed inside, remove it carefully so as not to tear it.
NOTE: If the original is torn, be sure to remove all remnants or fragments of it from the cassette.
6 Rotate the dial as shown in the illustration and remove the original.

natural_image
Technical line drawing of a mechanical component with an arrow indicating rotation or assembly (no text or symbols present)7 Close the Left Cover to return it to its original position.
Add the original that was jammed to the originals on the Original Table and resume copying.
Paper misfeed in the optional cassette (J12 to 16, J22 to 24)
When the paper misfeed has occurred in the optional cassette, use the procedure below to clear it.
1 Remove the left cover of the cassette being used.
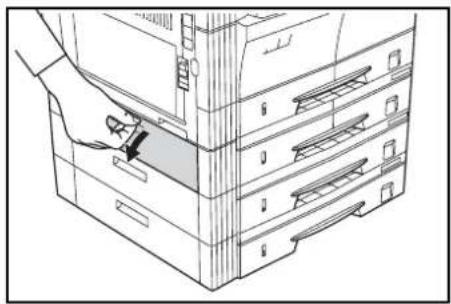
natural_image
Line drawing of a printer's internal structure showing paper feeding into a rack (no text or symbols)2 If a sheet of paper is jammed inside, remove it carefully so as not to tear it.
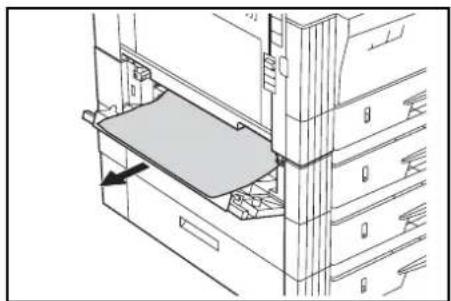
natural_image
Technical line drawing of a mechanical assembly with folded folders and a highlighted component (no text or symbols)NOTE: If the paper is torn, be sure to remove all remnants or fragments from the cassette.
3 Close the left cover of the cassette.
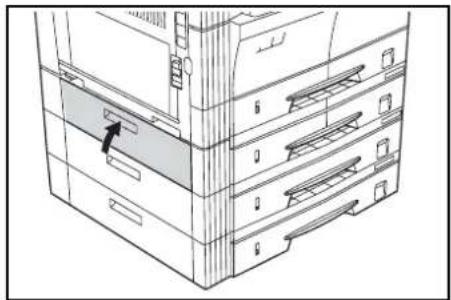
natural_image
Line drawing of a file cabinet with drawers and an open drawer, showing no text or symbols4 Pull the cassette out.
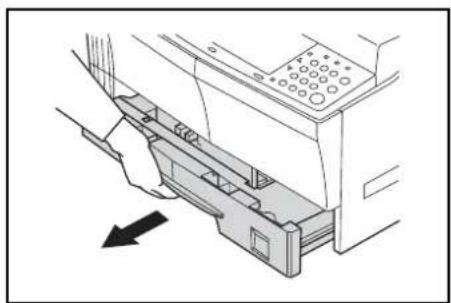
natural_image
Diagram of a printer's internal structure showing a slot and base panel, with no visible text or symbols.5 If a sheet of paper is jammed inside, remove it carefully so as not to tear it.
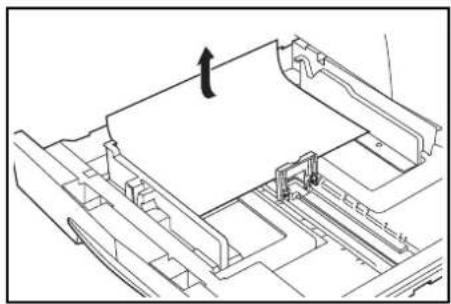
natural_image
Technical line drawing of a mechanical assembly with no visible text or symbolsNOTE: If the paper is torn, be sure to remove all remnants or fragments from the cassette.
6 Gently push the cassette back into its original position.
Appendix
This appendix lists the copier specifications.
Specifications
NOTE: Specifications are subject to change without notice.
Main Body
| Item Description | |
| Type Desktop Type | |
| Original Table Fixed Original Table | |
| Copy System Indirect electrostatic system | |
| Original TypesAccommodated | Sheets, books and 3-dimensional objects (Maximum original size: Ledger/A3) |
| Copy Sizes Ledger, Legal, Letter, Letter R, Statement, Oficio 2, A3, B4, A4, A4R, B5, B5R,A5R, B6R, A6R, Postcard, Folio, 8k, 16k and 16k RWidth that cannot be copied: 0.5 to 5.5 mm | |
| Copying Speed- 16-sheet copier | 1:1/Memory Copy Ledger/A3:8 sheets/minute, Legal/B4:8 sheets/minute,Letter/A4:16 sheets/minute, Letter R/A4R:13 sheets/minute, B5:16 sheets/minute, B5R:13 sheets/minute, A5R:10 sheets/minute, A6R:10 sheets/minute |
| - 20-sheet copier | 1:1/Memory Copy Ledger/A3:10 sheets/minute, Legal/B4:10 sheets/minute,Letter/A4:20 sheets/minute, Letter R/A4R:13 sheets/minute, B5:20 sheets/minute, B5R:13 sheets/minute, A5R:10 sheets/minute, A6R:10 sheets/minute |
| Warm-up Time | Less than 20 seconds (Room Temperature 71.6°F/22°C, Humidity 60% RH) |
| First Copy Time Less than | 5.9 seconds (A4) |
| Copying Magnification | 25 to 400% (1% increments) with variable and fixed magnifications. (25 to 200% with the document processor) |
| Standard Memory 18MB bitmap memory. 14MB image storage memory. | |
| Resolution | Reading: 600 × 600 dpiWriting: 600 × 600 dpi |
| Paper Supply System | Automatic Cassette Feed (Sheet storage: 300 sheets [80 g/m2]) and MP Tray(Sheet storage: 50 sheets [80 g/m2]) |
| Item Description | |
| Acceptable Paper- Paper Weights | Cassette: 64 to 105 g/m^2 Duplex Unit: 64 to 90 g/m^2 MP Tray: 45 to 160 g/m^2 |
| - Media Types | Cassette: Standard paper, recycled paper and color paperDuplex Unit: Standard paper, recycled paper and color paperMP Tray: Standard paper, recycled paper, color paper, vellum paper and thick paper |
| Consecutive Copying 1 to 999 sheets | |
| Light Source Rare gas lamp | |
| Developing System Dry developing | |
| Fixation System Heat roller | |
| Cleaning System Blade cleaning system | |
| Drum Type OPC | |
| Standard Functions and Modes | Automatic Paper Selection, Image Quality Selection, Automatic Magnification Selection Mode, Zoom Mode, 2-Sided Copy ^1 , Split Copy, Margin Shift, Border Width, Combine mode, Collate Copy, EcoPrint, Copy Program and Job Accounting1...When the Duplex Unit (option) is installed. |
| Ambient conditions- Temperature | 10 to 32.5 °C |
| - Humidity | 15 to 80 %RH |
| - Altitude | Maximum 2,500m |
| - Illumination | 1,500 lux or less |
| Power Source-Inch specifications | 120V AC 60Hz 9.0A |
| - Metric specifications | 220 to 240V AC 50Hz 5.0A |
| Dimensions Width 22 | 5/8" × Depth 21 3/4" × Height 19 3/4"Width 574 mm × Depth 552 mm × Height 502 mm |
| Weight Approximately 85.9 | Ibs/39 kg |
| Required Space Width 32 | 9/16" × Depth 21 3/4"Width 827 mm × Depth 552 mm |
| Options | Document Processor, Paper Feeder, Duplex Unit, Key CounterThe Original Cover is standard depending on the destination. |
Document Processor (option).
| Item Description | |
| Original Feed System Automatic feed system | |
| Acceptable Types of Originals | Sheet originals |
| Original Sizes Maximum: Ledger/A3Minimum: Statement/A5R | |
| Original Thickness (paper weight) | Single-side Originals: 45 to 160 g/m2Double-sided Originals: 50 to 120 g/m2 |
| No. of Originals that can be loaded | Less than 50 sheets (50 to 80 g/m2) |
| Power Source Electrically connected to the copier main unit | |
| External Dimensions Width | 21 3/4" × Depth 19 1/8" × Height 4 11/16"Width 552 mm × Depth 483 mm × Height 120 mm |
| Weight Approximately 13.2 | lbs/6 kg |
Paper Feeder (option)
| Item Description | |
| Paper Supply System | Automatic Cassette Feed (sheet storage 300 sheets [80 g/m2]) |
| Paper Sizes | Ledger, Legal, Letter, Letter R, Statement, Oficio 2, A3, B4, A4, A4R, B5, B5R and A5R |
| Acceptable Paper- Paper Weights- Media Types | 64 to 105 g/m2Standard paper, recycled paper and color paper |
| Power Source Electrically connected to the copier main unit | |
| Dimensions Width 22 | 7/16" × Depth 21 3/16" × Height 5 5/16"Width 570 mm × Depth 538 mm × Height 135 mm |
| Weight Approximately 15.4 | Ibs/7 kg |
Duplex Unit (option)
| Item Description | |
| System Internal type | |
| Paper Sizes | Ledger, Legal, Letter, LetterR, Statement, Folio, Oficio 2, A3, B4, A4, A4R, B5, B5R and A5R |
| Acceptable Paper- Paper Weights- Media Types | 64 to 90 g/m2Standard paper, recycled paper and color paper |
| Power Source Electrically connected to the copier main unit | |
| Dimensions Width 14 | 1/2" × Depth 2 1/16" × Height 7 1/16"Width 368 mm × Depth 53 mm × Height 180 mm |
| Weight Approximately 1.4 lbs/0.65 kg | |
Additional Memory (option).
| Item Description | |
| Memory Type 100-pin DIMM | |
| Memory Capacity 16MB, 32MB, 64MB and 128MB | |
| No. of Originals that can be read in | 16MB: 250 sheets, 32MB: 250 sheets, 64MB: 250 sheets, 128MB: 250 sheets (Letter, blackness ratio 6% originals) |
Environmental Specifications
Power consumption
| Item | Inch specifications120V AC 60Hz | Metric specifications220 to 240V AC 50Hz |
| Recovery time from the Low Power mode 10 seconds | 10 seconds | |
| Transition time to the Low Power mode (at time of purchase) | 15 minutes 15 minutes | |
| Transition time to the Sleep modes (at time of purchase) | 30 minutes 30 minutes |
Power consumption in the Plugged-In mode can only be terminated by removing the power plug from the outlet.
2-Sided Copy Function
Option
Paper Transportability
Recycled paper made from 100% recycled pulp may be used with this product.
Please consult with dealer or sales representative for information on the recommended types of paper, etc.
Functions and Settings Combination Chart
This copier has various functions, which if used together, can further increase copying efficiency. Refer to the chart below for function combinations.
The blank space can be combined as desired.
-= Cannot be combined.
DP: Document Processor
Secondary Priority
01= Clears the prior setting and gives priority to the later setting.
02= Switches the copier to Manual Exposure because the Photo Mode does not have Auto Exposure.
03= Mixed Original Sizes automatically detects the original size and switches the copier to Automatic Paper Selection Mode.
04= Switches the copier to automatic magnification when Combine mode is set.
05= This type of media cannot be copied on both sides. The media type will be given priority and 2-Sided Copy exited.
06= Automatic Paper Selection is cleared and the copier switched to automatic magnification or manual mode.
07= When a supply level other than A4, B5, Letter or 16k is to be selected, select the A4, B5, Letter or 16k paper size supply level.
Primary Priority
21= Setting is not possible because the Photo Mode does not have Auto Exposure.
22= Mixed Original Sizes has only Original Size Automatic Detection and Automatic Paper Selection.
23= Single side → 2-Sided Copy and Mixed Original Sizes cannot be combined.
24= Spread originals and Mixed Original Sizes cannot be combined.
25= Border Erase and Mixed Original Sizes cannot be combined.
26= Combine mode and Mixed Original Sizes cannot be combined.
27= Spread originals and Combine mode cannot be combined.
28= Only automatic magnification is available for Combine mode.
29= Media Type and 2-Sided Copy cannot be combined.
30= Media Type and Mixed Original Sizes cannot be combined.
31= Media Type and Automatic Paper Selection cannot be combined.
Functions can be combined (conditions for combining exist)
41= Irregular original sizes cannot be copied.
42= Vertically oriented originals and irregular original sizes cannot be copied.
43= Sizes other than Letter, Ledger, A3R, A4R, A5R, B4R, B5R and 8k cannot be copied.
44= 2-Sided Copies for paper sizes A6R, B6R, Postcard, Irregular Size or unspecified MP Tray sizes where the paper size is irregular cannot be produced.
45= Selection is not possible when the paper size is other than A4, B5, Letter or 16k.
| Necessary Option | After Setting | |||||||||||||||||||||||||||||
| 1 | 2 | 3 | 4 | 5 | 6 | 7 | 1 | 8 | 9 | 1 | : | A | B | C | ||||||||||||||||
| 1 | 2 | 3 | 1 | 2 | 1 | 2 | 1 | 2 | 1 | 2 | 3 | 2 | 3 | 1 | 2 | 2 | 1 | 2 | 1 | 2 | ||||||||||
| Present Setting | 1 Image Quality | 1 Text & Photo | 01 | - | ||||||||||||||||||||||||||
| 2 Photo - | 01 | 21 | ||||||||||||||||||||||||||||
| 3 Text | 01 | - | ||||||||||||||||||||||||||||
| 2 Exposure | 1 Auto 02 01 | |||||||||||||||||||||||||||||
| 2 Select | 01 | |||||||||||||||||||||||||||||
| 3 EcoPrint | ||||||||||||||||||||||||||||||
| 4 Original Size* | 1 Auto 43 43 42 | |||||||||||||||||||||||||||||
| 2 Select | 03 | 43 | 43 | 41 | 42 | 41 | 41 | |||||||||||||||||||||||
| 5 Mixed Original Size | DP | 22 | 22 | 22 | 22 | 22 | 23 | 24 | 24 | 25 | 25 | 26 | 26 | 30 | 30 | |||||||||||||||
| 6 △▽ | 1 Auto | 03 | 01 | 01 | ||||||||||||||||||||||||||
| 2 Select | 03 | 01 | 01 | 04 | 04 | |||||||||||||||||||||||||
| 7 Paper Select | 1 Auto | 01 | 06 | 06 | 04 | 04 | 06 | 06 | ||||||||||||||||||||||
| 2 Cassette | 03 | 01 | - | 44 | 44 | 07 | 07 | |||||||||||||||||||||||
| 3 MP Tray | 03 | 01 | - | 44 | 44 | 07 | 07 | |||||||||||||||||||||||
| 8 Collate Copy | ||||||||||||||||||||||||||||||
| 9 2-Sided Copy | 1 1-Sided → 2-Sided | 2-Sided | 23 | 44 | 44 | 01 | 01 | 01 | 01 | 05 | 05 | |||||||||||||||||||
| 2 2-Sided → 2-Sided | 2-Sided, DP | 44 | 44 | 01 | 01 | 01 | 01 | 05 | 05 | |||||||||||||||||||||
| 3 Book → 2-Sided | 2-Sided | 43 | 43 | 24 | 45 | 45 | 01 | 01 | 01 | 01 | 27 | 27 | 05 | 05 | ||||||||||||||||
| : Split Copy | 1 2-Sided → 1-Sided | DP | 01 | 01 | 01 | 01 | ||||||||||||||||||||||||
| 2 Book → 1-Sided | 43 | 43 | 24 | 45 | 45 | 01 | 01 | 01 | 01 | 27 | 27 | |||||||||||||||||||
| A Binding Margin | ||||||||||||||||||||||||||||||
| B Border Erase | 1 Sheet Border Erasure | 41 | 25 | 01 | ||||||||||||||||||||||||||
| 2 Book Border Erasure | 42 | 42 | 25 | 01 | ||||||||||||||||||||||||||
| C Combine mode | 1 2 in 1 | 41 | 26 | 28 | 28 | 27 | 27 | 01 | ||||||||||||||||||||||
| 2 4 in 1 | 41 | 26 | 28 | 28 | 27 | 27 | 01 | |||||||||||||||||||||||
| D Media Type | 1 Thick Paper | 30 | 31 | 29 | 29 | 29 | 01 | |||||||||||||||||||||||
| 2 Vellum Paper | 30 | 31 | 29 | 29 | 29 | 01 | ||||||||||||||||||||||||
| E Interrupt Copying | ||||||||||||||||||||||||||||||
* Note: Manual Size Selection includes Custom Sizes 1 and 2.
Index
Numerics
2 in 1 4-12
2-Sided copies 4-2
2-Sided Copy Reverse Side Rotation Setting 4-5
4 in 1 4-15
4 in 1 Layout Order 4-17
A
Accompanying paper sheet 2-5
Additional Memory 7-8
Adjusting Copy Exposure 3-3
Alarm 5-23
Auto Cassette Switching 5-15
Auto Clear function 1-6
Auto Clear Setting 5-20
Auto Clear Time 5-21
Auto Detect Originals 5-18
Auto Exposure Adjustment 5-11
Auto Rotation 5-20
Auto Sizing 5-15
Auto Sleep Mode 3-9
Auto Sleep Setting 5-21
Auto Zoom Ratio Selection Mode 3-5
Automatic Cassette Switching Function 1-7
Automatic Collating of copy sets 4-19
Automatic Paper Selection 5-14
B
Background Adjustment 5-13
Basic Operation 3-1
Book erase mode 4-10
C
Cassette Selection 5-13
Cassette Size Detection 2-5
Caution Labels viii
Cautions when handling consumables xiii
Cautions when using the copier xi
Cleaning Rod 8-7
Cleaning the Copier 8-2
Cleaning the Original Cover 8-2
Cleaning the Platen 8-2
Cleaning the Separation Pawl 8-3
Cleaning the Slit Glass 8-2
Cleaning the Transfer Rollers 8-4
Collating 4-19
Completion of the Copying Procedure 3-4
Copy Limit 5-19
Copying 2 or 4 originals onto a single page 4-12
Copying Functions 4-1
Counter Report 5-24
Custom Sizes 1-7
D
Deleting Department ID Codes 6-3
Department ID Code Registration 6-3
Document Processor 7-2
Drawer Size Detection 2-5
Duplex Unit 7-6
E
EcoPrint 4-21, 5-10
Environment ix
Exposure Steps 5-10
F
Functions and Settings Combination Chart Appendix-5
G
Grounding the copier x
H
Handling of plastic bags x
How to set the Job Accounting 6-5
I
If one of the following indications is Displayed 9-5
If other trouble occurs 9-2
If papaer jams 9-9
Image Quality Selection 3-3
Initial Density 5-9
Inputting Custom Sizes 5-15
Inputting MP Tray Size and Media Type 2-7
Interrupt Copying 3-7
J
Job Accounting 6-1
Job Accounting Operations Procedures 6-2
K
Key Counter 7-6
L
Loading Paper 2-2
Loading Paper into the Cassette 2-3
Low Power Mode 3-8
Low Power Mode Transition Time 5-22
M
Maintenance 8-1
Making a margin space on the copies 4-8
Making copies in the Job Accounting 6-6
Making copies with clean edges 4-10
Message Display 1-6
Message Language 5-8
Misfeed location indicators 9-9
Mixed Original Sizes Mode 7-5
N
Name of Parts 1-1
Notes on acceptable documents 7-2
O
Optional Equipment 7-1
Original Image Quality 5-9
Originals that can be used with the
Document Processor 7-2
Outputting the Job Accounting List 6-4
Overview of Job Accounting 6-2
P
Paper Feeder 7-6
Paper misfeed in the cassette 9-9
Paper misfeed in the Document Processor (option) 9-12
Paper misfeed in the Left Cover internal section 9-11
Paper misfeed in the MP tray 9-10
Paper misfeed in the optional cassette 9-13
Paper misfeed in the paper supply section 9-9
Paper Selection 3-2
Paper Weight and 2-sided Copying 5-17
Photo Exposure Adjustment 5-11
Photo Mode 3-3
Photo Processing 5-12
Power Supply x
PRECAUTIONS FOR USE xi
Print server 7-7
Printer Kit 7-7
Procedure for Changing the Default Settings 5-8
Processing to Reduce Black Line 5-12
Program Function 4-22
Pull the electrical charge section out as far as it will go and push it in after pulling it back and forth several times. 8-7
R
Registering a program 4-22
Rotate Collate Setting 5-19
S
Saving on toner use 4-21
Section Names (Document Processor) 7-3
Selected Cassette 5-14
Selecting Functions 3-2
Selecting Media Type 5-17
Setting Originals in the Document Processor 7-3
Setting paper on the MP tray 2-6
Setting the Border Width 4-11
Setting the Combine mode Border Lines 4-17
Setting the Key Counter 7-7
Setting the Margin 4-9
Setting the Number of Copies 3-3
Setting the Original 3-2
Setting the Original on the Platen (Document
Processor) 7-4
Sheet erase mode 4-10
Silent Mode Transition Time 5-20
Sleep Mode Transition Time (Default
Settings) 5-22
Split Copy Modes 4-6
Standard Margin 4-8
Start Copying 3-4
System Menu 1-6, 5-2
System Menu Items 5-2
System Menu Operations Procedures 5-7
System Setting 5-1
T
Text + Photo Mode 3-3
Text + Photo Mode Exposure Adjustment
5-11
Text Exposure Adjustment 5-12
Text Mode 3-3
Toner xiii
Toner Container 8-5
Toner Container release lever 8-6
Toner Coverage Report 5-23
Total Counter 5-24
Troubleshooting 9-1
U
User Status Report 5-8
Using programmed setting to make copies 4-22
W
Warm-up 3-2
Waste Toner Box 8-5
Z
Zoom Copying 3-5
Zoom Mode 3-5
For best results and machine performance, we recommend that you use only our original supplies for your products.
DIRECTIVE 2002/96/CE ON THE TREATMENT, COLLECTION, RECYCLING AND DISPOSAL OF ELECTRIC AND ELECTRONIC DEVICES AND THEIR COMPONENTS
INFORMATION
1. FOR COUNTRIES IN THE EUROPEAN UNION (EU)
The disposal of electric and electronic devices as solid urban waste is strictly prohibited: it must be collected separately.
The dumping of these devices at unequipped and unauthorized places may have hazardous effects on health and the environment.
Offenders will be subjected to the penalties and measures laid down by the law.
To dispose of our devices correctly:
a) Contact the Local Authorities, who will give you the practical information you need and the instructions for handling the waste correctly, for example: location and times of the waste collection centres, etc.
b) When you purchase a new device of ours, give a used device similar to the one purchased to our dealer for disposal.
The crossed dustbin symbol on the device means that:
- when it to be disposed of, the device is to be taken to the equipped waste collection centres and is to be handled separately from urban waste;
- The producer guarantees the activation of the treatment, collection, recycling and disposal procedures in accordance with Directive 2002/96/CE (and subsequent amendments).
2. FOR OTHER COUNTRIES (NOT IN THE EU)
The treatment, collection, recycling and disposal of electric and electronic devices will be carried out in accordance with the laws in force in the country in question.
olivetti
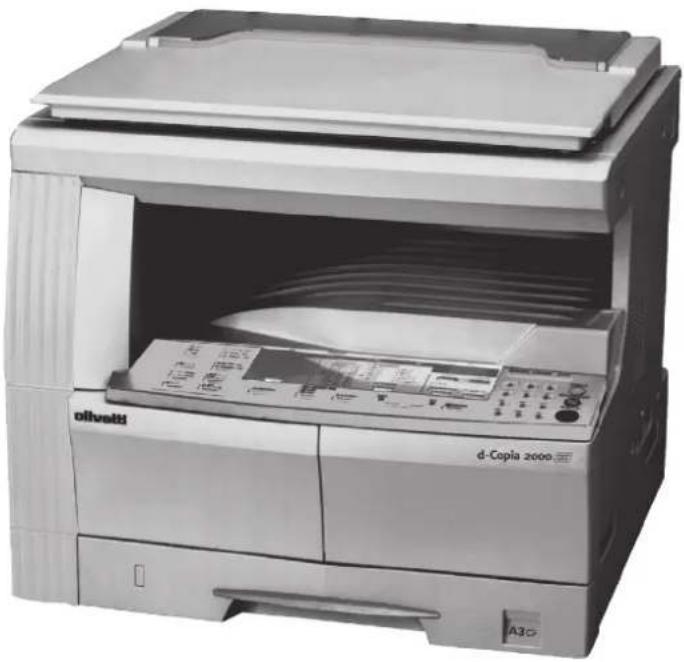
natural_image
Exterior view of a D-Copia 2000 printer with open lid and control panel (no visible text or symbols on device body)d-Copia 1600
d-Copia 2000
MODE D'EMPLOI
PUBLICATION EMISE PAR :
Olivetti, S.p.A.
Copyright © 2006 Olivetti
Programme Energy Star v
Conventions ...... xvii
1 Nomenclature
Corps principal 1-2
natural_image
Three-panel image showing a white background with scattered dots, two grayscale frames, and two white flower-like shapes on a gray background (no text or symbols)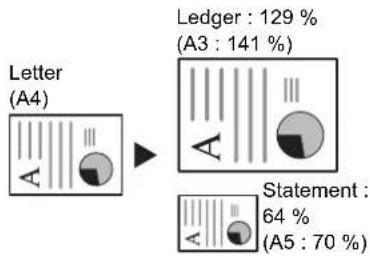
flowchart
graph LR
    A["Letter (A4)"] --> B["Ledger: 129% (A3: 141%)"]
    A --> C["Statement: 64% (A5: 70%)"]
Mode zoom
Fonction Diviser
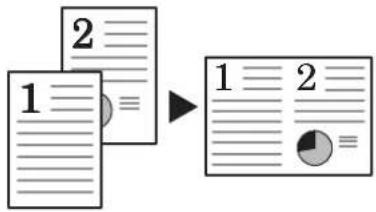
Mode Assembler
natural_image
Simple line drawing of three 3D blocks with two human figures below, no text or symbols presentnatural_image
Line drawing of a printer or scanner device with no visible text or symbols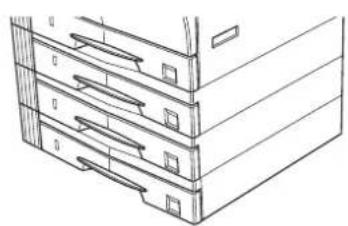
natural_image
Line drawing of a multi-level office cabinet with drawers (no text or symbols)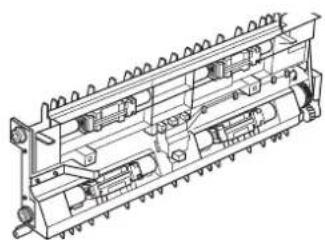
natural_image
Technical line drawing of a mechanical assembly with multiple components and mounting holes (no text or symbols)natural_image
Line drawing of a rectangular electronic component with slots and a side port (no text or symbols)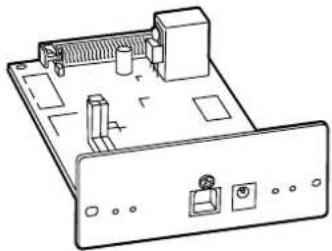
natural_image
Line drawing of an electronic device rear panel with ports and connectors (no text or symbols)
natural_image
Line drawing of a rectangular electronic component with four slots and a central ruler (no text or symbols)Programme Energy Star

DÉCLARATION DE CONFORMITÉ
AUX DIRECTIVES
89/336/CEE, 73/23/CEE et 93/68/CEE
natural_image
Line drawing of two hands holding a stack of papers (no text or symbols present)natural_image
Simple line drawing of a rectangular frame with internal curved lines (no text or symbols)natural_image
Diagram of a printer's internal structure showing a hand inserting a slot into a tray (no text or symbols visible)natural_image
Technical line drawing of a mechanical assembly with no visible text or symbolsnatural_image
Technical line drawing of a mechanical assembly with a hand operating a component (no text or symbols visible)4
natural_image
Technical line drawing of a mechanical assembly with internal components and directional arrows (no text or symbols)5
natural_image
Diagram of a printer's internal structure with a hand pressing a component (no text or symbols visible)natural_image
Line drawing of a hand inserting a component into a machine (no text or symbols)natural_image
Illustration of a hand inserting a card into a device (no text or symbols visible)REMARQUE : Lors de
natural_image
Illustration of a hand inserting a card into a device (no text or symbols visible)
natural_image
Illustration of a hand inserting a device into a printer holder (no text or symbols visible)natural_image
Technical line drawing of a mechanical assembly with two arrows indicating motion or force direction (no text or symbols)natural_image
Diagram of a printer or printer holder with an arrow indicating the paper plane (no text or symbols present)natural_image
Pure technical line drawing of a mechanical device without any text, numbers, or symbols4 Appuyer sur [OK].
natural_image
Line drawing of a hand using a tool to press or download documents from a machine (no text or symbols visible)natural_image
Line drawing of a printer with front panel and control panel (no text or symbols)Copie avec zoom
flowchart
graph LR
    A["Letter (A4)"] --> B["Ledger: 129% (A3: 141%)"]
    B --> C["Statement: 64% (A5: 70%)"]
natural_image
Line drawing of a hand using a paper filter to press or download a document into a printer (no text or symbols present)natural_image
Line drawing of a hand using a laptop to press documents on an open book (no text or symbols visible)natural_image
Line drawing of a hand using a tool to press or download documents from a machine (no text or symbols visible)flowchart
graph TD
    A["Original Copie"] --> B["(1)"]
    A --> C["(2)"]
natural_image
Line drawing of a hand using a tool to press or download documents from an open file (no text or symbols visible)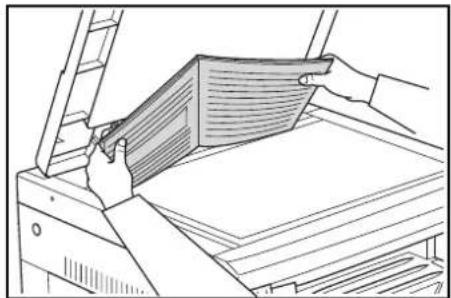
natural_image
Line drawing of hands handling a folded document or folder on a machine (no text or symbols visible)flowchart
graph LR
    A["Original"] --> B["Copie"]
REMARQUE :
[Spécifications en pouces]
flowchart
graph LR
    A["Original Copie"] --> B["1"]
    A --> C["2"]
natural_image
Line drawing of hands handling a folded paper or document on a machine (no text or symbols)flowchart
graph TD
    A["Original Copie"] --> B["Pie Chart"]
    B --> C["Divided into two separate pie charts"]
natural_image
Line drawing of a hand using a laptop to press documents on an open book (no text or symbols visible)natural_image
Line drawing of hands handling a folded document or folder on a machine (no text or symbols visible)natural_image
Line drawing of a hand using a laptop to press documents on a machine (no text or symbols visible)natural_image
Technical line drawing of a mechanical component with directional arrows indicating movement or force (no text or symbols)natural_image
Diagram of a printer or printer mechanism with directional arrows indicating motion (no text or symbols present)natural_image
Line drawing of a printer's front panel with a black arrow indicating the paper edge (no text or symbols present)natural_image
Technical line drawing of a mechanical component with no visible text or symbolsnatural_image
Technical line drawing of a mechanical component with an arrow indicating rotation (no text or symbols)natural_image
Technical line drawing of a printer or printer with a black arrow indicating a component (no text or symbols present)natural_image
Line drawing of a hand inserting a document into a printer (no text or symbols present)natural_image
Line drawing of a file cabinet with multiple drawers (no text or symbols)natural_image
Technical line drawing of a mechanical assembly with multiple components and mounting holes (no text or symbols)Compteur clé
natural_image
Line drawing of a rectangular electronic component with slots and a side port (no text or symbols)natural_image
Line drawing of a hand inserting a component into a container with an arrow indicating direction (no text or symbols)natural_image
Line drawing of an electronic device rear panel with ports and connectors (no text or symbols)natural_image
Line drawing of a cylindrical mechanical component with three vertical grooves (no text or symbols)natural_image
Line drawing of a rectangular electronic component with four slots and a central ruler (no text or symbols)(16 Mo, 32 Mo, 64 Mo, 128 Mo)
natural_image
Illustration of a hand cleaning a panel with a cloth (no text or symbols)natural_image
Line drawing of a hand using a 3D printer to clean or fabric the paper (no text or symbols)natural_image
Line drawing of a person using a computer to press or install a device (no text or symbols visible)natural_image
Technical diagram of a mechanical assembly with internal components and an arrow indicating rotation (no text or symbols present)natural_image
Technical line drawing of a mechanical assembly with a black arrow indicating a component (no text or symbols present)natural_image
Diagram of a computer monitor with an arrow indicating a directional change (no text or symbols present)natural_image
Technical diagram of a mechanical assembly with internal components and an arrow indicating rotation (no text or symbols present)natural_image
Technical line drawing of a mechanical assembly with a black arrow indicating a component (no text or symbols present)natural_image
Diagram of a computer monitor with an arrow indicating a directional change (no text or symbols present)natural_image
Technical line drawing of a mechanical assembly with hands operating a tool (no text or symbols present)natural_image
Technical diagram of a mechanical assembly with internal components and an arrow indicating rotation (no text or symbols present)natural_image
Technical line drawing of a mechanical assembly with no visible text or symbolsnatural_image
Technical line drawing of a mechanical part with two circular features and directional arrows (no text or symbols)natural_image
Technical line drawing of a mechanical assembly with no visible text or symbolsnatural_image
Technical line drawing of a mechanical component with an arrow indicating direction (no text or symbols)natural_image
Line drawing of a mechanical component with a curved band and directional arrow (no text or symbols)7
natural_image
Technical line drawing of a mechanical assembly with a hand holding a tool, no visible text or symbolsnatural_image
Line drawing of a hand inserting a component into a device (no text or symbols visible)9
10
natural_image
Technical line drawing of a mechanical assembly with no visible text or symbols11
natural_image
Technical line drawing of a mechanical assembly with an inset showing a close-up of a component (no text or symbols present)13
natural_image
Line drawing of two hands pressing down on a rectangular tray with a 5-inch angle indicator (no text or symbols)natural_image
Technical diagram of an internal mechanical assembly with labeled component (1), showing no readable text or symbols beyond the label.natural_image
Technical line drawing of a mechanical assembly with no visible text or symbols18 Refermer le capot avant.
natural_image
Diagram of a printer's internal structure showing a tray, control panel, and paper holder (no text or symbols)natural_image
Technical line drawing of a mechanical assembly with no visible text or symbolsnatural_image
Diagram of a mechanical device with a highlighted component and directional arrow (no text or symbols)natural_image
Diagram of a mechanical assembly with a central component and an arrow indicating direction (no text or symbols present)natural_image
Diagram of a computer monitor with an arrow indicating a download or exit (no text or symbols present)natural_image
Technical line drawing of a mechanical device with internal components (no text or symbols)natural_image
Technical line drawing of a computer tower with visible internal components and a directional arrow indicating motion (no text or symbols)natural_image
Line drawing of a printer cover with an arrow indicating the page direction (no text or symbols present)natural_image
Diagram of a printer or printer with a paper airplane and directional arrow indicating rotation (no text or symbols present)natural_image
Technical line drawing of a mechanical component with an arrow indicating direction (no text or symbols present)natural_image
Technical line drawing of a mechanical assembly with a directional arrow indicating motion (no text or symbols)natural_image
Line drawing of a file organizer with a hand inserting a clip into the cover (no text or symbols)natural_image
Technical line drawing of a file drawer with an arrow indicating a component (no text or symbols present)natural_image
Line drawing of a file cabinet with drawers and an open drawer, showing internal compartments and a highlighted section (no text or symbols)natural_image
Diagram of a printer's internal structure showing a printer slot and paper holder, with no visible text or symbols.natural_image
Technical line drawing of a mechanical assembly with no visible text or symbolsnatural_image
Exterior view of a D-Copia 2000 printer with open lid and control panel (no visible text or symbols on device body)d-Copia 1600
d-Copia 2000
Copyright © 2006, Olivetti
natural_image
Three grayscale images showing a daisy-like flower with stem and leaves, no text or symbols present.Zoom automático
Copias separadas
flowchart
graph LR
    A["Pie Chart"] --> B["Arrow Icon"]
Modo de combinación
natural_image
Simple line drawing of three 3D blocks with human figures below (no text or symbols)natural_image
Line drawing of a printer or scanner device with no visible text or symbols
natural_image
Line drawing of a file cabinet with multiple drawers (no text or symbols)
natural_image
Technical line drawing of an electronic component assembly (no text or symbols visible)natural_image
Line drawing of a rectangular electronic component with slots and ports (no text or symbols)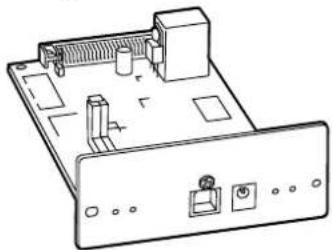
natural_image
Line drawing of an electronic device rear panel with ports and connectors (no text or symbols)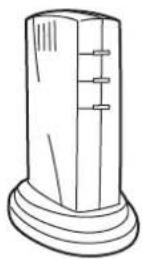
Memoria adicional
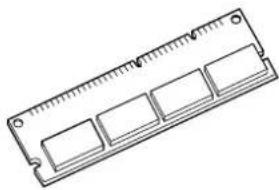
natural_image
Line drawing of a rectangular electronic component with four slots and a central ruler (no text or symbols)Programa Energy Star

natural_image
Line drawing of two hands holding a stack of papers (no text or symbols present)natural_image
Simple line drawing of a rectangular frame with internal diagonal lines (no text or symbols)natural_image
Diagram of a printer's internal structure with a hand inserting a slot into the base (no text or symbols visible)natural_image
Technical line drawing of a mechanical assembly with internal components and an arrow indicating direction (no text or symbols)natural_image
Technical line drawing of a mechanical assembly with arrows indicating motion or force direction (no text or symbols)4
natural_image
Technical line drawing of a mechanical assembly with internal components and directional arrows (no text or symbols)5
natural_image
Diagram of a printer's internal structure with a hand pressing down on the cover (no text or symbols visible)natural_image
Line drawing of a hand inserting a component into a machine (no text or symbols)natural_image
Illustration of a hand inserting a device into a computer (no text or symbols visible)natural_image
Illustration of a hand inserting a card into a device (no text or symbols visible)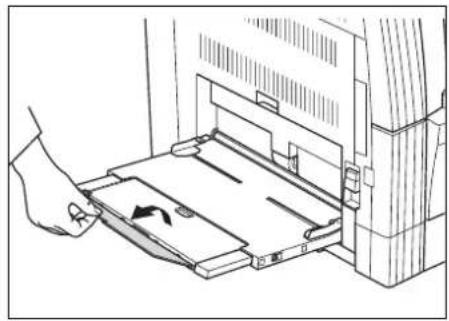
natural_image
Line drawing of a hand inserting a card into a computer drive (no text or symbols)natural_image
Technical line drawing of a printer or printer holder with an arrow indicating the paper direction (no text or symbols present)natural_image
Diagram of a printer or printer holder with an arrow indicating the paper plane (no text or symbols present)natural_image
Technical line drawing of a mechanical device with no visible text or symbols4 Pulse [OK].
natural_image
Line drawing of a hand using a tool to press or download documents from a machine (no text or symbols visible)natural_image
Line drawing of a printer with ventilation slots and control panel (no text or symbols)Copia con zoom
natural_image
Line drawing of a hand using a paper filter to press or download documents from an open file (no text or symbols visible)natural_image
Line drawing of a hand using a laptop to press documents on an open book (no text or symbols visible)2 Pulse , o [%/OK].
natural_image
Line drawing of a hand using a tool to press or download documents from a filelet (no text or symbols visible)natural_image
Line drawing of a hand using a tool to press or spread documents on an open printer (no text or symbols visible)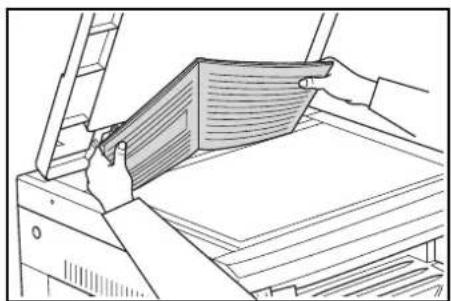
natural_image
Line drawing of hands handling a folded document or folder on a machine (no text or symbols)flowchart
graph LR
    A["Original"] --> B["Copia"]
NOTA:
flowchart
graph LR
    A["Original Copia"] --> B["1"]
    A --> C["2"]
natural_image
Line drawing of hands handling a folded paper or document on a machine (no text or symbols)flowchart
graph TD
    A["Original Copia"] --> B["Step 1: White circle with black segments on top"]
    B --> C["Step 2: White circle with black segments on bottom"]
    C --> D["Step 3: White circle with black segments on top"]
    D --> E["Step 4: White circle with black segments on bottom"]
natural_image
Line drawing of a hand inserting a card into a printer (no text or symbols)natural_image
Line drawing of hands handling a folded document or folder on a machine (no text or symbols visible)flowchart
graph LR
    A["1"] --> B["2"]
    B --> C["1 2 ="]
natural_image
Line drawing of a hand using a paper to press down an open drawer (no text or symbols)natural_image
Technical line drawing of a mechanical component with directional arrows indicating movement or force (no text or symbols)natural_image
Diagram of a printer or printer with a paper feeding into a stack, showing mechanical components and directional arrows (no text or symbols)natural_image
Line drawing of a printer cover with a black arrow indicating the page direction (no text or symbols present)natural_image
Technical line drawing of a mechanical component or assembly (no text or symbols visible)natural_image
Technical line drawing of a mechanical component with a curved arrow indicating rotation (no text or symbols)natural_image
Technical line drawing of a printer or scanner with a black arrow indicating a component (no text or symbols present)natural_image
Line drawing of a hand inserting a document into a printer (no text or symbols present)natural_image
Line drawing of a file cabinet with multiple drawers (no text or symbols)Unidad dúplex
natural_image
Technical line drawing of a mechanical assembly with multiple components and mounting holes (no text or symbols)Contador
natural_image
Line drawing of a rectangular electronic component with slots and ports (no text or symbols)natural_image
Line drawing of a hand inserting a component into a container with an arrow indicating direction (no text or symbols)natural_image
Line drawing of an electronic device rear panel with ports and connectors (no text or symbols)natural_image
Line drawing of a cylindrical mechanical component with three vertical grooves (no text or symbols)Memoria adicional
natural_image
Line drawing of a rectangular electronic component with four slots and a central ruler (no text or symbols)16 MB: 250 hojas, 32 MB: 250 hojas, 64 MB: 250 hojas, 128 MB: 250 hojas (Carta, originales con un porcentaje de cobertura del 6%)
8 Mantenimiento
natural_image
Line drawing of a hand cleaning a panel with a cloth (no text or symbols)natural_image
Line drawing of a hand using a clean or擦纸机 (no text or symbols present)natural_image
Line drawing of a hand operating a machine with a handle, labeled (a) (no text or symbols on the diagram itself)natural_image
Technical line drawing of a mechanical assembly with an open door and internal components (no text or symbols)natural_image
Technical line drawing of a mechanical assembly with a black arrow indicating a component (no text or symbols present)natural_image
Diagram of a computer monitor with an arrow indicating a directional change (no text or symbols present)natural_image
Technical diagram of a mechanical assembly with internal components and an arrow indicating rotation (no text or symbols present)natural_image
Technical line drawing of a mechanical assembly with a black arrow indicating a component (no text or symbols present)natural_image
Diagram of a computer monitor with an arrow indicating a directional change (no text or symbols present)natural_image
Technical line drawing of a mechanical assembly with hands operating a tool (no text or symbols present)natural_image
Technical diagram of a mechanical assembly with internal components and an arrow indicating rotation (no text or symbols present)natural_image
Technical line drawing of a mechanical assembly with no visible text or symbolsnatural_image
Technical line drawing of a mechanical part with two circular features and directional arrows (no text or symbols)natural_image
Technical line drawing of a mechanical assembly with no visible text or symbolsnatural_image
Technical line drawing of a mechanical component with an arrow indicating direction (no text or symbols)natural_image
Line drawing of a mechanical component with a curved cover and arrow indicating direction (no text or symbols)natural_image
Technical line drawing of a mechanical assembly with a hand holding a tool (no text or symbols visible)natural_image
Line drawing of a hand inserting a mechanical component into a device (no text or symbols visible)natural_image
Technical line drawing of a mechanical assembly with no visible text or symbols11
natural_image
Technical line drawing of a mechanical assembly with an inset showing a component detail (no text or symbols present)13
natural_image
Line drawing of two hands pressing down on a rectangular tray with a 5-inch angle indicator (no text or symbols)natural_image
Technical line drawing of a mechanical assembly with no visible text or symbolsnatural_image
Technical line drawing of a mechanical assembly with no visible text or symbolsnatural_image
Diagram of a printer's internal structure with an arrow indicating left motion (no text or symbols present)natural_image
Technical line drawing of a mechanical assembly with no visible text or symbolsnatural_image
Diagram of a mechanical device with a highlighted component and directional arrow (no text or symbols)natural_image
Diagram of a mechanical assembly with a central component and an arrow indicating direction (no text or symbols present)natural_image
Diagram of a computer monitor with an arrow indicating a directional change (no text or symbols present)
natural_image
Technical line drawing of an open mechanical device with internal components (no text or symbols)natural_image
Technical line drawing of a computer tower with internal components and a directional arrow indicating motion (no text or symbols present)natural_image
Line drawing of a printer cover with an arrow indicating the page direction (no text or symbols present)natural_image
Diagram of a printer or printer with an arrow indicating rotation or movement (no text or symbols present)natural_image
Technical line drawing of a mechanical component with an arrow indicating direction (no text or symbols)natural_image
Technical diagram of a mechanical device with internal components and directional arrow (no text or symbols)natural_image
Mechanical component diagram showing a gear assembly with an arrow indicating rotational motion (no text or symbols)7
natural_image
Line drawing of a printer's internal structure showing paper feeding into a stack of folders (no text or symbols)2
natural_image
Technical line drawing of a file drawer with an arrow indicating a component (no text or symbols present)natural_image
Line drawing of a file cabinet with drawers and an open drawer, showing no text or symbolsnatural_image
Diagram of a printer's internal structure showing a printer slot and paper holder, with no visible text or symbols.natural_image
Technical line drawing of a mechanical assembly with no visible text or symbolsnatural_image
Exterior view of a D-Copia 2000 printer with open lid and control panel (no visible text or symbols on body)d-Copia 1600
d-Copia 2000
BEDIENUNGSHANDBUCH
HERAUSGEBER:
Olivetti, S.p.A.
Copyright © 2006, Olivetti
natural_image
Three-panel image showing a white background with faint speckles, two grayscale panels with white daisy-like flowers and stems, and a separate gray panel with a single flower (no text or symbols)
flowchart
graph LR
    A["Letter (A4)"] --> B["Ledger: 129% (A3: 141%)"]
    B --> C["Statement: 64% (A5: 70%)"]
Zoom-Modus

flowchart
graph TD
    A["1"] --> B["2"]
    B --> C["1"]
    C --> D["2"]
    D --> E["1"]
    E --> F["2"]
Rand-Modus
flowchart
graph LR
    A["Pie Chart"] --> B["Arrow Icon"]
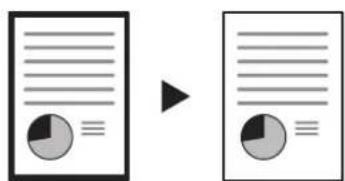

Sortier-Modus
natural_image
Three 3D blocks with human figures below, no text or symbols present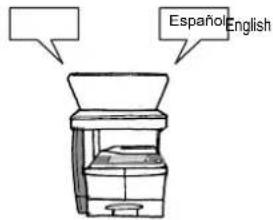
natural_image
Line drawing of a printer or scanner device with no visible text or symbols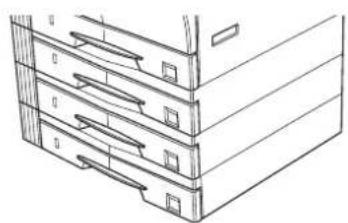
natural_image
Line drawing of a multi-level office cabinet with drawers (no text or symbols)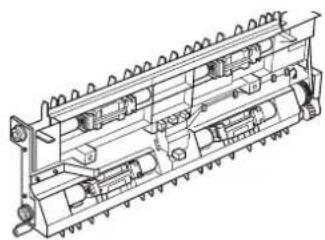
natural_image
Technical line drawing of a mechanical assembly with multiple components and no visible text or symbolsnatural_image
Line drawing of a rectangular electronic component with slots and ventilation slots (no text or symbols)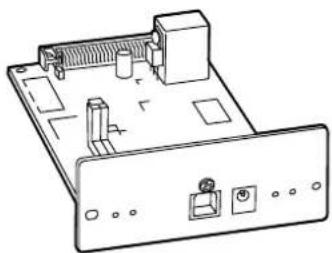
natural_image
Line drawing of an electronic device rear panel with ports and connectors (no text or symbols)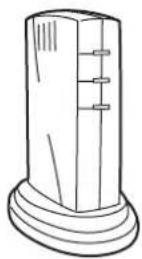
Speichererweiterung

natural_image
Line drawing of a rectangular electronic component with four slots and a central ruler (no text or symbols)Energy Star

CAUTION: The power plug is the main isolation device! Other switches on the equipment are only functional switches and are not suitable for isolating the equipment from the power source.
natural_image
Line drawing of two hands holding a stack of papers (no text or symbols present)natural_image
Simple line drawing of a rectangular object with internal lines, no text or symbols presentnatural_image
Diagram of a printer's internal structure showing a slot and base panel, with no visible text or symbols.natural_image
Technical line drawing of a mechanical assembly with internal components and an arrow indicating direction (no text or symbols present)natural_image
Technical line drawing of a mechanical assembly with a hand operating a component (no text or symbols visible)4
natural_image
Technical line drawing of a mechanical assembly with internal components and directional arrows (no text or symbols)5
natural_image
Technical line drawing of a mechanical assembly with a hand pressing a component (no text or symbols)natural_image
Line drawing of a hand inserting a component into a machine (no text or symbols)7
natural_image
Illustration of a hand inserting a device into a folder (no text or symbols visible)natural_image
Illustration of a hand inserting a card into a device, showing internal components and a scroll (no text or symbols)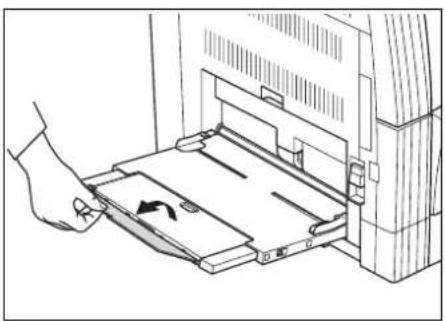
natural_image
Line drawing of a hand pressing down an open file into a machine (no text or symbols visible)natural_image
Technical line drawing of a mechanical assembly with arrows indicating motion or force direction (no text or symbols)natural_image
Diagram of a mechanical assembly with a rectangular component and an arrow indicating direction (no text or symbols present)| Zoll-Modelle Metrische Modelle | |
| Universalformat Universalformat | |
| Ledger R A3 R | |
| Legal R A4 R | |
| Letter R A4 | |
| Letter A5 R | |
| Statement R B4 R | |
| Andere Formate B5 R | |
| Ben.def. Format Folio R | |
| Andere Formate | |
| Ben.def. Format | |
natural_image
Pure technical diagram of a mechanical device without any text, numbers, or symbols4 [OK] drücken.
2 Vorlage auflegen
natural_image
Line drawing of a hand using a tool to press or download documents from a machine (no text or symbols visible)natural_image
Line drawing of a printer with front panel and control panel (no text or symbols)Zoom
flowchart
graph TD
    A["Letter (A4)"] --> B["Ledger: 129% (A3: 141%)"]
    B --> C["Statement: 64% (A5: 70%)"]
natural_image
Line drawing of a hand using a tool to press or spread materials on an open machine (no text or symbols visible)natural_image
Line drawing of a hand using a laptop to press documents on an open book (no text or symbols visible)natural_image
Line drawing of a hand using a laptop to press documents on a printer (no text or symbols visible)flowchart
graph TD
    A["Document with ghi and abc layers"] --> B["Transformation"]
    C["Document with ghi and abc layers"] --> B
    D["Document with ghi and abc layers"] --> B
    E["Document with ghi and abc layers"] --> B
    F["Document with ghi and abc layers"] --> B
    G["Document with ghi and abc layers"] --> B
    H["Document with ghi and abc layers"] --> B
    I["Document with ghi and abc layers"] --> B
    J["Document with ghi and abc layers"] --> B
    K["Document with ghi and abc layers"] --> B
    L["Document with ghi and abc layers"] --> B
    M["Document with ghi and abc layers"] --> B
    N["Document with ghi and abc layers"] --> B
    O["Document with ghi and abc layers"] --> B
    P["Document with ghi and abc layers"] --> B
    Q["Document with ghi and abc layers"] --> B
    R["Document with ghi and abc layers"] --> B
    S["Document with ghi and abc layers"] --> B
    T["Document with ghi and abc layers"] --> B
    U["Document with ghi and abc layers"] --> B
    V["Document with ghi and abc layers"] --> B
    W["Document with ghi and abc layers"] --> B
    X["Document with ghi and abc layers"] --> B
    Y["Document with ghi and abc layers"] --> B
    Z["Document with ghi and abc layers"] --> B
    AA["Document with ghi and abc layers"] --> B
    AB["Document with ghi and abc layers"] --> B
    AC["Document with ghi and abc layers"] --> B
    AD["Document with ghi and abc layers"] --> B
    AE["Document with ghi and abc layers"] --> B
    AF["Document with ghi and abc layers"] --> B
    AG["Document with ghi and abc layers"] --> B
    AH["Document with ghi and abc layers"] --> B
    AI["Document with ghi and abc layers"] --> B
    AJ["Document with ghi and abc layers"] --> B
    AK["Document with ghi and abc layers"] --> B
    AL["Document with ghi and abc layers"] --> B
    AM["Document with ghi and abc layers"] --> B
    AN["Document with ghi and abc layers"] --> B
    AO["Document with ghi and abc layers"] --> B
    AP["Document with ghi and abc layers"] --> B
    AQ["Document with ghi and abc layers"] --> B
    AR["Document with ghi and abc layers"] --> B
    AS["Document with ghi and abc layers"] --> B
    AT["Document with ghi and abc layers"] --> B
    AU["Document with ghi and abc layers"] --> B
    AV["Document with ghi and abc layers"] --> B
    AW["Document with ghi and abc layers"] --> B
    AX["Document with ghi and abc layers"] --> B
    AY["Document with ghi and abc layers"] --> AZ["Transformation"]
    BA["Document with ghi and abc layers"] --> BB["Transformation"]
natural_image
Two-step line drawings showing hand positioning and folding of a document on a machine (no text or symbols)flowchart
graph LR
    A["Document 1"] --> B["Representation"]
    B --> C["Document 2"]
natural_image
Line drawing of hands handling a folded document or folder on a machine (no text or symbols visible)natural_image
Line drawing of a hand using a laptop to press documents on an open book (no text or symbols visible)natural_image
Line drawing of hands handling a folded paper or document on a machine (no text or symbols)flowchart
graph LR
    A["1"] --> B["2"]
    B --> C["1 2 ="]
natural_image
Line drawing of a hand using a tool to press or download documents from a machine (no text or symbols visible)| Zoll-Modelle Metrische Modelle | |
| A3 R B5 R | |
| A4 R B6 R | |
| A4 A6 R | |
| A5 R Karton | |
| A6 R Ledger R | |
| B4 R Legal R | |
| B5 R Letter R | |
| B5 Letter | |
| B6 R Statement R | |
| 11×15 Zoll R Oficio 2 | |
| Folio R 11×15 Zoll R | |
| Karton Ben.def. Form. | |
| Ben.def. Form. | |
natural_image
Technical line drawing of a mechanical component with directional arrows indicating movement or force (no text or symbols)natural_image
Diagram of a printer or printer stack with a paper feeding into a tray, showing mechanical components and directional arrows (no text or symbols)natural_image
Line drawing of a printer cover with a black arrow indicating the paper edge (no text or symbols present)natural_image
Technical line drawing of a mechanical component with no visible text or symbolsnatural_image
Technical line drawing of a mechanical component with a curved arrow indicating rotation (no text or symbols)natural_image
Technical line drawing of a printer or scanner with a black arrow indicating a component (no text or symbols present)natural_image
Line drawing of a hand inserting a document into a printer (no text or symbols present)3
natural_image
Line drawing of a file cabinet with multiple drawers (no text or symbols)natural_image
Technical line drawing of an electronic component assembly (no text or symbols visible)Zähler
natural_image
Line drawing of a rectangular electronic component with slots and a side port (no text or symbols)Zähler installieren
natural_image
Line drawing of a hand inserting a component into a container with an arrow indicating direction (no text or symbols)natural_image
Line drawing of an electronic device chassis with ports and connectors (no text or symbols)Druckserver
natural_image
Line drawing of a cylindrical mechanical component with three vertical grooves and a base (no text or symbols)natural_image
Line drawing of a rectangular RAM module with four slots and a central shaft (no text or symbols)natural_image
Line drawing of a hand cleaning a panel with a cloth (no text or symbols)natural_image
Line drawing of a hand using a clean or擦纸机 (no text or symbols present)natural_image
Line drawing of a hand operating a machine with a tool, labeled (a), showing no text or symbols on the diagram itself.natural_image
Technical diagram of a mechanical assembly with internal components and an arrow indicating rotation (no text or symbols present)natural_image
Technical line drawing of a mechanical assembly with a black arrow indicating a component (no text or symbols present)natural_image
Diagram of a computer monitor with an arrow indicating a directional change (no text or symbols present)natural_image
Technical diagram of a mechanical assembly with internal components and an arrow indicating rotation (no text or symbols present)natural_image
Technical line drawing of a mechanical assembly with a black arrow indicating a component (no text or symbols present)natural_image
Diagram of a computer monitor with an arrow indicating a download or exit (no text or symbols present)natural_image
Technical line drawing of a mechanical assembly with hands operating a tool (no text or symbols present)natural_image
Technical diagram of a mechanical assembly with internal components and an arrow indicating rotation (no text or symbols present)2
natural_image
Technical line drawing of a mechanical assembly with no visible text or symbolsnatural_image
Technical line drawing of a mechanical part with two circular features and directional arrows (no text or symbols)natural_image
Technical line drawing of a mechanical assembly with no visible text or symbolsnatural_image
Technical line drawing of a mechanical component with an arrow indicating direction (no text or symbols)natural_image
Line drawing of a mechanical component with a curved band and directional arrow (no text or symbols)natural_image
Technical line drawing of a mechanical assembly with a hand holding a tool, no visible text or symbolsnatural_image
Line drawing of a hand inserting a mechanical component into a device (no text or symbols visible)natural_image
Technical line drawing of a mechanical assembly with no visible text or symbols11
natural_image
Technical line drawing of a mechanical assembly with an inset showing a close-up of a component (no text or symbols present)13
natural_image
Line drawing of two hands pressing down on a rectangular tray with a 5-inch angle indicator (no text or symbols)natural_image
Technical diagram of a mechanical assembly with labeled component (1), showing internal components and motion arrows (no text or symbols beyond label)natural_image
Technical line drawing of a mechanical assembly with no visible text or symbolsnatural_image
Diagram of a printer's internal structure showing a tray, control panel, and base panel (no text or symbols)natural_image
Technical line drawing of a mechanical assembly with no visible text or symbolsnatural_image
Diagram of a printer or printer slot with an arrow indicating left motion (no text or symbols present)2
natural_image
Diagram of a mechanical assembly with a directional arrow indicating movement or force (no text or symbols present)natural_image
Diagram of a computer monitor with ventilation slots and a black curved arrow indicating direction (no text or symbols)
natural_image
Technical line drawing of a mechanical device with internal components (no text or symbols)natural_image
Technical line drawing of a computer tower with visible internal components and an arrow indicating motion (no text or symbols)natural_image
Technical line drawing of a mechanical component with an arrow indicating direction (no text or symbols)natural_image
Diagram of a printer or printer casing with an arrow indicating rotation (no text or symbols present)natural_image
Line drawing of a printer internal component with an arrow indicating direction (no text or symbols)natural_image
Technical line drawing of a mechanical component with an arrow indicating rotation or movement (no text or symbols)natural_image
Line drawing of a printer's internal structure showing paper feeding into a multi-tiered rack (no text or symbols)natural_image
Technical line drawing of a mechanical assembly with a highlighted component (no text or symbols)natural_image
Line drawing of a file cabinet with an arrow pointing to the front panel (no text or symbols present)natural_image
Diagram of a printer's internal structure showing a printer slot and paper holder, with no visible text or symbols.5
natural_image
Technical line drawing of a mechanical assembly with no visible text or symbols

- olivetti
- d-Copia 1600
- d-Copia 2000
- OPERATION MANUAL
- PUBLICATION ISSUED BY:
- Legal Restriction On Copying
- Contents
- N a m e o f P a r t s
- Preparations
- Basic Operation
- Copying Functions
- System Setting
- Job Accounting
- Optional Equipment
- Maintenance
- Troubleshooting
- Making Full use of this copier's advanced functions
- Auto Paper Selection Mode
- Image Quality Selection
- Auto Zoom
- Zoom Mode
- 2-Sided Copy Mode
- Split copy
- Margin Mode
- Border Erase Mode
- Combine Mode
- Collate Mode
- EcoPrint
- Program Function
- Job Accounting Mode
- Language Selection
- Document Processor Paper Feeder Duplex Unit
- Key Counter Printer Kit Print server
- Additional memory
- Energy Star Program
- About the International Energy Star Program
- Low Power Mode
- Sleep Mode (If the copier has printer and/or facsimile function)
- Automatic 2-Sided Copy Function
- Paper Recycling
- Safety Conventions in This Guide
- Symbols
- Environment
- Caution
- Other precautions
- Power supply/Grounding the copier
- Warning
- Handling of plastic bags
- Cautions when using the copier
- Cautions when handling consumables
- Laser Safety (Europe)
- Safety Instructions Regarding the Disconnection of Power (Europe)
- DECLARATION OF CONFORMITY
- TO
- Safety of Laser Beam (USA)
- Safety of laser beam
- The CDRH Act
- Optical unit
- Safety switch
- Safety Instructions Regarding the Disconnection of Power
- About the Operation Guide
- Conventions
- Name of Par
- This chapter identifies copier parts and operation panel keys.
- Main Body
- Operation Panel
- Message Display
- Error codes
- System Menu (the mode after warm-up processing has been completed or [Reset] pressed)
- Auto Clear function
- Custom Sizes
- Automatic Cassette Switching Function
- Loading Paper
- Before Loading Paper
- Loading Paper into the Cassette
- [Inch specifications]
- [Metric specifications]
- Cassette Size Detection
- Setting paper on the MP tray
- Inputting MP Tray Size and Media Type
- Inputting Other Standards
- Inch specifications
- Metric specifications
- Inputting Custom Size
- Selecting Special Media Types
- This chapter explains the following operations.
- Basic Copying Procedure
- Warm-up
- Setting the Original
- Selecting Functions
- Paper Selection
- Image Quality Selection
- Adjusting Copy Exposure
- Setting the Number of Copies
- Start Copying
- Completion of the Copying Procedure
- Zoom Copying
- Auto Zoom Ratio Selection Mode
- Interrupt Copying
- Auto Sleep Mode
- This chapter explains the following topics.
- Making 2-Sided copies from various originals
- Making 2-Sided copies from a 2-Sided original
- NOTE:
- Making 2-Sided copies from an open-faced (book, etc.) original
- Making 2-Sided copies from one-sided originals
- 2-Sided Copy Reverse Side Rotation Setting
- Split Copy Modes
- Split copy from book originals
- Split copy from 2-sided originals
- Making a margin space on the copies
- Standard Margin
- Setting the Margin
- Making copies with clean edges
- Erasing blemishes from edges of copies (Sheet erase mode)
- Erasing blemishes from the edges and middle of copies made from books (Book erase mode)
- Setting the Border Width
- Copying 2 or 4 originals onto a single page
- in 1
- in 1
- When the original is set on the platen
- When the original is set in the Document Processor
- in 1 Layout Order
- Setting the Combine mode Border Lines
- Automatic Collating of copy sets
- Saving on toner use
- Registering a program
- Using programmed setting to make copies
- System Menu
- System Menu Items
- System Menu Operations Procedures
- Press [OK].
- Procedure for Changing the Default Settings
- User Status Report
- Message Language
- Original Image Quality
- Initial Density
- Exposure Steps
- Auto Exposure Adjustment
- Text + Photo Mode Exposure Adjustment
- Photo Exposure Adjustment
- Text Exposure Adjustment
- Processing to Reduce Black Line
- Photo Processing
- Background Adjustment
- Cassette Selection
- Selecting Media Types for Automatic Paper Selection
- Selected Cassette
- Auto Cassette Switching
- Auto Sizing
- Inputting Custom Sizes
- Selecting Media Type (Cassettes 1 to 4)
- Specifying the Paper Weight and 2-sided Copying to Custom Paper
- Auto Detect Originals
- Copy Limit
- Rotate Collate Setting
- Selecting Auto Rotation
- Silent Mode Transition Time
- Auto Clear Setting
- Auto Sleep Setting
- Auto Clear Time
- Low Power Mode Transition Time
- Sleep Mode Transition Time
- Alarm
- Toner Coverage Report
- 1.14
- Checking the Total Counter
- Machine No. 0 XXXXXXXXX
- Copy Prinsera Total
- Copy
- Overview of Job Accounting
- Job Accounting Operations Procedures
- Department ID Code Registration
- Deleting Department ID Codes
- Clearing the Job Accounting Count
- Outputting the Job Accounting List
- How to set the Job Accounting
- Making copies in the Job Accounting
- Document Processor
- Originals that can be used with the Document Processor
- Notes on acceptable documents
- Section Names
- Document Processor Open/Close Handle
- Setting Originals in the Document Processor
- 2
- Setting the Original on the Platen
- 1
- 3
- Mixed Original Sizes Mode
- Paper Feeder
- Duplex Unit
- Key Counter
- Setting the Key Counter
- Printer Kit
- Print server
- Cleaning the Copier
- Cleaning the Original Cover
- Cleaning the Platen
- Cleaning the Slit Glass
- Cleaning the Separation Pawl
- Cleaning the Transfer Rollers
- Replacing the Toner Container and Waste Toner Box
- 12
- 13
- 14
- 15
- If other trouble occurs
- If one of the following indications is Displayed
- If paper jams
- Misfeed location indicators
- Removal Procedure
- Paper misfeed in the MP Tray (J10)
- IMPORTANT: Paper misfeed in the MP Tray (except J10)
- Paper misfeed in the Left Cover internal section (J20, J30, J40 to 45, J50, J52 to 56, J60, J61)
- NOTE: Supplementary Information
- Paper misfeed in the Document Processor (option) (J70 to 75)
- Appendix
- Specifications
- Environmental Specifications
- 2-Sided Copy Function
- Paper Transportability
- Functions and Settings Combination Chart
- Secondary Priority
- Primary Priority
- Functions can be combined (conditions for combining exist)
- Index
- Numerics
- A
- B
- C
- D
- E
- F
- G
- H
- I
- J
- K
- L
- M
- N
- O
- P
- R
- S
- T
- U
- W
- Z
- DIRECTIVE 2002/96/CE ON THE TREATMENT, COLLECTION, RECYCLING AND DISPOSAL OF ELECTRIC AND ELECTRONIC DEVICES AND THEIR COMPONENTS
- INFORMATION
- FOR COUNTRIES IN THE EUROPEAN UNION (EU)
- To dispose of our devices correctly:
- FOR OTHER COUNTRIES (NOT IN THE EU)
- PUBLICATION EMISE PAR :
- Nomenclature
- Mode zoom
- Fonction Diviser
- Mode Assembler
- Programme Energy Star
- DÉCLARATION DE CONFORMITÉ
- AUX DIRECTIVES
- 4
- 5
- Copie avec zoom
- REMARQUE :
- [Spécifications en pouces]
- Compteur clé
- 7
- 9
- 10
- Zoom automático
- Copias separadas
- Modo de combinación
- Memoria adicional
- Programa Energy Star
- Copia con zoom
- NOTA:
- Unidad dúplex
- Contador
- Mantenimiento
- 11
- HERAUSGEBER:
- Zoom-Modus
- Rand-Modus
- Sortier-Modus
- Speichererweiterung
- Energy Star
- Vorlage auflegen
- Zoom
- Zähler
- Zähler installieren
- Druckserver
Brand : OLIVETTI
Model : d-Copia 2000
Category : Photocopier