
d-Copia 150D - Photocopier OLIVETTI - Free user manual and instructions
Find the device manual for free d-Copia 150D OLIVETTI in PDF.


| Product Type | Digital Multifunctional System (Copy, Print, Scan) |
| Copy System | Dry electrostatic transfer |
| Dimensions (W x D x H) | 607.6 x 492.5 x 380.4 mm |
| Weight | Approx. 16.9 kg |
| Power Supply | Local voltage ±10% (see nameplate) |
| Power Consumption | 1000 W |
| Copy Speed | 15 pages/min (A4) |
| Print Speed | 12 pages/min (A4) |
| First Copy Time | Approx. 9.6 seconds |
| Copy Ratio | 25% to 400% (1% increments), preset: 25%, 70%, 86%, 100%, 141%, 400% |
| Copy Resolution | 600 x 300 dpi (Auto/Manual), 600 x 600 dpi (Photo) |
| Print Resolution | 600 dpi |
| Scan Resolution | 600 x 1200 dpi |
| Paper Capacity | 250-sheet tray + 1-sheet bypass |
| Supported Paper Sizes | A4, B5, A5, Letter, Legal, Invoice, A6 (bypass only) |
| Special Media Support | Transparency, labels, envelopes (bypass) |
| Duplex Function | Manual two-sided copying from original table; automatic with SPF (optional) |
| Scanner Interface | USB 1.1 only (for scan function) |
| Printer Interface | USB 1.1 or IEEE1284 parallel |
| Memory | 16 MB |
| Supplies | TD cartridge: approx. 3,500 sheets; Drum cartridge: approx. 18,000 sheets |
| Maintenance | Clean original table, cover, scanning window, and transfer charger periodically |
| Safety Features | Class 1 laser product; automatic power shut-off; hot surface warning |
Frequently Asked Questions - d-Copia 150D OLIVETTI
User questions about d-Copia 150D OLIVETTI
0 question about this device. Answer the ones you know or ask your own.
Ask a new question about this device
Download the instructions for your Photocopier in PDF format for free! Find your manual d-Copia 150D - OLIVETTI and take your electronic device back in hand. On this page are published all the documents necessary for the use of your device. d-Copia 150D by OLIVETTI.
USER MANUAL d-Copia 150D OLIVETTI
d-Copia 120D d-Copia 150D
PUBLICATION ISSUED BY:
Olivetti S.p.A.
Copyright © 2006, Olivetti
All rights reserved
The C€ mark affixed to the product certifies that the product satisfies the basic quality requirements.

The manufacturer reserves the right to carry out modifications to the product described in this manual at any time and without any notice.

ENERGY STAR is a U.S. registered mark.
The ENERGY STAR program is an energy reduction plan introduced by the United States Environmental Protection Agency in response to environmental issues and for the purpose of advancing the development and utilization of more energy efficient office equipment.
Your attention is drawn to the following actions which could compromise the conformity attested to above, as well as the characteristics of the product:
- incorrect electrical power supply;
- incorrect installation, incorrect or improper use or use not in compliance with the warnings provided in the User's Manual supplied with the product;
- replacement of original components or accessories with others of a type not approved by the manufacturer, or performed by unauthorised personnel.
All rights reserved. No part of this material may be reproduced or transmitted in any form or by any means, electronic or mechanical, including photocopying, recording or by any information storage and retrieval system, without permission in writing from the Publisher.
CAUTIONS
Caution label on the unit
The label ( ) in the fusing area of the unit indicates the following:
⚠️: Caution, risk of danger
△: Caution, hot surface
Cautions on using the unit
Follow the cautions below when using this unit.
Warning:
- The fusing area is hot. Exercise care in this area when removing misfed paper.
- Do not look directly at the light source. Doing so may damage your eyes.
- Do not switch the unit rapidly on and off. After turning the unit off, wait 10 to 15 seconds before turning it back on.
- Unit power must be turned off before installing any supplies.
Caution:
- Place the unit on a firm, level surface.
- Do not install the unit in a humid or dusty location.
- When the unit is not used for a long time, for example for consecutive holidays, turn the power switch off and remove the power cord from the outlet.
- When moving the unit, be sure to turn the power switch off and remove the power cord from the outlet.
- Do not cover the unit with a dust cover, cloth or plastic film while the power is on. Doing so may prevent heat radiation, damaging the unit.
- Use of controls or adjustments or performance of procedures other than those specified herein may result in hazardous radiation exposure.
- The socket-outlet shall be installed near the equipment and shall be easily accessible.
Important points when selecting an installation site
Do not install your unit in areas that are:
- damp, humid, or very dusty
• exposed to direct sunlight - poorly ventilated
- subject to extreme temperature or humidity changes, e.g., near an air conditioner or heater.
Be sure to allow the required space around the machine for servicing and proper ventilation.

A small amount of ozone is produced within the unit during operation. The emission level is insufficient to cause any health hazard.
Note:
The present recommended long term exposure limit for ozone is 0.1ppm (0.2mg/m ^3 ) calculated as an 8hr. time-weighted average concentration.
However, since the small amount that is emitted may have an objectionable odor, it is advisable to place the unit in a ventilated area.
Cautions on handling
Be careful in handling the unit as follows to maintain the performance of this unit.
Do not drop the unit, subject it to shock or strike it against any object.
Do not expose the drum cartridge to direct sunlight.
- Doing so will damage the surface (green portion) of the drum cartridge, causing smudges on copies.
Store spare supplies such as drum cartridges and TD cartridges in a dark place without removing from the package before use.
- If they are exposed to direct sunlight, smudges on copies may result.
Do not touch the surface (green portion) of the drum cartridge.
- Doing so will damage the surface of the cartridge, causing smudges on copies.
Cautions on laser
| Wave length | 770 nm - 795 nm |
| Pulse times | 11.82 μs/7 mm |
| Output power | 0.17 mW ± 0.01 mW |
Trademark acknowledgements
- Microsoft and Windows are trademarks of Microsoft Corporation in the U.S.A. and other countries.
- IBM and PC/AT are trademarks of International Business Machines Corporation.
- Adobe and Acrobat are trademarks of Adobe Systems Incorporated.
- All other trademarks and copyrights are the property of their respective owners.

As an ENERGY STAR ^® Partner, OLIVETTI has determined that this product meets the ENERGY STAR ^® guidelines for energy efficiency.
Safety precautions:
This Digital Copier is rated Class 1 and complies with 21 CFR 1040.10 and 1040.11 of the CDRH standards. This means that the unit does not produce hazardous laser radiation. For your safety, observe the precautions below.
- Do not remove the cabinet, operation panel or any other covers.
- The unit's exterior covers contain several safety interlock switches. Do not bypass any safety interlock by inserting wedges or other items into switch slots.
In some areas, the "POWER" switch positions are marked "I" and "O" on the copier instead of "ON" and "OFF".
The symbol "O" denotes the copier is not completely de-energized but in a stand-by condition at this "POWER" switch position.
If your copier is so marked, please read "I" for "ON" and "O" for "OFF".
Caution!
For a complete electrical disconnection, pull out the main plug.
The socket-outlet shall be installed near the equipment and shall be easily accessible.
CONTENTS
1 INTRODUCTION
USING THE MANUALS......4
PART NAMES......5
OPERATION PANEL ......6
2 SETTING UP THE UNIT
SETUP PROCEDURE......7
CHECKING PACKED
COMPONENTS AND
ACCESSORIES......8
PREPARING THE UNIT FOR
INSTALLATION......8
SCAN HEAD LOCKING SWITCH .9
INSTALLING THE
TD CARTRIDGE....10
CONNECTING THE POWER
CORD 12
POWER ON....12
3 LOADING PAPER
PAPER....14
LOADING THE PAPER TRAY .....15
BYPASS FEED
(including special paper)......17
4 INSTALLING THE SOFTWARE
SOFTWARE FOR THE
OLIVETTI PERSONAL MFP
SERIES....19
HARDWARE AND SOFTWARE
REQUIREMENTS......19
BEFORE INSTALLATION......20
INSTALLING THE SOFTWARE...21
INDICATORS ON THE
OPERATION PANEL ....31
USING THE PRINTER MODE.....32
USING THE SCANNER MODE...... 34
HOW TO USE THE
ONLINE MANUAL 43
USING OTHER INSTALLED
DRIVERS......44
CONNECTING THE INTERFACE
CABLE......45
5 MAKING COPIES
COPY FLOW 46
ORIGINAL PLACEMENT......47
SET THE COPY QUANTITY .....49
EXPOSURE ADJUSTMENT/
PHOTO COPYING......50
REDUCTION/ENLARGEMENT/
ZOOM 52
6 SPECIAL FUNCTIONS
TWO SIDED COPYING......53
DESCRIPTION OF SPECIAL
FUNCTIONS....55
TONER SAVE MODE ....55
USER PROGRAMS......56
DISPLAYING TOTAL NUMBER
OF COPIES ....57
7 MAINTENANCE
TD CARTRIDGE
REPLACEMENT....58
DRUM CARTRIDGE
REPLACEMENT....59
CLEANING THE UNIT......60
8 TROUBLESHOOTING THE UNIT
TROUBLESHOOTING......62
STATUS INDICATORS......63
MISFEED REMOVAL....64
9 APPENDIX
SPECIFICATIONS 69
ABOUT SUPPLIES AND
INTERFACE CABLES......71
MOVING AND STORING
THE UNIT 72
INDEX....73
SOFTWARE LICENSE ....76
1
INTRODUCTION
This chapter provides basic information for using the unit.
USING THE MANUALS
In addition to this printed manual an online manual is also provided. To get full use of all features and functions of this product, be sure to familiarize yourself with both manuals. This printed manual provides all installation and setup instructions as well as instructions in the use of all copier functions. The online manual contains the following information.
Online manual
Provides you with information on how to specify preferences and troubleshooting. Check the online manual when you use this unit after all the initial setup is completed.
How to use the online manual
Explains how to use the online manual.
Provides information on how to print a document.
Scan
Explains how to scan using the scanner driver and how to adjust the settings for the Button Manager.
Troubleshooting
Provides instructions on how to solve driver or software problems.
Conventions used in this manual and online manual
- This operation manual explains the operation of models with and without the SPF. In cases where the operation is the same, the SPF model is used.
- Illustrations of driver screens and other computer screens show the screens that appear in Windows XP Home Edition. Some of the names that appear in these illustrations may differ slightly from the screens that appear in other operating systems.
- This operation manual refers to the Single Pass Feeder as the "SPF".
- In this manual, the following icons are used to provide the user with information pertinent to the use of the unit.

Warns the user that injury may result if the contents of the warning are not properly followed.

Cautions the user that damage to the unit or one of its components may result if the contents of the caution are not properly followed.

Notes provide information relevant to the unit regarding specifications, functions, performance, operation and such, that may be useful to the user.

Indicates a letter displayed in the display.
PART NAMES

① Original table
② Operation panel
③ Front cover
④ Paper tray
⑤ Side cover
⑥ Side cover open button
⑦ Bypass paper guides
⑧ Paper output tray
⑨ Paper output tray extension
⑩ Power switch
⑪ Handle
⑫ Power cord socket
⑬ Fusing unit release lever
⑭ Transfer charger
⑮ Charger cleaner
OPERATION PANEL

① Original to copy key and indicators
Two-sided copies from one-sided originals. Turn on Long Edge or Turn on Short Edge can be selected.
② Exposure mode selector key and indicators
Use to sequentially select the exposure modes: AUTO, MANUAL or PHOTO. Selected mode is shown by a lit indicator. (p.50)
③ Light and dark keys and exposure indicators
Use to adjust the MANUAL or PHOTO exposure level. Selected exposure level is shown by a lit indicator. (p.50) Use to start and terminate user program setting. (p.56)
④ Alarm indicators
Drum replacement required indicator (p.59)
8V Misfeed indicator (p.64)
TD cartridge replacement required indicator (p.58)
⑤ SPF indicator (p.48) (15 cpm model only)
⑥ SPF misfeed indicator (p.67) (15 cpm model only)
⑦ Copy ratio selector key and indicators
Use to sequentially select preset reduction/enlargement copy ratios. Selected copy ratio is shown by a lit indicator. (p.52)
⑧ Copy ratio display (%) key (p.52)
⑨ Display
Displays the specified copy quantity, zoom copy ratio, user program code, and error code.
⑩ SCANNER key and indicator (p.31, p.39)
⑪ ON LINE key and indicator
Lights up when the unit is used as a printer and scanner. For description of the ON LINE indicator, see "INDICATORS ON THE OPERATION PANEL" (p.31).
⑫ Power save indicator
Lights up when the unit is in a power save mode. (p.55, p.56)
⑬ Paper feed location indicators
Light up to show the selected paper feed station.
⑭ Zoom keys and indicator
Use to select any reduction or enlargement copy ratio from 25% to 400% in 1% increments. (p.52)
⑮ Copy quantity keys
- Use to select the desired copy quantity (1 to 99). (p.49)
- Use to make user program entries. (p.56)
⑯ Clear key
- Press to clear the display, or press during a copy run to terminate copying. (p.49)
- Press and hold down during standby to display the total number of copies made to date. (p.57)
⑰ Start key and indicator
- Copying is possible when the indicator is on.
- Press to start copying
- Use to set a user program. (p.56)
2
SETTING UP THE UNIT
Follow the installation procedure below to use the unit properly.

If the unit does not function properly during setup or use, or if a function cannot be used, see "TROUBLESHOOTING THE UNIT" (p.62).
SETUP PROCEDURE
When using the unit for the first time, setup the unit following the procedure shown below.
1 Open the package, and make sure that all the accessories are supplied with the unit. (p.8)
2 Remove the protective materials. (p.9)
3 Install the TD cartridge. (p.10)
4 Load the paper in the paper tray (p.15)
5 Insert the attached power cord into the power cord socket at the rear of the unit.
6 Plug the other end of the power cord into the nearest outlet. (p.12)
7 Install the software.* 1 (p.19)
8 Connect the interface cable* 1 (p.45) and turn on the unit. (p.12)
9 Now, you can copy (p.46), print (p.32), or scan (p.34) your document.
*1 If you are only using the unit for copying, skip this step.
CHECKING PACKED COMPONENTS AND ACCESSORIES
Open the carton and check if the following components and accessories are included.
If anything is not included or is damaged, contact your authorized Service representative.

PREPARING THE UNIT FOR INSTALLATION
1 Be sure to hold the handles on both sides of the unit to unpack the unit and carry it to the installation location.

natural_image
Line drawing of a hand holding a container with internal components (no text or symbols)2 Remove all pieces of tape shown in the illustration below. Then open the original cover/SPF and remove protective materials. After that, take out the bag containing the power cord and TD cartridge.

natural_image
Technical line drawing of a printer case with internal components and a close-up inset showing the part's detail (no text or symbols present)15 cpm model

natural_image
Line drawing of an open lid or vent with a flat lid and handle (no text or symbols)
natural_image
Line drawing of an open scanner or scanner with no visible text, numbers, or symbols15 cpm model 12 cpm model
SCAN HEAD LOCKING SWITCH
The scan head locking switch is under the original table. If the switch is locked (the unit will not operate. Unlock the switch ( ) as shown below.

INSTALLING THE TD CARTRIDGE
1 Open the side cover.

natural_image
Diagram showing a hand inserting a component into a computer monitor (no text or symbols visible)2 Push gently on both sides of the front cover to open the cover.
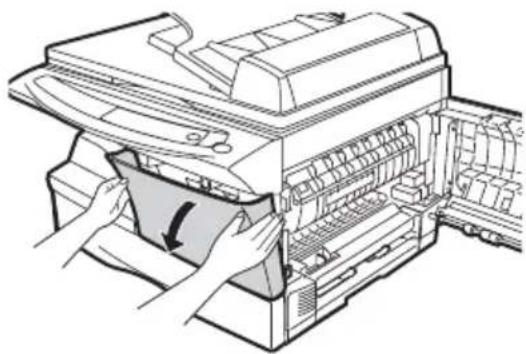
natural_image
Line drawing of a printer with hands inserting a plastic cup into the base (no text or symbols)3 Remove the TD cartridge from the bag. Hold the cartridge on both sides and shake it horizontally four or five times. Hold the tab of the protective cover and pull the tab to your side to remove the cover.

4 Gently insert the TD cartridge until it locks in place while pushing the lock release button.

natural_image
Diagram of a hand inserting a component into a machine (no text or symbols visible)5
Close the front cover and then the side cover by pressing the round projections near the side cover open button.

Caution
When closing the covers, be sure to close the front cover securely and then close the side cover. If the covers are closed in the wrong order, the covers may be damaged.

natural_image
Illustration of a printer's internal structure showing paper feeding into a paper airplane (no text or symbols present)
natural_image
Diagram of a computer monitor with an inset showing the internal components (no text or symbols present)If you use the unit in a country other than the country where the unit was purchased, you will need to make sure that your local power supply is compatible with your model. If you plug the unit into an incompatible power supply, irreparable damage to the unit will result.
1
Ensure that the power switch of the unit is in the OFF position. Insert the attached power cord into the power cord socket at the rear of the unit.

natural_image
Diagram showing a plug inserted into a device with an inset close-up of a component (no text or symbols visible)2
Plug the other end of the power cord into the nearest outlet.

Only insert the power cord into a properly grounded wall socket. Do not use extension cords or power strips.
Power on
Ensure that the power switch of the unit is in the OFF position. Plug the other end of the power cord into the nearest outlet. Turn the power switch on the left side of the unit to the "ON" position. The start (indicator will light up and other indicators which show the initial settings of the operation panel will also light up to indicate the ready condition. For the initial settings, see the "Initial settings of operation panel" described on the next page.

- The unit will enter a power save mode once the set time has elapsed without any unit operation. The settings of the power save modes can be modified. See "USER PROGRAMS" (p.56).
- The unit will return to the initial settings a preset amount of time after the end of copy, or scanner job. The preset amount of time (auto clear time) can be changed. See "USER PROGRAMS" (p.56).

natural_image
Technical line drawing of a device rear panel with a magnified inset showing internal components (no text or symbols)About the scan head
The scan head lamp remains on constantly when the unit is in the ready condition (when the Start indicator is illuminated).
The unit adjusts the scan head lamp periodically to maintain copying quality. At this time, the scan head moves automatically. This is normal and does not indicate unit trouble.
Initial settings of operation panel
When the unit power is on, the operation panel will revert to the initial settings when the time set with the "Auto clear time" setting (p.55) elapses after a copy or scanner job is finished, or when the clear (key is pressed twice.
The initial settings of the operation panel are shown below.
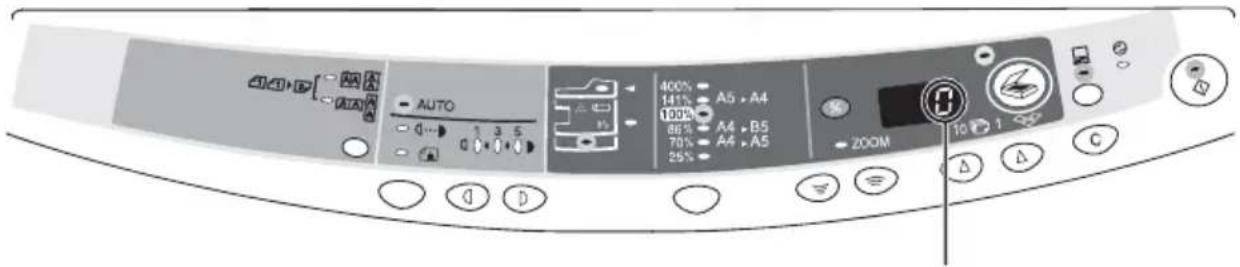
"0" is displayed in the display
When copying is begun in this state, the settings in the following table are used.
| Copy quantity 1 copy | |
| Exposure adjustment Auto | |
| Zoom 100% |
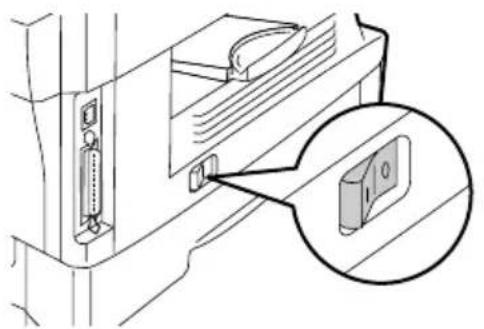
Power off methods
If not used for a certain period of time, the unit will automatically enter auto power shut-off mode (p.55) in order to minimize power consumption. In cases where the machine will not be used for a long time, turn off the power switch and remove the power cord from the outlet.
natural_image
Technical diagram of a device with a magnified inset showing a component detail (no text or symbols)
Follow the steps below to load paper into the tray.
PAPER
For best results, use only paper recommended by OLIVETTI.
| Type of paper feeding | Type of media Size | Weight | ||
| Paper tray Standard paper A4 | B5A5LetterLegalInvoice | 56 to 80g/m2 | ||
| Single bypass | Standard paper and thick paper | A4B5A5B6A6LetterLegalInvoice | 52 to 128g/m2** | |
| Special media | Transparency film | A4Letter | ||
| Envelope* International C5Commercial 10Monarch | ||||
* Do not use non-standard envelopes, and envelopes that have metal clasps, plastic snappers, string closures, windows, linings, self-adhesive, patches or synthetic materials. Do not use envelopes that are filled with air or envelopes that have labels or stamps attached. These will cause physical damage to the unit.
**For paper weighing from 104 to 128g / m^2 , A4 is the maximum size that can be fed through the single bypass.
- Special papers such as transparency film, labels and envelope must be fed one sheet at a time through the single bypass.
LOADING THE PAPER TRAY
1 Raise the handle of the paper tray and pull the paper tray out until it stops.

natural_image
Illustration of a hand pressing down on a mechanical component (no text or symbols visible)2 Remove the pressure plate lock. Rotate the pressure plate lock in the direction of the arrow to remove it while pressing down the pressure plate of the paper tray.

3 Store the pressure plate lock which has been removed in step 2. To store the pressure plate lock, rotate the lock to fix it on the relevant location.
Pressure plate lock

natural_image
Mechanical assembly diagram showing a rotating component with a tool, no text or symbols present4 Adjust the paper guides on the paper tray to the copy paper width and length. Squeeze the lever of paper guide and slide the guide to match with the width of the paper. Move paper guide to the appropriate slot as marked on the tray.
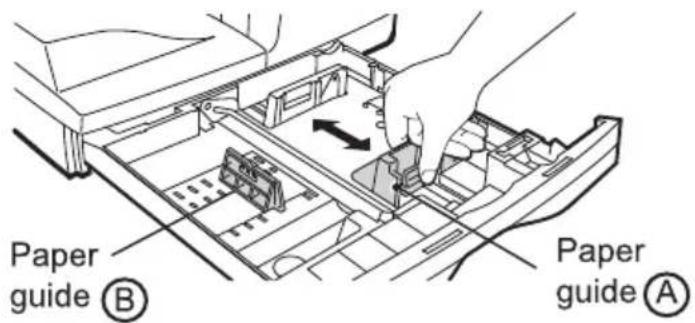
5
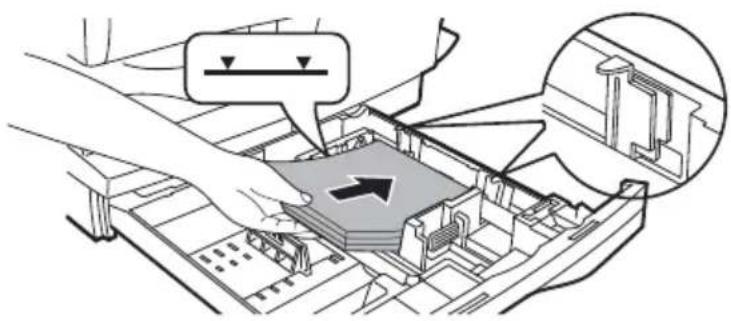
Fan the paper and insert it into the tray. Make sure the edges go under the corner hooks.

Note
Do not load paper above the maximum height line ( 12 exceeding the line will cause a paper misfeed.
6
Gently push the paper tray back into the unit.

Note
- After loading paper, to cancel the blinking without restarting copying, press the clear ( )key. The in the display will go out and the start ( )indicator will light up.
- Be sure that paper is free of rips, dust, wrinkles, and curled or bent edges.
• Make sure all the paper in the stack is the same size and type. - When loading paper, ensure there is no space between the paper and the guide, and check if the guide is not set too narrow causing the paper to bend. Loading paper in these ways will result in document skew or a paper jam.
- When not using the unit for an extended period, remove all paper from the paper tray and store it in a dry place. If paper is left in the unit for an extended period, the paper will absorb moisture from the air, resulting in paper jams.
- When adding new paper to the paper tray, remove the old paper already contained in the tray. Placing new paper on top of the paper already contained in the tray may result in feeding two sheets at one time.
BYPASS FEED (including special paper)
The single bypass can be used to feed standard paper, transparency film, labels, envelopes, and other special purpose paper. Paper measuring from A6 to A4/Legal and in the weight range of 52 to 128g / m^2 can be used in this tray. (For paper weighing from 104 to 128g / m^2 , A4 is the maximum size.)

- The single bypass can hold one sheet of paper.
- The original image must be smaller than the paper or media for copying. If the original image is bigger than the paper or media, this may cause smudges on the edges of the copies.
The single bypass

- If you insert a sheet of paper into the single bypass when multiple copies have been set with the copy quantity setting (p.49), the copy quantity setting will change to "0" and only one copy will be made.
- When copying onto transparency film, remove each copy promptly. Do not let copies stack up.
1 Select copy and print settings before you begin the copy job.
For information on the copy settings, see "MAKING COPIES" (p.46). For information on the print settings, see the online manual or the Help file for the printer driver, and then begin printing from the single bypass.
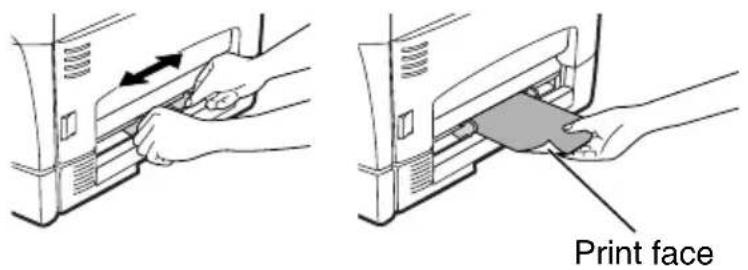
2 Set the paper guides to the paper width. Insert a single sheet of copy or print paper (print face down) into the feed slot of the single bypass.
Using copy mode
When you insert the paper, the machine will automatically draw in the paper and begin copying.
Using printer mode
After 4 years in the display, wait until the Paper feed location indicator for the single bypass illuminates and insert the paper. The machine will automatically draw in the paper and begin printing.
Note for loading envelopes
- Envelopes must be fed narrow side into the feed slot one sheet at a time.
- Do not use non-standard envelopes, and envelopes that have metal clasps, plastic snappers, string closures, windows, linings, self-adhesive, patches or synthetic materials. Do not use envelopes that are filled with air or envelopes that have labels or stamps attached.
- Envelopes of which the surface is not flat because of embossing may cause the prints to become smudged.
- Under high humidity and temperature conditions the glue flaps on some envelopes may become sticky and be sealed closed when printed.
- Use only envelopes which are flat and crisply folded. Curled or poorly formed envelopes may be poorly printed or may cause misfeeds.
- Be sure to select either Com10, DL, C5 or Monarch on the paper size setting of the printer driver. (For detailed information on printer driver, refer to the online manual.)
- It is recommended that you perform a test print before performing the actual print job.
4
INSTALLING THE SOFTWARE
This chapter provides you with information on how to install required software to use this unit with your computer. Information on how to use the online manual is also provided. The following term is used in this chapter.
CD-ROM
Means the supplied CD-ROM with the OLIVETTI Personal MFP Series software.
SOFTWARE FOR THE OLIVETTI PERSONAL MFP SERIES
The supplied CD-ROM includes software for this unit.
MFP driver
Scanner driver
Permits you to operate scanning function of this unit with TWAIN-compliant and WIA-compliant application.
Printer driver
Enables you to use the printer function of this unit with your computer.
Print Status Window
The print state and information on current printing are displayed on the status monitor window.
Desktop Document Manager
An integrated software environment that makes it easy to manage document and image files and launch applications.
Button Manager
Button Manager enabling the SCANNER ( ) key located on the unit.

The scanning feature is only available with Windows 98/Me/2000/XP using a USB connection. For users running Windows 95/NT 4.0 or using a parallel connection, only printing is available.
HARDWARE AND SOFTWARE REQUIREMENTS
Check the following hardware and software requirements in order to install the software.
| Computer type IBM PC/AT or compatible computer equipped with a USB1.1*1 or bi-directional parallel interface (IEEE 1284) | |
| Operating system*2 | Windows 95, Windows 98, Windows Me, Windows NT Workstation 4.0 (ServicePack 5 or later)*3, Windows 2000 Professional*3, Windows XP Professional*3, Windows XP Home Edition® |
| Display 800 x 600dots (SVGA) display with 256 colors (or better) | |
| Hard disk free space | 150MB or more |
| Other requirement for hardware | An environment on which any of the operating systems listed above can fully operate |
*1 Compatible with Windows 98, Windows Me, Windows 2000 Professional, Windows XP Professional or Windows XP Home Edition preinstalled model with USB interface equipped as standard.
*2 Printing is unavailable in MS-DOS mode.
*3 The administrator's authorization is required to install this software using this installer.
BEFORE INSTALLATION
The following table shows the drivers and software that can be installed for each version of Windows and interface connection method.
| MFP Driver | Button Manager | Desktop Document Manager | ||
| Printer driver/ Print Status Window | Scanner driver | |||
| Users of Windows 98/Me/2000/XP who will use the USB interface connection | Available*1 | Available Available | Available Available | |
| Users of Windows 98/Me/2000/XP who will use the parallel interface connection | Not Available | Not Available | Available*2 | |
| Windows 95/NT 4.0 users | ||||
*1 When the unit is connected through the parallel port, the Print Status Window can only be used when the parallel port is set to ECP mode. To set the parallel port mode, refer to your computer manual or ask the manufacturer of your computer.
*2 Desktop Document Manager can be installed when using a parallel interface connection, however, the unit's scanner function cannot be used.

Caution
Is there another GDI printer driver or a Windows Printing System printer driver already installed? If installed, change the printer port setting. For the change of the printer port setting, see "USING OTHER INSTALLED DRIVERS" (p.44).
Flow of installation
Refer to the following table and then begin installation
| Operating system | Interface | Reference pages for how to install |
| Windows XP | USB/Parallel | Installing onto Windows XP (USB/parallel interface) (p.21) |
| Windows 98 | USB | Installing onto Windows 98/Me/2000 (USB interface) (p.25) |
| Parallel | Installing onto Windows 95/98/Me/NT4.0/2000 (Parallel interface) (p.28) | |
| Windows Me | USB | Installing onto Windows 98/Me/2000 (USB interface) (p.25) |
| Parallel | Installing onto Windows 95/98/Me/NT4.0/2000 (Parallel interface) (p.28) | |
| Windows 2000 | USB | Installing onto Windows 98/Me/2000 (USB interface) (p.25) |
| Parallel | Installing onto Windows 95/98/Me/NT4.0/2000 (Parallel interface) (p.28) | |
| Windows 95/NT 4.0 | Parallel | Installing onto Windows 95/98/Me/NT4.0/2000 (Parallel interface) (p.28) |
INSTALLING THE SOFTWARE
The following term is used in this section.
MFP
Means the unit as a printer and scanner.

- For this description, it is assumed that the mouse is configured for right hand operation.
• To print or scan, the MFP must be in the online state. - The scanner feature only works when using a USB interface cable.
- If any error message appears, solve the problem following the instructions on the screen. After your problem is solved, the installing procedure will be continued. Depending on your problem, you may have to exit the installer. In this case, click the "Cancel" button to exit the installer. After solving your problem, reinstall the software from the beginning.
Installing onto Windows XP (USB/parallel interface)
Before starting the installation, make sure the USB or parallel interface cable is not connected to the MFP.
1 Insert the supplied CD-ROM into your CD-ROM drive.
2 Click the "start" button, click "My Computer" (), and then double-click the CD-ROM () icon.

When any of "Found New Hardware Wizard" messages appear during the software installation, be sure to click the "Cancel" button.
3 Double-click the "Setup" ( ) icon.

If the language selection screen appears after you double click the "Setup" icon, select the language you wish to use and click the "Next" button. (Normally, the correct language is selected automatically.)
4 Select the software packages to be installed, and then click the "Next" button.
The software packages with checkmark (√) on the list on the screen will be installed.
Click the "Display README" button to show the information on the selected package.


- If you are using the parallel interface connection, do not select the Button Manager checkbox because this feature is not supported with the parallel interface.
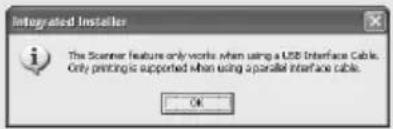
- If the following screen appears, click the "OK" button. Review the contents in "BEFORE INSTALLATION" (p.20), and then select only appropriate the software packages to be installed.
5 Review the software packages to be installed on the screen, and then click the "Start" button.
The software packages to be installed will be displayed on the screen. If inappropriate packages are displayed, click the "Back" button to select appropriate packages again.
![Selection of a package is finished. If you click the [Start] button, installation will start HEP Driver Button Manager Desktop Document Manager + Back Next Cancel](/content/2026/05/1060792/images/a37a0c4d780a795c8c2b421d4f6062731974fb905494e08b4fb7e335b54fbca9.jpg)
6 Copying files for MFP driver installation (This step will start if it was selected in step 4).
1 After confirming the message in the "Welcome" window, click the "Next" button.
2 A dialog box appears asking you to verify that the USB or parallel interface cable is not connected to the MFP. Make sure that the interface cable is not connected and click the "Next" button.
3 Click the "Next" button in the dialog box to install the MFP driver or Cancel to quit the installation.
The setup program will start to copy the files. If the following screen appears while the files are being copied (the message may appear more than once), click "Continue Anyway".

4 When the "The MFP driver installation is complete." dialog box appears, click the "OK" button.
The Button Manager installer will start.
7 Begin installation of the Button Manager (This step will start if it was selected in step 4).
1 After confirming the message in the "Welcome" window, click the "Next" button.
2 Read the message in the "Please read the following information." window, and then click the "Next" button.
3 When a message appears that lets you specify the location for the software to be installed, click the "Next" button.
4 If the program displays "Do you want the Button Manager added to Windows Startup?", check "Yes" and click the "OK" button.
The setup program will start to copy the files.
5 Click the "Finish" button when the message informs you that setup is successful.
The Desktop Document Manager installer will start.
8 Begin installation of the Desktop Document Manager (This step will start if it was selected in step 4).
1 After confirming the message in the "Welcome to Desktop Document Manager installation" window, click the "Next" button.
2 Read the message in the "Information" window, and then click the "Next" button.
3 When the "Choose Destination Location" window appears, click the "Next" button.
4 When the "Select Program Folder" window appears, click the "Next" button.
5 Click the "Finish" button when the message informs you that Setup is complete.
9 Click the "Close" button when the message informs you that "Setup has finished". When the "Now connect the MFP interface cable to the PC" dialog box appears, click the "OK" button.

After the installation, a message to restart your computer may be displayed. In this case, click the "Yes" button to restart your computer.

10 Make sure that the power of the MFP is turned on, and then connect the USB interface cable or parallel interface cable. (p.45)
Windows will detect the MFP and the Plug and Play screen will appear. If you are using Windows XP with the parallel interface, go to step 12.
11 Begin installation of the scanner driver.
1 "Olivetti d-Copia 150D" will appear in the "Found New Hardware Wizard" dialog box. Select "Install the software automatically (Recommended)" and click the "Next" button.
2 The "Install hardware" dialog box will appear. Click the "Continue Anyway" button.
3 When installation of the driver is completed, click the "Finish" button to finish the scanner driver installation.
12 Begin installation of the printer driver.
1 "Olivetti d-Copia 150D" will appear in the "Found New Hardware Wizard" dialog box. Select "Install the software automatically (Recommended)" and click the "Next" button.
2 The "Hardware Installation" dialog box will appear. Click the "Continue Anyway" button.
3 When installation of the driver is completed, click the "Finish" button to finish the printer driver installation.
You have completed the installation of all the software.

The "d-Copia 150D" driver is common to all models of the Olivetti Personal MFP Series.
Installing onto Windows 98/Me/2000 (USB interface)
Before starting the installation, make sure the USB interface cable is not connected to the MFP.
1 Insert the supplied CD-ROM into your CD-ROM drive.
2 Double-click "My Computer" ( ), and then double-click the CD-ROM ( ) icon.

When any of "Hardware Found", or "Found New Hardware Wizard" messages appear during the software installation, be sure to click the "Cancel" button.
3 Double-click the "Setup" ( ) icon.

If the language selection screen appears after you double click the "Setup" icon, select the language you wish to use and click the "Next" button. (Normally, the correct language is selected automatically.)
4 Select the software packages to be installed, and then click the "Next" button.
The software packages with checkmark (☑) on the list on the screen will be installed. Click the "Display README" button to show the information on the selected package.


If the following screen appears, click the "OK" button. Review the contents in "BEFORE INSTALLATION" (p.20), and then select the appropriate driver software packages to be installed.

5 Review the software packages to be installed on the screen, and then click the "Start" button.
The software packages to be installed will be displayed on the screen. If inappropriate packages are displayed, click the "Back" button to select appropriate packages again.
6
Copying files for MFP driver installation.
1 After confirming the message in the "Welcome" window, click the "Next" button.
2 A dialog box appears asking you to verify that the interface cable is not connected to the MFP. Make sure that the interface cable is not connected and click the "Next" button.
3 Click the "Next" button in the dialog box showing the files to be copied for installation of the MFP driver.
The setup program will start to copy the files. In Windows 2000, if the following screen appears while the files are being copied (the message may appear more than once), click "Yes" in Windows 2000.

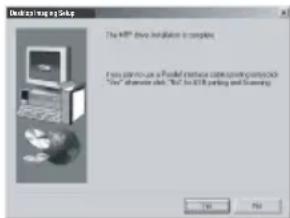
4 The following screen appears when all of the files for the USB interface connection have been copied. If you are not using a parallel interface cable for connection to the MFP, please click the "No" button.
5 When the "The MFP driver installation is complete." dialog box appears, click the "OK" button.
The Button Manager installer will start.
7
Begin installation of the Button Manager (This step will start if it was selected in step 4).
1 After confirming the message in the "Welcome" window, click the "Next" button.
2 Read the message in the "Please read the following information." window, and then click the "Next" button.
3 When a message appears that lets you specify the location for the software to be installed, click the "Next" button.
4 If the program displays "Do you want the Button Manager added to Windows Startup?", check "Yes" and click the "OK" button.
The setup program will start to copy the files.
5 Click the "Finish" button when the message to inform you of the completion of the installation appears.
The Desktop Document Manager installer will start.
8 Begin installation of the Desktop Document Manager (This step will start if it was selected in step 4).
1 After confirming the message in the "Welcome to Desktop Document Manager installation" window, click the "Next" button.
2 Read the message in the "Information" window, and then click the "Next" button.
3 When the "Choose Destination Location" window appears, click the "Next" button.
4 When the "Select Program Folder" window appears, click the "Next" button.
The setup program will start to copy the files. If the dialog box asking "This program is about to install Desktop Imaging, which does not support LZW compression." appears, answer the question to continue the Desktop Document Manager installation.
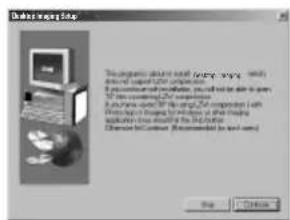
5 Click the "Finish" button when the message to inform you of the completion of the installation appears.
9 Click the "Close" button when the message to inform you of the completion of the installation appears. When the "Now connect the MFP interface cable to the PC." dialog box or "After Windows system restarts..." dialog box appears, click the "OK" button.

After the installation, a message to restart your computer may be displayed. In this case, click the "Yes" button to restart your computer.
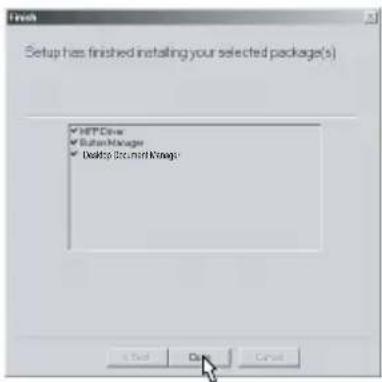
10 Make sure that the power of the MFP is turned on, and then connect the USB interface cable. (p.45)
Windows will detect the MFP and the Plug and Play screen will appear.
11 Follow the instructions in the Plug and Play screen that appears in your version of Windows to begin the installation.
You have completed the installation of the software.
Installing onto Windows 95/98/Me/NT4.0/2000 (Parallel interface)
Before starting the installation, make sure the USB or parallel interface cable is not connected to the MFP.
1 Insert the supplied CD-ROM into your CD-ROM drive.
2 Double-click "My Computer" ( ), and then double-click the CD-ROM ( ) icon.

When any of "Hardware Found", or "Found New Hardware Wizard" messages appear during the software installation, be sure to click the "Cancel" button.
3 Double-click the "Setup" ( ) icon.

If the language selection screen appears after you double click the "Setup" icon, select the language you wish to use and click the "Next" button. (Normally, the correct language is selected automatically.)
4 Select the software packages to be installed, and then click the "Next" button.
The software packages with checkmark (☑) on the list on the screen will be installed. Click the "Display README" button to show the information on the selected package.

In Windows 95/NT 4.0, "Button Manager" does not appear. In Windows 98/Me/2000, do not select the "Button Manager" checkbox. because this is not supported when using the parallel interface.

5 The next screen appears. Make sure that the parallel interface cable is not connected, and click "OK".
Windows 95/NT 4.0 Windows 98/Me/2000

6 Check the contents of the package on the screen, and then click the "Start" button.
The software packages to be installed will be displayed on the screen. If inappropriate packages are displayed, click the "Back" button to select only appropriate software packages.
7 Copying files for MFP driver installation and parallel interface setup (This step will start if it was selected in step 4).
1 After confirming the message in the "Welcome" window, click the "Next" button.
2 A dialog box appears asking you to verify that the USB or parallel interface cable is not connected to the MFP. Make sure that the interface cable is not connected and click the "Next" button.
3 Click the "Next" button in the dialog box to install the MFP driver or Cancel to quit the installation.
The setup program will start to copy the files. In Windows 2000, if the following screen appears while the files are being copied (the message may appear more than once), click "Yes" in Windows 2000.
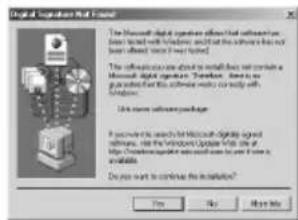
4 The following screen appears. Click the "Yes" button, and then the Model screen will appear. Select the model number that is the same as the model name of your MFP and click the "Next" button.
Be sure to select the displayed model number that is the same as the MFP's model name. If they are not the same, the driver will not be installed correctly.
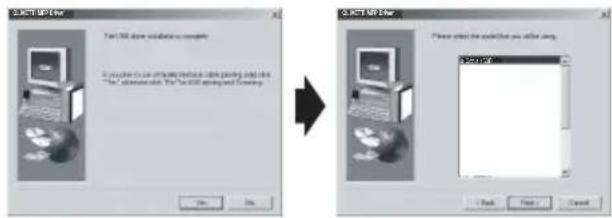
5 Establish the printer settings and click the "Next" button.
Select "LPT1" for the port to be used. If "LPT1" does not appear, it is likely that another printer or peripheral device is using "LPT1". Check your other printers and peripheral devices, and change the port setting as needed so no device is using "LPT1". If you wish the MFP to be your default printer, select "Yes". If not, select "No".
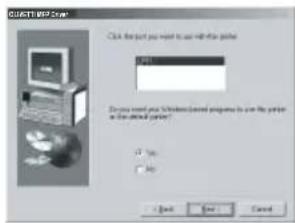
6 When the "Setup has completed gathering all necessary installation information" dialog box appears, click the "Yes" button.
The parallel interface driver is installed.
7 When the "The MFP driver installation is complete." dialog box appears, click the "OK" button.
The Desktop Document Manager installer will start.
8
Begin installation of the Desktop Document Manager (This step will start if it was selected in step 4).
1 After confirming the message in the "Welcome to Desktop Document Manager installation" window, click the "Next" button.
2 Read the message in the "Information" window, and then click the "Next" button.
3 When the "Choose Destination Location" window appears, click the "Next" button.
4 When the "Select Program Folder" window appears, click the "Next" button.
The setup program will start to copy the files. If the dialog box asking "This program is about to install Desktop Imaging, which does not support LZW compression." appears, answer the question to continue the Desktop Document Manager installation.

5 Click the "Finish" button when the message to inform you of the completion of the installation appears.
9
Click the "Close" button when the message to inform you of the completion of the installation appears. When the "Now connect the MFP interface cable to the PC." dialog box or "After Windows system restarts..." dialog box appears, click the "OK" button.

After the installation, a message to restart your computer may be displayed. In this case, click the "Yes" button to restart your computer.

10
Make sure that the power of the MFP is turned on, and then connect the parallel interface cable (p.45).
You have completed the installation of all the software.
The ON LINE indicator and the Start ( ) indicator indicate the state of the printer or scanner.
Start indicator
On: Indicates the unit is ready for copying or scanning is being performed.
Blinking: The indicator blinks in the following situation:
- When a print jobs is interrupted.
- When reseving a copy job.
- When toner is being replenished during a copy or print job.

Off: The indicator is off in the following situations:
• During copying or scanning.
- The unit is in the auto power shut-off mode.
- When a misfeed or error has occurred.
ON LINE indicator
The ON LINE key is pressed and on line and off line are changed.
On: Indicates the unit is ready for printing or scanning is being performed. (On line)
Blinking: Printing or data is being received from a computer.
Off: Copying is being performed. (Off line)
Power save indicator
On: Indicates the unit is in a power save mode.
Blinking: Indicates that the unit is initialising (when the side cover is opened and closed or the power turned off and on).
SCANNER indicator
On: The SCANNER ( ) key has been pressed and the unit is in scanner mode.
Blinking: A scan job is being executed from the computer, or scan data is stored in the unit's memory.
Off: The unit is in the copy mode.
USING THE PRINTER MODE

For problems with the printer function, see the On Line Manual or the Help file for the driver.
Opening the printer driver from the start menu
Open the printer driver setup screen by either of the methods shown below.
1 Click the "start" button.
2 Click "Control Panel", select "Printers and Other Hardware", and then click " Printers and Faxes.
On Windows 95/98/Me/NT4.0/2000, select "Settings" and click "Printers".
3 Click the "Olivetti d-Copia 150D" printer driver icon in the "Printers" window and from the "File" menu, select "Properties.

On windows NT 4.0, select "Document Defaults" to open the printer driver setup screen.
4 Click the "Printing Preferences" button in the "General" tab.
On Windows 95/98/Me, click the "Setup" tab. The printer driver setup screen will appear.

Refer to the Windows manual or help file for more information on the "General" tab, "Details" tab, "Color Management" tab and "Sharing" tab.
How to print
1 Make sure that the paper of the desired size and type is loaded in the tray.
The procedure for loading paper is the same as for loading copier papier. See "LOADING PAPER" (p.14).
2 Open the document you intend to print, and select "Print" from the application's "File" menu.
3 Make sure that "Olivetti d-Copia 150D" is selected as the current printer. If you intend to change any print setting, click the "Preferences" button to open the setting dialog.
On Windows 95/98/Me/NT 4.0, click the "Properties" button. On Windows 2000, the "Properties" button does not appear. Set your preferences by switching the tab in the "Print" dialog box.
4 Specify the print settings including the number of copies, media type, and print quality, and then click the "Print" button to start printing.
On Windows 95/98/Me/NT 4.0, click the "OK" button to start printing. For details on print settings, see the online manual or the help file for the printer driver.

- If copying is being performed when printing is started, copying will continue. After copying is complete, printing will be executed when the clear ( ) key is pressed twice, the ON LINE key is pressed to switch the unit to the online state or approximately 60 seconds (auto clear time)* elapse.
* The auto clear time varies with a user program setting. See "USER PROGRAMS" (p.56). - Preheat mode and auto power shut-off mode will be canceled when printing is started.
- If the paper size specified from the software application is larger than the paper size in the printer, part of the image that is not transferred to the paper may remain on the surface of the drum. In this case, the backside of the paper may become dirty. If this occurs, change to the correct size paper and print two or three pages to clean the image.
- If you start a print job while a scan job or copy job is in progress, the print data will be stored in the unit's memory. When the scan job or copy job is completed, printing will begin.
USING THE SCANNER MODE
The scanner driver for this unit includes an STI (Still image) driver and WIA (Windows Image Acquisition) driver. You can install software that supports the STI driver and WIA driver to enable scanning using the operation panel of the unit.

For problems with the scanner function, see the online manual or the help file for the driver.
Using the Button Manager
Setting up the Button Manager
The Button Manager accessory software supports the STI driver and WIA driver. Setup that is required in Windows to use the Button Manager is explained in the following.
Windows XP
1 Click the "start" button, select "Control Panel" and click "Printers and Other Hardware", and then click "Scanners and Cameras" in the start menu. Right click the "Olivetti d-Copia 150D" icon and click "Properties" in the menu that appears.
2 In the "Properties" screen, click the "Events" tab.

3 Click the "Select an event" button and select "ScanMenu SC1" from the pull-down menu. Select "Button Manager (OLIVETTI Personal MFP Series)" in "Start this program" and click "Apply".

4 Repeat step 3 to set "ScanMenu SC2" through "ScanMenu SC6".
Click the "Select an Event" button and select "ScanMenuSC2" from the pull-down menu. Select "Button Manager (Olivetti Personal MFP Series)" in "Start this program" and click "Apply". Do the same for each ScanMenu through "ScanMenuSC6". When the settings have been completed, click the "Close" button to close the screen. When the settings have been completed in Windows, start the Button Manager. Adjust detailed settings and then scan an image from the unit. For the procedures for starting Button Manager and adjusting settings, see "Scan Parameter Settings Dialog Box" (p.36).
Windows 98/Me/2000
To scan directly into an application using the Button Manager on Windows 98, Windows Me and Windows 2000. Set the Event Manager properties to send only to Button Manager as shown below.
1 Click the "Start" button, select "Control Panel" from "Settings", and open "Scanners and Cameras" in start menu.

In Windows Me, it occasionally happens that the "Scanners and Cameras" icon does not appear immediately after installation of the MFP driver is completed. If the icon does not appear, click "View all Control Panel options" in the Control Panel and display the "Scanner and Cameras" icon.
2 Select "Olivetti d-Copia 150D" and click the "Properties" button.
In Windows Me, right click "Olivetti d-Copia 150D" and click the "Properties" in the menu that appears.
3 In the "Properties" screen, click the "Events" tab.

4 Click the "Scanner events" button and select "ScanMenu SC1" from the pull-down menu. Select "Button Manager (Olivetti Personal MFP Series)" in "Send to this application" and click "Apply".

If other application are shown, deselect the checkboxes for the other applications and leave only the Button Manager checkbox selected.
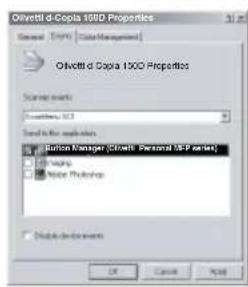
5 Repeat step 4 to set "ScanMenu SC2" through "ScanMenu SC6".
Click the "Scanner events" and select "ScanMenu SC2" from the pull-down menu. Select "Button Manager (Olivetti Personal MFP Series)" in "Start this program" and click "Apply". Do the same for each ScanMenu through "ScanMenu SC6".
When the settings have been completed, click the "OK" button to close the screen. When the settings have been completed in Windows, start the Button Manager. Adjust detailed settings and then scan an image from the unit. For the procedures for starting Button Manager and adjusting settings, see "Scan Parameter Settings Dialog Box" (p.36).
Scan Parameter Settings Dialog Box
After you have completed the Button Manager settings in Windows, configure the scan settings in Button Manager. To configure the scan settings in Button Manager, right click the ( )icon in the Taskbar and select "Setting" from the menu that appears.
For details on configuring the scan settings in Button Manager, see the online manual or the help file.
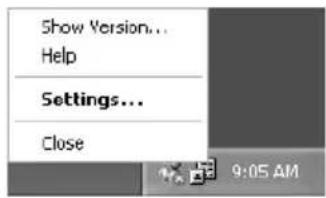
This is the corresponding setting in the Button Manager to automatically send multiple images from the SPF in full colour at 75 dpi to Desktop Document Manager using the operation panel "SC1" scanner key selection.


This dialog shows the SC1 event set to go directly to Button Manager. With the Button Manager set to send the image to Desktop Document Manager (factory default setting) Desktop Document Manager will open after acquiring the image automatically.
Flow of the Button Manager setting
The Button Manager can directly handle a d-Copia 150D device event and start your selected application according to the scan setting made on the d-Copia 150D front panel (SC1, SC2, SC3, SC4, SC5, SC6).
This will scan directly into your application from the device.
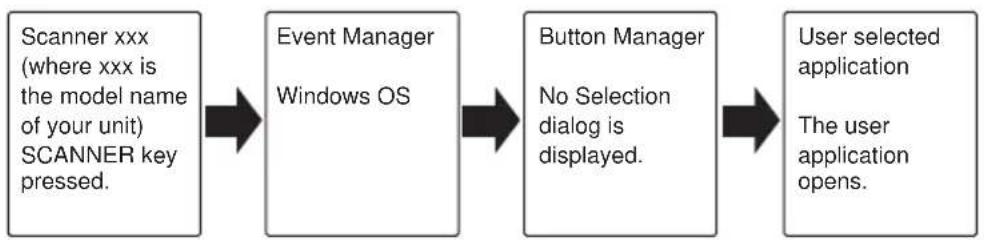
flowchart
graph LR
    A["Scanner xxx (where xxx is the model name of your unit) SCANNER key pressed."] --> B["Event Manager Windows OS"]
    B --> C["Button Manager No Selection dialog is displayed."]
    C --> D["User selected application The user application opens."]
The settings for the Windows Event Manager for the Olivetti d-Copia 150D device allow the user to take advantage of the Olivetti Button Manager to take control of events from Windows and send scanned images to any application that can be selected in Button Manager.
This can be done with the Windows OS showing the Event Manager selection dialog or directly into a selected application if the Button Manager is the only allowed handler for device events from the Olivetti d-Copia 150D.
This is done by changing the Windows device settings for the d-Copia 150D in the Scanner and Camera device settings in the Control Panel.

This is the Control Panel Properties dialog for "Scanners and Cameras".

All About The Windows Event Manager and scanner events in Windows 98, Windows Me, Windows 2000 and Windows XP.
Windows Platforms provide a mechanism for software to handle external events for a scanner device like the Olivetti d-Copia 150D series products. This mechanism is controlled by the device manager on a device basis. Applications that can handle events from a scanner/camera device register with the Windows Event Manager and shown as available in the registered applications. The path an event takes to get to the user's selected application depends upon the event settings for the device.

flowchart
graph LR
    A["Scanner xxx (where xxx is the model name of your unit) SCANNER key pressed."] --> B["Event Manager Windows OS"]
    B --> C["Event Manager selection dialog Displayed on screen"]
    C --> D["User selects an application. The user application opens."]
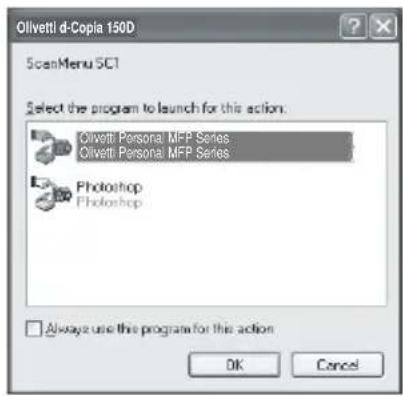
This is the Windows Event Manager Selection Dialog. Shown are 2 applications registered to handle the scanner event from the d-Copia 150D.
Using the SCANNER key to begin scanning

- Scanning is not possible during a copy job.
- If the SCANNER (key is pressed during a print job, the scan job will be stored.
- When scanning an original that has been placed in the SPF, only one original can be placed unless you are using Desktop Document Manager.
1 Press the SCANNER ( ) key.
The unit enters scan mode.

2 Place the original you wish to scan on the original table/SPF.
For the procedure for placing the original, see "ORIGINAL PLACEMENT" (p.47).
3 Press the right copy quantity key to display the number of the application that you wish to use for scanning.
The application numbers are initially as follows.
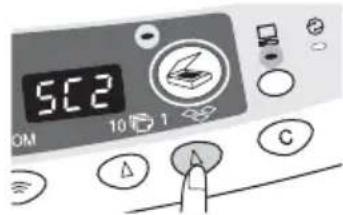
| Application number | Application launched |
| SC1 | Desktop Document Manager (Full colour) (if installed) |
| SC2 | Desktop Document Manager (Monochrome) (if installed) |
| SC3 | E-mail (your standard e-mail program in the Windows OS you are using) |
| SC4 Fax (if a fax program is installed) | |
| SC5 OCR (if an OCR program is installed) | |
| SC6 Microsoft Word (if installed) | |
To check the settings, see "Scan Parameter Setting Dialog Box" (p.36) and then open the settings window of the Button Manager.
4 Press the start () key.
Scanning will start and the scanned data will be transferred to the application.

- If the following screen appears, select Button Manager and click "OK". Button Manager starts and the application associated with Button Manager starts. If you want only Button Manager to start in this case, set up Button Manager for use in Windows as explained in "Setting up the Button Manager" (p.34).
- If step 4 is performed with the "Show TWAIN setting screen when scanning" checkbox selected in the Scan Parameter Setting Dialog Box (p.36), the TWAIN settings screen (p.41) will automatically appear. Check the settings, and then press the start ( 🔊 ) key again or click the "Scan" button in the TWAIN setting screen to start scanning. The scanned data will be transferred to the application.

Opening the scanner driver and scanning from your computer
Follow the steps below to open the scanner driver setup screen. As an example, this instruction is given using Desktop Document Manager as an image capture application.

- Scanning is not possible during a copy and print job.
- The method for starting the scanner driver differs depending on the type of application. Refer to the manual or the help file of your application.
- When using the scanner driver to scan an original that has been placed in the SPF. If you perform a pre-scan (see the online manual or the help file for the scanner driver), the original in the SPF will be output to the exit area after scanning. To scan the original after the pre-scan, place the original in the SPF once again.
Using the OLIVETTI TWAIN
1 Place the original you wish to scan on the original table/SPF.
For the procedure for placing the original, see "ORIGINAL PLACEMENT" (p.47).
2 After starting Desktop Document Manager, click the "File" menu and select "Select Scanner".

3 Select "OLIVETTI Personal MFP Series", and click the "Select" button.


If you use more than one scanning device, select the scanner you want to use through the application. The method for accessing the "Select Scanner" option, depends upon the application. For more information, see the online manual or the help file of your application.
4 Select "Acquire Image" from the "File" menu, or click the "Acquire" button ( ) .
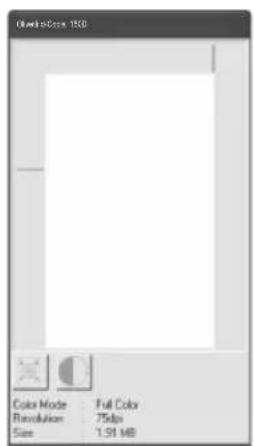

5 Set the configuration for scanning (refer to the online manual and help file), and click the "Scanning" button.
Scan is started.
Scanning with the "Scanner and Camera Wizard" in Windows XP
Windows XP includes as a standard feature an image scanning function. The procedure for scanning with the "Scanner and Camera Wizard" is explained here.

To cancel scanning, click the "Cancel" button in the screen that is displayed.
1 Place the original you wish to scan on the original table/SPF.
1For the procedure for placing the original, see "ORIGINAL PLACEMENT" (p.47).
2 Click the "start" button, select "Control Panel", and click "Printers and Other Hardware", and then click "Scanners and Cameras" in the start menu. Click the "Olivetti d-Copia 150D" icon and click "Get picture" in "Imaging Tasks".

3 The "Scanner and Camera Wizard" appears. Click "Next" and establish the basic settings for scanning.
For information on the settings, see the Windows XP help file. After completing each setting, click "Next".

4 Select a name, format, and folder for the scanned image.
For information on the image name, file format, and folder, see the Windows XP help file.

5 Scanning begins. When scanning ends, select the next task you wish to perform.
For information on each selection, see the Windows XP help file. To quit the "Scanner and Camera Wizard", select "Nothing. I'm finished working with these pictures." and click "Next".

6 Click "Finish" in the screen that appears.
The "Scanner and Camera Wizard" closes and the scanned image is saved.
HOW TO USE THE ONLINE MANUAL
The online manual provides detailed instructions for operating the unit as the printer or scanner and a list of methods for dealing with printing or scanner problems.
To access the online manual, your computer must have Acrobat Reader 5.0 or a later version. If it is not installed, refer to "Installing Acrobat Reader" (below).
1 Turn on your computer.
2 Insert the supplied CD-ROM into your CD-ROM drive.
3 Click the "start" button, click "My Computer" (), and then double-click the CD-ROM () icon.
On Windows 95/98/Me/NT 4.0/2000, double-click "My Computer" ( ), and then double-click the CD-ROM ( ) icon.
4 Double-click the "MANUAL" folder, the "English" folder, and then the "d-Copia 120D, 150D Online EN.pdf" icon.
The following window will appear.

6 Click the button to read the online manual.
To close the online manual, click the (>) button located at the top-right of the window.

- The online manual can be printed out using Acrobat Reader. OLIVETTI recommends printing out the sections which you refer to regularly.
- Refer to "Help" of Acrobat Reader for more details on the operation and function of Acrobat Reader.
Installing Acrobat Reader
1 Turn on your computer.
2 Insert the CD-ROM into the CD-ROM drive.
3 Click the "start" button, click "My Computer" (), and then double-click the CD-ROM () icon.
Windows95/98/Me/NT4.0/2000, double-click "My Computer" ( ) and then double-click the CD-ROM ( ) icon.
4 Double-click the "Acrobat" folder, and then double-click the "ar500enu.exe" icon.
Follow the on-screen instructions to install Acrobat Reader.
USING OTHER INSTALLED DRIVERS
If you use another GDI printer or a Windows Printing System printer, interference between printers may occur and printing may not be performed properly. To use another GDI printer or a Windows Printing System printer, you must change the port setting of the printer driver using the following procedure.

If another printer does not operate properly when the Olivetti Personal MFP Series printer driver is set to "FILE" as described below, uninstall the Olivetti Personal MFP Series printer driver. To uninstall the printer driver, see the online manual.
1 Click the "start" button.
2 Click "Control Panel", click "Printer and Other Hardware" and then click "Printer and Faxes".
On Windows 95/98/Me/NT4.0/2000, select "Settings" and then click "Printers".
3 Right-click the "Olivetti d-Copia 150D" icon in the printer dialog box and then click "Properties".

4 Click the "Ports" tab ("Details" tab - on Windows 95/98/Me) in the "Properties" dialog box, select "FILE": in the "Print to the following port" list box, and click the "OK".
5 Right-click the icon of the printer to be used and click "Properties".
6 Click the "Ports" tab ("Details" tab - on Windows 95/98/Me) in the "Properties" window, select "LPT1" (or the currently used port), and click the "OK" button.

To use the Olivetti Personal MFP Series again, perform the same procedure but select the port to be used (for example, LPT1) in step 4.
CONNECTING THE INTERFACE CABLE
This unit includes both USB and parallel interface connectors.
Interface cables for connecting the unit to your computer are not included with this unit. Please purchase the appropriate cable for your computer.

Caution
- If you intend to use the unit as a scanner, it must be connected to your computer with a USB interface cable. The scanner function cannot be used if the unit is connected with a parallel cable.
- USB is available with a PC/AT compatible computer that was originally equipped with USB and had Windows 98, Windows Me, Windows 2000 Professional, Windows XP Professional or Windows XP Home Edition preinstalled.
- Do not connect the interface cable before installing the MFP driver. The interface cable should be connected during installation of the MFP driver. (p.21)
Connecting the USB interface cable
1 Obtain a shielded USB interface cable.
2 Insert the cable into the USB interface connector located on the rear of the unit.

natural_image
Technical diagram showing a mechanical assembly with a magnified inset highlighting a component (no text or symbols present)3 Insert the other end of the cable into the interface connector of your computer, or the USB hub connected to your computer.
Connecting the parallel interface cable
1 Obtain an IEEE1284 shielded parallel interface cable.
2 Ensure that your computer and unit are turned off.
3 Insert the cable into the parallel interface connector located on the rear of the unit, and fasten with clasps.

natural_image
Diagram of a refrigerator interior showing a door, seat, and battery (no text or labels)4 Insert the other end of the cable into the interface connector of your computer.
5
MAKING COPIES
This chapter describes basic copying functions and some other copying functions. The copier is equipped with a 1-page memory buffer. This memory allows the copier to scan an original once only and make up to 99 copies. This feature allows for improved workflow, reduced operating noise from the copier and reduced wear and tear on the scanning mechanism. This feature provides for a higher reliability.

If the unit does not function properly during use, or if a function cannot be used, see "TROUBLESHOOTING THE UNIT" (p.62).
COPY FLOW
1 Make sure that paper has been loaded in the paper tray (p.15) and check the paper size (p.14).
If paper is not loaded, see page 15. If you are using the single bypass, check the paper size and then proceed to the next step without loading paper.
2 Place the original.
If you are using the original table, see "Using the original table" (p.47). If you are using the SPF, see "Using the SPF (p.48).
When copying onto A4 paper or a large size, pull out the paper output tray extension.

natural_image
Diagram showing a hand operating a mechanical component before and after assembly (no text or symbols)3 Select the copy settings.
If you wish to copy using the initial settings (p.13), proceed to the next step. To set the number of copies, see page 49.
To adjust the resolution and contrast settings, see page 50.
To enlarge or reduce the copy, see page 52.
To print on both sides of the paper, see page 53.
4 Start copying.
Press the start ( ◎ ) key.
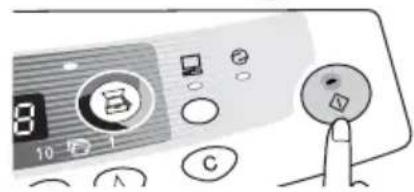
If you are using the single bypass
Do not press the start (☐) key. Insert a sheet of paper into the single bypass.
(Page 17)

Multiple copies are not possible using the single bypass.

Do not insert paper in the single bypass when a copy job from the paper tray is in progress. This will cause a misfeed.

- If you start a print job while a copy job is in progress, the print job will begin when the copy job is completed.
- The scanning function cannot be used while a copy job is in progress.
About interrupt copying
If you press the start ( ) key to begin a copy job while a print job using the paper tray is in progress, the copy job will begin automatically after the print data in the unit's memory is printed (interrupt copying). When this is done, the print data remaining in the computer is not sent to the unit. When the copy job ends, press the clear ( ) key twice, or press the ON LINE key once to change the unit to the online state (p.31), or wait until the set auto clear time (p.56) elapses. The remaining print data will be sent to the unit and printing will resume. Interrupt copying is not possible during a print job using the single bypass.
ORIGINAL PLACEMENT
Using the original table

- The original table can read up to A4 original.
- Image loss 4 mm can occur at the leading and trailing edges of the copies. Also image loss 4.5 mm in total can occur along the other edges of the copies. It can be 6 mm (max.) at the trailing edge of the second copy of two-sided copying.
- When copying a book or an original which has been folded or a crumpled original, press down the original cover lightly. If the original cover is not securely closed, the copies may be striped or blurred.
- The original cover can be simply lifted straight up and reattached to allow copying of a large original (12 cpm model only)
1 Open the original cover/SPF, and place the original.
2 Place an original face down on the original table. Align it with the original scale and the centering (▶mark. Gently close the original cover/SPF.


natural_image
Diagram of a hand opening a device with a grid pattern, showing an open lid and a curved arrow indicating rotation (no text or symbols present)Setting a large original (12 cpm model only)
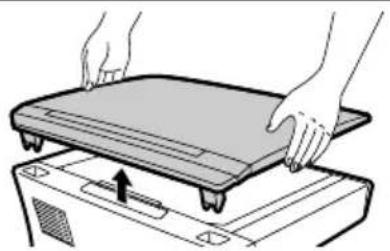
The original cover can be removed to allow copying of bulky objects.
1 Simply lift the original cover straight up.
natural_image
Illustration of hands pressing down on a flat tray with a handle, no text or symbols present2 To reattach the original cover, reverse the above procedure.
Using the SPF
The SPF is designed to hold up to 30 originals measuring from A5 to A4 and weighting from 52 to 90 g/m ^2 .

- Before feeding originals in the original feeder tray, be sure to remove any staples or paper clips from them.
- Before placing curled or wavy originals into the original feeder tray, be sure to flatten them. If not, original misfeeds may result.
- The SPF (☐) indicator on the operation panel will light up. If this indicator does not light up, the originals are not properly set or the SPF is not properly closed.
- Badly damaged originals may misfeed in the SPF. It is recommended that such originals be copied from the original table.
- Special originals such as transparency film should not be fed through the SPF, but should be placed directly on the original table.
- Image loss (max. 4 mm) can occur at the leading and trailing edges of the copies. Also image loss (max. 4.5 mm in total) can occur along the other edges of the copies. It can be 6 mm (max.) at the trailing edge of the second copy of two-sided copying.
• To stop continuous copying using the SPF, press the clear Ⓞ key.
1 Make sure that no original is left on the original table.
2 Adjust the original guides to the size of originals.

natural_image
Illustration of hands using a tool to press or adjust a mechanical component (no text or symbols visible)3 Set the originals face up in the original feeder tray.
Original face up

natural_image
Diagram of a hand pressing down on a mechanical component with an arrow indicating force (no text or symbols present)Stream feeding mode
The stream feeding mode allows easy operation of continuous copying from the SPF. If the stream feeding mode has been enabled using user program No.4, the SPF ( ) indicator will blink approximately 5 seconds after the last original has been fed by the SPF. While this indicator is blinking, any new originals placed in the original feeder tray will be fed and copied automatically. If the stream feeding mode has been disabled, the start ( ) key must be pressed each time the originals are set even immediately after completion of a copy run from the SPF. The default setting of the stream feeding mode is "ON". See "USER PROGRAMS" (p.56).
SET THE COPY QUANTITY
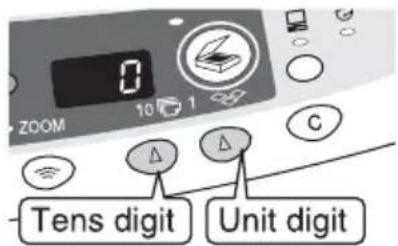
Set the number of copies using the two copy quantity ( , ) keys when copying from the original table or from the SPF if installed.

- Press the clear () key to clear an entry if a mistake is made.
-
A single copy can be made with the initial setting, i.e., when "0" is displayed.
-
Press the right copy quantity key to set the unit digit from 0 to 9. This key will not change the tens digit.
- Press the left copy quantity key to set the tens digit from 1 to 9.
EXPOSURE ADJUSTMENT/PHOTO COPYING
Exposure adjustment
Copy density adjustment is not required for most originals in the automatic exposure mode. To adjust the copy density manually or to copy photographs, the exposure level can be adjusted in two steps manually.

The copy resolution used for AUTO and MANUAL (1) mode can be changed. (p.56)
1 Press the exposure mode selector key to select the MANUAL ( ) mode or PHOTO ( ) mode.

2 Use the light ( ) and dark ( ) keys to adjust the exposure level. If exposure level 2 is selected, the two left-handmost indicators for that level will light up simultaneously. Also, if level 4 is selected, the two right-handmost indicators for that level will light up simultaneously.

Automatic exposure adjustment

This automatic exposure level will remain in effect until you change it again by this procedure.
The automatic exposure level can be adjusted to suit your copying needs. This level is set for copying from the original table and copying from the SPF respectively.
When adjusting the automatic exposure level for copying from the SPF, place an original in the original feeder tray and make sure that the SPF ( indicator lights up. When adjusting the level for copying from the original table, make sure that no original is left in the original feeder tray.
2 Press the exposure mode selector key to select the photo (mode.

3 Press and hold down the exposure mode selector key for approximately 5 seconds. The photo (indicator will go out and the AUTO indicator will begin to blink. One or two exposure indicators corresponding to the automatic exposure level which has been selected will light up.

4 Press the light ( ) or dark ( ) key to lighten or darken the automatic exposure level as desired. If exposure level 2 is selected, the two left-handmost indicators for that level will light up simultaneously. Also, if level 4 is selected, the two right-handmost indicators for that level will light up simultaneously.

5 Press the exposure selector key. The AUTO indicator will stop blinking and light up steadily.
REDUCTION/ENLARGEMENT/ZOOM
Three preset reduction ratios and two enlargement ratios can be selected. The zoom function enables copy ratio selection from 25% to 400% in 1% increments.
1 Set the original and check the paper size.
2 Use the copy ratio selector key and/or zoom ( , keys to select the desired copy ratio.

- To verify a zoom setting without changing the zoom ratio, press and hold down the copy ratio display (%) key. When the key is released, the display will return to the copy quantity display.
- To reset the ratio to 100%, press the copy ratio selector key repeatedly until the 100% indicator lights up.
3 Set the reduction/enlargement ratio.

To decrease or increase the zoom ratio rapidly, press and hold down the ( ) or ( ) key. However the value will stop at the preset reduction or enlargement ratios. To move beyond these ratios, release the key and then press and hold it down again.
To select a preset copy ratio:
Preset reduction and enlargement ratios are: 25%, 70%, 86%, 141%, and 400%.

To select a zoom ratio:
When a zoom ( &= or )key is pressed, the Zoom indicator will light up and the zoom ratio will be displayed in the display.
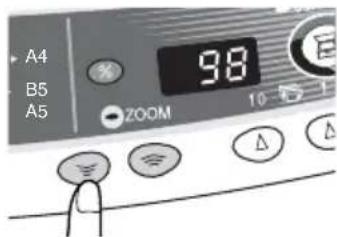
6
SPECIAL FUNCTIONS
This chapter describes the special functions of this unit. Use these functions as needed.
TWO SIDED COPYING
When copying from the SPF, two-sided originals can be copied automatically without having to manually turn them over. Automatic two-sided copying can also be performed without using the SPF. When copying from one-sided originals to two-sided copies, copying orientation can be selected between Turn on Long Edge and Turn on Short Edge.

- When making two-sided copies from the original table, the paper size must be A4, letter. When making two-sided copies from the SPF, A4, B5, A5, letter, legal, and invoice sizes can be used. Non-standard size paper cannot be used.
- When using two-sided invoice size originals from the SPF, be sure to place them in the landscape orientation. Otherwise, an original misfeed will occur.


Making two-sided copies
1 Place the original on the original table or in the SPF. (see "ORIGINAL PLACEMENT" (p.47).
2 Select two-sided copy mode.
Use the original to copy key to select the desired one-sided to two-sided copying mode (Turn on Long Edge or Turn on Short Edge). See the illustrations on page 53.

3 Select the copy settings. See "SET THE COPY QUANTITY" (p.49), "EXPOSURE ADJUSTMENT/PHOTO COPYING" (p.50), and "REDUCTION/ENLARGEMENT/ZOOM" (p.52).
Using the original table
If you are using the original table, copying is only possible in one sided to two-sided mode ("A" above).
1 Press the start ( ) key.
The original is scanned into the unit's memory.
2 Place the original that you wish to copy onto the rear side of the paper, and press the start ()key again.
Copying begins.
Using the SPF
Press the start ( )key. Copying begins in the selected two-sided copy mode.
DESCRIPTION OF SPECIAL FUNCTIONS
Toner save mode (page 55)
Reduces toner consumption by approximately 10%.
Power save modes (page 56)
The unit has two power save modes of operation: preheat mode and auto power shut-off mode.
Preheat mode
When the unit enters the preheat mode, the power save (② indicator will light up and other indicators will remain on or off as before. In this condition, the fuser in the unit is maintained at a lower heat level, thereby saving power. To copy from the preheat mode, make desired copier selections and press the start (③ key using the normal copying procedure.
Auto power shut-off mode
When the unit enters the auto power shut-off mode, the power save (② indicator will light up and other indicators will go out. The auto power shut-off mode saves more power than the preheat mode but requires a longer time before starting copying. To copy from the auto power shut-off mode, press the start (③ key. Then make desired copier selections and press the start (④ key using the normal copying procedure.
Auto clear (page 56)
The unit returns to the initial settings a preset amount of time after the end of copy, or scanner operation. This preset amount of time (auto clear time) can be changed.
Stream feeding mode (page 56)
For description of the stream feeding mode, see "Stream feeding mode" (p.49).
Resolution of AUTO & MANUAL mode (page 56)
You can set the copy resolution used for AUTO and MANUAL (0) exposure mode.
TONER SAVE MODE
1 Press the exposure mode selector key to select the manual () mode.

2 Press and hold down the exposure mode selector key for approximately 5 seconds. The MANUAL ( ) indicator will go out and the PHOTO ( ) indicator will begin to blink. The exposure indicator marked "5" will light up, indicating the standard toner mode is active.
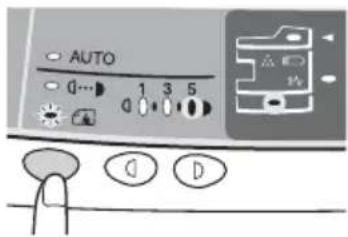
3 To enter the toner save mode, press the light (key). The exposure indicator marked "1" will light up, indicating the toner save mode is selected.
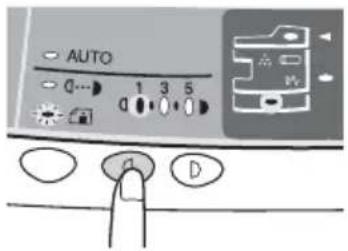
4 Press the exposure mode selector key. The PHOTO ( ) in indicator will stop blinking and light up steadily. The light and dark indicator marked "3" will light up. The toner save mode is now active.

To return to the standard mode, repeat the procedure but use the dark ( )key to select exposure level "5" in step 3.
USER PROGRAMS
The user programs allow the parameters of certain functions to be set, changed, or canceled as desired.
Setting the power save modes, auto clear time, stream feeding mode and resolution of AUTO & MANUAL mode
1 Press and hold down the light ( ) and dark ( ) keys simultaneously for more than 5 seconds until all the alarm indicators ( ), , ) blink and "" appears in the display.
2 Use the left copy quantity (key to select a user program number (1: auto clear time, 2: preheat mode, 3: auto power shut-off timer, 4: stream feeding mode, 5: auto power shut-off mode 6: resolution of AUTO & MANUAL mode). The selected number will blink in the left side of the display.
3 Press the start ( ) key. The entered program number will be steadily lit and the currently selected parameter number for the program will blink on the right side of the display.
4 Select the desired parameter using the right copy quantity (☐) key. The entered parameter number will blink on the right of the display.
| Program No. | Mode Parameters | |
| 1 Auto | clear time | 0 -OFF, 1 10sec., 2 30sec.*3 → 60sec., → 4 90sec., 5 |
| 2 Preheat mode *0 30sec., 1 | 60sec., 2 90sec. → | |
| 3 | Auto power shut-off timer | 0 -2min., *1 5min., 2 15min.3 -30min. 4 60 min. 5 120min. |
| 4 | Stream feeding mode | 0 -OFF, *1 ON |
| 5 | Auto power shut-off mode | 0 -OFF, *1 ON |
| 6 | Resolution of AUTO & MANUAL mode | *0 -300dpi, 1 600dpi |
* Factory default settings are indicated with an asterisk (*).
5 Press the start ( )key. The right-hand number in the display will be steadily lit and the entered value will be stored.

To change the setting or to set another mode, press the clear (key). The unit will return to step 2.
6 Press the light ( ) or dark ( ) key to return to the normal copy mode.
DISPLAYING TOTAL NUMBER OF COPIES
Use the following procedure to display the total number of copies.
Press and hold down the clear ( )key for approximately 5 seconds. The total number of copies will appear in two steps, each with three digits.
Example: Total number of copies is 1,234.


7
MAINTENANCE
This chapter describes how to replace the TD cartridge and drum cartridge, and how to clean the unit.

Be sure to use only genuine Olivetti parts and supplies.
TD CARTRIDGE REPLACEMENT
The TD cartridge replacement required (.) indicator will light up when toner is needed. For more information on purchasing the TD cartridge, see "ABOUT SUPPLIES AND INTERFACE CABLES" (p.71). If copying is continued while the indicator is lit, copies will gradually become lighter until the unit stops and the indicator begins blinking. Replace the old TD cartridge by following the procedure below.

• After the unit stops, it may be possible to make a few more copies by taking the TD cartridge out of the unit, shaking it horizontally, then reinstalling it. If copying is not possible after this operation, replace the TD cartridge.
- During long copy run of a dark original, the start ( ) indicator may blink, the indicator light up, and the unit stop, even though toner is left. The unit will feed toner up to 2 minutes and then the start ( ) indicator will light up. Press the start ( ) key to restart copying.
1 Open the side cover and front cover, in that order.
To open the side cover and front cover, see "INSTALLING THE TD CARTRIDGE" (p.10).
2 Gently pull the TD cartridge out while pressing the lock release button.
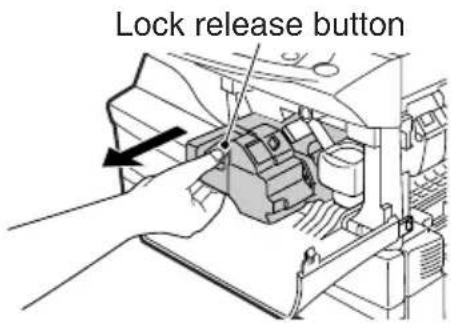

Dispose of the old TD cartridge in accordance with local regulations.
3 Install a new TD cartridge. To install the new cartridge, see "INSTALLING THE TD CARTRIDGE" (p.10).
4
Close the front cover and then the side cover by pressing the round projections near the side cover open button. The indicator will go out and the start ( ) indicator will light up.

Caution
When closing the covers, be sure to close the front cover securely and then close the side cover. If the covers are closed in the wrong order, the covers may be damaged.
DRUM CARTRIDGE REPLACEMENT
The useful life of the drum cartridge is approximately 18,000 copies. When the internal counter reaches approximately 17,000 copies, the drum replacement required (☐) indicator will light up indicating that replacement of the drum cartridge will be needed soon. For more information on purchasing the drum cartridge, see "ABOUT SUPPLIES AND INTERFACE CABLES" (p.71). When the indicator begins to blink, the unit will stop operating until the cartridge is replaced. Replace the drum cartridge at this time.

Caution
Do not remove the protective cover on the drum portion (black paper) of a new drum cartridge before use. The cover protects the drum against external light.
1 Remove the TD cartridge (see "TD CARTRIDGE REPLACEMENT" (p.58).
2 Hold the drum cartridge handle and gently pull the cartridge out. Dispose of the old drum cartridge in accordance with local regulations.
Drum cartridge handle

natural_image
Hand operating a mechanical device with a tool, no visible text or symbols3 Remove the new drum cartridge from the protective bag and remove the protective cover from the cartridge. Then gently install the new drum cartridge.

Caution
- Do not touch the surface of the drum (green portion) of the cartridge. Doing so may cause smudges on the copies.

natural_image
Illustration of hands holding a cylindrical mechanical component with a downward arrow indicating force or movement (no text or symbols)
natural_image
Diagram of a hand operating a mechanical device with an arrow indicating direction (no text or symbols present)4 Gently install the TD cartridge. To install the TD cartridge, see "INSTALLING THE TD CARTRIDGE" (p.10).
5 Close the front cover and then the side cover by pressing the round projections near the side cover open button. The drum replacement required (○) indicator will go out and the start (○) indicator will light up.

When closing the covers, be sure to close the front cover securely and then close the side cover. If the covers are closed in the wrong order, the covers may be damaged.
CLEANING THE UNIT
Proper care is essential in order to get clean, sharp copies. Be sure to take a few minutes to regularly clean the unit.

- Before cleaning, be sure to turn the power switch off and remove the power cord from the outlet.
- Do not use thinner, benzene or other volatile cleaning agents. Doing so may cause deformation, discoloration, deterioration or malfunction.
Cabinet
Wipe the cabinet with a soft, clean cloth.
Original table and the back side of the original cover/SPF
Stains on the glass, scanning window, cover or SPF roller will also be copied. Wipe the glass, scanning window, cover and SPF roller with a soft, clean cloth. If necessary, dampen the cloth with a glass cleaner.
Original table/scanning window Original cover/SPF

Transfer charger
If copies start becoming streaky or blotchy, the transfer charger may be dirty. Clean the charger using the following procedure.
1 Turn the power switch off. (p.12)
2 Open the side cover while pressing the side cover open button.
3 Take the charger cleaner out by holding the tab. Set the charger cleaner onto the right end of the transfer charger, gently slide the cleaner to the left end, and then remove it. Repeat this operation two or three times.

Slide the charger cleaner from the right end to the left end along the groove of the transfer charger. If the cleaner is stopped on the way, smudges on copies may occur.
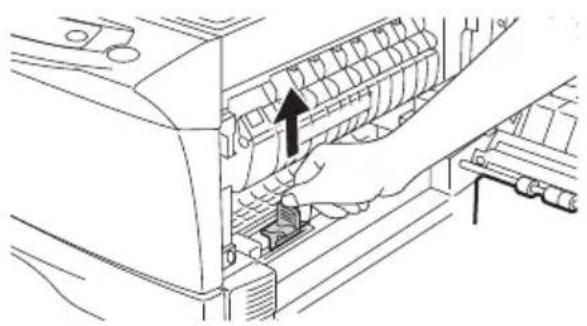
natural_image
Line drawing of a hand inserting a component into a device (no text or symbols visible)
natural_image
Diagram of a printer internal structure showing internal components and a hand operating the frame (no text or symbols present)4 Return the charger cleaner to its original position. Close the side cover by pressing the round projections near the side cover open button.
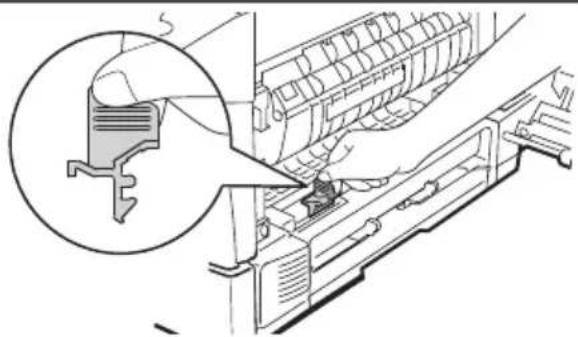
natural_image
Technical illustration of a hand operating a mechanical device with a magnified inset showing a component detail (no text or symbols present)5 Turn the power switch on. (p.12)
8
TROUBLESHOOTING THE UNIT
This chapter describes misfeed removal and troubleshooting.
For problems with the printer function or the scanner function, see the online manual or the Help file for the printer/scanner driver.
TROUBLESHOOTING
If any problem occurs, check the list below before contacting our Technical Assistance Department.
| Problem Possible cause Solution Page | |||
| Unit does not operate. | Unit plugged in? Plug the unit into a grounded outlet. 12 | ||
| Power switch on? Turn the power switch on. 12 | |||
| Side cover closed securely? Gently close the side cover. 10 | |||
| Front cover closed? Gently close the front cover and then close the side cover. | 10 | ||
| Blank copies | Is the original placed face down on the original table or face up in the SPF? | Place the original face down on the original table or face up in the SPF. 47,48 | |
| Copies are too dark or too light. | Is original image too dark or too light? | Adjust the exposure manually. | 50 |
| Is the unit in the automatic exposure mode? | Adjust the automatic exposure level. | 51 | |
| Is the unit in the photo exposure mode? | Cancel the photo exposure mode. | 50 | |
| Dust, dirt, smudges appear on copies. | Original table or original cover dirty? | Clean regularly. | 60 |
| Original smudged or blotchy? | Use a clean original. | - | |
| Striped copies Is transfer charger clean? Clean the transfer charger. 61 | |||
| Paper misfeeds frequently. | Non-standard paper used? | Use standard paper. If using special papers, feed the paper through the single bypass. | 14 |
| Paper curled or damp? | Store paper flat in the wrapper in a dry location. | - | |
| Pieces of paper inside unit? | Remove all pieces of misfed paper. | 64 | |
| Paper guides in the paper tray not set properly? | Set the guides properly depending on the paper size. | 15 | |
| Too much paper in the paper tray? | Remove excessive paper from the tray. | 16 | |
| Images rub off the copy easily. | Is the paper too heavy? | Use paper within the specified range. | 14 |
| Paper damp? | Replace with dry paper. If the unit is not used for long time, remove the paper from the paper tray and store it in its wrapper in a dry location. | 72 | |
STATUS INDICATORS
When the following indicators light up or blink on the operation panel or the following alphanumeric codes appear in the display, solve the problem immediately referring to both the table below and the relevant page.

Caution
Be sure to use only genuine OLIVETTI parts and supplies.
| Indication Cause and remedy Page | ||||
| Drum replacement required indicator | Steadily lit | Replacement of drum cartridge will be needed soon. Prepare a new cartridge. | 71 | |
| Blinking | Drum cartridge must be replaced. Replace it with a new one. | 59 | ||
| TD cartridge replacement required indicator | Steadily lit | Replacement of TD cartridge will be needed soon. Prepare a new cartridge. | 71 | |
| Blinking | TD cartridge must be replaced. Replace it with a new one. | 58 | ||
| 8V | Misfeed indicator Blinking | A misfeed has occurred. Remove the misfed paper referring to the description of "MISFEED REMOVAL". | 64 | |
| SPF misfeed indicator | Blinking | An original misfeed has occurred in the SPF. Remove the misfed originals referring to the description of "D: Misfeed in the SPF". | 67 | |
| Power save indicator is steadily lit. | The unit is in the preheat mode. Press any key to cancel the preheat mode. | 55 | ||
| The unit is in the auto power shut-off mode. Press the start (key to cancel the auto power shut-off mode. | 55 | |||
 | The paper tray indicator is blinking. | The paper tray is not installed properly. Push the tray into the unit securely. | - | |
| "CH" is blinking in the display. | The TD cartridge is not installed. Check if the cartridge is installed. | 58 | ||
 | "CH" is steadily lit in the display. | Side cover is open. Close the side cover securely by pressing the round projections near the side cover open button. | - | |
| "P" is blinking in the display. | The paper tray is empty, or single bypass has been selected in the printer function. Load paper. | 15, 17 | ||
| A misfeed has occurred in the paper tray or single bypass. Remove the misfed paper. | 64 | |||
 | A letter and a number appear alternately. | The scan head locking switch is locked. Unlock the scan head locking switch and turn the power switch off/on. | 9 | |
 | A letter and a number appear alternately. | The unit will not function. Turn the power switch off and then switch it on, and if there is again an error, remove the power cord from the outlet, and contact your authorized service representative. | - | |
MISFEED REMOVAL
When the misfeed (8) indicator blinks or blinks in the display, the unit will stop because of a misfeed. If a misfeed occurs when using the SPF, a number may appear in the display after a minus sign. This indicates the number of the originals that must be returned to the original feeder tray after a misfeed. Return the required number of originals. Then this number will disappear when copying is resumed or the clear ( ) key is pressed. When the SPF misfeeds an original sheet, the unit will stop and the SPF misfeed ( ) indicator will blink, while the misfeed ( ) indicator will remain off. For a misfeed of originals in the SPF, see "D: Misfeed in the SPF" (p.67).
1 Open the side cover.
To open the side cover, see "INSTALLING THE TD CARTRIDGE" (p.10).
2 Check the misfeed location. Remove the misfed paper following the instructions for each location in the illustration below. If 8V blinks in the display, proceed to "A: Misfeed in the paper feed area" (p.65).
If the misfed paper is seen from this side, proceed to "C: Misfeed in the transport area". (p. 66)
If paper is misfed here, proceed to "B: Misfeed in the fusing area". (p. 65)

If paper is misfed here, proceed to "A: Misfeed in the paper feed area". (p. 65)
A: Misfeed in the paper feed area
Gently remove the misfed paper from the paper feed area as shown in the illustration. When 8 blinks in the display and the misfed paper is not seen from the paper feed area, pull out the paper tray and remove the misfed paper. If the paper cannot be removed, proceed to "B: Misfeed in the fusing area".

The fusing unit is hot. Do not touch the fusing unit when removing misfed paper. Doing so may cause a burn or other injury.

- Do not touch the surface of the drum (green portion) of the drum cartridge when removing the misfed paper. Doing so may damage the drum and cause smudges on copies.
- Toner on the paper may stain the paper transport area, resulting in smudges on copies.
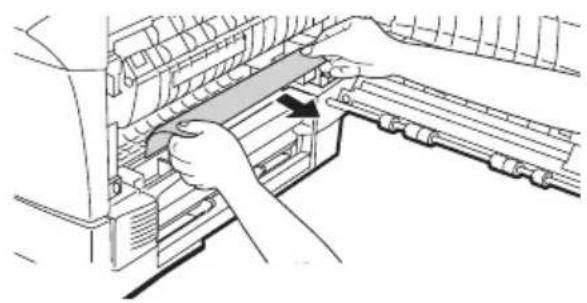
natural_image
Illustration of a hand operating a printer into a rack, showing mechanical components and a blue tab (no text or symbols)2 Close the side cover by pressing the round projections near the side cover open button. The misfeed (8) indicator will go out and the start ( ) indicator will light up.
B: Misfeed in the fusing area
1 Lower the fusing unit release lever.

2 Gently remove the misfed paper from under the fusing unit as shown in the illustration. If the paper cannot be removed, proceed to "C: Misfeed in the transport area".

The fusing unit is hot. Do not touch the fusing unit when removing misfed paper. Doing so may cause a burn or other injury.

natural_image
Illustration of hands operating a printer with a roller being inserted (no text or symbols visible)
- Do not touch the surface of the drum (green portion) of the drum cartridge when removing the misfed paper. Doing so may cause smudges on copies.
- Do not remove the misfed paper from above the fusing unit. Unfixed toner on the paper may stain the paper transport area, resulting in smudges on copies.
3 Raise the fusing unit release lever and then close the side cover by pressing the round projections near the side cover open button. The misfeed (8) indicator will go out and the start (1) indicator will light up.
C: Misfeed in the transport area
1 Lower the fusing unit release lever.
See "B: Misfeed in the fusing area" (p.65).
2 Open the front cover.
To open the front cover, see "INSTALLING THE TD CARTRIDGE" (p.10).
3 Rotate the feeding roller in the direction of the arrow and gently remove the misfed paper from the exit area.


Raise the fusing unit release lever, close the front cover and then close the side cover by pressing the round projections near the side cover open button. The misfeed (Indicator will go out and the start (Indicator will light up.

Raise the fusing unit release lever, close the front cover and then close the side cover by pressing the round projections near the side cover open button. The misfeed (8) indicator will go out and the start (9) indicator will light up.
D: Misfeed in the SPF
An original misfeed may occur at one of three locations: if the misfed original is seen from the original feeder tray, (A) in the original feeder tray; if the misfed original is not seen from the original feeder tray, (B) in the exit area or (C) under the feeding roller. Remove the misfed original following the instructions for each location.
(A) Open the feeding roller cover and pull the original gently to the left and out from the original feeder tray. Close the feeding roller cover. Open and close the original cover to clear the SPF misfeed ( ) indicator. If the misfed original cannot be easily removed, proceed to (C).

natural_image
Illustration of hands installing or adjusting a device on a computer (no text or symbols visible)Feeding roller cover
(B) Open the original cover and rotate the roller rotating knob to remove the misfed original from the exit area. If the misfed original cannot be easily removed, proceed to (C).

(C) If the original does not move easily into the exit area, remove it in the direction of the arrow while rotating the knob.

natural_image
Illustration of a hand holding a device with a circular inset showing a mechanical component (no text or symbols)
A number may appear in the display after a minus sign, indicating the number of the originals that must be returned to the original feeder tray. Open and close the SPF to clear the SPF misfeed(◀) indicator and then clear the misfeed and return the required number of originals. Then press the start ( ) key to resume copying.
SPECIFICATIONS
| Model 12 cpm model | 15 cpm model | ||
| Type Digital multifunctional system, desk-top type | |||
| Copy system Dry, electrostatic transfer | |||
| Originals Sheets, bound documents | |||
| Printer function Available | |||
| Scanner function Available | |||
| Paper tray 250 sheets | |||
| Single bypass Single bypass (1 sheet) | |||
| SPF — Available | |||
| Original sizes | Original table A4/Legal | ||
| SPF | — | A4/Legal | |
| Original feed | Original table | 1 sheet | |
| SPF | — | 30 sheets max. | |
| Copy/Printing size | A4 to A6 *1 | ||
| Image loss | Max. 3 mm (Original table) *2Max. 4 mm (SPF) *2Max. 4.5 mm *3Max. 6 mm *4 | ||
| Copy speed | 12 pages/min. | 15 pages/min. | |
| Print speed | 12 pages/min. (A4) | ||
| Continuous copying/printing | Max. 99 pages subtractive counter | ||
| First-copy/print time (Approximately) | 9.6 seconds *5(paper:A4, exposure mode:AUTO, copy ratio:100%) | ||
| Copy ratio | Variable: 25% to 400% in 1% increments (total 376 steps)Fixed: 25%, 70% 86%, 100%, 141%, 400% | ||
| Exposure system | Original table | Moving optical source, slit exposure (stationary platen) with automatic exposure | |
| SPF | — | Moving original | |
| Fusing system | Heat rollers | ||
| Development system | Magnetic brush development | ||
| Light source | Cold cathode fluorescent lamp | ||
| Resolution | Scanner | 600 x 1200dpi | |
| Copier | 600 x 300dpi (Auto/Manual mode)600 x 600dpi (Photo mode) | ||
| Printer | 600dpi | ||
| Gradation | Scan | 256 levels | |
| Output | 2 levels | ||
| Bit depth | 1 bit or 8 bit/pixel | ||
| Sensor | Colour CCD | ||
| Scanning speed Max. 2.88 ms/line | |||
| Memory 16 MB | |||
| Power supply | Local voltage ±10% (For this copier power supply, see the name plate located on the back of the unit) | ||
| Power consumption 1000 W | |||
| Overall dimensions | Width (mm) 607.6 | 607.6 | |
| Depth (mm) 462.5 | 492.5 | ||
| Weight (Approximately)*6 | 15.3 kg 16.9 kg | ||
| Unit dimensions | Width (mm) 518 | 518 | |
| Depth (mm) 462.5 | 492.5 | ||
| Height (mm) 295.6 | 380.4 | ||
| Operating conditions | Temperature: 10°C to 30°C Humidity: 20% to 85% | ||
| Emulation GDI | |||
| Interface | IEEE1284-compliant bi-directional parallel interface/USB interface (USB1.1 Standard) | ||
| Noise level | Sound Power Level LwA (1B=10dB) Copying: 6.0 [B], Standby: 3.7 [B] Sound Pressure Level LpA (bystander positions) Copying: 46 [dB (A)], Standby: 23 [dB (A)] Noise emission measurement in accordance with ISO 7779. | ||
| Emission concentration (measurement according to RAL-UZ 62) | Ozone: less than 0.02 mg/m3 Dust: less than 0.075 mg/m3 Styrene: less than 0.07 mg/m3 | ||
^* ^1 Feed paper lengthwise only.
^*2 Leading and trailing edges.
*3 Along the other edges in totals.
*4 The trailing edge of the second (Two-sided copy mode).
*5 Data transmission time is not included. (Only for printer)
*6 Not including TD cartridge, drum cartridge and cables.

As a part of our policy of continuous improvement, OLIVETTI reserves the right to make design and specification changes for product improvement without prior notice. The performance specification figures indicated are nominal values of production units. There may be some deviation from these values in individual units.
ABOUT SUPPLIES AND INTERFACE CABLES

Be sure to use only genuine OLIVETTI parts and supplies.
For best copying results, be sure to use only OLIVETTI Genuine Supplies which are designed, engineered, and tested to maximize the life and performance of OLIVETTI copiers. Look for the Genuine Supplies label on the toner package.
Supply list
| Supply Usable life | |
| TD cartridge Approx. 3,500 sheets * | |
| Drum cartridge Approx. 18,000 sheets | |
* Based on copying onto A4-type paper at 5% toned area

The machine comes with a TD cartridge whose life span is approximately 2,000 sheets of paper.
Interface cable
Please purchase the appropriate cable for your computer.
Parallel interface cable
IEEE 1284-Shielded type bi-directional parallel interface cable (2m Max.)
USB interface cable
Shielded twisted pair cable, high-speed transmission equivalent (2m Max.)
MOVING AND STORING THE UNIT
Moving instructions
When moving the unit, follow the procedure below.

When moving this unit, be sure to remove the TD cartridge in advance.
1 Turn the power switch off and remove the power cord from the outlet.
2 Open the side cover and front cover, in that order. Remove the TD cartridge and close the front cover and side cover, in that order.
To open and close the side cover and front cover, and to remove the TD cartridge, see "TD CARTRIDGE REPLACEMENT" (p.58).
3 Raise the handle of the paper tray and pull the paper tray out until it stops.
4 Push the center of the pressure plate down until it locks in place and lock the plate using the pressure plate lock which has been stored in the front of the paper tray.
5 Push the paper tray back into the unit.
6 Lock the scan head locking switch (p.9).

When shipping the unit, the scan head locking switch must be locked to prevent shipping damage.
7 Close the paper output tray extension, and attach the packing materials and tape which were removed during installation of the unit. See "PREPARING THE UNIT FOR INSTALLATION" (p.8).
8 Pack the unit into the carton. See "CHECKING PACKED COMPONENTS AND ACCESSORIES" (p.8).
Proper storage
Store the supplies in a location that is:
- clean and dry,
- at a stable temperature,
• not exposed to direct sunlight
Store paper in the wrapper and lying flat.
- Paper stored out of the wrapper or in packages standing on end may curl or get damp, resulting in paper misfeeds.
INDEX
A
Acrobat reader....43
Alarm indicator
- Drum replacement required indicator....6, 59, 63
- Misfeed indicator......6, 63, 64
- TD cartridge replacement required indicator....6, 58, 63
Appendix 69
Auto clear time ....55, 56
Auto power shut-off mode .....55, 56
Automatic exposure adjustment......51
B
Before installation....20
Button Manager....19, 34
Bypass feed....17
Bypass paper guides....5, 17, 18
C
Cautions
- Handling......2
- Using....1
Charger cleaner....5, 61
Checking packed components and accessories ....8
Cleaning the unit
- Cabinet....60
- Original cover ......60
- Original table 60
- Scanning window ......60
- SPF 60
- Transfer charger......61
Clear key 6, 49, 57
Connecting the interface cable
- Parallel interface cable......45
- USB interface cable......45
Conventions used in this manual and online manual....4
Copy flow....46
Copy quantity 49
Copy quantity key......6, 49, 56
Copy ratio display key 6, 52
Copy ratio selector indicators......6, 52
Copy ratio selector key......6, 52
D
Dark key 6,50
Desktop Document Manager......19
Display....6
Displaying total number of copies ..... 57
Disposing of TD cartridges....58
Drum cartridge....59
Drum cartridge replacement....59
Drum replacement required indicator 6, 59, 63
E
Exposure adjustment....50
Exposure indicator.... 6, 50
Exposure mode indicators .....6, 50
Exposure mode selector key .....6, 50
F
Flow of installation.... 20
Front cover ....5
Fusing unit release lever ....5, 65
H
Handle....5
Hardware and software
requirements 19
How to print.... 34
How to use the online manual......43
|
Indicators on the operation panel..... 31
Initial settings of operation panel......13
Installing the software....19, 21
Installing the TD cartridge .....10
Interface
- Parallel interface....45
- USB interface....45
Interface cable....71
Interrupt copying.... 47
Introduction...... 4
L
Light key....6, 50
Loading paper 14
Loading the paper tray .....15
M
Making copies ....46
MFP driver
- Printer driver....19
- Print Status Window......19
- Scanner driver....19
Misfeed indicator ......6, 63, 64
Misfeed removal
- Fusing area ......65
- Paper feed area....65
- SPF 67
- Transport area......66
Moving instructions....72
N
Name
- Operation panel......6
- Part names......5
O
OLIVETTI MFP Personal Series......19
ON LINE indicator 6, 31
ON LINE key 6,31
Online manual 4, 43
Opening the printer driver
- Application....33
- Start menu....32
Opening the scan driver ....40
Operation panel....5, 6
Original placement
- Original table 47
- SPF 48
Original table 5,47
Original to copy key......6, 54
P
Paper....14
Paper feed location indicator......6
Paper output tray....5
Paper output tray extension ....5
Paper tray....5, 15
Parallel interface cable....45, 71
Photo copying....50
Power cord ....5
Power off ....13
Power on 12
Power save indicator....6, 31
Power switch 5, 12
Preheat mode....55
Preparing the unit for installation...... 8
Printer driver....19
Proper storage....72
R
Reduction/enlargement/zoom .....52
S
Scan head locking switch.... 9
Scanner driver....19
Scanner indicator 6,31
SCANNER key 6,39
Scanning from your computer .....40
Scanning with the "Scanner and
Camera Wizard"......42
Setting up the unit ....7
Setup procedure....7
Side cover ....5
Side cover open button ....5
Single bypass....18
Software for the
Specifications 69
SPF 48
SPF indicator.... 6, 48
SPF misfeed indicator 6, 67
Start indicator....6, 31
Start key.... 6, 46, 57
Status indicators....63
Stream feeding mode......49, 55, 56
Supplies and interface cables .....71
Supply list
- Drum cartridge....71
- TD cartridge.... 71
T
TD cartridge....10, 58
TD cartridge replacement....58
TD cartridge replacement required
indicator....6, 58, 63
Transfer charger....5, 61
Troubleshooting......62
Troubleshooting the unit......62
Two sided copying....53
U
USB interface cable....45, 71
Using other installed drivers......44
Using the manuals....4
Using the printer mode....32
Using the scanner mode ....35
Using the OLIVETTI TWAIN......41
Z
Zoom indicator....52
Zoom key....6, 52
INDEX BY PURPOSE
Checking the package......8
Cleaning the unit
- Cabinet......60
- Original cover......60
- Original table 60
- SPF 60
- Transfer changer......61
Connecting the interface cable
- Parallel interface cable......45
- USB interface cable....45
Copying 46
Displaying total number of copies.....57
Enlarging/reducing copies....52
Installing the software
- Acrobat......43
- Button Manager......19
- MFP driver....19
- Desktop Document Manager......19
Installing the TD cartridge ....10
Loading paper
- Paper tray....15
- Single bypass....18
Loading the original
- Original table 47
- SPF 48
Moving the unit....72
Opening the printer driver....32
Power off 13
Power on 12
Preparing for installation....8
Printing 33
Removing paper jams
- Fusing area 65
- Paper feed area....65
- SPF 67
- Transport area......66
Replacing the drum cartridge....59
Replacing the TD cartridge....60
Scanning
- Button Manager......34
- Scanner and Camera Wizard.....42
- OLIVETTI TWAIN....41
Setting the copy quality
- Auto....51
- Manual....50
- Photo....50
Setting the copy quantity......49
Setting the toner save mode .....55
Setting the user program....56
Setting up the Button Manager......34
Storing the unit 72
Two sided copying....53
Using other installed drivers......44
Using the online manual.... 43
SOFTWARE LICENSE
PLEASE READ THIS LICENSE CAREFULLY BEFORE USING THE SOFTWARE. BY USING THE SOFTWARE, YOU ARE AGREEING TO BE BOUND BY THE TERMS OF THIS LICENSE.
1. License.
The application, demonstration, system and other software accompanying this License, whether on disk, in read only memory, or on any other media (the "Software") and related documentation are licensed to you by OLIVETTI. You own the disk on which the Software is recorded but OLIVETTI and/or OLIVETTI'S Licensors retain title to the Software and related documentation. This License allows you to use the Software on one or more computers connected to a single printer and make one copy of the Software in machine-readable form for backup purposes only. You must reproduce on such copy the OLIVETTI copyright notice, the copyright notice of OLIVETTI'S Licensors and any other proprietary legends of OLIVETTI and/or its Licensors that were on the original copy of the Software. You may also transfer all your license rights in the software, the backup copy of the Software, the related documentation and a copy of this License to another party, provided the other party reads and agrees to the terms and conditions of this License.
2. Restrictions.
The Software contains copyrighted material, trade secrets and other proprietary material which is owned by OLIVETTI and/or its Licensors and in order to protect them you may not decompile, reverse engineer, disassemble or otherwise reduce the Software to a human-perceivable form. You may not modify, network, rent, lease, loan, distribute or create derivative works based upon the Software in whole or in part. You may not electronically transmit the Software from one computer to another or over a network.
3. Termination.
This license is effective until terminated. You may terminate this License at any time by destroying the Software and related documentation and all copies thereof. This License will terminate immediately without notice from OLIVETTI and/or OLIVETTI'S Licensors if you fail to comply with any provision of this License. Upon termination you must destroy the Software and related documentation and all copies thereof.
4. Export Law Assurances.
You agree and certify that neither the Software nor any other technical data received from OLIVETTI, nor the direct product thereof, will be exported outside the United States except as authorized and as permitted by the laws and regulations of the United States. If the Software has been rightfully obtained by you outside of the United States, you agree that you will not re-export the Software nor any other technical data received from OLIVETTI, nor the direct product thereof, except as permitted by the laws and regulations of the United States and the laws and the regulation of the jurisdiction in which you obtained the Software.
5. Government End Users.
If you are acquiring the Software on behalf of any unit or agency of the United States Government, the following provisions apply. The Government agrees:
(i) if the Software is supplied to the Department of Defense (DoD), the Software is classified as "Commercial Computer Software" and the Government is acquiring only "restricted rights" in the Software and its documentation as that term is defined in Clause 252.227-7013 (c)(1) of the DFARS; and
(ii) if the Software is supplied to any unit or agency of the United States Government other than DoD, the Government's rights in the Software and its documentation will be as defined in Clause 52.227-19 (c)(2) of the FAR or, in the case of NASA, in Clause 18-52.227-86 (d) of the NASA Supplement to the FAR.
6. Limited Warranty on Media.
OLIVETTI warrants the disks on which the Software is recorded to be free from defects in materials and workmanship under normal use for a period of ninety (90) days from the date of purchase as evidenced by a copy of the receipt. The entire liability of OLIVETTI and/or its Licensors and your exclusive remedy will be replacement of the disk which fails to meet the limited warranty provided by this Clause 6. A disk will be replaced when it is returned to OLIVETTI or a OLIVETTI authorized representative with a copy of the receipt. OLIVETTI will have no responsibility to replace a disk damaged by accident, abuse or misapplication.
ANY IMPLIED WARRANTIES ON THE DISKS, INCLUDING THE IMPLIED WARRANTIES OF MERCHANTABILITY AND FITNESS FOR A PARTICULAR PURPOSE, ARE LIMITED IN DURATION TO NINETY (90) DAYS FROM THE DATE OF DELIVERY. THIS WARRANTY GIVES YOU SPECIFIC LEGAL RIGHTS, AND YOU MAY ALSO HAVE OTHER RIGHTS WHICH VARY FROM JURISDICTION TO JURISDICTION.
7. Disclaimer of Warranty on Software.
You expressly acknowledge and agree that use of the Software is at your sole risk. The software and related documentation are provided "AS IS" and without warranty of any kind and OLIVETTI and OLIVETTI'S Licensor(s) (for the purpose of provisions 7 and 8, OLIVETTI and OLIVETTI'S Licensor(s) shall be collectively referred to as "OLIVETTI") EXPRESSLY DISCLAIM ALL WARRANTIES, EXPRESS OR IMPLIED, INCLUDING, BUT NOT LIMITED TO, THE IMPLIED WARRANTIES OF MERCHANTABILITY AND FITNESS FOR A PARTICULAR PURPOSE. OLIVETTI DOES NOT WARRANT THAT THE FUNCTIONS CONTAINED IN THE SOFTWARE WILL MEET YOUR REQUIREMENTS, OR THAT THE OPERATION OF THE SOFTWARE WILL BE UNINTERRUPTED OR ERROR-FREE, OR THAT DEFECTS IN THE SOFTWARE WILL BE CORRECTED. FURTHERMORE, OLIVETTI DOES NOT WARRANT OR MAKE ANY REPRESENTATIONS REGARDING THE USE OR THE RESULTS OF THE USE OF THE SOFTWARE OR RELATED DOCUMENTATION IN TERMS OF THEIR CORRECTNESS, ACCURACY, RELIABILITY, OR OTHERWISE. NO ORAL OR WRITTEN INFORMATION OR ADVICE GIVEN BY OLIVETTI OR A OLIVETTI AUTHORIZED REPRESENTATIVE SHALL CREATE A WARRANTY OR IN ANY WAY INCREASE THE SCOPE OF THIS WARRANTY. SHOULD THE SOFTWARE PROVE DEFECTIVE, YOU (AND NOT OLIVETTI OR A OLIVETTI AUTHORIZED REPRESENTATIVE) ASSUME THE ENTIRE COST OF ALL NECESSARY SERVICING, REPAIR OR CORRECTION, SOME JURISDICTIONS DO NOT ALLOW THE EXCLUSION OF IMPLIED WARRANTIES, SO THE ABOVE EXCLUSION MAY NOT APPLY TO YOU.
8. Limitation of Liability.
UNDER NO CIRCUMSTANCES INCLUDING NEGLIGENCE, SHALL OLIVETTI BE LIABLE FOR ANY INCIDENTAL, SPECIAL OR CONSEQUENTIAL DAMAGES THAT RESULT FROM THE USE OR INABILITY TO USE THE SOFTWARE OR RELATED DOCUMENTATION, EVEN IF OLIVETTI OR AN OLIVETTI AUTHORIZED REPRESENTATIVE HAS BEEN ADVISED OF THE POSSIBILITY OF SUCH DAMAGES. SOME JURISDICTIONS DO NOT ALLOW THE LIMITATION OR EXCLUSION OF LIABILITY FOR INCIDENTAL OR CONSEQUENTIAL DAMAGES SO THE ABOVE LIMITATION OR EXCLUSION MAY NOT APPLY TO YOU. In no event shall OLIVETTI'S total liability to you for all damages, losses, and causes of action (whether in contract, tort (including negligence) or otherwise) exceed the amount paid by you for the Software.
9. Controlling Law and Severability.
For a portion of the Software related with Apple Macintosh and Microsoft Windows, this license shall be governed by and construed in accordance with the laws of the state of California and Washington, respectively. If for any reason a court of competent jurisdiction finds any provision of this License, or portion thereof, to be unenforceable, that provision of the License shall be enforced to the maximum extent permissible so as to effect the intent of the parties, and the remainder of this License shall continue in full force and effect.
10. Complete Agreement.
This License constitutes the entire agreement between the parties with respect to the use of the Software and related documentation, and supersedes all prior or contemporaneous understandings or agreements, written or oral, regarding such subject matter. No amendment to or modification of this License will be binding unless in writing and signed by a duly authorized representative of OLIVETTI.


- d-Copia 120D d-Copia 150D
- PUBLICATION ISSUED BY:
- CAUTIONS
- Caution label on the unit
- Cautions on using the unit
- Warning:
- Caution:
- Important points when selecting an installation site
- Note:
- Cautions on handling
- Cautions on laser
- Trademark acknowledgements
- Safety precautions:
- Caution!
- CONTENTS
- INTRODUCTION
- SETTING UP THE UNIT
- LOADING PAPER
- INSTALLING THE SOFTWARE
- MAKING COPIES
- SPECIAL FUNCTIONS
- MAINTENANCE
- TROUBLESHOOTING THE UNIT
- APPENDIX
- 1
- INTRODUCTION
- USING THE MANUALS
- Online manual
- How to use the online manual
- Scan
- Troubleshooting
- Conventions used in this manual and online manual
- PART NAMES
- OPERATION PANEL
- 2
- SETTING UP THE UNIT
- SETUP PROCEDURE
- CHECKING PACKED COMPONENTS AND ACCESSORIES
- PREPARING THE UNIT FOR INSTALLATION
- SCAN HEAD LOCKING SWITCH
- INSTALLING THE TD CARTRIDGE
- 5
- Close the front cover and then the side cover by pressing the round projections near the side cover open button.
- Power on
- About the scan head
- Initial settings of operation panel
- Power off methods
- PAPER
- LOADING THE PAPER TRAY
- Fan the paper and insert it into the tray. Make sure the edges go under the corner hooks.
- 6
- Gently push the paper tray back into the unit.
- BYPASS FEED (including special paper)
- The single bypass
- Select copy and print settings before you begin the copy job.
- Set the paper guides to the paper width. Insert a single sheet of copy or print paper (print face down) into the feed slot of the single bypass.
- Using copy mode
- Using printer mode
- Note for loading envelopes
- 4
- INSTALLING THE SOFTWARE
- CD-ROM
- SOFTWARE FOR THE OLIVETTI PERSONAL MFP SERIES
- MFP driver
- Scanner driver
- Printer driver
- Print Status Window
- Desktop Document Manager
- Button Manager
- HARDWARE AND SOFTWARE REQUIREMENTS
- BEFORE INSTALLATION
- Flow of installation
- MFP
- Installing onto Windows XP (USB/parallel interface)
- Review the software packages to be installed on the screen, and then click the "Start" button.
- Copying files for MFP driver installation (This step will start if it was selected in step 4).
- Begin installation of the Button Manager (This step will start if it was selected in step 4).
- Begin installation of the Desktop Document Manager (This step will start if it was selected in step 4).
- Click the "Close" button when the message informs you that "Setup has finished". When the "Now connect the MFP interface cable to the PC" dialog box appears, click the "OK" button.
- Make sure that the power of the MFP is turned on, and then connect the USB interface cable or parallel interface cable. (p.45)
- Begin installation of the scanner driver.
- Begin installation of the printer driver.
- Installing onto Windows 98/Me/2000 (USB interface)
- Insert the supplied CD-ROM into your CD-ROM drive.
- Double-click "My Computer" ( ), and then double-click the CD-ROM ( ) icon.
- Double-click the "Setup" ( ) icon.
- Select the software packages to be installed, and then click the "Next" button.
- Copying files for MFP driver installation.
- 7
- Begin installation of the Button Manager (This step will start if it was selected in step 4).
- Click the "Close" button when the message to inform you of the completion of the installation appears. When the "Now connect the MFP interface cable to the PC." dialog box or "After Windows system restarts..." dialog box appears, click the "OK" button.
- Make sure that the power of the MFP is turned on, and then connect the USB interface cable. (p.45)
- Follow the instructions in the Plug and Play screen that appears in your version of Windows to begin the installation.
- Installing onto Windows 95/98/Me/NT4.0/2000 (Parallel interface)
- Copying files for MFP driver installation and parallel interface setup (This step will start if it was selected in step 4).
- 8
- 9
- 10
- Start indicator
- ON LINE indicator
- Power save indicator
- SCANNER indicator
- USING THE PRINTER MODE
- Opening the printer driver from the start menu
- How to print
- USING THE SCANNER MODE
- Using the Button Manager
- Setting up the Button Manager
- Windows XP
- Windows 98/Me/2000
- Click the "Start" button, select "Control Panel" from "Settings", and open "Scanners and Cameras" in start menu.
- Select "Olivetti d-Copia 150D" and click the "Properties" button.
- In the "Properties" screen, click the "Events" tab.
- Click the "Scanner events" button and select "ScanMenu SC1" from the pull-down menu. Select "Button Manager (Olivetti Personal MFP Series)" in "Send to this application" and click "Apply".
- Repeat step 4 to set "ScanMenu SC2" through "ScanMenu SC6".
- Scan Parameter Settings Dialog Box
- Flow of the Button Manager setting
- All About The Windows Event Manager and scanner events in Windows 98, Windows Me, Windows 2000 and Windows XP.
- Using the SCANNER key to begin scanning
- Press the SCANNER ( ) key.
- Place the original you wish to scan on the original table/SPF.
- Press the right copy quantity key to display the number of the application that you wish to use for scanning.
- Press the start () key.
- Opening the scanner driver and scanning from your computer
- Using the OLIVETTI TWAIN
- Place the original you wish to scan on the original table/SPF.
- After starting Desktop Document Manager, click the "File" menu and select "Select Scanner".
- Select "OLIVETTI Personal MFP Series", and click the "Select" button.
- Select "Acquire Image" from the "File" menu, or click the "Acquire" button ( ) .
- Set the configuration for scanning (refer to the online manual and help file), and click the "Scanning" button.
- Scanning with the "Scanner and Camera Wizard" in Windows XP
- Click the "start" button, select "Control Panel", and click "Printers and Other Hardware", and then click "Scanners and Cameras" in the start menu. Click the "Olivetti d-Copia 150D" icon and click "Get picture" in "Imaging Tasks".
- The "Scanner and Camera Wizard" appears. Click "Next" and establish the basic settings for scanning.
- Select a name, format, and folder for the scanned image.
- Scanning begins. When scanning ends, select the next task you wish to perform.
- Click "Finish" in the screen that appears.
- Installing Acrobat Reader
- USING OTHER INSTALLED DRIVERS
- CONNECTING THE INTERFACE CABLE
- Connecting the USB interface cable
- Connecting the parallel interface cable
- MAKING COPIES
- COPY FLOW
- About interrupt copying
- ORIGINAL PLACEMENT
- Using the original table
- Open the original cover/SPF, and place the original.
- Place an original face down on the original table. Align it with the original scale and the centering (▶mark. Gently close the original cover/SPF.
- Setting a large original (12 cpm model only)
- Simply lift the original cover straight up.
- To reattach the original cover, reverse the above procedure.
- Using the SPF
- Make sure that no original is left on the original table.
- Adjust the original guides to the size of originals.
- Set the originals face up in the original feeder tray.
- Stream feeding mode
- SET THE COPY QUANTITY
- EXPOSURE ADJUSTMENT/PHOTO COPYING
- Exposure adjustment
- Automatic exposure adjustment
- REDUCTION/ENLARGEMENT/ZOOM
- Set the original and check the paper size.
- Use the copy ratio selector key and/or zoom ( , keys to select the desired copy ratio.
- Set the reduction/enlargement ratio.
- To select a preset copy ratio:
- To select a zoom ratio:
- SPECIAL FUNCTIONS
- TWO SIDED COPYING
- Making two-sided copies
- Select two-sided copy mode.
- Select the copy settings. See "SET THE COPY QUANTITY" (p.49), "EXPOSURE ADJUSTMENT/PHOTO COPYING" (p.50), and "REDUCTION/ENLARGEMENT/ZOOM" (p.52).
- DESCRIPTION OF SPECIAL FUNCTIONS
- Toner save mode (page 55)
- Power save modes (page 56)
- Preheat mode
- Auto power shut-off mode
- Auto clear (page 56)
- Stream feeding mode (page 56)
- Resolution of AUTO & MANUAL mode (page 56)
- TONER SAVE MODE
- USER PROGRAMS
- Press the start ( )key. The right-hand number in the display will be steadily lit and the entered value will be stored.
- Press the light ( ) or dark ( ) key to return to the normal copy mode.
- DISPLAYING TOTAL NUMBER OF COPIES
- MAINTENANCE
- TD CARTRIDGE REPLACEMENT
- Open the side cover and front cover, in that order.
- Gently pull the TD cartridge out while pressing the lock release button.
- Install a new TD cartridge. To install the new cartridge, see "INSTALLING THE TD CARTRIDGE" (p.10).
- DRUM CARTRIDGE REPLACEMENT
- CLEANING THE UNIT
- Cabinet
- Original table and the back side of the original cover/SPF
- Transfer charger
- TROUBLESHOOTING THE UNIT
- STATUS INDICATORS
- MISFEED REMOVAL
- Open the side cover.
- Check the misfeed location. Remove the misfed paper following the instructions for each location in the illustration below. If 8V blinks in the display, proceed to "A: Misfeed in the paper feed area" (p.65).
- A: Misfeed in the paper feed area
- B: Misfeed in the fusing area
- C: Misfeed in the transport area
- D: Misfeed in the SPF
- ABOUT SUPPLIES AND INTERFACE CABLES
- Supply list
- Interface cable
- Parallel interface cable
- USB interface cable
- MOVING AND STORING THE UNIT
- Moving instructions
- Proper storage
- INDEX
- A
- B
- C
- D
- E
- F
- H
- |
- L
- M
- N
- O
- P
- R
- S
- T
- U
- Z
- INDEX BY PURPOSE
- SOFTWARE LICENSE
- PLEASE READ THIS LICENSE CAREFULLY BEFORE USING THE SOFTWARE. BY USING THE SOFTWARE, YOU ARE AGREEING TO BE BOUND BY THE TERMS OF THIS LICENSE.
- License.
- Restrictions.
- Termination.
- Export Law Assurances.
- Government End Users.
- Limited Warranty on Media.
- Disclaimer of Warranty on Software.
- Limitation of Liability.
- Controlling Law and Severability.
- Complete Agreement.
Brand : OLIVETTI
Model : d-Copia 150D
Category : Photocopier