
T230 - Camcorder AIPTEK - Free user manual and instructions
Find the device manual for free T230 AIPTEK in PDF.


| Product type | Digital camcorder |
| Brand | Aiptek |
| Model | T230 |
| Dimensions (L x W x H) | 122 x 58 x 52 mm |
| Weight | 210 g (with battery) |
| Power source | Rechargeable Lithium-Ion battery 3.7 V |
| Battery type | Removable Li-ion |
| Battery capacity | 800 mAh |
| Battery life | Approximately 60 minutes of recording |
| Video resolution | HD 720p (1280 x 720) |
| Photo resolution | Up to 5 MP (interpolated) |
| Digital zoom | 8x |
| LCD screen | 2.7 inches, 230,000 pixels |
| Internal memory | None (requires SD/SDHC card) |
| External storage | SD/SDHC card up to 32 GB |
| Input/Output | USB 2.0, AV output, HDMI (depending on version) |
| Main features | Video recording, photo, digital zoom, motion detection |
| Maintenance and cleaning | Clean the exterior with a soft, dry cloth. Avoid solvents. |
| Safety | Do not expose to moisture, shocks, or excessive heat. |
| Spare parts available | Battery, charger, USB cable, AV cable |
| Repairability | User-replaceable battery. Other repairs by a professional. |
| General information | Compact device suitable for beginners. User manual PDF available. |
Frequently Asked Questions - T230 AIPTEK
User questions about T230 AIPTEK
0 question about this device. Answer the ones you know or ask your own.
Ask a new question about this device
Download the instructions for your Camcorder in PDF format for free! Find your manual T230 - AIPTEK and take your electronic device back in hand. On this page are published all the documents necessary for the use of your device. T230 by AIPTEK.
USER MANUAL T230 AIPTEK
User's Manual
POCKETDV
Welcome:
Dear user, thank you for purchasing this product.
Much investment in time and effort has gone into its development, and it is our hope that it will give you many years of trouble-free service.
FCC Compliance Statement:
This device complies with Part 15 of the FCC Rules. Operation is subjected to the following two conditions: (1) this device may not cause harmful interference, and (2) this device must accept any interference received, including interference that may cause undesired operation.

This equipment has been tested and found to comply with limits for a
Class B digital device, pursuant to Part 15 of the FCC rules. These limits
are designed to provide reasonable protection against harmful interference in residential installations. This equipment generates, uses, and can radiate radio frequency energy, and if not installed and used in accordance with the instructions, may cause harmful interference to radio communications.
However, there is no guarantee that interference will not occur in a particular installation. If this equipment does cause interference to radio or television equipment reception, which can be determined by turning the equipment off and on, the user is encouraged to try to correct the interference by one or more of the following measures:
-Reorient or relocate the receiving antenna.
-Move the equipment away from the receiver.
-Plug the equipment into an outlet on a circuit different from that to which the receiver is connected.
-Consult the dealer or an experienced radio/television technician for additional suggestions.
You are cautioned that any change or modifications to the equipment not expressly approved by the party responsible for compliance could void Your authority to operate such equipment.
Safety Notice:
- Do not drop, puncture or disassemble the camcorder; otherwise the warranty will be voided.
- Avoid all contact with water, and dry hands before using.
- Do not expose the camcorder to high temperature or leave it in direct sunlight. Doing so may damage the camcorder.
- Use the camcorder with care. Avoid pressing hard on the camcorder body.
- For your own safety, avoid using the camcorder when there is a storm or lightning.
- Do not use batteries of different specifications. Doing so may lead to the potential for serious damage.
- Remove the battery during long periods between usage, as a deteriorated battery may affect the functionality of the camcorder.
- Remove the battery if it shows signs of leaking or distortion.
- Use only the accessories supplied by the manufacturer.
- Keep the camcorder out of the reach of infants.
- Risk of explosion if battery is replaced by an incorrect type.
- Dispose of used batteries according to the instructions.



If the time arises to throw away your product, please recycle all the components possible.
Batteries and rechargeable batteries are not to be disposed in your domestic waste! Please recycle them at your local recycling point.
Together we can help to protect the environment.
Preparing the Camcorder
Package content
The package should contain all the followings. If anything is missing or appears damaged, contact your dealer immediately.
Camcorder•
CD-ROM•
User Manual•
USB/AV combo cable•
AA batteries × 2•
Wrist strap
Product overview
![Zoom button / Up & Down [2] Photo mode & Shutter / OK [1] VIDEO mode / RECORD [3] Playback [4] USB interface [5] MicroSD card slot [6] Strap hook [7] LCD panel / screen [8] Lens [14] Macro switch [9] Speaker [10] Battery cover lock [11] Battery cover [12] Tripod connector [13] Flash light [15] Left / flash light [16] Right / EV± [17] Menu [18] Power & Icon On/ Off [19]](/content/2026/06/1278454/images/487629dc80ad45845ce674714e4542e7d9b84effc983507ba99c2221cb18f43e.jpg)
Getting Started
Loading the battery
- Fix LCD panel/ screen [8] in close position.
- Open the battery cover [12].
- Insert 2x AA alkaline batteries into the camera. Make sure that the polarisation of the batteries is like shown in the picture.
- Close the battery cover [12].

natural_image
Diagram of a car battery pack with external components and battery bodies (no text or labels)Inserting the Micro SD card
This DV camcorder (camera) has built-in internal memory. This memory can be extended with a microSD memory card (not included in standard packaging).
- Turn off the DV camcorder (camera) first.
- Insert the micro SD card as the direction shown in the picture. Put carefully in until it reaches the end of the micro SD card slot [6].
-
Turn on the DV camcorder (camera). When the card is inserted successfully, the icon will appear on the display.
-
To remove the card, push it slightly in until card pop out by itself.

natural_image
Line drawing of a compact digital camera with front panel and rear buttons (no text or symbols)Notice:
* Please do not insert and take out micro SD card when DV (camera) is on, or the DV (camera) will turn off automatically.
* There is only one right direction to insert micro SD card into the slot. Do not force the card into the slot, or both DV (camera) and micro SD card slot will be damaged.
* The micro SD card must be formatted before taking video and pictures.
Turning on/off the camcorder
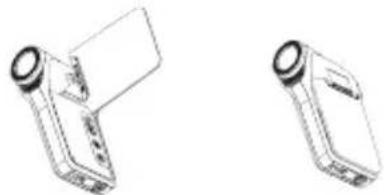
To turn on the camcorder, either open the LCD panel / screen [8] or press the Power & Icon On / Off [19] button for 3 seconds.
To turn off the camcorder, either close the LCD panel / screen [8] or press the Power & Icon On / Off [19] button for 3 seconds.
natural_image
Two technical line drawings of a mechanical device with no visible text or symbolsIf the power is not turned on, please check the following points have been done correctly:
1) The battery is correctly loaded;
2) The loaded battery has enough power.
Reading LCD indicators

No. Item Option
| a Battery indicator |  | The batteries are full. |
| The batteries are empty. | ||
 | Low Battery, the DV will turn off. | |
| b Zoom ratio indicator 1.00~8.00 | ||
| c Mode selected |  | P photographs mode. |
| Videos capture mode. | ||
| d Normal / Macro mode indicator | [SC27] | Normal mode (0.5m – infinity). |
| acro mode (11cm –18cm). | ||
| e Video resolution VGA/QVGA/D1 | ||
| f Memory source |  | Micro SD card |
| Internal memory | ||
| g View center | ||
| h Counting indicator | Show time left in DV mode | |
| Show picture left in DC mode | ||
| Show recording time during recording | ||
| i One shot / Continuous shot |  | One shot |
| 3 Continuous shot | ||
| j Flash indicator |  | Force flash: The flash is on in any environment. |
| Auto Flash: The camera determines if the flash should be used or not. | ||
 | No Flash : The flash is turned off. | |
| k Date | ||
| I Photo mode | ||
| m Picture resolution | VGA/ 3M/ 5M/ 8M/ 12M | |
| n White Balance | Auto (Default) | |
| Daylight | Cloudy | |
| Tungsten | Fluorescent | |
| o Hand-shaking indicator | Appears as the pictures taken might be blur caused by the hand shake when in low light | |
| p Stabilizer indicator | Appears means you're turn on stabilizer function | |
How to setup the language
Please choose your local language before using the camcorder.
- Press the Menu [18] button to enter the Menu.
- Press the Right/ EV± [17] button to select the Setup menu.
- Use the Zoom button/ Up & Down [2] button to navigate to point language. Press the Photo mode & Shutter/ OK [1] button to enter the language menu.
- Use the Zoom button/ Up & Down [2] button to choose the language you want and press the Photo mode & Shutter/ OK [1] button to confirm.
- Press the Menu [18] button to exit the Menu.
Recording a video clip
- Set the focus to an appropriate setting by using the Macro switch [9].
Normally, you may set the focus to (▲ for most filming conditions.
Select (only for close-ups.
-
Press the VIDEO mode/ RECORD [3] (n) button to start recording.
-
Use the Zoom button/ Up & Down [2] (+/-) button to zoom in or zoom out the screen.
-
Press the VIDEO mode/ RECORD [3] (button again to stop recording.
Taking a still picture
- Set the focus to an appropriate setting. Normally, you may set the focus to ( ) for most filming conditions.
Select ( ) only for close-ups.
-
Use the Zoom button/ Up & Down [2] (+/-) button to zoom in or zoom out the screen.
-
Press the Photo mode & Shutter/ OK [1] (i) to take a still picture.
Note: The flash light is not available when using ( ) and continuous shot ( ) mode.
Note: The continuous shot function is not available when Scene Mode setting is Night mode.
Note: When in low light, the hand-shaking icon ( ) might appear as the pictures taken might be blur caused by the hand shake.
Playing back still picture or video clip
To playback the recorded videos/pictures, press the Playback [4] (▶ button.
- To play back still picture or video clip. Use Left/ Flash light [16] button for Last file and Right/EV± [17] button for Next file. The file NO is displayed in the bottom of the display. To playback a video clip, press the VIDEO mode/ RECORD [3] button.
- Use Zoom button Up and Down to zoom in /out the still picture.
- Pan function: After zoom in, you could press the Left or Right button to enter Pan function. Press the Left or Right button again to move from one end of the picture to the other.

| No. Item | |
| a Play / Pause | |
| b File number | |
| c Playback mode | |
| d Video file or photo file | |
| e Resolution (VGA/QVGA/D1) | |
| f Memory source (MInternal memory /SD Micro SD card) |
Exporting to a TV
The TV system is different across areas. If you need to adjust the TV-out setting, please refer to the “Advanced settings” section for more information. (Taiwan: NTSC; America: NTSC; Europe: PAL; China: PAL)
- Turn on your TV and switch the TV to AV mode.
- Connect the audio and video ends of the USB /AV combo cable to the TV.
- Connect the other end of the USB /AV combo cable to your camcorder.
- Turn on the camcorder.
- To play back still picture or video clip. Use Left/ Flash light [16] button for Last file and Right/ EV± [17] button for Next file. The file no is displayed in the bottom of the display. To playback a video clip, press the VIDEO mode/ RECORD [3] button.
- Use Zoom button Up and Down to zoom in /out the still picture.

How to navigate in the menu
Icon Description
Photo mode & Shutter/ OK [1] To confirm the selection.
Zoom button / Up& Down [2] Navigate through the settings up and down.
Left/ flash light [16] Choose Left-side Menu or Exit.
Right/ EV± [17] Choose Right-side Menu.
Menu [18] Open the Menu or delete the photo.
Advanced settings
Setting menu (Options
Photo setting
Press Photo mode & Shutter/ OK [1] to enter the photo mode and press Menu [18] button once to enter photo setup mode. Use the Zoom button/ Up & Down [2] button to choose the selection you want. Press the Photo mode & Shutter/ OK [1] button to enter the setting you like to modify.
Item Option Description
| Size VGA/ 3M/ 5M/ 8M/ 12M Resolution | ||
| Quality Fine/Standard/Economy Picture quality | ||
| Scene Mode | Auto/ Sport/ Night/ Portrait/Landscape/ Backlight | Scene selected for different modes |
| EV Setup | 0.0,+/-1/3, +/-2/3, +/-1.0,+/-4/3, +/-5/3, +/-2.0 | Level of exposure |
| White Balance | Auto (Default) Automatic white balance | |
| Daylight White balance selected for daylight surrounding | ||
| Cloudy White balance selected for cloudy surrounding | ||
| Tungsten White balance selected for tungsten lighting | ||
| Fluorescent | White balance selected for Fluorescent surrounding | |
| ISO Auto/ 100/ 200/ 400 ISO | ||
| Color | Standard/ Vivid/ Sepia/Moonochrome | Select color mode |
| Saturation Normal/ High/ Low Select saturation mode | ||
| Sharpness | Normal/ Hard/ Soft | Select sharpness mode |
| Selftimer | Off | Turn off the self-timer |
| 2, 10, 10+2 Seconds | Set the delay time at 2s, 10s or 10+2s to take a picture | |
| Time Stamp | Off/ Date only/ Date&Time | Set a date stamp on each picture and video in formal YYYY.MM.DD |
| Continuous Shot | On/ Off | Take single picture or 3 continuous pictures |
| Face Detection | Off/ Face Det./ Smile Det./ | Select face or smile detection mode |
Video setting
Press the VIDEO mode/ RECORD [3] button to enter the video mode and press Menu [18] button once to enter video setup mode. Use the Zoom button/ Up & Down [2] button to choose the selection you want. Press the Photo mode & Shutter/ OK [1] button to enter the setting you like to modify.
| Item Option Description | ||
| Size VGA/QVGA/D1 Select video size | ||
| EV Setup | 0.0,+/-1/3, +/-2/3, +/-1.0, +/-4/3, +/-5/3, +/-2.0 | Level of exposure |
| White Balance | Auto (Default) Automatic white balance | |
| Daylight White balance selected for daylight surrounding | ||
| Cloudy White balance selected for cloudy surrounding | ||
| Tungsten White balance selected for tungsten lighting | ||
| Fluorescent White balance selected for Fluorescent surrounding | ||
Setup
In photo/video setup mode, press Right/ EV± [17] button to enter the Setup menu. Use the Zoom button/ Up & Down [2] button to choose the selection you want and Photo mode & Shutter/ OK [1] to confirm the setting.
| Item Option Description | ||
| Format Cancel/ Execute Format the memory card or the internal memory. | ||
| Language | English(Default)/T-Chinese/S-Chinese/French/German/Italian/Spanish/Portuguese/Netherland/Dutch | Select display language |
| Auto Off Off / 1min / 3min / 5min | Auto power off in 1min, 3min(default) if no operation | |
| System Reset Cancel / Execute Restore default setting | ||
| Light Frequency | 50 Hz | Main European electricity frequency |
| 60 Hz | Main American electricity frequency | |
| TV Output | NTSC | American and Japanese video format |
| PAL | European video format | |
| Date Input | Off / Set | Date setting |
| Sound Effect | On / Off | Turn on/ off the sound effect |
| Note: The escape from menu press the Menu [18] button to exit. | ||
Playback Settings
Press Playback [4] to enter the playback mode and press Menu [18] button once to enter PLAYBACK setup mode. Use the Zoom button/ Up & Down [2] button to choose the selection you want and Photo mode & Shutter/ OK [1] to confirm the setting.
| Item | Option | Description |
| Delete | Single / All / Select | Select photo to delete |
| Copy to Card Cancel / Execute Select photo to copy to your microSD card | ||
| Slide Show | 3 sec. /5 sec. /10 sec. | Select the slide show time |
| Protect | Single / All / Select | Select photo to protect |
| Thumbnail | Execute Turn the thumbnail setting | |
| Volume 1~8 | Volume set | |
Specifications
| Item Description | |
| Model 5 Mega-pixel camera | |
| Resolution Camcorder: | |
| D1 (720x480)@30fps | |
| VGA (640X480)@30fps | |
| QVGA (320X240)@30fps | |
| Camera: 12M / 8M / 5M / 3M / VGA | |
| External memory Micro SD slot (SDHC Card), up to 16GB SDHC | |
| Digital zoom 8X | |
| File format AVI (M-JPEG), JPEG | |
| LCD display 6.1 cm (2.4") (480RGB x 234)LCD with 270° rotation | |
| TV-out NTSC/PAL system supported | |
| Lens specifications Fixed focus, 2 steps | |
| Shutter time 1/8 to 1/4000 seconds | |
| Humity 0~90% | |
| Working temperature 0~40°C | |
| Bulit-in Microphone Yes | |
| Bulit-in Speaker Yes | |
| Self-Timer | 2 seconds:Take photo after pressing the camera shutter. |
| 10 seconds:Take photo after pressing the camera shutter. | |
| 10+2 seconds: Take photo after pressing camera shutter in 10 seconds and after that it will take photos every 2 seconds per each until user press camera shutter to stop. | |
| Interface USB 2.0 | |
| Battery | 2x AA alkaline batteries (1.5 V); Rechargeable battery allowed |
| Mesurements | 107.8x32.8x69.5mm |
| Weight 110g(without battery inside) | |
| Note: Specifications are subject to change without notification. | |
Troubleshooting
| Problem Cause Solution | ||
| Cannot turn on the unit | 1. Low battery power.2. Battery placed at wrong polarities. | Replace or install the battery correctly. |
| Photos can not be saved when taking pictures. | The memory card or built-in memory hasn't been formatted properly. | Format the memory in SETUP mode of the camera. Please refer to section 5.3. |
| Flash does not work. | Battery Power is too low. Replace with new ALKALINE battery. | |
| The photos are over exposure | Set the flash light to force mode in bright environment. | Set the Flash light to Auto Mode A |
| The photos are blurry | 1. The DV (camera) is not held steadily2. The lens of DV (camera) is dirty.3. The DV (camera) is Set to wrong macro mode. | 1. Hold the DV (camera) steadily until it beeps when taking video or photo.2. Clean the lens with soft dry cloth.3. Set the macro mode according to the distances of subject. |
natural_image
Diagram of a car battery pack with two batteries and one casing, showing internal components without any text or symbols.natural_image
Line drawing of a compact digital camera with no visible text or symbolsHinweis:
natural_image
Two technical line drawings of a handheld device with circular ports and a rectangular body (no text or symbols)natural_image
Diagram of a car battery pack with external batteries and casing (no text or symbols)natural_image
Line drawing of a compact digital camera with no visible text or symbolsNotice :
natural_image
Technical line drawings of two mechanical components with no visible text or symbolsnatural_image
Diagram of a car battery pack with external components and battery bodies (no text or labels)natural_image
Line drawing of a digital camera module (no text or symbols)Avviso:
natural_image
Two technical line drawings of a handheld device with circular ports and a rectangular body (no text or symbols)natural_image
Diagram of a battery pack assembly with two batteries and one casing, showing internal components without any text or symbols.natural_image
Line drawing of a digital camera module (no text or symbols)Aviso:
natural_image
Two technical line drawings of a handheld device with circular components and a rectangular body (no text or symbols)natural_image
Diagram of a car battery pack with external components and battery bodies (no text or labels)natural_image
Line drawing of a digital camera module (no text or symbols)Aviso:
natural_image
Two technical line drawings of a handheld device with circular ports and a rectangular body (no text or symbols)natural_image
Diagram of a car battery pack with external batteries and casing (no text or symbols)natural_image
Line drawing of a digital camera module (no text or symbols)Opmerking:
natural_image
Two technical line drawings of a handheld device with circular components (no text or symbols)| Year Ended December 31, | ||
| 2018 | 2017 | |
| (in millions) | ||
| Revenues | 1,465 | 1,395 |
| Costs and expenses | (1,048) | (1,018) |
| Net income | 1,465 | 1,395 |
| Auto (Standaard) |
| Bewolkt |
| Fluorescent |
Taal instellen
Model 5 Mega-pixel camera
Resolutie Camcorder:
D1 (720x480)@30fps
VGA (640X480)@30fps
QVGA (320X240)@30fps
Camera: 12M / 8M / 5M / 3M / VGA
natural_image
Diagram of a battery pack with external components and battery cells (no text or labels)natural_image
Line drawing of a compact digital camera with no visible text or symbolsข้อสังเกต:
natural_image
Two technical line drawings of a mechanical device with no visible text or symbolsnatural_image
Diagram of a car battery pack with external components and battery plates (no text or labels)插入Micro SD卡
natural_image
Line drawing of a digital camera module (no text or symbols)注意:
natural_image
Two technical line drawings of a handheld device with circular components (no text or symbols)natural_image
Diagram of a car battery pack with external batteries and casing (no text or symbols)插入Micro SD記憶卡
natural_image
Line drawing of a digital camera module (no text or symbols)注意事項:
natural_image
Two technical line drawings of a handheld device with no visible text or symbolsnatural_image
Diagram of a car battery pack with external components and battery bodies (no text or labels)Micro SD 카드 삽입하기
natural_image
Line drawing of a digital camera module (no text or symbols)주의:
natural_image
Two technical line drawings of a mechanical device with no visible text or symbolsnatural_image
Diagram of a battery pack assembly with external components and polarity indicators (no text or labels)Micro SDカードの装着
natural_image
Line drawing of a compact digital camera with visible lens, buttons, and front panel (no text or symbols)注意:
natural_image
Two technical line drawings of a mechanical device with no visible text or symbolsnatural_image
Diagram of a car battery pack with external batteries and casing (no text or symbols)natural_image
Line drawing of a digital camera module (no text or symbols)Aviso:
natural_image
Two technical line drawings of a mechanical device with no visible text or symbols

- POCKETDV
- Welcome:
- FCC Compliance Statement:
- Safety Notice:
- Preparing the Camcorder
- Package content
- Product overview
- Getting Started
- Loading the battery
- Inserting the Micro SD card
- Notice:
- Turning on/off the camcorder
- How to setup the language
- Recording a video clip
- Taking a still picture
- Playing back still picture or video clip
- Exporting to a TV
- How to navigate in the menu
- Icon Description
- Advanced settings
- Setting menu (Options
- Photo setting
- Video setting
- Setup
- Playback Settings
- Hinweis:
- Notice :
- Avviso:
- Aviso:
- Opmerking:
- Taal instellen
- 插入Micro SD卡
- 插入Micro SD記憶卡
- Micro SD 카드 삽입하기
- 주의:
- Micro SDカードの装着
- 注意:
Brand : AIPTEK
Model : T230
Category : Camcorder