
BCS-707 - Home Theater System PIONEER - Free user manual and instructions
Find the device manual for free BCS-707 PIONEER in PDF.


| Product Type | Home Theater System |
| Brand | Pioneer |
| Model | BCS-707 |
| Category | Home Theater System |
| Dimensions (W x H x D) | 420 x 320 x 350 mm (main unit) |
| Weight | 5.2 kg (main unit) |
| Power Supply | 220-240 V, 50/60 Hz |
| Power Consumption | 150 W (operating) |
| Speaker Configuration | 5.1 channels (5 satellites + subwoofer) |
| Output Power | 100 W per channel (1 kHz, 6 ohms, 1% THD) |
| Supported Disc Formats | DVD-Video, DVD-R/RW, CD, CD-R/RW |
| Connectivity | HDMI (input/output), USB, optical digital audio input, analog audio input (RCA) |
| FM Radio | Yes, with 30 presets |
| Bluetooth Function | Yes, version 2.1 + EDR |
| Remote Control | Supplied (type RC-xxx) |
| Display | Vacuum Fluorescent Display (VFD) |
| Maintenance and Cleaning | Dust with a soft, dry cloth. Do not use solvents. |
| Safety | Do not expose to moisture. Use in a well-ventilated area. |
| Spare Parts and Repairability | Parts available via authorized Pioneer center. Repairability index: 6.5/10 |
| General Information | 2-year warranty. Made in Malaysia. |
Frequently Asked Questions - BCS-707 PIONEER
User questions about BCS-707 PIONEER
0 question about this device. Answer the ones you know or ask your own.
Ask a new question about this device
Download the instructions for your Home Theater System in PDF format for free! Find your manual BCS-707 - PIONEER and take your electronic device back in hand. On this page are published all the documents necessary for the use of your device. BCS-707 by PIONEER.
USER MANUAL BCS-707 PIONEER
Operating instructions
Mode d'emploi
Bedienungsanleitung
This lightning flash with arrowhead symbol within an equilateral triangle is intended to alert the user to the presence of uninsulated dangerous voltage within the product's enclosure that may be of sufficient magnitude to constitute a risk of electric shock to persons.
The exclamation point within an equilateral triangle is intended to alert the user to the presence of important operating and maintenance (servicing) instructions in the literature accompanying the product.
Cautions and Warnings
WARNING: TO PREVENT FIRE OR ELECTRIC SHOCK HAZARD, DO NOT EXPOSE THIS PRODUCT TO RAIN OR MOISTURE.
WARNING: Do not install this equipment in a confined space such as a book case or similar unit.
CAUTION: Do not block any ventilation openings. Install in accordance with the manufacturer's instructions.
Slots and openings in the cabinet are provided for ventilation and to ensure reliable operation of the product and to protect it from over heating. The openings shall be never be blocked by placing the product on a bed, sofa, rug or other similar surface. This product shall not be placed in a built-in installation such as a bookcase or rack unless proper ventilation is provided or the manufacturer's instruction has been adhered to.
CLASS 1 LASER PRODUCT APPAREIL À LASER DE CLASSE 1
CAUTION: This product is a class 1 laser product classified under the Safety of laser products, IEC60825-1:2007. To ensure proper use of this product, please read this owner's manual carefully and retain it for future reference. Shall the unit require maintenance, contact an authorized service centre.
Use of controls, adjustments or the performance of procedures other than those specified herein may result in hazardous radiation exposure.
To prevent direct exposure to laser beam, do not try to open the enclosure. Visible laser radiation when open. DO NOT STARE INTO BEAM.
CAUTION concerning the Power Cord
Most appliances recommend they be placed upon a dedicated circuit;
That is, a single outlet circuit which powers only that appliance and has no additional outlets or branch circuits. Check the specification page of this owner's manual to be certain. Do not overload wall outlets. Overloaded wall outlets, loose or damaged wall outlets, extension cords, frayed power cords, or damaged or cracked wire insulation are dangerous. Any of these conditions could result in electric shock or fire. Periodically examine the cord of your appliance, and if its appearance indicates damage or deterioration, unplug it, discontinue use of the appliance, and have the cord replaced with an exact replacement part by an authorized service centre. Protect the power cord from physical or mechanical abuse, such as being twisted, kinked, pinched, closed in a door, or walked upon. Pay particular attention to plugs, wall outlets, and the point where the cord exits the appliance. To disconnect power from the mains, pull out the mains cord plug. When installing the product, ensure that the plug is easily accessible.

PIONEER hereby declares that this/these product(s) is/are in compliance with the essential requirements and other relevant provisions of Directive 2004/108/EC, 2006/95/EC, and 2009/125/EC.
WARNING: To prevent a fi re hazard, do not place any naked fl ame sources (such as a lighted candle) on the equipment.
This device is equipped with a portable battery or accumulator.
Safety way to remove the battery or the battery from the equipment: Remove the old battery or battery pack, follow the steps in reverse order than the assembly. To prevent contamination of the environment and bring on possible threat to human and animal health, the old battery or the battery put it in the appropriate container at designated collection points. Do not dispose of batteries or battery together with other waste. It is recommended that you use local, free reimbursement systems batteries and accumulators. The battery shall not be exposed to excessive heat such as sunshine, fire or the like.
CAUTION: The apparatus shall not be exposed to water (dripping or splashing) and no objects filled with liquids, such as vases, shall be placed on the apparatus.
Information for users on collection and disposal of old equipment and used batteries

(Symbol examples) for batteries

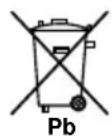
These symbols on the products, packaging, and/or accompanying documents mean that used electrical and electronic products and batteries should not be mixed with general household waste.
For proper treatment, recovery and recycling of old products and used batteries, please take them to applicable collection points in accordance with your national legislation.
By disposing of these products and batteries correctly, you will help to save valuable resources and prevent any potential negative effects on human health and the environment which could otherwise arise from inappropriate waste handling.
For more information about collection and recycling of old products and batteries, please contact your local municipality, your waste disposal service or the point of sale where you purchased the items.
These symbols are only valid in the European Union.
For countries outside the European Union:
If you wish to discard these items, please contact your local authorities or dealer and ask for the correct method of disposal.
Notes on Copyrights
- Because AACS (Advanced Access Content System) is approved as content protection system for BD format, similar to use of CSS (Content Scramble System) for DVD format, certain restrictions are imposed on playback, analogue signal output, etc., of AACS protected contents. The operation of this product and restrictions on this product may vary depending on your time of purchase as those restrictions may be adopted and/or changed by AACS after the production of this product.
• Furthermore, BD-ROM Mark and BD+ are additionally used as content protection systems for BD format, which imposes certain restrictions including playback restrictions for BD-ROM Mark and/or BD+ protected contents. To obtain additional information on AACS, BD-ROM Mark, BD+, or this product, please contact an authorized Customer Service Centre. - Many BD-ROM/DVD discs are encoded with copy protection. Because of this, you should only connect your player directly to your TV, not to a VCR. Connecting to a VCR results in a distorted picture from copy-protected discs.
- This product incorporates copyright protection technology that is protected by U.S. patents and other intellectual property rights. Use of this copyright protection technology must be authorized by Rovi Corporation, and is intended for home and other limited viewing uses only unless otherwise authorized by Rovi Corporation. Reverse engineering or disassembly is prohibited.
• Under the U.S. Copyright laws and Copyright laws of other countries, unauthorized recording, use, display, distribution, or revision of television programmes, videotapes, BD-ROM discs, DVDs, CDs and other materials may subject you to civil and/or criminal liability.
Important Notice for TV colour system
The colour system of this player differs according to currently playing discs.
For example, when the player plays the disc recorded in the NTSC colour system, the image is output as an NTSC signal.
Only the multi system colour TV can receive all signals output from the player.
- If you have a PAL colour system TV, you will see just distorted images when using discs or video contents recorded in NTSC.
- The multi system colour TV changes the colour system automatically according to input signals. In case that the colour system is not changed automatically, turn it off and then on to see normal images on screen.
- Even if the disc recorded in NTSC colour system are well displayed on your TV, these may not be recorded correctly on your recorder.
Contents
1
Safety Information
2 Cautions and
2
Preparation
8 Introduction
8 About ☉ the
Display
8 Symbols Used in this Manual
9 Supplied Accessories
10 Playable Discs
11 File compatibility
12 Regional Code
12 AVCHD (Advanced
Codec High Definition)
12 Certain System Requirements
12 Compatibility Notes
13 Remote control
14 Front panel
15 Rear panel
3
Installation
16 Assemble the speakers
16 Speaker Setup for BCS-707
18 Speaker Setup for BCS-303
19 Wall mounting the centre speaker
19 Additional notes on speaker
20 Positioning the system
21 Connecting to Your TV
21 HDMI Connection
22 Component Video
Connection
23 Video Connection
23 Resolution Setting
24 Antenna Symbol connection
24 Connections with external device
AUX Connection
25 PORTABLE IN connection
25 OPTICAL IN 1/2 connection
26 Bluetooth® connection
28 Connecting to your Home Network
29 Network Setup
31 USB device connection
32 Settings
32 Adjust the Setup Settings
33 [DISPLAY] Menu
34 [LANGUAGE] Menu
35 [AUDIO] Menu
36 [LOCK] Menu
37 [NETWORK] Menu
37 [OTHERS] Menu
39 Sound Eff ect
4
Operation
40 General Playback
42 Advanced Playback
44 On-Screen display
48 Enjoying BD-LIVE
49 Playing movie file and VR discs
51 Viewing a photo
53 Listening to music
56 Playing the iPod
58 Radio Operations
59 Playing content via your home network
5
Maintenance
63 Notes on Discs
63 Handling the Unit
6
Troubleshooting
64 General
65 Picture
65 Sound
66 Network
7
Appendix
67 Controlling a TV with the Supplied Remote Control
68 Area Code List
69 Language code List
70 Video output resolution
71 Trademarks and Licences
73 Specifications
75 Open source software notice
2
Preparation
Introduction
About the "∅" Symbol Display
"may appear on your TV display during operation and indicates that the function explained in this owner's manual is not available on that specific media.
Symbols Used in this Manual

NOTE
Indicates special notes and operating features.

CAUTION
Indicate cautions for preventing possible damages from abuse.
A section whose title has one of the following symbols are applicable only to the disc represented by the symbol.
 | BD-ROM disc |
 | DVD-Video, DVD±R/RW in Video mode or VR mode and fi nalized |
 | DVD±R/RW in AVCHD format |
 | Audio CDs |
 | Movie fi les |
 | Music fi les |
 | Photo fi les |
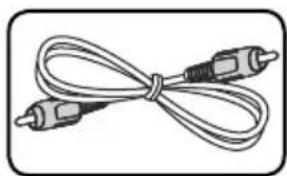
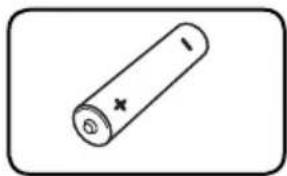
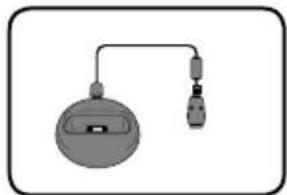
Supplied Accessories
natural_image
Illustration of a double-sleeve cable with two connectors (no text or symbols)
natural_image
Black remote control device with black buttons and a grid (no visible text or symbols)Video cable (1) Remote control (1)
natural_image
Simple line drawing of a cylindrical battery with a cross mark on its side (no text or symbols)
natural_image
Simple line drawing of a cable with two connectors (no text or symbols)Battery (1) FM antenna (1)
natural_image
Simple diagram of a device with a circular component and connected plug (no text or symbols)iPod cradle (1)
Accessories of speaker box (S-BD707T)
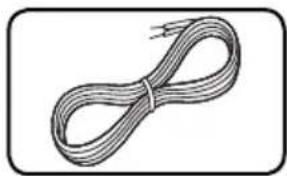
natural_image
Illustration of a coiled cable or wire with no text or symbols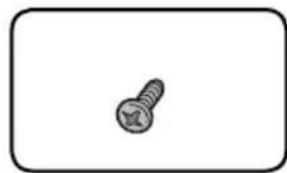
natural_image
Simple line drawing of a screw inside a rounded rectangle (no text or symbols)Colour-coded
Speaker cables (5)

natural_image
Simple 3D-rendered gray oval object with three small dots on its surface, enclosed in a rounded rectangle (no text or symbols)Speaker stand bases (4)
Screws (12)

natural_image
Simple diagram of four circles inside a parallelogram, no text or symbols presentSmall non-skid pads (1)

natural_image
Grid of circular holes on a rectangular surface, no text or symbols presentMiddle non-skid pads (1)
Accessories of speaker box (S-BD707SW)

natural_image
Illustration of a coiled cable or wire with no text or symbols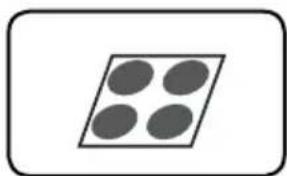
natural_image
Simple diagram of four circles arranged in a diamond shape within a rounded rectangle (no text or symbols)Speaker cable (1) Large non-skid pads (1)
Accessories of speaker box (S-BD303)

natural_image
Simple line drawing of a coiled cable or rope (no text or symbols)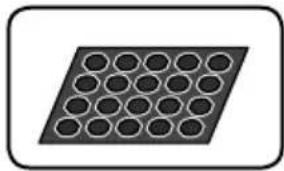
natural_image
Diagram of a grid-patterned rectangular plate with uniform circular holes (no text or symbols)Small non-skid pads (1)
Colour-coded
Speaker cables (6)

natural_image
Simple diagram of four circles arranged in a diamond shape within a rounded rectangle (no text or symbols)Large non-skid pads (1)
playable Discs
| [BLu-rayDisc] | Blu-ray Disc- Discs such as movies that can be purchased or rented.- BD-R/RE discs that contain Movie, Music or Photo fi les. |
 | DVD-VIDEO8 / 12 cm discDiscs such as movies that can be purchased or rented. |
 | DVD±R8 / 12 cm disc- Video mode and fi nalized only- Supports the dual layer disc also- Finalized AVCHD format- DVD±R discs that contain Movie, Music or Photo fi les |
 | |
 | DVD-RW8 / 12 cm disc- VR mode, Video mode and fi nalized only- Finalized AVCHD format- DVD-RW discs that contain Movie, Music or Photo fi les. |
 | DVD+RW8 / 12 cm disc- Video mode and fi nalized only- AVCHD format- Finalized AVCHD format- DVD+RW discs that contain Movie, Music or Photo fi les. |
 | Audio CD8 / 12 cm disc |
 | CD-R/RW8 / 12 cm disc- CD-R/RW discs that contain audio titles, Movie, Music or Photo fi les. |

NOTE
- Depending on the conditions of the recording equipment or the CD-R/RW (or DVD±R/RW) disc itself, some CD-R/RW (or DVD±R/RW) discs cannot be played on the unit.
- Depending on the recording software & the finalization, some recorded discs (CD-R/RW, DVD±R/RW, BD-R/RE) may not be playable.
- BD-R/RE, DVD±R/RW and CD-R/RW discs recorded using a personal computer or a DVD or CD Recorder may not play if the disc is damaged or dirty, or if there is dirt or condensation on the player's lens.
- If you record a disc using a personal computer, even if it is recorded in a compatible format, there are cases in which it may not play because of the settings of the application software used to create the disc. (Check with the software publisher for more detailed information.)
- This player requires discs and recordings to meet certain technical standards in order to achieve optimal playback quality.
- Pre-recorded DVDs are automatically set to these standards. There are many different types of recordable disc formats (including CD-R containing MP3 or WMA files) and these require certain pre-existing conditions to ensure compatible playback.
- Customers should note that permission is required in order to download MP3 / WMA files and music from the Internet. Our company has no right to grant such permission. Permission should always be sought from the copyright owner.
File compatibility
Overall
Available File extensions:
".jpg", ".jpeg", ".png", ".avi", ".divx", ".mpg", ".mpeg", ".mkv", ".mp4", ".mp3", ".wma", ".wav"
• Available fi le extensions diff er depending on the DLNA servers.
- Some ".wav" files are not supported on this player.
• The file name is limited to 180 characters.
- Depending on the size and number of the files, it may take several minutes to read the contents on the media.
Maximum Files/Folder: Less than 2 000 (total number of files and folders)
CD-R/RW, DVD±R/RW, BD-R/RE Format:
ISO 9660+JOLIET, UDF and UDF Bridge format
MOVIE
Available resolution size:
1 920 x 1 080 (W x H) pixels
playable subtitle: SubRip (.srt/.txt), SAMI (.smi), SubStation Alpha (.ssa/.txt), MicroDVD (.sub/.txt), VobSub (.sub), SubViewer 1.0 (.sub), SubViewer 2.0 (.sub/.txt), TMPlayer (.txt), DVD Subtitle System (.txt)
- VobSub (.sub) is not available in the [Home Link] feature.
Playable Codec format: "DIVX3.xx", "DIVX4.xx", "DIVX5.xx", "XVID", "DIVX6.xx" (Standard playback only), H.264/MPEG-4 AVC, MPEG1 SS, MPEG2 PS, MPEG2 TS
Playable Audio format: "Dolby Digital", "DTS", "MP3", "WMA", "AAC", "AC3"
- Not all the WMA and AAC Audio formats are compatible with this unit.
Sampling frequency:
between 32 kHz to 48 kHz (WMA), between 16 kHz to 48 kHz (MP3)
Bit rate:
between 20 kbps to 320 kbps (WMA), between 32 kbps to 320 kbps (MP3)

NOTE
- HD movie fi les contained on the CD or USB 1.0/1.1 may not played properly. BD, DVD or USB 2.0 are recommended to play back HD movie fi les.
- This player supports H.264/MPEG-4 AVC profi le Main, High at Level 4.1. For a fi le with higher level, the warning message will appear on the screen.
- This player does not support the fi les that are recorded with GMC*1 or Qpel*2. Those are video encoding techniques in MPEG4 standard, like DivX or XVID have.
*1 GMC – Global Motion Compensation
*2 Qpel - Quarter pixel
MUSIC
Sampling frequency:
between 8 kHz to 48 KHz (WMA), between 11 kHz to 48 kHz (MP3)
Bit rate:
between 8 kbps to 320 kbps (WMA, MP3),

NOTE
- This unit cannot support the ID3 Tag embedded MP3 file.
- The total playback time indicated on the screen may not be correct for VBR fi les.
PHOTO
Recommended size:
Less than 4,000 x 3,000 x 24 bit/pixel Less than 3,000 x 3,000 x 32 bit/pixel Less than 4 MByte/fi le
- Progressive and lossless compression photo image files are not supported.
Regional Code
This unit has a regional code printed on the rear of the unit. This unit can play only BD-ROM or DVD discs labeled same as the rear of the unit or "ALL".
AVCHD (Advanced Video Codec High Defi nition)
- This player can playback AVCHD format discs. These discs are normally recorded and used in camcorders.
- The AVCHD format is a high definition digital video camera format.
- The MPEG-4 AVC/H.264 format is capable of compressing images at higher efficiency than that of the conventional image compressing format.
- Some AVCHD discs use the "x.v.Colour" format.
- This player can playback AVCHD discs using "x.v.Colour" format.
- Some AVCHD format discs may not play, depending on the recording condition.
- AVCHD format discs need to be finalized.
- "x.v.Colour" offers a wider colour range than normal DVD camcorder discs.
Certain System Requirements
For high definition video playback:
• High definition display that has COMPONENT or HDMI input jacks.
• BD-ROM disc with high definition content.
- HDMI or HDCP capable DVI input on your display device is required for some content (as specified by disc authors).
- For up-conversion of standard definition DVD, a HDMI or HDCP capable DVI input on your display device is required for copy protected content.
Compatibility Notes
- Because BD-ROM is a new format, certain disc, digital connection and other compatibility issues are possible. If you experience compatibility problems, please contact an authorized Customer Service Centre.
- Viewing high-definition content and up-converting standard DVD content may require a HDMI-capable input or HDCP-capable DVI input on your display device.
- Some BD-ROM and DVD discs may restrict the use of some operation commands or features.
- You can use a USB device that is used to store some disc related information, including downloaded on-line content. The disc you are using will control how long this information is retained.
Remote control
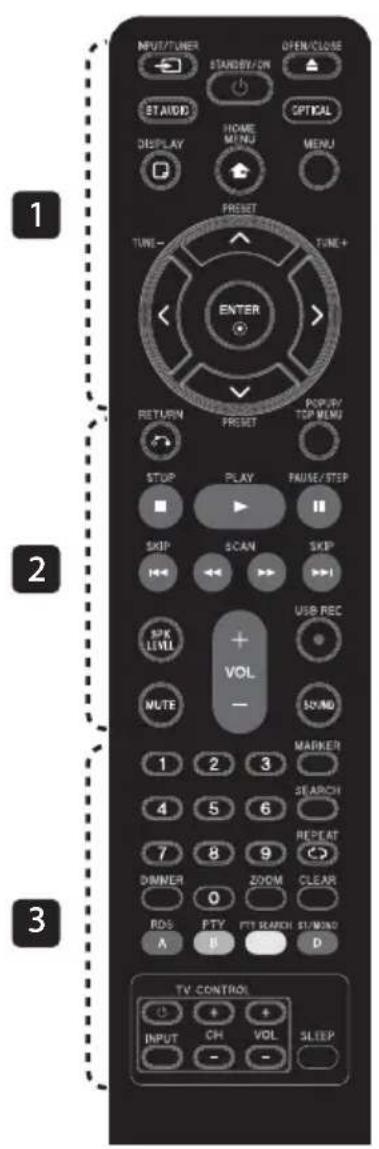
Battery Installation
Remove the battery cover on the rear of the Remote Control, and insert a R03 (size AAA) battery with + and - matched correctly.
1
(STANDBY/ON): Switches the player ON or OFF.
▲ OPEN/CLOSE: Opens and closes the disc tray.
INPUT/TUNER: Changes input mode.
BT AUDIO: Changes input mode to BT AUDIO directly.
OPTICAL: Changes input mode to optical directly.
☐ DISPLAY: Displays or exits On-Screen Display.
HOME MENU: Displays or exits the [Home Menu].
MENU: Accesses the menu on a disc.
Direction buttons: Selects an option in the menu.
ENTER: Acknowledges menu selection.
TUNE (+/-): Tunes in the desired radio station.
PRESET: Selects programme of Radio.
2
RETURN: Exits the menu or resumes playback.
POPUP/TOP MENU: Displays the DVD title menu or BD-ROM's pop-up menu, if available.
■ STOP: Stops playback.
▶ PLAY: Starts playback.
II PAUSE/STEP: Pauses playback
I ◀◀/▶▶I SKIP: Goes to the next or previous chapter / track / fi le.
◄◄/►► SCAN: Searches backward or forward.
SPK LEVEL: Sets the sound level of desired speaker.
● USB REC: Records an audio CD.
MUTE: Mute the unit.
SOUND: Selects a sound effect mode.
VOL +/- : Adjusts speaker volume.
3
0-9 numerical buttons: Selects numbered options in a menu.
MARKER: Marks any point during playback.
SEARCH: Displays or exits the search menu.
REPEAT: Repeats a desired section or sequence.
CLEAR: Removes a mark on the search menu or a number when setting the password.
DIMMER: Dims the light on the unit.
ZOOM: Accesses the zoom menu.
Coloured (A, B, C, D) buttons: Use to navigate on menus.
- A button (RDS): Radio Data System.
- B button (PTY): Views the programme type of the RDS.
- C button (PTY SEARCH): Searches programme type.
- D button: Selects MONO or STEREO in FM mode.
TV Control Buttons: See page 67.
SLEEP: Sets a certain period of time after which the unit will switch to off.
Front panel

1 Disc Tray
2 Operation buttons
STANDBY/ON Button
▲ (OPEN/CLOSE)
FUNCTION
Changes the input source or function
▶/■ (PLAY / PAUSE)
■ (STOP)
◀◀/▶◀ (SKIP)
- TUNE + (Radio tuning)
3 Remote sensor
4 Display window
5 PORTABLE IN
6 USB Port
7 Volume control
Rear panel

1 AC Power cord Plug into the power source.
2 Speakers connectors
3 Cooling Fan
4 Antenna Connector
5 VIDEO OUT
6 AUX (L/R) INPUT
7 COMPONENT VIDEO (Y PB PR) OUTPUT (PROGRESSIVE SCAN)
8 OPTICAL IN 1(TV) / 2
9 iPod (24 pin)
Connect to the furnished iPod cradle.
10 HDMI OUT (type A, Version 1.3) Connect to TV with HDMI inputs.
11 LAN port
3 Installation
Assemble the speakers
Speaker Setup for BCS-707
Preparing the speakers
- Attach the non-skid pads to the base of each speaker stand bases, the subwoofer and the centre speaker.
For speaker stand bases:
Use the supplied adhesive to attach four middle pads to the base (bottom) of each speaker stand base.

For subwoofer:
Use the supplied adhesive to attach four large pads to the base of subwoofer.

For centre speaker:
Use the supplied adhesive to attach four small pads to the base of centre speaker.
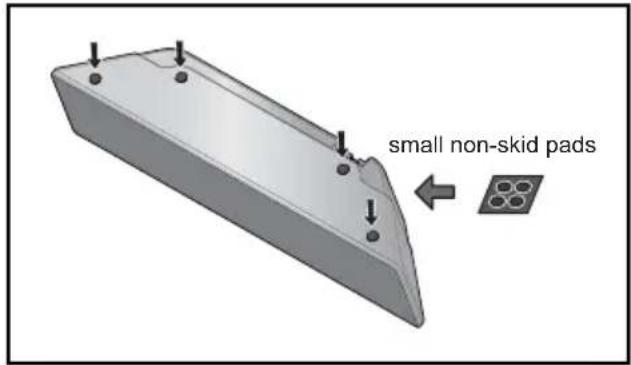
- Attach the speaker stand bases to the stems using the screws provided.
Once you have aligned the stem and base, secure with the small screws at the points shown below. Note that the speaker should face in the direction of the base of the isosceles triangle.

3. Connect the wires to the player.
Connect the white wire with gray line into (+) side and the other wire into (−) side. To connect the cable to the player, press each plastic finger pad to open the connection terminal. Insert the wire and release the finger pad.


CAUTION
- Do not connect any speakers other than those supplied to this system.
- Do not connect the supplied speakers to any amplifi er other than the one supplied with this system. Connection to any other amplifi er may result in malfunction or fi re.
Securing your front and surround speakers
Secure each of the front and surround speakers using the plastic catch provided. Screw two supporting hooks into the wall behind the speaker. Pass a thick cord around the hooks and through the plastic catch so that the speaker is stabilized (make sure to test that it supports the weight of the speaker). After installing, make sure the speaker is securely fixed.


CAUTION
- The plastic catch is not a mounting fi xture, and the speaker should not be hung directly from the wall using this catch. Always use a cord when stabilizing the speaker.
- Pioneer disclaims all responsibility for any losses or damage resulting from improper assembly, installation, insufficient strength of the installation materials, misuse, or natural disasters.
- When placing this unit, ensure that it is firmly secured and avoid areas where it may be likely to fall and cause injury in the event of a natural disaster (such as an earthquake).
Speaker Setup for BCS-303
Preparing the speakers
- Attach the non-skid pads to the base of each speaker.
For speaker stand bases:
Use the supplied adhesive to attach four middle pads to the base (bottom) of each speaker stand base.

For subwoofer:
Use the supplied adhesive to attach four large pads to the base of subwoofer.

For centre speaker:
Use the supplied adhesive to attach four small pads to the base of centre speaker.
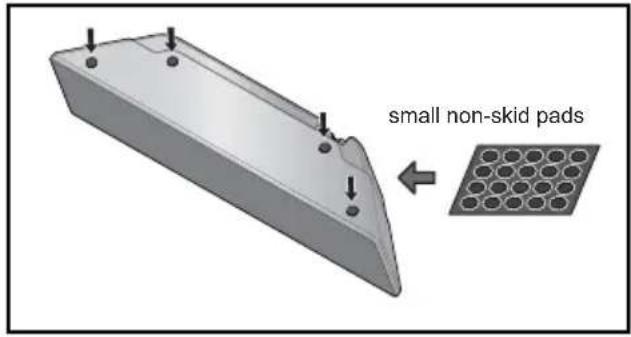
- Connect the wires to the player.
Connect the white wire with gray line into (+) side and the other wire into (−) side. To connect the cable to the player, press each plastic finger pad to open the connection terminal. Insert the wire and release the finger pad.

Wall mounting the centre speaker
The centre speaker have a mounting hole which can be used to mount the speaker on the wall.
Before mounting
Remember that the speaker system is heavy and that its weight could cause the screws to work loose, or the wall material to fail to support it, resulting in the speaker falling. Make sure that the wall you intend to mount the speakers on is strong enough to support them. Do not mount on plywood or soft surface walls.
Mounting screws are not supplied. Use screws suitable for the wall material and support the weight of the speaker.

CAUTION
- If you are unsure of the qualities and strength of the wall, consult a professional for advice.
- Pioneer is not responsible for any accidents or damage that result from improper installation.
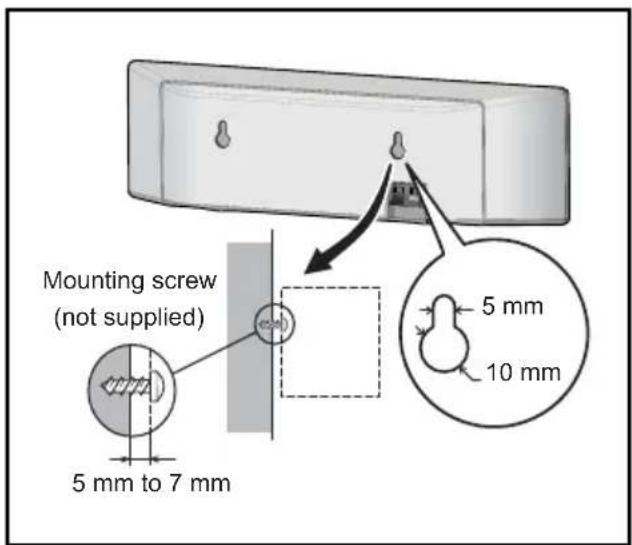
Additional notes on speaker
Install the main front left and right speakers at an equal distance from the TV.
Precautions:
Make sure that all the bare speaker wire is twisted together and inserted fully into the speaker terminal. If any of the bare speaker wire touches the back panel it may cause the power to cut off as a safety measure.
The front, centre and surround speakers supplied with this system are magnetically shielded. However, depending on the installation location, colour distortion may occur if the speaker is installed extremely close to the screen of a television set. If this case happens, turn the power switch of the television set OFF, and turn it ON after 15 min. to 30 min. If the problem persists, place the speaker system away from the television set.
The subwoofer is not magnetically shielded and so should not be placed near a TV or monitor. Magnetic storage media (such as floppy discs and tape or video cassettes) should also not be kept close to the subwoofer.
Do not attach the front/surround speakers and subwoofer to a wall or ceiling. They may fall off and cause injury.
Positioning the system
The following illustration shows an example of positioning the system. Note that the illustrations in these instructions differ from the actual unit for explanation purposes.
For the best possible surround sound, all the speakers other than the subwoofer should be placed at the same distance from the listening position (A).
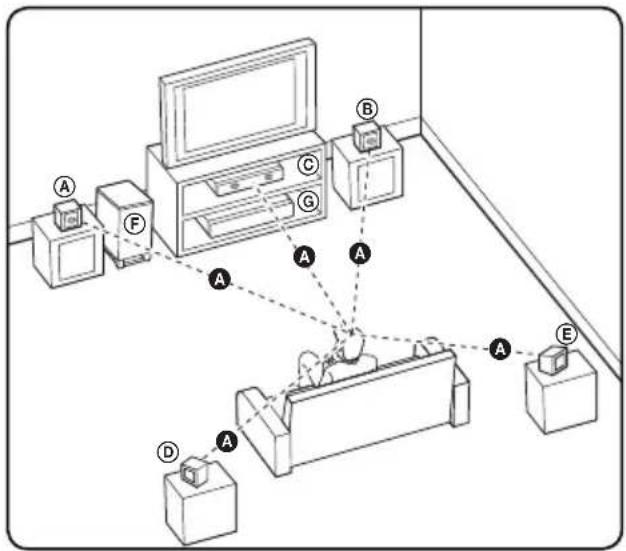
Ⓐ Front left speaker (L)/
⑧ Front right speaker (R):
Place the front speakers to the sides of the monitor or screen and as flush with the screen surface as possible.
© Centre speaker:
Place the centre speaker above or below the monitor or screen.
(D) Surround left speaker (L)/
⑤ Surround right speaker (R):
Place these speakers behind your listening position, facing slightly inwards.
⑤ Subwoofer:
The position of the subwoofer is not so critical, because low bass sounds are not highly directional. But it is better to place the subwoofer near the front speakers. Turn it slightly toward the centre of the room to reduce the wall reflections.
©Unit

CAUTION
- Be careful to make sure children do not put their hands or any objects into the *subwoofer duct. *subwoofer duct: A hole for plentiful bass sound on subwoofer cabinet (enclosure).
- Place the centre speaker at a safe distance from the child's reach.
Otherwise it may result in the speaker falling down and causing personal injury and/or property damage.
• The speakers contain magnet parts, so colour irregularity may occur on the TV screen or PC monitor screen. Please use the speakers away from the TV screen or PC monitor screen.
Connecting to Your TV
Make one of the following connections, depending on the capabilities of your existing equipment.
• HDMI connection (pages 21-22)
- Component Video connection (page 22)
• Video connection (page 23)

NOTE
- Depending on your TV and other equipment you wish to connect, there are various ways you could connect the player. Use only one of the connections described in this manual.
- Please refer to the manuals of your TV, stereo system or other devices as necessary to make the best connections.
- Make sure the player is connected directly to the TV. Tune the TV to the correct video input channel.
- Do not connect your player via your VCR. The image could be distorted by the copy protection system.
HDMI Connection
If you have a HDMI TV or monitor, you can connect it to this player using a HDMI cable(Type A, Version 1.3). Connect the HDMI OUT jack on the player to the HDMI IN jack on a HDMI compatible TV or monitor.
HDMI Connection

flowchart
graph TD
    A["Player"] --> B["HDMI OUT"]
    B --> C["+"]
    C --> D["+"]
    D --> E["+"]
    E --> F["HDMI IN"]
    G["TV"] --> H["+"]
    H --> I["+"]
    I --> J["HDMI IN"]
Set the TV's source to HDMI (refer to TV's Owner's manual).

NOTE
- Changing the resolution when the connection has already been established may result in malfunctions. To solve the problem, turn off the player and then turn it on again.
- When the HDMI connection with HDCP is not verified, TV screen is changed to black screen. In this case, check the HDMI connection, or disconnect the HDMI cable.
- If there is noise or lines on the screen, please check the HDMI cable (length is generally limited to 4.5 m and use a high speed HDMI cable (version 1.3).
- If a connected HDMI device does not accept the audio output of the player, the HDMI device's audio sound may be distorted or may not output.
- When you use HDMI connection, you can change the resolution for the HDMI output. (Refer to "Resolution Setting" on page 23.)
- Select the type of video output from the HDMI OUT jack using [HDMI Color Setting] option on the [Setup] menu (see page 34).
- When you connect a HDMI or DVI compatible device make sure of the following:
- Try switching off the HDMI/DVI device and this player. Next, switch on the HDMI/DVI device and leave it for around 30 seconds, then switch on this player.
- The connected device's video input is set correctly for this unit.
- The connected device is compatible with 720x576p (480p), 1280x720p, 1920x1080i or 1920x1080p video input.
- Not all HDCP-compatible HDMI or DVI devices will work with this player.
- The picture will not be displayed properly with non-HDCP device.
- This player does not playback and TV screen is changed to black screen.
Component Video Connection
Connect the COMPONENT VIDEO OUT jacks on the player to the corresponding input jacks on the TV using Y Pb Pr cables. You can hear the sound the through the system's speaker.
Component Connection


NOTE
When you use COMPONENT VIDEO OUT connection, you can change the resolution for the output. (Refer to "Resolution setting" on page 23.)
Video Connection
Connect the VIDEO OUT jack on the player to the video in jack on the TV using a video cable. You can hear the sound through the system's speakers.

Resolution Setting
The player provides several output resolutions for HDMI OUT and COMPONENT VIDEO OUT jacks. You can change the resolution using [Setup] menu.
- Press HOME MENU (↑).
- Use </> / ∧/V to select the [Setup] and press ENTER (●). The [Setup] menu appears.
- Use /V to select [DISPLAY] option then press > to move to the second level.
- Use / to select the [Resolution] option then press ENTER ( ) or > to move to the third level.
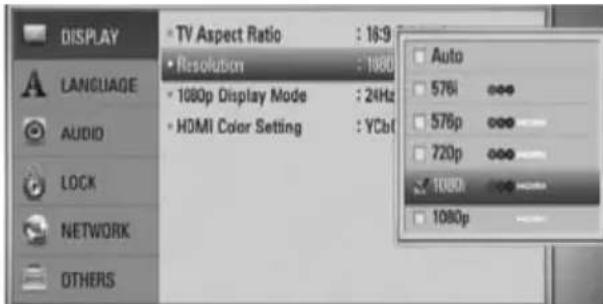
- Use /V to select the desired resolution then press ENTER (●) to confirm your selection.

NOTE
- If your TV does not accept the resolution you have set on the player, you can set resolution to 576p (480p) as follows:
- Press ▲ to open the disc tray.
- Press ■ for more than 5 seconds.
- Since several factors affect the resolution of video output, see "Video Output Resolution" on page 70.
Antenna connection
Connect the supplied antenna for listening to the radio.
Antenna Connection
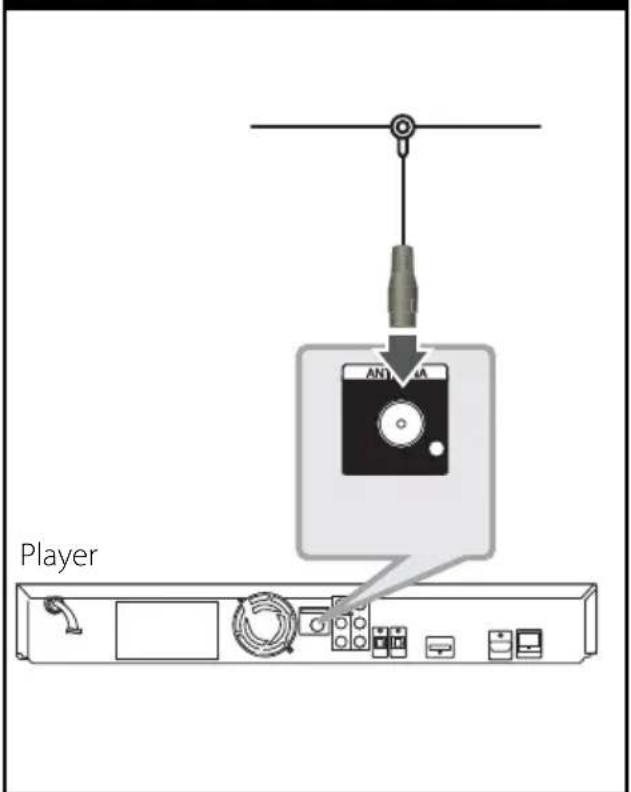

NOTE
After connecting the FM wire antenna, keep it as horizontal as possible. Be sure to fully extend the FM wire antenna.
Connections with external device
AUX Connection
You can enjoy the sound from an external component through the speakers of this system.
Connect the analogue audio output jacks of your component into the AUX L/R (INPUT) on this unit. And then select the [AUX] option by pressing INPUT/TUNER, </> and ENTER (◎).
AUX Connection

PORTABLE IN connection
You can enjoy the sound from your portable audio player through the speakers of this system.
Connect the headphones (or line out) jack of the portable audio player into the PORTABLE IN socket of this unit. And then select the [PORTABLE] option by pressing INPUT/TUNER, </> and ENTER (◎).
PORT.IN Connection

OPTICAL IN 1/2 connection
You can enjoy the sound from your component with a digital optical connection through the speakers of this system.
Connect the optical output jack of your component into the OPTICAL IN 1/2 jacks on the unit. And then select the [OPTICAL 1/2] option by pressing INPUT/TUNER, </> and ENTER (●). Or press OPTICAL to select directly.
Optical Connection

Bluetooth® connection
About Bluetooth
Bluetooth ^® is wireless communication technology for short range connection.
The available range is within 10 meters. (The sound may be interrupted when the connection interfered by the other electronic wave or you connect the bluetooth in the other rooms.)
Connecting individual devices under Bluetooth wireless technology does not incur any charges. A mobile phone with Bluetooth wireless technology can be operated via the Cascade if the connection was made via Bluetooth wireless technology.
Available Devices : Mobile phone, MP3, Laptop, PDA (This units be supported the Stereo Headset.)
Bluetooth Profi les
In order to use Bluetooth wireless technology, devices must be able to interpret certain profi les.
This unit is compatible with following profi le.
A2DP (Advanced Audio Distribution Profi le)
Listening to music of a Bluetooth device
Pairing your unit and Bluetooth device
Before you start the pairing procedure, make sure the Bluetooth feature is turned on in to your Bluetooth device. Refer to your Bluetooth device's user guide. Once a pairing operation is performed, it does not need to be performed again.
- Select the Bluetooth function by using the INPUT/TUNER or BT AUDIO. Appears "BT AUDIO" and then "BT READY" in display window.
- Operate the Bluetooth device and perform the pairing operation. When searching for this unit with the Bluetooth device, a list of the devices found may appear in the Bluetooth device display depending on the type of Bluetooth device. Your unit appears as "PIONEERAUDIO".
- Enter the PIN code. PIN cord : 0000
- When this unit successfully paired with your Bluetooth device, Bluetooth LED of this unit lights up and appears "BT SINK".

NOTE
Depending on the Bluetooth device type, some device have a different pairing way.
- Listening to music. To play a music stored on your Bluetooth device, refer to your Bluetooth device's user guide.

NOTE
- If you change the function of the unit, the Bluetooth function is disconnected, operate pairing again.
- AVRCP cannot be available in this mode.
Checking the information of connected Bluetooth device
This function is operated after pairing. You can check the Bluetooth information.
Press DISPLAY repeatedly.
Bluetooth information is changed as follows. Local Bluetooth Device Address → Device Name → None → ...

NOTE
- This units dose not be supported the Mono Headset Profi le (Hands Free Profi le).
- The sound may be interrupted when the connection interfered by the other electronic wave.
- You cannot control the Bluetooth device with this unit.
- Pairing is limited one Bluetooth device per one unit and multi-pairing is not supported.
- Although the distance between your Bluetooth and the set is less than 10 m, there are obstacles between both, your Bluetooth device cannot be connected.
- Depending on the type of the device, you may not be able to use the Bluetooth function.
- When not connected the Bluetooth, "BT READY" appears on the display window.
- The Electrical malfunction due to devices using same frequency such as Medical equipment, Microwaves or wireless LAN devices, the connection will be disconnected.
- When someone stands and interrupts communication between Bluetooth device and the player, the connection will be disconnected.
- If the gotten away of the distance between Bluetooth and the unit, the sound quality is lower and lower the connection will disconnect when the space between the Bluetooth and the unit gets out of the operating range of Bluetooth.
- The device with Bluetooth wireless technology is disconnected, if you turn off the main unit or put the device away from the main unit more than 10 m.
Connecting to your Home Network
This player can be connected to a local area network (LAN) via the LAN port on the rear panel.
Please refer to the documentation for your network device for further instructions. Connect the player's LAN port to the corresponding port on your Modem or Router using a commercially available LAN or Ethernet cable (CAT5 or better with RJ45 connector). In the example configuration for wired connection below, this player would be able to access content from either of the PCs.
Network Connection

flowchart
graph TD
    A["Router"] --> B["WAN"]
    B --> C["LAN 1"]
    B --> D["LAN 2"]
    B --> E["LAN 3"]
    C --> F["PC"]
    D --> G["PC"]
    E --> H["PC"]
    I["Broadband Service"] --> J["PC"]
    K["Player"] --> L["Computer"]

NOTE
- When plugging or unplugging the LAN cable, hold the plug portion of the cable. When unplugging, do not pull on the LAN cable but unplug while pressing down on the lock.
- Do not connect a modular phone cable to the LAN port.
- Since there are various connection configurations, please follow the specifications of your telecommunication carrier or internet service provider.
- If you want to access content from PCs or DLNA servers, this player must be connected to the same local area network with them via a router.
Network Setup
Before setting the wired network, you need to connect the broadband internet to your home network.
If there is a DHCP server on the local area network (LAN) via wired connection, this player will automatically be allocated an IP address. After making the physical connection, a small number of home networks may require the player's network setting to be adjusted. Adjust the [NETWORK] setting as follows.
- Select [Connection Setting] option in the [Setup] menu then press ENTER (◎).

- Use /V/</> to select the IP mode between [Dynamic] and [Static]. Normally, select [Dynamic] to allocate an IP address automatically.


NOTE
If there is no DHCP server on the network and you want to set the IP address manually, select [Static] then set the [IP Address], [Subnet Mask], [Gateway] and [DNS Server] using //<< > and numerical buttons. If you make a mistake while entering a number, press CLEAR to clear the highlighted part.
- Select [OK] and press ENTER (☐ to apply network settings.
- The player will ask you to test the network connection. Select [OK] and press ENTER (◎) to complete the network connection.

- If you select [Test] and press ENTER (☑) at step 4 above, the network connection status is displayed on the screen. You can also test it on the [Connection Status] in the [Setup] menu.
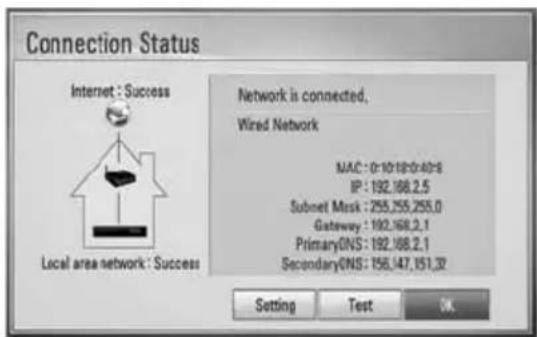
Notes on Network Connection:
- Many network connection problems during set up can often be fixed by re-setting the router or modem. After connecting the player to the home network, quickly power off and/or disconnect the power cable of the home network router or cable modem. Then power on and/or connect the power cable again.
- Depending on the internet service provider (ISP), the number of devices that can receive internet service may be limited by the applicable terms of service. For details, contact your ISP.
- Our company is not responsible for any malfunction of the player and/or the internet connection feature due to communication errors/malfunctions associated with your broadband internet connection, or other connected equipment.
- The features of BD-ROM discs made available through the Internet Connection feature are not created or provided by our company, and our company is not responsible for their functionality or continued availability. Some disc related material available by the Internet Connection may not be compatible with this player. If you have questions about such content, please contact the producer of the disc.
- Some internet contents may require a higher bandwidth connection.
-
Even if the player is properly connected and configured, some internet contents may not operate properly because of internet congestion, the quality or bandwidth of your internet service, or problems at the provider of the content.
-
Some internet connection operations may not be possible due to certain restrictions set by the Internet service provider (ISP) supplying your broadband Internet connection.
- Any fees charged by an ISP including, without limitation, connection charges are your responsibility.
- A 10 Base-T or 100 Base-TX LAN port is required for wired connection to this player. If your internet service does not allow for such a connection, you will not be able to connect the player.
- You must use a Router to use xDSL service.
- A DSL modem is required to use DSL service and a cable modem is required to use cable modem service. Depending on the access method of and subscriber agreement with your ISP, you may not be able to use the internet connection feature contained in this player or you may be limited to the number of devices you can connect at the same time. (If your ISP limits subscription to one device, this player may not be allowed to connect when a PC is already connected.)
- The use of a "Router" may not be allowed or its usage may be limited depending on the policies and restrictions of your ISP. For details, contact your ISP directly.
- Turn off all unused network equipment in your local home network. Some devices may generate network traffic c.
USB device connection
This player can play movie, music and photo files contained in the USB device.
- Insert a USB device to the USB port until it fits into place.
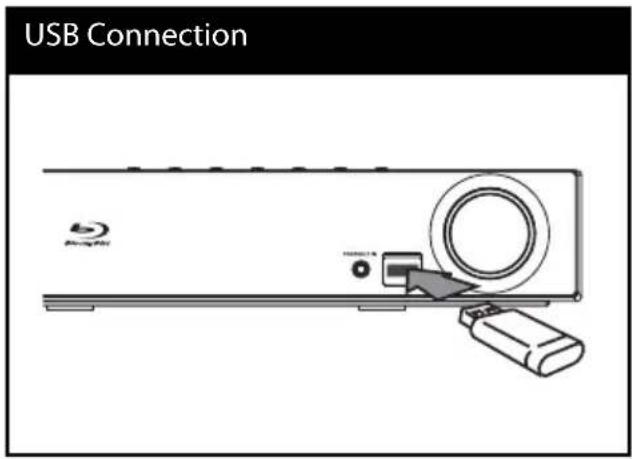
- Press HOME MENU.
Select [Movie], [Photo] or [Music] using ∧/∨/</>, and press ENTER (💡)
- Select a fi le using ∧/∨/</>, and press PLAY or ENTER (◎) to play the fi le.
You can check the space of the USB device on the screen.
- Select the other mode. And withdraw the USB device carefully.

NOTE
- This player supports USB flash memory/external HDD formatted in FAT16, FAT32 and NTFS when accessing files (music, photo, movie). However, for BD-LIVE and Audio CD recording, only FAT16 and FAT32 formats are supported. Use the USB flash memory/external HDD formatted in either FAT16 or FAT32 when using BD-LIVE and Audio CD recording.
- The USB device can be used for local storage for enjoying BD-Live discs from the Internet.
- This unit can support up to 4 partitions of the USB device.
- Do not extract the USB device during operation (play, etc.).
- An USB device which requires additional programme installation when you have connected it to a computer, is not supported.
- USB device: USB device that support USB 1.1 and USB 2.0.
- Movie, music and photo fi les can be played. For details of operations on each fi le, refer to relevant pages.
- Regular back up is recommended to prevent data loss.
- If you use a USB extension cable, USB HUB or USB Multi-reader, the USB device may not be recognised.
- Some USB device may not work with this unit.
• Digital camera and mobile phone are not supported.
- The USB Port on this unit cannot be connected to a PC.
Settings
Adjust the Setup Settings
You can change the settings of the player in the [Setup] menu.
- Press HOME MENU (♠).

- Use < / > / / to select [Setup] and press ENTER (The [Setup] menu appears.
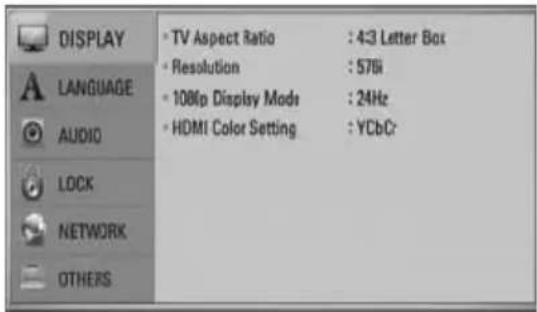
- Use / V to select a first setup option, and press > to move to the second level.

- Use /V to select a second setup option, and press ENTER ( ) to move to the third level.

- Use /V to select a desired setting, and press > or ENTER (to confirm your selection.
[DISPLAY] Menu
TV Aspect Ratio
Select a TV aspect ratio option according to your TV type.
[4:3 Letter Box]
Select when a standard 4:3 TV is connected. Displays theatrical images with masking bars above and below the picture.
[4:3 Pan Scan]
Select when a standard 4:3 TV is connected. Displays pictures cropped to fill your TV screen. Both sides of the picture are cut off.
[16:9 Original]
Select when a 16:9 wide TV is connected. The 4:3 picture is displayed with an original 4:3 aspect ratio, with black bars appearing at the left and right sides.
[16:9 Full]
Select when a 16:9 wide TV is connected. The 4:3 picture is adjusted horizontally (in a linear proportion) to fi ll the entire screen.
![PIONEER BCS-707 - [16:9 Full] - 1](/content/2026/06/1277448/images/d7705ed8d5f0bb0cae5a570fdaae4be8562fd7dcd5eba5cbd0ba212d8aed3c5c.jpg)
NOTE
You cannot select [4:3 Letter Box] and [4:3 Pan Scan] option when the resolution is set to higher than 720p.
Resolution
Sets the output resolution of the Component and HDMI video signal. Refer to page 23 and 70 or details about the resolution setting.
[Auto]
If the HDMI OUT jack is connected to TVs providing display information (EDID), this automatically selects the resolution best suited to the connected TV. If the COMPONENT VIDEO OUT only is connected, this changes the resolution to 1080i as default resolution.
[1080p]
Outputs 1080 lines of progressive video.
[1080i]
Outputs 1080 lines of interlaced video.
[720p]
Outputs 720 lines of progressive video.
[576p (480p)]
Outputs 576 (480) lines of progressive video.
[576i (480i)]
Outputs 576 (480) lines of interlaced video.
1080p Display Mode
When the resolution is set to 1080p, select [24 Hz] for smooth presentation of fi lm material (1080p/ 24 Hz) with a HDMI-equipped display compatible with 1080p/ 24 Hz input.

NOTE
- When you select [24 Hz], you may experience some picture disturbance when the video switches video and film material. In this case, select [50 Hz].
- Even when [1080p Display Mode] is set to [24 Hz], if your TV is not compatible with 1080p/ 24 Hz, the actual frame frequency of the video output will be 50 Hz to match the video source format.
HDMI Color Setting
Select the type of output from the HDMI OUT jack. For this setting, please refer to the manuals of your display device.
[YCbCr]
Select when connecting to a HDMI display device.
[RGB]
Select when connecting to a DVI (RGB) display device.
[LANGUAGE] Menu
Display Menu
Select a language for the [Setup] menu and on-screen display.
Disc Menu/ Disc Audio/ Disc Subtitle
Select the language you prefer for the audio track (disc audio), subtitles, and the disc menu.
[Original]
Refers to the original language in which the disc was recorded.
[Other]
Press ENTER (◎) to select another language. Use number buttons then ENTER (▶) to enter the corresponding 4-digit number according to the language code list on page 69.
[Off] (for Disc Subtitle only)
Turn off Subtitle.
![PIONEER BCS-707 - [Off] (for Disc Subtitle only) - 1](/content/2026/06/1277448/images/04bd24805a8df6283de007301a8ce7aff00261adcdda46969853ccfba808500e.jpg)
NOTE
Depending on the disc, your language setting may not work.
[AUDIO] Menu
Speaker Setup
To obtain the best possible sound, use the speaker setup display to specify the volume of the speakers you have connected and their distance from your listening position. Use the test to adjust the volume of the speakers to the same level.
[Speaker]
Select a speaker that you want to adjust.
[Volume]
Adjust the output level of each speaker.
[Distance]
Adjust the distance between each speaker and the listening position.
[Test/ Stop test tone]
The speakers will emit a test tone.
[OK]
Confirms the setting.
[Cancel]
Cancels the setting.
HD AV Sync
Sometimes Digital TV encounters a delay between picture and sound. If this happens you can compensate by setting a delay on the sound so that it effectively 'waits' for the picture to arrive: this is called HD AV Sync. Use to scroll up and down through the delay amount, which you can set at anything between 0 and 300 ms.
The delay will vary depending on which digital TV channel you are on. If you change channel you may need to readjust the HD AV Sync.
DRC (Dynamic Range Control)
When a title encoded in Dolby Digital or Dolby Digital Plus is playing back, you may wish to compress the dynamic range of the audio output (the difference between the loudest sounds and the quietest ones). This allows you to listen to a movie at a lower volume without losing clarity of sound. Set [DRC] to [On] for this effect.

NOTE
The DRC setting can be changed only when a disc is not inserted or the unit is in complete stop mode.
[LOCK] Menu
To access any features in the [LOCK] settings, you must enter the 4-digit security code you have created.
If you have not entered a password yet, you are prompted to do so. Enter a 4-digit password twice, and press ENTER (●) to create a new password.
Password
You can create or change the password.
[None]
Enter a 4-digit password twice, and press ENTER (◎) to create a new password.
[Change]
Enter the current password and press ENTER (●). Enter a 4-digit password twice, and press ENTER (○) to create a new password.
![PIONEER BCS-707 - [Change] - 1](/content/2026/06/1277448/images/be68a5396c24b08669542f0143ec9cc600fc2dc54ca990846bdf574eb251e739.jpg)
NOTE
If you make a mistake before pressing ENTER (☐), press CLEAR. Then input the correct password.
If you forget your password,
If you forget your password, you can clear it using the following steps:
- Remove any disc that might be in the player.
- Select [Lock] option in the [Setup] menu.
- Use number buttons to enter "210499" on the [Lock] Menu. The password is cleared.
DVD Rating
Blocks playback of rated DVD based on their content. (Not all discs are rated.)
[Rating 1-8]
Rating one (1) has the most restrictions and rating eight (8) is the least restrictive.
[Unlock]
If you select this, parental control is not active and the disc plays in full.
BD Rating
Sets an age limit for BD-ROM playback. Use number buttons to input an age limit for BD-ROM viewing.
[255]
All BD-ROM can be played.
[0-254]
Prohibits play of BD-ROM with corresponding ratings recorded on them.
![PIONEER BCS-707 - [0-254] - 1](/content/2026/06/1277448/images/f5dcef089024837b9d56eac024e677d9a92302eb54157b2ff8df54488efff0c7.jpg)
NOTE
The [BD Rating] will be applied only for the BD disc that containing the Advanced Rating Control.
Area Code
Enter the code of the area whose standards were used to rate the DVD video disc, based on the list on page 68.
[NETWORK] Menu
Connection Setting
If your home network environment is ready to connect to the player, the player needs to be set up for network communication. (See "Connecting to your Home Network" on page 28.)
Connection Status
If you want to check the network status on this player, select the [Connection Status] option and press ENTER (▶to check whether a connection to the network and the internet has been established.
BD-LIVE connection
You can restrict Internet access when BD-LIVE functions are used.
[Permitted]
Internet access is permitted for all BD-LIVE contents.
[Partially permitted]
Internet access is permitted only for BD-LIVE contents which have content owner certifi cates. Internet access and AACS Online functions are prohibited for all BD-LIVE contents without a certifi cate.
[Prohibited]
Internet access is prohibited for all BD-LIVE contents.
[OTHERS] Menu
DivX VOD
ABOUT DIVX VIDEO: DivX® is a digital video format created by DivX, Inc. This is an official DivX Certified device that plays DivX video. Visit www.divx.com for more information and software tools to convert your files into DivX video.
ABOUT DIVX VIDEO-ON-DEMAND: This DivX Certifi ed® device must be registered in order to play DivX Video-on-Demand (VOD) content. To generate the registration code, locate the DivX VOD section in the device setup menu. Go to vod.divx.com with this code to complete the registration process and learn more about DivX VOD.
[Register]
Displays the registration code of your player.
[Deregister]
Deactivate your player and display the deactivation code.
![PIONEER BCS-707 - [Deregister] - 1](/content/2026/06/1277448/images/3fc33391b1cf3d8654690ef6452aa409e5b8abd12c9e88864fe4b3ac5ac6e389.jpg)
NOTE
All the downloaded videos from DivX VOD with this player's registration code can only be played back on this unit.
Auto Power Off
The screen saver appears when you leave the player in Stop mode for about five minutes. If you set this option to [On], the unit automatically turns itself off after the Screen Saver is displayed for 25 minutes. Set this option to [Off] to leave the screen saver until the unit is operated by the user.
Initialize
Factory Set
You can reset the player to its original factory settings.
BD Storage Clear
Removes the BD contents from the connected USB storage.

NOTE
If you reset the player to its original factory settings using [Factory Set] option, you have to set all the activation for the on-line services and network settings again.
Software Information
Displays the current software version.
Sound Eff ect
You can select a suitable sound mode. Press SOUND repeatedly until the desired mode appears on the front panel display or the TV screen. The displayed items for the equalizer maybe different depending on sound sources and effects.
[Pioneer 1]: Gives you suitable sound setting with connecting small type of speakers (S-BD303).
[Pioneer 2]: Gives you suitable sound setting with connecting tall type of speakers (S-BD707T).
[Bypass]: Software with multichannel surround audio signals is played according to the way it was recorded.
[Bass Blast]: Reinforce the bass sound effect from front left and right speaker and subwoofer.
[PL II Movie]: Performs Pro Logic II movie mode decoding to the input signal and produces five full-bandwidth output channels from 2 channel sources. This setting is ideal for watching videos of overdubbed or old movies. This mode is available only to 2 channel sources.
[PL II Music]: Performs Pro Logic II music mode decoding to the input signal and produces five full-bandwidth output channels from 2 channel sources. This setting is ideal for normal stereo sources such as CD. This mode is available only to 2 channel sources.
[Clear Voice]: This mode makes voice sound clear, improving the quality of voice sound.
[Game]: You can enjoy more virtual sound while playing video games.
[Night]: This may be useful when you want to watch movies at low volumes late at night.
[Mus. ReTouch]: When listening to MP3 fi les or other compressed music, you can enhance the sound. This mode is available only to 2 channel sources.
[Loudness]: Improves bass and treble sound.
4 Operation
General Playback
Playing Discs
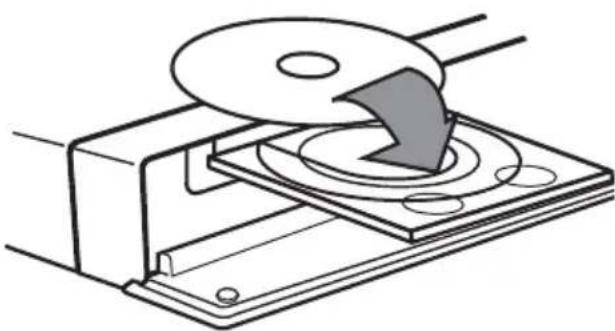
- Press ▲ OPEN/CLOSE, and place a disc on the disc tray.
natural_image
Technical line drawing of a mechanical device with a disc and cutting tool (no text or symbols)- Press ▲ OPEN/CLOSE to close the disc tray. For most Audio CD, BD-ROM and DVD-ROM discs, playback starts automatically.
- Press ⬆ HOME MENU.

- Select [Movie], [Photo] or [Music] using ∧/∨/</>, and press ENTER (💡)
- Select the Disc option using </>, and press ENTER (●).

When you connect up to two devices, it appears as above.
- Select a file using /V/</> , and press PLAY or ENTER (○) to play the file.
NOTE
- Playback functions described in this manual are not always available in every files and medium. Some functions can be restricted depending on many factors.
- Depending on the BD-ROM titles, a USB device connection may be needed for proper playback.
To stop playback
Press ■ STOP during playback.
To pause playback
Press ■■ PAUSE/STEP during playback.
Press ▶ PLAY to resume playback.
To play frame-by-frame
Press ■■ PAUSE/STEP while movie playback.
Press ■■ PAUSE/STEP repeatedly to playback Frame-by-Frame.
To scan forward or backward
Press ◀◀ or ▶▶ to play fast forward or fast reverse during playback.
You can change the various playback speeds by pressing ◀◀ or ▶▶ repeatedly.
To slow down the playing speed
While the playback is paused, press ▶▶ SCAN repeatedly to play various speeds of slow motion.
To skip to the next/previous chapter/track/fi le
During playback, press ◀◀◀ or ▶▶▶ to go to the next chapter/track/fi le or to return to the beginning of the current chapter/track/fi le.
Press ◀◀ twice briefy to step back to the previous chapter/track/fi le.
Using the disc menu
BD
DVD
AVCHD
To display the disc menu
The menu screen may be displayed first after loading a disc which contains a menu. If you want to display the disc menu during playback, press MENU.
Use /V/</> buttons to navigate through menu items.
To display the Pop-up menu
Some BD-ROM discs contain a Pop-up menu that appears during playback.
Press POPUP/TOP MENU during playback, and use ∧/∨/<> buttons to navigate through menu items.
Resume playback
BD
DVD
AVCHD
MOVIE
ACD
MUSIC
This unit remembers the ■ STOP depending on the disc.
If "■■■ (Resume Stop)" appears on the screen briefy, press▶ (PLAY) to resume playback (from the scene point).
If you press ■(STOP) twice or unload the disc,
"■"(Complete Stop) appears on the screen.
The unit will clear the stopped point.

NOTE
- The resume point may be cleared when a button is pressed (for example; ⏻ (POWER), ▲ (OPEN/CLOSE), etc).
- On BD-Video discs with BD-J, the resume playback function does not work.
- If you press ■ (STOP) once during BD-ROM interactive title playback, the unit will be in Complete Stop mode.
Advanced Playback
Repeat Playback
BD DVD AVCHD ACD MUSIC
During playback, press REPEAT (☐) repeatedly to select a desired repeat mode.
BDs/DVDs
A- - Selected portion will be repeated continually.
Chapter – The current chapter will be played back repeatedly.
Title – The current title will be played back repeatedly.
To return to normal playback, press REPEAT (☐) repeatedly to select [Off].
Audio CDs/Music fi les
Track – The current track or file will be played back repeatedly.
All – All the tracks or files will be played back repeatedly.
✗ – The tracks or files will be played back in random order.
✗ All – All the tracks or files will be played back repeatedly in random order.
A-B - Selected portion will be repeated continually. (Audio CD only)
To return to normal playback, press CLEAR.

NOTE
- If you press ▶▶▶ once during Repeat Chapter/Track playback, the repeat playback cancels.
• This function may not work on some disc or title.
Repeating a specific portion
BD
DVD
AVCHD
ACD
This player can repeat a portion you have selected.
- During playback, press REPEAT (☐) to select [A-] at the beginning of the portion you wish to repeat. And then press ENTER (☐).
- Press ENTER (◎) at the end of the portion. Your selected portion will be repeated continually.
- To return to normal playback, press REPEAT (☐) repeatedly to select [OFF] or press CLEAR.

NOTE
You cannot select a portion less than 3 seconds.
Marker Search
BD
DVD
AVCHD
MOVIE
You can start playback from up to nine memorized points.
To enter a marker
- During playback, press MARKER at the desired point. The Marker icon appears on the TV screen briefly.
- Repeat step 1 to add up to nine markers.
To recall a marked scene
- Press SEARCH and the search menu appears on the screen.
- Press a number button to select a marker number that you want to recall. Playback starts from the marked scene.
To delete a Marker
- Press SEARCH and the search menu appears on the screen.
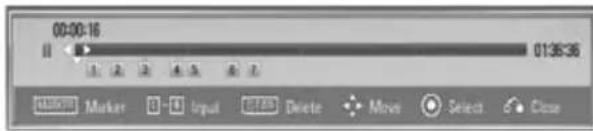
- Press V to highlight a marker number. Use </> to select a marked scene that you want to delete.
- Press CLEAR and the marked scene is erased from the search menu.

NOTE
- This function may not work depending on discs, titles, server ability.
- All marked points are cleared if the title is in complete stop (■) mode, the title is changed or if you unload the disc.
- If the total length of the title is less than 10 seconds, this function is not available.
Using the search menu
BD
DVD
AVCHD
MOVIE
Using search menu, you can easy to find the point where you want to start playback.
To search a point
- During playback, press SEARCH to display the search menu.

- Press </> to skip the playback 15 seconds forward or backward. You can select a point that you want to skip by pressing and holding </> button.
To start playback from a marked scene
- Press SEARCH and the search menu appears on the screen.
- Press V to highlight a marker number. Use </> to select a marked scene that you want to playback from.
- Press ENTER (●) to start playback from the marked scene.

NOTE
- This function may not work depending on discs, titles, server ability.
- This function may not work on some [Home Link] contents depending on the file type and ability of the DLNA server.
Last Scene Memory
BD
DVD
This unit memorizes the last scene from the last disc that is viewed. The last scene remains in memory even if you remove the disc from the unit or switch off the unit. If you load a disc that has the scene memorized, the scene is automatically recalled.

NOTE
- Last Scene Memory function for a previous disc is erased once a different disc is played.
- This function may not work depending on the disc.
- This unit does not memorize settings of a disc if you switch off the unit before commencing to play it.
On-Screen display
You can display and adjust various information and settings concerning the content.
Displaying content information on-screen
BD
DVD
AVCHD
MOVIE
- During playback, press DISPLAY (☐) to show various playback information.
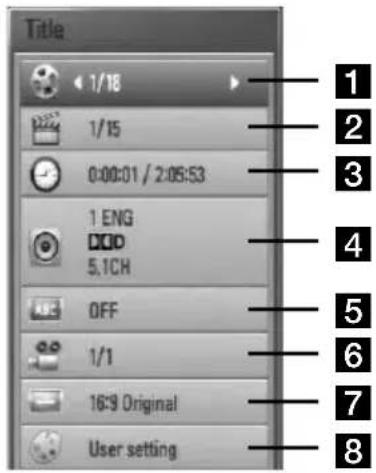
1 Title – Current title number/total number of titles
2 Chapter – Current chapter number/total number of chapters
3 Time – Elapsed playing time/Total playback time
4 Audio – Selected audio language or channel
5 Subtitle – Selected subtitle
6 Angle – Selected angle/total number of angles
7 TV Aspect Ratio – Selected a TV aspect Ratio
8 Picture Mode – Selected picture mode
- Select an option using /V .
- Use </> to adjust the selected option value.
- Press RETURN (💡) to exit the On-Screen display.

NOTE
- If no button is pressed for a few seconds, the on-screen display disappears.
- A title number cannot be selected on some discs.
• Available items may differ depending on discs or titles. - If BD interactive title is playing back, some setting information is displayed on the screen but prohibited to be changed.
Playing from selected time
BD DVD AVCHD MOVIE
- Press DISPLAY (D) during playback. The time search box shows the elapsed playing time.
- Select the [Time] option and then input the required start time in hours, minutes, and seconds from left to right.
For example, to find a scene at 2 hours, 10 minutes, and 20 seconds, enter "21020".
Press </> to skip the playback 60 seconds forward or backward.
- Press ENTER (◎) to start playback from selected time.

NOTE
- This function may not work on some disc or titles.
- This function may not work on some [Home Link] contents depending on the file type and ability of the DLNA server.
Hearing different audio
BD
DVD
AVCHD
MOVIE
- During playback, press DISPLAY (☐) to display the on-screen display.
- Use /V to select the [Audio] option.
- Use </> to select desired audio language, audio track or audio channel.

NOTE
- Some discs allow you to change audio selections only via the disc menu. If this is the case, press POPUP/TOP MENU or MENU button and choose the appropriate audio from the selections on the disc menu.
- Immediately after you have switched sound, there may be a temporary discrepancy between the display and actual sound.
Selecting a subtitle language
BD
DVD
AVCHD
MOVIE
- During playback, press DISPLAY (☐) to display the on-screen display.
- Use /V to select the [Subtitle] option.
- Use </> to select the desired subtitle language.
- Press RETURN (💡) to exit the On-Screen display.

NOTE
Some discs allow you to change subtitle selections only via the disc menu. If this is the case, press POPUP/TOP MENU or MENU button and choose the appropriate subtitle from the selections on the disc menu.
Watching from a different angle
BD DVD
If the disc contains scenes recorded at different camera angles, you can change to a different camera angle during playback.
- During playback, press DISPLAY (☐) to display the on-screen display.
- Use /V to select the [Angle] option.
- Use </> to select desired angle.
- Press RETURN (💡) to exit the On-Screen display.
Changing the TV Aspect Ratio
BD DVD AVCHD MOVIE
You can change the TV aspect ratio setting during playback.
- During playback, press DISPLAY (☐) to display the on-screen display.
- Use /V to select the [TV Aspect Ratio] option.
- Use </> to select desired option.
- Press RETURN (💡) to exit the On-Screen display.

NOTE
Even if you change the value of the [TV Aspect Ratio] option in On-Screen display, the [TV Aspect Ratio] option in the [Setup] menu is not changed.
Changing the Picture Mode
BD DVD AVCHD MOVIE
You can change the [Picture mode] option during playback.
- During playback, press DISPLAY (☐) to display the on-screen display.
- Use /V to select the [Picture Mode] option.
- Use </> to select desired option.
- Press RETURN (💡) to exit the On-Screen display.
Setting the [User setting] option
- During playback, press DISPLAY ( ) to display the on-screen display.
- Use /V to select the [Picture Mode] option.
- Use </> to select the [User setting] option, and press ENTER (●).
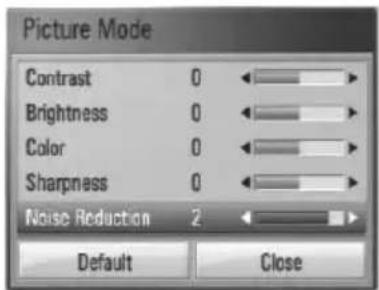
- Use /V/<> to adjust the [Picture Mode] options.
Select [Default] option then press ENTER (☐ to reset the all adjustments.
- Use /V/</> to select the [Close] options, and press ENTER (◎) to finish setting.
Enjoying BD-LIVE
This unit allows you to enjoy functions such as picture-in-picture, secondary audio and Virtual packages, etc., with BD-Video supporting BONUSVIEW (BD-ROM version 2 Profi le 1 version 1.1/ Final Standard Profi le).
Secondary video and audio can be played from a disc compatible with the picture-in-picture function. For the playback method, refer to the instructions in the disc.
In addition to the BONUSVIEW function, BD-Video supporting BD-LIVE (BD-ROM version 2 Profi le 2) that has a network extension function allows you to enjoy more functions such as downloading new movie trailers by connecting this unit to the internet.
- Check the network connection and settings (pages 28-30).
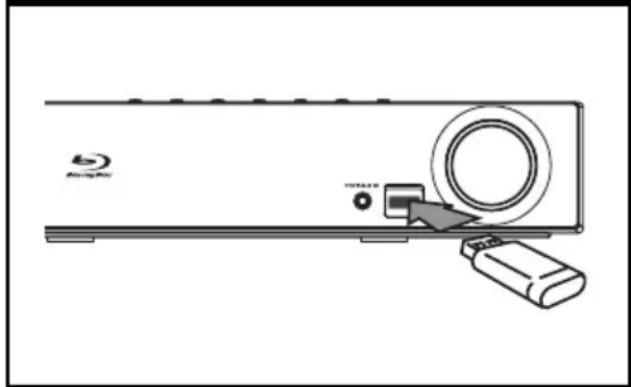
- Insert a USB storage device to the USB port on the front panel.
A USB storage device is needed to download bonus content.
USB Connection
natural_image
Diagram of a device rear panel with a circular button and a USB flash, showing no text or symbols.- Press HOME MENU, and set the [BD-LIVE connection] option on the [Setup] menu (page 37).
Depending on the disc, the BD-LIVE function may not operate if [BD-LIVE connection] option is set to [Partially Permitted].
- Insert a BD-ROM with BD-LIVE.
The operations may differ depending on the disc. Refer to the manual supplied with the disc.

NOTE
- Do not extract the connected USB device while content is being downloaded or a Blu-ray disc is still in the disc tray. Doing so may damage the connected USB device and BD-LIVE features may not operate properly with the damaged USB device anymore. If the connected USB device seems damaged from such an action, you can format the connected USB device from the PC and reuse it with this player.
- Some BD-LIVE contents may be restrictively accessed in some territories by contents provider's own decision.
- It may take up to several minutes to load and start enjoying BD-LIVE contents.
Playing movie fi le and VR discs
You can play DVD-RW discs that are recorded in Video Recording (VR) format and movie files contained in a disc or USB device.
- Press ⬆ HOME MENU.
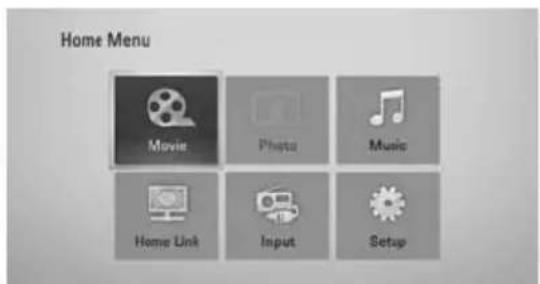
- Select [Movie] using //</> , and press ENTER (☑)
- Select the device using </>, and press ENTER (💡)

natural_image
Three grayscale icons: a CD, USB plug, and iPod device (no text or symbols)When you connect up to two devices, it appears as above.
- Select a file using ∧/∨/ </>, and press ► PLAY or ENTER (●) to play the file.

NOTE
- The file requirements are described on page 11.
- You can use various playback functions. Refer to pages 40-47.
- Unfinalized DVD VR format discs may not be played in this player.
- Some DVD-VR disc are made with CPRM data by DVD recorder. This unit cannot support these kinds of discs.
What is CPRM?
CPRM is a copy protection system (with scramble system) only allowing the recording of 'copy once' broadcast programmes. CPRM stands for Content Protection for Recordable Media.
Selecting a subtitle fi le MOVIE
If a movie fi le name and the subtitle fi le name are the same, subtitle fi le is played automatically when playing the movie fi le.
If the subtitle fi le name is different with the movie fi le name, you need to select the subtitle fi le on the [Movie] menu before playing the movie.
- Use ∧/∨/</> to select the subtitle file you wish to play in the [Movie] menu.
- Press ENTER (●).
Press ENTER (●) again to deselect the subtitle fi le. Selected subtitle fi le will be displayed when you play the movie fi le.

NOTE
- If you press ■ STOP during playback, the subtitle selection is cancelled.
- This function may not work in the [Home Link] feature.
Changing subtitle code page MOVIE
If the subtitle is not displayed properly, You can change the subtitle code page to view the subtitle fi le properly.
- During playback, press DISPLAY (☐) to display the on-screen display.
- Use /V to select the [Code Page] option.
- Use </> to select desired code option.

- Press RETURN (💡) to exit the On-Screen display.
Viewing a photo
You can view photo files using this player.
- Press ⬆ HOME MENU

-
Select [Photo] using </>, and press ENTER (◎).
-
Select the device using </>, and press ENTER (💡)

When you connect up to two devices, it appears as above.
- Select a file using /V/< , and press ENTER (to view the photo.

To play a slide show
Press ▶ PLAY to start slide show.
To stop a slide show
Press ■ STOP during slide show.
To pause a slide show
Press ■■ PAUSE/STEP during slide show. Press ▶ PLAY to re-start the slide show.
To skip to the next/previous photo
While viewing a photo in full screen, press < or > to go to the previous or next photo.

NOTE
- The file requirements are described on page 11.
- You can use various playback functions. Refer to pages 40-47.
Options while viewing a photo
You can use various options while viewing a photo in full screen.
-
While viewing a photo in full screen, press DISPLAY (☐) to display the option menu.
-
Select an option using /V .

1 Current photo/Total number of photos - Use </> to view previous/next photo.
2 Slide Show – Press ENTER (◎) to start or pause slide show.
3 Music Select – Select the background music for the slide show.
4 Music –Press ENTER (●) to start or pause background music.
5 Rotate – Press ENTER (◎) to rotate the photo clockwise.
6 Zoom – Press ENTER (●) to display the [Zoom] menu.
7 Eff ect - Use</> to select a transition effect between photos in a slide show.
8 Speed – Use </> to select a delaying speed between photos in a slide show.
- Press RETURN (💡) to exit the option menu.
Listening to music during a slide show
You can display photo fi les while listening to music fi les.
- Press ⬆ HOME MENU

-
Select [Photo] or [Home Link] using /V/</> , and press ENTER (①)
-
Select the [Disc] or [USB] option using </> and press ENTER (✗)

Selecting a server or a share folder is needed for [Home Link] menu.
-
Select a file using //</> , and press ENTER (to view the photo.
-
Press DISPLAY ☐ to display the option menu.
-
Use /V to select [Music Select] option, and press ENTER (●) to display the [Music Select] menu.
-
Use / V to select a device, and press ENTER (◎).
Devices that you can select may differ depending on the location of the photo file you are displaying in full screen.
| Photo location Available Device | |
| Disc Disc, USB | |
| USB Disc, USB | |
| Share Folder on your PC (CIFS) | CIFS |
| DLNA server DLNA | server |
- Use /V to select a file or a folder you wish to play.

Select a folder and press ENTER (●to display the lower directory.
Select 📊 and press ENTER (→ to display the upper directory.

NOTE
When selecting music from [Home Link], folder selection is not available. Only fi le selection is available on the [Home link].
- Use > to select [OK], and press ENTER (☑) to complete music selection.
Listening to music
The player can play Audio CDs and music fi les
- Press ⬆ HOME MENU
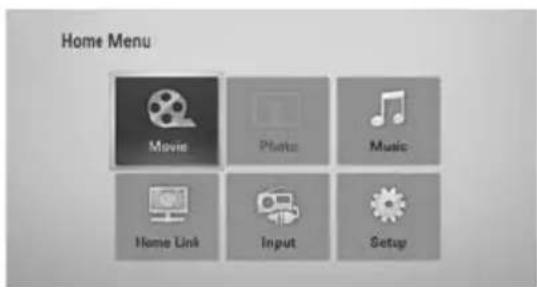
-
Select [Music] using ∧/∨/</>, and press ENTER (💡)
-
Select the device using </>, and press ENTER (💡)

When you connect up to two devices, it appears as above.
- Select a music file or audio track using /V/</> , and press ENTER (●) to play the music.

NOTE
• The fi le requirements are described on page 11.
- You can use various playback functions. Refer to pages 40-47.
Audio CD Recording
You can record one desired track or all of the tracks in Audio CD to a USB storage device.
- Insert a USB storage device to the USB port on the front panel.
- Press ▲ (OPEN/CLOSE), and place an Audio CD on the disc tray.
Press ▲ (OPEN/CLOSE) to close the disc tray. The playback starts automatically. - Press DISPLAY ☐ to display the option menu.
Or
Press ● USB REC button on the remote control. You can record all musics in the audio CD.
- Use / V to select [CD Recording] option, and press ENTER (●) to display the [CD Recording] menu.
Repeat this step to select tracks as many as you want.
- Use /V to select a track you wish to copy on the menu, and press ENTER (◎).
Repeat this step to select tracks as many as you can.
| Select All | Select all the tracks on an Audio CD. |
| Option | Selects an encoding option from the pop-up menu (128 kbps, 192 kbps, 320 kbps or Lossless). |
| Close | Cancels the recording and returns to the previous screen. |
-
Use /V/</> to select [Start], and press ENTER (○).
-
Use /V/</> to select the destination folder to be copied.

If you want to create a new folder, use / / < / > to select [New Folder] and press ENTER
Enter a folder name using the virtual keyboard, and press ENTER (●while [OK] is selected.
-
Use /V/</> to select [OK], and press ENTER (○) to start Audio CD recording. If you want to stop the Audio CD recording, press ENTER (○while [Cancel] is highlighted.
-
A message appears when Audio CD recording is completed. Press ENTER (●) to check the music file created in the destination folder.

NOTE
- The table below shows the average recording time from an audio track with 4 minutes of playback time to a music file with 192 kbps as an example.
| stop mode during playback | |
| 1.4 min. 2 min. | |
- All times in the above table are approximate.
- Actual recording time for USB storage device varies depending on the USB storage device's ability.
- Make sure that there is minimum of 50 MB free space when recording into the USB storage device.
- The length of the music should be longer than 20 seconds for the proper recording.
- Do not turn off this player or extract the connected USB storage device during Audio CD recording.
The making of unauthorized copies of copy-protected material, including computer programmes, files, broadcasts and sound recordings, may be an infringement of copyrights and constitute a criminal offense. This equipment should not be used for such purposes.
Be responsible Respect copyrights
Playing the iPod
You can enjoy the sound with your iPod. For details about iPod, refer to the iPod's User Guide.
Preparation
- To view iPod's Videos and Photos on the TV screen.
- Be sure to use the video connection through the VIDEO OUT jack on the rear panel of this unit. Select the appropriate video input mode on the TV.
- Depending on the iPod, make sure that select Videos > Video settings, and then set TV Out to Ask or On from your iPod. For details about Video Settings, refer to the iPod User Guide.
- The viewing photos is available only if this unit is in iPod IN mode and you can view photos only as a slide show. You have to start a slide show on your iPod to view a photo on a TV. For details about a slide show, refer to the iPod User Guide.
- Before connecting the iPod, turn this unit off and reduce the volume of this unit to its minimum.
- Connect the iPod firmly.
Connect the iPod

Connect the cradle and put your iPod on it.
- Select a fi le using ∧/∨/</>, and press ENTER (●) to play the fi le.
Enjoying iPod on the screen
-
Connect the iPod firmly.
-
Press HOME MENU ( )
-
Select [Music] or [Movie] using </>, and press ENTER (☑) If you connected the other device (CD or USB), select the iPod on the menu.
-
Select a content using ∧/∨/</>, and press ENTER (◎) to play.
Enjoying the iPod IN mode
You can operate your iPod by using the supplied remote control and controls on your iPod.
- Connect the iPod firmly.
If you turn this unit on, your iPod is automatically turned on and recharging starts.
- Press INPUT/TUNER to select iPod IN mode.
| Λ/V/<> | Selects an option in the menu. |
| ►/ENTER | Starts playback the music or video. |
| || | To pause while it is playing. To resume playing, press ►(PLAY) again. |
| ◄◄/►► | Fast-forward or rewind a song or video |
| |◄◄/►►| | Skip the playback forward or backward . |
| REPEAT To select a desired repeat mode: Track (○), All (○), Off (No display). | |

NOTE
This system is compatible with the audio and video of the iPod(4th generation), iPod nano, iPod classic, iPod mini, iPod touch and iPhone (iPod shuffle is not supported.).

NOTE
- An error message "CHECK IPOD" or "Connected iPod model is not supported." appears when:
- your iPod is not available for the function to be operated.
- An error message "CHECK iPod" or "Please update iPod's software." appears when:
- your iPod has an old software version. → Update your iPod software to latest version.
- If this unit displays an error message, follow the message. An error message "CHECK IPOD" or "Please check your iPod." appears when:
- the communication between this unit and your iPod is failed.
→ Undock & re-dock your iPod in this unit.
- your iPod is not connected firmly.
- this unit recognises your iPod as unknown device.
- your iPod is exceptionally low on power.
→ The battery needs to be charged.
→ If you charge the battery while iPod is extremely low in power, it may take longer to charge.
- You may use the dock adapter which should be supplied with your iPod to the dock for the stable use of the iPod. If you need an adapter, consult your iPod dealer.
- Compatibility with your iPod may vary depending on the type of your iPod.
- iPod touch and iPhone have any difference in operation other than iPod. You may need any additional control to use them with this unit. (e.g. "slide to unlock")
- If you use an application, make a call, or send and receive SMS text message, etc. on iPod touch or iPhone, disconnect it from iPod dock of this unit and then use it.
- Depending on your iPod's software version, it may not be possible to control your iPod from this unit. We recommend installing the latest software version.
- The video quality depends on the video sources on your iPod.
- If you have a problem with your iPod, please visit www.apple.com/support/ipod.
Radio Operations
Be sure that the antenna is connected. (Refer to the page 24)
Listening to the radio
- Press INPUT/TUNER until TUNER (FM) appears in the display window. The last received station is tuned in.
- Press and hold TUNE (-/+) for about two seconds until the frequency indication starts to change. Scanning stops when the unit tunes in a station. Or Press TUNE (-/+) repeatedly.
- Adjust the volume by rotating VOLUME on the front panel or by pressing VOL (+/-) on the remote control.
Presetting the Radio Stations
You can preset 50 stations for FM. Before tuning, make sure that you have turned down the volume.
- Press INPUT/TUNER until the TUNER (FM) appears in the display window.
- Select the desired frequency by using TUNE (-/+).
- Press ENTER (●) a preset number will flash in the display window.
- Press PRESET to select the preset number you want.
- Press ENTER (●). The station is stored.
- Repeat the steps 2 to 5 to store other stations.
Deleting all the saved stations
Press and hold CLEAR for two seconds. "ERASE ALL" will flash up. Press CLEAR again. Then all the saved stations are deleted.
Improving poor FM reception
Press D (blue) (ST/ MONO) coloured button on the remote control. This will change the tuner from stereo to mono and usually improve the reception.
See information about a radio station
The FM tuner is supplied with the RDS (Radio Data System) facility. This shows information about the radio station being listened to. Press RDS repeatedly to cycle through the various data types:
| PS (Programme Service Name)The name of the channel will appear in the display |
| PTY (Programme Type Recognition)The programme type (e.g. Jazz or News) will appear in the display. |
| RT (Radio Text)A text message contains special information from the broadcast station. This text may scroll across the display. |
| CT (Time controlled by the channel)This shows the time and date as broadcast by the station. |
Playing content via your home network
This player can browse and play content from your PC and DLNA certified media servers connected on your home network.
About DLNA
This Player is a DLNA Certified digital media player that can display and play movie, photo and music content from your DLNA-compatible digital media server (PC and Consumer Electronics).
The Digital Living Network Alliance (DLNA) is a cross-industry organization of consumer electronics, computing industry and mobile device companies. Digital Living provides consumers with easy sharing of digital media through a network in the home.
The DLNA certification logo makes it easy to find products that comply with the DLNA Interoperability Guidelines. This unit complies with DLNA Interoperability Guidelines v1.5.
When a PC running DLNA server software or other DLNA compatible device is connected to this player, some setting changes of software or other devices may be required. Please refer to the operating instructions for the software or device for more information.
Accessing a DLNA media server
- Check the network connection and settings (pages 28-30).
- Press ⬆ HOME MENU.
- Select [Home Link] using /V/</> , and press ENTER (●).
- Select a DLNA media server from the list using /V , and press ENTER (☐)

If you want to rescan for available media servers, press the green (B) coloured button.

NOTE
Depending on the media server, this player may need to get permission from the server.
- Select a file using // < /> , and press ENTER (●) to play the file.


NOTE
- The file requirements are described on page 11.
- You can use various playback functions. Refer to pages 40-47.
- The file requirements on page 11 are not always compatible. There may be some restrictions due to the file's features and media server's ability.
- The thumbnail of the unplayable fi les can be displayed in the [Home Link] menu, but those cannot be played on this player.
- If there is an unplayable music fi le in the [Home Link] menu, the player skips the fi le and plays the next fi le.
- The subtitle fi le name and movie fi le name have to be the same and located in the same folder.
- The playback and operating quality of the [Home Link] function may be affected by your home network condition.
- The fi les from removable media such as USB drive, DVD-drive etc. on your media server may not be shared properly.
Accessing a share folder from your PC
- Start your PC that is connected on your local area network.
- On your PC, share folders which contain movie, photo or music files.
-
On the player, check the network connection and settings (pages 28-30).
-
Press ⚠ HOME MENU.
-
Select [Home Link] using ∧/∨/</>, and press ENTER (◎).
-
Select a share folder from the list using /V , and press ENTER (●).
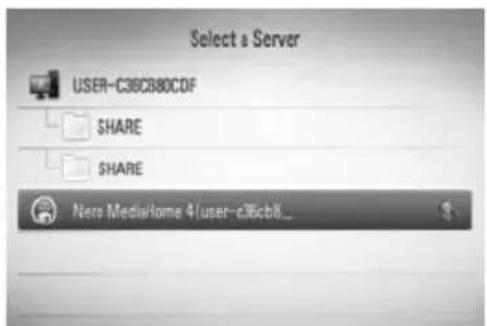
If you want to rescan available media servers, press the green (B) coloured button.

NOTE
Depending on the share folder, this player may need to input network user ID and password for accessing the folder.
- Select a file using /V/</> , and press ENTER (to play the file.

NOTE
- The file requirements are described on page 11.
- You can use various playback functions. Refer to pages 40-47.
- The thumbnail of the unplayable fi les can be displayed in the [Home Link] menu, but those cannot be played on this player.
- If there is an unplayable music file in the [Home Link] menu, the player skips the file and play next file.
- The subtitle fi le name and movie fi le name have to be the same and located at the same folder.
- The playback and operating quality of the [Home Link] function may be affected by your home network condition.
- The fi les on a removable media such as USB drive, DVD-drive etc. on your PC may not be shared properly.
- You may experience connection problems depending on your PC's environment.
PC requirements
- Windows® XP (Service Pack 2 or higher), Windows Vista® (no Service Pack required) Windows 7®
• 1.2 GHz Intel® Pentium® III or AMD Sempron™ 2200+ processors
• Network environment: 100 Mb Ethernet, WLAN (IEEE 802.11b/g/n)

NOTE
If you use Windows® XP or Windows Vista®, visit link below for more information on fi le share settings.
Windows® XP: http://support.microsoft.com/kb/304040
Windows Vista®: http://support.microsoft.com/kb/961498
Entering a network user ID and the password
Depending on your PC's environment, you may need to enter a network user ID and the password for accessing a shared folder.
- The keyboard menu appears automatically if the network user ID and the password are required.
- Use ∧/∨/</> to select a character then press ENTER (●to confirm your selection on the keyboard menu.
To enter a letter with an accent mark, select the letter from the extended character set.
Example: Select "D" and then press DISPLAY (☐) to display the extended character set. Use </> to select "D" or "D" and then press ENTER (☐)
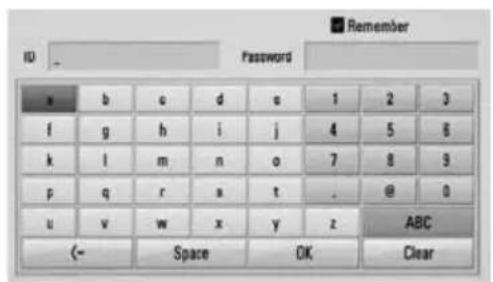
[Clear] – Clear all entered characters.
[Space] – Inserts a space at the cursor position.
[<-] – Deletes the previous character at the cursor position.
[ABC / abc / #+-=&] - Change the keyboard menu settings to capital letters, small letters or symbols.
- When you finish entering the network user ID and password, select [OK] using /V/</ > and press ENTER (◎) to access the folder. The network user ID and password will be remembered after accessing the folder for your convenience. If you do not want the network user ID and password to be remembered, press red (A) coloured button to un-tick the [Remember] check box before accessing the folder.
5 Maintenance
Notes on Discs
Handling Discs
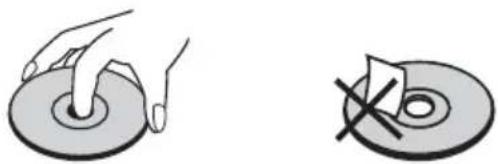
natural_image
Two diagrams showing a hand pressing on a circular object and a cross symbol on a ring (no text or labels)Never stick paper or tape on the disc.
Storing Discs
After playing, store the disc in its case. Do not expose the disc to direct sunlight or sources of heat and never leave it in a parked car exposed to direct sunlight.
Cleaning Discs

Do not use strong solvents such as alcohol, benzine, thinner, commercially available cleaners, or anti-static spray intended for older vinyl records.
Handling the Unit
When shipping the unit
Please save the original shipping carton and packing materials. If you need to ship the unit, for maximum protection, re-pack the unit as it was originally packed at the factory.
Keeping the exterior surfaces clean
- Do not use volatile liquids such as insecticide spray near the unit.
- Wiping with strong pressure may damage the surface.
- Do not leave rubber or plastic products in contact with the unit for a long period of time.
Cleaning the unit
To clean the player, use a soft, dry cloth. If the surfaces are extremely dirty, use a soft cloth lightly moistened with a mild detergent solution. Do not use strong solvents such as alcohol, benzine, or thinner, as these might damage the surface of the unit.
Maintaining the Unit
The unit is a high-tech, precision device. If the optical pick-up lens and disc drive parts are dirty or worn, the picture quality could be diminished. For details, please contact your nearest authorized service centre.
6
Troubleshooting
General
| The Power does not turn on. | Plug the power cord into the wall outlet securely. |
| The unit does not start playback. | Insert a playable disc. (Check the disc type, colour system, and regional code.)Place the disc with the playback side down.Place the disc on the disc tray correctly inside the guide.Clean the disc.Cancel the rating function or change the rating level. |
| The angle cannot be changed. | Multi-angles are not recorded on the DVD Video being played. |
| The subtitle language cannot be changed or turned off. | Subtitles are not recorded on the DVD Video being played. |
| Cannot play MP3/WMA/ JPEG/DivX fi les. | The fi les are not recorded in a format that the unit can play.The unit does not support the codec of the movie fi le. |
| The remote control does not work properly. | The remote control is not pointed at the remote sensor of the unit.The remote control is too far from the unit.There is an obstacle in the path between the remote control and the unit.The battery in the remote control is exhausted. |
Picture
| There is no picture. • Select the appropriate video input mode on the TV so the picture from the unit appears on the TV screen.• Connect the video connection securely.• Check the [HDMI Colour Setting] in the [Setup] menu is set to the appropriate item that conforms to your video connection.• Your TV may not support the resolution you have set on the player. Change the resolution to one that your TV accepts.• The player's HDMI OUT jack is connected to a DVI device that does not support copyright protection. |
| Picture noise appears • You are playing a disc recorded in a colour system that is different from your TV.• Set the resolution to one that your TV accepts. |
Sound
| There is no sound or the sound is distorted. | The unit is in scan, slow motion, or pause mode.The sound volume is low.Check the speaker cable connection. (page 16) |
Network
| BD-LIVE feature does not work. | The connected USB storage may not have enough space. Connect the USB storage with at least 1GB free space.Ensure that the unit is correctly connected to the local area network and can access the internet (see page 28).Your broadband speed may not be fast enough to use the BD-LIVE features. Contact your Internet Service Provider (ISP) and increase the broadband speed to suit the unit's.The [BD-LIVE connection] option in the [Setup] menu is set to [Prohibited]. Set the option to [Permitted]. |
Design and specifications are subject to change without notice.
Updates
Note that information on this product is available on the Pioneer website. Please check the website for information on updating or servicing your Blu-ray Disc PLAYER.
7 Appendix
Controlling a TV with the Supplied Remote Control
You can control your PIONEER TV using the buttons below.

| Button Operation | |
| (TV Power) | Turn the TV on or off. |
| INPUT Switch the TV's input source between the TV and other input sources. | |
| CH +/- Scan up or down through memorized channels. | |
| VOL +/- Adjust the volume of the TV. | |

NOTE
Depending on the unit being connected, you may not be able to control your TV using some of the buttons.
Setting up the remote to control your TV
You can operate your TV with the supplied remote control. If your TV is listed in the table below, set the appropriate manufacturer code.
- While holding down ⏻ (TV POWER) button, and press the manufacturer code for your TV with the numerical buttons (see the table below).
| Manufacturer Code Number | |
| Pioneer 1(Default) | |
| Sony 2, 3 | |
| Panasonic 4, 5 | |
| Samsung 6, 7 | |
| LG 8, 9 | |
- Release the ⏻ (TV POWER) button to complete setting.
Depending on your TV, some or all buttons may not function on the TV, even after entering the correct manufacturer code. When you replace the batteries of the remote, the code number you have set may be reset to the default setting. Set the appropriate code number again.
Area Code List
Choose an area code from this list.
| Area | Code | Area | Code | Area | Code | ||
| Afghanistan AF | Fiji | FJ | Monaco | MC | Singapore SG | ||
| Argentina AR | Finland | FI | Mongolia | MN | Slovak Republic | SK | |
| Australia AU | France | FR | Morocco | MA | Slovenia | SI | |
| Austria AT | Germany | DE | Nepal | NP | South Africa | ZA | |
| Belgium BE | Great Britain | GB | Netherlands | NL | South Korea KR | ||
| Bhutan BT | Greece | GR | Netherlands | Spain | ES | ||
| Bolivia BO | Greenland GL | Antilles AN | Sri Lanka | LK | |||
| Brazil BR | Hong Kong | HK | New Zealand | NZ | Sweden SE | ||
| Cambodia KH | Hungary | HU | Nigeria | NG | Switzerland CH | ||
| Canada CA | India | IN | Norway | NO | Taiwan | TW | |
| Chile CL | Indonesia | ID | Oman | OM | Thailand | TH | |
| China CN | Israel | IL | Pakistan | PK | Turkey | TR | |
| Colombia CO | Italy | IT | Panama PA | Uganda | UG | ||
| Congo CG | Jamaica | JM | Paraguay | PY | Ukraine | UA | |
| Costa Rica CR | Japan | JP | Philippines | PH | United States | US | |
| Croatia | HR | Kenya | KE | Poland PL | Uruguay | UY | |
| Czech Republic | CZ | Kuwait | KW | Portugal | PT | Uzbekistan | UZ |
| Denmark | DK | Libya | LY | Romania | RO | Vietnam | VN |
| Ecuador EC | Luxembourg | LU | Russian Federation | RU | Zimbabwe | ZW | |
| Egypt | EG | Malaysia | MY | Saudi Arabia | SA | ||
| El Salvador SV | Maldives | MV | Senegal | SN | |||
| Ethiopia | ET | Mexico | MX | ||||
Language code List
Use this list to input your desired language for the following initial settings: [Disc Audio], [Disc Subtitle] and [Disc Menu].
| Language | Code | Language | Code | Language | Code | Language |
| Afar 6565 | French | 7082 | Lithuanian | 7684 | Sindhi 8368 | |
| Afrikaans 6570 | Frisian | 7089 | Macedonian | 7775 | Singhalese 8373 | |
| Albanian 8381 | Galician | 7176 | Malagasy | 7771 | Slovak 8375 | |
| Ameharic 6577 | Georgian | 7565 | Malay | 7783 | Slovenian 8376 | |
| Arabic 6582 | German | 6869 | Malayalam | 7776 | Spanish 6983 | |
| Armenian 7289 | Greek | 6976 | Maori | 7773 | Sudanese 8385 | |
| Assamese 6583 | Greenlandic | 7576 | Marathi 7782 | Swahili 8387 | ||
| Aymara 6588 | Guarani 7178 | Moldavian | 7779 | Swedish 8386 | ||
| Azerbaijani 6590 | Gujarati 7185 | Mongolian | 7778 | Tagalog 8476 | ||
| Bashkir 6665 | Hausa | 7265 | Nauru | 7865 | Tajik 8471 | |
| Basque 6985 | Hebrew | 7387 | Nepali 7869 | Tamil 8465 | ||
| Bengali; Bangla 6678 | Hindi | 7273 | Norwegian | 7879 | Telugu 8469 | |
| Bhutani 6890 | Hungarian | 7285 | Oriya | 7982 | Thai 8472 | |
| Bihari 6672 | Icelandic 7383 | Panjabi 8065 | Tonga 8479 | |||
| Breton 6682 | Indonesian 7378 | Pashto, Pushto | 8083 | Turkish 8482 | ||
| Bulgarian 6671 | Interlingua | 7365 | Persian | 7065 | Turkmen 8475 | |
| Burmese 7789 | Irish | 7165 | Polish | 8076 | Twi 8487 | |
| Byelorussian 6669 | Italian | 7384 | Portuguese | 8084 | Ukrainian 8575 | |
| Chinese 9072 | Japanese | 7465 | Quechua | 8185 | Urdu 8582 | |
| Croatian 7282 | Kannada | 7578 | Rhaeto-Romance | Uzbek 8590 | ||
| Czech 6783 | Kashmiri | 7583 | 8277 | Vietnamese 8673 | ||
| Danish 6865 | Kazakh | 7575 | Rumanian | 8279 | Volapük 8679 | |
| Dutch 7876 | Kirghiz | 7589 | Russian | 8285 | Welsh 6789 | |
| English 6978 | Korean | 7579 | Samoan | 8377 | Wolof 8779 | |
| Esperanto 6979 | Kurdish | 7585 | Sanskrit 8365 | Xhosa 8872 | ||
| Estonian 6984 | Laothian | 7679 | Scots Gaelic | 7168 | Yiddish 7473 | |
| Faroese 7079 | Latin | 7665 | Serbian | 8382 | Yoruba 8979 | |
| Fiji 7074 | Latvian, Lettish | 7686 | Serbo-Croatian | 8372 | Zulu 9085 | |
| Finnish 7073 | Lingala | 7678 | Shona 8378 |
Code
Video output resolution
When the non-copy protected media is playing back
| Resolution\Video Out | HDMI OUT | COMPONENT VIDEO OUT | |
| HDMI connected HDMI disconnected | |||
| 576i (480i) 576p (480i) | 576i (480i) | ||
| 576p (480p) 576p (480p) | 576p (480p) | ||
| 720p 720p 720p | |||
| 1080i 1080i 1080i | |||
| 1080p / 24 Hz 1080p / 24 Hz 576i (480i) 1080i | |||
| 1080p / 50 (60) Hz 1080p / 50 (60) Hz 576i (480i) 1080i | |||
When the copy protected media is playing back
| Resolution\Video Out | HDMI OUT | COMPONENT VIDEO OUT | |
| HDMI connected HDMI disconnected | |||
| 576i (480i) 576p (480p) | 576i (480i) | ||
| 576p (480p) | 576p (480p) | 576p (480p) | |
| 720p | 720p 576i (480i) | 576p (480p) | |
| 1080i | 1080i | 576i (480i) | 576p (480p) |
| 1080p / 24 Hz | 1080p / 24 Hz | 576i (480i) | 576p (480p) |
| 1080p / 50 (60) Hz | 1080p / 50 (60) Hz | 576i (480i) | 576p (480p) |
HDMI OUT connection
- For the 576i (480i) resolution setting, real output resolution of HDMI OUT will change to 576p (480p).
- If you select a resolution manually and then connect the HDMI jack to TV and your TV does not accept it, the resolution setting is set to [Auto].
- If you select a resolution that your TV does not accept, the warning message will appear. After resolution change, if you cannot see the screen, please wait 20 seconds and the resolution will automatically revert back to the previous resolution.
- The 1080p video output frame rate may be automatically set to either 24 Hz or 50 Hz depending both on the capability and preference of the connected TV and based on the native video frame rate of the content on the BD-ROM disc.
COMPONENT VIDEO OUT connection
BD or DVD could prevent up-scaling on analogue output.
VIDEO OUT connection
The resolution of the VIDEO OUT jack is always outputted at 576i (480i) resolution.
Trademarks and Licences

"Blu-ray Disc" and are trademarks.

"BD-LIVE" logo is a trademark of Blu-ray Disc Association.
"BONUSVIEW" is trademark of Blu-ray Disc Association.

Java and all Java-based trademarks and logos are trademarks or registered trademarks of Sun Microsystems, Inc. in the United States and other countries.

Manufactured under licence from Dolby Laboratories. Dolby, and the double-D symbol are trademarks of Dolby Laboratories.


Manufactured under licence under U.S. Patent #'s: 5,451,942; 5,956,674; 5,974,380; 5,978,762; 6,226,616; 6,487,535; 7,392,195; 7,272,567; 7,333,929; 7,212,872 & other U.S. and worldwide patents issued & pending. DTS and the Symbol are registered trademarks, & DTS-HD, DTS-HD Master Audio I Essential and the DTS logos are trademarks of DTS, Inc. Product includes software. © DTS, Inc. All Rights Reserved.
HDMI
HDMI, the HDMI Logo and High-Definition Multimedia Interface are trademarks or registered trademarks of HDMI Licensing, LLC in the United States and other countries.

DVD is a trademark of DVD Format/Logo Licensing Corporation.

DLNA and DLNA CERTIFIED are trademarks and / or service marks of Digital Living Network Alliance.

DivX is a registered trademark of DivX, Inc., and is used under licence.
x.v.Color
x.v.Colour
"x.v.Colour" or "x.v.Colour" is a trademark of Sony Corporation.
AVCHD™
"AVCHD" and the "AVCHD" logo are trademarks of Panasonic Corporation and Sony Corporation.
This product is licenced under the AVC patent portfolio licence and VC-1 patent portfolio licence for the personal and non-commercial use of a consumer to (i) encode video in compliance with the AVC Standard and VC-1 Standard ("AVC/VC-1 Video") and/or (ii) decode AVC/VC-1 Video that was encoded by a consumer engaged in a personal and non-commercial activity and/or was obtained from a video provider licenced to provide AVC/VC-1 Video. No licence is granted or shall be implied for any other use. Additional information may be obtained from MPEG LA, LLC. See http://www.mpegla.com.

iPod is a trademark of Apple Inc., registered in the U.S. and other countries.
iPhone is a trademark of Apple Inc.
"Made for iPod" means that an electronic accessory has been designed to connect specifically to iPod and has been certified by the developer to meet Apple performance standards.
"Works with iPhone" means that an electronic accessory has been designed to connect specifically to iPhone and has been certified by the developer to meet Apple performance standards.
Apple is not responsible for the operation of this device or its compliance with safety and regulatory standards.
Windows Media is either a registered trademark or trademark of Microsoft Corporation in the United States and / or other countries.
This product includes technology owned by Microsoft Corporation and cannot be used or distributed without a license from Microsoft Licensing, Inc.
Bluetooth®
Bluetooth® wireless technology is a system which allows radio contact between electronic devices within a max. range of 10 meters.
Connecting individual devices under Bluetooth wireless technology does not incur any charges. A mobile phone with Bluetooth wireless technology can be operated via the Cascade if the connection was made via Bluetooth wireless technology.
The Bluetooth word mark and logos are owned by the Bluetooth SIG, Inc. and any use of such marks by Pioneer Corporation is under license. Other trademarks and trade names are those of their respective owners.
Specifications
General
• Power requirements: AC 220-240 V, 50/60 Hz
• Power consumption:
150 W
In Standby mode: Less than 0.5W
- Dimensions (W x H x D):
Approx. 430 × 64 × 304 mm
• Net Weight (Approx.): 3.6 kg
- Operating temperature: 41 °F to 95 °F (5 °C to 35 °C)
• Operating humidity: 5 % to 90 %
- Bus Power supply (USB): DC 5V = 500 mA
Inputs/ Outputs
• VIDEO OUT:
1.0 V (p-p), 75 Ω, sync negative, RCA jack x 1
- COMPONENT VIDEO OUT:
(Y) 1.0 V (p-p), 75 Ω, sync negative, RCA jack x 1, (Pb)/(Pr) 0.7 V (p-p), 75 Ω, RCA jack x 2
• HDMI OUT (video/audio):
19 pin (HDMI standard, Type A, Version 1.3)
- Analogue AUDIO IN:
2.0 Vrms (1 kHz, 0 dB), 600 Ω, RCA jack (L, R) x 1
• DIGITAL IN (OPTICAL 1/2): 3 V (p-p), Optical jack x 2
- PORTABLE IN:
0.5 Vrms (3.5 mm stereo jack)
Tuner
• FM Tuning Range: 87.5 to 108.0 MHz or 87.50 to 108.00 MHz
Amplifi er
• Power output, (PEAK), (4Ω/3Ω)
Total 1100 W
Front 180 W x 2
Centre 180 W
Rear 180 W x 2
Sub-Woofer 200 W (Passive)
• Power output, (RMS), THD 10% (4Ω/3Ω)
Total 930 W
Front 150 W x 2
Centre 150 W
Rear 150 W x 2
Sub-Woofer 180 W (Passive)
System
- Laser:
Semiconductor laser
Wavelength: 405 nm / 650 nm
• Signal system: Standard NTSC/PAL colour TV system
• Frequency response: 20 Hz to 20 kHz (48 kHz, 96 kHz, 192 kHz sampling)
• LAN port: Ethernet jack x 1, 10BASE-T/100BASE-TX
Speakers for BCS-707
S-BD707
- Front/Surround speaker (Left/ Right)
Type: 2 Way
Impedance Rated: 4 Ω
Net Dimensions 260 x 1097 x 260 mm
(W × H × D):
Net Weight: 3.8 kg
- Centre speaker
Type: 1 Way
Impedance Rated: 4 Ω
Net Dimensions 300 x 87x 65 mm
(W × H × D):
Net Weight: 0.6 kg
S-BD707SW
- Subwoofer
Type: 1 Way 1 speaker
Impedance Rated: 3 Ω
Net Dimensions 130.5 x 420 x 375 mm
(W × H × D):
Net Weight: 4.4 kg
Speakers for BCS-303
S-BD303
- Front/Surround speaker (Left/ Right)
Type: 1 Way
Impedance Rated: 4 Ω
Net Dimensions 96 x 96 x 85 mm
(W × H × D):
Net Weight: 0.4 kg
- Centre speaker
Type: 1 Way
Impedance Rated: 4 Ω
Net Dimensions 300 x 87x 65 mm
(W × H × D):
Net Weight: 0.6 kg
- Subwoofer
Type: 1 Way 1 speaker
Impedance Rated: 3 Ω
Net Dimensions 130.5 x 420 x 375 mm
(W × H × D):
Net Weight: 4.4 kg
Open source software notice
The following GPL executables and LGPL libraries used in this product are subject to the GPL2.0/LGPL2.1 License Agreements:
GPL EXECUTABLES: Linux kernel 2.6, bash, busybox, cramfs, dhcpd, e2fsprogs, fdisk, mkdosfs, mtd-utils, net-tools, procps, samba-3.0.25b, sysutils, tcpdump, tftpd, tinylogin, unzip, utelnetd
LGPL LIBRARIES: uClibc, DirectFB, blowfi sh, cairo, ff mpeg, iconv, libusb, mpg123
gSOAP Public License 1.3 LIBRARY: gsoap
A copy of the corresponding source code can be obtained by being charged the fee for distribution. To obtain a copy, contact your local Pioneer Customer Support.
You can obtain a copy of the GPL, LGPL licenses from http://www.gnu.org/licenses/old-licenses/gpl-2.0.html and http://www.gnu.org/licenses/old-licenses/lgpl-2.1.html.
Also you can obtain a copy of gSOAP public license from http://www.cs.fsu.edu/\~engelen/license.html.
This software is based in part on the work of the Independent JPEG Group copyright © 1991 - 1998, Thomas G. Lane.
This product includes
- boost C++: copyright © Beman Dawes 1999-2003
• c-ares : copyright © 1998 by the Massachusetts Institute of Technology
- curl: copyright © 1996 - 2008, Daniel Stenberg
- expat: copyright © 2006 expat maintainers
- freetype: copyright © 2003 The FreeType Project (www.freetype.org).
- jpeg: This software is based in part on the work of the Independent JPEG Group copyright © 1991 – 1998, Thomas G. Lane.
- mng: copyright © 2000-2007 Gerard Juyn, Glenn Randers-Pehrson
- ntp:copyright © David L. Mills 1992-2006
- OpenSSL:
- cryptographic software written by Eric Young (eay@cryptsoft.com).
– software written by Tim Hudson (tjh@cryptsoft.com). - software developed by the OpenSSL Project for use in the OpenSSL Toolkit. (http://www.openssl.org)
• png: copyright © 2004 Glenn Randers-Pehrson - portmap: copyright © 1990 The Regents of the University of California
- ptmalloc: copyright © 2001-2006 Wolfram Gloger
- UnitTest++ : copyright © 2006 Noel Llopis and Charles Nicholson
- UPnP SDK: copyright © 2000-2003 Intel Corporation
- strace :
copyright © 1991, 1992 Paul Kranenburg
copyright © 1993 Branko Lankester
copyright © 1993 Ulrich Pegelow
copyright © 1995, 1996 Michael Elizabeth Chastain
copyright © 1993, 1994, 1995, 1996 Rick Sladkey
copyright © 1999,2000 Wichert Akkerman
• xml2 : copyright © 1998-2003 Daniel Veillard - XML-RPC For C/C++: copyright © 2001 by First Peer, Inc. All rights reserved. copyright © 2001 by Eric Kidd. All rights reserved.
- zlib: copyright © 1995-2002 Jean-loup Gailly and Mark Adler.
All rights reserved.
Permission is hereby granted, free of charge, to any person obtaining a copy of this software and associated documentation files (the "Software"), to deal in the Software without restriction, including without limitation the rights to use, copy, modify, merge, publish, distribute, sublicense, and/or sell copies of the Software, and to permit persons to whom the Software is furnished to do so, subject to the following conditions:
THE SOFTWARE IS PROVIDED "AS IS", WITHOUT WARRANTY OF ANY KIND, EXPRESS OR IMPLIED, INCLUDING BUT NOT LIMITED TO THE WARRANTIES OF MERCHANTABILITY, FITNESS FOR A PARTICULAR PURPOSE AND NONINFRINGEMENT. IN NO EVENT SHALL THE AUTHORS OR COPYRIGHT HOLDERS BE LIABLE FOR ANY CLAIM, DAMAGES OR OTHER LIABILITY, WHETHER IN AN ACTION OF CONTRACT, TORT OR OTHERWISE, ARISING FROM, OUT OF OR IN CONNECTION WITH THE SOFTWARE OR THE USE OR OTHER DEALINGS IN THE SOFTWARE.
1
RISQUE D'ÉLECTROCUTION NE PAS OUVRIR

ATTENTION: AFIN DE MINIMISER LES RISQUES D'ÉLECTROCUTION, NE RETIREZ PAS LE COUVERCLE (OU L'ARRIÈRE) AUCUNE PIÈCE DE CET APPAREIL N'EST SUSCEPTIBLE D'ÊTRE RÉPARÉE PAR L'UTILISATEUR CONFIEZ L'ENTRETIEN DE L'APPAREIL À DES PERSONNES QUALIFIÉES.

natural_image
Illustration of a double-sleeve cable with two connectors (no text or symbols)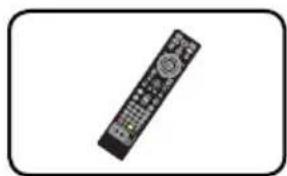
natural_image
Black remote control device with black buttons and a grid (no visible text or symbols)natural_image
Simple line drawing of a cylindrical battery with a cross mark on its side (no text or symbols)
natural_image
Simple line drawing of a cable with two connectors (no text or symbols)Piles (1) Antenne FM (1)
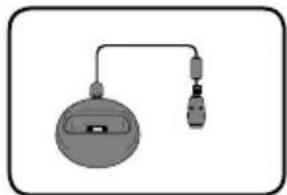
natural_image
Simple diagram of a device with a circular component and connected plug (no text or symbols)Sabot iPod (1)
natural_image
Illustration of a coiled cable or wire with no text or symbols
natural_image
Simple line drawing of a screw with a circular head, no text or symbols presentnatural_image
Simple 3D-rendered gray oval object with three small dots on its surface, enclosed in a rounded rectangle (no text or symbols)natural_image
Simple diagram of four circles arranged in a diamond shape within a rounded rectangle (no text or symbols)natural_image
Grid of circular holes on a rectangular surface, no text or symbols presentnatural_image
Simple line drawing of a coiled cable or wire (no text or symbols)natural_image
Simple diagram of four gray circles arranged in a diamond shape within a rounded rectangle (no text or symbols)natural_image
Illustration of a coiled cable or wire with no text or symbolsnatural_image
Diagram of a grid-patterned rectangular structure with circular holes, enclosed in a rounded rectangle (no text or symbols)natural_image
Simple diagram of four gray circles arranged in a diamond shape within a rounded rectangle (no text or symbols)Eff acer stockage BD
natural_image
Technical line drawing of a mechanical device with a disc and cutting tool (no text or symbols)natural_image
Three grayscale icons: a CD, USB plug, and iPod (no text or symbols)
REMARQUE
12 AVCHD (Advanced Codec High Definition)
natural_image
Illustration of a double-sleeve cable with two connectors (no text or symbols)
natural_image
Black remote control device with black buttons and a grid of buttons, isolated on white background (no text or symbols)natural_image
Simple line drawing of a cylindrical battery with a cross mark on its side (no text or symbols)
natural_image
Simple line drawing of a coiled cable or wire with two connectors (no text or symbols)Batterien (1) UKW-Antenne (1)

natural_image
Simple line drawing of a device with a circular base and connected plug (no text or symbols)iPod-Dock (1)
natural_image
Illustration of a coiled cable or wire with no text or symbols
natural_image
Simple line drawing of a screw inside a rounded rectangle (no text or symbols)natural_image
Simple 3D-rendered gray oval object with three small dots on its surface, enclosed in a rounded rectangle (no text or symbols)natural_image
Simple geometric diagram of four circles inside a parallelogram (no text or symbols)natural_image
Pattern of uniform circular holes arranged in a grid on a gray background (no text or symbols)natural_image
Illustration of a coiled cable or wire with no text or symbolsnatural_image
Simple diagram of four gray circles arranged in a diamond shape within a rounded rectangle (no text or symbols)natural_image
Simple line drawing of a coiled cable or wire (no text or symbols)natural_image
Diagram of a grid-patterned rectangular plate with uniform circular holes, enclosed in a rounded rectangle (no text or symbols)natural_image
Simple diagram of four circles arranged in a diamond shape within a rounded rectangle (no text or symbols)AVCHD (Advanced Video Codec High Definition)

HINWEIS
natural_image
Diagram of a device with a circular button and a USB port, showing no text or symbols[Test/Testton beenden]
natural_image
Technical line drawing of a mechanical device with a disc and cutting tool (no text or symbols)natural_image
Diagram of a device with a circular button and a USB flash, showing no text or symbolsnatural_image
Three grayscale icons: a CD/DVD, USB cable, and iPod (no text or symbols)LGPL-BIBLIOTHEKEN: uClibc, DirectFB, blowfi sh, cairo, ff mpeg, iconv, libusb, mpg123
gSOAP Public License 1.3-BIBLIOTHEK: gsoap
- boost C++: Copyright © Beman Dawes 1999-2003
• c-ares: Copyright © 1998 Massachusetts Institute of Technology
- curl: Copyright © 1996 - 2008, Daniel Stenberg
- expat: Copyright © 2006 expat maintainers
- freetype: Copyright © 2003 The FreeType Project (www.freetype.org).
- ntp: Copyright © David L. Mills 1992-2006
- OpenSSL:
- Kryptographische Software programmiert von Eric Young (eay@cryptsoft.com).
- Software programmiert von Tim Hudson (tjh@cryptsoft.com).
natural_image
Illustration of a double-sleeve cable with two connectors (no text or symbols)![PIONEER BCS-707 - [Test/Testton beenden] - 1](/content/2026/06/1277448/images/b81cc577c031d406d72d35601bab1cc8018fe8dd474bb40322e988402d7e271f.jpg)
natural_image
Black remote control device with black buttons and a grid (no visible text or symbols)natural_image
Simple line drawing of a cylindrical battery with a cross mark on its side (no text or symbols)![PIONEER BCS-707 - [Test/Testton beenden] - 2](/content/2026/06/1277448/images/fb8bb107f66292afd65255e90bd90873ba2940057a3410a737543b6c8327a985.jpg)
natural_image
Simple line drawing of a cable with two connectors (no text or symbols)Batterie (1) Antenna FM (1)
![PIONEER BCS-707 - [Test/Testton beenden] - 3](/content/2026/06/1277448/images/f06754b555ac19b38aafd1fa4c471f8195e2651b66f500b4d7f610e30724266f.jpg)
natural_image
Simple diagram of a device with a circular component and connected plug (no text or symbols)natural_image
Illustration of a coiled cable or wire with no text or symbolsnatural_image
Simple line drawing of a screw inside a rounded rectangle (no text or symbols)Viti (12)
![PIONEER BCS-707 - [Test/Testton beenden] - 4](/content/2026/06/1277448/images/f5337c77c21c00daac63cfede2ad700dcf14441915c696370d4692448c7554cd.jpg)
natural_image
Simple 3D-rendered gray oval object with three small dots on its surface, enclosed in a rounded rectangle (no text or symbols)natural_image
Simple diagram of four circles inside a diamond shape, enclosed in a rounded rectangle (no text or symbols)Attenuatori antislittamento generali (1)
![PIONEER BCS-707 - [Test/Testton beenden] - 5](/content/2026/06/1277448/images/20f1aafef31fb417b0ff7f708b94dc30de601a47456b3a79af44ac9303648919.jpg)
natural_image
Grid of circular holes on a rectangular surface, no text or symbols presentAttenuatori antislittamento mediani (1)
natural_image
Simple line drawing of a coiled cable or wire (no text or symbols)![PIONEER BCS-707 - [Test/Testton beenden] - 6](/content/2026/06/1277448/images/cb65e8611f16362a1cc33b1d80c59fcd16510d431eeb1dc4206db157eedf7d1f.jpg)
natural_image
Simple diagram of four gray circles arranged in a diamond shape within a rounded rectangle (no text or symbols)natural_image
Illustration of a coiled cable or wire with no text or symbolsnatural_image
Grid of circular holes on a dark rectangular surface, enclosed in a rounded rectangle (no text or symbols)Attenuatori antislittamento generali (1)
![PIONEER BCS-707 - [Test/Testton beenden] - 7](/content/2026/06/1277448/images/83e2029560cddf71cbd8874ee9fd3276c3ea13af1958da669993190d8e25bd37.jpg)
natural_image
Simple diagram of four circles arranged in a diamond shape within a rounded rectangle (no text or symbols)AVCHD (Advanced Video Codec High Definition)
(A) Altoparlante anteriore sinistro (S)/
© Altoparlante anteriore destro (D):
A2DP (Advanced Audio Distribution Profi le)
natural_image
Diagram of a device rear panel with a circular button and a USB flash, showing no text or symbols.- Premere HOME MENU.
natural_image
Technical line drawing of a mechanical device with a disc and rotating component (no text or symbols)Audio CD/File musicali
natural_image
Diagram of a remote control panel with a mouse cursor pointing to the button (no text or symbols present)natural_image
Three grayscale icons: a CD/DVD, USB plug, and iPod (no text or symbols)
The Ground Truth image displays a single, solid horizontal line. According to Rule 2 (UNDERSCORE & LINE RULES), this is a stylistic or background line, not a placeholder underscore. Therefore, the OCR result must ignore it and output nothing or only meaningful text. The provided OCR content is "____", which consists of four underscores. This is an incorrect interpretation of the line as a placeholder, violating the rule that stylistic lines must be ignored. The OCR has hallucinated underscores where none should exist based on the GT's visual context. Hence, the OCR result is inconsistent with the Ground Truth.

Pb
natural_image
Illustration of a double-sleeve cable with two connectors (no text or symbols)
natural_image
Black remote control device with black buttons and a grid (no visible text or symbols)Cable de vídeo (1) Mando a distancia (1)

natural_image
Simple line drawing of a cylindrical battery with a cross mark on its side (no text or symbols)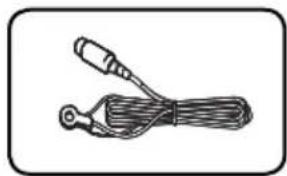
natural_image
Simple line drawing of a cable with two connectors (no text or symbols)Pilas (1) Antena FM (1)

natural_image
Simple diagram of a device with a circular component and connected plug (no text or symbols)natural_image
Illustration of a coiled cable or wire with no text or symbols
natural_image
Simple line drawing of a screw inside a rounded rectangle (no text or symbols)natural_image
Simple 3D-rendered oval object with three small dots on its surface, enclosed in a rounded rectangle (no text or symbols)natural_image
Simple diagram of four circles arranged in a diamond shape inside a rounded rectangle (no text or symbols)natural_image
Grid of circular holes on a rectangular surface, no text or symbols presentApoyos intermedios antideslizantes (1)
natural_image
Simple line drawing of a coiled cable or wire (no text or symbols)natural_image
Simple diagram of four gray circles arranged in a diamond shape within a rounded rectangle (no text or symbols)Apoyos grandes antideslizantes (4)
natural_image
Illustration of a coiled cable or wire with no text or symbolsnatural_image
Diagram of a grid-patterned rectangular plate with uniform circular holes, enclosed in a rounded rectangle (no text or symbols)natural_image
Simple diagram of four circles arranged in a diamond shape within a rounded rectangle (no text or symbols)Apoyos grandes antideslizantes (1)
A2DP (Advanced Audio Distribution Profi le)
natural_image
Technical line drawing of a mechanical device with a disc and cutting tool (no text or symbols)natural_image
Diagram of a wall-mounted air conditioner unit with a circular dial and a USB port, showing no text or symbols.natural_image
Three grayscale icons: a CD, a USB cable, and an iPod device (no text or symbols on the devices themselves)NOTA
natural_image
Two diagrams showing a hand pressing on a circular object and a cross symbol on a ring (no text or labels)75 Kennisgeving over open-source software
2
Voorbereiding
Inleiding
natural_image
Illustration of a double-sleeve cable with two connectors (no text or symbols)Videokabel (1)

natural_image
Black remote control with black buttons and a circular dial (no text or symbols visible)Afstandsbediening (1)

natural_image
Simple line drawing of a cylindrical battery with a cross mark on its side (no text or symbols)Batterijen (1) Fm-antenne (1)

natural_image
Simple line drawing of a cable with a connector (no text or symbols)
natural_image
Simple diagram of a device with a circular component and connected plug (no text or symbols)iPod houder (1)
natural_image
Illustration of a coiled cable or wire with no text or symbolsnatural_image
Simple line drawing of a screw inside a rounded rectangle (no text or symbols)Schroeven (12)

natural_image
Simple 3D-rendered oval object with three small dots on its surface, enclosed in a rounded rectangle (no text or symbols)natural_image
Simple diagram of four circles arranged in a diamond shape within a rounded rectangle (no text or symbols)kleine antislipkussentjes (1)

natural_image
Circular perforated panel with uniform holes, no text or symbols visibleMiddelgrote antislipkussentjes (1)
natural_image
Illustration of a coiled cable or wire with no text or symbolsnatural_image
Simple diagram of four circles arranged in a diamond shape within a rounded rectangle (no text or symbols)natural_image
Illustration of a coiled cable or wire with no text or symbolsnatural_image
Pure diagram of a grid pattern with circular holes, no text or symbols presentkleine antislipkussentjes (1)

natural_image
Simple diagram of four ellipses arranged in a diamond shape within a rounded rectangle (no text or symbols)Grote antislipkussentjes (1)
Afspeelbare disks
*1 GMC – Global Motion Compensation
*2 Qpel – Quarter pixel
MUSIC (Muziek)
Bemonsteringsfrequentie:
AVCHD (Advanced Video Codec High Definition)
BT AUDIO: Changes input mode to BT AUDIO directly.
A2DP (Advanced Audio Distribution Profi le)
Local Bluetooth Device Address → Device Name → None → ...

LET OP
[Teste/ Stop testoon]
natural_image
Diagram of a mechanical device with a disc and rotating component (no text or symbols)natural_image
Diagram of a remote control panel with a circular dial and a mouse pointer (no text or symbols)natural_image
Three grayscale icons: a CD, USB, and iPod, displayed side by side (no text or symbols on devices)![PIONEER BCS-707 - [Teste/ Stop testoon] - 1](/content/2026/06/1277448/images/36163f3943313d3e156057dc65ecf9000aa9042151a43c16cf522d769fb45d72.jpg)
LET OP
natural_image
Illustration of a hand pressing on a circular component and a cross symbol on a circular plate (no text or symbols present)Kennisgeving over open-source software
LGPL-PROGRAMMABIBLIOTHEKEN: uClibc, DirectFB, blowfi sh, cairo, ff mpeg, iconv, libusb, mpg123
gSOAP Public License 1.3 BIBLIOTHEEK: gsoap
• c-ares: copyright © 1998 by the Massachusetts Institute of Technology
- curl: copyright © 1996 - 2008, Daniel Stenberg
- expat: copyright © 2006 expat maintainers
- freetype: copyright © 2003 The FreeType Project (www.freetype.org).
Declaration of Conformity with regard to the R&TTE Directive 1999/5/EC
Manufacturer:
Pioneer Corporation
1-1, SHIN-OGURA, SAIWAI-KU, KAWASAKI-SHI, KANAGAWA-KEN 212-0031, JAPAN
EU Representative's:
Pioneer Europe NV
Haven 1087, Keetberglaan 1, 9120 Melsele, Belgium
http://www.pioneer.eu
CE
English:
Hereby, Pioneer, declares that this BCS-707 (BCS-303) is in compliance with the essential requirements and other relevant provisions of Directive 1999/5/EC.
Suomi:
Published by Pioneer Corporation.
Copyright © 2010 Pioneer Corporation.
All rights reserved.
Publication de Pioneer Corporation.
© 2010 Pioneer Corporation.
PIONEER ELECTRONICS (USA) INC.
P.O. BOX 1540, Long Beach, California 90801-1540, U.S.A. TEL: (800) 421-1404
PIONEER ELECTRONICS OF CANADA, INC.
300 Allstate Parkway, Markham, Ontario L3R 0P2, Canada TEL: 1-877-283-5901, 905-479-4411
PIONEER EUROPE NV
Haven 1087, Keetberglaan 1, B-9120 Melsele, Belgium TEL: 03/570.05.11
PIONEER ELECTRONICS ASIACENTRE PTE. LTD.
253 Alexandra Road, #04-01, Singapore 159936 TEL: 65-6472-7555
PIONEER ELECTRONICS AUSTRALIA PTY. LTD.
178-184 Boundary Road, Braeside, Victoria 3195, Australia, TEL: (03) 9586-6300
PIONEER ELECTRONICS DE MEXICO S.A. DE C.V.
Blvd.Manuel Avila Camacho 138 10 piso Col.Lomas de Chapultepec, Mexico, D.F. 11000
TEL: 55-9178-4270

- Cautions and Warnings
- CLASS 1 LASER PRODUCT APPAREIL À LASER DE CLASSE 1
- CAUTION concerning the Power Cord
- Information for users on collection and disposal of old equipment and used batteries
- These symbols are only valid in the European Union.
- For countries outside the European Union:
- Notes on Copyrights
- Important Notice for TV colour system
- Contents
- 1
- Safety Information
- 2
- Preparation
- 3
- Installation
- 4
- Operation
- 5
- Maintenance
- 6
- Troubleshooting
- 7
- Appendix
- Introduction
- About the "∅" Symbol Display
- Symbols Used in this Manual
- NOTE
- CAUTION
- Supplied Accessories
- Accessories of speaker box (S-BD707T)
- Accessories of speaker box (S-BD707SW)
- Accessories of speaker box (S-BD303)
- File compatibility
- Overall
- Available File extensions:
- CD-R/RW, DVD±R/RW, BD-R/RE Format:
- MOVIE
- Available resolution size:
- Sampling frequency:
- Bit rate:
- MUSIC
- PHOTO
- Recommended size:
- Regional Code
- AVCHD (Advanced Video Codec High Defi nition)
- Certain System Requirements
- Compatibility Notes
- Remote control
- Battery Installation
- Front panel
- FUNCTION
- Rear panel
- Installation
- Assemble the speakers
- Speaker Setup for BCS-707
- Preparing the speakers
- For speaker stand bases:
- For subwoofer:
- For centre speaker:
- Connect the wires to the player.
- Securing your front and surround speakers
- Speaker Setup for BCS-303
- Wall mounting the centre speaker
- Before mounting
- Additional notes on speaker
- Precautions:
- Positioning the system
- Connecting to Your TV
- HDMI Connection
- Component Video Connection
- Video Connection
- Resolution Setting
- Antenna connection
- Connections with external device
- AUX Connection
- PORTABLE IN connection
- OPTICAL IN 1/2 connection
- Bluetooth® connection
- About Bluetooth
- Bluetooth Profi les
- Listening to music of a Bluetooth device
- Pairing your unit and Bluetooth device
- Checking the information of connected Bluetooth device
- Connecting to your Home Network
- Network Setup
- Notes on Network Connection:
- USB device connection
- Settings
- Adjust the Setup Settings
- [DISPLAY] Menu
- TV Aspect Ratio
- [4:3 Letter Box]
- [4:3 Pan Scan]
- [16:9 Original]
- [16:9 Full]
- Resolution
- [Auto]
- [1080p]
- [1080i]
- [720p]
- [576p (480p)]
- [576i (480i)]
- 1080p Display Mode
- HDMI Color Setting
- [YCbCr]
- [RGB]
- [LANGUAGE] Menu
- Display Menu
- Disc Menu/ Disc Audio/ Disc Subtitle
- [Original]
- [Other]
- [Off] (for Disc Subtitle only)
- [AUDIO] Menu
- Speaker Setup
- [Speaker]
- [Volume]
- [Distance]
- [Test/ Stop test tone]
- [OK]
- [Cancel]
- HD AV Sync
- DRC (Dynamic Range Control)
- [LOCK] Menu
- Password
- [None]
- [Change]
- If you forget your password,
- DVD Rating
- [Rating 1-8]
- [Unlock]
- BD Rating
- [255]
- [0-254]
- Area Code
- [NETWORK] Menu
- Connection Setting
- Connection Status
- BD-LIVE connection
- [Permitted]
- [Partially permitted]
- [Prohibited]
- [OTHERS] Menu
- DivX VOD
- [Register]
- [Deregister]
- Auto Power Off
- Initialize
- Factory Set
- BD Storage Clear
- Software Information
- Sound Eff ect
- Operation
- General Playback
- Playing Discs
- To stop playback
- To pause playback
- To play frame-by-frame
- To scan forward or backward
- To slow down the playing speed
- To skip to the next/previous chapter/track/fi le
- Using the disc menu
- To display the disc menu
- To display the Pop-up menu
- Resume playback
- Advanced Playback
- Repeat Playback
- BDs/DVDs
- Audio CDs/Music fi les
- Repeating a specific portion
- Marker Search
- To enter a marker
- To recall a marked scene
- To delete a Marker
- Using the search menu
- To search a point
- To start playback from a marked scene
- Last Scene Memory
- On-Screen display
- Displaying content information on-screen
- Playing from selected time
- BD DVD AVCHD MOVIE
- Hearing different audio
- Selecting a subtitle language
- Watching from a different angle
- BD DVD
- Changing the TV Aspect Ratio
- Changing the Picture Mode
- Setting the [User setting] option
- Enjoying BD-LIVE
- Playing movie fi le and VR discs
- What is CPRM?
- Selecting a subtitle fi le MOVIE
- Changing subtitle code page MOVIE
- Viewing a photo
- To play a slide show
- To stop a slide show
- To pause a slide show
- To skip to the next/previous photo
- Options while viewing a photo
- Listening to music during a slide show
- Listening to music
- Audio CD Recording
- Playing the iPod
- Connect the iPod
- Enjoying iPod on the screen
- Enjoying the iPod IN mode
- Radio Operations
- Listening to the radio
- Presetting the Radio Stations
- Deleting all the saved stations
- Improving poor FM reception
- See information about a radio station
- Playing content via your home network
- About DLNA
- Accessing a DLNA media server
- Accessing a share folder from your PC
- PC requirements
- Entering a network user ID and the password
- Maintenance
- Notes on Discs
- Storing Discs
- Handling the Unit
- When shipping the unit
- Cleaning the unit
- Maintaining the Unit
- Network
- Updates
- Appendix
- Controlling a TV with the Supplied Remote Control
- Setting up the remote to control your TV
- Area Code List
- Language code List
- Video output resolution
- HDMI OUT connection
- COMPONENT VIDEO OUT connection
- VIDEO OUT connection
- Trademarks and Licences
- HDMI
- AVCHD™
- Bluetooth®
- Specifications
- General
- Inputs/ Outputs
- Tuner
- Amplifi er
- System
- Speakers for BCS-707
- S-BD707
- S-BD707SW
- Speakers for BCS-303
- S-BD303
- Open source software notice
- Eff acer stockage BD
- REMARQUE
- AVCHD (Advanced Video Codec High Definition)
- HINWEIS
- [Test/Testton beenden]
- Audio CD/File musicali
- NOTA
- Voorbereiding
- Inleiding
- MUSIC (Muziek)
- Bemonsteringsfrequentie:
- LET OP
- [Teste/ Stop testoon]
- Kennisgeving over open-source software
- Declaration of Conformity with regard to the R&TTE Directive 1999/5/EC
- Pioneer Corporation
- Pioneer Europe NV
- CE
- English:
- Suomi:
- PIONEER ELECTRONICS (USA) INC.
- PIONEER ELECTRONICS OF CANADA, INC.
- PIONEER ELECTRONICS ASIACENTRE PTE. LTD.
- PIONEER ELECTRONICS AUSTRALIA PTY. LTD.
- PIONEER ELECTRONICS DE MEXICO S.A. DE C.V.
Brand : PIONEER
Model : BCS-707
Category : Home Theater System