
TensioS1 - Sphygmomanometer LANAFORM - Free user manual and instructions
Find the device manual for free TensioS1 LANAFORM in PDF.


| Product Type | Blood Pressure Monitor |
| Brand | Lanaform |
| Model | TensioS1 |
| Measurement Method | Oscillometric |
| Measurement Range | Systolic: 60-260 mmHg, Diastolic: 40-200 mmHg, Pulse: 40-200 bpm |
| Accuracy | Blood Pressure: ±3 mmHg, Pulse: ±5% |
| Arm Circumference | 22-32 cm (standard cuff) |
| Display | LCD Digital Display |
| Memory | Up to 120 readings with date and time |
| Power Source | 4 x AAA batteries (included) or AC adapter (optional) |
| Battery Life | Approximately 2000 measurements |
| Auto Shut-Off | After 3 minutes of inactivity |
| Dimensions | 140 x 90 x 40 mm |
| Weight | Approximately 250 g (without batteries) |
| Device Classification | Class IIa Medical Device |
| Clinical Validation | Yes (ESH, BHS, or international protocol) |
| Irregular Heartbeat Detection | Yes |
| WHO Blood Pressure Classification Indicator | Yes |
| Care and Cleaning | Wipe with a soft, dry cloth. Do not use solvents or immerse in water. |
| Safety Features | Auto cuff pressure adjustment, low battery indicator, error code display |
| Spare Parts and Repairability | Replacement cuffs available. Contact customer service for repairs. |
| General Information | Includes carry case, instruction manual, and warranty card |
Frequently Asked Questions - TensioS1 LANAFORM
User questions about TensioS1 LANAFORM
0 question about this device. Answer the ones you know or ask your own.
Ask a new question about this device
Download the instructions for your Sphygmomanometer in PDF format for free! Find your manual TensioS1 - LANAFORM and take your electronic device back in hand. On this page are published all the documents necessary for the use of your device. TensioS1 by LANAFORM.
USER MANUAL TensioS1 LANAFORM

Blood Pressure Monitor
4 - 13
14 - 23
24 - 33
34 - 43
44 - 53
54 - 63
64 - 73
74 - 83
84 - 93
94 - 103
104 - 113
114 - 123
124 - 133






Thank you for purchasing LANANFORM® Upper-Arm Blood Pressure Monitor. This monitor applies the Oscillometric method to measure human systolic/diastolic blood pressure and heart rate. All values are shown on the LCD screen. This device is designed only for adults.
IMPORTANT NOTICE
When using this product, please be sure to follow all the notes listed below. Any action against these notices may cause injury or affect the accuracy.
- Do not disassemble, repair or remodel the monitor.
- Do not expose the monitor to extreme temperature, very high humidity, or direct sunlight.
- Do not rough handling and avoid dropping.
- Press Start/Stop button during measurement may cause the Blood Pressure Monitor stop operating.
- During the measurement, please keep silent to make sure the accuracy.
- Inaccurate readings may occur if users vibrate during measurements.
- Avoid measuring blood pressure in 30 minutes after exercises, bathing or returning from outdoor.
- Under any circumstance, measured results are ONLY for reference. Any further medical action should follow the advice of doctors.
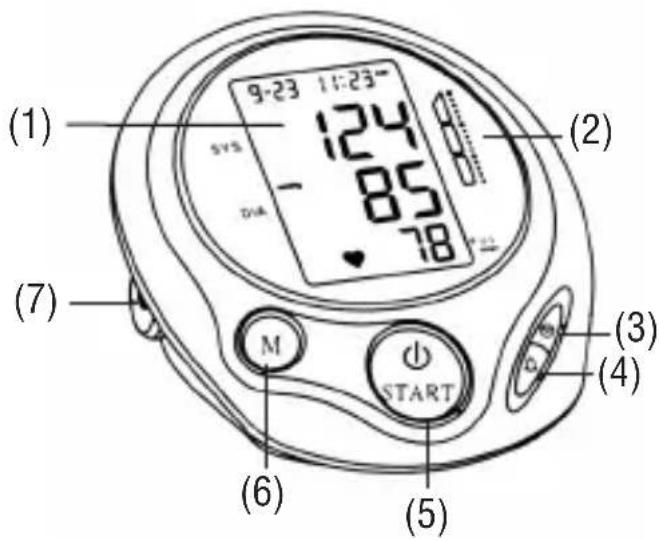
DEVICE DESCRIPTION
- LCD Display
- WHO Indicator
- Time Set Button
- Alarm Mode Selection
- Start / Stop Button
- Memory
- Air Jack
- Arm Cuff
- Air Tube
- Orange Cuff Marker
- Air Plug (connects to Air Jack)

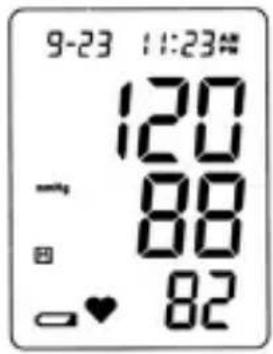
DESCRIPTION OF DISPLAY SYMBOLS
- Date
- Time
- Systolic Pressure
- Diastolic Pressure
- Pulse Rate
- Pulse Symbol
- Low Battery Symbol
- Memory Sets
- Alarm Symbol
- Memory Symbol
- Average Measurement Symbol
- Measurement Unit Symbol
- Inflation / Deflation Symbol

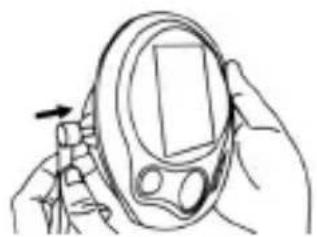
INSERT / REPLACE BATTERIES
- Follow the direction to remove the battery cover. (See figure 1).
- Insert four 1.5V AA size alkaline batteries. The direction of batteries is as indicated. (See figure 2).
- Replace the battery cover.
- When the "Low Battery Symbol" appears on the left bottom of the LCD screen, please replace all four batteries. (See figure 3).
- If the monitor will not be used for a long time, please remove all four batteries.

ATTACHING PRESSURE CUFF
- Insert the air plug of the arm cuff into the air jack of the monitor.
- The cuff should be assembled correctly when it is removed from the box. If it is not, pass the end of the cuff furthest from the tubing through the metal D-ring to form a loop. The smooth cloth should be on the inside of the cuff loop.
- If the cuff is assembled correctly, the sewn hook material will be on the outside of the cuff loop and the metal D-ring will not touch your skin.

- Put your left arm through the cuff loop. The bottom of the cuff should be approximately 2 to 3cm above the elbow. The cuff tubing should be positioned along the middle of the inside of your arm.

- Pull the cuff so that the top and bottom edges are tightened evenly around your arm. (Please make sure that the cuff is attached within the area of "orange cuff marker".)

- When the cuff is positioned correctly, press the sewn hook material firmly against the pile side of the cuff.
- The cuff should be wrapped so that it fits snugly and stays in place. You should be able to fit one finger between the cuff and your arm.
- Sit in a chair with your feet laid on the floor and your arm rest on a table so that the cuff is at the same level as your heart.
- Relax your arm and turn your palm upward.
- Be sure that the air tubing is not twisted.

ATTENTION: Naturally blood pressure varies from one hand to the other, so always measure your blood pressure on the same arm, in order to ensure comparability of two readings.
DATE / TIME SET PROCEDURE
- Press Time Set Button “💡” to enter Date / Time setting procedure, and the Year value will blink first.
- To adjust the value of year, please press "M" button, and the value will go up from 01 to 100. Please press Time Set Button " √ ” again to confirm the set value.
- Follow the steps instructed above to adjust the value of date and time consequently.
![graph TD A["Press "●""] --> B["9-21 11:30" yr 04"] B --> C["Press "●""] C --> D["9-21 11:30" yr 04"] D --> E["Press "●""] E --> F["9-21 11:30" yr 04"] F --> G["OFF"]](/content/2026/06/1276408/images/9d036595c9fac4acf79d01580f2c965f7cce02dc80a40cd7045b444f52702025.jpg)
ALARM CLOCK SET PROCEDURE
- Press Alarm Mode Button "☐" to enter Alarm Clock setting procedure.
- You are able to set 3 sets of memory. You can press Alarm Mode Button 🔊” consequently to select the memory number you would like to apply.
![graph LR A["Press "Q""] --> B["OFF 01"] B --> C["Press "Q""] C --> D["OFF 02"] D --> E["Press "Q""] E --> F["OFF 03"] F --> G["Press "Q""] G --> H["OFF 04"] H --> I["Press "Q""] I --> J["OFF 05"] J --> K["Press "Q""]](/content/2026/06/1276408/images/a042e56fe406afbceba2bd578f875afdd510d989db7edadf1feada5945633964.jpg)
- To set the alarm clock, please press Time Set Button “💡”. Then, you will be able to set your preferred time by following the Time Set procedure just before. After finished time setting, please press Time Set Button “💡” to finalize time setting.
- If you would like to turn off or turn on the alarm clock, you can just press "M" button after setting the preferred time.
![graph LR A["OFF 01"] -->|Press "⊗-"| B["OFF 01"] B -->|Press "M"| C["ON 01"]](/content/2026/06/1276408/images/cb55a1ea06bd69e6a904fa913985b54a04f6d6dc18f23ef3ed0ca24d2e1a38ba.jpg)
HOW TO MEASURE
- Press the Start / Stop button.
- All display symbols appear for approx. 1 second. This is the initial LCD test.
- When the monitor completes the necessary preparations before measurement, last reading result will be shown on the display.
- The monitor will begin to measure your blood pressure, and you will see the inflation symbol on the display during inflation. During the process of deflation, the symbol of inflation will turn off and the symbol of deflation will turn on.
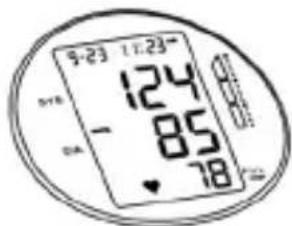
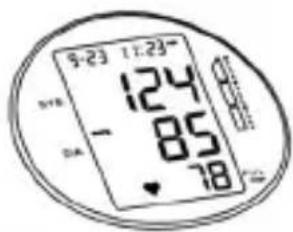
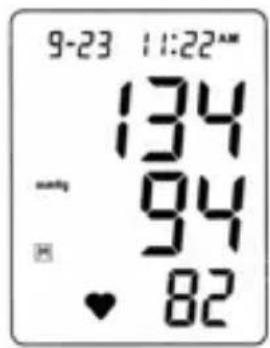
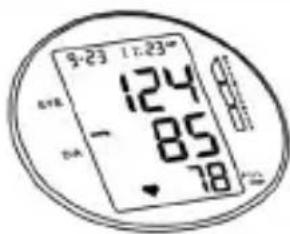
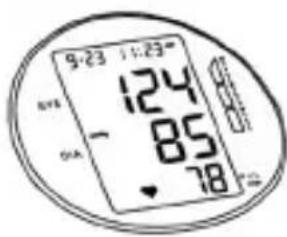
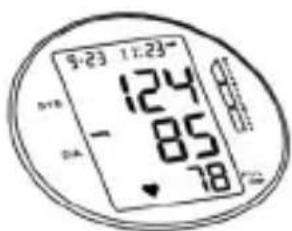
- Measurement Results Display.
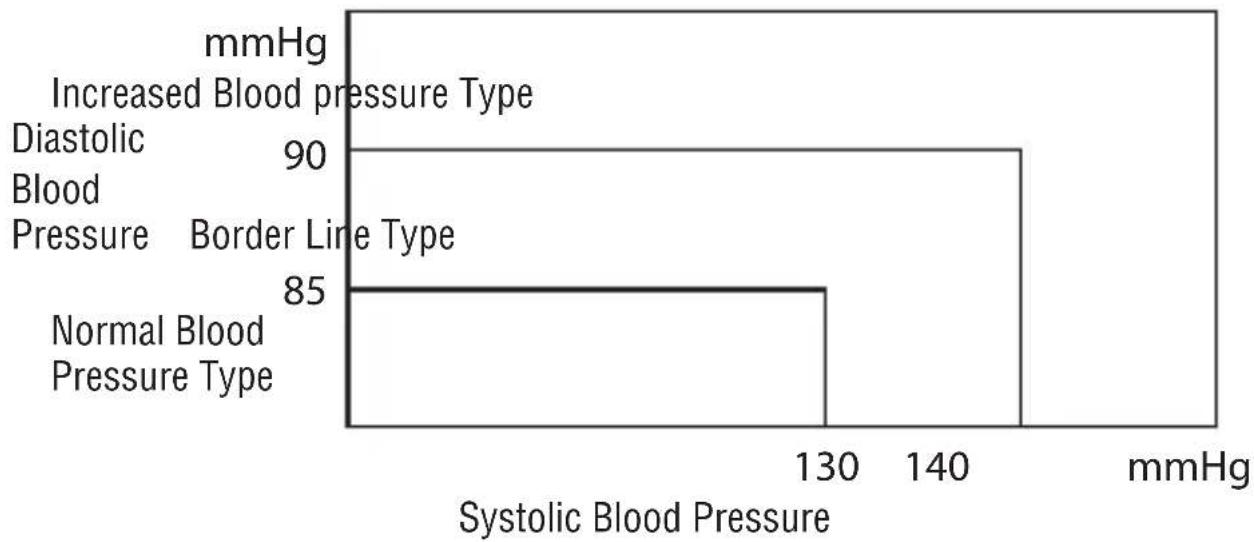
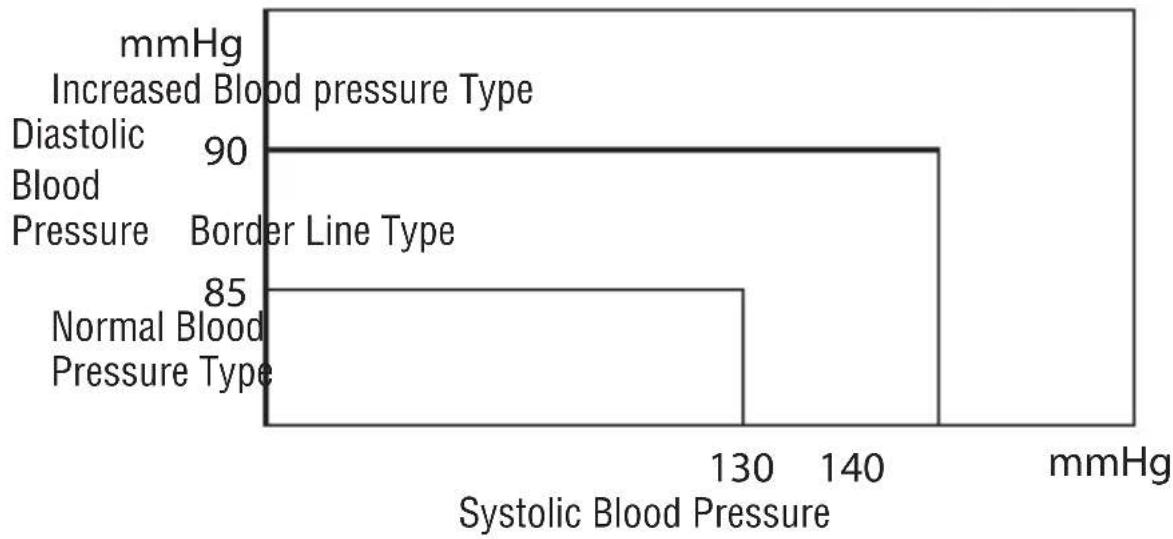
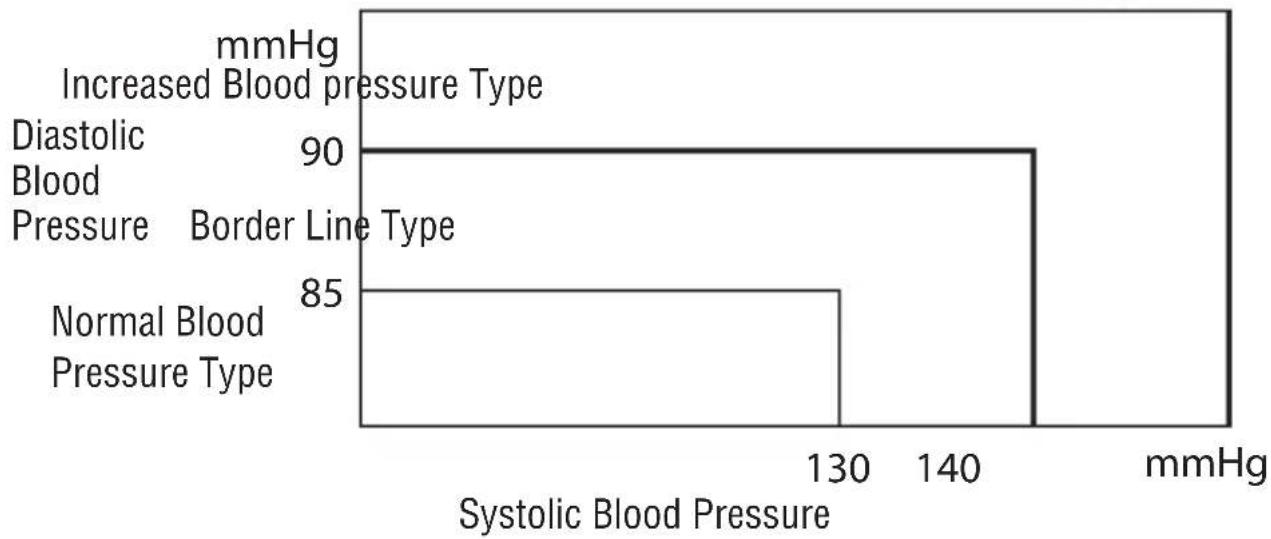
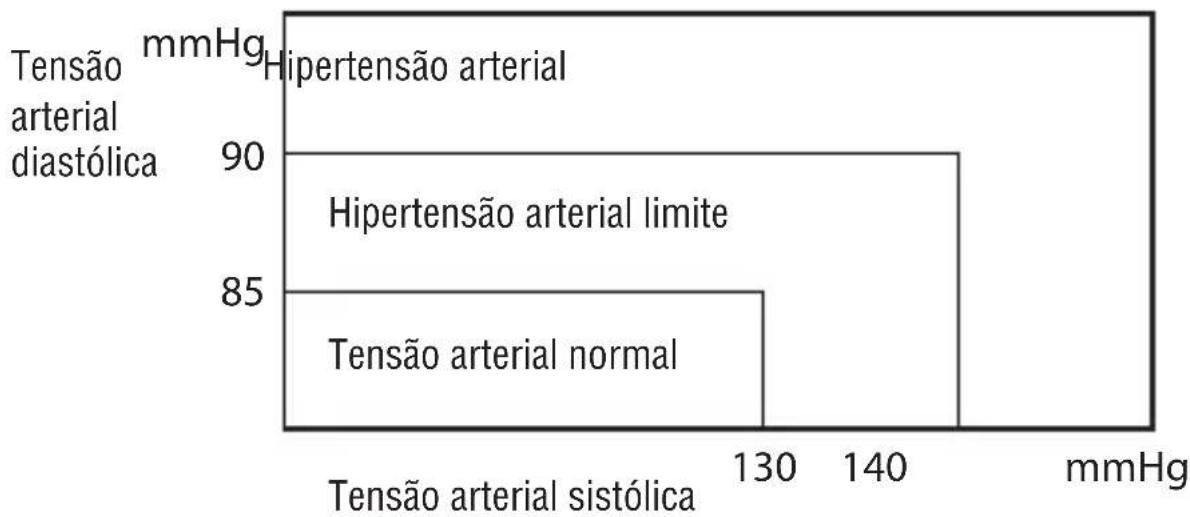
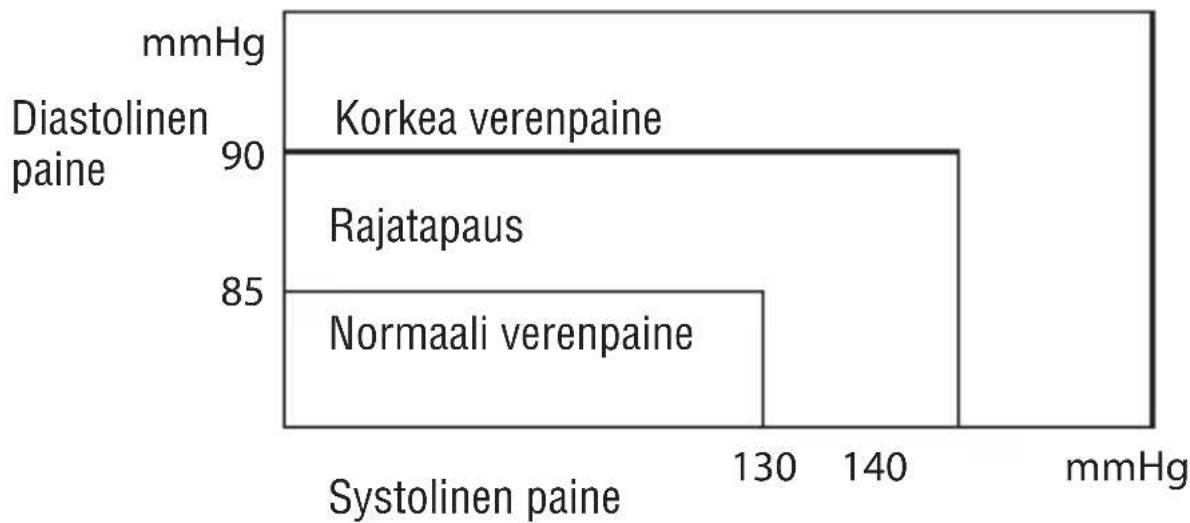
-When the measurement is completed, your blood pressure and pulse will be displayed on the LCD display automatically. -Based on the measurement result, your blood pressure level will be shown on the right side of the monitor according to the research of WHO (World Health Organization).


3. Memory Recall
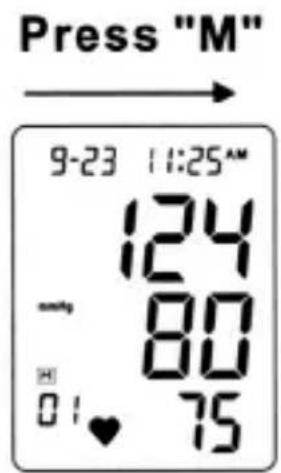
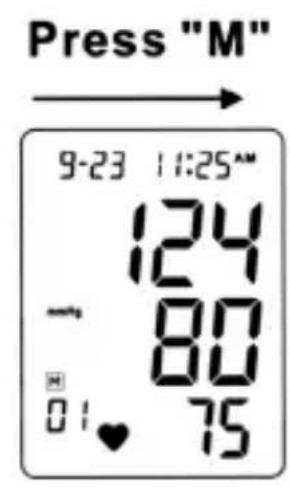
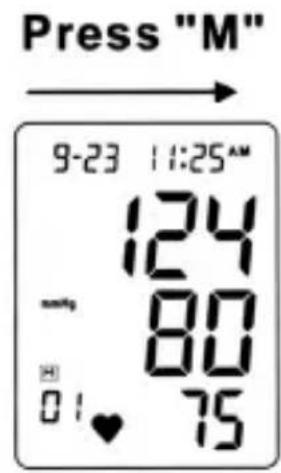
- This monitor can store up to 60 sets of memory. To recall the memory, please press "M" button first. Then, the average measurement result will be shown on the LCD first.
- After the average reading is shown on the display, you can press "M" to track historical records from No.1 to No.60.
- Press Time Set Button "√" to recall historical records backward.



4. Memory Deletion
- To clear all the memory records, please press "M" and hold it until the screen shows CIr.
- This function is only operated under power off mode.

MAINTENANCE AND CLEANING

- Clean the device carefully only with a slightly moistened cloth or mild detergent.
- Do not immerse the device in water. It may cause damage if water enters.
- Do not use any gas, strong detergent, or solvents to clean the device, including the arm cuff.
APPLIED STANDARDS
This product conforms to the previsions of the EC directive MDD (93/42/EEC).
The following standards apply to design and/or manufacture of the products:
- EN 1060-1
Non-invasive sphygmomanometers – Part 1 : General requirements
- EN 1060-3
Non-invasive sphygmomanometers – Part 3 : Supplementary requirements for electro-mechanical blood pressure measuring system
- ANSI/AAMI SP10
Electronic or automated sphygmomanometers
- IEC/EN 60601-1
Medical electrical equipment – Part 1: General requirements for safety
- IEC/EN 60601-1-2
Medical electrical equipment – Part 2: Collateral standard: Electromagnetic compatibility – Requirements and tests
TROUBLESHOOTING
| Condition Cause Corrective Action | ||
| No display after push the Start / Stop button | The positions of the batteries are incorrect. | Insert the batteries in the correct positions. |
| The voltage of the batteries is extremely low. | Replace all four batteries with new ones. | |
| Replace batteries symbol The voltage of the batteries is extremely low. | Replace all four batteries with new ones. | |
| When chilly, the batteries might have a weak electron release. | ||
| Utilization times become less | Might not utilize the Alkaline batteries. | Try to utilize the Alkaline batteries. |
| No reading after measurement | The voltage of the batteries is extremely low. | Replace all four batteries with new ones. |
| Suspicious measurement results. Higher or lower than user's average measurement. | Maybe not in correct position during measuring. | Adjust to a correct position to measure. |
| The blood pressure naturally varies from time to time. | ||
| Heart pulse rate higher/ lower than user's average | Move arm or body during measuring. | Do not move arm or body during measuring. |
| Measuring right after exercise. | Do not measure right after exercise. | |
| Power switch off automatically. | System design Push the Start/ Stop button again, and then measure again | |
| Inflate the air again during measuring. | Normal action, if user's blood pressure is higher than the initial pressure value, the device would automatically pump to a higher pressure by 20 mmHg each time of inflation until it reaches a suitable pressure. | |
| Cuff is not fastened. Fasten the cuff again. | ||
ERROR CODE
Err 0: No pulse or detected pulse is not enough.
Err 1: Cuff serious leakage or inflation too low.
Err 2: Can't get systolic.
Err 3: Cuff pressure is too high.
Err 4: Can't figure out diastolic or it outsides the legal range.
Err 5: Deflation is too fast.
Err 6: Deflation is too slow.
Err 7: Systolic outsides the legal range.
Err 8. : Mean pressure outside the legal range.
Err 9. : Cuff pressure is insufficient even when the highest value is pumped.
PRODUCT SPECIFICATION
Range of Measurement:
Blood Pressure: 30 to 280 mmHg
Pulse Rate: 40-200 beats/min
Accuracy Calibration:
Blood Pressure: ±3 mmHg
Pulse Rate: ±4%
Power Supply: 4 x 1.5V AA size alkaline batteries
Operation Environment:
Temperature: 10 to 40°C
Humidity: 15% to 95% RH (non-condensing)
Storage Environment:
Temperature: -20 to 50°C
Humidity: 15% to 95% RH (non-condensing)
LIMITED GUARANTEE
LANAFORM® guarantees this product to have no material or manufacturing defect for a period of two years beginning from the day it was purchased, with the exception of the items below.
The guarantee of this LANAFORM® product does not cover damages arising from any abusive use or any incorrect use, accident, attachment of any unauthorised accessory, change made to the product or any other situation, whatever the nature, beyond the control of LANAFORM®.
LANAFORM® will not be held responsible for any incidental, consequential or special damage.
Any implied guarantees of product capacity are limited to a period of two years beginning from the initial purchase date.
Upon receipt, LANAFORM® will repair and replace, depending on the case, your personal trimmer, and will send it back to you at no charge. The guarantee may only be used through a LANAFORM® Service Centre. Any repair work on this product carried out by any person other than the LANAFORM® Service Centre will be deemed to annul the present guarantee.
NV LANAFORM SA
Zoning de Cornemont



Electronic or automated sphygmomanometers.
- IEC/EN60601-1



3. Memory recall



3. Consult the memory



ATTACHING THE CUFF


- Memory reset

CUFF PLACEMENT




3. Memory

Electronic or automated sphygmomanometers
- IEC/EN 60601-1

PLACING THE CUFF WITH AIR PRESSURE
- The cuff should already be correctly assembled in the box. If not, push the end of the cuff tubing through the metal D-ring and make a loop (fastener). The soft fabric should be on the inside of the loop (fastener) of the cuff.
- If the cuff is correctly assembled, the sewn part used for fastening should be on the outside of the cuff and the metal D-ring should not touch your skin.


- Thread your left arm through the cuff loop. The bottom edge of the cuff loop should be about 2–3 cm above the elbow. The cuff tubing should be roughly in the center of the inner side of your arm.
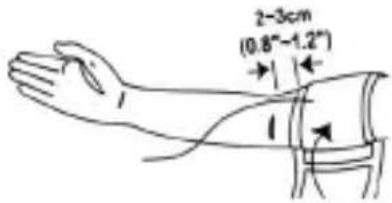
- Pull the cuff so that the top and bottom edges tighten around your arm (make sure the cuff is secured at the "orange cuff indicator" part).

- When the cuff is properly positioned, press the sewn fabric firmly against the soft fabric of the cuff to secure it.
- The cuff should be wrapped so that it is comfortably fixed and stays in place. You should be able to insert a finger between the cuff and your arm.
- Sit on a chair with your feet on the floor and your arm on a table so that the cuff is at the same height as your heart.
- Relax your arm and turn your palm upward.
- Check that the air hose is not bent.
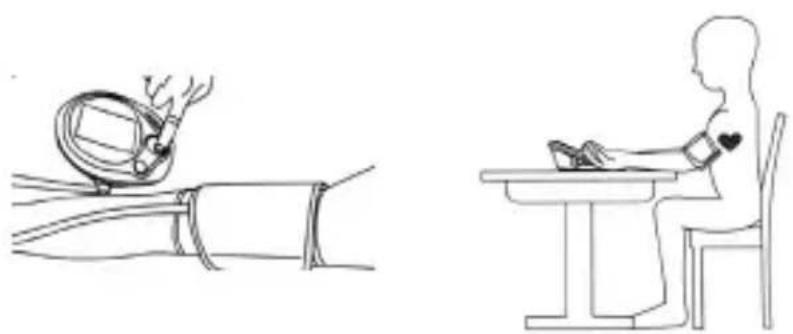
⚠️ WARNING: Normal arterial pressure naturally varies between the two arms. Therefore, always measure pressure on the same arm to be able to compare data.
SETTING DATE AND TIME
- Press the "Clock setting" switch to start the date and time setting process; the year value will start flashing first.
- Press the "M" switch to set the year, and the value will go from 1 to 100. Press the "Clock setting" switch again to confirm the set value.
- Repeat the process described above to set the date and time. Once the date/time data are set, press the "Clock setting" switch again to confirm all entered values.
![graph TD A["Press "○""] --> B["9-21 14:30-"] B --> C["9-21 14:30-"] C --> D["9-21 14:30-"] D --> E["9-21 14:30-"] E --> F["9-21 14:30-"] F --> G["9-21 14:30-"] G --> H["OFF"] I["Press "○""] --> J["9-21 14:30-"] J --> K["9-21 14:30-"] K --> L["9-21 14:30-"] L --> M["9-21 14:30-"]…](/content/2026/06/1276408/images/df628d8432296c8dfdb29a220ae55b00a399c371d28d958282a60c92ee557f0b.jpg)
SETTING THE ALARM
- Press the alarm switch (alarm-bell) to start setting the alarm.
- You can set 3 different memories. Press the Alarm button (bell) to specify the memory number you want to use.

![graph LR A["Press "Q""] --> B["01 OFF"] B --> C["Press "Q""] C --> D["02 OFF"] D --> E["Press "Q""] E --> F["03 OFF"] F --> G["Press "Q""]](/content/2026/06/1276408/images/4c278375fa7843b04f036576eccf245d6bc5ce225e917b9bdfa741f74507d735.jpg)
- To set the alarm, press the hour adjustment button. You can now set the hour following the instructions for setting the hour. After adjusting the alarm hour, press the "Hour Setting" button to confirm the set value and finish the adjustment.
- To start or turn off the alarm, press the "M" button after setting the desired hour.
![graph LR A["OFF 01"] -->|Press "⊗"| B["OFF 01"] B -->|Press "M"| C["ON 01"]](/content/2026/06/1276408/images/4dc1a393293a4836e805c5181e5bc21ae906296a6c7acb30a24b2fee136ea1d8.jpg)
HOW TO MEASURE
- Press the ON/OFF switch (start/stop).
- At the beginning of the self-diagnostic procedure, all measurement symbols flash on the monitor for approximately 1 second. This is the initial LCD test.
- After the monitor has completed the initial pre-measurement phase, the LCD screen then shows the value of the last measurement.
- After these stages, the system will automatically start a new measurement of your blood pressure. The inflation symbol appears on the screen during the inflation phase. During deflation, the inflation symbol is off and the deflation symbol is on.
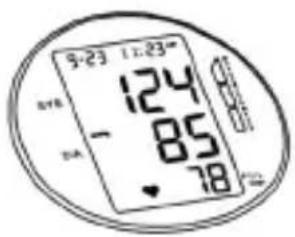
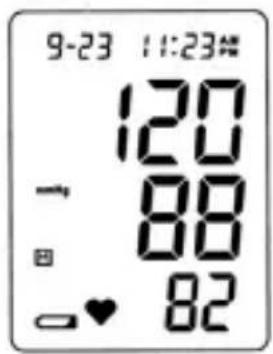
- Displaying the measurement results
- When the measurement is complete, your blood pressure and heart rate will automatically appear on the LCD screen.
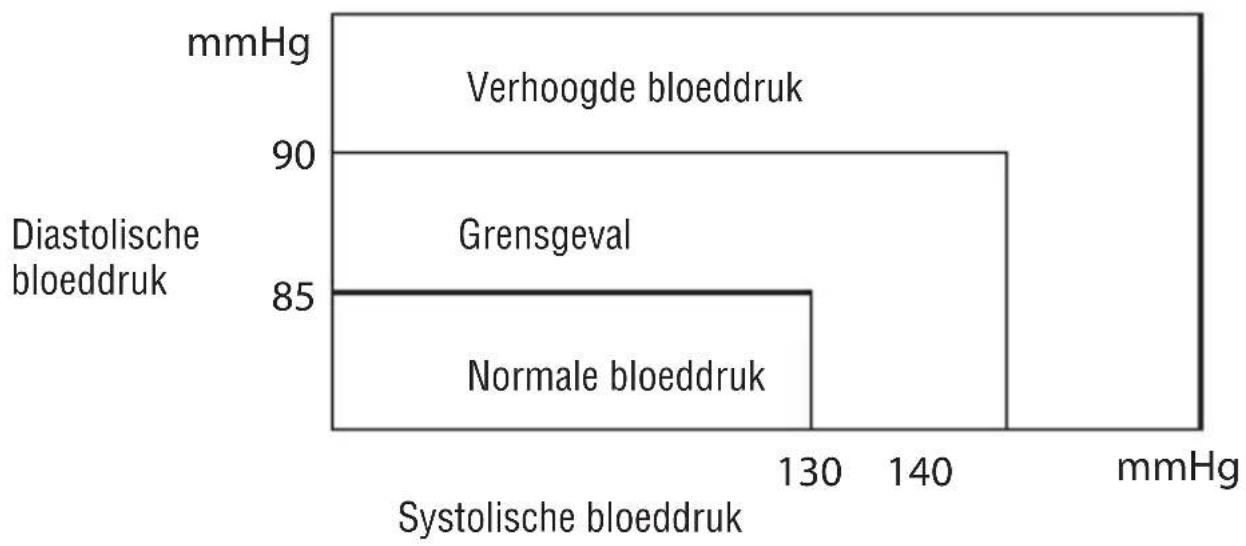
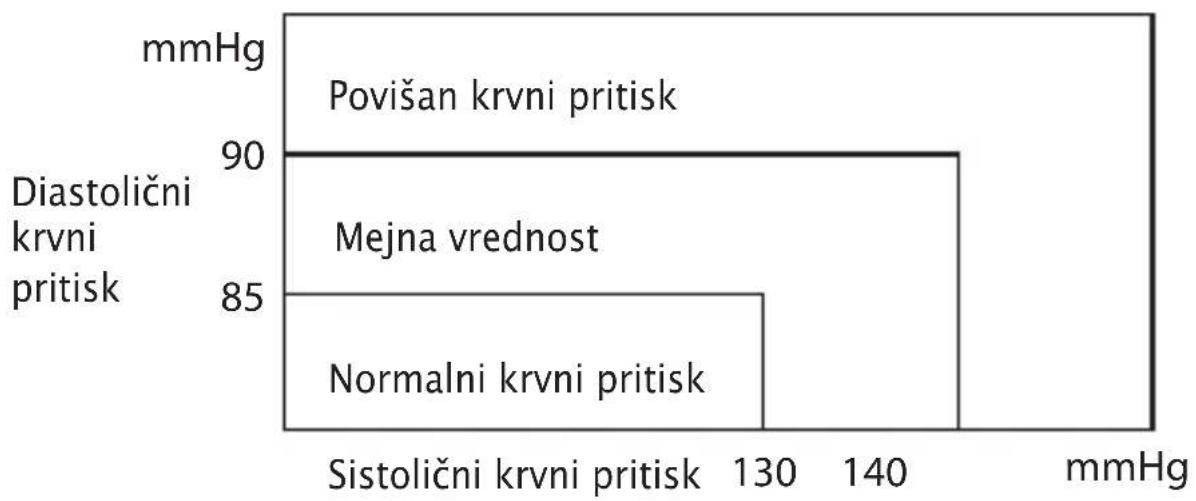
- Based on the measurement result, your blood pressure value will appear on the right side of the monitor according to the World Health Organization (WHO) standards.


4. Deleting memory
- To delete all recorded data in memory, press and hold "M" until "Crl" appears on the screen.
- This function can only be performed while the device is not powered on.

MAINTENANCE AND CLEANING

Electronic or automated sphygmomanometers
- IEC/EN60601-1

FITTING THE CUFF FOR BLOOD PRESSURE MEASUREMENT
It should be approximately 2 to 3 cm above the elbow. The tube must hang in the middle along the inner side of the upper arm.
- Tighten the cuff so that the lower and upper edges are evenly

- When the cuff is properly positioned, press the Velcro to secure the cuff.
- The cuff must be positioned so that it fits snugly and remains still. Check that you have placed it correctly by inserting a finger between your upper arm and the cuff.
- Sit on a chair so that your feet are flat on the floor, and rest your arm on a table, keeping the device at heart level during the measurement.
- Relax your arm, with your palm facing upward.
- Make sure the tubes are not kinked.
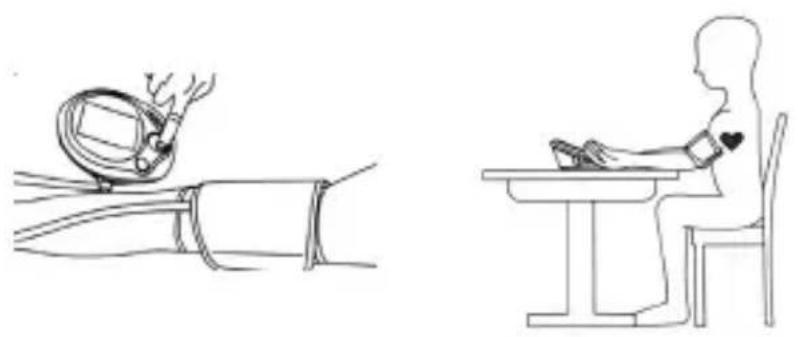


- Deleting stored values from memory
- To delete all values, press and hold the "M" button until "Clr" appears.


CUFF PLACEMENT INSTRUCTIONS





- BLOOD PRESSURE MONITOR
- IMPORTANT NOTICE
- DEVICE DESCRIPTION
- DESCRIPTION OF DISPLAY SYMBOLS
- INSERT / REPLACE BATTERIES
- ATTACHING PRESSURE CUFF
- DATE / TIME SET PROCEDURE
- ALARM CLOCK SET PROCEDURE
- HOW TO MEASURE
- MEMORY RECALL
- MEMORY DELETION
- MAINTENANCE AND CLEANING
- APPLIED STANDARDS
- ERROR CODE
- PRODUCT SPECIFICATION
- LIMITED GUARANTEE
- CONSULT THE MEMORY
- ATTACHING THE CUFF
- CUFF PLACEMENT
- MEMORY
- PLACING THE CUFF WITH AIR PRESSURE
- SETTING DATE AND TIME
- SETTING THE ALARM
- DELETING MEMORY
- FITTING THE CUFF FOR BLOOD PRESSURE MEASUREMENT
- CUFF PLACEMENT INSTRUCTIONS
Brand : LANAFORM
Model : TensioS1
Category : Sphygmomanometer