
ADR81BLX1 - Dash cam PHILIPS - Free user manual and instructions
Find the device manual for free ADR81BLX1 PHILIPS in PDF.


| Product type | Dash camera |
| Brand | Philips |
| Model | ADR81BLX1 |
| Dimensions | Approximately 60 x 40 x 30 mm |
| Weight | Approximately 60 g |
| Power supply | 12V/24V cigarette lighter adapter (USB cable included) and internal lithium battery |
| Video resolution | Full HD 1080p (1920 x 1080) at 30 fps |
| Viewing angle | 140° wide angle |
| Night vision | Yes, with infrared LED |
| G-sensor | Built-in, shock detection and automatic lock of recordings |
| Motion detection | Yes, in parking mode |
| Loop recording | Yes, with configurable 1/3/5 minute files |
| Storage | microSD card up to 128 GB (not included) |
| Screen | 2-inch LCD screen |
| Microphone and speaker | Built-in |
| Mounting | Suction cup on windshield and rotating mount |
| Maintenance and cleaning | Clean the lens with a soft, dry cloth. Avoid abrasive products. |
| Safety | Secure the camera firmly to prevent falling. Do not block ventilation openings. |
| Spare parts and repairability | For any repair, contact a Philips authorized service center. Available parts: USB cable, mount, suction cup, battery. |
Frequently Asked Questions - ADR81BLX1 PHILIPS
User questions about ADR81BLX1 PHILIPS
0 question about this device. Answer the ones you know or ask your own.
Ask a new question about this device
Download the instructions for your Dash cam in PDF format for free! Find your manual ADR81BLX1 - PHILIPS and take your electronic device back in hand. On this page are published all the documents necessary for the use of your device. ADR81BLX1 by PHILIPS.
USER MANUAL ADR81BLX1 PHILIPS
Driving Video Recorder
ADR810

natural_image
Black and white photo of a Philips VR headset with visible lens and grille (no text or symbols)EN Driving video recorder
2.1 Insert the Memory Card....6
2.2 Installing in Vehicles....6
2.3 Automatic Power On/Off 8
2.4 Manual Power On/Off....8
2.5 Manual Record Start/Stop....9
2.6 Manual Voice Recording Off/On....9
2.7 Remove the Memory Card....10
2.8 About Micro SD Card....10
3 User Interface Overview....11
4 System Setting....12
4.1 Set Date and Time....12
4.2 Function Settings....12
5 Operating Instructions....14
5.1 Recording Videos....14
5.2 Playback Videos....14
5.3 Deleting Videos....15
5.4 Protecting Videos....16
6 Add-on Functions....17
6.1 Driver Fatigue Alert....17
6.2 EasyCapture Function....17
7 Technical Specifications....19
1 Product Overview

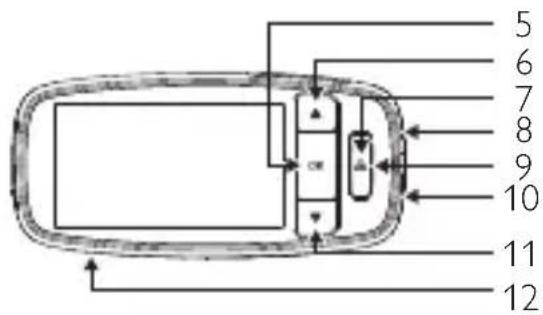

- Bracket Holder
- Lens
- Micro SD card Slot
- Slide Switch (ON/OFF)
- Enter Button (OK)
- Up Button/REC (▲)
-
EasyCapture Button/Return(⚠️)
-
Micro USB Port
- 3-color LED Indicator
- HDMI Port
- Down Button/Voice Recording On/Off (▼)
- Speaker
- Cigarette Lighter with EasyCapture Button

2 Quick Start
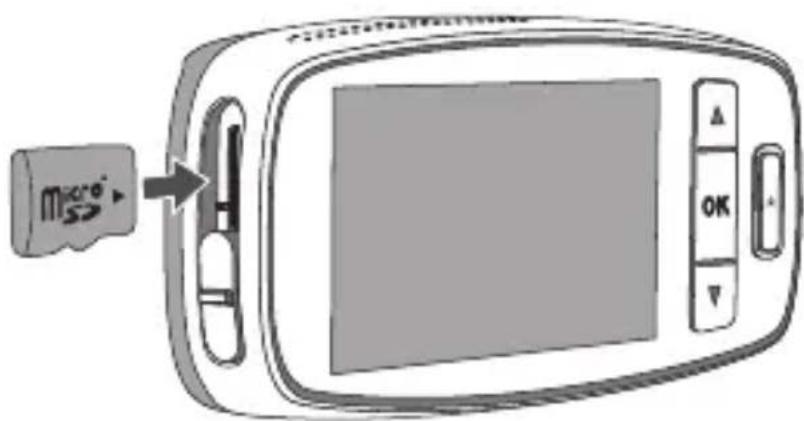
2.1 Insert the Memory Card
- Insert the memory card with the gold contacts facing to the front of the device.
- Push the memory card until it clicks into place, and slide the switch to ON.
2.2 Installing in Vehicles
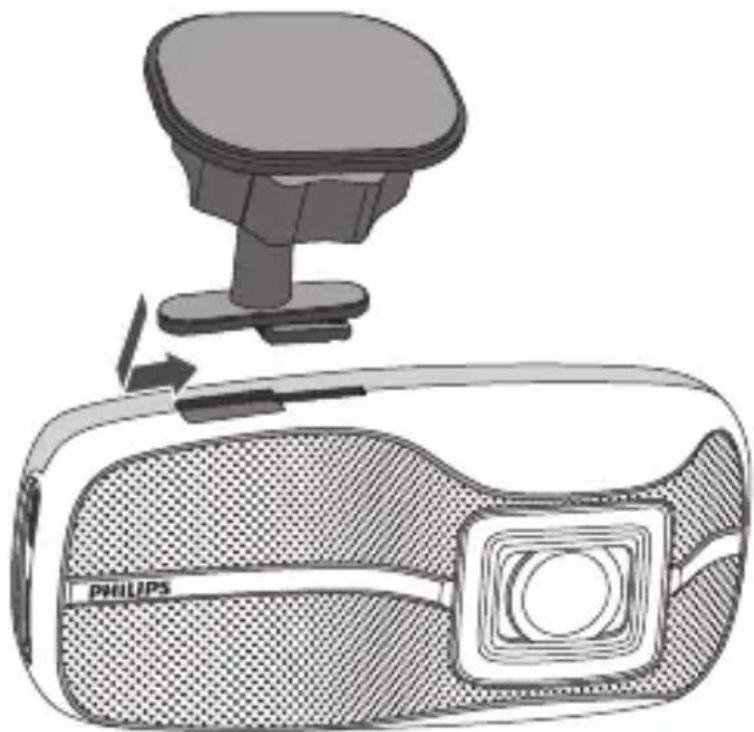
Attach the bracket to the device. Slide it into the bracket holder until you hear a click.
natural_image
Diagram of a Philips VR headset with a top-mounted sensor and a close-up view showing the device (no text or symbols on the device itself)- Peel off the protective plastic sheet from the adhesive bracket and Lens.

natural_image
Illustration of a Philips device with a handle and belt, showing internal components and a circular button (no text or symbols)- Place and press down the bracket firmly onto your windshield.

natural_image
Illustration of a Philips medical device with a device attached to its neck, showing a close-up of its internal structure and a separate panel (no text or symbols on the device itself)- Adjust the device position. Loose the knob to swivel the device to proper position. Then tighten the knob to make sure the device is securely locked in place.

natural_image
Line drawing of a digital camera with scroll wheel and control panel (no text or symbols)-
Connect the Micro USB interface of the car charger to the Micro USB port of the device.
-
Plug the car charger to the cigarette lighter socket of your vehicle.

natural_image
Interior view of a car dashboard and infotainment system (no text or symbols visible)2.3 Automatic Power On/Off
-
Once the power of the vehicle is on, the device automatically turns on.
-
If you disconnect the car charger, the device automatically turns off.
2.4 Manual Power On/Off
- To turn on the device, slide the switch to ON.
- To turn off the device, slide the switch to OFF.
2.5 Manual Record Start/Stop
- When device in automatic recording status, press ▲ to stop recording.

- When device in stop recording status, press ▲ to start recording video again.
2.6 Manual Voice Recording Off/On
- When device set voice recording on in system setting, press ▼ to switch voice to Off.

- When device set voice recording Off in system setting, press ▼ to switch voice rec to On.

2.7 Remove the Memory Card
Slide the switch to Off, and push to eject the memory card out of the slot.
2.8 About Micro SD Card
- Please use Micro SD card with the size/memory at least 8GB, Class6(up to 32GB)
- Be sure to format Micro SD card using the device before the initial usage.
- The following information is the card capacity and Recording time:
| Micro SD Card Capacity | Video Resolution | ||
| (720P/30FPS) | (720P/60FPS) | (1080P/30FPS) | |
| 16GB 260 minutes 170 minutes 160 minutes | |||
| 32GB 520 minutes 340 minutes 320 minutes | |||
Notes:
- If car power supply doesn't stop automatically, it is recommended to disconnect the car charger manually to avoid car battery power lost.
- Please use our dedicated car charger to avoid non-compliance with the device.
- Once connected to a PC through USB, the device only allows data transfer.
3 User Interface Overview

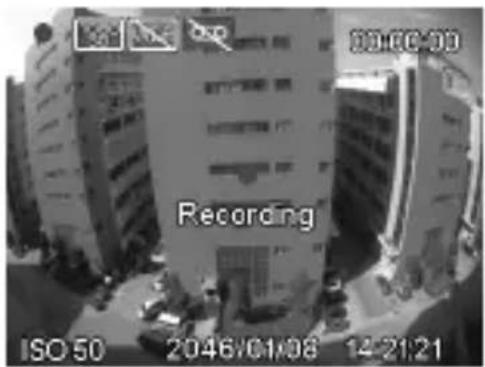
| No. | Description |
| 1 | Emergency recording indicator |
| 2 | Voice recording ON/OFF switch |
| 3 | WDR(Wide dynamic range) indicator |
| 4 | Resolution indicator |
| 5 | Recording/stop indicator |
| 6 | Driver fatigue alert icon |
| 7 | Fatigue index |
| 8 | ISO value |
| 9 | Date/Time stamp |
| 10 | 3-color LED indicatorBlue: Recording statusRed: Emergency recording statusGreen: non-recording status(in start-up, menu operation or other abnormal status) |
4 System Setting
Press on OK to show the menu list, and set different functions of the device.
4.1 Set Date and Time
- Press OK to open the on screen display menu.
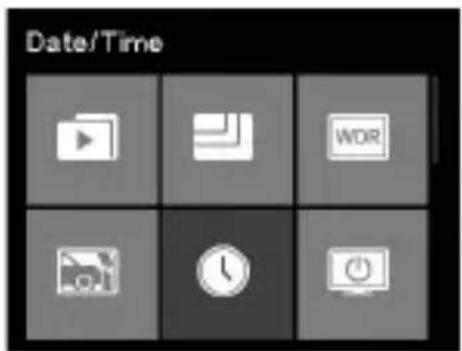
- Press ▲/▼ to select Date/Time and press OK to enter date and time setting Menu.
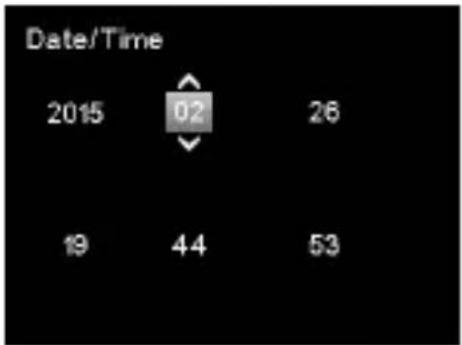
-
To adjust date and time field, press OK to select the field.
-
Press ▲/▼ to select the value.
-
Repeat steps 3-4 to adjust other fields.
-
Press Ⓔ to save your changes.
4.2 Function Settings
| No. | Function Menu | Icon | Description |
| 1 | Video Operate | normal and emergency video file, users can play,  | pause, delete, lock, and unlock the video files. |
| 2 | Resolution Set |   | resolution to Full HD 1080P(FHD), HD Premium(60FPSHD+) and HD Premium(HD+). |
| 3 | WDR (Wide Dynamic Range) |  | Switch on/off WDR function. |
| 4 Collision Detection |  | Select the level of event detection sensitivity to high sensitivity/ middle sensitivity/low sensitivity/off.The Collison Detection function will automatically detect any collision events, and create an emergency video clip. The emergency video clip will show 30 seconds before and after the event detection. The video file will be saved into the Emergency Record folder. |
5 Date/Time Set date and  | time for the device | |
| 6 LCD Auto Off |  | Set the time before the monitor is turned off automatically, or set the monitor always on. |
7 Format Format your TF  | card(Micro SD). Please format your card using the device before you use it for the first time. | |
| 8 Language English, French, German, Italian, Spanish, Portuguese, Polish and Russian. | ||
| 9 Voice Recording |  | Switch on/off voice recording function. |
10 EV Value Manually adjust the exposure level. | ||
11 Date Stamp Switch on/off date and time marking on the video. | ||
| 12 Motion Detection |  | Switches to ON to trigger Motion Detection mode.the function will detect movements in the field of front view.When any movement is detected, continuous 20 seconds recording starts immediately. if any movement is detected in the 20 seconds, recording will last additional 20 seconds from the trigger time. |
| 13 Driver Fatigue Alert |  | Switch on/off driver fatigue alert function. |
14 Default Reset all device  | settings to factory default settings. | |
15 About Firmware version  | and related product information. | |
5 Operating Instructions
5.1 Recording Videos
5.1.1 Video Recording
When the power of the vehicle is on, the device automatically turns on and starts recording. Recording will automatically stop when the power of the vehicles is off. Or, press ▲ to stop recording manually at any time.

5.1.2 Emergency Recording
- When the Collision Detection function is activated, the device will automatically detect any collision events, and create an emergency video file. The emergency video clip will show 30 seconds before and after the event detection. The video file will be saved into the Emergency Records folder.
- During video recording, you can manually create an Emergency Recording, to secure a video file of any event that might happen, with the EasyCapture buttons®located on the device or on the cigarette-lighter adaptor.
- Press ▲ to start the manual Emergency Recording.
- 📁con appears on the top right side of the screen, indicating Emergency Recording is ongoing.
- The system automatically creates emergency video files. The video files are saved into the Emergency Records folder.
5.2 Playback Videos
-
Press OK to enter Menu.
-
Press ▲/▼ to select Video and press OK.

- Press ▲/▼ to select Normal Recording and press OK.
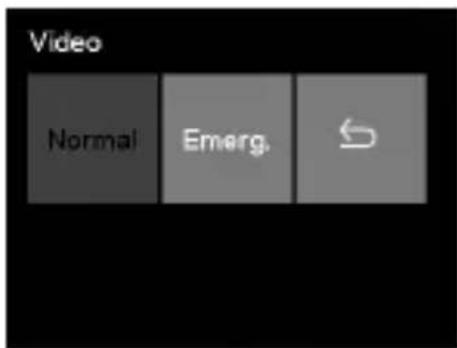
- Press ▲/▼ to browse for the desired video file and press OK, and then select Play to play the desired video.

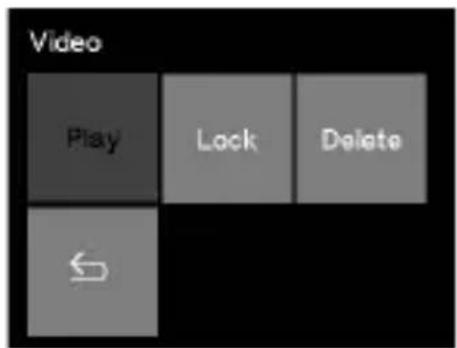
- During playing video, press OK to pause. Press ▲ to fast forward, press ▼ to fast backward, press emergency button to return.
5.3 Deleting Videos
- Press ▲/▼ to browse for deleting the desired video file and press OK, and then select Delete to remove video file.

- Select Delete All to delete all unlocked video files.

- A confirmation message appears on the screen, press ▲/▼ to select YES and press OK to confirm deletion.
5.4 Protecting Videos
To secure videos against being overwritten.
- Press ▲/▼ to browse for the video files and press OK.

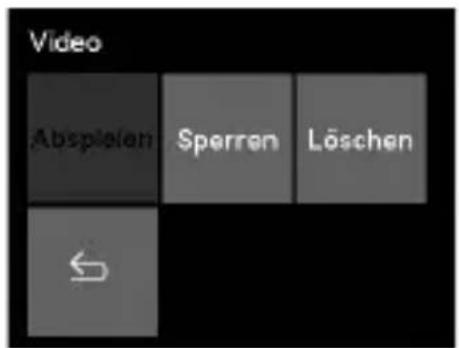
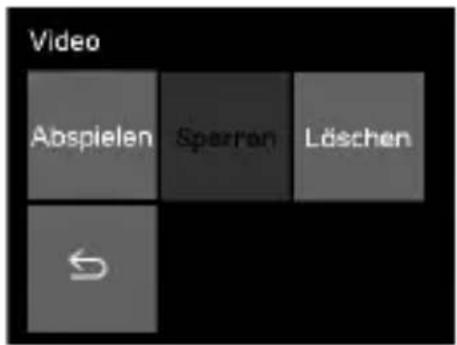
- Press ▲/▼ to select Lock and press OK.

- Return to video list automatically, and selected video is protected.
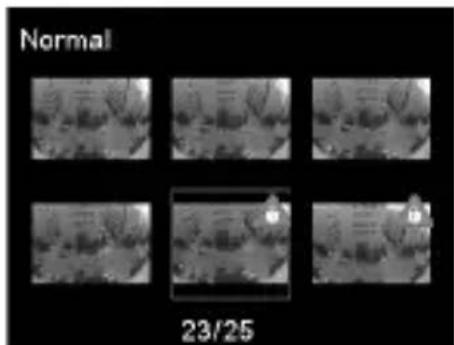
- Use same method to unlock video files.
6
Add-on Functions
6.1 Driver Fatigue Alert
To help car drivers manage the evolution of their fatigue, a fatigue index displays the evolution of driver's fatigue, taking into account physiological and journey related parameters such as time of the day and time spent driving. The device will alert the driver when fatigue index reaches 80, and also every two hours of driving.
When switch on, fatigue index will be displayed on the screen. When fatigue index is less than 60, the value in green color is displayed on screen. Before fatigue index reaches 80, yellow value is displayed on screen with an alert sound. When fatigue index is above 80, red value is displayed on screen with 3 alert sounds and an fatigue icon pop up to alert user.(System time need set correctly when user switch on driver fatigue alert function).

6.2 EasyCapture Function
Philips EasyCapture ensures you always have an emergency recording button to hand, to capture and save everything that happens on the road: one clearly identified on the device, and one on the cigarette lighter adaptor. Simply press the EasyCapture button (nr 13, product overview),
to create and protect up to 6 minutes video clip before and after you pressed the emergency button. The recording file will be protected and cannot be deleted unless you unlock the file in Emergency file folder by manual operation or Emergency file folder is full. The number of recording files is depending on the size of the SD-card.
7 Technical Specifications
| Functions | Automatic recordingCollision detection & emergency file protectionSeamless loop recordingAuto exposureAuto white balanceDate and time stampAuto LCD offDriver fatigue alert with fatigue indexEasyCapture emergency recording buttonsWide angleAdvanced night view |
| Image Sensor 2.1 Mega-pixels CMOS | |
| Video Resolution | Full HD(1920x1080p) @30fpsHD Premium(1280x720p)@60fpsHD Premium(1280x720p)@30fps |
| Display 2.7" LCD | |
| Aperture Range F/#2.0 | |
| Fixed Lens 7G wide angle lens, FOV 156 (Diagonal) | |
| File Format | .MOVPCM audio compression /H.264 video compression |
| Random Access Memory 64Mx16bit (1Gbits) DDR3 SDRAM | |
| Internal Memory 32Mb SPI Flash | |
| Recording Media (external memory) | Micro SD card (class 6 or higher, up to 32GB) |
| Recording Time | 160min @16GB for full HD320min @32GB for full HD |
| RTC 5days | |
| Operating Temperature | -10°C ~ 65°C |
| Storage Temperature | -20°C ~ 70°C |
| Accessories | Micro USB Car Charger, 3M Mount Bracket, Quick Guide |
| Interface | Micro USB 2.0, HDMI, Micro SD Slot, Microphone, Speaker |
| Languages | English, French, German, Italian, Spanish, Portuguese, Polish and Russian |
| Power | 12-24V/5V 1A car adapter with EasyCapture record button |
Dimensions (LxWxH) 106.7 × 50.0 × 32.5mm
Inhaltsverzeichnis
natural_image
Diagram of a Philips VR headset with a top-mounted sensor and a close-up of its internal components (no text or symbols)natural_image
Illustration of a Philips VR headset with a top-mounted sensor and a circular button (no text or symbols on the device itself)natural_image
Line drawing of a digital camera with scroll wheel and control panel (no text or symbols)natural_image
Interior view of a car dashboard and infotainment system (no text or symbols visible)
natural_image
Diagram of a Philips VR headset with a top-mounted sensor and a close-up view showing the device (no text or symbols on the device itself)natural_image
Illustration of a Philips VR headset with a top-mounted device and a circular button (no text or symbols on the device itself)natural_image
Diagram of a digital camera with scroll wheel and control panel, showing rotation and adjustment mechanism (no text or symbols)natural_image
Interior view of a car dashboard and infotainment system (no text or symbols visible)natural_image
Diagram of a Philips VR headset with a top-mounted sensor and a side panel, showing mechanical components (no text or symbols)natural_image
Illustration of a Philips VR headset with a top-mounted sensor and a circular button (no text or symbols on the device itself)natural_image
Line drawing of a digital camera with scroll wheel and control panel (no text or symbols)natural_image
Interior view of a car dashboard with steering wheel, dashboard, and camera module (no text or symbols visible)2.3 Allumage/extinction automatique

natural_image
Diagram of a Philips VR headset with a top-mounted sensor and a side panel, showing mechanical components (no text or symbols)natural_image
Illustration of a Philips VR headset with a top-mounted sensor and a circular button (no text or symbols on the device itself)natural_image
Illustration of a Philips device with a camera and screen, showing a directional arrow (no text or symbols on the device itself)natural_image
Line drawing of a digital camera with scroll wheel and control panel (no text or symbols)natural_image
Interior view of a car dashboard and infotainment system (no text or symbols visible)2.3 Accensione automatica On/Off


natural_image
Illustration of a Philips VR headset with a top-mounted sensor and a close-up of its internal components (no text or symbols)natural_image
Illustration of a Philips device with a handle and circular button, no text or symbols presentnatural_image
Illustration of a Philips device with a camera and screen, showing a directional arrow (no text or symbols on the device itself)natural_image
Line drawing of a digital camera with scroll wheel and control panel (no text or symbols)natural_image
Interior view of a car dashboard with steering wheel, dashboard, and camera module (no text or symbols visible)natural_image
Illustration of a Philips VR headset with a top-mounted sensor and a close-up of the front panel (no text or symbols on the device itself)natural_image
Illustration of a Philips device with a handle and circular button, no text or symbols presentnatural_image
Line drawing of a digital camera with scroll wheel and control panel (no text or symbols)natural_image
Interior view of a car dashboard and infotainment system (no text or symbols visible)2.3 Automático On/Off


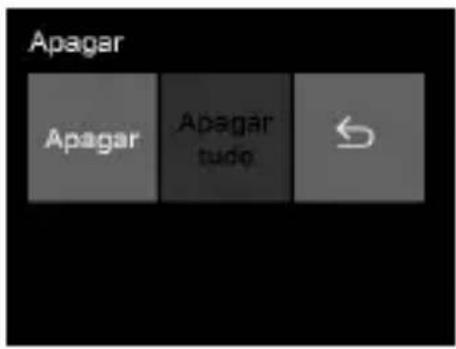
- Seleccione Eliminar Todos para eliminar todos os ficheiros de vídeo desbloqueados.
natural_image
Diagram of a Philips VR headset with a top-mounted sensor and a side panel, showing mechanical components (no text or symbols)natural_image
Illustration of a Philips VR headset with a top-mounted device and a circular button (no text or symbols on the device itself)natural_image
Line drawing of a digital camera with scroll wheel and control panel (no text or symbols)natural_image
Interior view of a car dashboard with steering wheel, dashboard, and control panel (no text or symbols visible)All rights reserved.
Document order number: 3211 008 21261


- Driving Video Recorder
- Product Overview
- Quick Start
- Insert the Memory Card
- Installing in Vehicles
- Automatic Power On/Off
- Manual Power On/Off
- Manual Record Start/Stop
- Manual Voice Recording Off/On
- Remove the Memory Card
- About Micro SD Card
- Notes:
- User Interface Overview
- System Setting
- Set Date and Time
- Function Settings
- Operating Instructions
- Recording Videos
- Video Recording
- Emergency Recording
- Playback Videos
- Deleting Videos
- Protecting Videos
- 6
- Add-on Functions
- Driver Fatigue Alert
- EasyCapture Function
- Technical Specifications
- Inhaltsverzeichnis
- Allumage/extinction automatique
- Accensione automatica On/Off
- Automático On/Off
Brand : PHILIPS
Model : ADR81BLX1
Category : Dash cam