
ADR900 - Dash cam PHILIPS - Free user manual and instructions
Find the device manual for free ADR900 PHILIPS in PDF.


| Product Type | Dash cam |
| Brand | Philips |
| Model | ADR900 |
| Dimensions (approx.) | 5.5 x 2.5 x 1.5 inches |
| Weight (approx.) | 120 g |
| Power Supply | 12V car cigarette lighter adapter |
| Display | 2.7 inch LCD |
| Video Resolution | Full HD 1920x1080 |
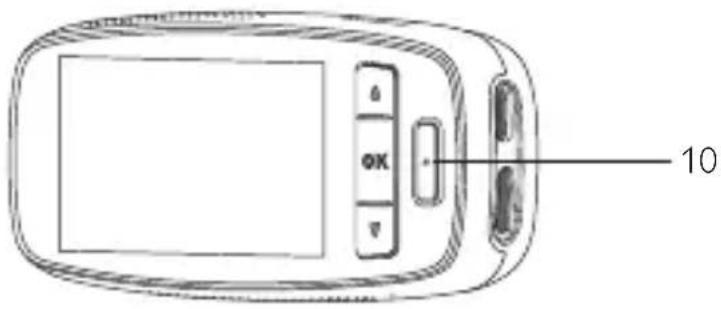
| Viewing Angle | 140 degrees |
| Storage | MicroSD card up to 32 GB (Class 10 recommended) |
| GPS | Built-in GPS receiver |
| G-Sensor | Yes, records impact events |
| Night Vision | Infrared LED for night recording |
| Parking Mode | Motion detection and impact recording while parked |
| Loop Recording | Yes, overwrites oldest footage |
| Maintenance | Clean lens with soft, dry cloth; format SD card monthly |
| Safety Precautions | Do not install near airbags; avoid extreme temperatures |
| Spare Parts Available | Suction mount, power cable, USB cable |
| User Manual | Free PDF download from official site |
Frequently Asked Questions - ADR900 PHILIPS
User questions about ADR900 PHILIPS
0 question about this device. Answer the ones you know or ask your own.
Ask a new question about this device
Download the instructions for your Dash cam in PDF format for free! Find your manual ADR900 - PHILIPS and take your electronic device back in hand. On this page are published all the documents necessary for the use of your device. ADR900 by PHILIPS.
USER MANUAL ADR900 PHILIPS
Automotive Driving Recorder
ADR900
User manual
English 5
简体中文 21
ภาษาไทย 37
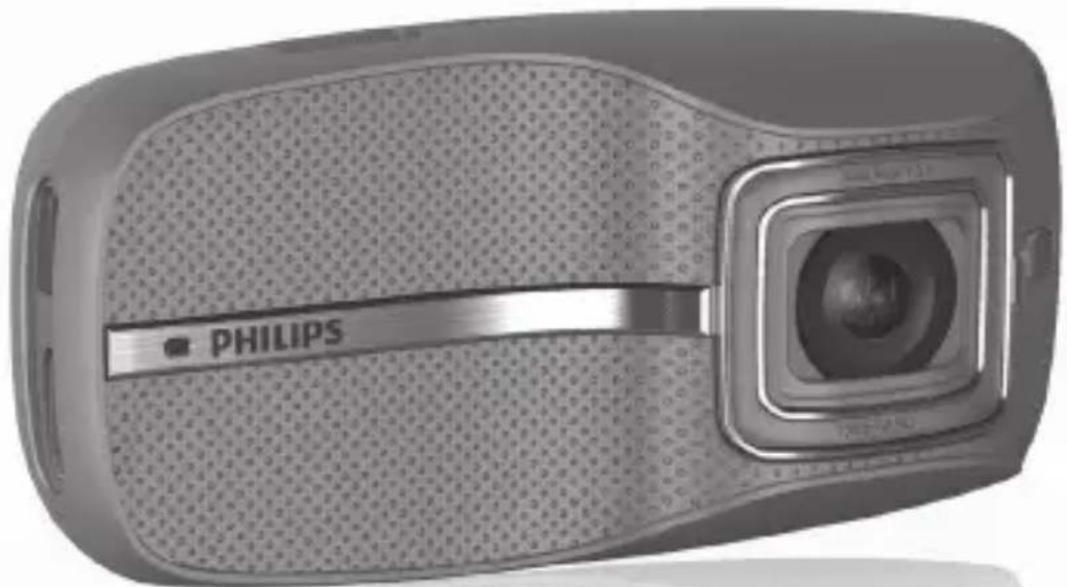
natural_image
Close-up of a Philips digital camera with visible lens and textured grille (no text or symbols on body)Table of Contents
1 Product Overview 5
2 Quick Start....6
2.1 Insert the Memory Card....6
2.2 Install in Vehicle 6
2.3 Automatic Power On/Off....8
2.4 Manual Power On/Off 8
2.5 Manual Voice Recording Off/On....9
2.6 Remove the Memory Card 9
2.7 About Micro SD Card....9
3 User Interface....9
4 System Setting....12
4.1 Set Date and Time....12
4.2 Function Settings ......12
5 Operating Instruction 14
5.1 Recording Videos....14
5.2 Playback Videos 14
5.3 Deleting Videos ....15
5.4 Protecting Videos....16
6 Add-on Functions....17
6.1 WaveGuard® Parking Monitoring......17
6.2 Driver Fatigue Alert....17
7 Technical Specification....19
8 Disclaimer....20
1 Product Overview
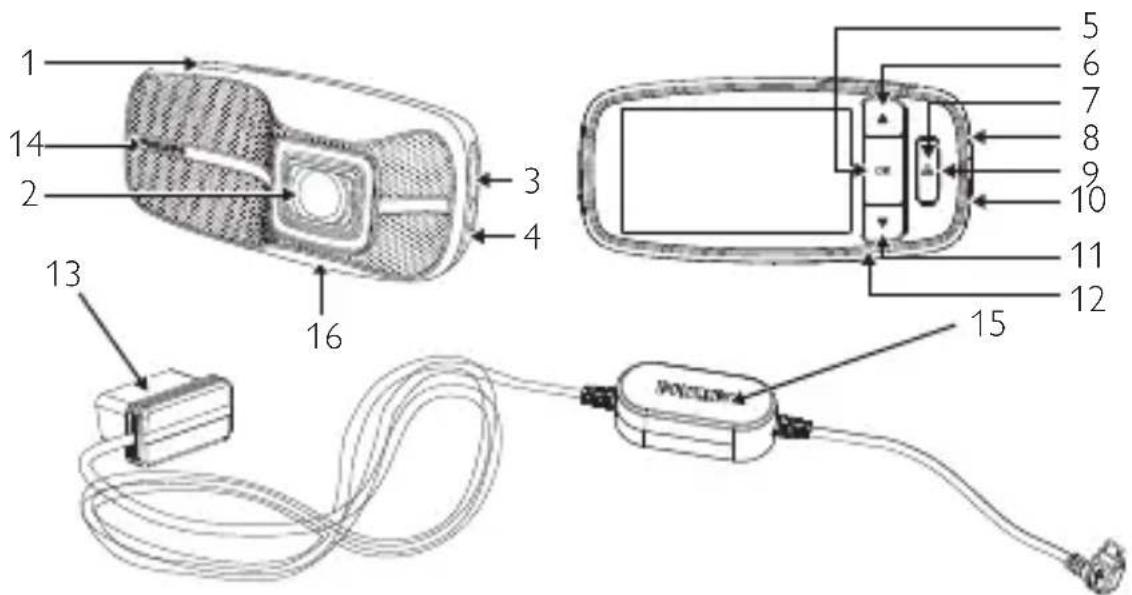
- Bracket Holder
- Lens
- Micro SD card Slot
- Slide Switch (ON/OFF)
- Enter Button (OK)
- Up Button (▲)
- EasyCapture Button/Return(△)
-
Micro USB Port
-
Status Indicator
- Mini HDMI Port
- Down Button/Voice Recording On/Off (▼)
- Microphone
- OBD Cable
- WaveGuard® Indicator
- DC Converter Box
- Speaker
Attention: 1. This device is equipped with an OBD power adapter. The OBD is the On Board Diagnostics interface of the car and it can provide constant power supply for the device.
- To find your car's OBD port, please refer car's user manual or ask the car dealer.
3.Please do NOT operate the device while driving! - Please take TF (Micro SD) out as earlier as possible, to prevent important videos overwritten!
2
Quick Start
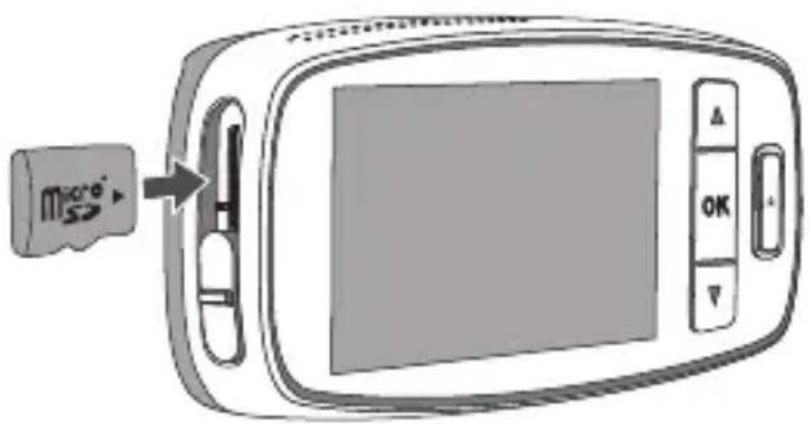
2.1 Insert the Memory Card
-
Insert the memory card with the gold contacts facing to the front of the device.
-
Push the memory card until it clicks into place, and slide the switch to ON.
2.2 Install in Vehicle
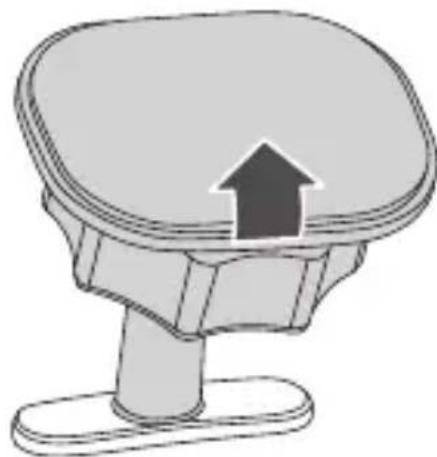
- Peel off the protective plastic film from both the bracket and Lens.
natural_image
Simple line drawing of a mechanical component with an upward arrow, no text or symbols present.- Please make necessary attempts to find a pasting position where the portion of windscreen in front of device's lens can be cleaned automatically by the vehicle windscreen wiper, and the status indicator of device can be easily captured by the eyes of the driver. Please do clean the pasting surface of glasses beforehand.
Attention: 1. Please execute the pasting of the bracket only when the environment temperature is 18 38^ C , or switch on car air conditioner.
- The device should be installed in a position where should not block driver's view.
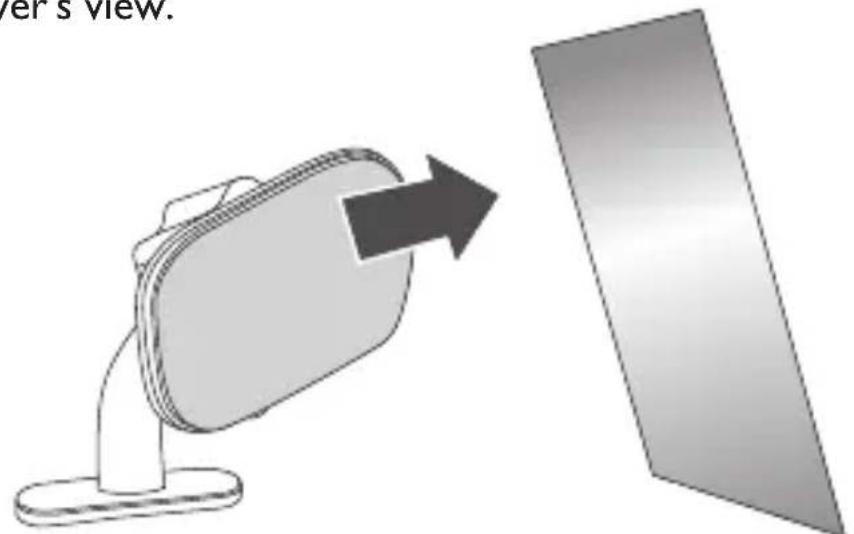
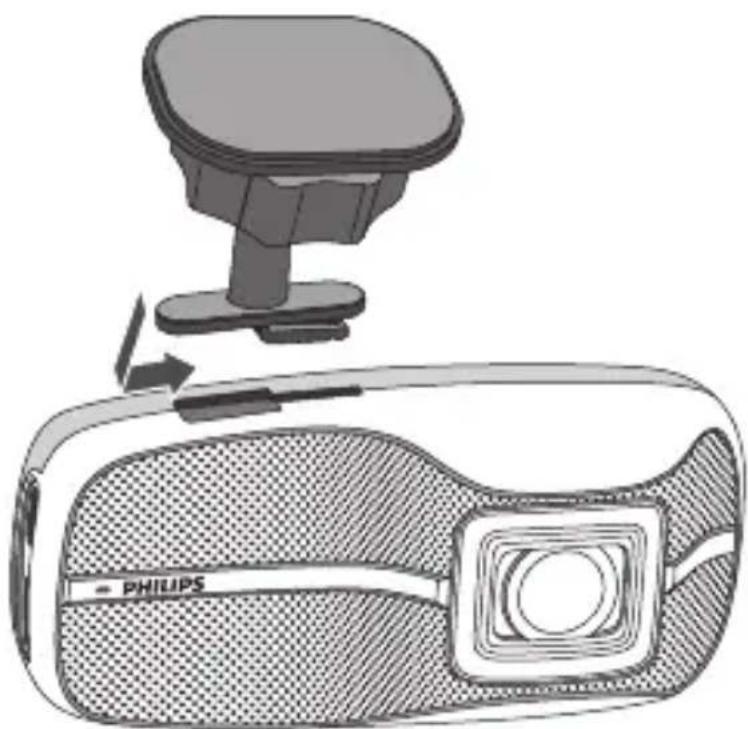
- Mount the device after 24 hours. Attach the bracket to the device. Slide it into the bracket holder until you hear a click.
natural_image
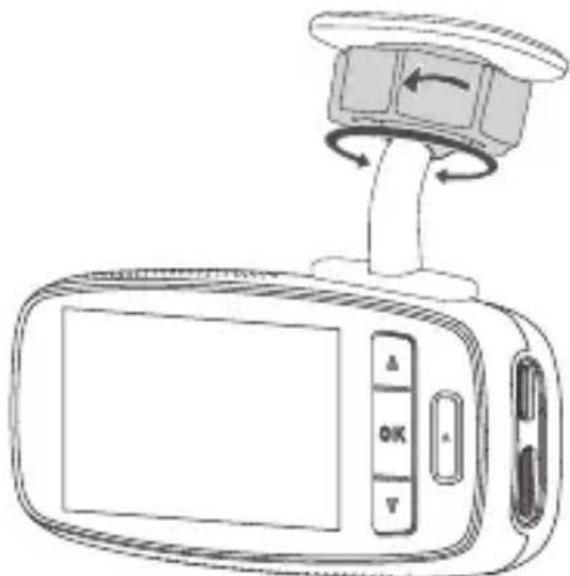
Diagram of a Philips VR headset with a top-mounted sensor and a side panel, showing mechanical components (no text or symbols)- Loose the knob to adjust the device to proper position. Then tighten the knob to make sure the device securely locked.
natural_image
Diagram of a digital camera with scroll wheel and control panel (no text or symbols)-
Connect the micro USB port of OBD cable to the Micro USB port of the device.
-
Plug the OBD cable to the OBD socket of your vehicle.
-
Paste the DC converter box of OBD cable near the device.
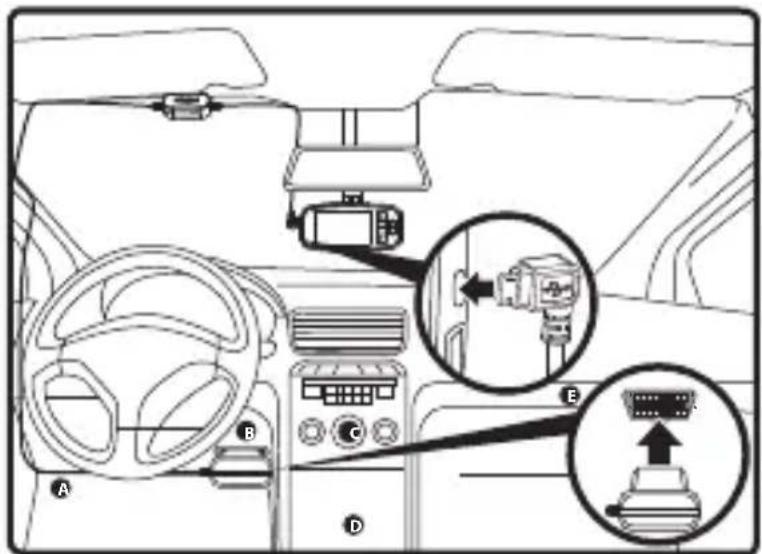
Attention: 1. The location of most cars' OBD port is in area A, B, C, D or E. 2. To avoid OBD cable hanging unsafely or extruding higher than 10 ~mm in car cabin, PLEASE USE CABLE CLIPS TO FIX OBD CABLE! 3. The mounting of the device and OBD cable should NOT interfere the normal operation of vehicle's original equipments, such as airbag etc.
2.3 Automatic Power On/Off
- Once the power of the vehicle is on, the device automatically turns on.
- If you disconnect the OBD cable, the device automatically turns off.
2.4 Manual Power On/Off
- To turn on the device, slide the switch to ON.
- To turn off the device, slide the switch to OFF.
2.5 Manual Voice Recording Off/On
- When the setting of voice recording in System Setting is OFF, press ▼ to switch on voice recording.
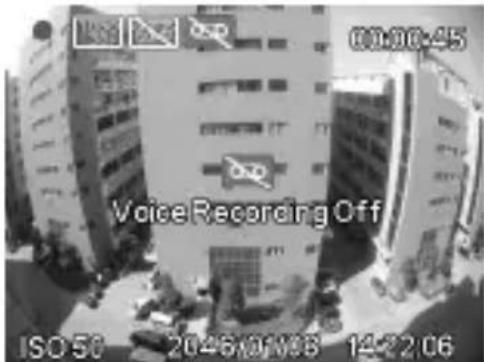
- When the setting of voice recording in System Setting is ON, press ▼ to switch off voice recording.
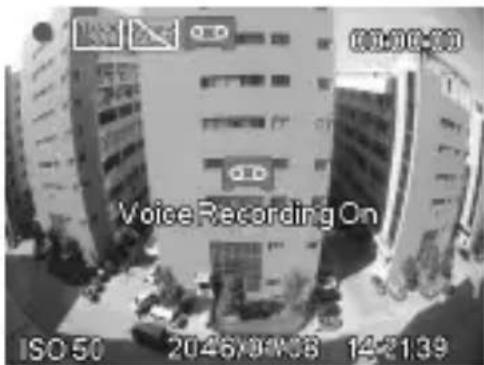
2.6 Remove the Memory Card
Slide the switch to Off, and push to eject the memory card out of the slot.
2.7 About Micro SD Card
- Please use Micro SD card with the capacity at least 8GB, Class10
- Be sure to format Micro SD card using the device before the usage.
- The relationship between card capacity and recording time:
| Micro SD Card Capacity | Video Resolution | ||
| (720P/30FPS) (720P/60FPS) (1080P/30FPS) | |||
| 32GB 520 minutes 340 minutes 320 minutes | |||
| 64GB 1040 minutes 680 minutes 640 minutes | |||
Notes:
- If vehicle is not be used over a month, please do disconnect OBD cable to avoid the possible over power consumption of vehicle battery.
- Please use the dedicated OBD cable to avoid noncompliance with the device.
- Once connected to a PC through USB, the device only allows data transferring.
-
To maximize parking monitoring time, you need
-
Set video resolution to 720p, to double the valid monitoring time of 1080p.
- Use 64G TF card, to double the valid monitoring time of 32G TF.
-
Set parking monitoring range to "near", to extend the valid monitoring time 10\~30%.
-
Every TF card has a limited lifetime, especially used for high volume data read/writing, in the high vibration & high temperature car environment,
-
Please use only recommended TF card;
- When frequently prompting "SD slow speed, format or replace it", please replace with a new one.
3 User Interface
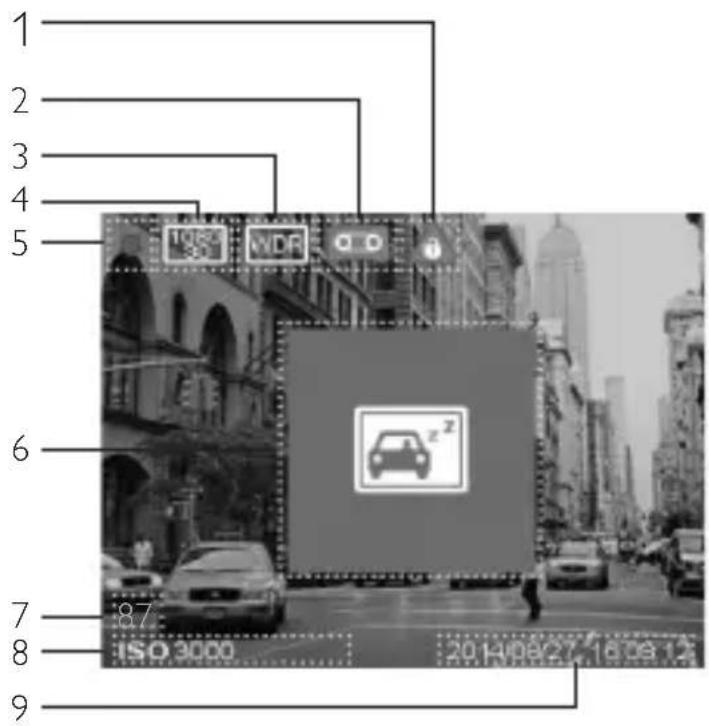
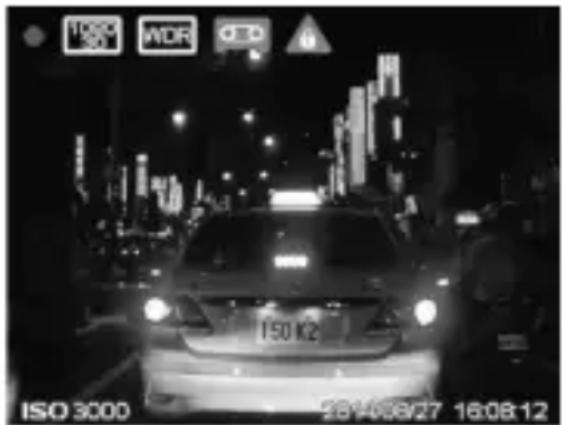
| No. | Description |
| 1 | Emergency recording status indicator |
| 2 | Voice recording ON/OFF indicator |
| 3 | WDR(Wide dynamic range) ON/OFF indicator |
| 4 | Video resolution indicator |
| 5 | Video recording/stop status indicator |
| 6 | Driver fatigue alert icon |
| 7 | Driver fatigue index |
| 8 | ISO value |
| 9 | Date & Time stamp |
| 10 | Status indicator- Blue: Video Recording status- Red: Emergency recording status (when the EasyCapture button is pressed)- Off: Non-recording status |
4
System Setting
Press OK to show the main menu, and set different functions of the device.
4.1 Set Date and Time
- Press OK to open the main menu.
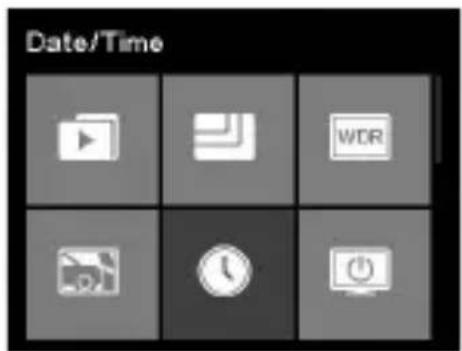
- Press ▲/▼ to select Date&Time icon and press OK to enter date and time setting Menu.
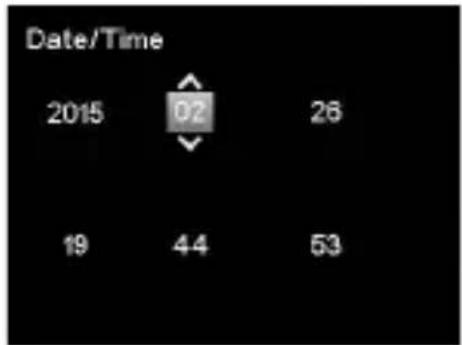
-
To adjust date and time field, press OK to select the field.
-
Press ▲/▼ to select the value.
-
Repeat steps 3-4 to adjust other fields.
-
Press △ to save your changes.
4.2 Function Settings
| No. | Function | Menu Icon | Description |
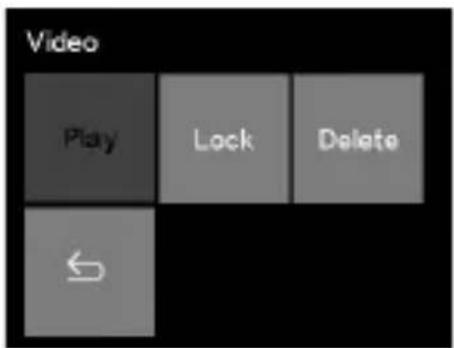
| 1 Video |  | Watch and operate normal and emergency video files.users can play, pause, delete, lock, or unlock the video files. | |
| 2 Resolution |  | Set the video resolution to Full HD 1080P(FHD), HD Premium(60FPSHD+) or HD Premium(HD+). | |
| 3 | WDR (Wide Dynamic Range) |  | Switch on/off WDR function. |
| 4 | Collision Detection |  | Select the sensitivity level of collision detection to high / middle /low /off. |
| 5 | Date/Time Set |  and time for the device and time for the device | |
| 6 | LCD Auto Off |  | Set the time before the LCD is turned off automatically, or set the LCD always on. |
| 7 | Format |  | Format your Micro SD Card. |
| 8 | Language China |  English are available for selection. English are available for selection. | |
| 9 | Voice Recording |  | Switch on/off voice recording function. |
| 10 | EV Value Manual |  just the exposure value. just the exposure value. | |
| 11 | Time Stamp Sy |  on/off date & time watermark on the video. on/off date & time watermark on the video. | |
| 12 | Parking Monitoring |  | Set the protective range of parking monitoring as far/middle/near. |
| 13 | Driver Fatigue Alert |  pitch on/off driver fatigue alert function. pitch on/off driver fatigue alert function. | |
| 14 | Default Reset |  rice settings to factory default ones. rice settings to factory default ones. | |
| 15 | About Firmwal |  sion, and other related product information. sion, and other related product information. | |
5 Operating Instruction
5.1 Recording Videos
5.1.1 Normal Video Recording
When the engine of the vehicle is on, the device automatically turns on and starts recording continuously. When the engine of the vehicle is off (parking status), video recording will stop automatically. But as long as any moving object at a reasonable range in front of the device is detected, WaveGuard® indicator will flash and then video recording function will be activated immediately. If no any further moving event happens in 10 seconds' time, the video recording function will be shutdown again. All these video files will be saved into the Normal video folder.
5.1.2 Emergency Video Recording
-
When the Collision Detection function is activated, the device will automatically detect any collision events, and create an emergency video file and save it into the Emergency video folder. While driving, the emergency video clip will show video before and after that event. While parking, the emergency video clip can only show video after an event.
-
During video recording status, you can manually create an Emergency Recording, to secure a video file of any interesting moment with the EasyCapture buttons.
-
To ensure the effective protection time of parking monitoring, the number of emergency files are restricted to 12. If that limit is exceeded, the older ones would be deleted automatically. In that case, please BACKUP before the vehicle engine is started.
5.2 Playback Videos
-
Press OK to enter the main Menu.
-
Press ▲/▼ to select Video icon and press OK.
-
Press ▲/▼ to select Normal or Emergency Video folder and press OK.
-
Press ▲/▼ to find the desired video file and press OK, and then select Play to play it.
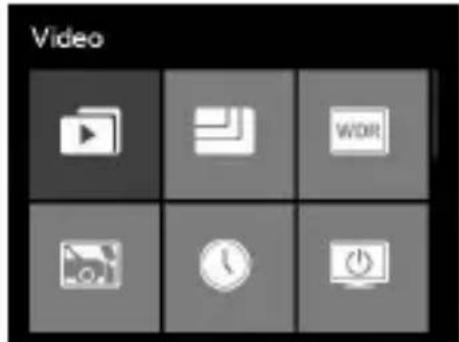
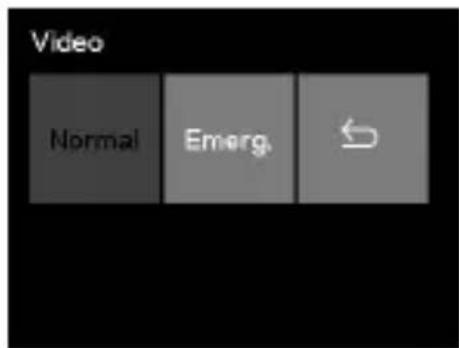
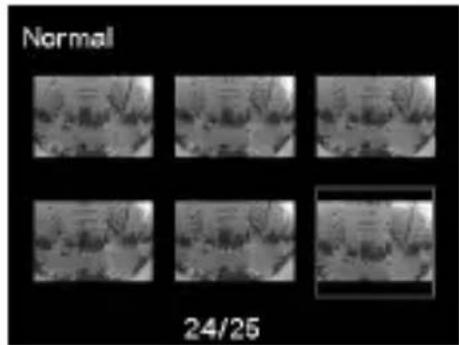
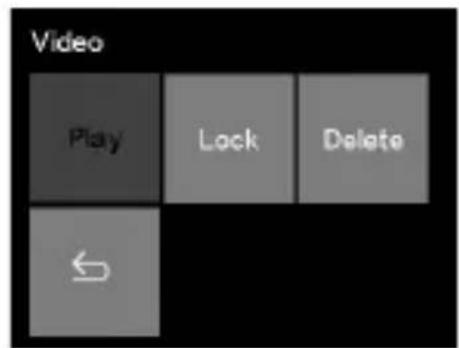
- During playing video, press OK to pause, press ▲ to fast forward, press ▼ to fast backward, or press emergency button to return.
5.3 Deleting Videos
- Press ▲/▼ to find the desired video file and press OK, and then select Delete to remove it.
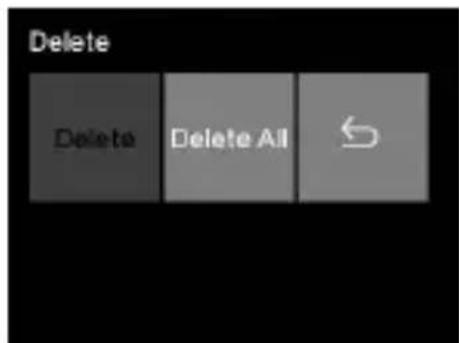
- Select Delete All to delete all unlocked video files.
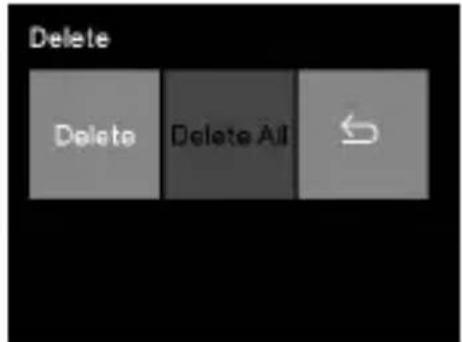
- A confirmation message appears on the screen, press ▲/▼ to select YES and press OK to confirm deletion.
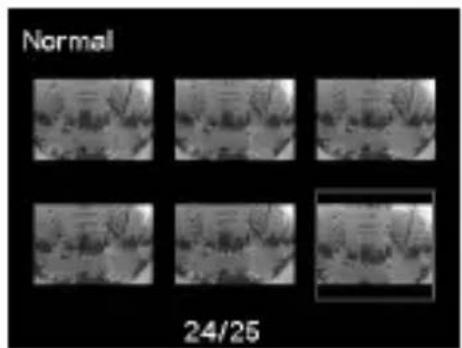
5.4 Protecting Videos
To secure videos against being overwritten,
- Press ▲/▼ to find the desired video file and press OK.
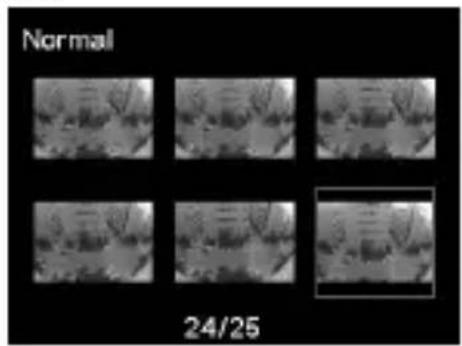
- Press ▲/▼ to select Lock and press OK.
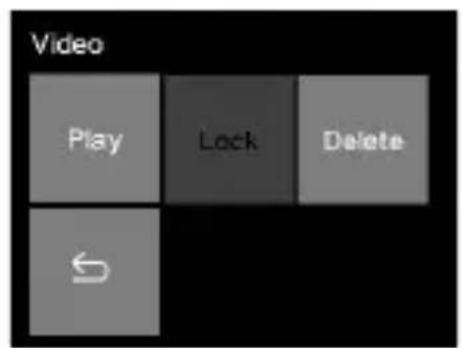
- Return to video list automatically, and the selected video is protected.
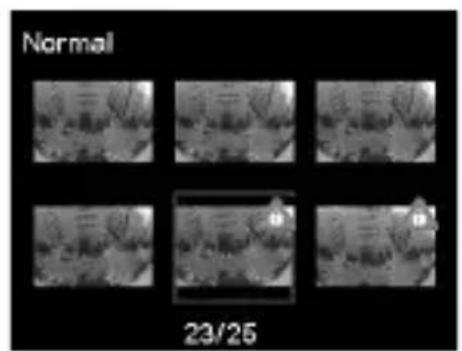
- Use same method to lock/unlock other video files.
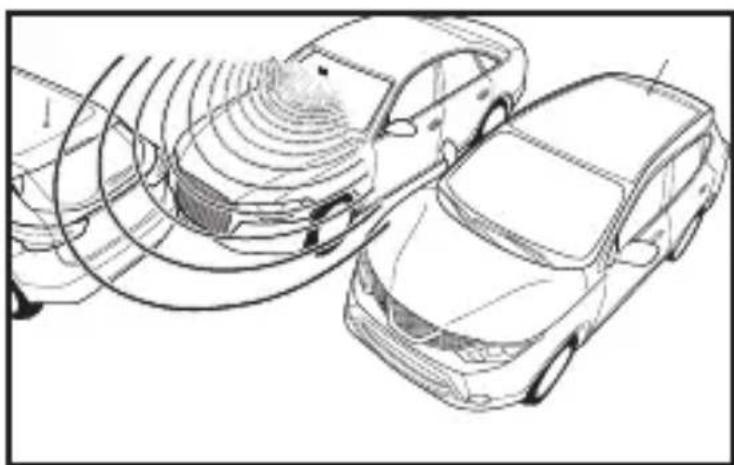
6.1 WaveGuard® Parking Monitoring
To protect your vehicle continuously during parking status, the device will start recording and save to Normal video folder whenever it detects moving objects. And video recording function will be shutdown automatically to conserve vehicle battery power when there is no moving objects detected. If the device detects any collisions during parking status, it will start video recording and save to Emergency video folder.
natural_image
Technical line drawing of a car with sensor or sensor overlay, showing multiple cars (no text or symbols)6.2 Driver Fatigue Alert
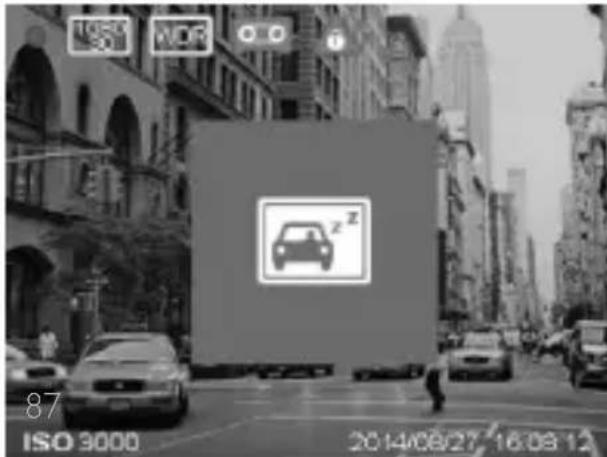
To help vehicle drivers manage the evolution of their fatigue, a fatigue index displays the evolution of driver's fatigue, taking into account physiological and journey related parameters such as time of the day and time spent on driving. The device will alert the driver every two hours of driving. When fatigue index is less than 60, the value is displayed in green color. Before fatigue index reaches 80, yellow value is displayed with an alert sound. When fatigue index is above 80, red value is displayed with 3 alert sounds and an fatigue icon pop up to alert user. (System time needs set correctly when user switches on driver fatigue alert function). When switched off, fatigue index will not be displayed on the screen.
7 Technical Specification
| Functions | WaveGuard® parking surveillanceAutomatic video recordingCollision detection & emergency file protectionSeamless loop recordingAuto exposureAuto white balanceDate and time stampAuto LCD offDriver fatigue alert and fatigue index displayEasyCapture emergency recording buttonWide angle video capturingAdvanced night view |
| Image Sensor | 2.1 Mega-pixels CMOSFull HD(1920x1080p) @30fps |
| Video Resolution | HD Premium(1280x720p)@60fpsHD Premium(1280x720p)@30fps |
| Display | 2.7" LCD (960x240) |
| Aperture Range | F/#2.0 |
| Fixed Lens | 7G wide angle lens, FOV 171° (Diagonal)MOV |
| File Format | PCM audio compression /H.264 video compression |
| Random Access Memory | 64Mx16bit (1Gbits) DDR3 SDRAM |
| Internal Memory | 64Mb SPI Flash |
| Recording Media (external memory) | Micro SD card(at least 8GB, class 10 or higher, 64GB recommended) |
| Recording Time | 320min @32GB for full HD640min @64GB for full HD |
| RTC | 5days |
| Operating Temperature | -10°C ~ 65°C |
| Storage Temperature | -20°C ~ 70°C |
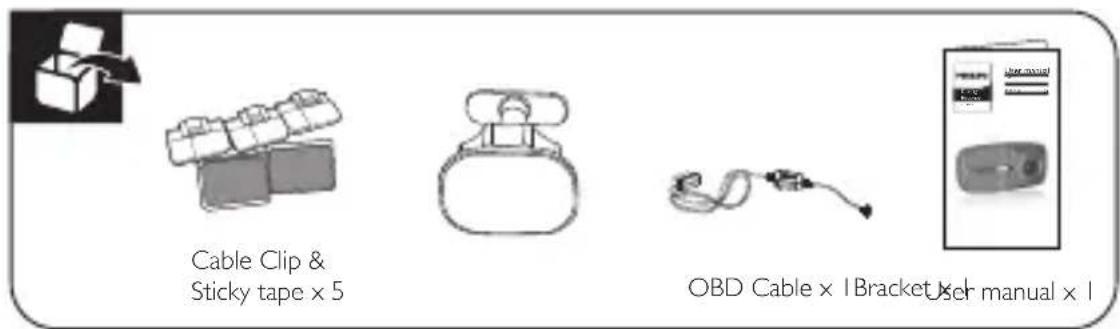
| Accessories | OBD cable, Bracket, Quick Guide, Sticky Tape, Cable Clips |
| Interface | Micro USB 2.0, Mini HDMI port, Micro SD Slot, Microphone, Speaker |
| Languages | English, Chinese |
| Power | 12V to 5V/1A, OBD cable |
| Dimensions (LxWxH) | 106.7 x 50.0 x 32.5mm |
8
Disclaimer
* The device is only suitable for the 12V power supply's vehicles.
* To realize 7 days × 24 hours' protection by video surveillance, the SD card capacity must be at least 32G.
* The device only can detect and record moving objects within a limited range, and in the same direction with lens coverage, but can't detect any events in reversed direction. If you need a 360° protection of vehicle, please buy 2 devices, one is for forward direction, and the other is for backward direction.
* When vehicle's cabin temperature exceeds 70^ C, to protect vehicle's security, the device will be powered off automatically and pause the protection by video surveillance.
* Winter's low temperature, aged or un-fully-charged vehicle battery, will cause the device's effective video surveillance time reduced.
* If the windshield in front of the device's lens becomes dirty, by rain, snow, sand-storm or other nature/human factors, , it will cause the device not get effective video evidences.
* Rain, snow, swaying tree branches or busy streets/parking lot environment, will sometimes cause the video recording continuously, so the effective protection time will be greatly reduced. When the engine of an auto-start-stop enabled vehicle is restarted and leads its battery voltage lower than the voltage protection threshold, the device could be rebooted.
* Some windscreen films will not only interfere GPS, radar, ETC etc, but also affect WaveGuard® detection range. If still not satisfied by the protection range adjustment in the System Setting menu, please use a better film or “open” a small window on it for the device.
To judge the existence of the film interference, stand in front of the vehicle and wave your hand, and the red WaveGuard® indicator will not flash.
目录
natural_image
Simple line drawing of a mechanical component with an upward arrow, no text or symbols presentnatural_image
Diagram showing a folder with an arrow pointing to a blank sheet, no text or symbols presentnatural_image
Diagram of a Philips VR headset with a sensor and adjustment lever (no text or symbols)natural_image
Line drawing of a digital camera with scroll wheel and control buttons (no text or symbols)natural_image
Technical line drawing of a car with sensor or sensor overlay, no visible text or symbols6.2 疲劳驾驶警报
natural_image
Simple line drawing of a seat with an upward arrow indicating direction (no text or symbols)natural_image
Illustration of a folder with an arrow pointing to a blank sheet, no text or symbols presentnatural_image
Diagram of a Philips VR headset assembly showing the base and top view with a handle attachment (no text or symbols)natural_image
Line drawing of a digital camera with scroll wheel and control buttons (no text or symbols)โปรดทราบ:
natural_image
Technical line drawing of a car with sensor or sensor overlay, showing two cars (no text or symbols present)Lumileds is the warrantor of this product.
The Philips trademarks are used under license from Koninklijke Philips N.V. (2017).
© Lumileds Holding B.V. 2017. All rights reserved
3211 008 22241

- User manual
- Table of Contents
- Product Overview
- 2
- Quick Start
- Insert the Memory Card
- Install in Vehicle
- Automatic Power On/Off
- Manual Power On/Off
- Manual Voice Recording Off/On
- Remove the Memory Card
- About Micro SD Card
- Notes:
- User Interface
- 4
- System Setting
- Set Date and Time
- Function Settings
- Operating Instruction
- Recording Videos
- Normal Video Recording
- Emergency Video Recording
- Playback Videos
- Deleting Videos
- Protecting Videos
- WaveGuard® Parking Monitoring
- Driver Fatigue Alert
- Technical Specification
- 8
- Disclaimer
- 目录
- 疲劳驾驶警报
- โปรดทราบ:
Brand : PHILIPS
Model : ADR900
Category : Dash cam